
Elite Forces 1/18 F6F Hellcat Part 15 - Windscreen & Canopy
By Rodney Williams
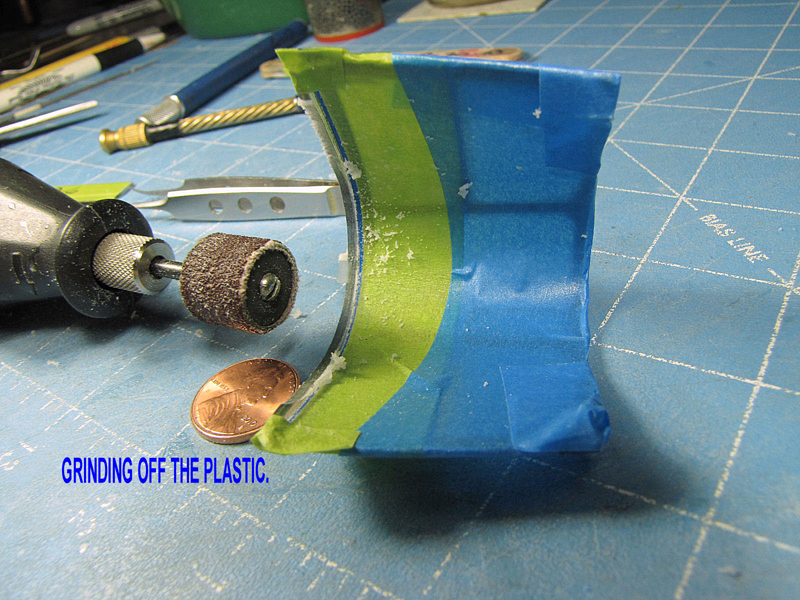
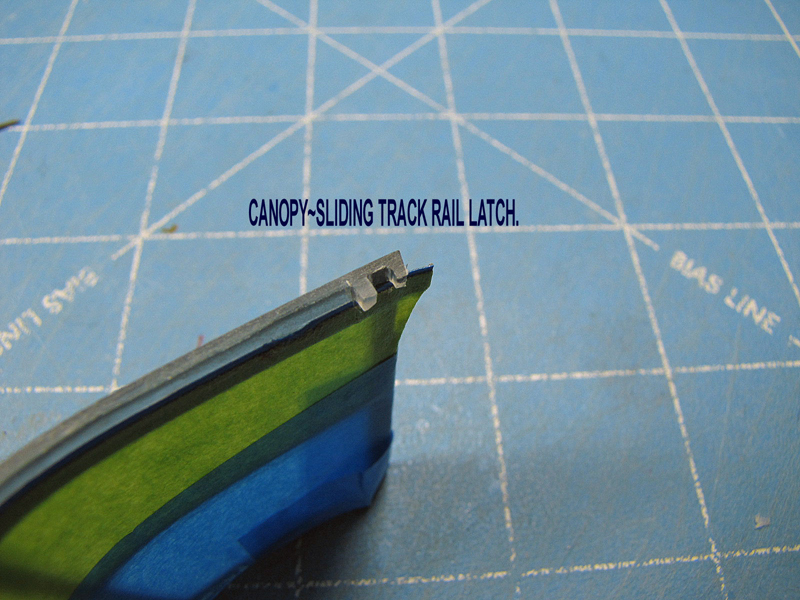
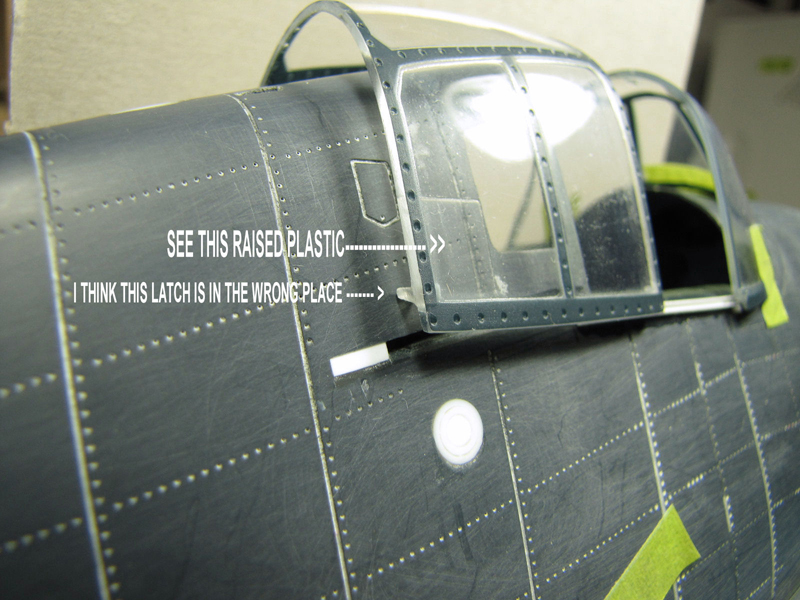
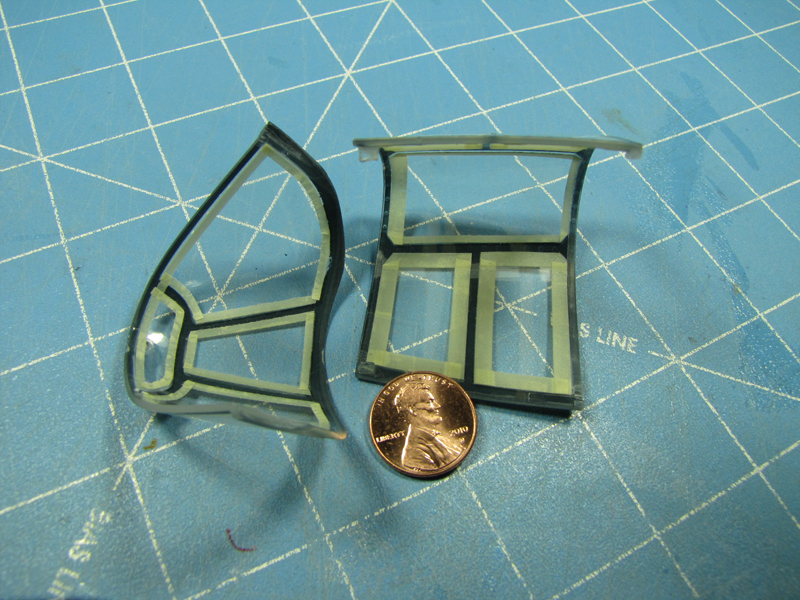
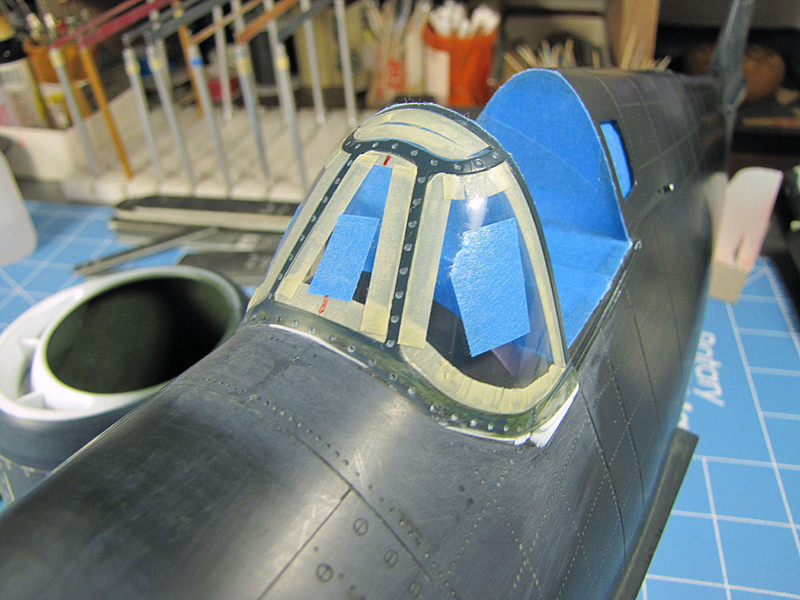
I did not like the looks of the leading edge of the kit canopy so I revised it and made a latch in the plastic to mate up with my installed canopy rail. The "U" type of bracket that I used for the canopy rail came from my supply of Plastruct white styrene products. It´s about 17 years old and is still flexible and it´s shown in photo #9.
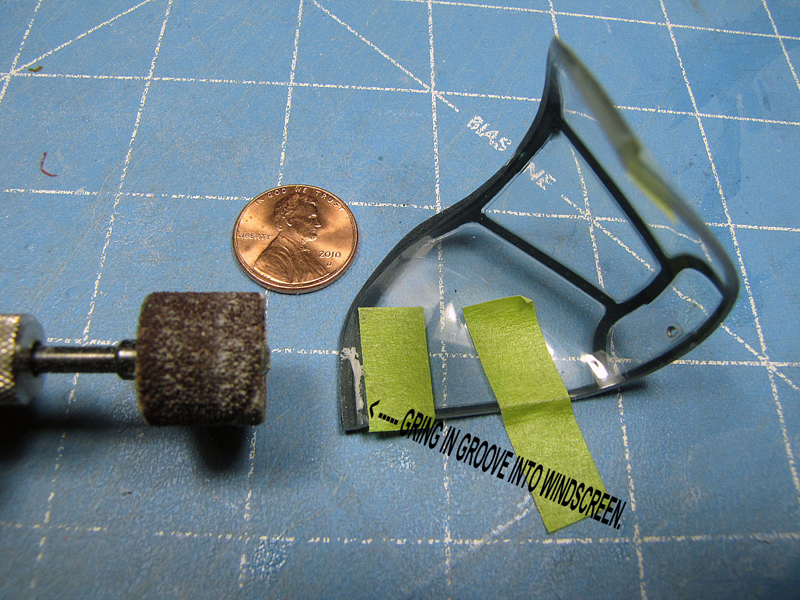
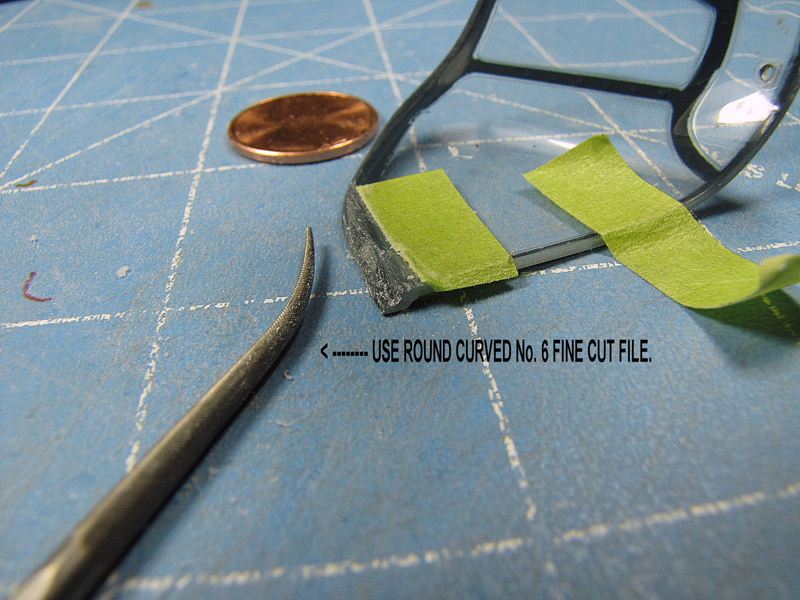
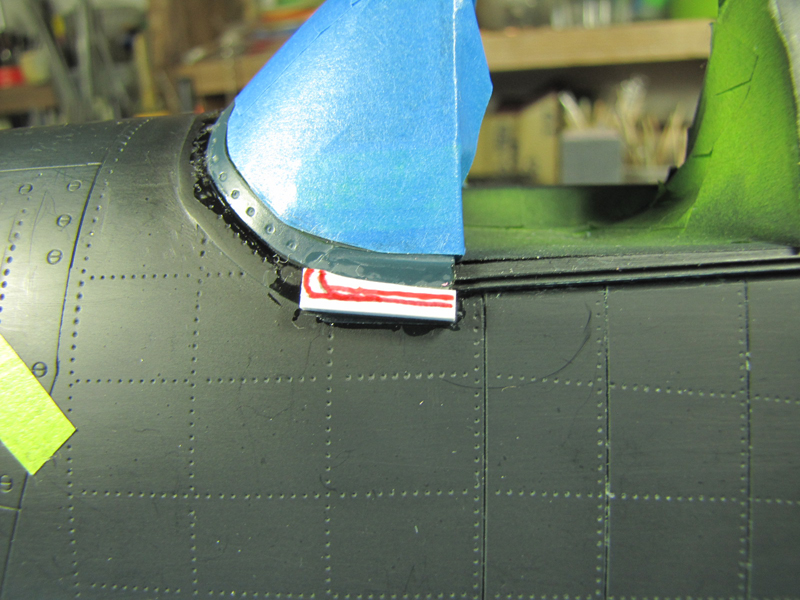
The canopy rail fit inside the bottom aft section of the windscreen. I ground in a groove into the lower edge of the windscreen.
My next minor operation was to move the molded-in bracket on the aft inside section of the canopy. This bracket was too high and was even molded in on part of the clear window, (#$@$#%^*&*&**). I cut the bracket off with my razor saw then glued it to the canopy frame. The company has a raised clear section in the aft bottom clear canopy section. I looked at every cockpit area photo that I have on hand and I do not see this raised area on any Hellcat... I did not grind it off.
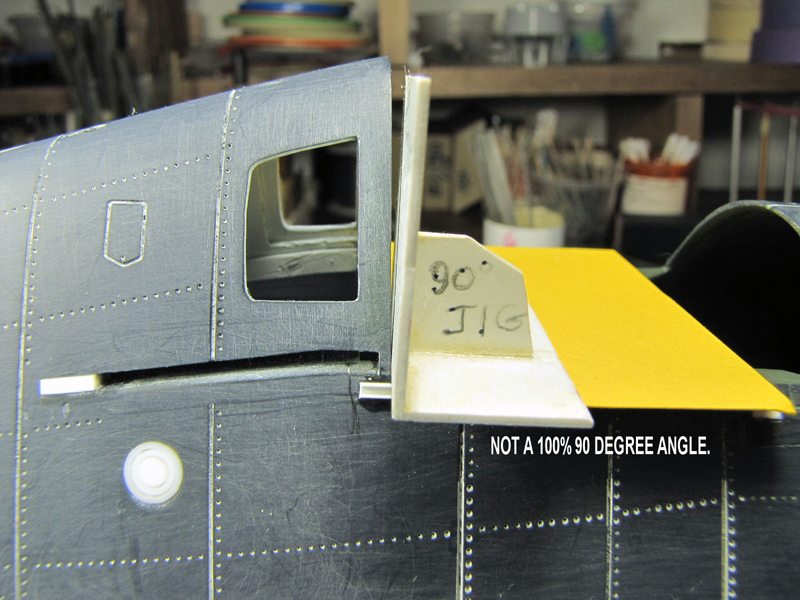
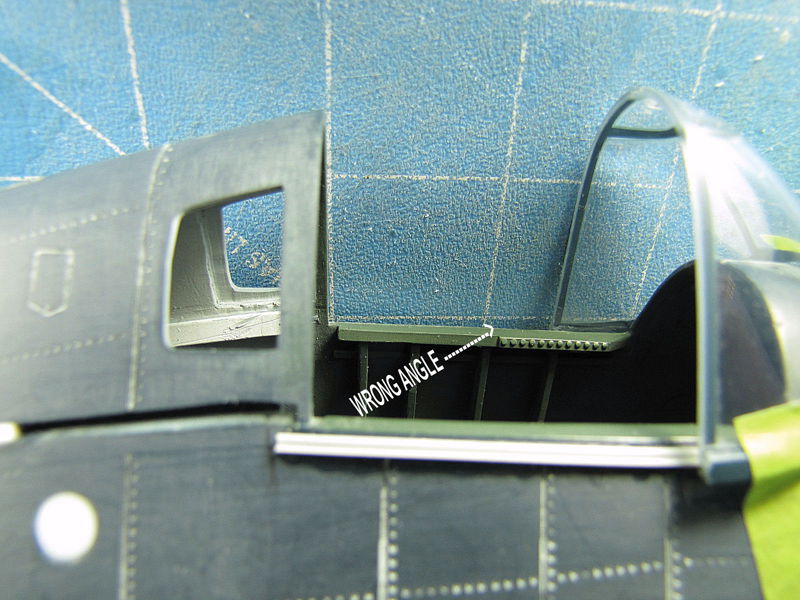
My drawings show that the horizontal cockpit side walls are at a 90 degree to the vertical open section of the fuselage, which is slightly forward of the side windows. I did not revise this item either.
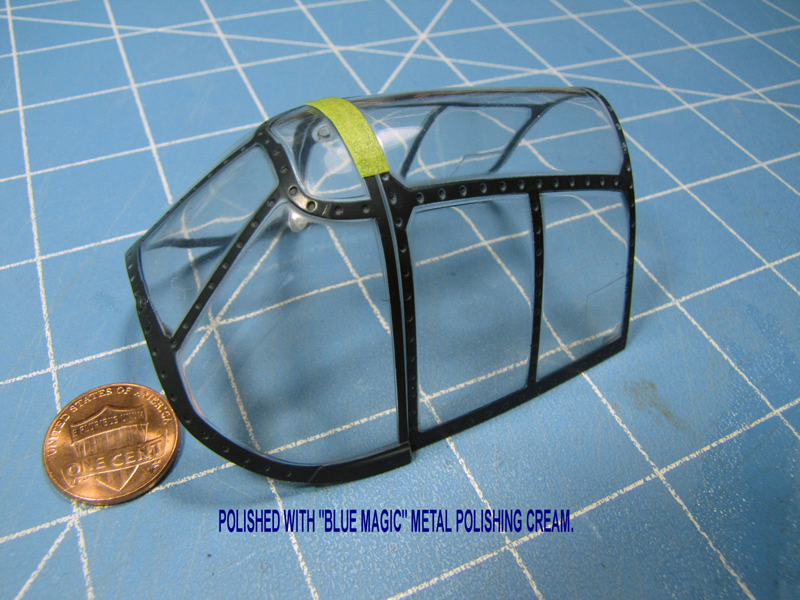
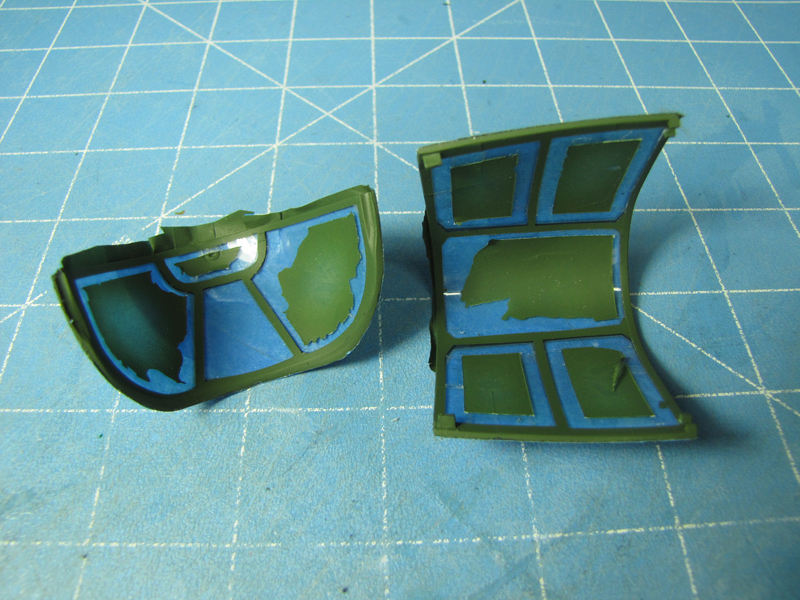
I polished out the windscreen and canopy with my trusted 20 year old tube of "Blue Magic Metal Polishing Cream." I let the cream/paste "gas-out" as they call it for a few days then I mask off the insides with my tape. My masking tape is by "Scotch 3M" and is called "Fine Line Tape." The tape comes in several widths and is on a roll 60 yards/54.8M long. I have been buying this tape since 1986. Way back then it was called "Green-Stuff" and was about USD#1.00 per roll. Recently I ordered more 1/16"/1.58mm and other sizes "on line" and the cost for each roll was around USD$8.00 including shipping.
I use two kinds of liquid mask: You know one by its´ name: Micro-Mask which is made by MICROSCALE. The other old standby is home made by mixing up "Elmer´s white Glue-All" 50% 50% with liquid "DAWN" ultra concentrated hand soap. This mix is real thick so it´s best to add some water to it.
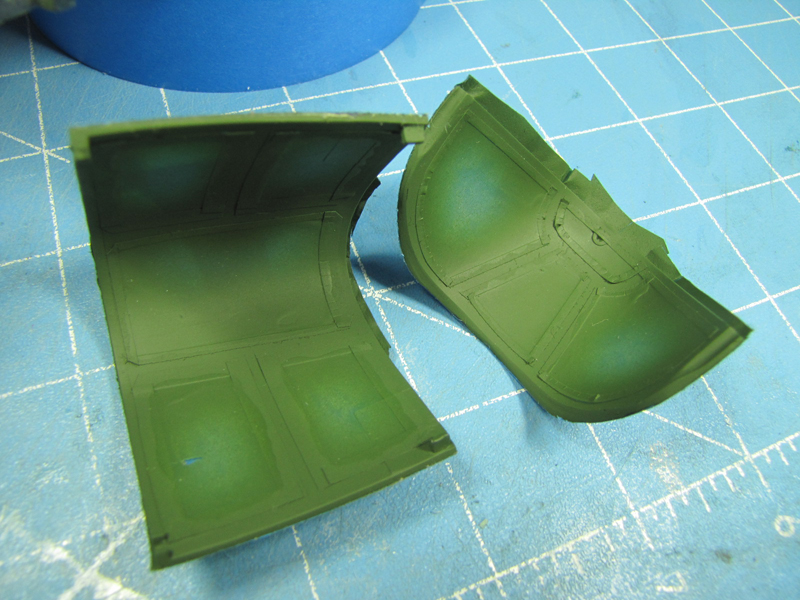
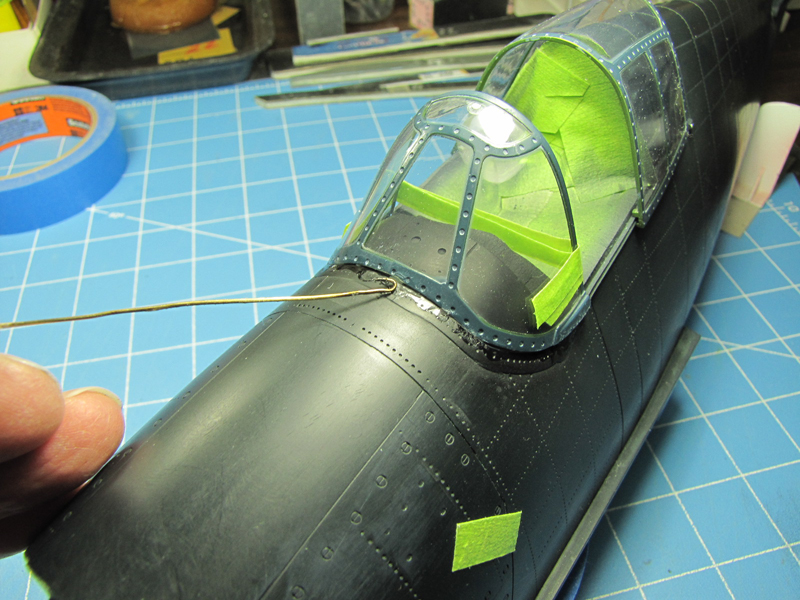
As soon as the liquid mask dries I spray on my Tamiya XF-5 Flat Interior Green paint. The Tamiya green paint matches the kit´s green paint. I let it dry over night and then remove the tape and place the parts into warm water to remove the liquid masking. The finished canopy is set aside and the windscreen is glued to the fuselage. The w/screen is mask off on the outside and I add the bottom part of the frame work that I cut off long ago so I could get the windscreen off the model which let me take the fuselage apart.
Why is next? No kidding, it´s back to the center wing section and how I attach the two outer wing panels and what "I DISCOVERED" that the company left off the wings.
WOW!


Part 1 | Part 2 | Part 3 | Part 4 | Part 5 | Part 6 | Part 7 | Part 8 | Part 9 | Part 10 | Part 11 | Part 12 | Part 13 | Part 14 | Part 15 | Part 16 | Part 17 | Part 18 | Part 19 | Part 20 | Part 21
© Rodney Williams 2010
This article was published on Wednesday, July 20 2011; Last modified on Saturday, May 14 2016