
Williams Brothers | Curtiss F9C-2 Sparrowhawk
Reviewed by Randy Lutz
A FEW 'SMART' COMMENTS BY SASO KNEZ
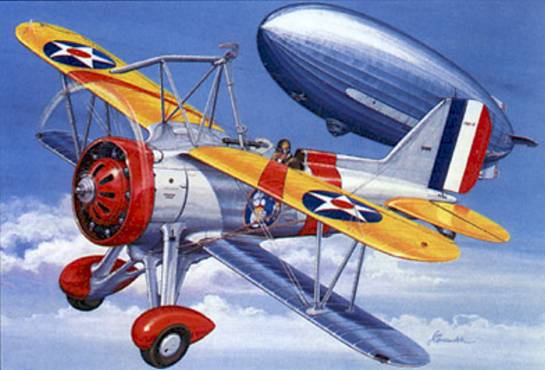
OK, combine these words in a sentence: Curtiss Sparrowhawk, Men on the Flying trapeze, and crazy. If you are able to put these words in a sentence, then skip the history lesson and go to A PEEK IN THE BOX. For the rest of you here is a bit of history. In 1932 a very special reconnaissance group was formed in the ranks of the Navy. It was designed to operate in a very unique fashion. The group consisted of an airship and 4-5 Curtiss Sparrowhawk. The task of the group was to reconnoiter large areas. The Sparrowhawks performed a double role-defending the airship if needed, and helping to expand the reconnaissance band of the airship. The thing that made the group so special is that the airplanes operated FROM the airship. That means they took off and landed on the airship. This was carried out with the help of a trapeze contraption which was lowered from the airship and another trapeze carried on the airplane. When these were hooked up, the trapeze with the fighter was lifted into the airship. Take off was identical, but of course reversed in the process. In the airship there was an internal hangar which provided all the necessary for a group of four fighters. There were two such airships (the Macon and the Akron). Both airships were lost in accidents.
A PEEK IN THE BOX
Williams Brothers is a great company-they listen to modelers, so they must like 32nd scale.They produce a lot of racers from the Golden age era along with other models.
Anyway I though that it was about time to find out more about the company firsthand.Carlo Medina (assistant manger) was kind enough to provide a review sample of the Curtiss Sparrowhawk. The box arrived safe and unharmed. Nice box with a bit of history and a warning that this kit is: 'suggested to experienced builders'.
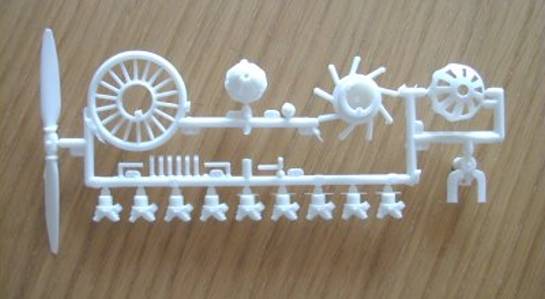
When opening the box you will see that apart three sprues of parts cast in white styrene, you also get the windscreen, rubber tires (a habit of WB is that they enclose both the rubber and plastic tires) and a length of monofilament rigging and above all a decal sheet that provides the necessary decals for any of the six different Sparrowhawks that flew operationally.
As all aircraft this model starts with the cockpit. The cockpit laid out correctly,and has a decal for the instrument panel. This is OK, but if you want extra credit, then photocopy the decal sheet, then place the paper copy of the instrument panel on a thin sheet of plastic and drill out the instruments. If you have done it correctly, this plastic when attached to the decal will show instruments through the drilled holes.
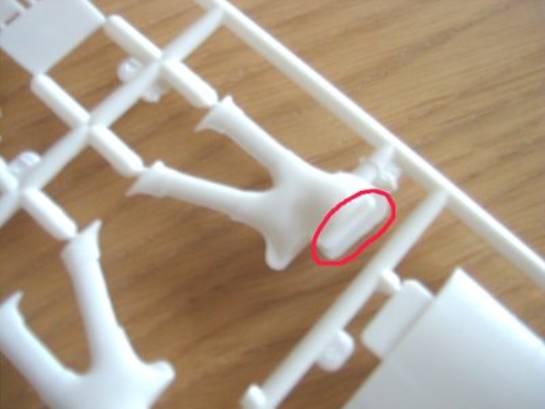
The easily correctable,but still present flesh
The ribbing on the cockpit sidewalls is not deep enough, but you can fix this with a lot of washes and dry-brushing, or you just simply make one from plastic strips-not as hard to do.
Apart from this the cockpit is fine!
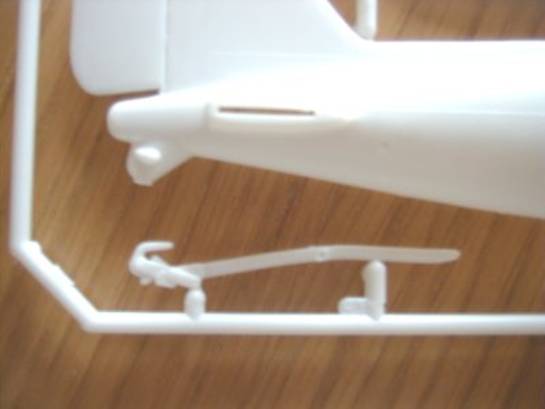
The exterior is marred by flesh, and raised (though very subtle) details and panel lines. The good thing is that it is very crisply detailed. You even have the rigging openings opened up. The ribs are also very well done. The trapeze is well detailed, but the assembly of the wheel struts is a bit tricky. This will be later referred to by Randy.
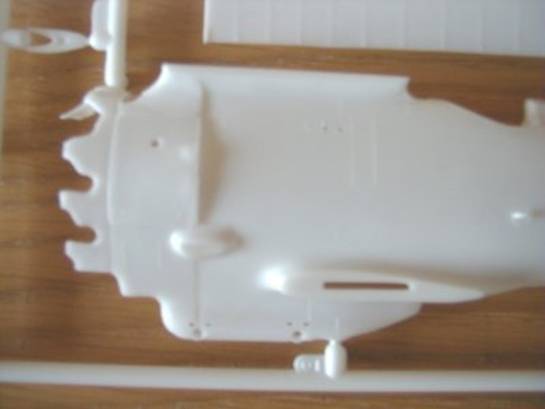
The front part ofthe fuselage with the rigging holes
The engine is made up of the crankcase, cylinders, exhaust pipes etc.. So it will require a bit patience to assemble. This is very crisply molded and should look great if one chooses to add a bit of wires and plumbing to it.
The instructions are scarce in the area of sketches, but they make up since the process of building the model is detailed in the text. Also a drawing of the aircraft and marking sketches are provided.
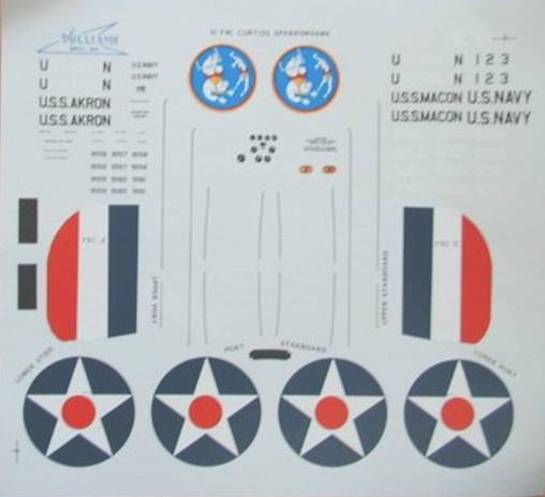
The decal sheet is well printed, the carrier film is medium thick (thinner then Hasegawa, thicker than Craftworks), and are in register, the colours of the sheets are mostly correct (again see below for more details).
Now over to Randy, who actually built this model:
THE MODEL
This was my first foray into building a Williams Brothers model and I am pleased to say that it was a pleasant experience. They are to be commended for producing subjects which are not your typical run of the mill World War II fighters.The box cover clearly states that this model is intended for experienced builders and the instruction sheet reiterates this point by saying that this model is not intended for the person seeking instant gratification.What all this means is take your time and study the instructions, as this model is not designed to fall together. The model is moulded in a soft medium grey styrene with large amounts of flash, predominantly around the front of the fuselage and the exhaust pipes. All surface detailing is subtle and raised, with thankfully, no rivets. A Scalemaster decal sheet is provided which allows the builder to construct any of the eight Sparrowhawks that were manufactured in either of the two paint schemes used for both the U.S.S. Macon or U.S.S. Akron. The only fault I could find with the decals was that the blue used for the national insignia is too light. They should be Insignia Blue as opposed to True Blue. This information is supported in The Official Monogram US Navy & Marine Corps Aircraft Color Guide, Vol 1, 1911-1939 from Monogram Aviation Publications. To arrive at the correct shade of blue I replaced the star insignia with samples from a Superscale sheet for Grumman F3F'sNo.32-4.
CONSTRUCTION
The first step entailed removing the majority of the parts from the runners and cleaning the flash. There were also extensive mould seams to remove due to a mismatch of parts during the manufacturing process. With the parts cleaned up,it was time for dry fitting. I found with this model that once you think the parts are going to mate properly, check again, as guide pins or holes are virtually non-existent. The interior components were airbrushed with Testors Model Master Light Gull Grey, and the seat finished in Testors Metallic Silver. The instrument panel was painted gloss black in preparation for the instrument panel decal supplied with the kit.Afterwards the panel was sprayed with Floquil Flat and then the dials were covered with Superscale Kristal Koat.
A set of seatbelts were fabricated using masking tape, painted flat tan and fastened to the seat. No photo-etched hardware was added as I was attempting to comply with the Out-of- the-box rules. Actually this is an ideal model to enter in this category as the instruction sheet clearly indicates or suggests additional items that can be added such as antenna tripods,ground assist handles, pitot tube etc. The fuselage was assembled with liquid cement and set aside to dry.
Humbrol Gunmetal was applied to the individual engine cylinders and then a flat black wash was used to accentuate the cooling fin detail. Humbrol gloss dark grey was brush painted on the crankcase and the intake manifold was airbrushed with Testors Model Master Jet Exhaust. All the exhaust pipes were drilled out and bevelled to the proper angle, painted with Humbrol Dark Earth, but were not installed until near the end of construction.
The engine cowling was assembled, and the two seams smoothed over. Floquil Old Silver was airbrushed on the inner surface and Xtracolour X152 ANA501 True Blue was applied to the outside as well as the engine face plate.
The wings were removed from the sprue, the edges cleaned up and then held together with clothespins while liquid cement was allowed to flow along the joint. This approach was necessary as there are no locating pins to ensure correct alignment of the upper and lower halves. By establishing the alignment prior to applying the cement it tends to simplify the process. Once the wings had dried they were placed over the scale drawings supplied with the kit to determine where the rigging cutouts are situated in the leading edges of the lower wings. With the location established a half round file was used to shape the indentations and then they were sanded to obtain a more refined appearance.
The completed wings were then sprayed with Floquil Old Silver and set aside to dry.
The rear stabilizers were glued in position and Tamiya putty was used to blend them into the fuselage. After much trial fitting and adjustment the upper wing was fastened to the fuselage and blended in at the leading and trailing edges. Xtracolour X106 FS13538 Insignia Yellow was airbrushed on the upper surface of both the main wing and rear stabilizers. The yellow was masked off and then Xtracolour X136 FS16375 Light Compass Grey was airbrushed on the fuselage, landing gear struts and trapeze assembly.
As a note, the main landing gear struts must be notched to clear the wing rigging prior to painting. This step entails a lot of trial fitting and eyeballing to ensure the notches are in the right place.
The next colour to be applied was the Insignia White of the rudder stripes. This was accomplished using Testors Model Master FS17875, followed by XtracolourX103 FS11136 Insignia Red and lastly Xtracolour X122 FS15044 Insignia Blue. Williams Brothers provides the rudder stripes in the form of two decals, but they also suffer the same affliction as the national insignia by being printed in True Blue. Based on the number of colours required for this model I was beginning to think that I alone was keeping the Xtracolour Paint Company on the plus side of the ledger. Xtracolour True Blue was used for the fuselage band and wing chevrons, and at this time most of the major painting had been completed.
When all the masking tape was removed I was relieved to find that I had not experienced any paint bleeding under the tape. I do not feel it is wise to compromise the quality of the finished product by cutting corners and using a lower grade masking tape. I use only 3M tape for all applications. They offer different grades of adhesives to address the hardness of a variety of finishes that one encounters in a typical model.
The lower wings were now attached and before the glue had set up the wing struts were fastened in place. I was not pleased with the method provided by Williams Brothers for the attachment of the struts. Instead of having the struts fit in a recess in the wings, they are joined to small stumps of the strut which are already cast with the wing. This presents an additional 8 seams that must be finished, all of which are precariously close to the silver painted portion of the wings. After extensive filling and sanding the attachment points were free of visible seams and to ensure that the strut faired smoothly into the wing, white glue was applied at the attachment points. Once completed the struts were brush painted with Testors Model Master FS36375 Light Ghost Grey. This was shaping up to be a nice model.
The main wheels were brush painted flat black and were fastened at the same time as the wheel spats. This was literally the way it happened, as the wheels were placed inside the spats and then the two parts were glued to the main landing gear struts. Be advised that portion of the assembly is not for impatient builders. Williams Brothers very clearly states in the instructions, "This may be the most difficult task of the kit,and fitting plus filling will be required." They were not kidding as I spent hours fitting, trimming and adjusting to arrive at the proper stance for the wheels.
Prior to installing the completed engine assembly, the two machine gun barrels were drilled out, painted with Testors Gunmetal and fished in through the front of the fuselage to rest on the instrument panel. The engine was glued to the front of the fuselage and is really only held in place by the carburettor air duct on the bottom as there is no definitive mounting point for the engine. The exhaust pipes and trapeze assembly were installed and with all major components in place the model was ready for the application of the decals. As stated previously, the decals are a combination of Superscale and the kit supplied Scalemaster and both were applied with the aid of Solvaset setting solution. Once the decals had dried, any excess adhesive was removed with warm water and the model was airbrushed with Floquil flat.
The propeller face was airbrushed with Floquil Old Silver and polished with SnJ Polishing powder. Tamiya TS-6 Flat Black lacquer was applied to the back side of the propeller and the three colour stripes on the tips were made from Superscale decal film. The windscreen was bent to the proper shape and installed along with the telescopic gunsight. To add a little realism to the gunsight, both ends were drilled out and filled with Superscale Kristal Koat to represent the glass portions.
Prior to adding the rigging, the two wing mounted tripods must be fabricated and installed. I elected to make mine from fine wire, but plastic would work as well. All rigging was accomplished using stretched sprue and fastened with superglue. Once in place, the proper tension was obtained by holding a lit incense stick close to the rigging. Besides tightening the rigging it adds a nice aroma to my work space. Spreader bars for the rigging were made from a thicker stretched sprue and fastened in place with superglue. It is important that the spreader bars be installed after the rigging has been tightened. If not, the final position of the spreader bars could be compromised due to inconsistencies in the rigging being tightened. Fine surgical wire was bent to shape and installed in previously-drilled holes in the leading edges of the lower wing to represent the ground assist handles. These handles and the adjacent areas were painted flat black.
Final details consisted of painting the navigation lights with gloss dark red and dark green,while the navigation light on the top of the vertical fin was replaced with a small piece of clear sprue All control surfaces were defined with the aid of a technical pen and black ink.
The completed model is very striking and quite small. In fact the size is deceiving and has led some people to believe it is a scale other than 1/32nd. It resides in my display case and is dwarfed in comparison to a Thunderbolt sitting next to it.
Back over to Smarty...
SUMMARY
Kits done by Williams Brothers are in my opinion match or even better in some respects to the best of Revell-like kits. They provide interesting subjects in our scale, I recommend these kits even to inexperienced modelers (with a little patience of course), but most of all I recommend it to anyone who has an AMS to cure.
WHAT NEXT?
And a look to the future? Well for me definitely a P-35 in Swedish markings. For Williams Brothers I certainly hope they will put out a Brewster Buffalo. It is a golden age fighter, so it would not be so out of place in their range and those colorful fighters from Lady Lex, and not to mention the mounts of Hasse Wind and the like...
© Randy Lutz and Saso Knez
This review was published on Saturday, July 02 2011; Last modified on Wednesday, May 18 2016