
Trumpeter | 1/24 Scale A6M2b Zero Type 21
Reviewed by Chris Mikesh
Pearl Harbor vets will get a chill when they look at this kit. It is a very accurate kit in detail from far away as many vets saw, and from close up as the new generations will see.
I was really impressed with the quality and crispness of the casting. I was up until 2am after I worked with my father until nearly midnight. Needless to say, he was just as impressed as I was. Before I get too excited, let me start from the top.
I was asked to review and critique the kit from a modeler’s viewpoint as well as from a technical point of view. I know of no one in the USA or for that matter the world that can claim to be an authority on the Zero other than my Dad, Robert C. Mikesh. Mr Mikesh used to be the Senior Curator at the Smithsonian Air and Space Museum for 20+ years.
He has also authored 2 books on the Zero as well as numerous articles. Most recently, he has authored the now highly sought after book “Japanese Aircraft Interiors” published by Monogram. He has been a consultant on many aircraft restorations – predominantly Japanese aviation.
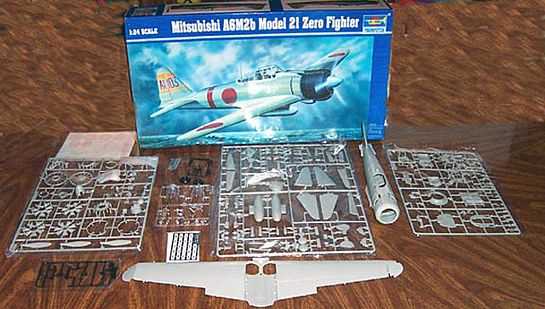
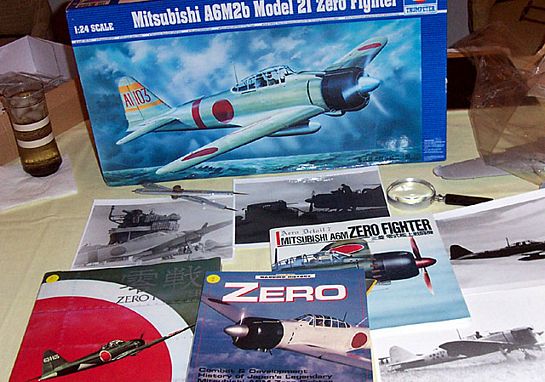
Trumpeter's brand-new A6M2 Zero Type 21 kit has 193 parts on 9 sprues, 2 rubber tires and a rubber sprue of brake hoses, photo etch flap hinges, and a film for the instrument panel.
Opening the box I was very impressed with the packaging. This gives the kit a degree of quality, as it becomes obvious that the kit was packaged to give the impression of care and quality. Trumpeter is putting kits in “high pressure” boxes or 2 ply boxes to prevent crushing and the damage of kits. In this day and age of cutting costs, often the boxes become less than sturdy causing damage to the most vital parts. Each tree is individually wrapped preventing scratches and in many cases – such as the Engine mounts – they are reinforced with padding. Every modeler has gone through the agony of a cracked part fresh out of the box. There is minimal concern here.
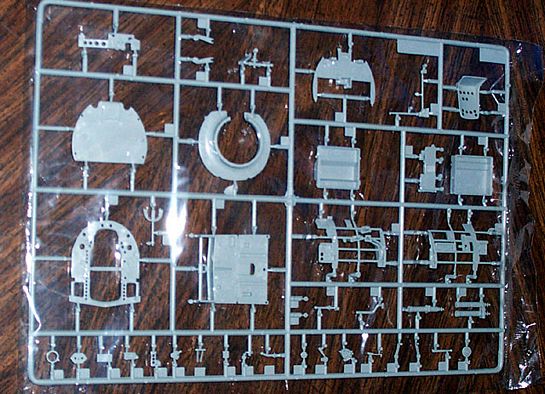
The surfaces were wonderful! Rivets and panel lines are subdued and not the prominent feature to the kit. (Too often manufactures over do the panel lines and such.).
Construction
I couldn’t resist assembling the major components, and we started with the fuselage. Cutting the parts off the tree was easy and there was ample room to get the cutters between the sprue and fuselage half. One item of note, on the fuselage halves, the connector to the sprue must be fully removed in order to fit the fuselage halves together. These connectors are on the portion of the fuselage where you glue. If these connectors are not fully removed flush you will get a gap when assembling the fuselage. Although inconvenient, this is actually good as when they are removed properly, there will be minimal damage to the surface detail and the fit is excellent.
Moving on to the cowling; I was amazed at how well the two halves fit. The latches for the top half met the bottom half perfectly, and it lined up the cowling halves perfectly. Hardly a gap was noticeable – just like on the real plane.
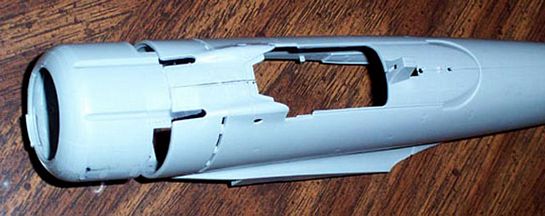
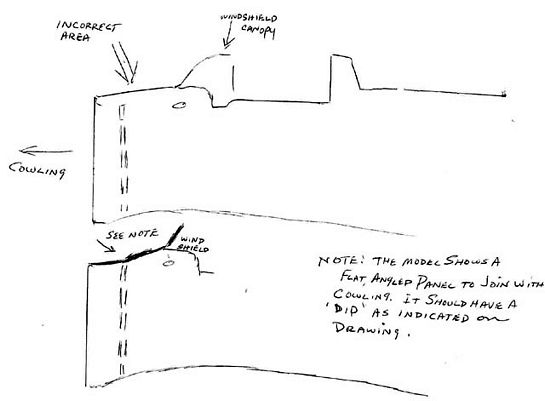
There is a distraction that needs to be noted however; although the cowling is very well engineered, it is slightly misshapen. If you are looking for this error you will find it, but if you don’t know to look for it, you will not know it unless you study photographs and drawings on the subject. As you look at the profile of the cowling, notice the top.
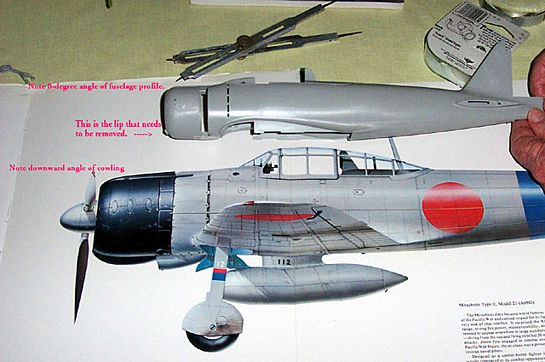
There should be about a 1-degree downward slop for the area closest to the windscreen to the propeller. On the model, there is no slope, resulting in a flat, 0-drgree profile. Also the fuselage between the windscreen and the cowling needs a slight dip in that panel, then upward to the windscreen. (This is not easily seen in pictures and not clearly seen on the kit. In other words – don’t worry about it.)
There is a way to display the kit without the cowling on, and it shows the engine detail beautifully. Simply, if displayed this way, you cannot see the cowling flaw!
Also, the carburetor air scoop on the chin has a slight flaw. The lip of the scoop extends beyond the plane of the cowling. According to the photos we have, that chin opening is flush to the cowling. Simply sanding off that lip will solve the problem. If you have ‘Aero Details #7, turn to page 8, picture 2, for details.
Commentary
At this point I want to make note that the cowling area of any model aircraft kit is the hardest part to manufacture as well as build. Although there is a minor flaw – and it is minor – it is an excellent attempt (no one has done better on a Zero 21 in my experience). Every P-51, T-6, and F-16 kit (for example) I know has something wrong with the nose area – none are perfect. If this Zero is off by 1-degree – consider the quality of the rest of the kit in all of its excellence.
Back to Assembly
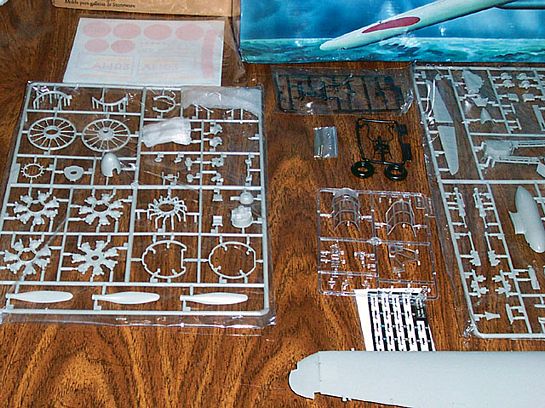
The Landing Gear is amazing! The wheel well detail is excellent. Even the depth of the wheel well is deep enough to support the whole assembly. Another neat feature is the shocks in the landing gear. All of the parts are actually operational – including the scissors on the main gear.
Engine detail of the Sakae 12 is superb. With a little wiring, some oil/grease, and other operational fluids, you’d swear that it was real. I’m sure if Trumpeter had the specifications, and the metal parts I’ll bet they could make one in this scale that would work. The only thing it’s missing is the smell.
Another feature of note is the outstanding reproduction of the propeller and propeller hub. The blades are separate, and the hub is keyed to mount the propeller blades at the correct angle and pitch. Once assembled, and the nose cone is removed, the propeller hub looks great. It is a unique feature if doing a diorama it would show very well.
Wings
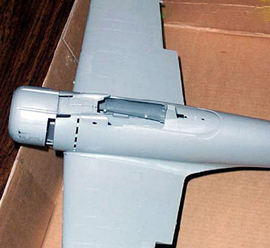 These are a masterpiece. In all cases the comparison from drawing to kit was absolutely perfect in dimension and in location of ‘landmarks’. Even the wing tips fold. I didn’t have time to fully assemble the joint for the wing folds. But my example was perfect. The joint was spot on, and easy to move – even though much of it was taped together.
The fabric-covered surfaces on the ailerons, elevator and rudder are notable. The ribs on these surfaces are just slightly overdone. Sandpaper (about 1000 grit) can solve that problem. I noticed this on the Spitfire as well. Although good, the rib work was too pronounced. Again, nothing a good modeler can’t fix. Otherwise the dimensions were perfect.
Cockpit freaks unite!!! The only thing it doesn’t have is a relief tube - and it shouldn’t, as the real plane did not have one!! In other words, WOW, Amazing and Superb! I was stunned at the detail on the instrument panel as well as the sidewalls. It’s all there. Many people will confuse the Type 21 with the numerous pictures of the Type 52. The cockpits are not the same. Even the seats are different – and they got it right!
Finally the instructions are very clear. A picture is worth a thousand words and they wrote volumes. It’s not likely the Western market will understand the Chinese language, so they made it very clear in the drawings. Also of note is a color fold out of the painting and markings guide. Although nice, the colors were incorrect on the print I received. The version I received was of a green tint overall, which leads me to believe a setting was out of place when printed. Many of you know that modelers should not go by the electronic color print outs, nor printed color documents like this as often they are incorrect shades. The decal locations are correct, which is what the primary purpose of this page was intended. Color was just a ‘feature’ – like Microsoft has ‘features’. (Computer geeks will know what I mean.)
Markings
The kit has only one option; Akagi, 2nd Squadron, in the Pearl Harbor scheme.
The Zero depicted should have a gray with a shade of tan in it. Testors and Gunzi offer an ‘INJ Gray paint’, but they are close, not accurate for this kit however. I’m sure some alternate markings will be hitting the market soon and the Green over Gray will be the easiest alternatives.
Conclusion
I’m still in awe over this kit. It has a good depth of plastic where it needs to be thick and it is nearly paper-thin where it needs to be thin. The clear parts are excellent. Everything is proportional and very clear to the average modeler what needs to be done.
With the exception of the cowling – which is the hardest part to produce on any kit – there is nothing an average modeler can’t handle.
The dimensions are perfect – really. And that amazed me. Usually kits are off just a bit. Not this one! The wing dimensions are spot-on. I found the same with the fuselage, the tail, and even the location of the wing attachments.
My hat is off to you guys at Trumpeter (That is a compliment – not an effort to sun-burn the top of my head). You did an excellent job.
What few flaws there are in this kit is not worth bashing. I highly recommend the kit, not only for its subject matter but especially for the quality of the product.
Wing dimensions, fuselage dimensions, tail dimensions, landing gear, cockpit and engine are absolutely outstanding.
Congratulations Trumpeter!
Thanks to Mike Bass at Stevens International for the opportunity to evaluate the kit.
And thanks to my father Robert C. Mikesh. Without him, I would not be here.
Check out Chris's store Nostalgic Plastic where you can sign up for his NostalgicPlastiGram.
© Chris Mikesh 2003
This review was published on Saturday, July 02 2011; Last modified on Wednesday, May 18 2016