
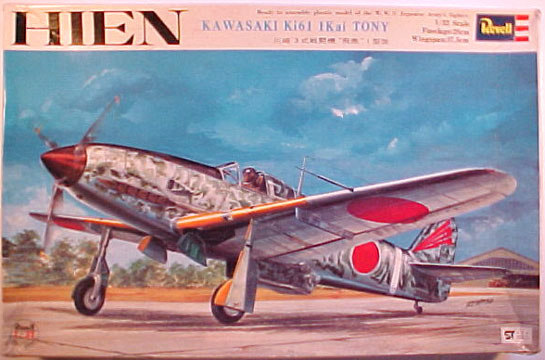
Revell | H-276: Kawasaki Ki-61 Kai
Reviewed by Rato Marczak
AN ALMOST EXTINCT BIRD
I guess that most modelers dedicated to 1/32 scale know the story behind this kit. For those who don't, I will summarize it briefly here.
Revell/Japan released this kit and two others (the Mitsubishi J2M3 Raiden and the Kawanishi N1K1-J Shinden-kai) during the 1972 time frame. As far as I know, these were the only efforts of Revell/Japan in 1/32 scale and, given the subjects, it was clearly directed to the domestic market. After a few batches the molds of all three kits should be traded to be injected in another Revell subsidiary (after rumors it was Revell/Mexico, but I've never confirmed). So the molds were sent by ship... and the ship sunk!
Well, Robert Ballard will be of little help in this case. Now we have to accept the idea that this is kinda short-run (or should I say short-life?) kit and we won't find it on the shelves again. As the years pass, this kit becomes more and more scarce. Its price is rising significantly and in a matter of a couple of years it may be more expensive than the new Tamiya Zero. In short: it is becoming a true collector item. On the good side, it still can be found if you really look for it, particularly in swap meetings and web based auctions.
One day it will be completely extinct...
"IN BOX" REVIEW
I'm convinced that this kit (along with its two brothers) can be considered a change in Revell lineage of 1/32 models. I'll try to show you why in this review: petite recessed panel lines, recessed rivets, good fit, no movable parts and five different decal options. Maybe it is just its Japanese heritage, but the fact is that except for the cockpit (and also accounting for the manufacturing technology of 1970s), this is very good kit even for today standards.
However don't expect this Revell Ki-61 to be Tamiya like. I'm sure it made many young modelers happy 30 years ago out of the box. Of course it can be done today too, but considering that only dedicated modelers will try to find one, they have plenty room to improve this one, if desired.
GENERAL
The kit comes in sturdy cardboard box typical of an early Revell 1/32 model, with a beautiful artwork signed by Mr Ikematsu. The assembly instructions come in a single sheet that once unfolded will cover most of your workbench. All in Japanese and don't ask me what is written there. A nice touch is the terrific profile that comes with the kit depicting the Ki-61 'blue 24' flown by Maj. Teruhiko Kobayashi in February, 1945. Unfortunately that is a wrong scheme for this particular Tony (more on that later) but it makes a good aviation art picture in any wall. Manufacturers could adopt the idea again...
The kit comprises 68 silver styrene plus 6 clear parts used along 10 instruction steps (including decal application). The silver plastic is more brittle than the one typically used by Revell/USA models of the same time, and this has obvious benefits to the parts fitting. There are some flash here and there and many ejection pin marks as well, mostly on areas that won't be seen after assembling.
A big plus of this model is on the surfaces of the main parts: the way the panel lines are made. They are all recessed, as well as access hatches, fasteners and the zillions of rivets. The panel lines very subtle and on scale. Yes, a 1/32 kit without rescribing, at last! The quality of the smaller parts is more or less like any other average Revell kit in this scale.
Contrary to what is stated on the box, I measured a wingspan of 373,4 mm and a length of 276,6 mm. The correct dimensions in this scale are 375,0 / 273,4 mm.
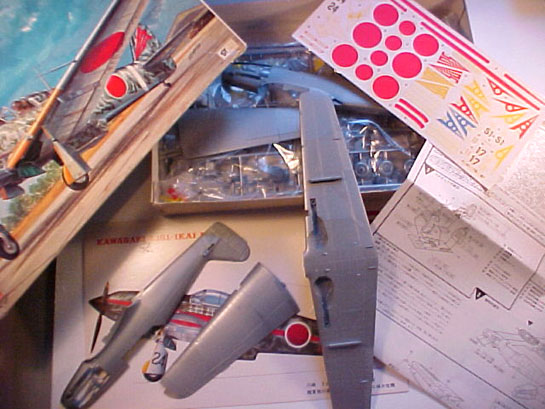
This is what you get once you open the box.
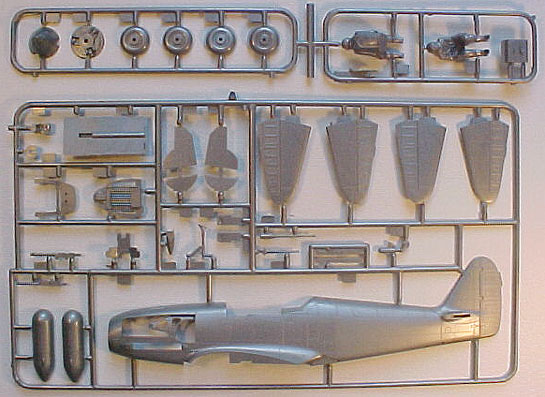
The only trees still holding all its parts in my sample.
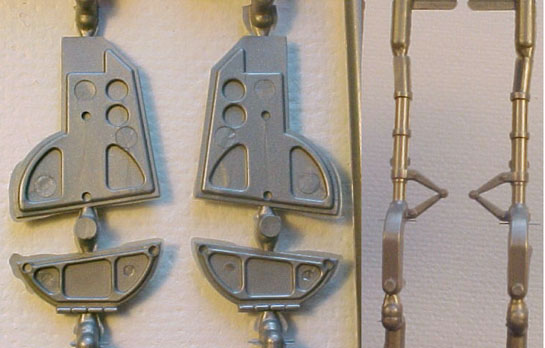
COCKPIT
The weakest part of the kit. The cockpit comes with floor, firewall, bulkhead, seat, control panel, stick, gun sight and the pilot. The corresponding details molded on the fuselage halves are very basic: a few ribs simulating the internal fuselage structure with the radio and the throttle. Everything can be improved. If you like super detailing, I'd suggest to scratch almost everything using the kit parts as templates. The kit floor has the rudder pedals molded on very crudely. You can remove the pedals and use the floor along with the characteristic control stick. The control panel is very basic. A new one made of plastic card and PE bezels with decal dials would be much better.
Yes, we could live with the kit's cockpit. But remember that everything can be seen through the canopy.
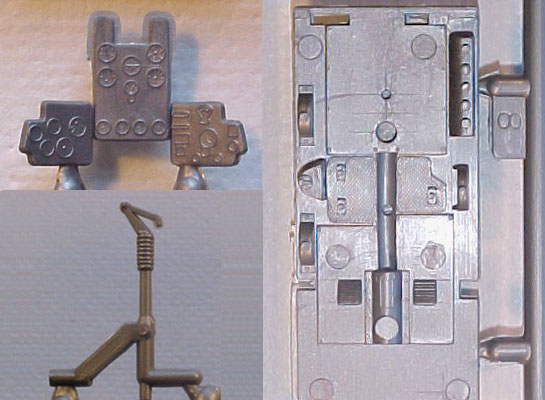
Some of the cockpit details: instruments panel, control stick and the floor.
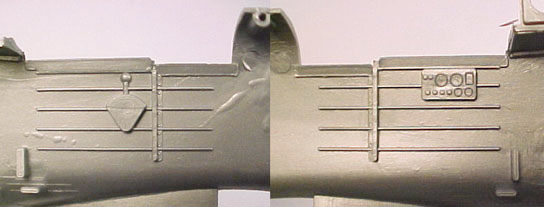
The kit sidewalls. Rather basic.
ENGINE
Revell always added engines in their 1/32 aircraft range. Remember the Spitfire, Hurricane, P-51 etc.? The same concept was used in the Ki-61: a reasonable engine mounted between the fuselage halves and a removable access panel on each side of the fuselage.
The engine subassembly is typical of Revell: two engine block halves, top and bottom parts and a crankcase where the propeller fits. The Ki-61 had two 20 mm cannons mounted on the top of its inverted Kawasaki Type 2 engine. The kit provides the cannons. These are very crude parts, but they become completely hide (seen from the engine opening) once the fuselage halves are joined. On the other hand they can be barely seen from the apertures on both sides of the control panel (particularly the right side cannon, since they were mounted in offset). Exhaust stacks should be opened for a more realistic aspect. I suspect this is impossible to be done. The trick here is to adapt Moskit stacks for the Me-109 (product #MOS32005)... much better (don't forget that the first stack is molded on the fuselage). If you prefer to stick with the kit parts, don't remove the seam lines as they simulate pretty well the weld line found on the actual aircraft.
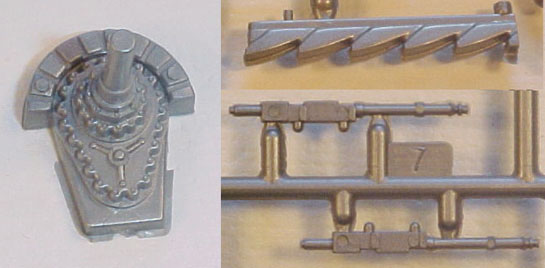
The mounting struts of the engine are molded with the fuselage halves. Some of you will prefer to remove them and scratch new mounts attached to the engine block. This is not difficult as it sounds, and probably the kit mountings can be reused to save some work. This is the way to go in a well detailed engine. Also, around the fuselage engine opening there are a couple of unrealistic tabs to hold the access panels in place. Thankfully, there's no molded on wiring to clean and so they can be individually added along with some additional plumbing for great effect. Because the Ki-61 engine was in fact the german DB 601A built under license, I guess that Verlinden's Bf 109 engine can be mostly used, but it's up to you to check. If you decide for not showing the engine, a careful filling will be necessary to alleviate the gaps around the access panels.
Each propeller blade is a separate part and they go slotted on locating pins inside the spinner to assert the proper pitch angle. There are ejection pin parts on all three blades which are not really deep and must be filled and sanded smooth.
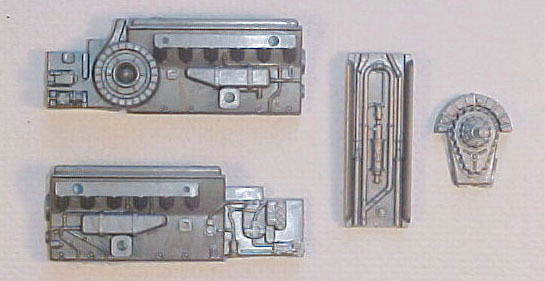
Some of the engine parts.
A zoom on the crankcase, exhaust stacks (the sixth stack is faired and molded on the fuselage) and the 20 mm cannons.
Close up of the engine mounting struts area.
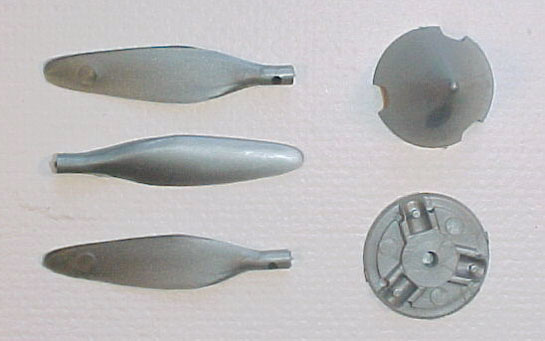
Propeller parts.
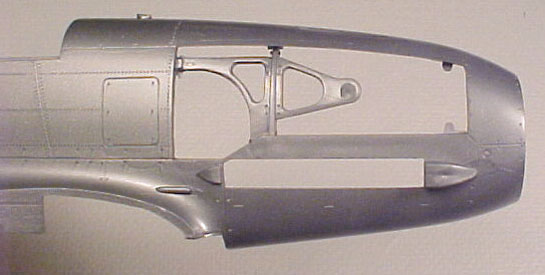
MAIN PARTS
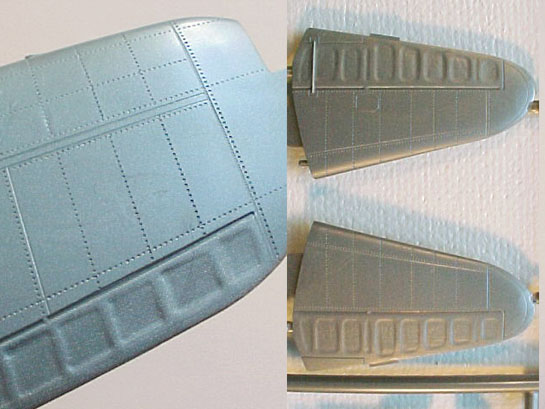
The basic airframe is split in a classical nine parts assembly: two fuselage halves, upper wing halves, a single bottom wing part and the horizontal stabilizers (upper and lower parts). I found no visible warping on any of them. As I said, the panel lines are recessed and very well done, with some fairings slightly raised to simulate overlapping areas. All the control surfaces have a convincing fabric texture, although a bit overdone. A matter of taste, though.
The fit is good and most panel lines match their continuation around the joints. Strangely, some accompanying rivet lines don't (upper fuselage joint, just behind the canopy). You may be thinking: that's ok, they will be sanded afterwards. Nope. The rivets are molded in a countersunk fashion and, given the good overall fit, a careful sanding will preserve most of them. A rivet counter will claim that the rivets are too deep. If you agree, use and old recipe to alleviate this: hand brush Mr. Surfacer along all rivet lines. Wait until dry and then rub a tissue paper wet with Mr. Thinner in fast movements. This will remove the Surfacer from all areas but those recessed, partially filling the rivets depressions. Repeat the procedure if necessary. Personally, I see the rivets of this kit in the proper dimensions to support a heavy primer/cammo paints/gloss finish/decals/flat finish sequence without disappearing. Anyway, don't think about it like Tomy/Swallow/Doyusha rivets. These ones are much more delicate.
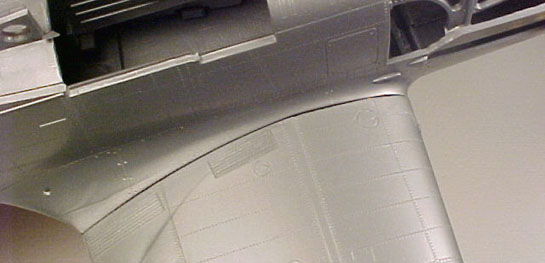
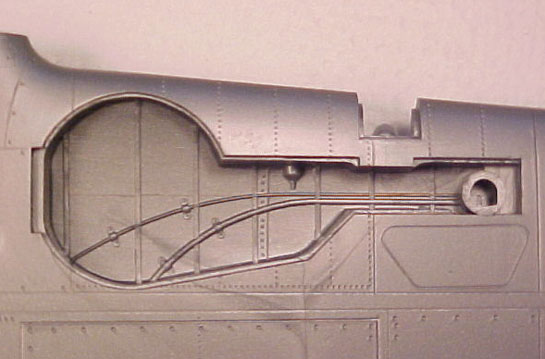
The prominent air intake under the fuselage has a separate radiator flap door which can be glued in open or closed position. Whatever the choice, these parts should be thinned from inside for an improved appearance. It sounds much better to discard the kit flap and scratch a new one. Also, the retraction mechanism of the radiator flap and the radiator itself are clearly visible from behind in an actual aircraft (specially when the radiator flap is deployed), but there's no internal parts representing them.
The kit provides the external fuel tanks to be installed under the wings. The pylons are molded with the lower wing. There's no parts for the anti-sway braces.
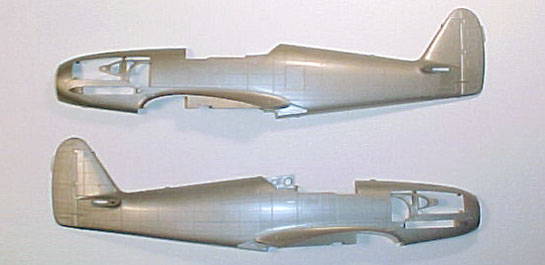
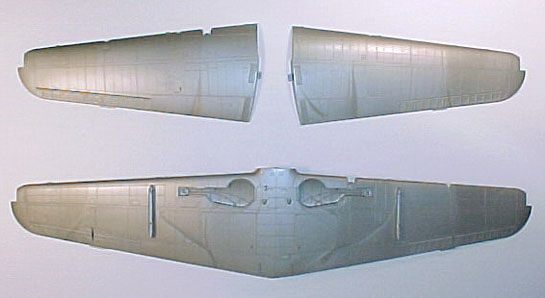
Fuselage and wings.
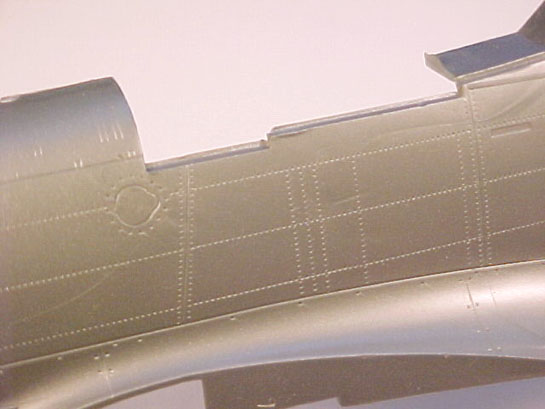
The recessed panel lines and rivets at a glance (left fuselage).
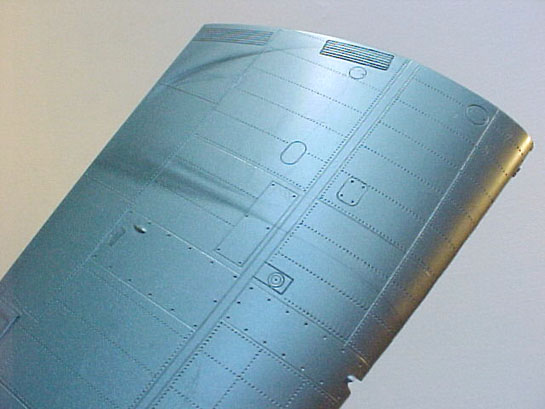
The recessed panel lines and rivets at a glance (upper right wing).
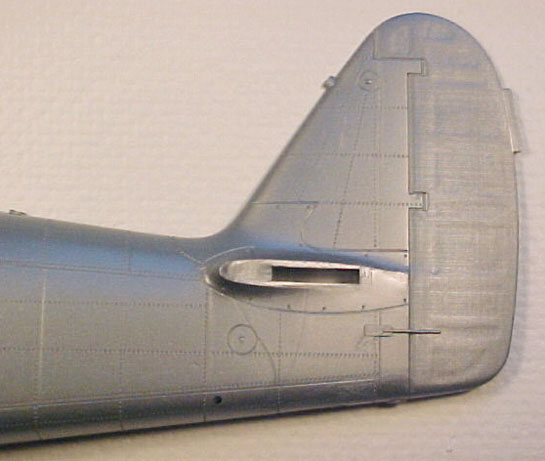
Detail shot of the tail area. Note the petite fabric covered rudder.
Zoom on the fabric control surfaces (right wing tip and horizontal stabilizers).
The fit of the main parts in really good. It is not like other old Revell models plagued by warping. I'm convinced that this is a welcome consequence of the brittle type of styrene used in this kit (pretty much like the type used by Tamiya). Areas constantly under concern like fuselage joints and wing roots are workable. The wing roots will need a bit of putty, only to fill the gaps. The bottom fuselage area will need some too, because there are several sink marks around the locating pins areas. The only really noticeable gap seems to be the air intake joint behind the flaps.
Wing root gap.

Lower fuselage gaps.
THE NOSE
Ahhh, the nose... There's a saying among 1/32 modelers: "Four of each five inline engined model subjects have the nose incorrectly shaped". Unfortunately, this one in not the exception. The tapering of the nose is too smooth on top fuselage, right behind the propeller spinner. However, this is not much noticeable and would be acceptable, was this the only problem. There are two other inaccuracies that a JAAF aircraft expert won't let pass are:
- The nose is too long. Matching the fuselage halves with scale drawings will show clearly the discrepancies ahead of the windscreen stations.
- The openings for the cannon muzzles are hopelessly wrong.
Model Art Magazine on the Ki-61 comes to help here. On pages 119-120 there are some sketches showing how to proceed the surgery to correct the problem, including a nose reshaping. They also recommend the removal of 4 mm of the nose section (this is in good agreement with the 3.2 mm in excess that I found in the overall length). That's a daunting task, though, and surely not for beginners. You decide what to do here. I'll only leave you with a sketch of the proposed solution.
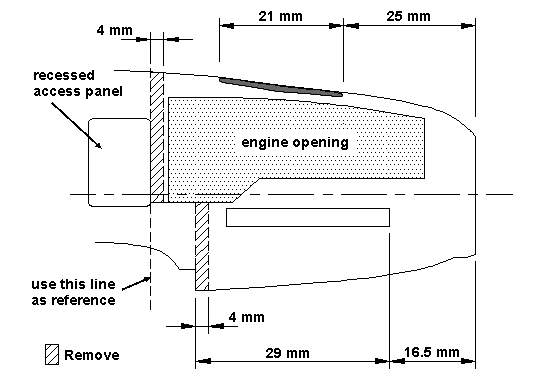
How to shorten the nose and remake the muzzles openings.
LANDING GEAR
Landing gear parts are quite simple. The main struts are fairly detailed, and can be used throughout. Just clean any seams and add the break lines. I liked the well molded torque links - no need for replacement. Wheel covers are simple and look good, except for the annoying pin marks in places that make them quite difficult to be sanded. I suspect that the details on the inner side are speculative, but I've found no pictures to check. The wheels are also simple and devoid of any visible detail, as is the actual part (and sorry, no separate hub). The tail wheel comes in a single part and can be improved. Superdetailers will probably make a new one from scratch, but the kit part is acceptable.
The wheel wells are typical of most 1/32 offerings of that time: too shallow without any interesting detail. Detail fanatics will have a hard time here, though, because the only way to correct it is by removing the bays from the lower wing and scratchbuilding a new one. A shortcut is to add some plumbing and stuff and live with the kit part. But be aware that, again, the details in the wheel bays are only illustrative and has nothing to do with the actual details. In the actual aircraft, there was a big depression that housed the wheel fork after retraction, and this is not represented at all. Furthermore, there should be a small retraction arm near the pivoting point of each of the gear struts, and they are not present in the kit.
Well, always the same story: when the gear struts are good the wheel bay is a piece of crap.
Landing gear parts. Lots of ejection pin marks.
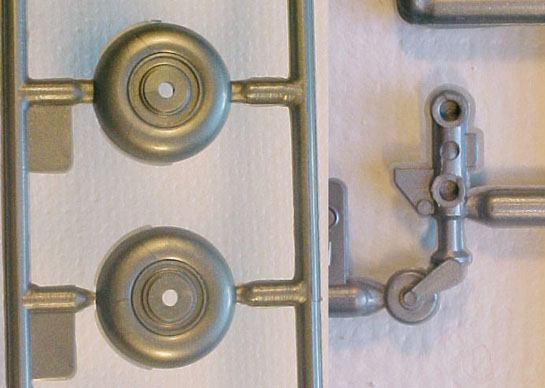
The main wheel parts and the tail wheel strut.
Wheel well. Nothing to do with the actual aircraft.
CLEAR PARTS
There are 8 clear parts: three for the canopy, two wingtip lights, one wing lens cover and two gun sight reflectors.
I dry fitted the canopy parts. The distortion they produce is very noticeable and my sample had several strange marks (I've noted that in other samples of the kit, too). The frame marks are way on the heavy side. A careful thinning/sanding and a bath in Future Floor will improve them. Also worth to note is the horrible fit of the rear canopy to the fuselage. Yet another problem is that the sliding portion of the canopy can't be assembled in open position because of its thickness. If you want to, be prepared for a major (and dangerous) thinning - better vac-form a new one using the kit part as a mold.
Remember to refine the wing landing light before attaching its clear cover.
Clear parts. What the hell are those bubble marks?
DECALS
The good news is that there are no less than five versions to choose. The bad news is that these are old decals. And as you know, old decals suffer severe yellowing, may crack and can't sustain strong solvents. I don't recommend using the kit decals. I'm convinced that the better advice here is not to run risks and go to aftermarket options.
The most famous of the versions provided by the decal sheet is the Ki-61-I-Tei 'blue 24' flown by CO 244 Sentai Maj. Teruhiko Kobayashi in February 1945, showing his ten B-29 and two Hellcat kills. In Fact, the decal sheet is wrong, because the red strip along the fuselage sides should be blue. This wrong scheme was published in several books so check your references. The other versions are two green/aluminum aircraft of the 105 and 68 Sentai and two overall green aircraft from the 56 and 19 Sentai.
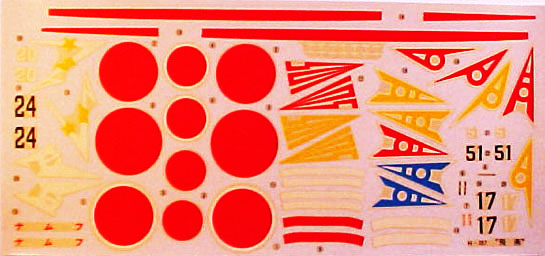
The decal sheet
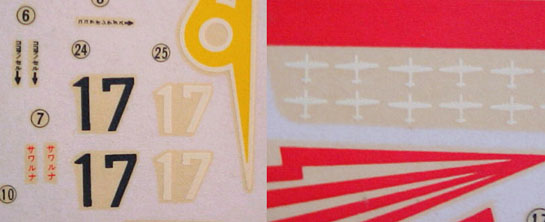
A zoom on the decal sheet. Note the yellowing.
FINAL COMMENTS
This is a very interesting subject. There are several beautiful paint jobs to choose, from NMF to overall green finishes. The Ki-61 entered the war in the final years, when nothing in the Japan aircraft arsenal had the same manufacturing quality and maintenance of the first years. Most war time photos of the Ki-61 seems to reflect that: very flat painting, lots of chipping, exhaust streaks etc. A Tony in 1/32 can feature all this still preserving its unique lines (it was the only AAF using inline engine).
Maybe I was quite a bit critical in this review, but I was just trying to give you some perspective of what can be done to improve this model. Most other Revell kits would produce a text at least twice longer if reviewed with the same level of criticism. This is a good kit out of the box. The problems with the nose can be overlooked in my opinion. Just refine the cannon openings and insert some new muzzles made of tubing. Apart from this, the only area that really need some work is the cockpit, provided you can live with the wrong wheel wells. It is just a matter of a good paint job and weathering.
On the other side, this model can be turned in a real marvel in the hands of an experienced modeler. Model Art magazine on the Ki-61 shows two impressive examples of this very kit (one of them is a conversion to the bubble top Ki-61 II-Otsu!!!).
My main references for this review were:
- The Maru Mechanic No. 45: Nakajima Ki-43 Hayabusa / Kawasaki Type 3 Army Fighter Ki-61 Hien.
- Model Art Special on the Army Type 3 Fighter.
I recommend both of them for a Tony in any scale.
SUMMARY
Why four stars? Because it is one of the best Revell efforts. I would probably give three stars to a P-47 of the same manufacturer. But this is not the case, the big difference being the fitting and the recessed surface details. And with the new Tamiya Zero around, better to save five stars for future reviews. Maybe I should subtract a half-star because of the availability of this kit...
One thing is for sure. This kit has no problems with molds aging :-) . Given the fate of the molds, on several occasions I discussed with my friends about the dilemma: to build it or to keep it unassembled as a collector item? My answer always was: If you can get one, build it.
ACKNOWLEDGMENTS
I'd like to thank my friend and fellow modeler Fernando Souza for helping me with several useful data about the Ki-61 and for preserving the review sample intact for over 25 years. Later I received this kit as gift, but that's another story...
© Rato Marczak 2005
This review was published on Saturday, July 02 2011; Last modified on Friday, June 03 2016