
Revell | 04721: Messerschmitt Bf 109G-4/trop
Reviewed by Rato Marczak
The last couple of years have been good times for us 1/32ers. After the Tamiya Zero, Hasegawa came to rescue an army of Luftwaffe modelers avid for a fully new injected Bf 109. And Hasegawa has not disappointed them. After the G-6 (also encompassing the G-5) grand debut, the tall tail G-14 followed shortly after. The last member of the family is the G-4 in its tropical configuration. Released in 2002, it is the result of a collaboration between Revell-Germany (Revell-Monogram) and Hasegawa to make the prices more affordable in Europe, since it is injected there.
We will do an in-box review here, and I confess that I am not a Luftwaffe expert. But our goal is merely to show you what to expect from this kit in case you are wondering to have one. Surely some full construction articles will abound here in a near future, with more in-depth considerations about fit, parts alignment etc.
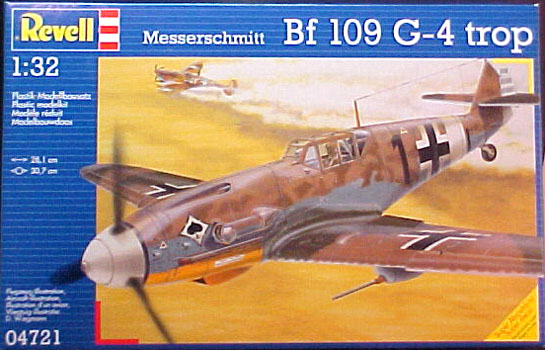
The box art of the G-4 release.
OPENING THE BOX
The kit comes in a typical Revell-Germany boxing with the artwork depicting The Bf 109G-4 "Black 1" flew by Oblt. Schiess from JG 53 in Sicily during 1943. The instructions come as a 15 pages booklet covering 31 assembly steps and 4 camouflage/decal application diagrams. Color specs are given as generic names with numbers referring ProModeler paints. When applicable, the RLM color codes are given.
The kit comprises 107 tan colored styrene parts arranged in 8 sprues (about a dozen of them are leftovers from the previous versions and won´t be used), plus 11 clear pieces and 4 vinyl caps.

This is what you get once you open the box.
I found a minimal flash and mold seams around smaller parts, only. Otherwise, the quality of the molding is very high, with crispy details and recessed panel lines. The styrene used in this model seems a bit more brittle than the typical Revell-Germany soft type. Well, there will be no rescribing job anyway... And here are the sprues:
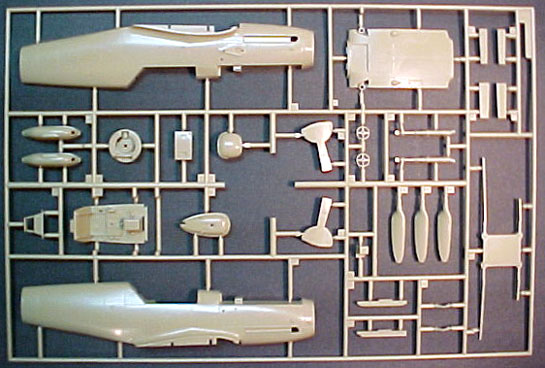
Sprue A
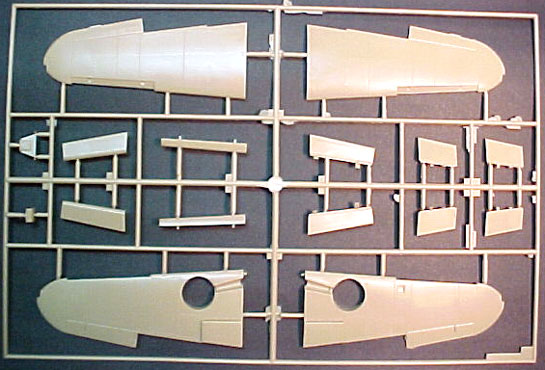
Sprue B
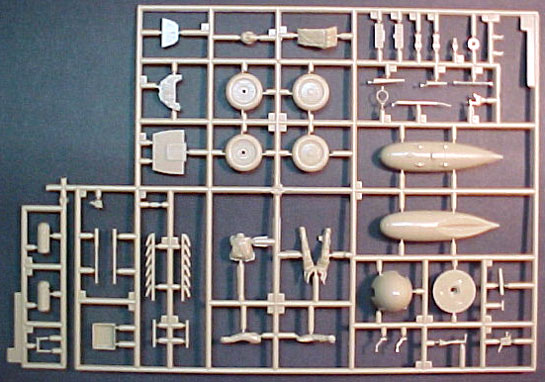
Sprue M
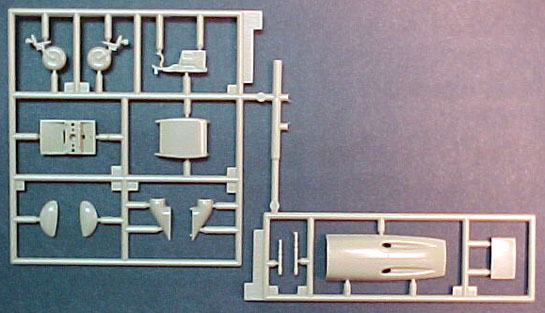
Sprues G & L
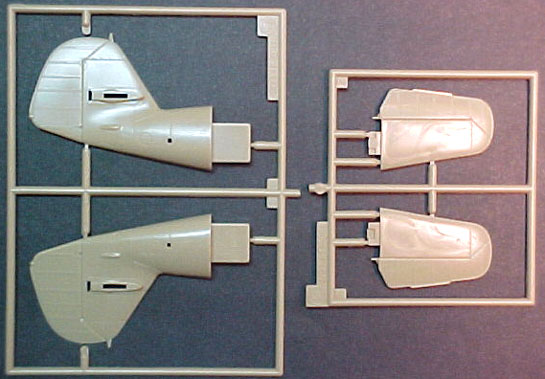
Sprues C & E
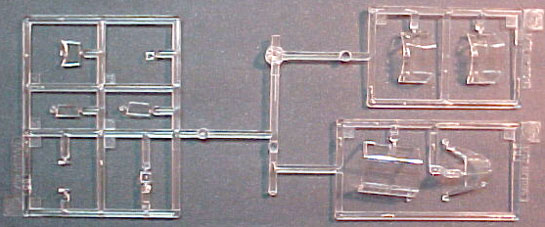
Clear parts - sprues R, S & T
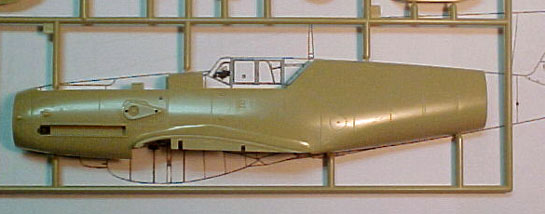
MAIN PARTS
The airframe is clearly engineered to maximize the number of versions that the molds can provide, which means almost the entire G-series. The fuselage halves have separate tail and engine cowling, while the wings have five parts: upper and lower halves and a bottom center section. The center section sandwishes the wing spars (a single, very thick part) against the fuselage. The wings are then boxed on these spars, resulting a strong joint and good alignment at the wing roots (assembly steps 11 and 12). As a by product, we don´t have to worry about dihedral. The stabilizers are molded as a single part. It saves us some assembly time, but you have more work in case you are planning to remove the control surfaces.
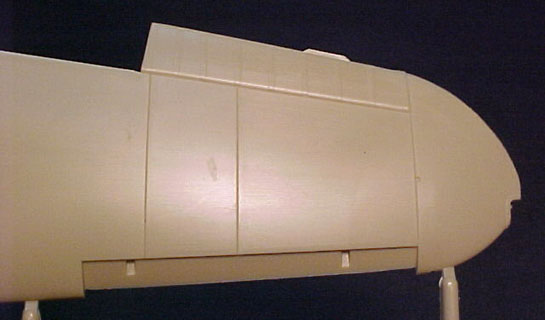
As we expect from modern kits, all panel lines and prominent rivets are recessed, except where they really should be raised. Interestingly, no rivets are present on the upper wings, which is correct as these were flushed, as well as the rear fuselage (which were butt jointed along the panel lines). The engine area has very well done dzus fasteners, and along with the finely recessed lines they will benefit from a careful wash. The top cowling panel (part L3), where the gun muzzles go, is a separate piece because the area varied from the G-4 version to the others. However, the engine cowlings opened to the sides (they were hinged on the center line of nose) as a single piece (see photo below). So, the horizontal seam line resulting from attaching the L3 part must be sanded flush.
And no, there´s no engine in the kit, but wait a few months and I bet many aftermarket items will appear... MDC has already done their fabulous DB-605, and it is not intended to be installed inside the fuselage. But surely will add a lot of interest when posed side by side to this model...
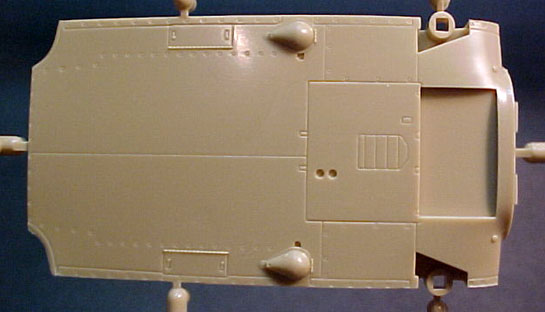
Don´t forget to fill and sand the fuel hatches on the right fuselage (just aft the cockpit - see step 5 on the instructions). These should be there only on the G-5 and on versions.
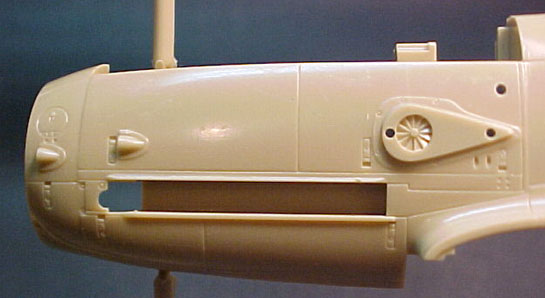
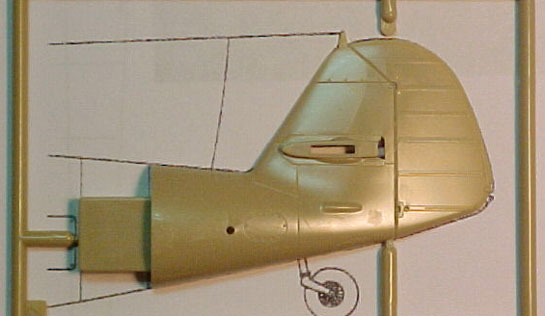
The front fuselage around the engine area. Note the supercharger intake details.
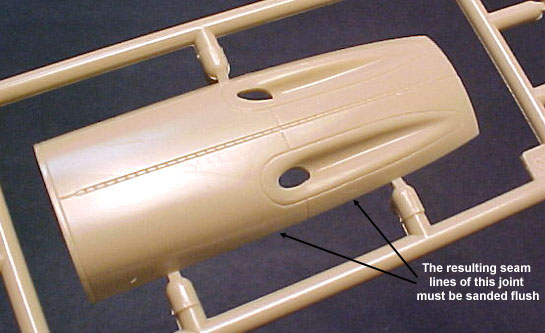
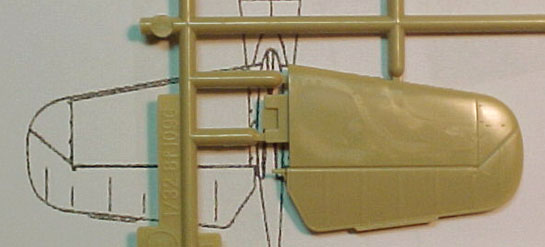
Top engine cowling (part L3).

This is how the engine cowling was open (Bf 109G-4 from IV.JG-54).
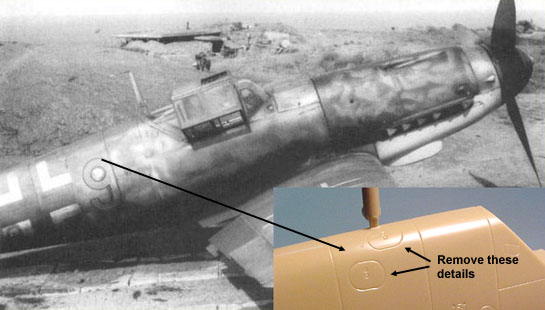
Fuselage details to be removed for an accurate G-4 (Bf 109G-4 from II.JG-52).
The flaps and the slats are positionable, a long time complain of 109 fans. I must add, however, that deployed flaps were not as common in grounded dash-G Gustavs as you may be thinking. All control surfaces are fixed, though. I have no doubt that some of you would like to reposition them.
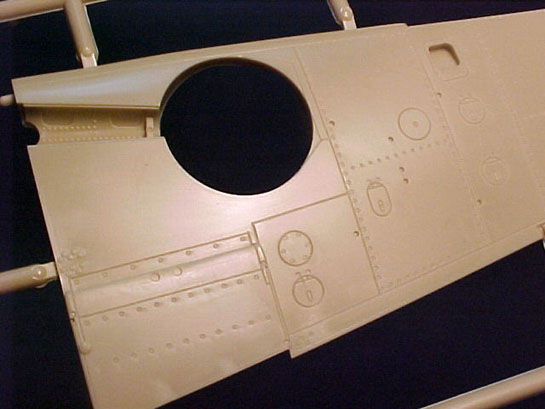
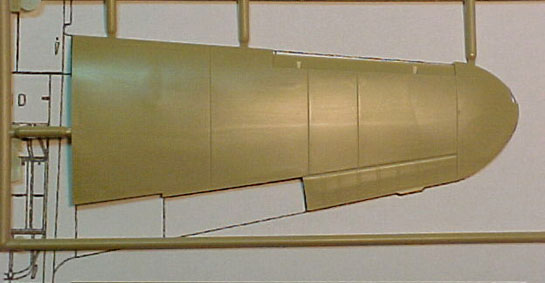
Surface detail at a glance (upper left wing). Note the slots for the slats (eh, eh, my English must be improving ... now I can do puns).
Surface detail at a glance (lower left wing).
Surface detail at a glance (lower center wing section).
The fabric covered rudder and horizontal stabilizers are accurate and devoid of any attempt to simulate the fabric covering, but includes a good representation of the stitching along the ribs. This approach should be used by other manufacturers, as this aspect is generally very overdone in most 1/32 WWII kits. The photo below from the JG-52 shows clearly that the ribs were virtually invisible.
As a final note about the major parts, they fit very well, with extensive use of slots to provide a clean assembly. Although I didn´t test fit my sample, most articles in printed magazines and on the internet report the use of none or very little putty during the whole assembly.

Surface detail at a glance (tail).
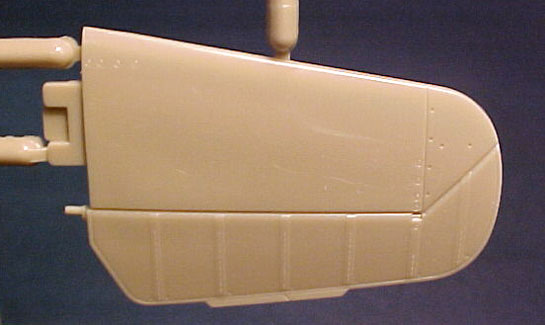
Surface detail at a glance (horizontal stabilizer). The horizontal stabilizers are molded as single pieces.
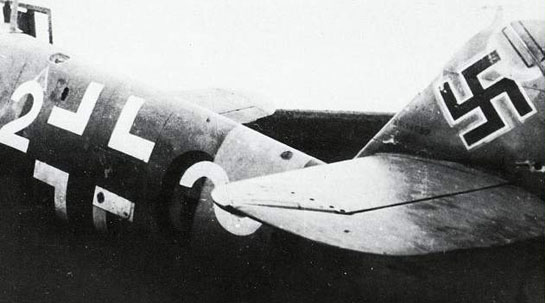
Bf 109G-4 from III. JG-52, showing that the horizontal stabilizers ribs were virtually invisible.
SHAPE AND DIMENSIONAL ACCURACY
I guess most reviewers are a bit reticent about checking accuracy after all the discussion involving some new 1/24 and 1/32 releases. I´ll take my shot here. I used several drawings as references (they are pretty abundant, you know). After checking the dimensions of the resized drawings, I have chosen a few to make my comparisons.
I found a negligible difference on the wingspan, but to avoid nitpicking, I´ll just say that this kit is as perfect as it can be. Even the stations of the fuselage sections agreed with the drawings. Take a look on the photos and judge by yourself...
Checking fuselage accuracy.
Checking wings accuracy.
Checking tail accuracy.
Checking stabilizers accuracy.
COCKPIT
If you are not crazy for hyperdetailed cockpits, this is for you. Revell provided a quite good cockpit. Despite of not being perfect, it is crisply molded, and have all the prominent visible details. Again, I see the cockpit of this kit as agood benchmark for other manufacturers to follow: not absurdly detailed(what would make the kit more expensive and difficult to build) but much more detailed than a 1/48 kit. My point is, if you build the kit OOB, nobody will complain that the radio is missing or something. Now if you are going to scratchbuild a lot of details, you are half way done... In case you don´t know, there are at least three very good cockpit detail sets for the G-6 on the market. Start from one of them and you will save a lot of work (as the G-4 to G-6 cockpit differences are small).
The control panel is finely molded with raised details. A decal is provided for it, but a very convincing panel can be done by drybrushing (the kit´s panel seems to be made for it). The inner sides of the fuselage have ribs and other relief details molded on, but as I mentioned before, a few wires here and there will do the job. As for the painting, follow one of the many good books or internet sites on the subject. I won´t run the risk, but will leave you with a picture of a Bf 109G-2 authentically restored as a starting point.
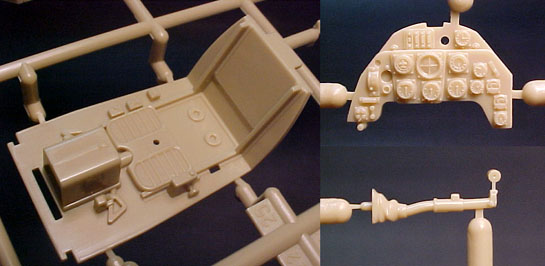
Some parts showing the level of detail in the cockpit: floor, control panel and control column.
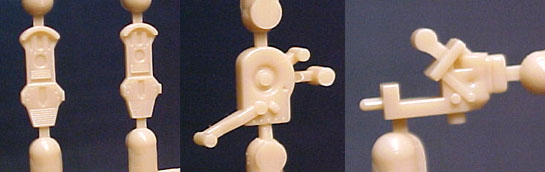
Here you see the rudder pedals, the throttle, and the gun sight.
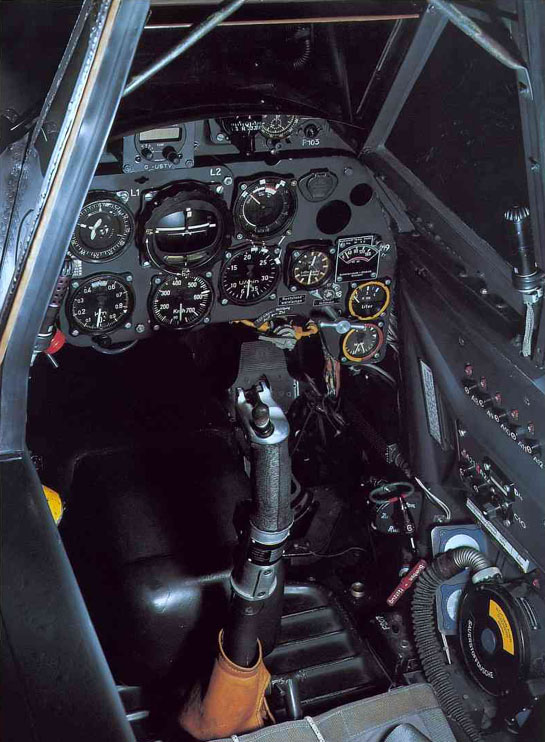
An authentically restored Bf 109G-2 cockpit.
LANDING GEAR
Revell has taken a simple approach here too. The wheel wells are well detailed (something new for 1/32 Gustavs). The kit comes with the correct, larger (660 x 160 mm) tire and late hub-cap. However, most G-4s were equipped with the old spoked hub cap, as exemplified by the picture below, just in case you are looking for a different touch. The main gear leg is well molded, and the brake lines are molded on (I know some of you don´t like this). The torque links are separate parts, making easier to paint the oleo part. The wheel door is molded in a single piece, but it should be split in two parts. It an easy task to cut off the upper area (devoid of any detail) and make a new one. I included some pics from the aircraft manual showing the correct configuration. As for the tail wheel, I still don´t understand why the manufacturers insist in making it as two halves. It would be much better to have the yoke as an integral part and the wheel as another single part.
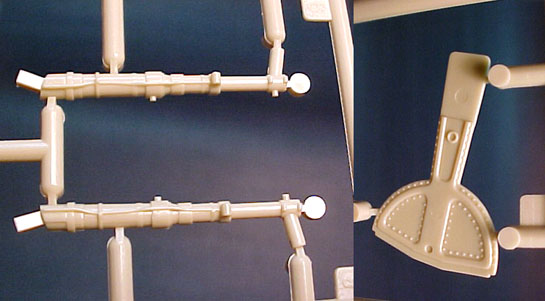
The main landing gear legs and the wheel well door.
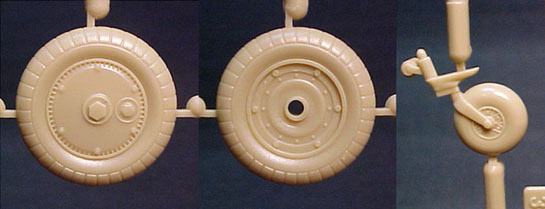
Detail view of the main wheels and the tail wheel (one half of the later shown).
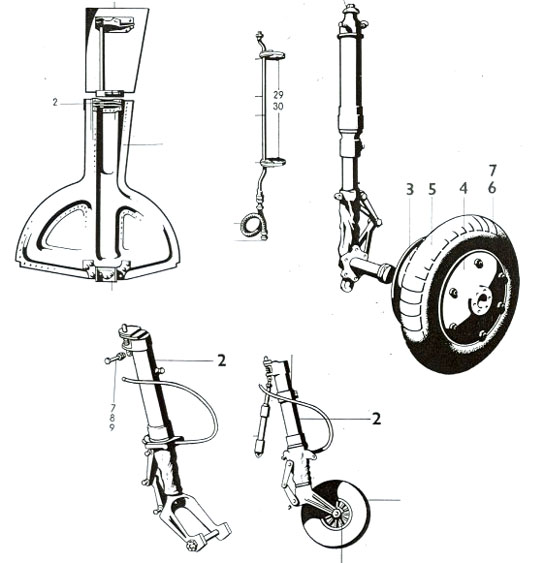
Landing gear details (from the aircraft manual). Note the correct configuration of the wheel doors.
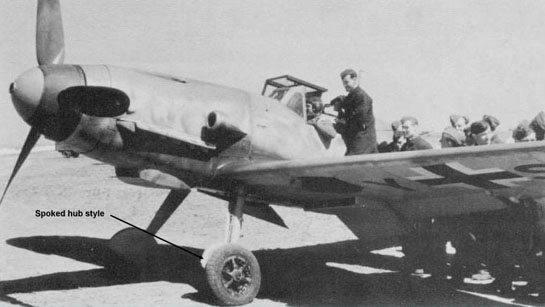
Another G-4 from the III. JG-52, showing the more common spoked wheel hub.
PROPELLER AND OTHER DETAILS
The propeller is very well done, with the blades individually molded. The spinner would benefit from replacing the cannon barrel emulation by plastic or metal tube.
I found the exhaust deflector plates (that go just above the stacks) a bit too thick for the scale, and can be easily replaced by plastic card or metal sheet of proper thickness. The supercharger filter doesn´t have a very crisp representation of the grilles, but to replace it would mean to scratchbuild a completely new item. There is a very good aftermarket item for it in resin, if you want so.
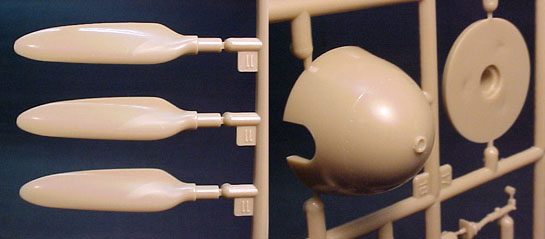
Propeller blades and spinner.

The sand filter for the supercharger intake.
The belly fuel tank is beautifully molded in upper and lower halves. A bit bothering to clean the joint, but head and shoulders ahead anything of the type previously injected. The attachment clamps are particularly crisp.
The underwing cannon gondolas are nice, too, and will make an Gustav somewhat different from the usual. Pay attention to the version you are going to build to be sure your bird had them.
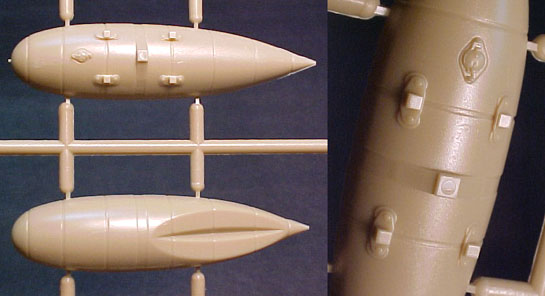
The belly tank.
CLEAR PARTS
Another strong point of the kit. Well molded, thin, and with very delicate frame lines/rivets. Just a matter of a good masking job. The internal armored glass is a separate piece.
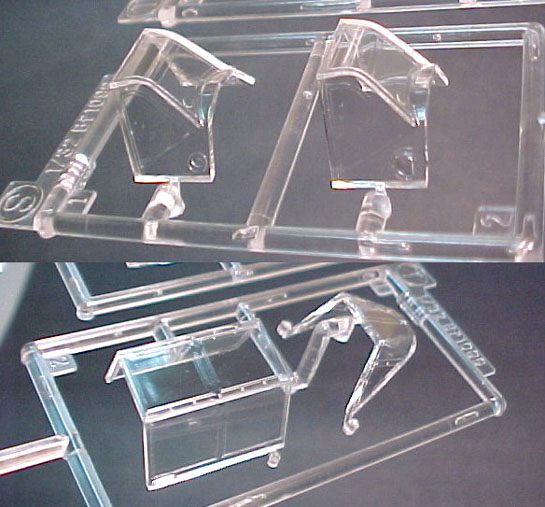
The clear parts.
DECALS
I´m a long-time fan of Revell-Germany decals (and not so much of the Hasegawa´s ones). They are generally very opaque, well printed and respond well to most setting solutions. The sheet of this kit is no exception, with the usual very high printing quality.
You can choose from four versions, all from JG.53:
- Yellow 7, Oblt. Tonne, III./JG 53, Bizerta, 1943.
- Black 1, Oblt. Schiess, VIII./JG 53, Sicily, 1943.
- White 8, IV./JG 53, La Marsa, 1943.
- White 2, IV./JG 53, La Marsa, 1943.
They are all in desert cammo RLM 79 / RLM 80 over RLM 78. Revell could be a bit more creative in the choice of these versions, in my opinion, as they all look pretty much similar. Maybe a non-trop G-4 would not differ enough externally from the previously released G-6. Go figure...
An interesting point of the decals are the generic factory numbers, which will allow you to build virtually any aircraft by assembling the Werk Nr. individually (they are printed on a continuous film - you have to cut them apart). However, I failed to locate in the instructions where they go. As expected from Revell-DE, you can read all the stenciling. The control panel decal is very detailed... you can even read some of the scales. On the other hand, making it to conform on the relief detailed control panel part will require a lot of patience and setting solution. Consider to punch the gauges out and to apply them one by one.
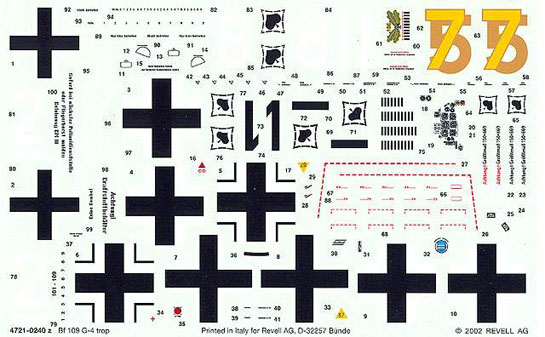
The decal sheet.
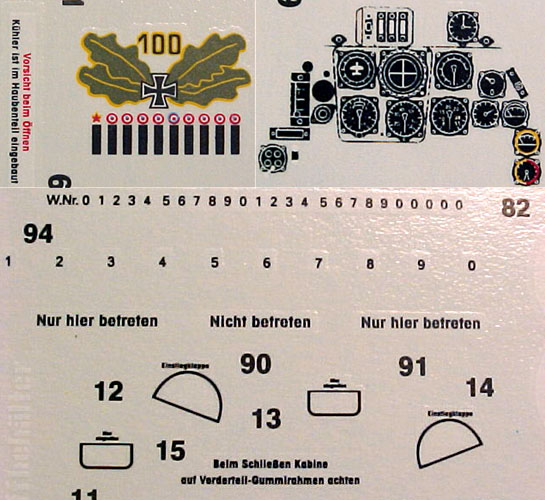
A zoom on the decal sheet.

The second decal option of the kit is this bird, a Black 1 from the III./JG 53.
FINAL COMMENTS
There are still a number of smaller points worth to mention, but it would be better to ask to an expert on the subject. So, instead of pretending I have a deep knowledge on the subject, I prefer to quote Brett Green´s (Hyperscale´s editor) points in a recent review on this very kit:
- "Revell supply the same rear fuselage/fin as in the G-6 kit. The Bf 109G-4 should have an open tail wheel well, not faired over as in the G-6. A little cutting will be required here, and some thought about how to mount the tail wheel strut. Also, the style of cover for the tail wheel strut was different to the G-6. And just to complicate matters more, this cover was not always fitted
- The tail wheel supplied is the large style appropriate for later G-4s. This wheel was fixed in the "down" position as it was too big to fit in the tail wheel well. Earlier G-4s were fitted with a smaller, retractable tailwheel.
- The oval inspection hatch between fuselage stations 8 and 9 (behind the jacking hole) on the port side should be filled and sanded.
- The join line between the top cowl and the cowl sides is not a panel line. This will need to be carefully filled and sanded smooth.
- The Morane mast was not fitted to the G-4. Glue the isolator/base (part R3) in place under the wing, then fill and sand smooth.
- Don't use the Galland Panzer pilot's armour (parts A26, R5 and R6). This was not fitted to the G-4. Use the solid plate armour (part B16) either by itself or with the curved top extension (part B15). Check your references to see which style is appropriate for your subject.
- The kit-supplied main wheels are the correct width for most G-4s, but the plain hub style was not typical. The "spoked" style is on virtually every photo of a G-4 that I have seen. Also, early G-4s did not have the wing Beule (bump) and were fitted with the same narrow wheels as the G-2. If you are building an early G-4 you are in luck - True Details produce a resin set of narrow spoked wheels."
To that I would only add that the engine air intake under the nose is slightly undersized, if you want to count rivets.
This is a good example of a modern injected kit. Almost perfect in all aspects. Even not being a Luftwaffe fan, this is the sort of kit that make you feel impelled to start it right away, I must confess. As I mentioned before, we just wanted to show "what´s in the box" here.
The number of references for this subject is overwhelming, printed or on the Internet. So, I won´t even try to list them all here. Some useful sites to start with are:
- The 109 Lair (created and maintained by Lynn ´109´ Ritger).
- Falcon´s Messerschmitt Hangar.
- Jim´s 109 page.
- Le Messerschmitt 109 (foreign Bf 109 users)
- The 109 evolution (good source of drawings).
As for the printed references, you´d better to browse LSP reference section, where Charles Metz has made an incredible job compiling modeling references on the Bf 109 F and G.
You won´t need to add a lot of things to finish this kit as a real winner, but the popularity of the subject already (re-)generated a stunning number of decals and detail sets. Too many to list here. You don´t need to stick to the G-4/trop version. A straight G-4 can be made from this kit, you can also backdate it to a G-2 or even an F version (there is a resin nose for it on the market).
Now if you want to see what can be done with it right OOB, check Chris Sherland´s wonderful job on this kit, here at LSP: Chris Sherland´s superb OOB accomplishment.
CONCLUSIONS
Revell-Germany (well Hasegawa, in fact) has chosen a very simplistic way to produce this kit. Contrary to the new Tamiya´s Zero approach, this is an all plastic, very simple model. Yet, it is easily the best Bf 109 kit on the market so far, in any scale. It can be built by a beginner or an experienced modeler in a matter of a few days. The kit is so well engineered that I suspect that the major differences between the master´s model and the average modeller´s one will be in the paint finish and weathering. No rescribing, no scratchbuilding, no putty...just a painless, enjoyable project out of the box. Of course some of you will start from it to make a museum quality model. In any case, this is a highly recommended model of a long wanted subject.
And now we know what to expect from the upcoming Hasegawa Fw 190D-9...
© Rato Marczak 2003
This review was published on Saturday, July 02 2011; Last modified on Wednesday, May 18 2016