
Vintage Fighter Series | 1/24th scale Republic P-47D Thunderbolt
Reviewed by Randy Bumgardner
Whoa Nelly! This thing is huge. So, I get home from work and I'm unable to open my front door because a box the size of my couch is in the way. Alright, maybe not quite the size of my couch, but it was big.
Well, boys and girls, it's finally arrived. We've seen the built masters by our own Chris Sherland (who also gets special recognition on the first page of the instruction booklet). And, we've also seen the test shots on the Internet. Vintage Fighter Series is just about ready to ship their giant 1/24th scale Republic P-47D "Bubbletop" Thunderbolt, and it's gonna be big.
Did I mention that this thing is big?
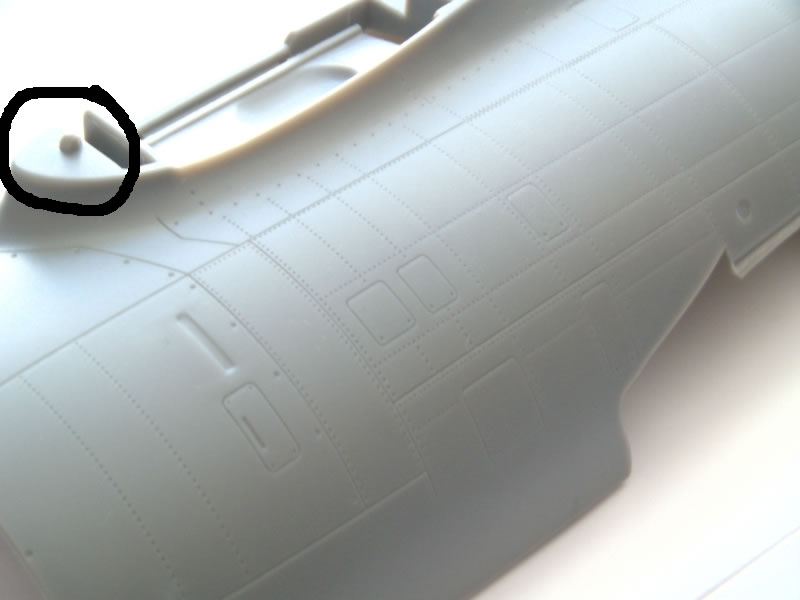
Once you open the box, you'll notice that it is fully packed with 22 parts trees molded in gray styrene, 1 clear parts tree, one bag of rubber parts (pilot and tires), and the fuselage halves and port/starboard wing halves (they didn't come on a sprue). All told the box contains about 1,000,000 parts to construct a very large model of a P-47D-25/27. The plastic is molded in gray styrene that isn't too soft and isn't too brittle. (I'm not trying to sound like Goldilocks...) I did find a couple of sink marks near the edges of the fuselage halves " corresponding to the locator pins on each fuselage part. The ejector pin marks are tucked away into unseen places on the kit plastic.
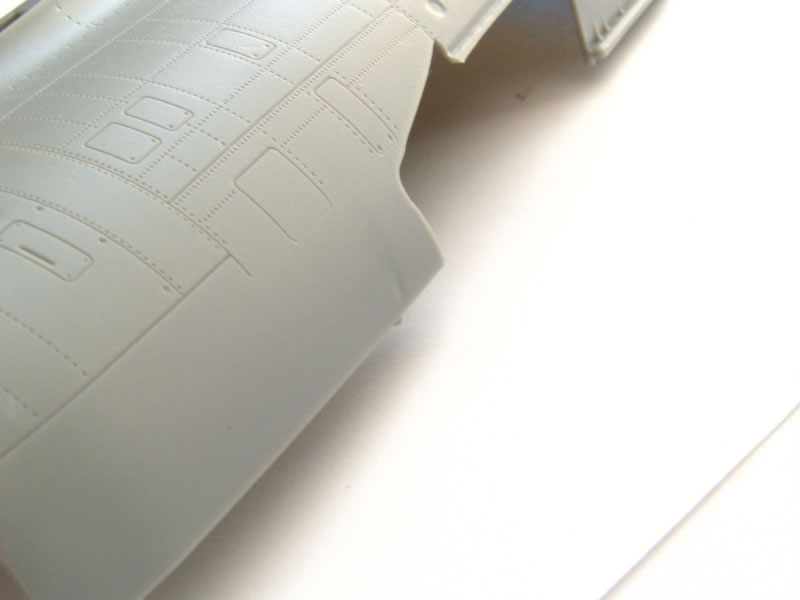
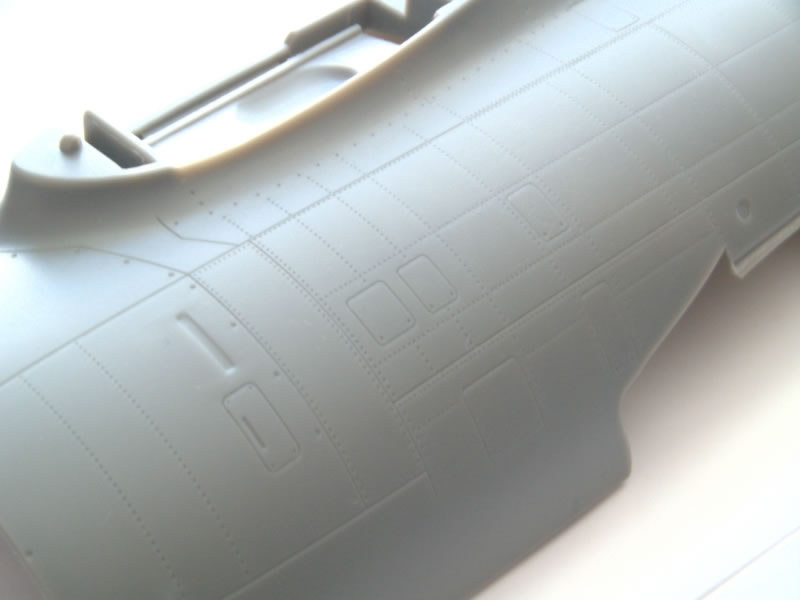
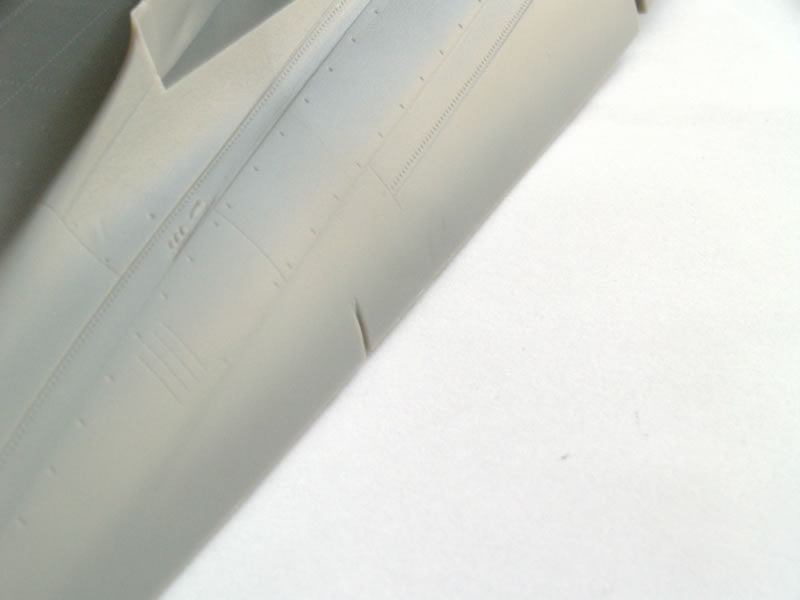
The surface detail is nice and refined. The panel lines are very well done " not too deep and, for the most part, not too mythical. One catch though, on my sample the panel lines tend to fade out towards the edges of the fuselage halves. Nothing too horrific, just a little rescribing necessary. The rivet detail is also nicely done. No divots on this airframe, just nice little rivets. Actually, for the size and scale of this model, the rivet representation on the surface of this kit is one of the best I've seen in a long time. Nice and subtle and will get noticed when the viewer is up close, and hardly noticeable when the viewer stands back away from the model.
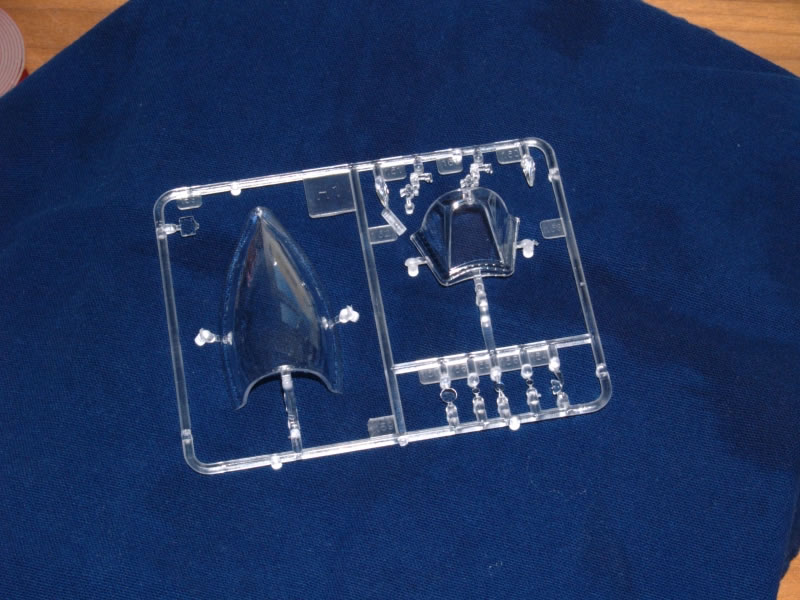
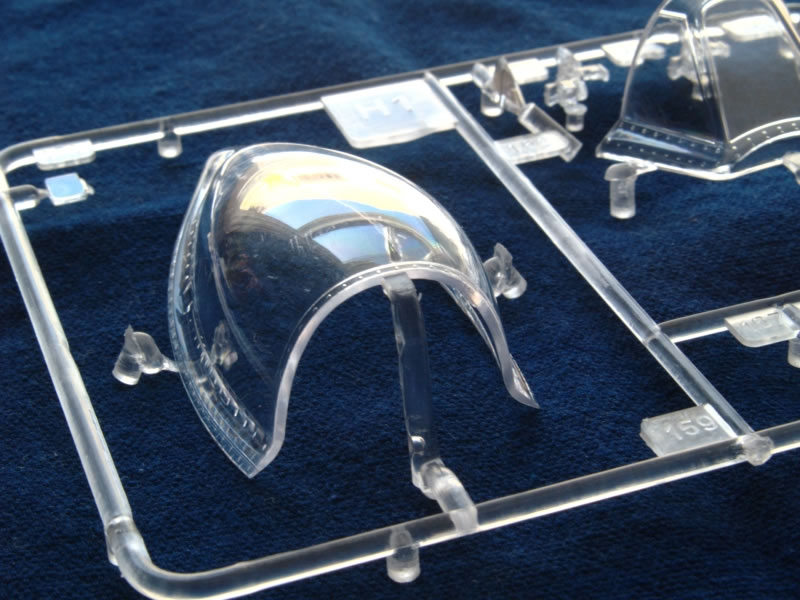
The clear parts are crystal clear and free of any blemishes and distortions. They have been molded admirably thin with petite frames that look correct for this scale. The attachment points to the parts tree are on the edges of the windscreen and canopy, so removal will be easier while minimizing any chance of damage to the parts. The glass for the gun sights, both the Mk.VIII and the K-14, wingtip navigation lights, and the rear view mirror round out the clear parts.
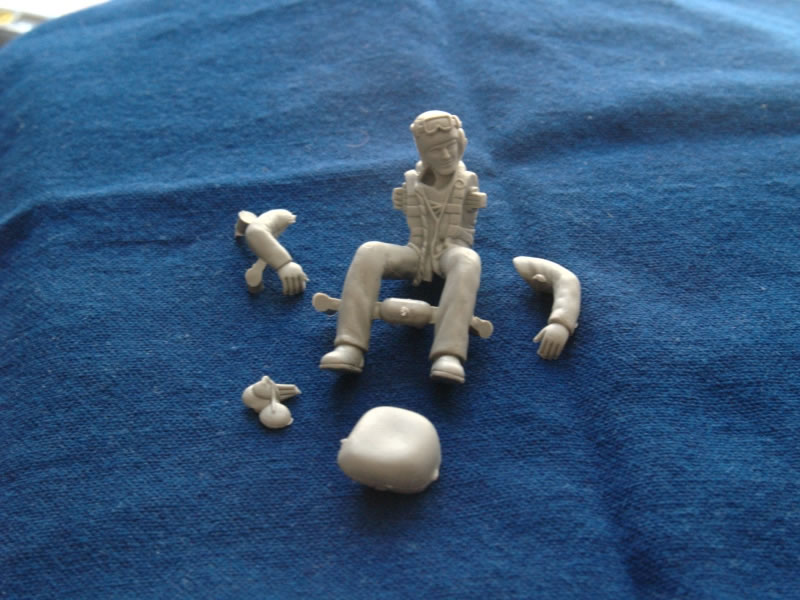
The rubber parts consist of a five part positionable pilot and the two main tires. I'm kind of a middle of the road guy when it comes to the use of rubber or vinyl tires. I have never had them corrode the plastic wheels on previous models, but I usually have a good fight with the mold seam. I never "seam" to win... I guess the pun was intended. I'll leave the debate to others about using these things, and I'll just let you know the parts are in the package. However, one thing to notice is that the mating halves of the tires were rotated slightly out of alignment with each other when they were molded, leaving an incorrect tread pattern on the parts (below, left) as opposed to the pattern on the real thing (below, right)


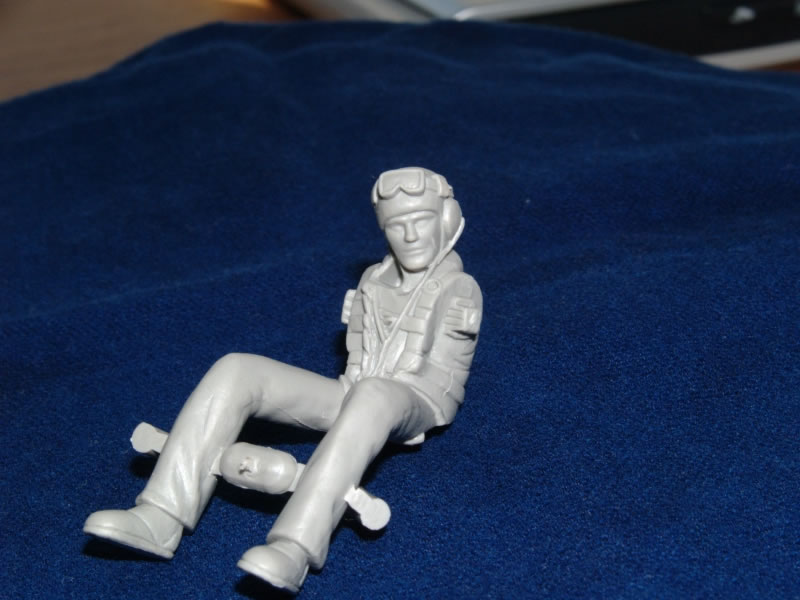
The pilot looks pretty good with nice facial detail. The details on the front of his Mae West are fairly crisp as well. And, with some nice painting and a good wash, this little guy will build up into a respectable P-47D pilot. I'm not sure about the positionable possibilities, though. The arms are keyed for one position each, and, although it is made of rubber, his limbs don't really want to bend to another position. I suppose there is always a method to make things happen...
So, let's start at the front and talk our way to rudder.
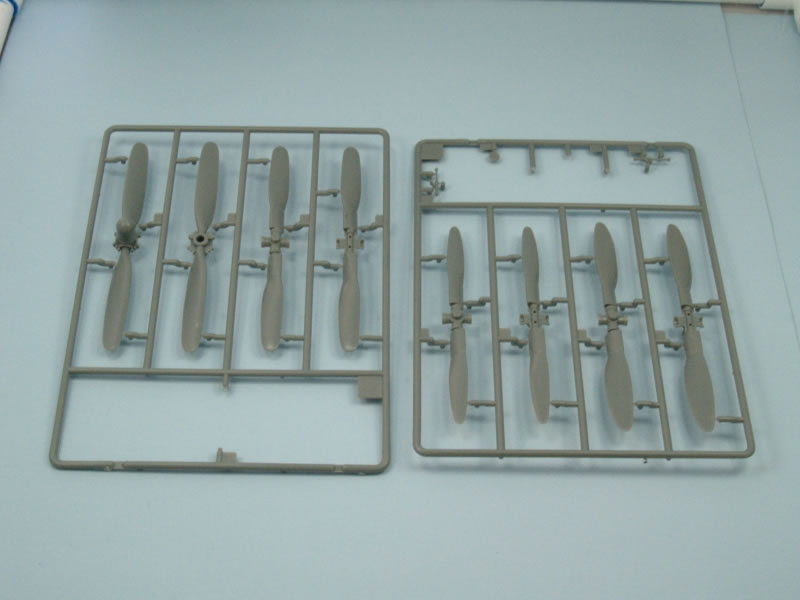
VFS very kindly gives the modeler all four props used on the P-47D " the Curtiss Electric symmetrical, the Curtiss Electric symmetrical paddle, the Curtiss Electric asymmetrical paddle, and the ubiquitous Hamilton Standard. The propellers are all very well molded with little flash and nice detail on the hubs. The modeler should check their references to verify the correct prop when building their model. Using the kit markings, the two RAF aircraft will use the Curtiss symmetrical thin bladed prop, while the remaining four aircraft " both French and U.S. - will use the Hamilton Standard propeller.
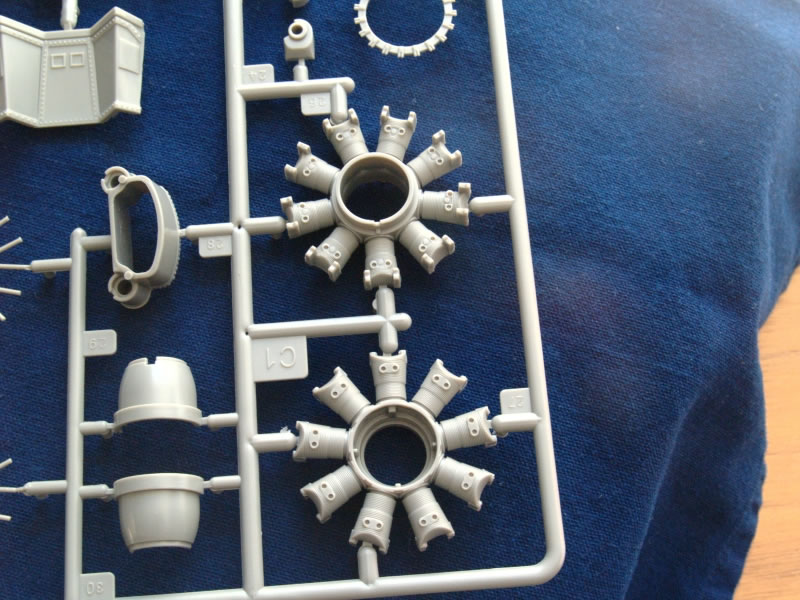
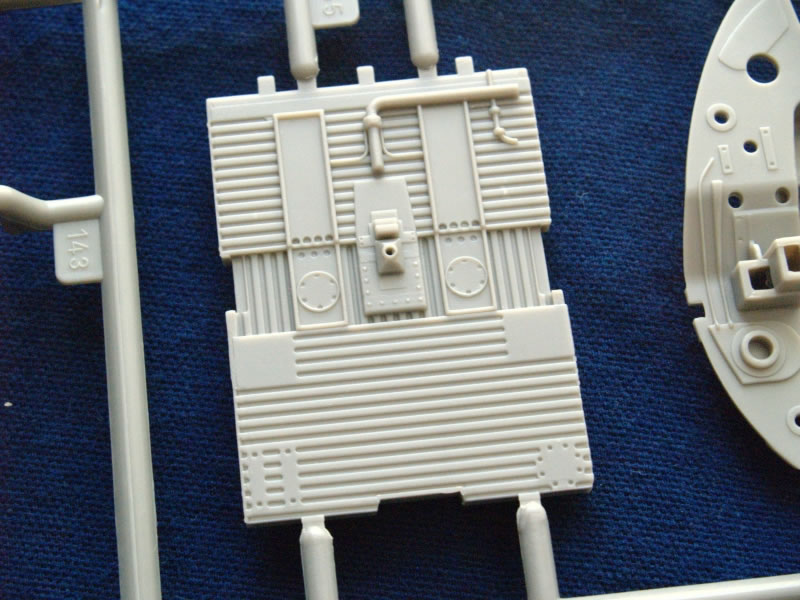
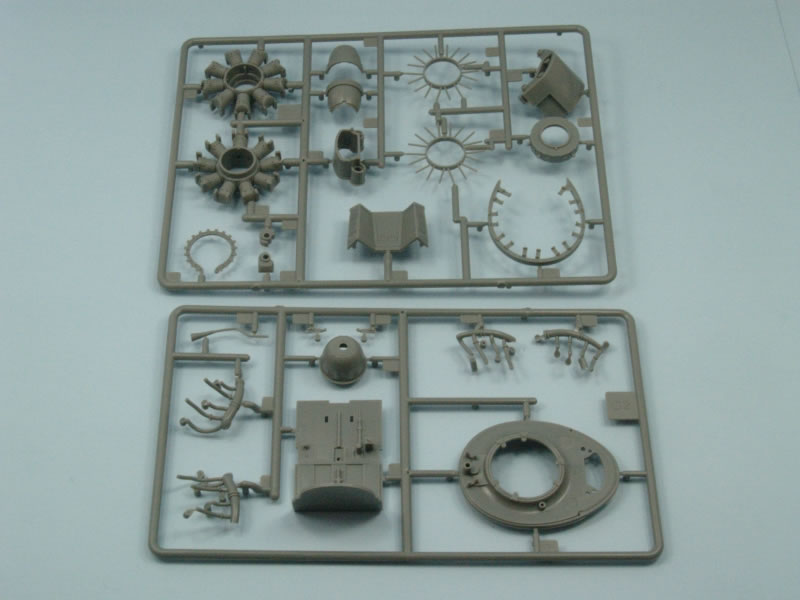
The engine, and associated accoutrement, consist of 59 parts and is a very detailed sub-assembly. The front and rear cylinder banks are each molded as a single part, with just a hint of a mold parting line on some of the cylinder heads. Nothing that a few swipes of the sanding stick won't take care of. The modeler will have to install their own spark plug wires. In this large of a scale, that engine will just be hanging out in the breeze " especially since it's a radial " and a lack of plug wires will certainly be noticeable.
The engine accessory area is also very well detailed. The engine mounts, oil reservoir, carburetor intake plumbing, and the rear end of the motor are all highly detailed and not so highly visible. Actually, unless the modeler cuts away one of the access panels on the fuselage, no one will ever see this area. And that's too bad because there is some really cool detail back here. Of course, the modeler will have to provide the rest of the plumbing, but VFS gives the modeler a great head start on detailing this section.
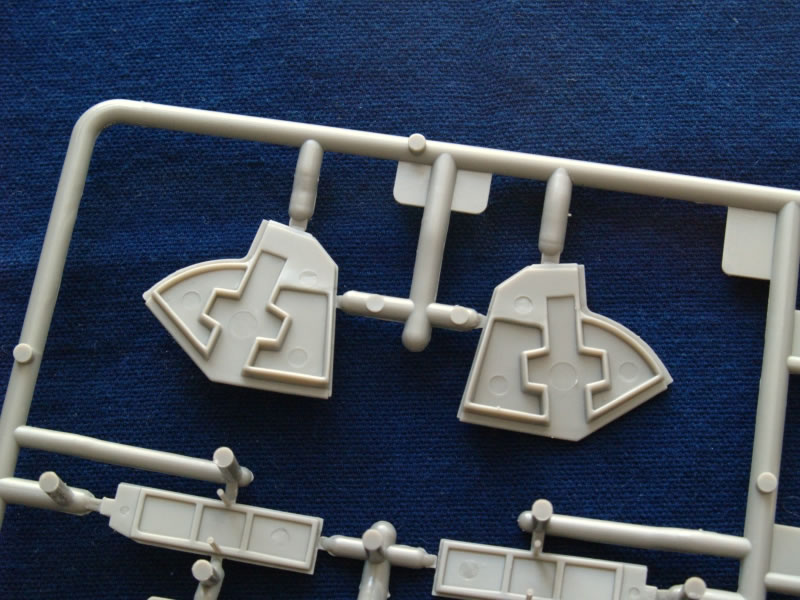
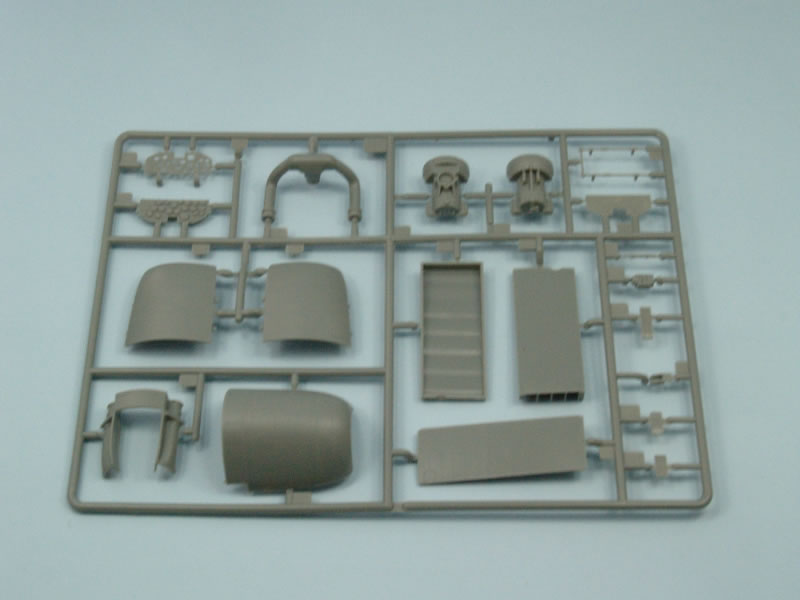
The cowling is a simple six piece affair, similar to Hasegawa's layout of the cowling in their 1/32 Thunderbolt offering. There is one exception, though. VFS provides the correct cowl mount rings in the engine assembly, so mounting the cowl panels won't be as fiddly as those other guy's cowling. On the other hand, given the amount of detail in and around that engine, leaving a couple of the cowl panels off would be pretty cool as well. The inner faces of the cowl have the panel structure molded on (and very well done, too) thereby reducing the amount of detailing the modeler must perform. The downside is that there are a few ejector pin marks that must be taken care of. The modeler is also presented with one option for the position of the cowl flaps " closed. Hopefully, some resourceful resin manufacturer will come to the rescue with a set of open cowl flaps.
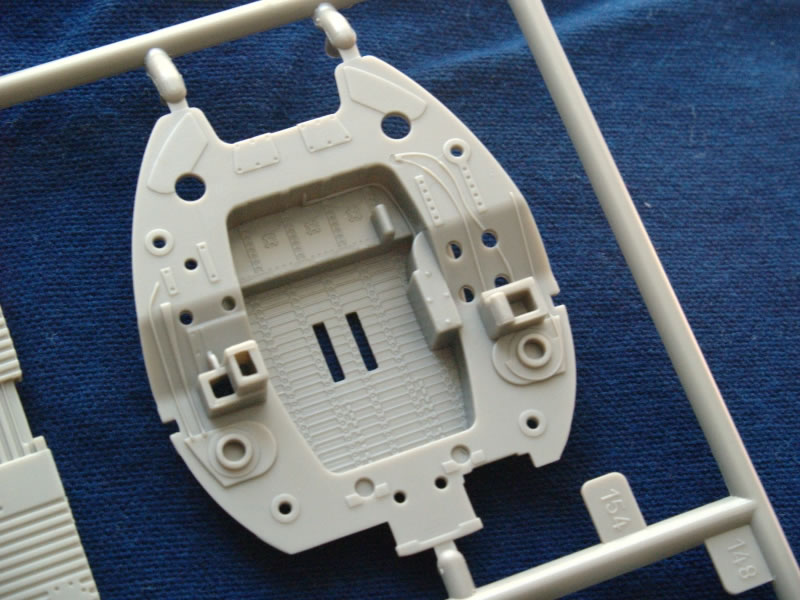
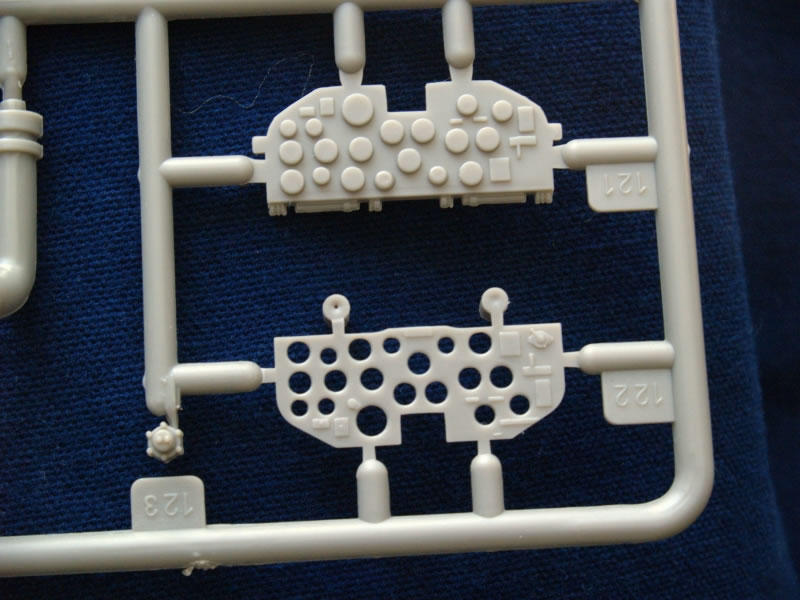
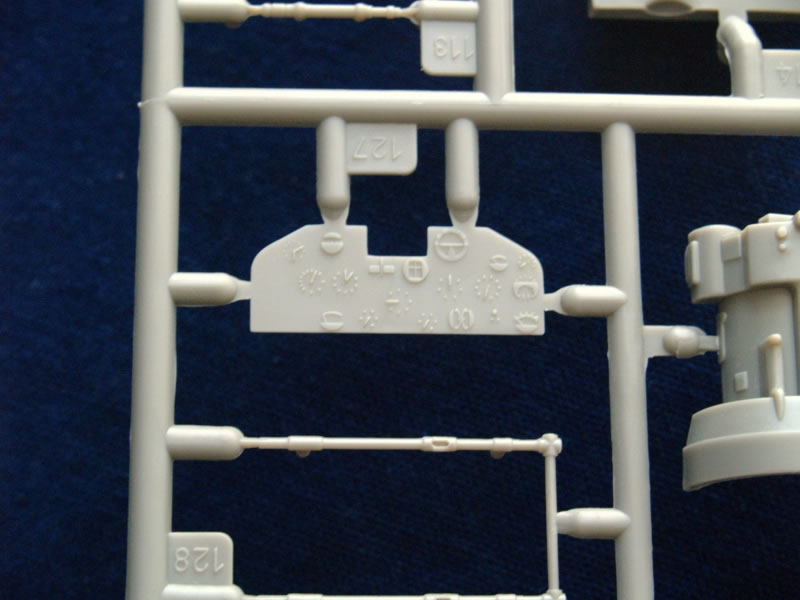
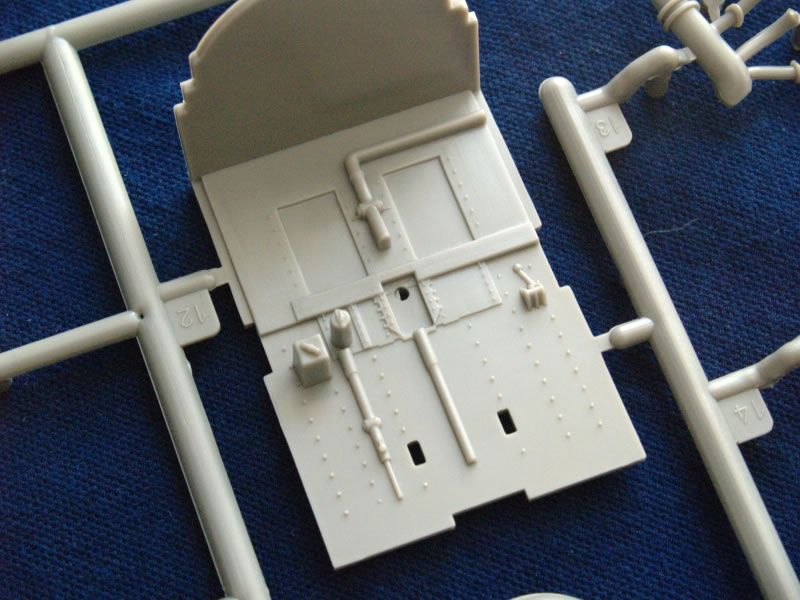
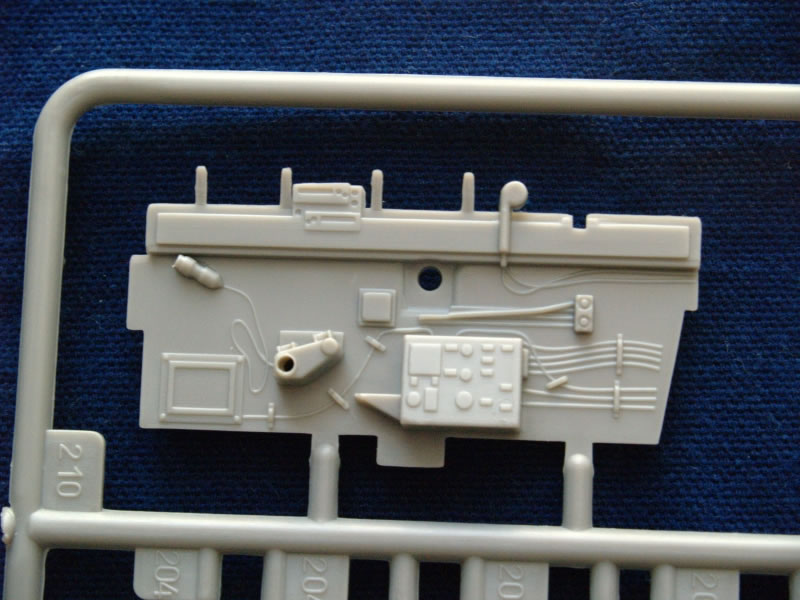
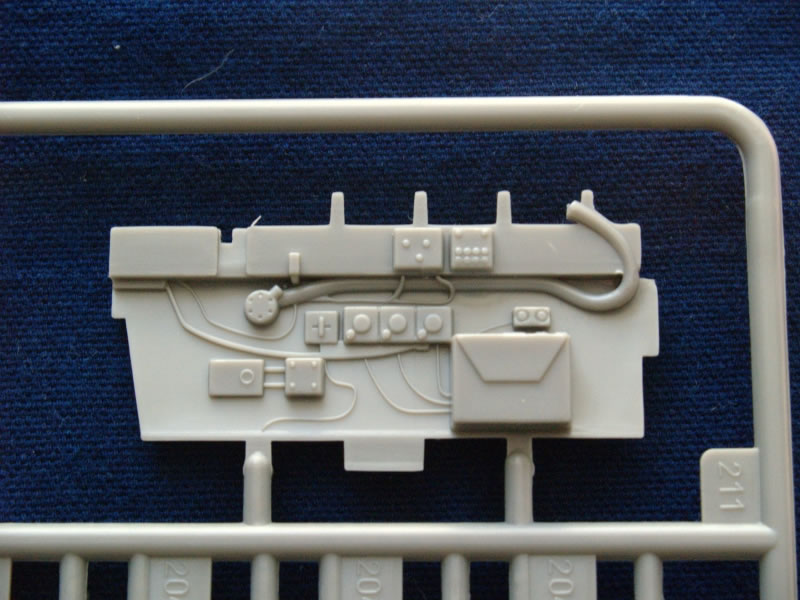
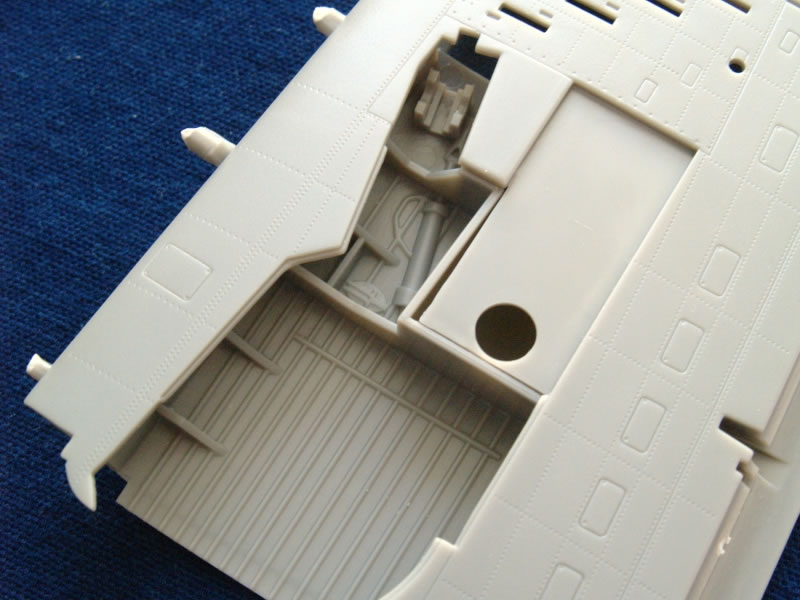
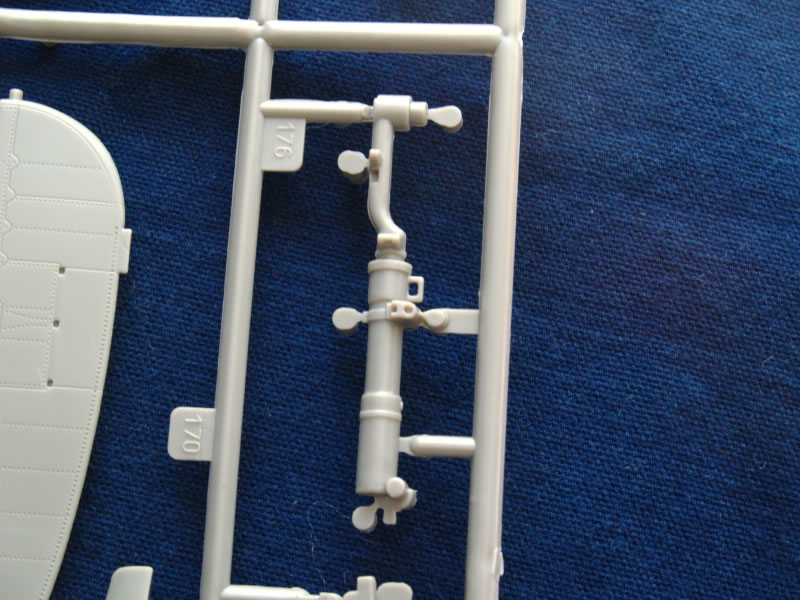
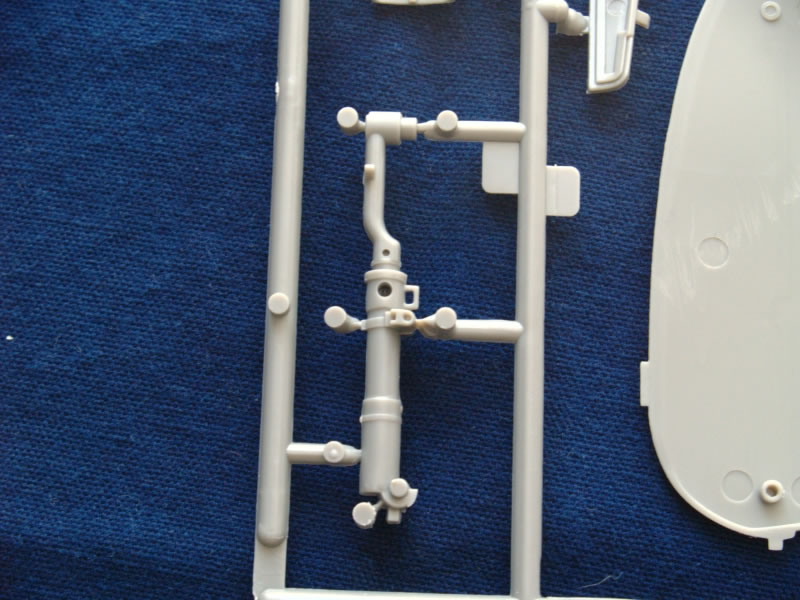
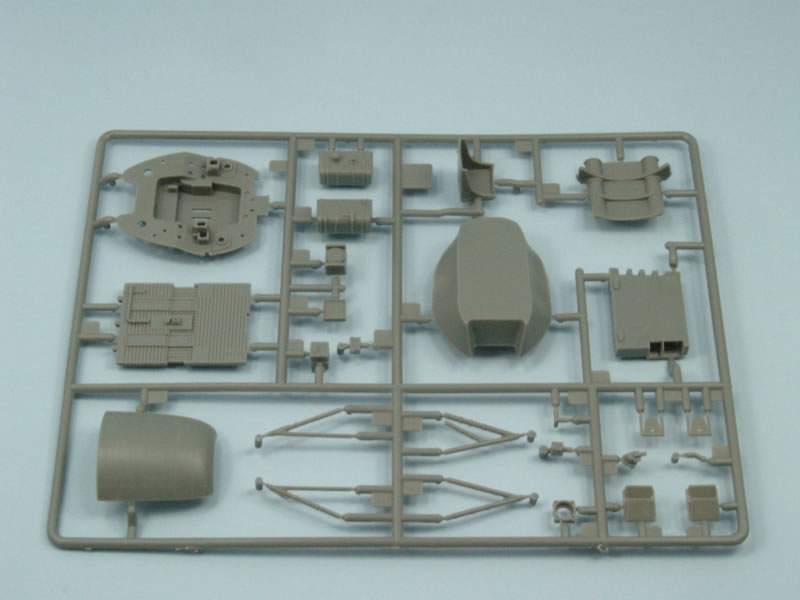
Moving towards the rear of the airframe, we come upon the cockpit. This is a 27 piece affair that assembles similarly to the Tamiya kit. And, I must say, the level of detail is very well done. The cockpit sidewalls are suitably detailed for this large scale and will build up nicely right out of the box. The modeler may want to "enhance" the cords and wires along the sidewalls by adding their own to really give the sidewall some depth. The throttle quadrant is a six piece unit that contains some finely molded small parts. Go slow here and take your time " no sense losing some of these parts to the carpet monster. The instrument panel is a three piece sandwich assembly, making it very easy to paint and then assemble. There is one thing the modeler must add, if they are not going to seat the pilot in the cockpit. The seat belts. VFS doesn't provide any of the lap or shoulder harnesses in the kit, so the modeler is left to their own devices.
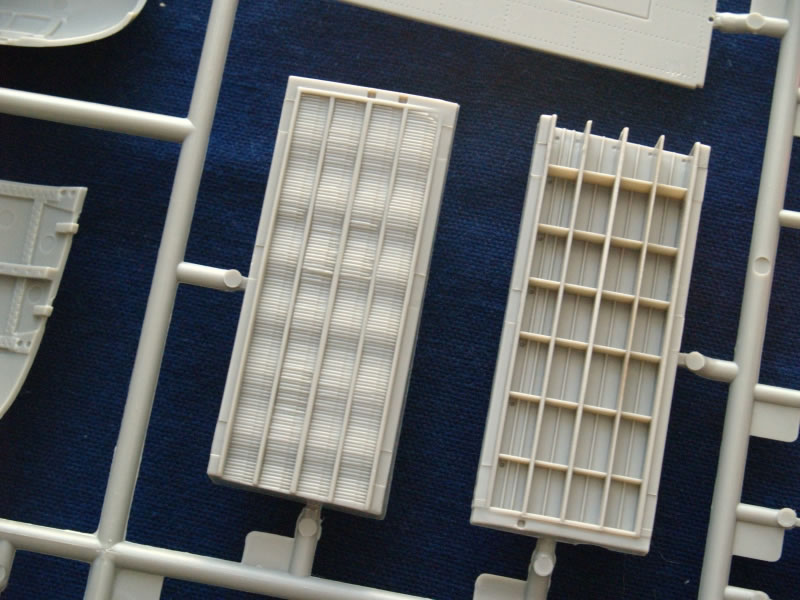
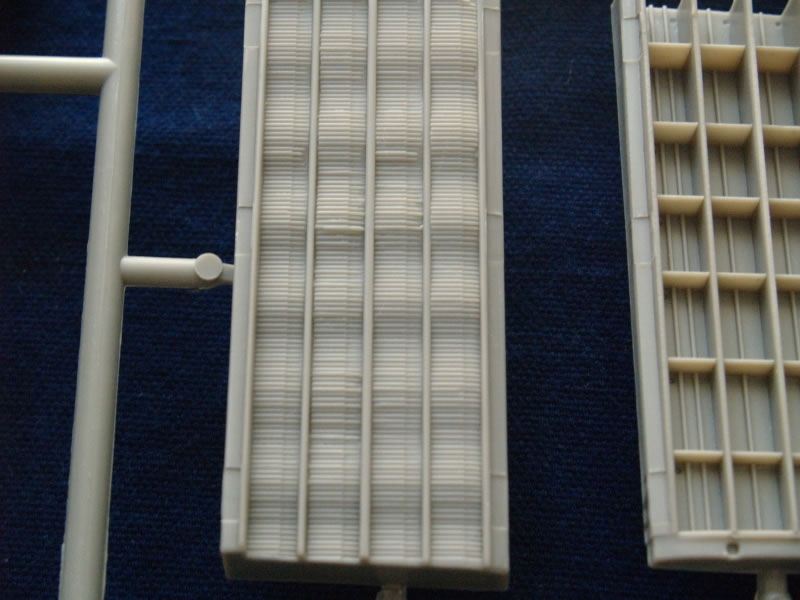
VFS kindly offer the modeler two options for the cockpit floor, the well known corrugated flooring of the early Thunderbolts and the smooth floor of later models. As the kit markings span the D-25 series through the D-28 series, pay attention to which marking you are building towards and opt for the proper cockpit. Two versions of the gun sight are also available, the Mk.VIII and the K-14. Although, the K-14 didn't appear on production airframes until the P-47M.
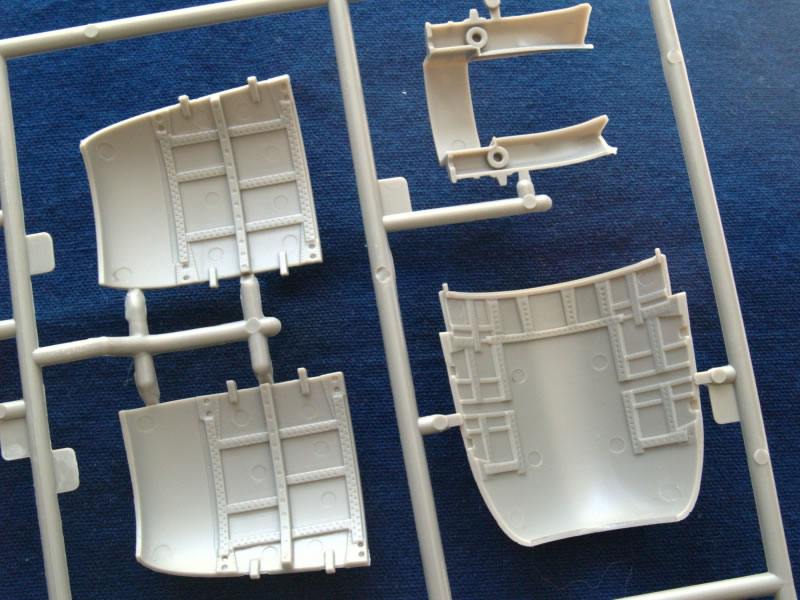
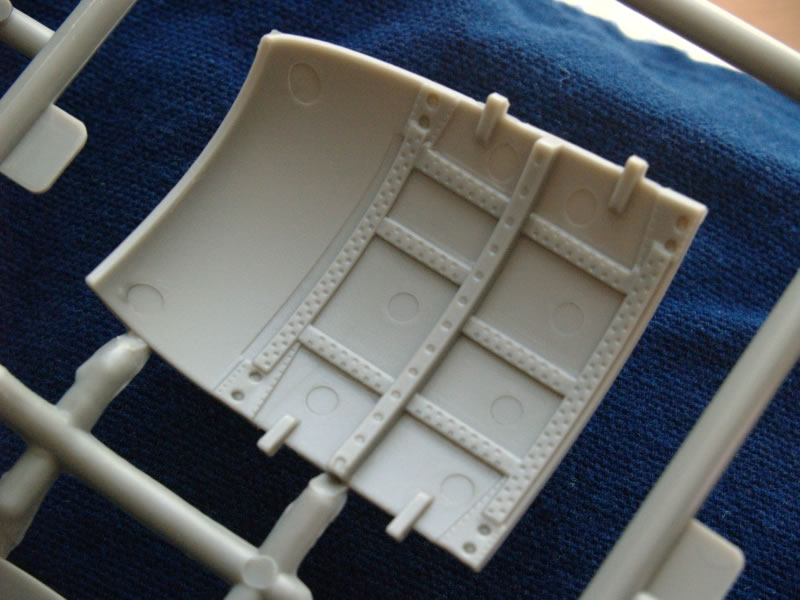
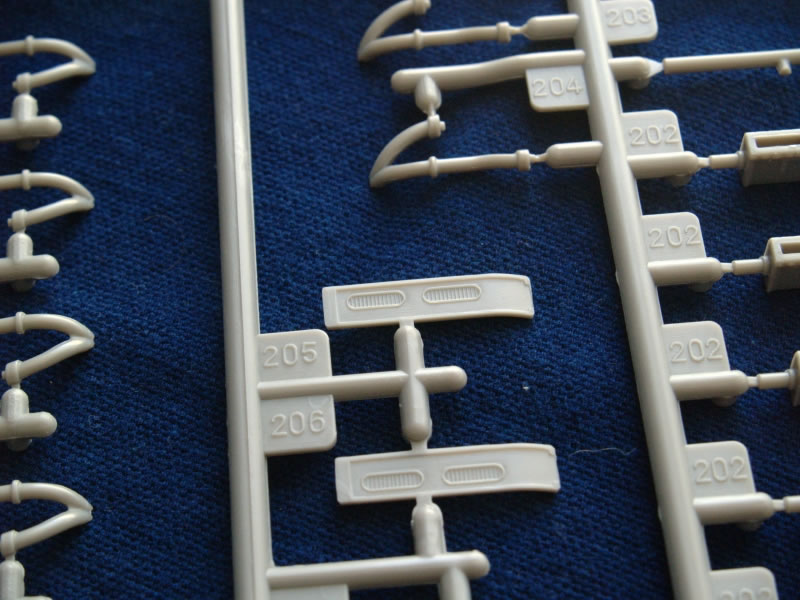
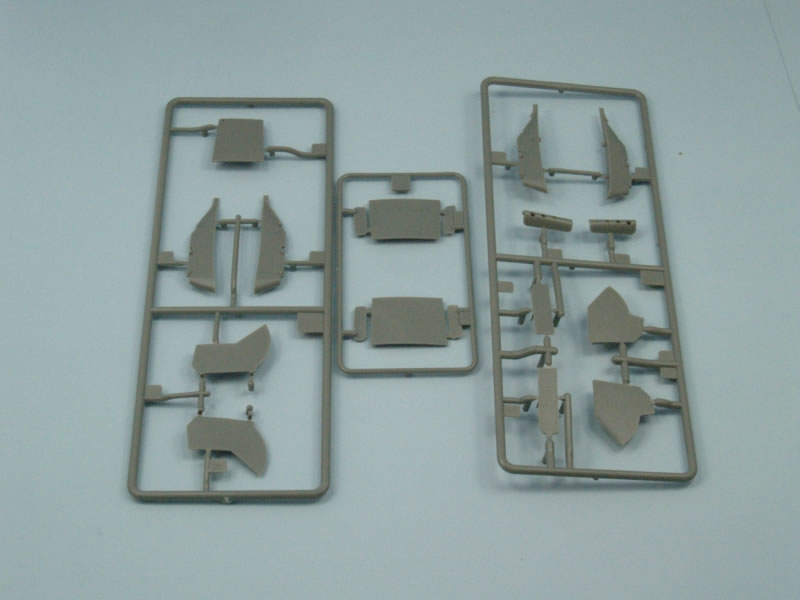
Let's take a look at the wings. The will be assembled in a manner similar to the Tamiya kits. I guess, when you think about it, there aren't too many ways to break down a kit when maximizing the molds is a priority. The same panels for landing lights and divebrakes are added, and the flaps are also constructed similarly. You only get one choice with the flaps " up. I guess that's not really a choice and that's too bad, as I really think the lowered flaps give the P-47 that special "look." The modeler, if they are so inclined, can always scratchbuild the necessary parts for the lowered flaps.
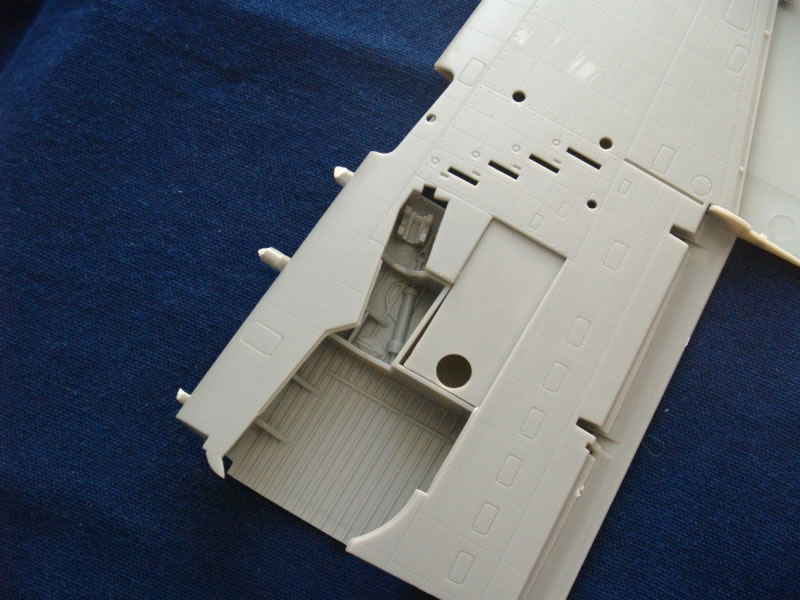
The main wheel wells are done very well. The ceiling of the wells is molded into the inner surface of the upper wing halves with some wiring detail and the retraction mechanism molded in. A bit of extra plumbing would spruce up this area immensely. The main gear legs are nice and stout and do have a "loaded" appearance " not the too tall, unloaded look that most kit oleo's seem to have. The inner gear doors have nice detailing on the inner faces and have that "thickness" the P-47 gear doors are known for. However, the outer main gear doors, the lower section that covers the wheel, are devoid of detail. It appears that VFS tried to get that inner face, but didn't quite make it. Milliput to the rescue! A bit of epoxy putty smoothed in the hollow areas will fix that right up. Else, some very thin plastic card cut to shape will to the trick as well.

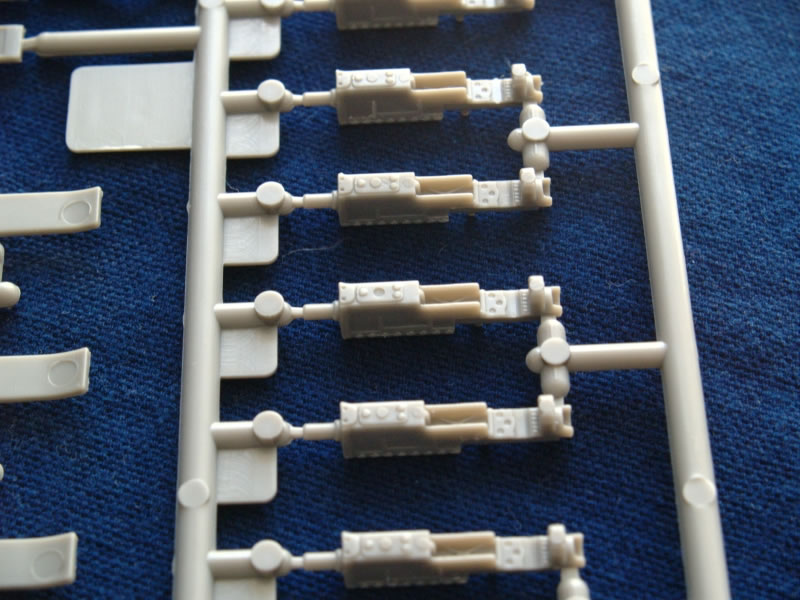
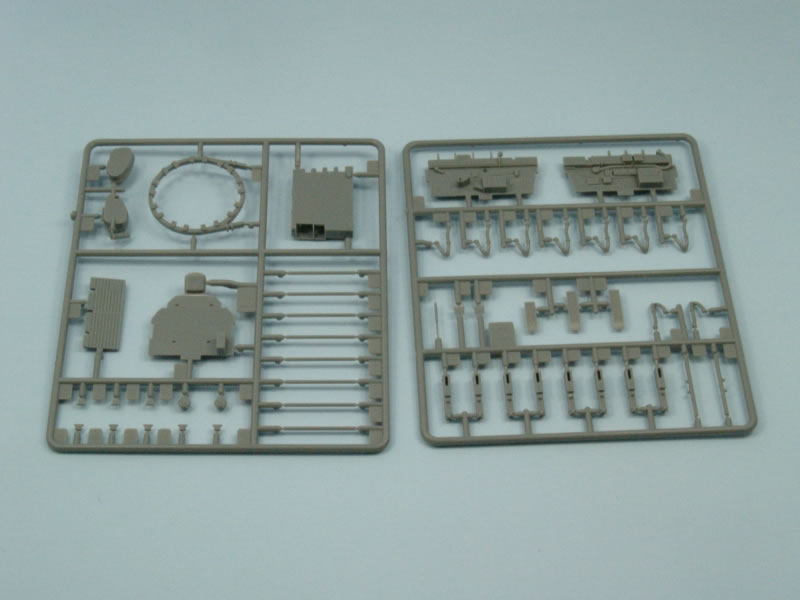
The machine guns and gun bays are well detailed. The kit contains gun bays for both wings, but only provides a displayable ammunition bay for the port wing. Both are very nicely done and when painted and a wash is applied it will look great. The only critique are with the gun barrels. They do not have hollow tips. The modeler needs to drill out the ends, especially in 1/24th scale, or substitute stainless steel tubing (hypodermic tubing) for the barrels. It does make a difference.
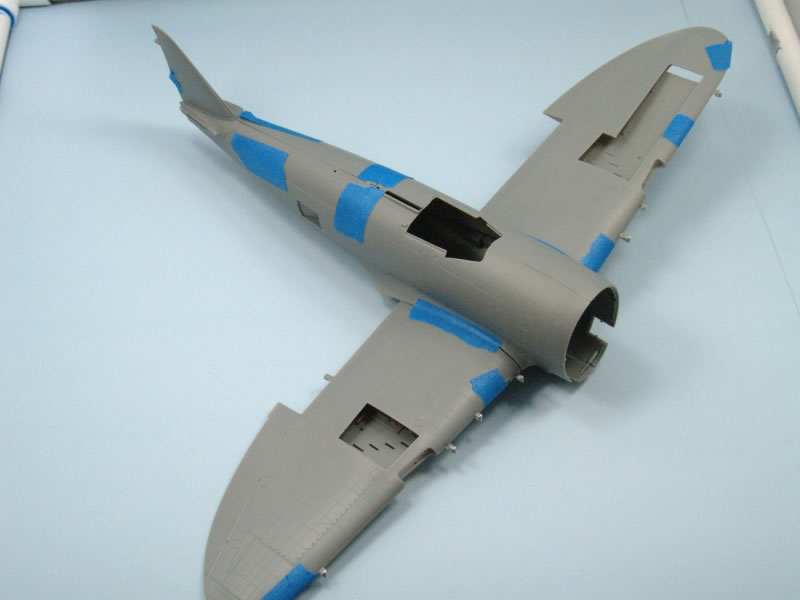
The wing to fuselage joint looks like a winner during my test fitting. There is a spar assembly installed in the fuselage prior to the halves getting closed up. This assembly provides strength and reinforcement for the proper wing dihedral. One little adjustment that should be made is the removal of the forward locating pin on the joint. This pin forces the leading edge of the joint down, creating a step in the fuselage/wing joint. Gluing through this step carefully and slowly, along with the sturdy spar setup, will ensure a strong, solid joint.
The fuselage spine/vertical stabilizer is included as a couple of separate parts " again similar to Tamiya's breakdown of their kit. This tells me an 'M' and 'N' are in our future. But what about a Razorback? Well, that would require two new fuselage halves. I'm hoping and cheering for them!
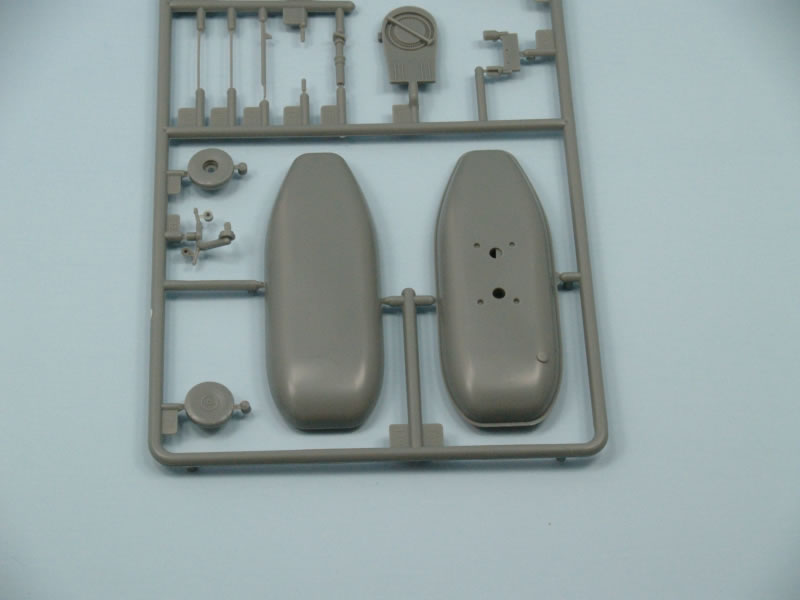
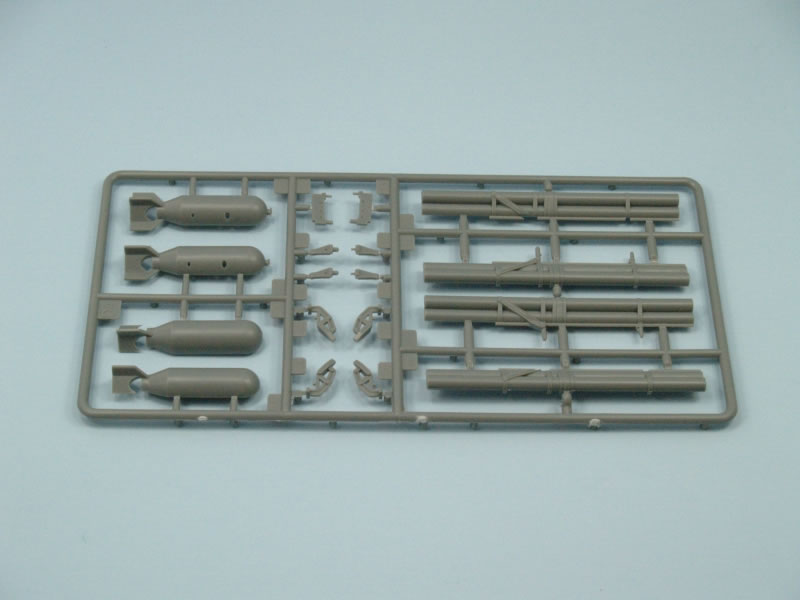
So, you're probably wondering, "What can hang on this thing?" VFS gives you everything " including the kitchen sink. Well, maybe not the kitchen sink, but I bet you could if you tried hard enough. VFS includes three styles of drop tanks, 1) the paper 108 gallon tanks, 2) the 150 gallon "P-38" style tanks, and 3) the pancake 215 gallon belly tank. The modeler also gets two 500lb. bombs and two bazooka rocket launchers. All the stuff you'll need for moving some mud or flying deep into the heart of Germany on an escort mission.

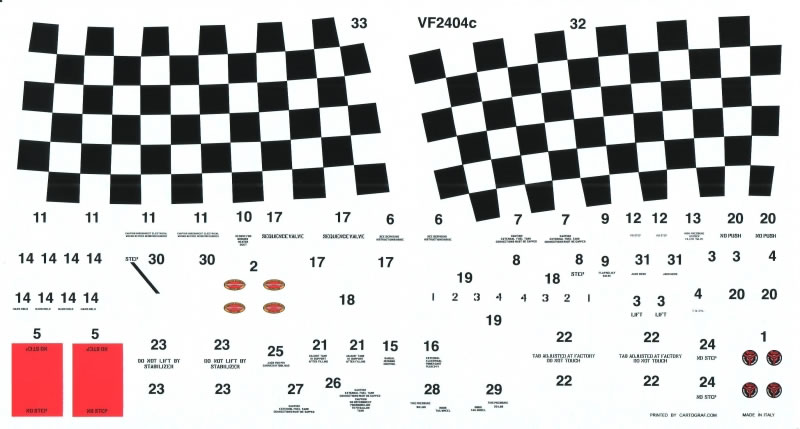
The decals are printed by Cartograf who are known for their quality. These are no exception as the decals are very thin and the registration is perfect. VFS supplies three large sheets in the kit. The first contains the stencils and checkered nose for the two 78th FG aricraft. The other two sheets contain the national insignias for each aircraft and various serial numbers and aircraft markings for each option.
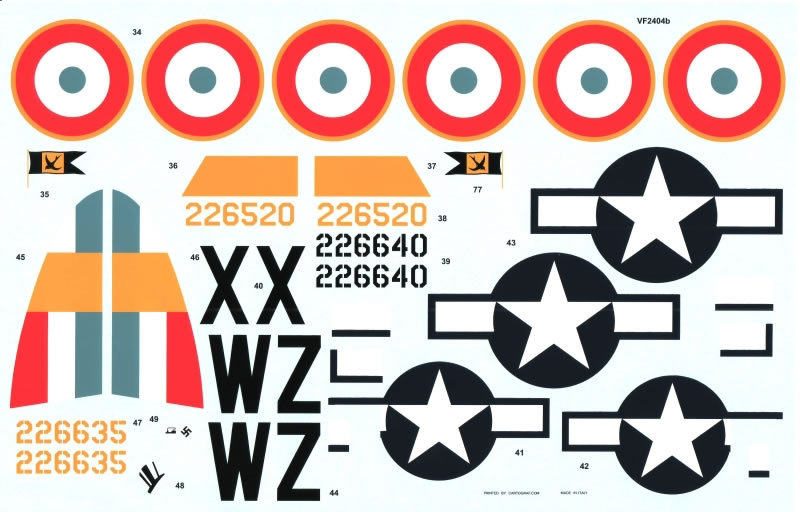
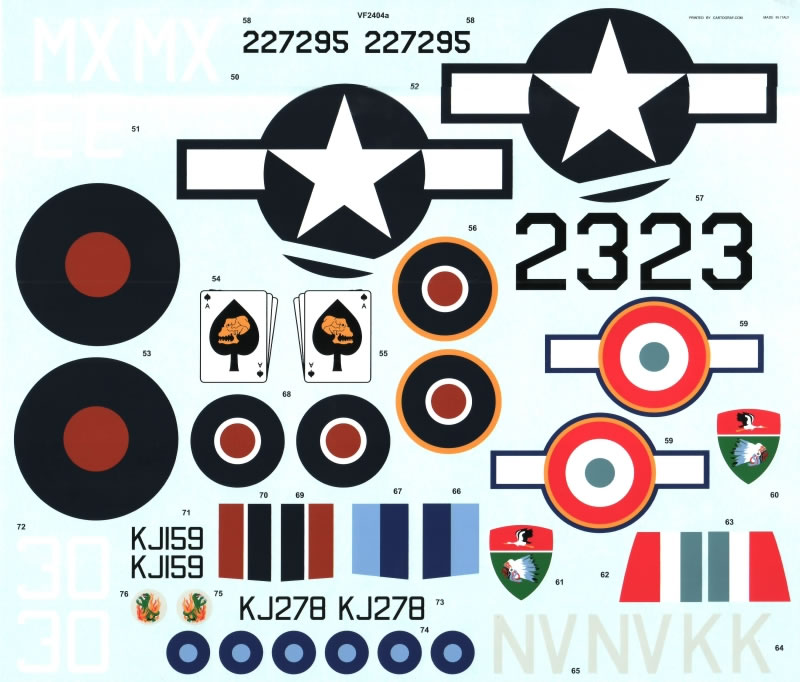
The modeler gets six marking options to choose from:
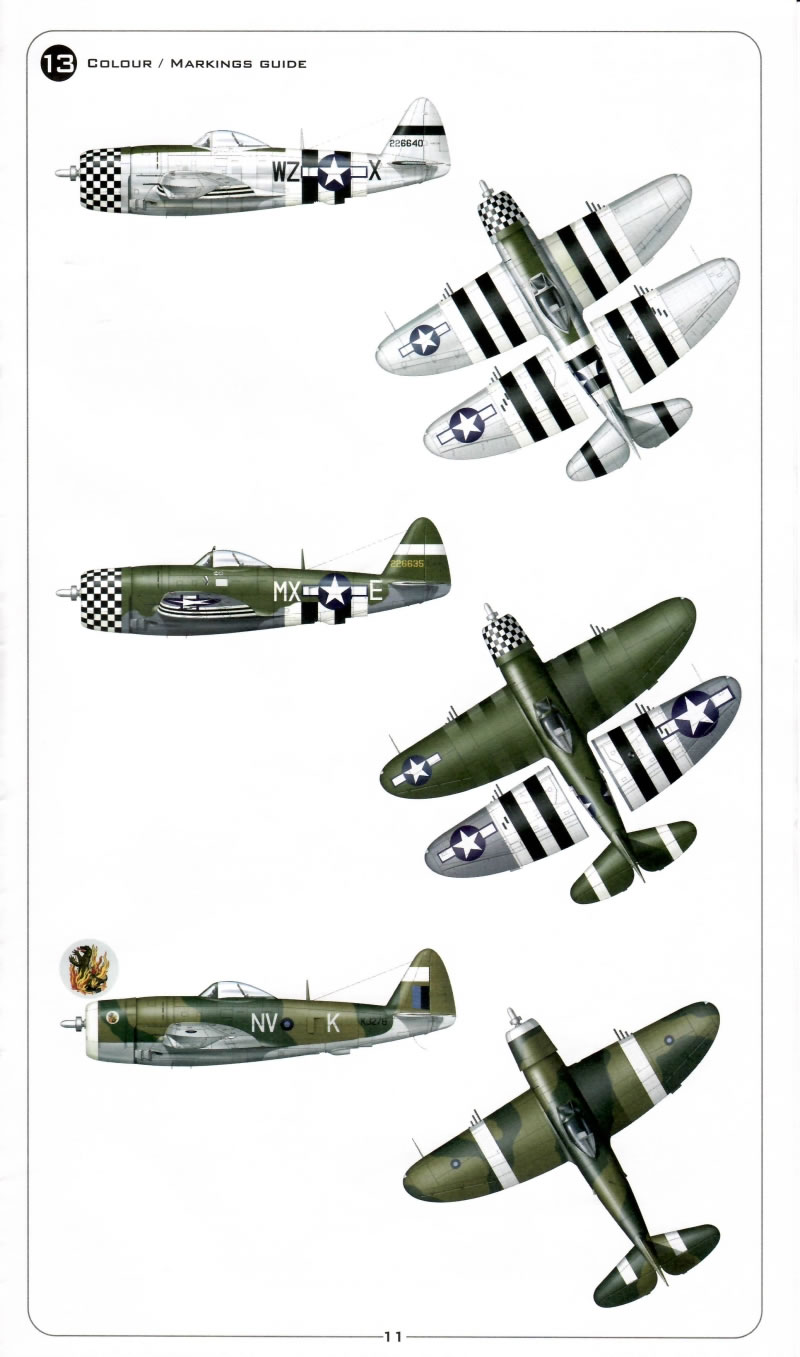
- P-47D-28RE, RAF, No. 79 Sqn., "NV-K" KJ278, Burma
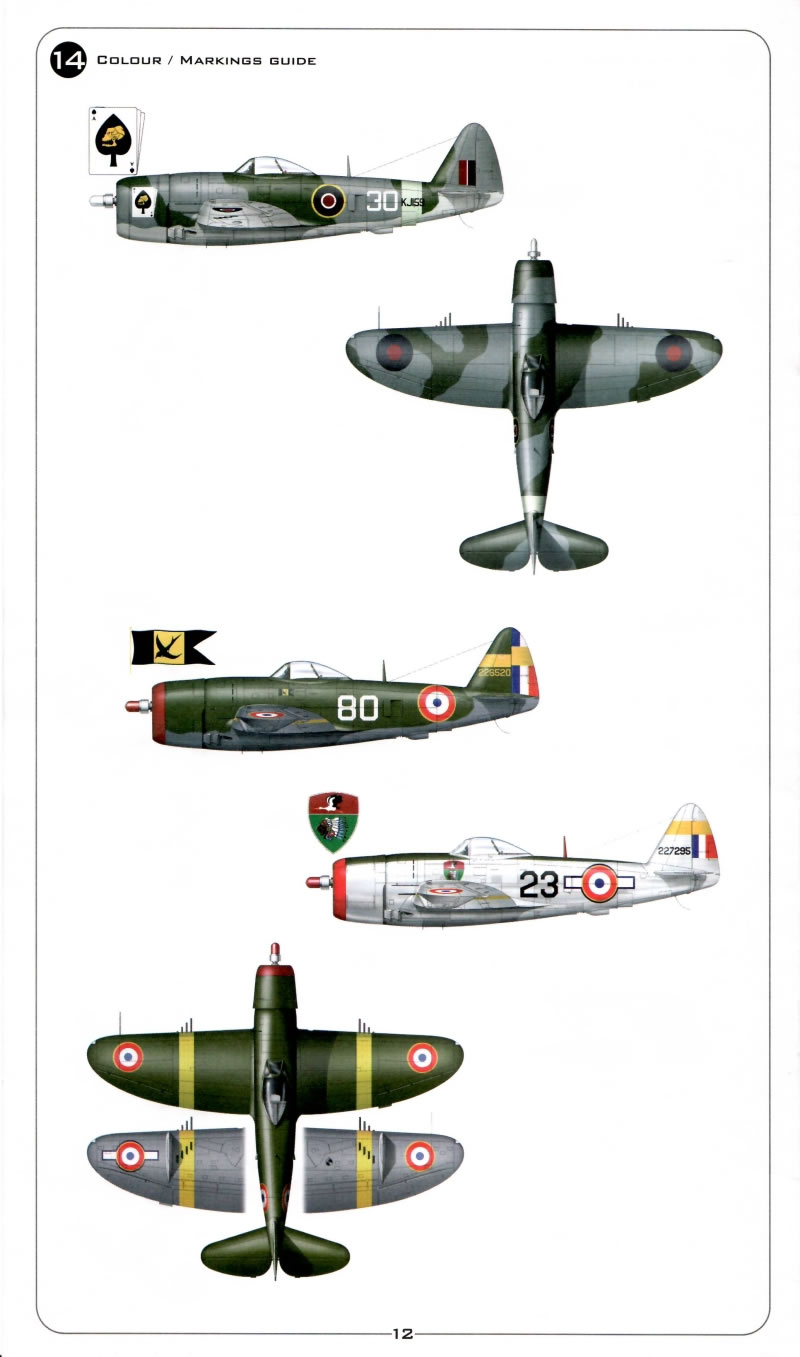
- P-47D-28RE, RAF, No. 73 O.T.U., "No. 30" KJ159, Egypt
- P-47D-27RE, Arme de l'Air, GC 2/5 Lafayette, "23" (42-27295)
- P-47D-27RE, Arme de l'Air, GC 1/3, "80" (42-26520)
- P-47D-25RE, USAAF, 84th FS/78th FG, 8th AF, "WZ-X" BuNo. 226640, Duxford
- P-47D-25RE, USAAF, 82nd FS/78th FG, 8th AF, "MX-E" BuNo. 226635, Duxford
Another highlight of this kit is the instruction booklet. It comes as a 12 page booklet covering the 11 assembly steps, each shown in an exploded view. The instructions are easy to read and understand and clearly show the options available to the modeler. The paint color required for each assembly is clearly shown in the course of the assembly sequence, with a color chart for the paints on page 9. The color chart does not indicate a specific brand of paint, it only identifies the necessary FS595 number for the color and it's common name. The last two pages of the booklet contain full color painting and decal diagrams for each scheme.
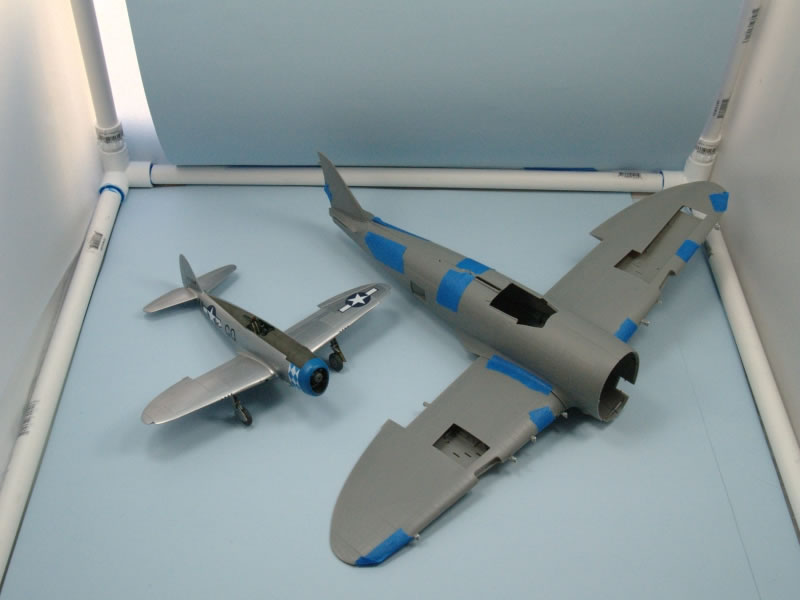
I'm willing to bet you're curious how this thing will fit together. Well, I've test fitted the fuselage and wings, and this beast will go together quite nicely. On the fuselage, with the exception of the fading panel lines and rivets, the mating joint is almost perfect " very little filler will be necessary. Similarly, the wing to fuselage joint will require little to no filler either. VFS have engineered a marvel of a P-47D, with well fitting parts and attention to detail. In the image on the right, you can see how large this kit is compared to my in-progress 1/48th Tamiya P-47D.
In addition, the general shape of the Thunderbolt is obviously present. VFS captured the squat, "bulldog" look of the Thunderbolt. When compared with drawings, the fuselage shape in a good match. The wings are also a good match when compared with a plan view of the Thunderbolt. Since I didn't have a set of 1/32nd scale plans handy, I compared things the old-fashioned way " I measured them. I used the 1/48th scale drawings in the Kagero Monographs for the P-47D-25 and the 1/48th scale drawings in Aero Detail #14 on the P-47. I also used various measurements and drawings in the Detail & Scale and Warbird Tech volumes covering the P-47. What it all boils down to is that my measurements correlated well with printed dimensions.
So, I'm convinced that this is one of the better P-47D's in large scale that has recently hit the market. VFS has done the homework " and Chris Sherland certainly knows this aircraft inside and out " and far surpassed what they achieved with their first offering, the P-40B. They offer many nice options " the different cockpit floors, the external stores, 6 markings options, and more. Sure, the kit has a few drawbacks. However, these pale in comparison to what this kit has to offer " great detail, fine panel lines and rivets, and the fit looks to be really good. Definitely worth the wait...
Review sample courtesy of Stevens International. Thank You!
Additional images:
© Randy Bumgardner 2008
This review was published on Saturday, July 02 2011; Last modified on Wednesday, May 18 2016