
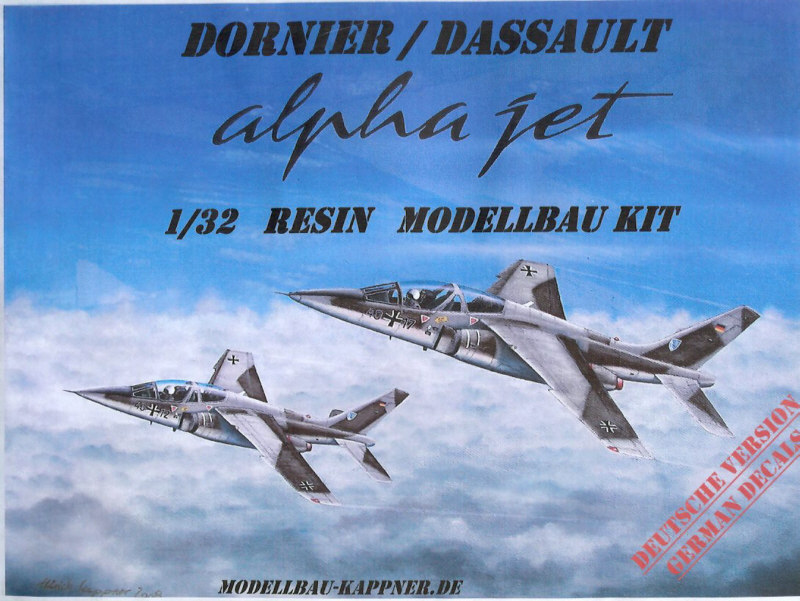
Fliegerhorst Authentics | 1/32 Dornier/Dassault Alpha Jet, German Version
Reviewed by Ray Peterson
The Dornier/Dassault Alpha Jet was the result of a competition to replace the Lockheed T-33 and Fouga Magister for training purchases. It was a joint effort between the French and German companies in an attempt to keep the costs down. An agreement was made that each country would acquire 200 machines, each assembled in their own countries.
The Alpha Jet prototype first flew late in 1973, powered by twin SNECMA turbofan jets, the Luftwaffe insisting on a twin engine design after suffering severe attrition with their single engine F-104s. It is a relatively compact plane for a twin seater, compared to typical American fighters like the F-15 or F-18, with a length of 40 ft 3 in (12.3 m) and a wingspan of 30 ft (9.14 m). It has a top speed of 609mph (0.8 Mach), with a ceiling of 50,000ft (13,700 m). Range is 1,530 miles (2,600 km) w/ external tanks.
Early on, the Luftwaffe decided they would primarily use the Alpha Jet as a light strike aircraft, while the French decided to keep it in the advanced trainer role. As an attack craft, the aircraft became known as the Alpha Jet A, and could carry gun pods, bombs, rockets, and missiles including the AGM-65 Maverick and the AIM-9L. As an advanced trainer, the aircraft was known as the Alpha Jet E. The different avionics between the two versions made them easy to tell apart: the French craft featured a blunt, rounded nose while the German version has a sharp, pointed nose. In total, approximately 500 Alpha Jets were produced up to 1985.
The Kit
The model comes in a slightly flimsy cardboard box, with the parts wrapped well in bubble wrap, and the smaller parts divided in separate plastic Ziploc bags. Also included are decals for two schemes and instructions.

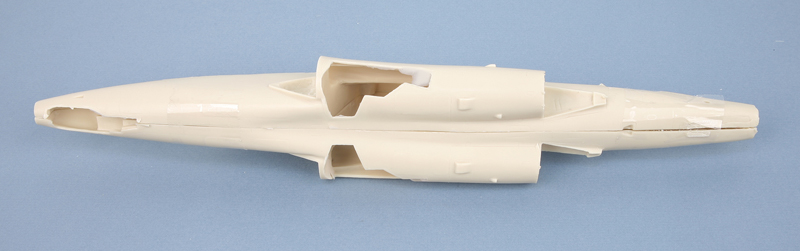
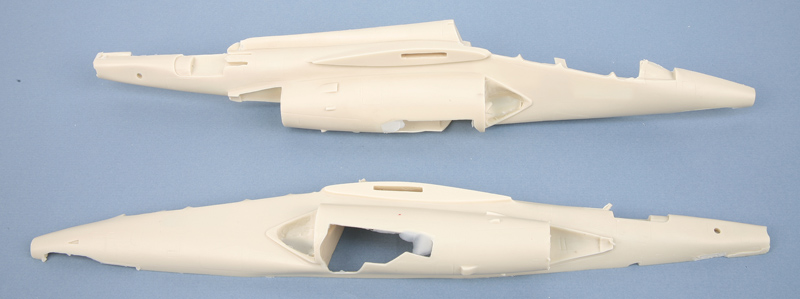
The main parts include the fuselage halves, wings, tail and flight surfaces. These are cast in cream-colored resin and are very nice indeed with virtually no air bubbles. There is some resin flash at the mating surfaces so some clean up will be required. The panel lines are finely engraved, a little too fine in some cases as the panel lines virtually disappear in places and the builder may want to re-engrave them. Once again, I have managed to procure a model of an aircraft that I have little reference material on. Comparing to some 3-view drawings I found on the internet, the model appears to scale well, with some variation with the elevators and location of the sawtooth on the wings, the location of the sawtooth being the most suspect (it appears to be too close to the fuselage). I have no idea of the reliability of the drawings however, so these areas should be studied further against photos of the aircraft you are building. The interior of the main fuselage includes the major structural tub of the cockpit, which is cast virtually bare. While the few pics I have seen of the cockpit show it to be pretty clean, I think some wiring and bits may be needed to help detail up the cockpit walls.
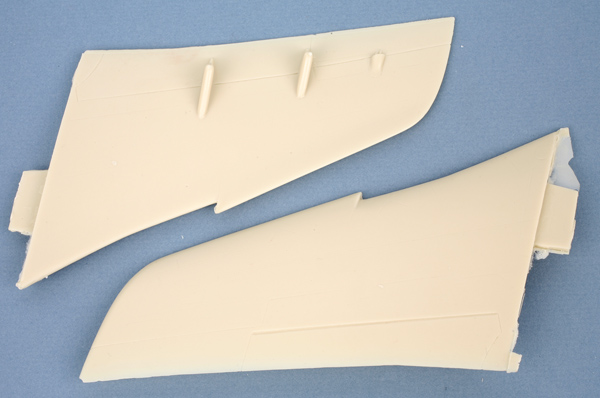
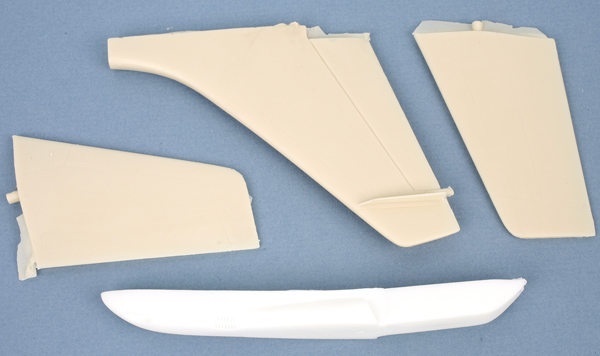
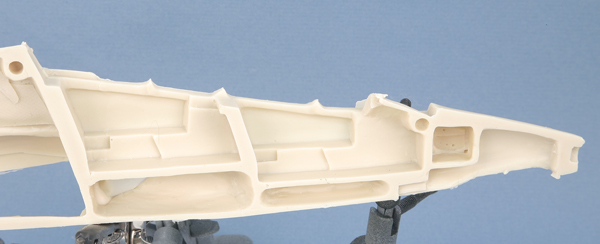
The wings, tail, elevators, and gun pod are also nicely cast, with the training edges nice and sharp. No warping to speak of in the major parts. As you can see, the gun pod is cast in a white resin. This white resin is cast well, but it appears to be somewhat softer than the tan resin and details are a bit softer. Note that all flying surfaces are cast in the neutral position.
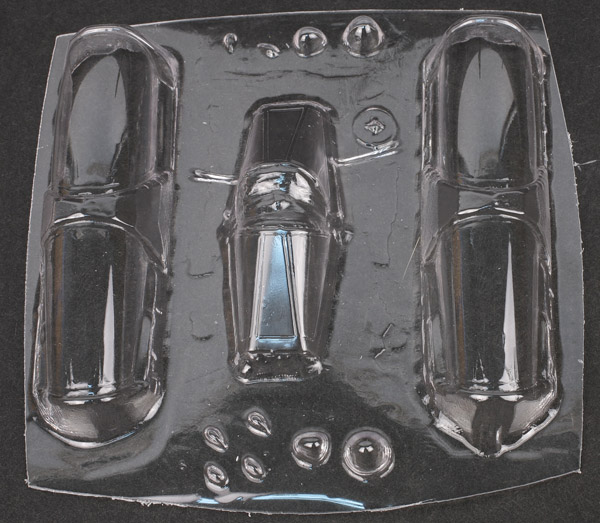
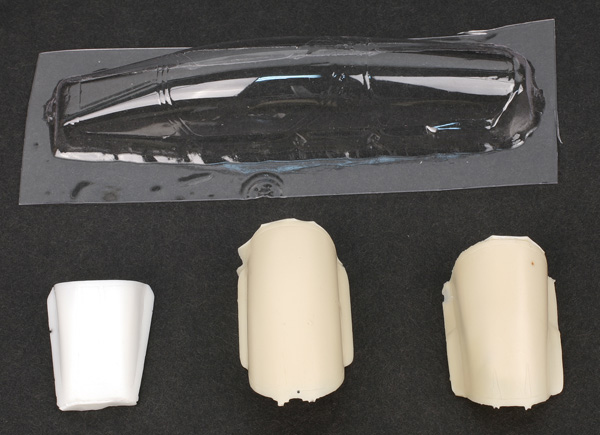
The clear parts are perhaps the highlight of the kit. They are some of the clearest vac canopies I have yet seen. You get one copy of the canopies in the closed position, and two copies of the individual canopies if you want to display in the open position. You also get resin plugs to assist in cutting the canopies out. One note: if you wish to display the canopies in the open configuration, you are directed to use a clear resin piece (seen later) for the glass in between the opening canopies of the cockpit. I suggest an alternative would be to cut out the center part from the one part canopy as it appears far clearer than the resin part. One other note: the clear plastic seems a bit more brittle than typical vac plastic I have encountered before. It may just be because the clear plastic is a little thicker than usual, but take care when cutting the parts out in any case!
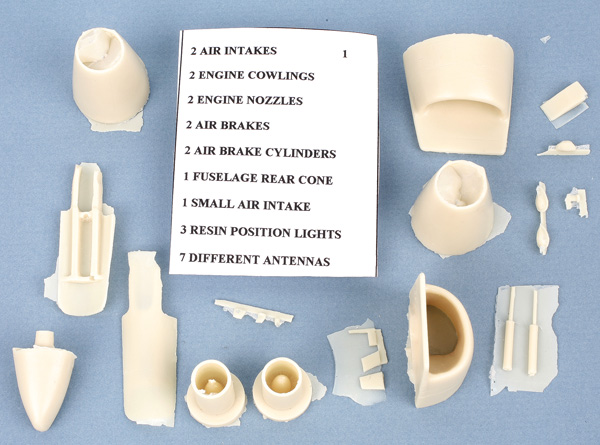
Now we get to all the bagged parts. Bag 1 includes various airframe parts including engine tail cones, air brakes, antennae and the like. Not much to say other than some clean up is required for the resin flash. While a bit of work, there is not much of any large pour gates, just thin flash.
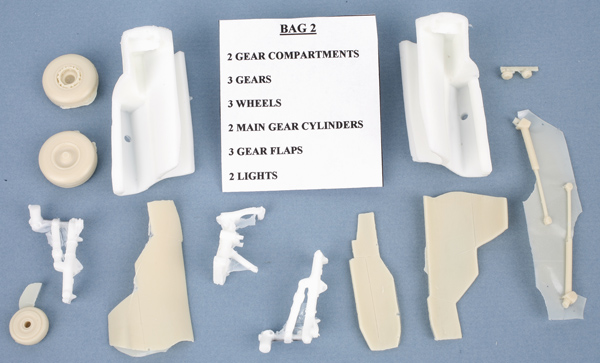
Bag 2 includes parts for the wheel bays. Note that the wheel bays are clean. Any plumbing or other detailing is left up to the modeler. This brings up one area I am a little nervous about on this model. The main landing gear legs are cast in white resin, with some wire cast inside the resin. I am not sure if the wire extends all the way up the leg, or if the nose gear leg has any wire at all. Considering the total weight of this all-resin kit, the gear legs could be a weak point. I would have definitely preferred to see the gear legs in white metal or brass. I am keeping my fingers crossed… Other than that, the wheels look pretty good, but I would replace the resin landing lights with clear lenses.
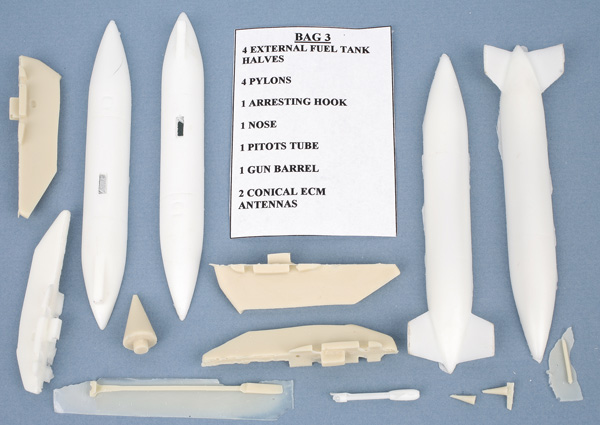
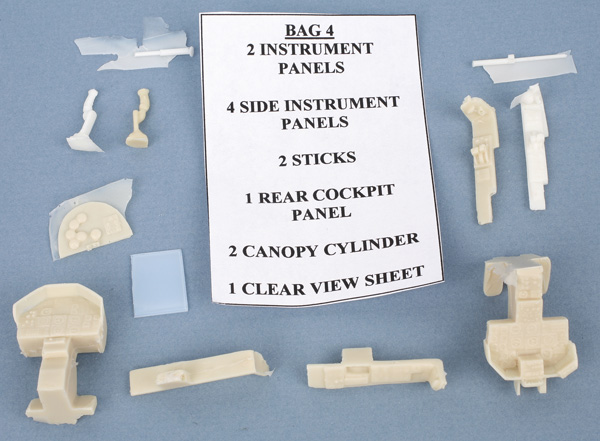
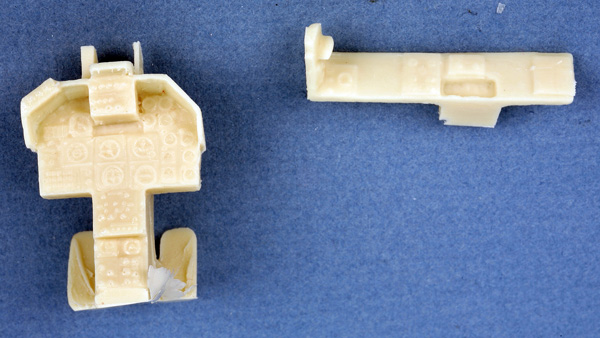
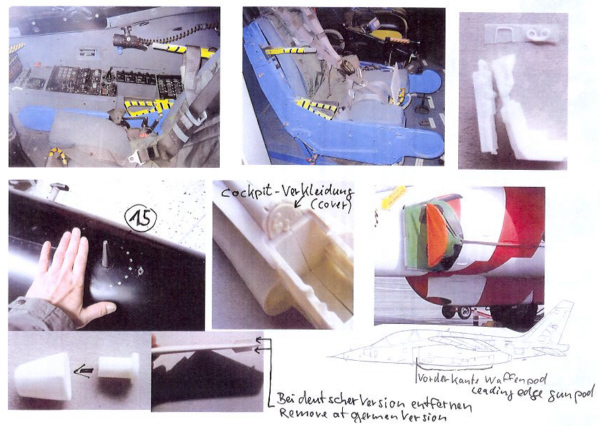
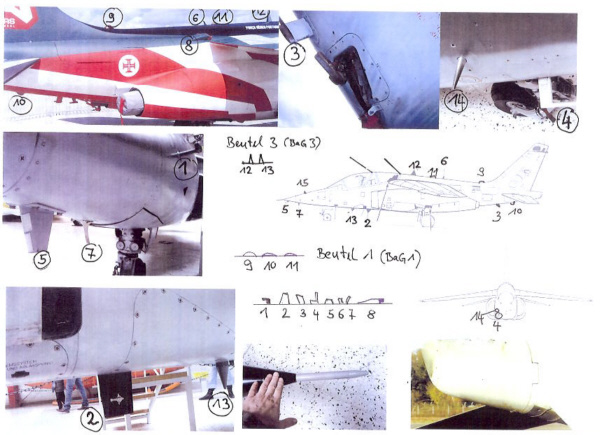
Bag 3 includes some of the pylons, stores, and more external detailing including the sharp nose of the German Alpha Jet A variant. Other than more flash and a small pinhole or two, nothing else worth mentioning. Bag 4 includes the cockpit details. Not bad, but I wish they would stick to the tan resin as it seems to hold the detail a little better. Even on the tan parts, some of the detail is soft, as can be seen in the detail photo where I have cranked the contrast up. While the instrument panel is pretty darn good, the sidewall detail appears pretty soft. The modeler may want to add some punched discs and bits and a little wiring to spruce it up.
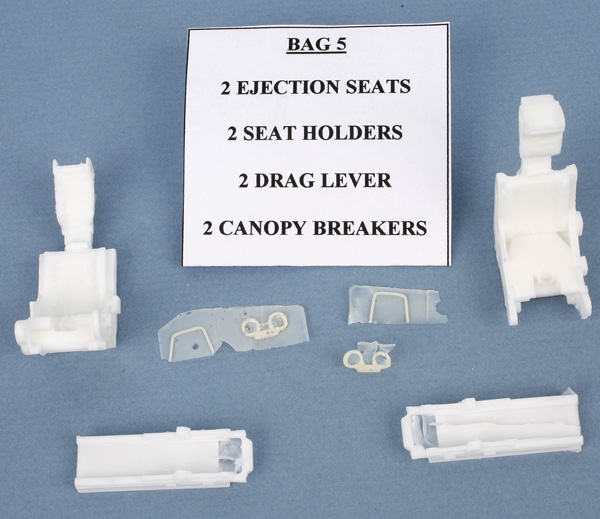
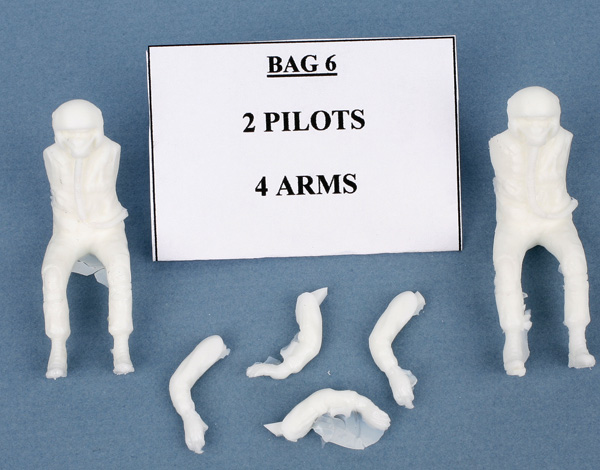
Here is Bags 5 & 6, including the bang seats and the pilot figures respectively. The seats don’t look too bad, though they are missing any kind of belts. I am sure a few little bits wouldn’t go wrong here, either. They do include some seat pictures in the instructions to help with detailing and painting. The figures are a little soft in detail, the white resin not helping any. They are also exactly the same, so one might want to do a little surgery to vary them a bit if one wanted to use them.
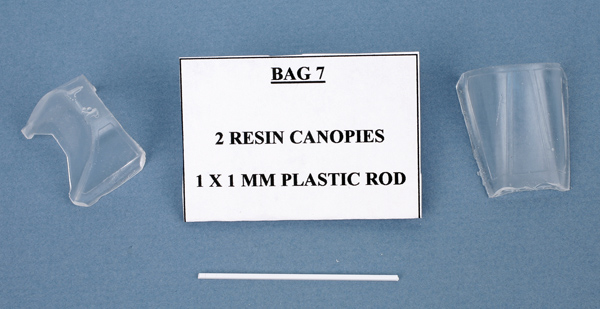
Bag 7 contains some alternate resin canopy parts. As can be seen, they are not as clear as the vac parts, although a bath in Future might help.
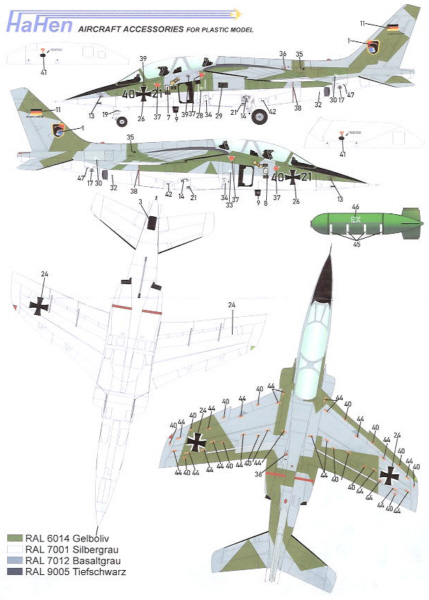
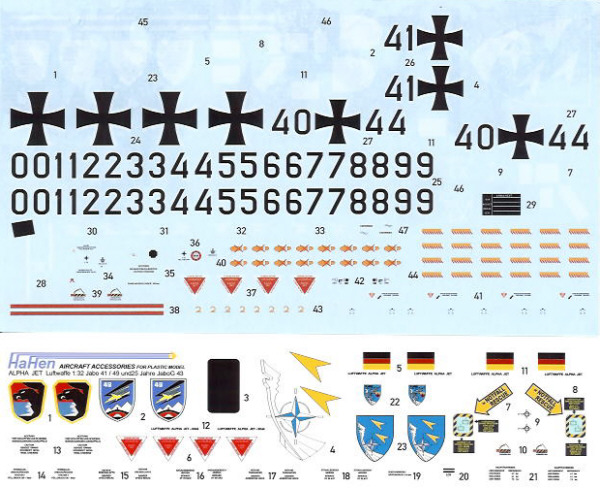
The decals included cover two different schemes of the Luftwaffe, one in standard camouflage, the other in a special show scheme. Numbers and insignia are included that would allow for a wide range of numbers of different aircraft you might have photos of however. The colors are very nice, with only very fine pixilation of some of the stencils visible under magnification. It appears the smaller sheet was printed by a hi-res inkjet then sealed, while the larger sheet was printed with an ALPS printer. Therefore the sheets are solid decal paper and each design needs to be cut out close to the edges. All the white backing is done as a single layer on the ALPS sheet, so be warned they might not be totally opaque: I have found it takes 3 layers to get good opaqueness on the ALPS. Also, the decals are no doubt more fragile than standard decals so be warned.
The instructions include 4 pages of written instructions in German and English, plus some picture pages as shown here. I have to say on the whole they are a little weak, although I have seen worse. Definitely some additional references would be helpful. Coopers Models was talking about editing and expanding on the instructions; that would be most helpful if it comes about.
Another 1/32nd kit of an aircraft that hasn’t been available in kit form before. This is definitely the golden age of 1/32nd aircraft! While the casting on the whole is quite good, I am going to give this kit an evaluation of ‘Recommended with Reservations’ due to some of the soft detail, missing detail in areas such as the wheel wells, and the landing gear, which I think should have been cast in white metal or brass. This definitely won’t be a quick-build kit, it is going to take some time. The kit is also on the expensive side, around $200 here in the States. However, it is the only game in town if you want an Alpha Jet, and no doubt can be made into a show piece with some perseverance.
Note, future releases will include the French version as well as ordnance kits.
Kit for review graciously provided by Coopers Models, http://www.coopersmodels.com.
© Ray Peterson 2008
This review was published on Saturday, July 02 2011; Last modified on Wednesday, December 21 2016