
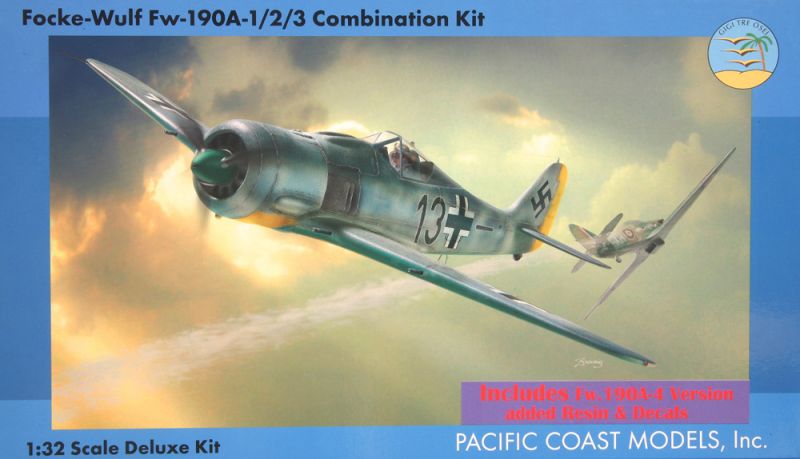
Pacific Coast Models | 32011A4: 1/32 Focke Wulf 190A-4
Reviewed by Ray Peterson
Introduction
Pacific Coast Models is currently still the only company to release the early versions of the well-known Focke-Wulf Anton. These kits have been out of production for a while now and with the retirement of PCM's creators, modelers wondered if the kits would ever be seen on model store shelves again.
Enter Loic Anthian, creator of Great Models Webstore. Loic sold GMW to Sprue Brothers while he pursued other interests, but when Ken and Mary announced they were retiring, he decided to get back into the model business and purchased PCM and their import rights. He has also started Kitlinx.com to get back to the retail side of things. He hopes with Kitlinx to re-create a GMW-style experience.
The 'new' PCM is now re-releasing several of their kits. One of the first of the re-releases is the Fw 190A-1/2/3 kit with parts to recreate the Fw190A-4 variant. This makes for a very versatile kit as from it, with a little work, you can recreate the Fw 190A-0/1/2/3 A-4 early, A-4 late and even a F-1, which was a re-designated A-4/U-3 ground attack variant.
Kit Description
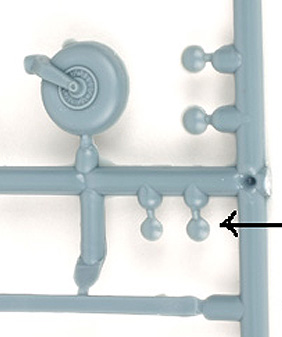
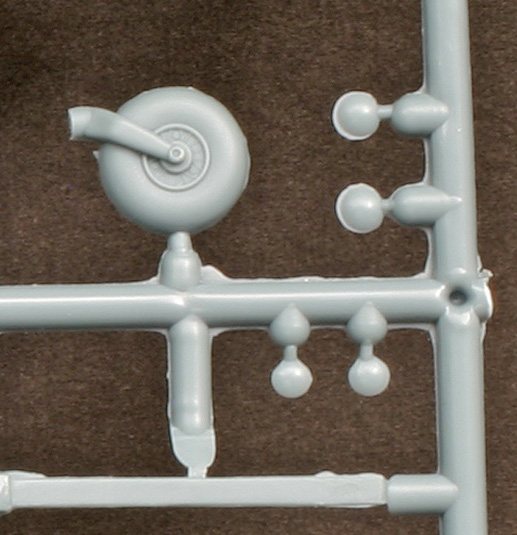
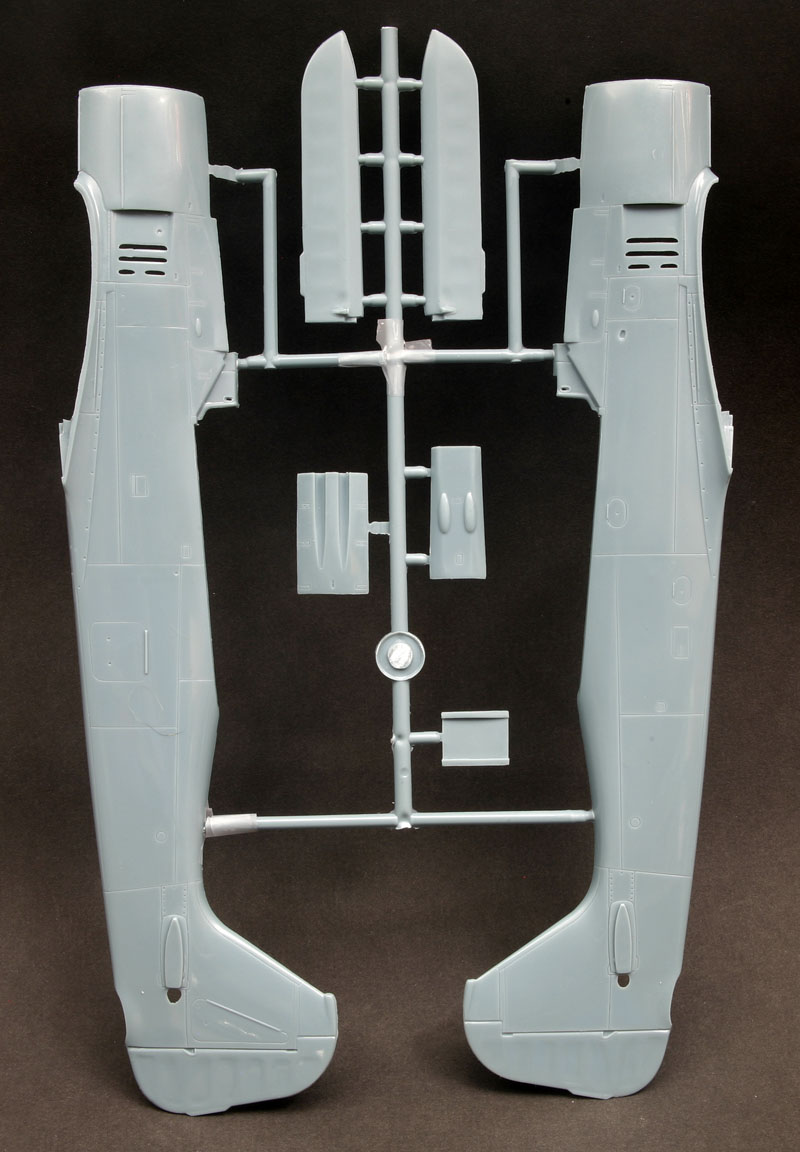
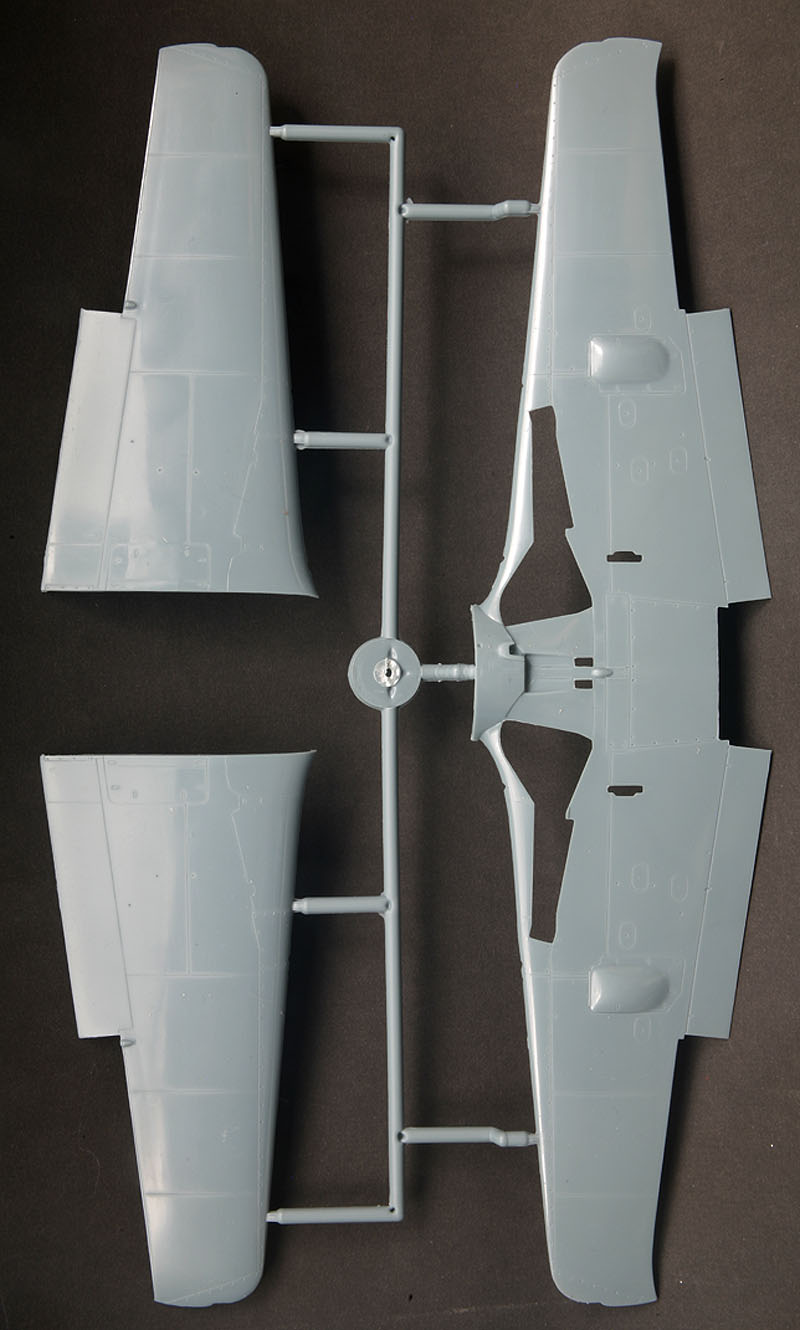
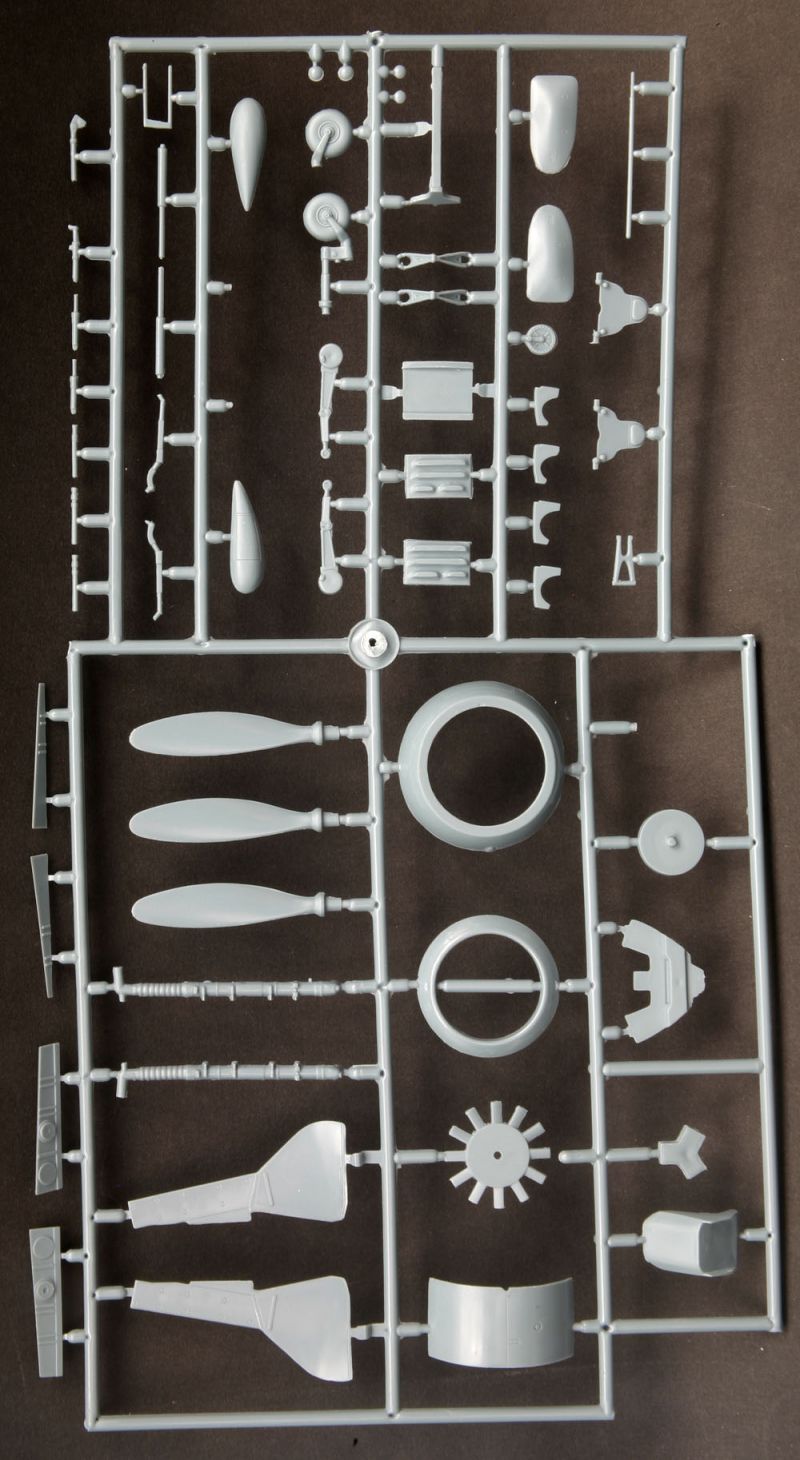
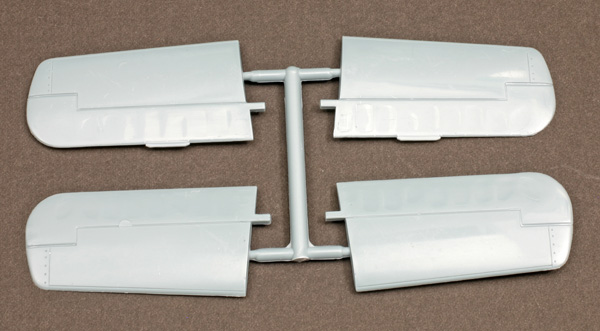
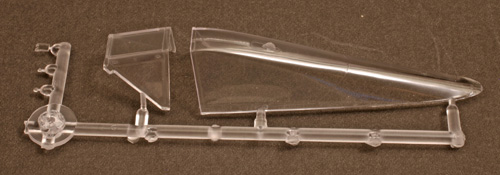
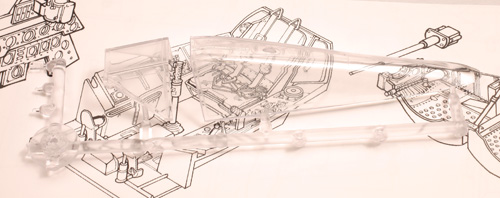
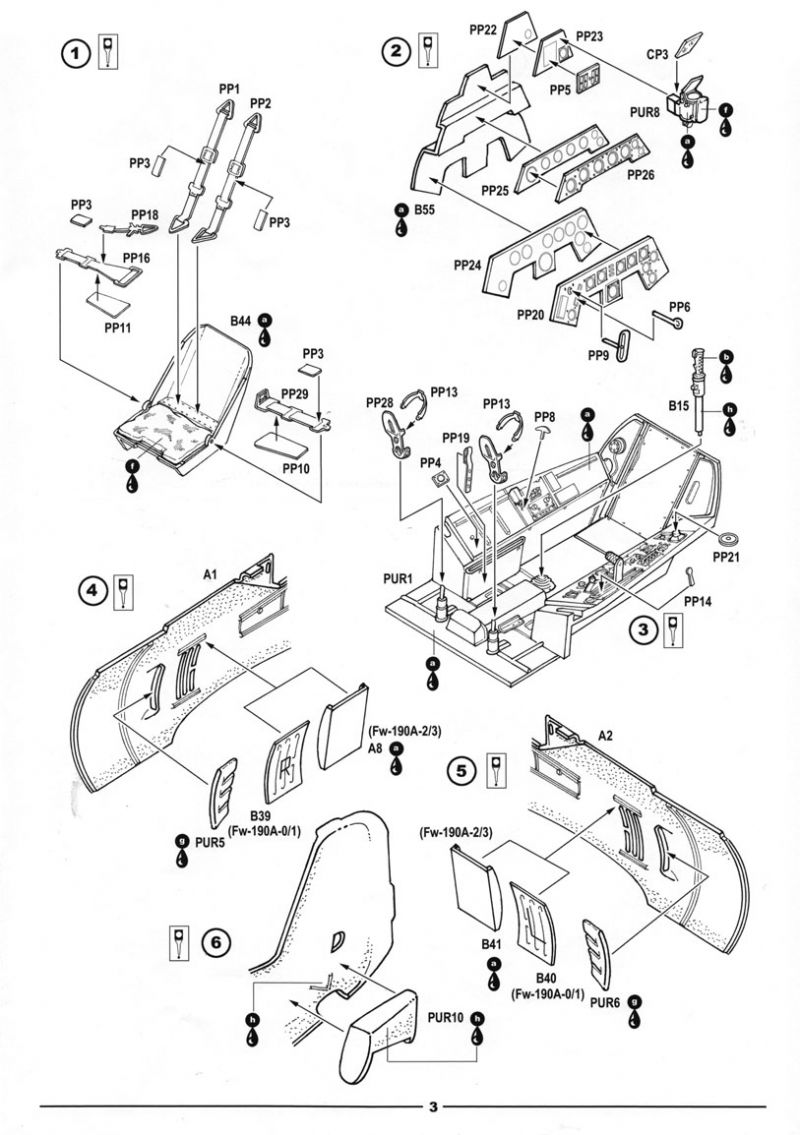
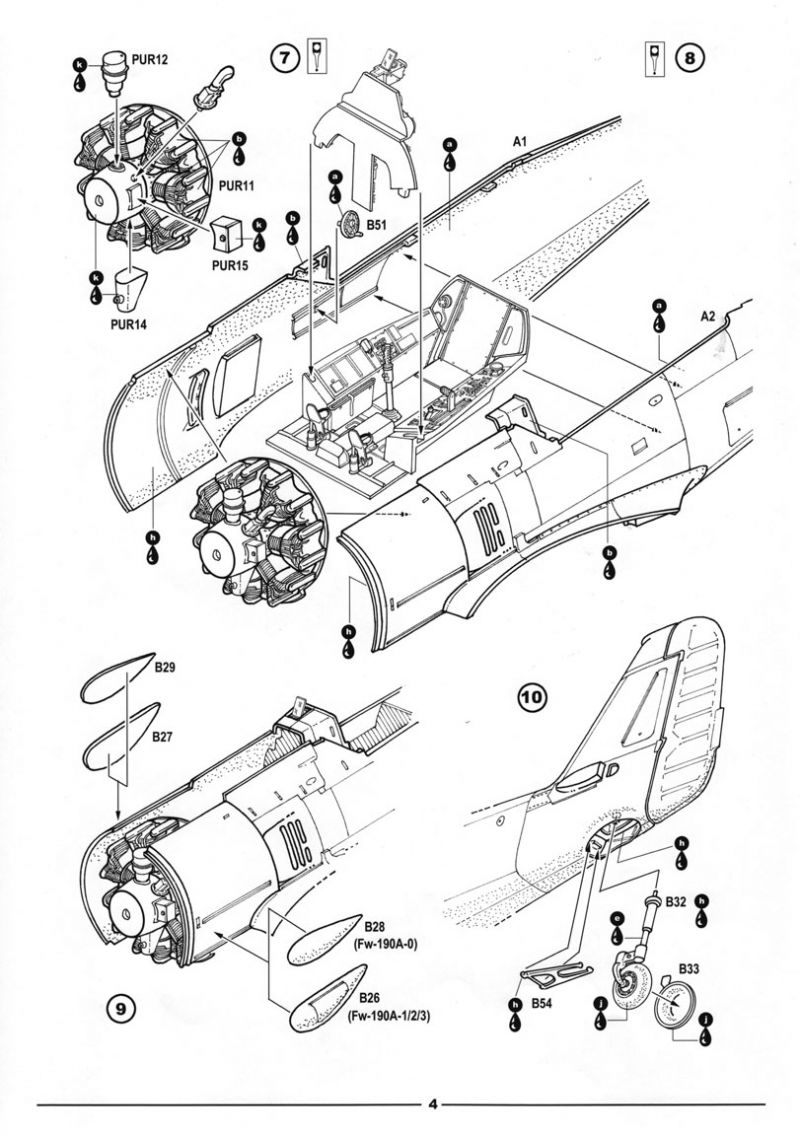
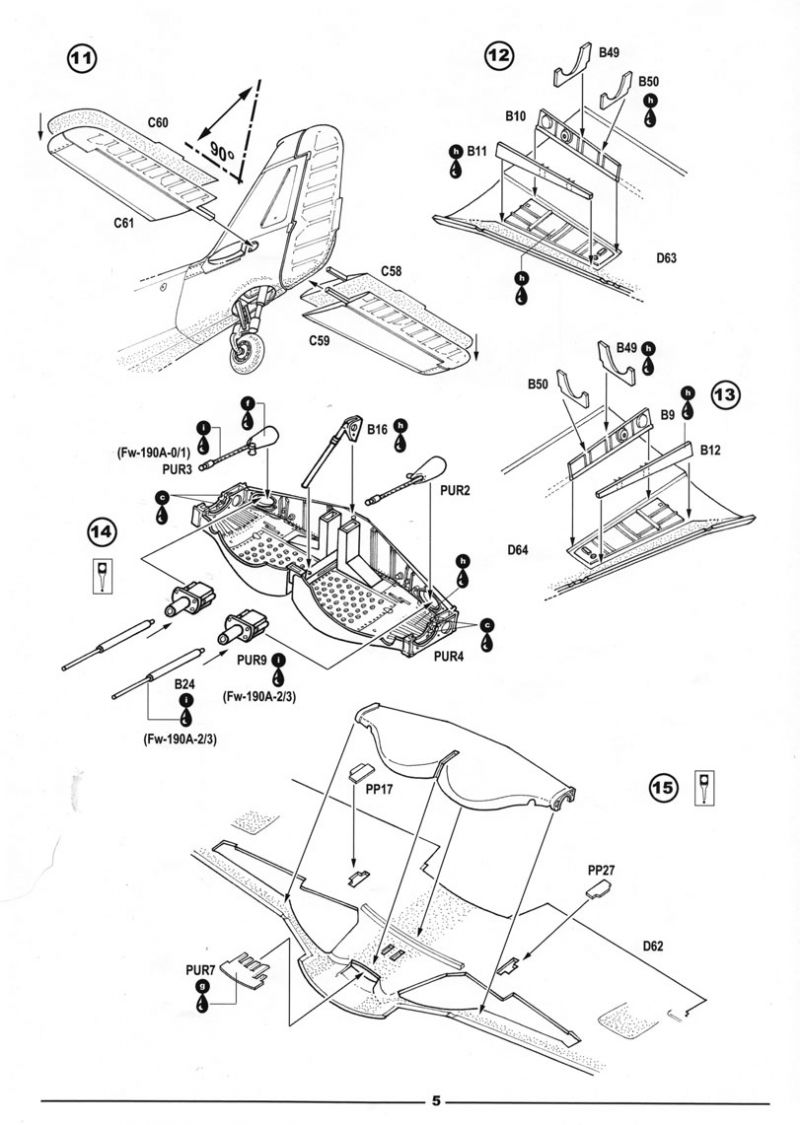
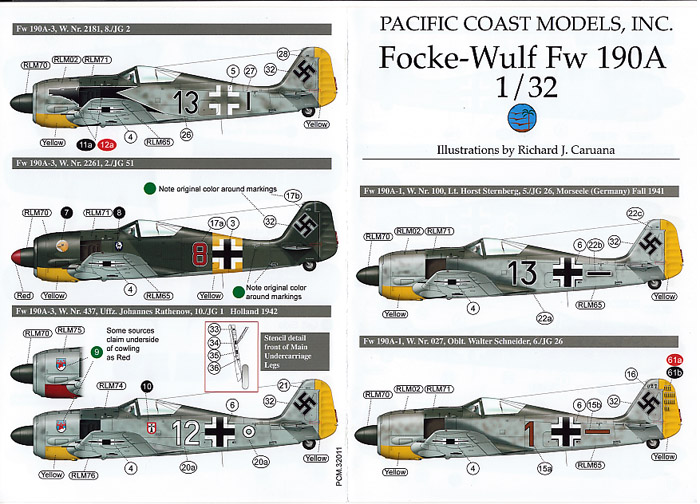
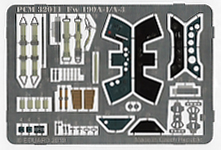
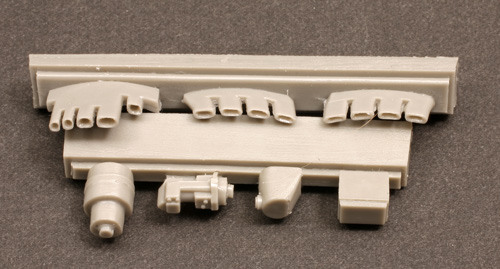
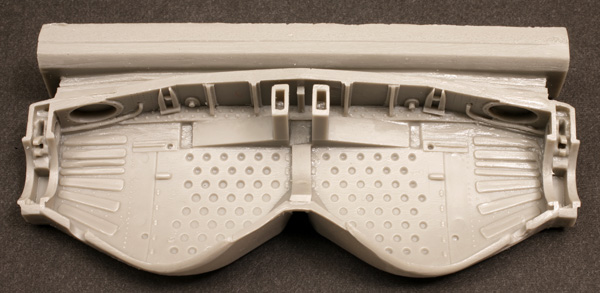
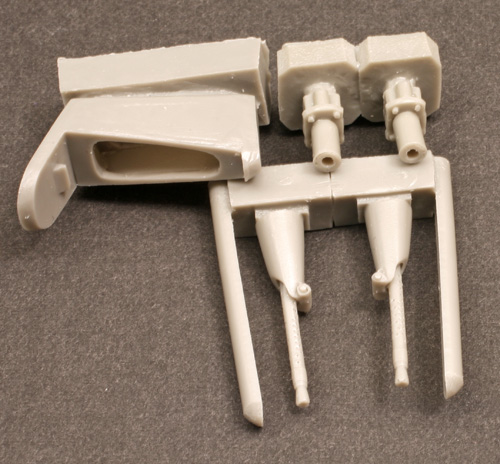
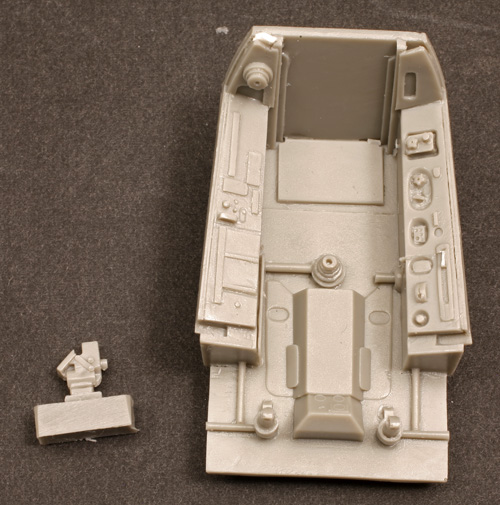
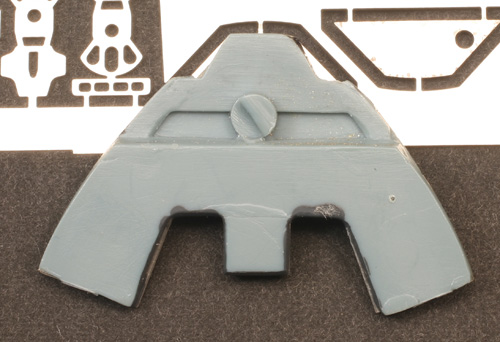
The kit is presented in PCM's familiar glossy grey plastic. The original A-1/2/3 kit includes 76 grey plastic parts, 5 clear plastic parts, 20 resin parts, and 45 PE parts. Decals are provided for 8 aircraft, including for 2 A-1s, 1 A-2, and 5 A-3s, as well as typical stencil decals for one aircraft. Instructions are exploded view line drawings on nice glossy paper and seem to be clear, with color suggestions given by name, no manufacturers paints are listed. See my original review of the kit elsewhere on LSP. I have provided photos of all the parts again to show the quality has varied little from the original release. There has only been a small amount of flash that wasn't seen on the original. The two pictures below show some of the worst of it on the sprues around the tail wheel and small bulges. The picture with the white background is the original release, and the black background has the new release. The other pictures are of all the original contents (except for the engine, which I will get to later). The canopy is nice and clear.
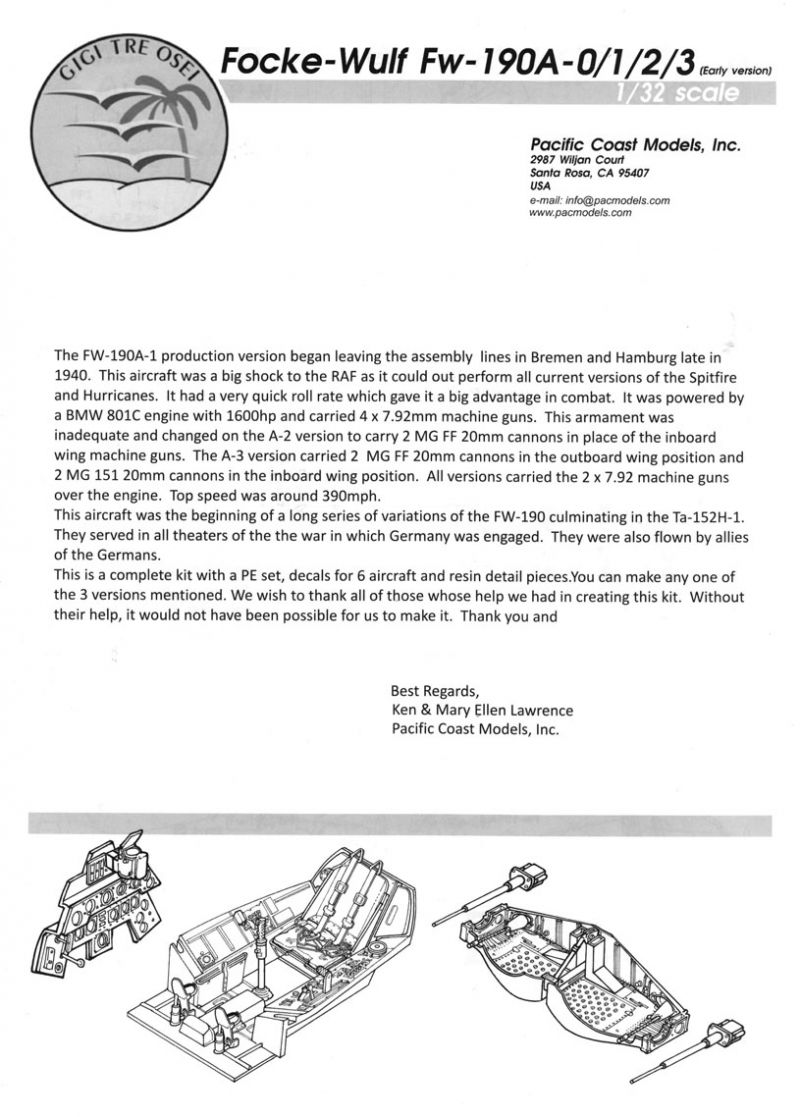

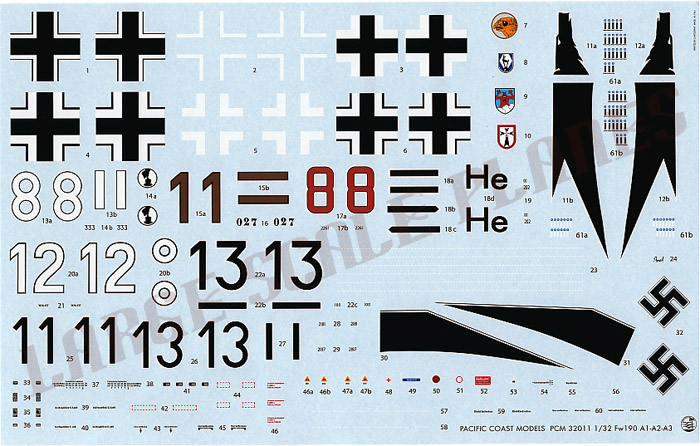
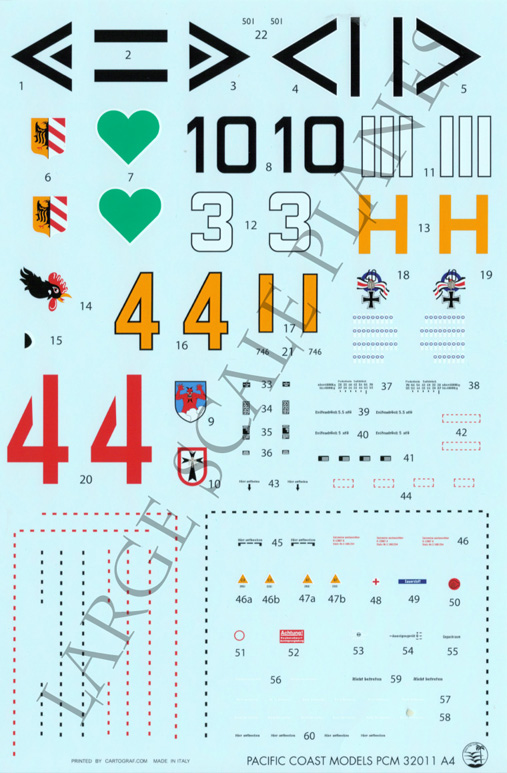
Focusing on the what is new for the A-4 release, the kit adds 3 resin parts and markings for an additional 8 (for a total of 16!) aircraft. A three-page insert provides the instructions for the conversion.

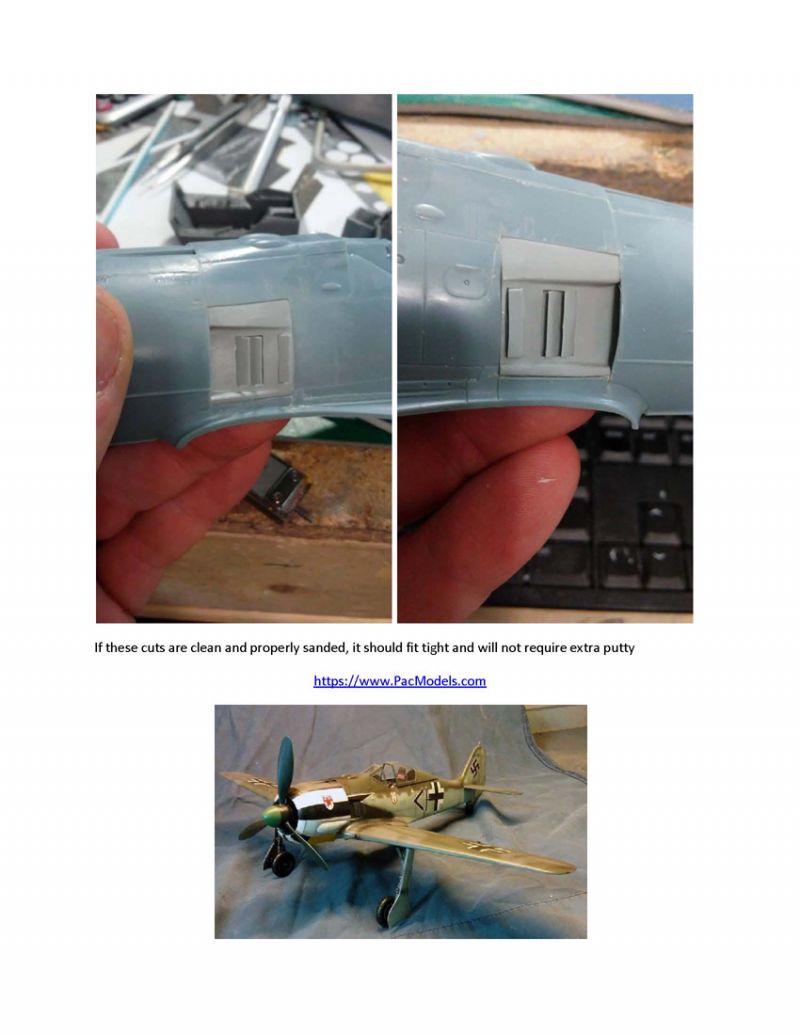
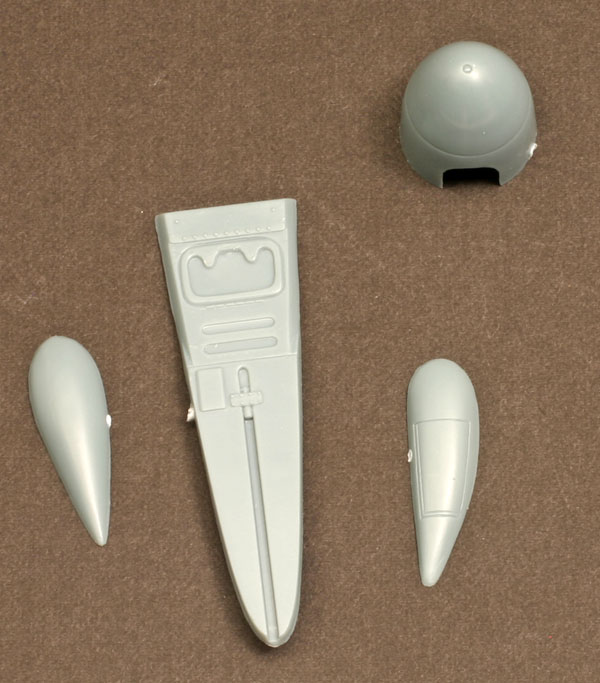
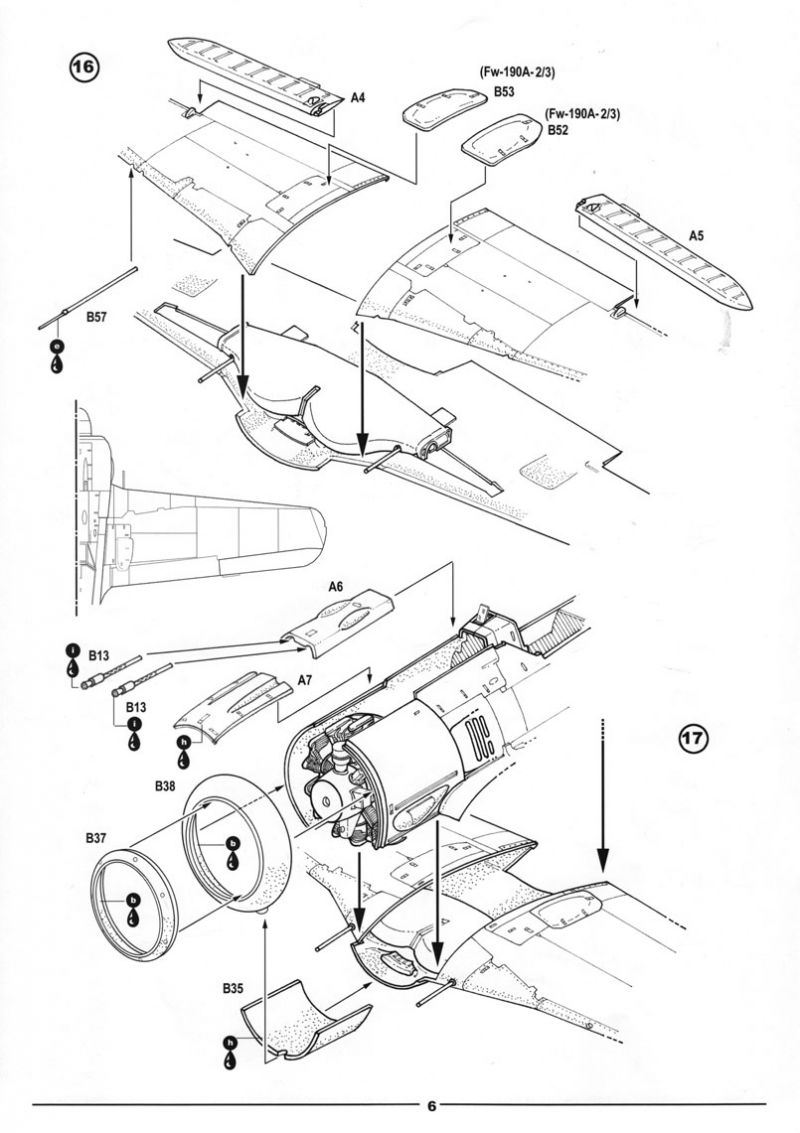
The three resin parts include inserts for the engine vents on each side adding the louvered vents in place of the open vents of earlier versions. Note these vents are for later production A-4s; earlier aircraft kept the open slots so you may not need these two parts depending on which aircraft you want to represent. The third resin piece replaces the antennae mount at the top front of the vertical stabilizer with the blade post used for all later 190As. This was used on all A-4s.
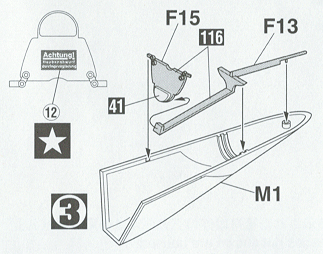
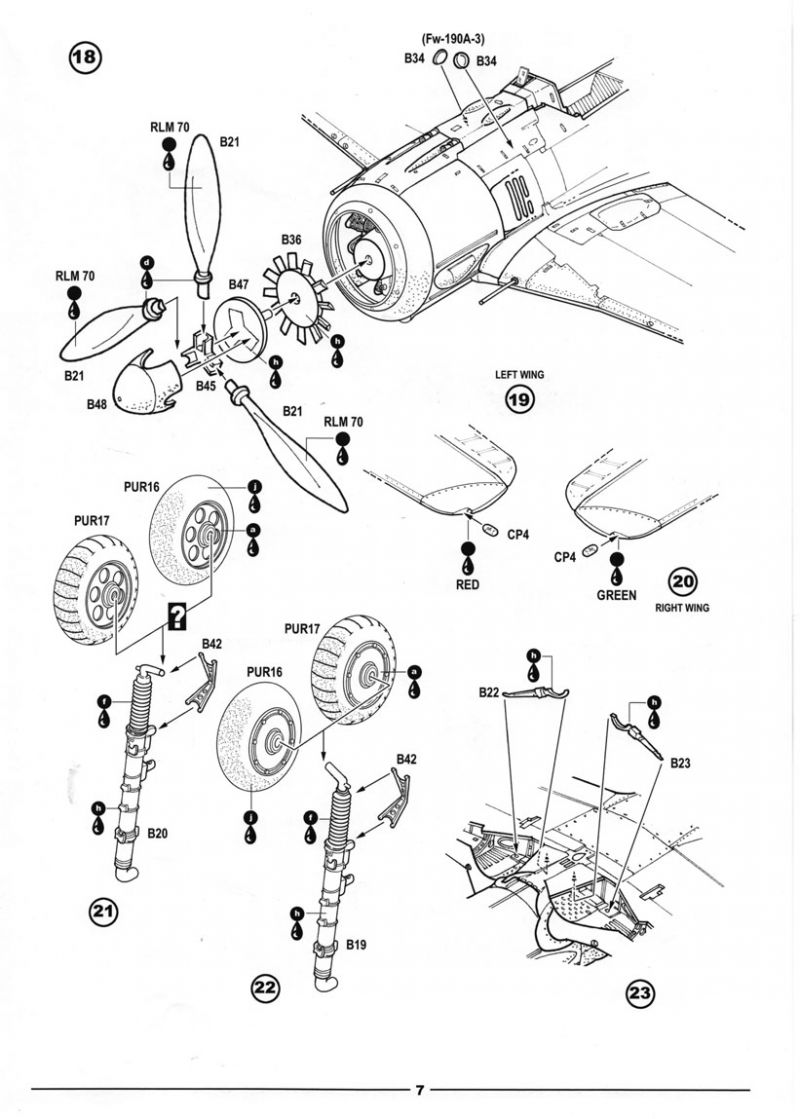
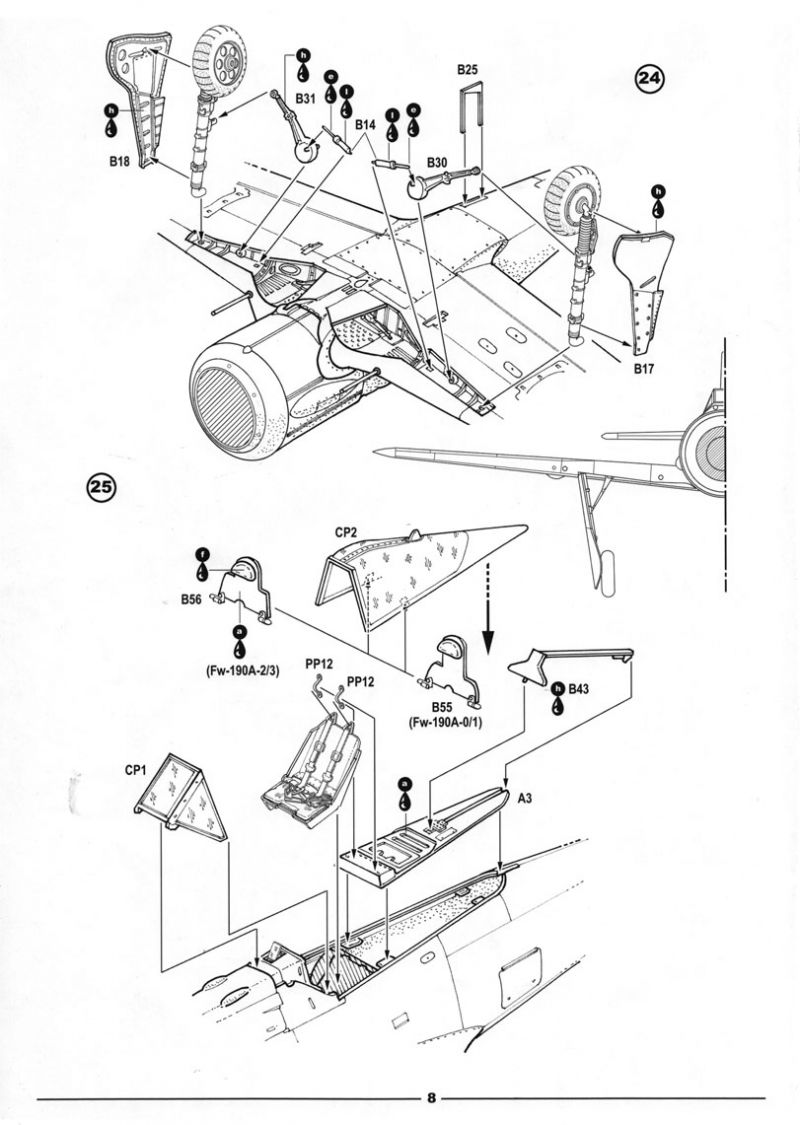
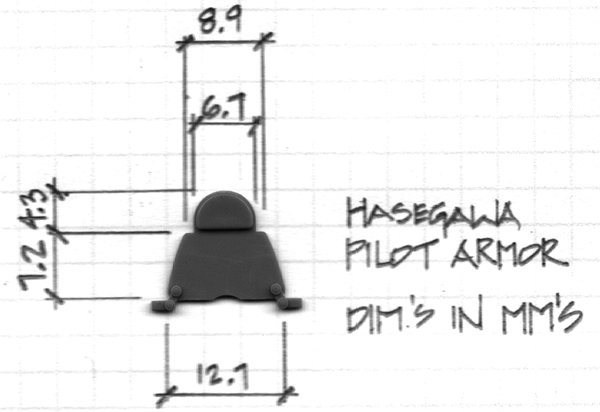
One item missing from the A-4 parts is the revised pilot headrest armor, which the references all say changed with the A-4 to the wider style used all the way to the A-8 and D-9, on those aircraft with the flat canopy. One good thing is if you have a Hasegawa A-8 or D-9 kit, and plan on using the blown canopy, the flat canopy and armor parts can be used on the A-4 kit. You can even use the canopy, too, as the canopies match. I have included the relevant snippet from the Hasegawa instructions showing the relevant parts, and below a picture of the part with dimensions in case you want to scratch it instead of robbing it. (Added 7/8/18)Please note, if you intend on using the PCM parts for the canopy, whether you scratch a new piece of armor or not, on page 8 of the instructions, step 25, part #B43 is shown 180 degrees off. It should be built similar to as shown in the Hasegawa instructions, with Hasegawa part #F13 being similar to PCM part #B43.
Building Notes
For building an A-4 early, it is pretty easy. Build it as per an A-3, except add the new tail antenna post, and revise the pilot's headrest armor.
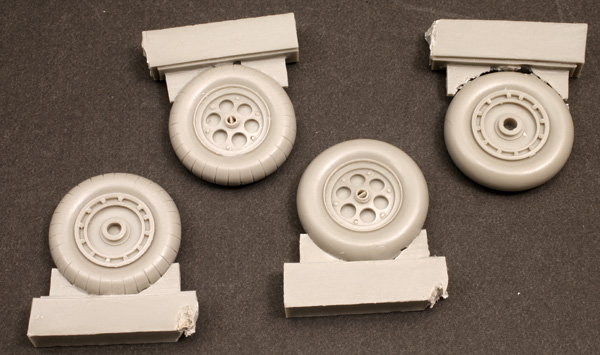
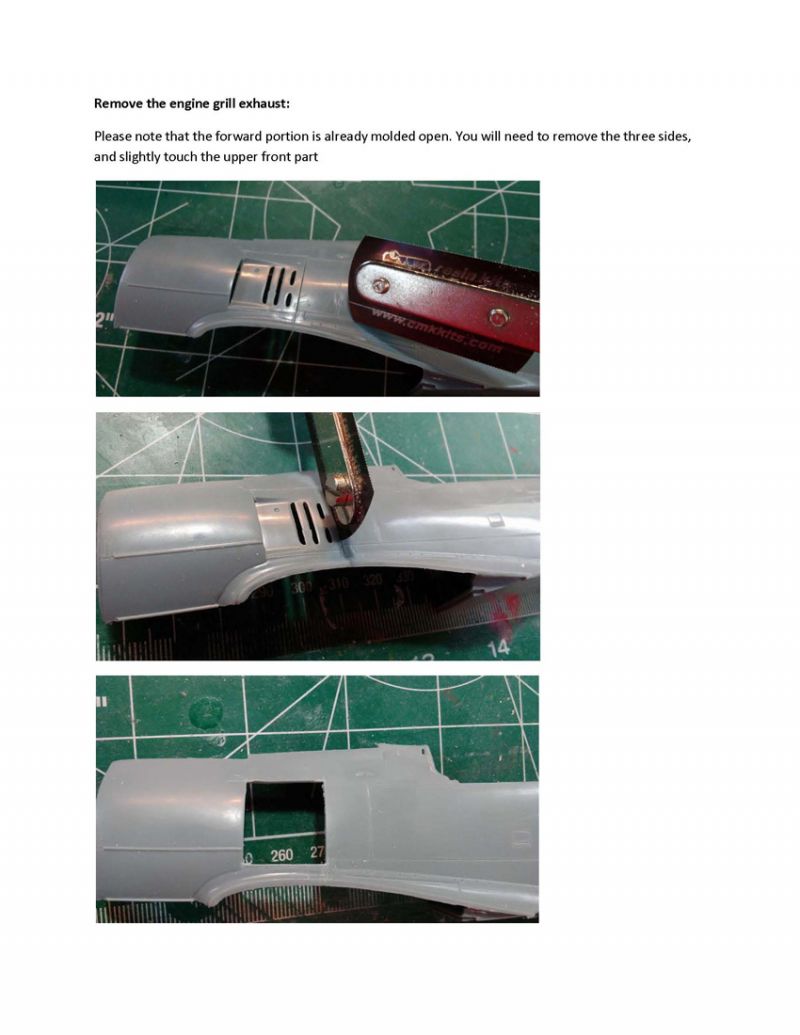
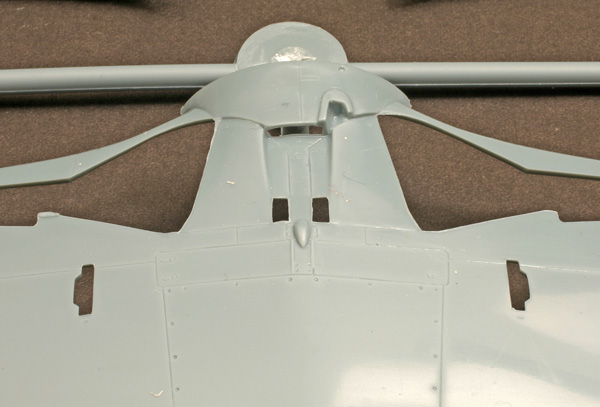
To create an A-4 late, you must change the antenna post, change the pilot armor, and use the new resin adjustable engine vents. Note the new resin vents show them as open, which is a first. The Hasegawa kits and the Montex conversion both have them closed. Only the new tool Revell kits have them molded open. I do suggest a slightly different method for prepping for them in lieu of the instructions: I would cut out the kit's vents just inside the panel lines, then file the opening larger than necessary rather than trying to cut perfectly on the panel lines. You will have less filling to do that way. On another note, references mention some late A-4s had the later solid disc main wheels. Eagle Editions has them if you wish to go that way.
If you want to build a A-4/U-3 which later was re-designated F-1, a ETC 501 carrier needs to be added. Hasegawa has them in their A-8s and F-8s; Revell has one in the F-8, also, so there are places to rob them from. There was also armor added around the engine and cockpit, but the references say it was all internal, so I don't think there is really anything needed to be bothered about showing that. For most of these aircraft, the outer cannon, the MGFF, were removed and the opening patched over. The underwing bulge is also missing from the access panel.
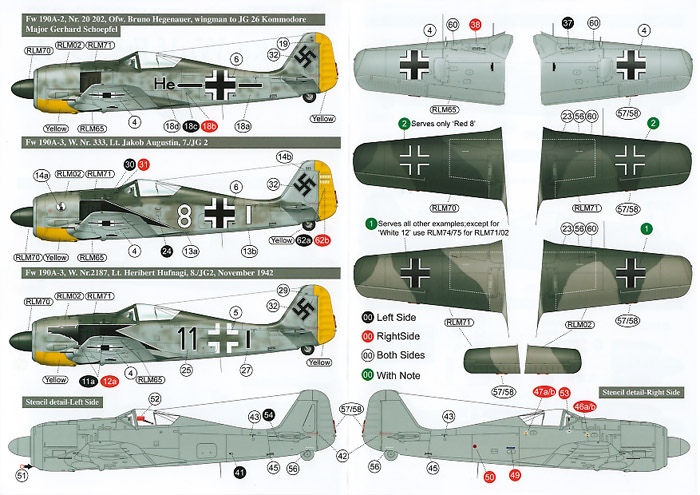
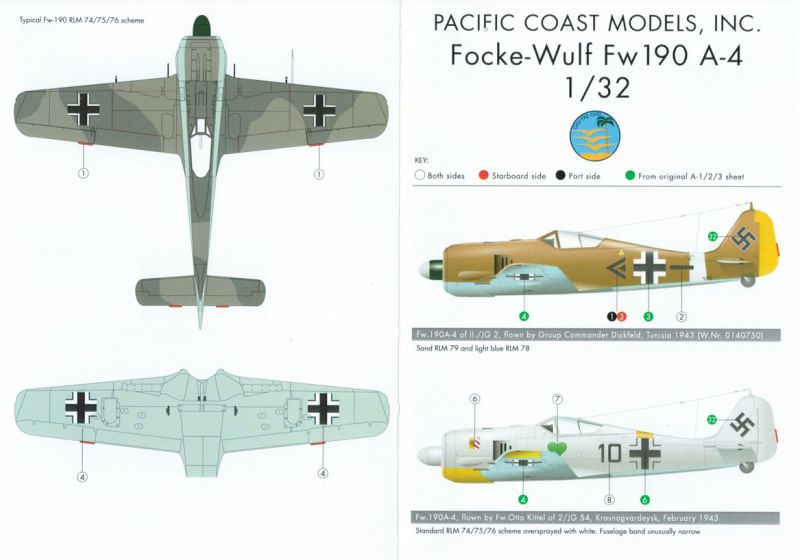
Looking at the decal options, the artwork seems to show them all as A-4 early aircraft. I have located most of the options and here are my notes:
"Black <<+-" of Group Commander Dickfeld, II./JG 2, Tunisia: Didn't find any photos, only matching artwork in Ref. D page 61, but other aircraft in the unit are late aircraft. Paint is fresh and appears dark. If you want a little more modeling fun, Ref. A page 74 shows a very early Tunisian-based A-4/U-3 trop, "White 1". This appears to be a prototype aircraft and has a ETC 501 (lying below the aircraft in the pic), but still carries the outer MGFF's and corresponding under-wing bulges. It also has the tropical filters.
"Black 10" of Fw. Otto Kittel, 2/JG 54, Krasnogvardeysk: Again, no photos found, but Ref. C pages 210-220 showing several other aircraft in the unit. Both early and late examples.
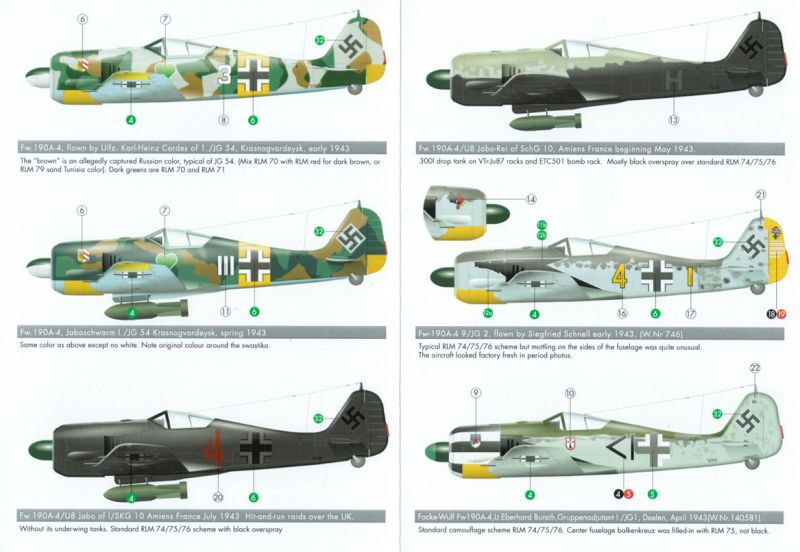
"White 3" of Ulfz. Karl-Heinz Cordes of 1./JG 54, Krasnogvardeysk: Photo in Ref. C page 221. Note this reference states JG 54 camo scheme, started with their 109's, is interpreted as two shades of green. The darker green similar to RLM 70 or slightly darker than RLM 71 and the lighter green as similar to RLM 71 ranging to a lighter, brighter green. This goes for both this aircraft (under the white winter coat) and for the next aircraft from the same unit. "White 3" is an early A-4.
"White III" of Jaboschwarm I./JG 54, Krasnogvardeysk: Ref C. has a series of photos on pages 250-251 showing these are actually late A-4/U-3s or F-1s, missing the outer MGFF. Note there were more than one aircraft with these markings so not sure they were all late versions.
The next two aircraft were night raiders flying raids out of Amiens. "Red 4" of I/SKG 10 I could find nothing on. "Yellow H" of SchG 10 shows up in Ref. B, page 92 and 93. They refer to it as "Yellow H + black (filled triangle)". Another reference with the same pictures does not refer to the black triangle, and I can see hide nor hair of the triangle through the black overspray. Both references show the rudder as over-painted yellow. Note these are both A-4/U8's so are missing the outer cannon, no bulge under wings, carry ETC 501s and "Yellow H" was a late A-4 and was also fitted with the Junkers-style drop tanks on the wings. Maybe those tanks and carriers could be sourced from a Hasegawa or Trumpeter Ju 87 kit. I know the Trumpeter Ju 87A has them in it, which would be a good source as I don't think the Anton was capable of carrying them.
"Yellow 4 + I" of Siegfried Schnell of 9/JG 2: Ref. B has a nice group of photos and art on pages 82 and 83. It is an early A-4.
"Black < I + " of Lt. Eberhard Burath, I./JG 1: This aircraft appears in Ref. D, page 52. It is an early A-4.
I have started on my first A-1/2/3 kit and have a few other comments that work for all versions. As a general comment, since this is a short-run kit, be sure to clean up all mating surfaces and dryfit, dryfit, then when you are ready to glue parts, dryfit again.
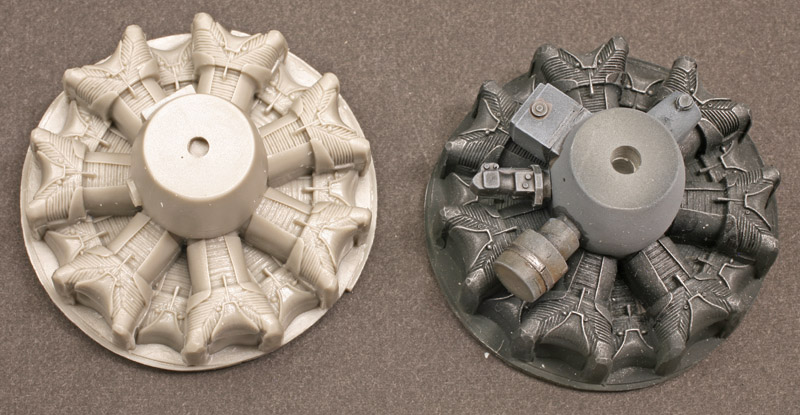
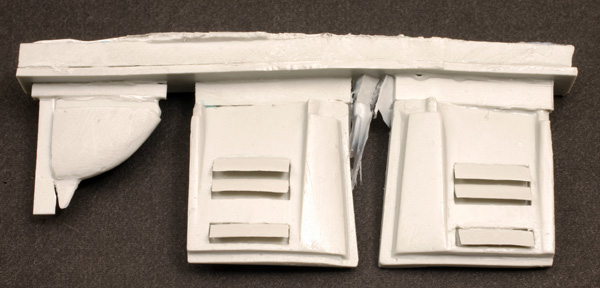
The engine is pretty simple, made up of only a few parts. I show it above in raw resin and mostly assembled and painted. I may add a little more detail painting, but as so little can be seen through the fan blade, the kit engine should work fine.
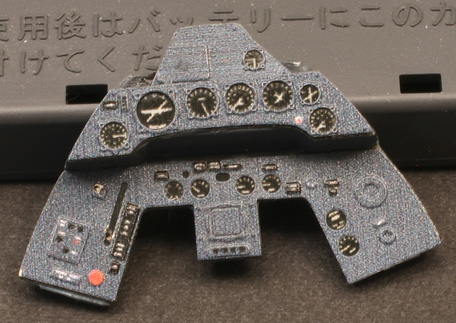
The cockpit is pretty well detailed right out of the box. Simply add some wiring and a few labels and it will turn out nice. There is one thing to look out for, however. The Eduard PE parts for the upper instrument panel will not fit under the coaming - it is too wide. Thankfully, it is an easy fix. Simply cut down the PE parts to fit, and add the seperate ammo counters later. See pics below. You can see about how much I cut it down.
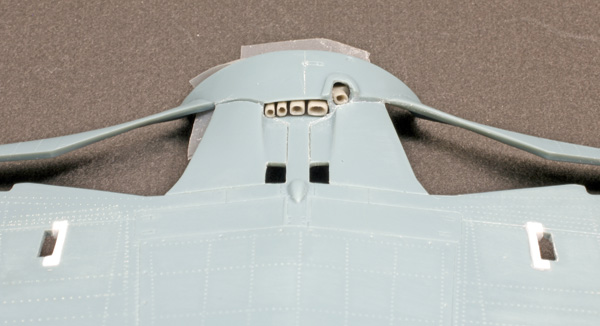
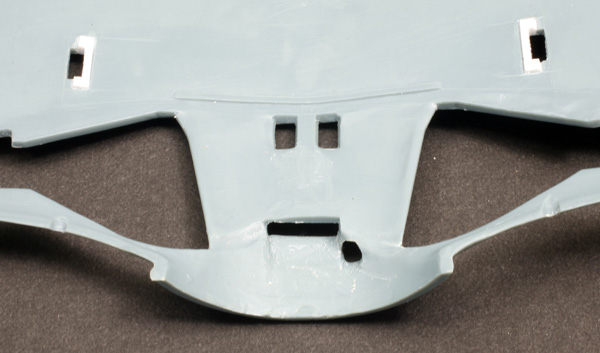
Visible edges should be thinned to make them look more like sheet metal. This is especially needed at the exhausts to make the resin inserts fit better. The outlets below the cowling are the worst. A lot of material needs to be removed to get everything to sit properly. I suggest separating the shorter exhaust to make it easier to fit. I have nearly finished mine. Before and after shots of the area are below. You can also see I have filled and re-cut openings for the shell casing ejection chutes. That is because I am building a MG armed A-1 and the kit openings are for cannon-armed aircraft. Sharp-eyed readers may also notice I have added rivet detail with a Rosie the Riveter style tool.
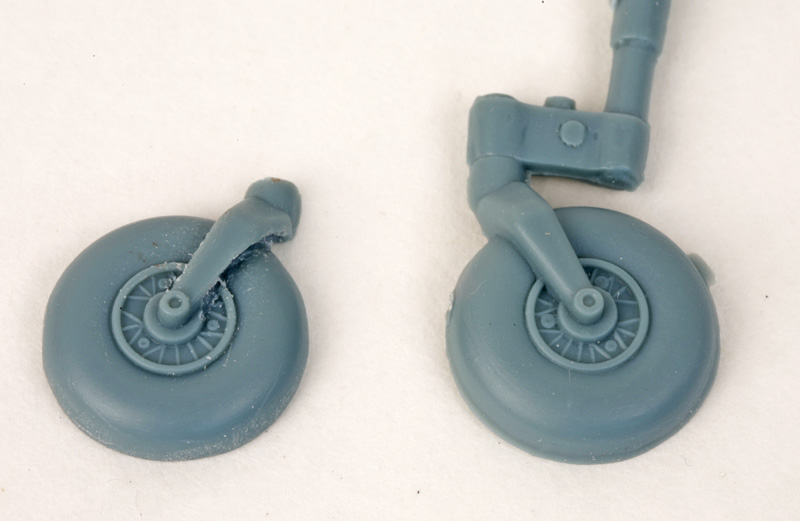
The kit has a tail wheel similar to the Hasegawa kits with the fork molded with the wheel halves. It definitely helps to take a modeling chisel and sharp knife and undercut the forks. I have nearly finished one half in the below picture, with the other half showing the difference without the undercutting.
The rest of the kit appears it will fit pretty well, again see my previous review of the A-1/2/3 kit for pictures of the major parts mocked up.
Summary
In conclusion, I have to give this kit very high marks. The large amount of options, decals, and the fact this is still the only way to produce a very early Fw190A makes this a great choice.
Highly recommended!
The Pacific Coast Models Fw 190A-4 is available from Kitlinx, who provided this kit for review.
References
- Squadron Signal Publications "Walk Around #22: Focke-Wulf Fw 190A/F"
- Classic Colours "Luftwaffe Colours Vol. 4, Sect. 1; Jagdwaffe: Holding the West 1941-1943"
- Classic Colours "Luftwaffe Colours Vol. 4, Sect. 3; Jagdwaffe: The War in Russia 1942-1943"
- Osprey Publications "Aircraft of the Aces #9: Focke-Wulf Fw 190 Aces of the Western Front"
- Classic Publications "Focke-Wulf Fw 190 Volume One 1938-1943"
- Aero Detail #6 "Focke-Wulf Fw190A/F"
- AJaKs Model Fan Encyclopedia #3 "Focke Wulf Fw 190"
- Model Art "Focke-Wulf Fw190A/F/G
© Ray Peterson 2018
This product is available from the following LSP sponsors
This review was published on Sunday, June 17 2018; Last modified on Sunday, July 08 2018