
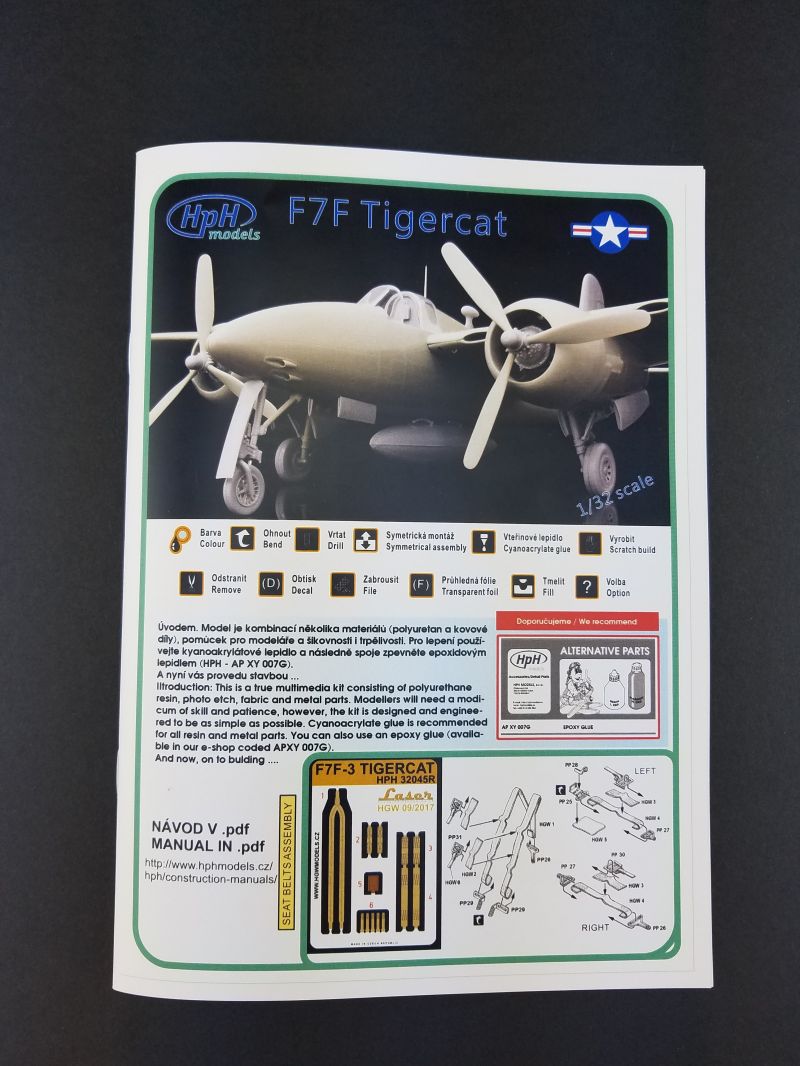
HpH Models | HPH32045R: F7F-3P Tigercat
Reviewed by Brian Leitch
When I first heard a "rumor" that HpH was going to release an F7F Tigercat in 1/32nd scale, I nearly fainted. It turned out to be the start of a modeling dream come true.
When I was just 7 years old, I had just begun to appreciate aviation, as my father and brother both had a love of anything that flew. My brother moved out long prior to this, but left behind his collection of model airplanes, and it helped to fuel my passion for the hobby. On one of the set of 8 glass shelves of models he left behind, sat a 1/72nd scale model of a DSB F7F Tigercat.
I remember how I loved that model, with is graceful ovalized fuselage, forward swept trailing edges, and of course those two enormous R2800 Double Wasp engines. I was in love from the very first time I saw the model. As a kid of course, I didn't start immediately immersing myself in finding documentation on the plane like I would have today, instead I played with that model till it broke; several times.
My passion for the Tigercat remains to this day, and when I was lucky enough to be given a shot to review a kit of my all time favorite airframe in my all time favorite scale, I jumped at the chance. The operational history of the F7F is not extremely long nor prestigious, but it was indeed a stepping stone for later designs. Ill not be delving into the history of the aircraft, but instead will concentrate on the model itself.
The Box
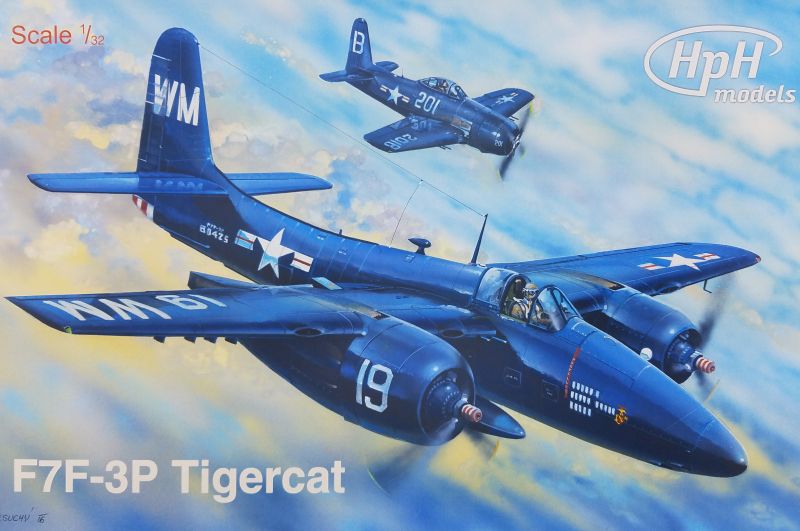
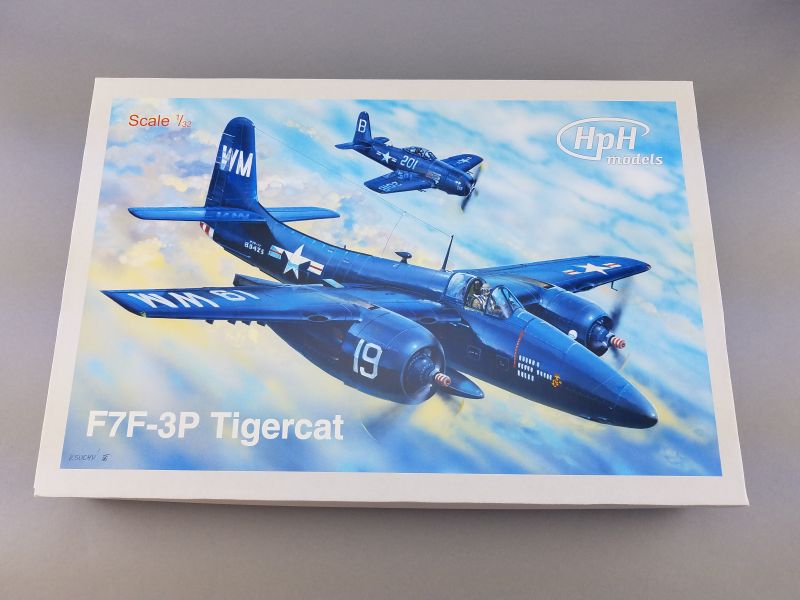
First impressions of a kit often start with the box and box art, and of course as a new release without much documentation on the web, the new HpH Tigercat was no exception. Upon inspection of the box, its a very robust cardboard, top opening box, that is quite wide and tall, but not very deep. Overall the box is comparable in size to the HpH Me-410, and slightly larger than the HpH Walrus box, with some very well done eye-catching box art:
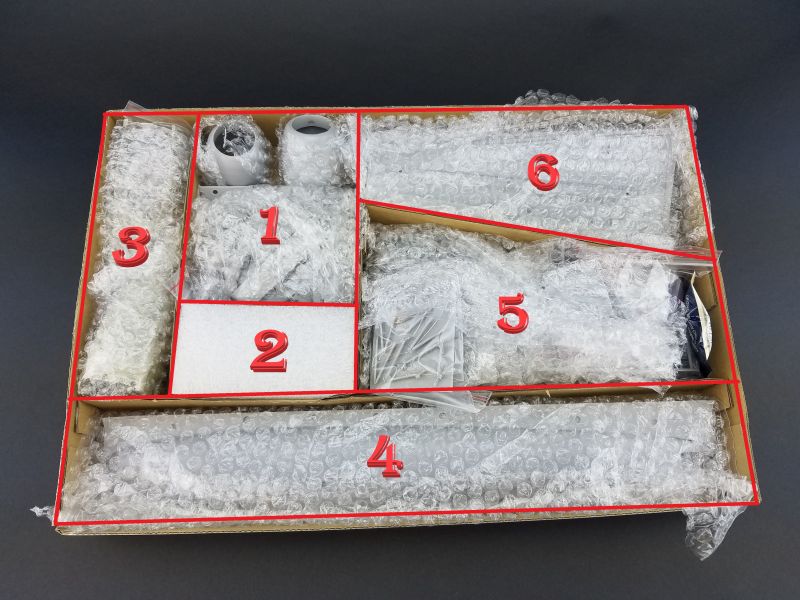
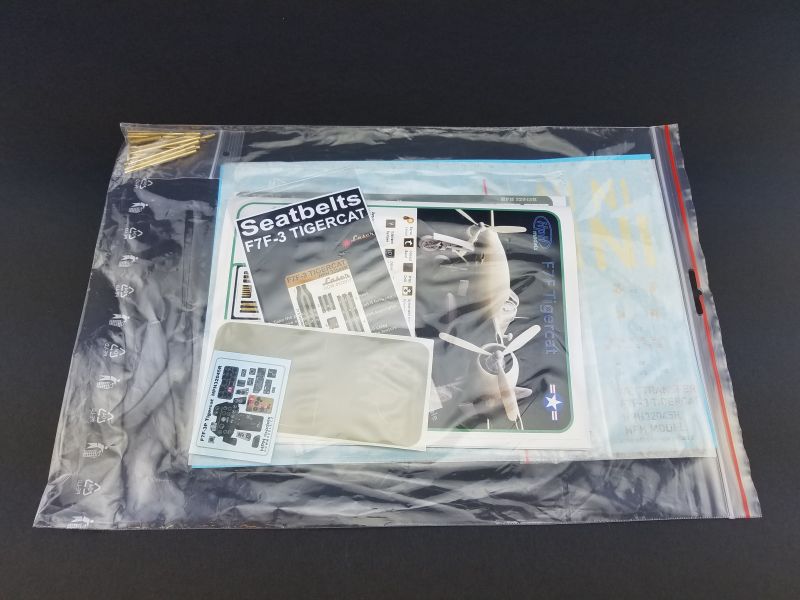
When you open the box, you will find that it is compartmentalized into 6 different sections, divided up by hard cardboard divisions that are jam packed with bubble wrapped resin parts, metal parts, water slide decals, fabric seat belts, paint masks, a giant photo etch fret, and an A5-sized full-color instruction booklet with some walk around photos.
There are several changes HpH has seemingly made with this Tigercat. This is the first time I can recall HpH having included paper instructions, they have significantly reduced the thickness of the "resin pool" that they use to mold some of their parts, and they appear to have possibly changed the resin they use in their kit. Although I cant confirm the last bit, the Tigercat resin is a light gray color, where all previous HpH kits I have are a brown gray color. This could only be a superficial resin color change, so I will have to wait to get into the build to see if the properties of the resin have changed at all.
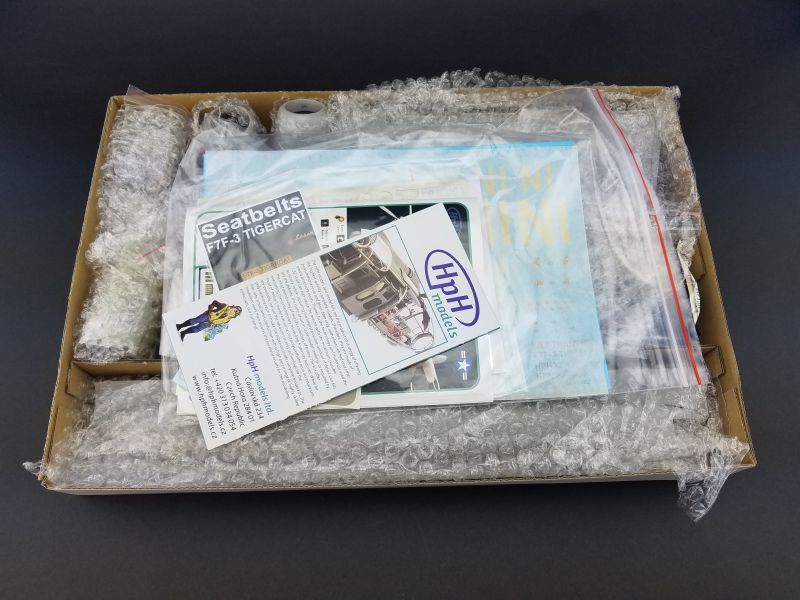
The 6 compartments inside the box contain everything you need to make a show stopping model. In this review, I will go over each compartment one by one and detail what you get in each section.
Section One
This section contains the two large resin cowls, the one piece resin center drop tank and a large bag of loose resin parts composing of the flying surfaces, gear doors, oil tanks, and engine front cases:
The one piece resin center drop tank is very well done:


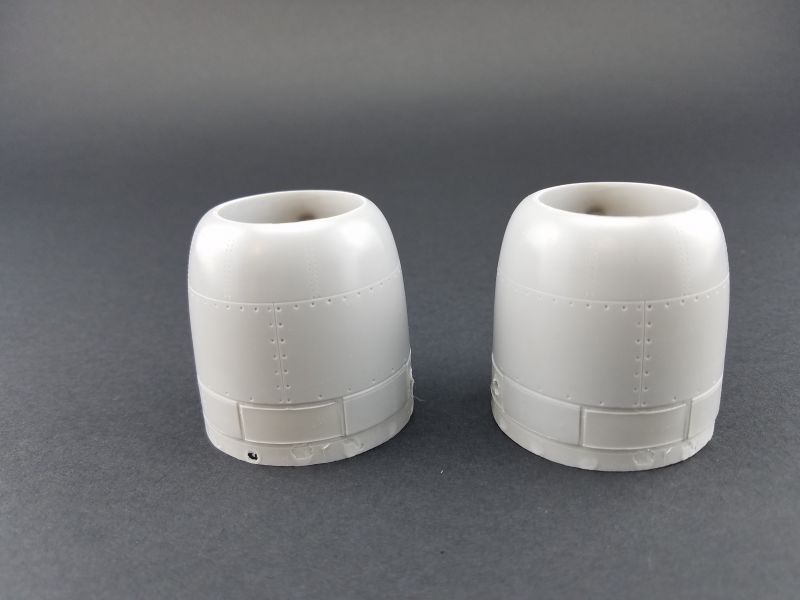
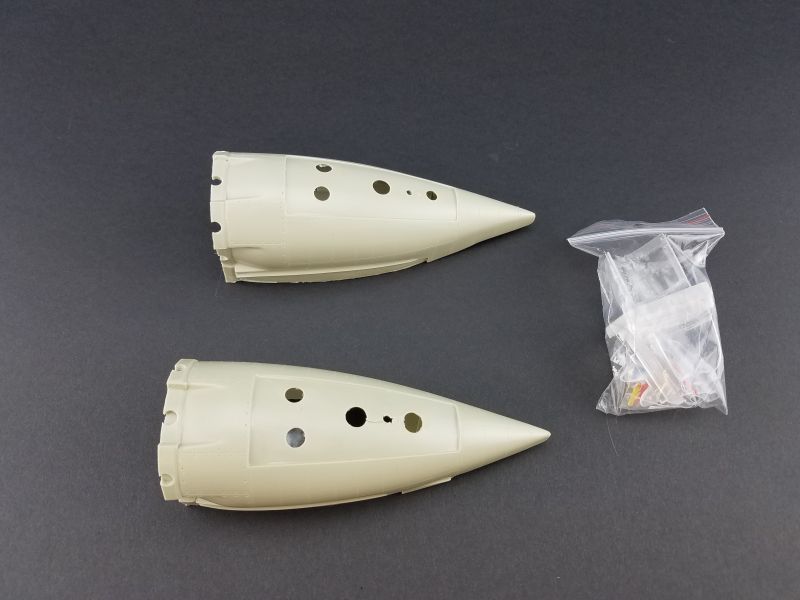
The two cowls have very intricate panel lines and rivets, and they look to only require minimal cleanup:


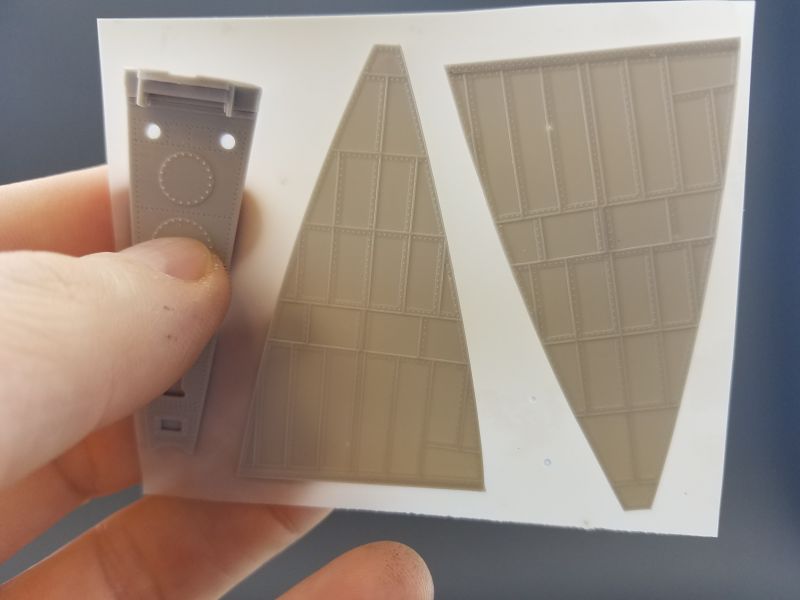
The large bag of resin parts in section one is practically bursting, and the majority of the parts contained within are the flying surfaces and gear doors. Also contained in this bag are the the front engine faces of the R2800 radials, as well as two solid resin shoulders that will give the two piece wings a very solid mounting mounting point. The gear doors are very well done and have some very nicely done recessed holes in them. I also like the way HpH have chosen to do the fabric representation. Its a tiny bit overdone in my opinion, but this is nothing a few swipes of a sanding stick couldn't remedy:


Section Two
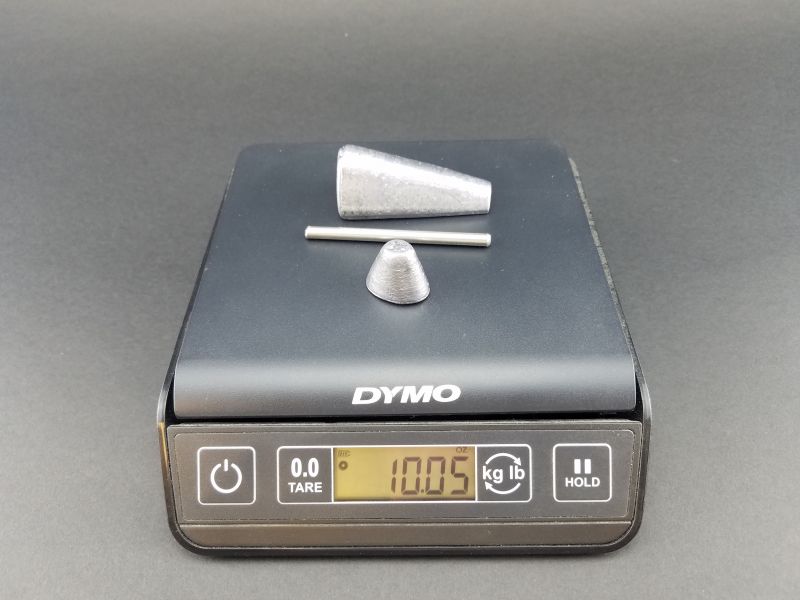
Section two contains 3 solid metal parts, two large pieces of lead nose weight, and a solid metal rod used as extra support for the wings. Often people tend to underestimate the amount of weight needed to counteract the tendency of a model with tricycle gear to tail sit. The F7F is a VERY large aircraft, and in 1/32nd scale, with resin as the medium, I expected a considerable amount weight to be needed in the nose. What I didn't expect is to end up with over 10oz of metal in the model when completed:
Section Three
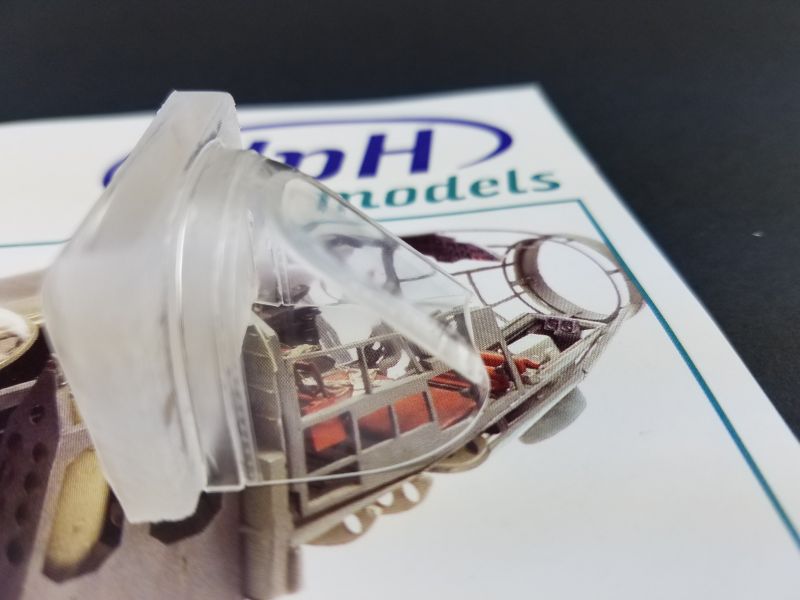
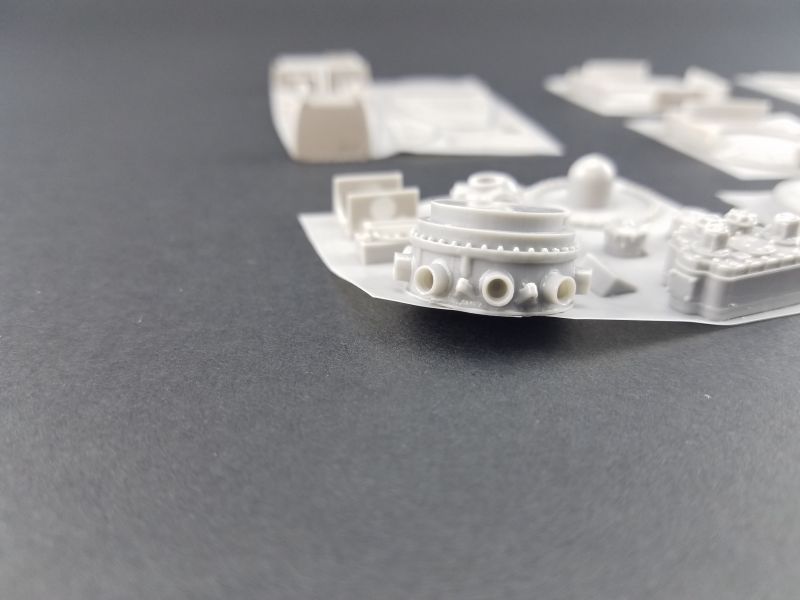
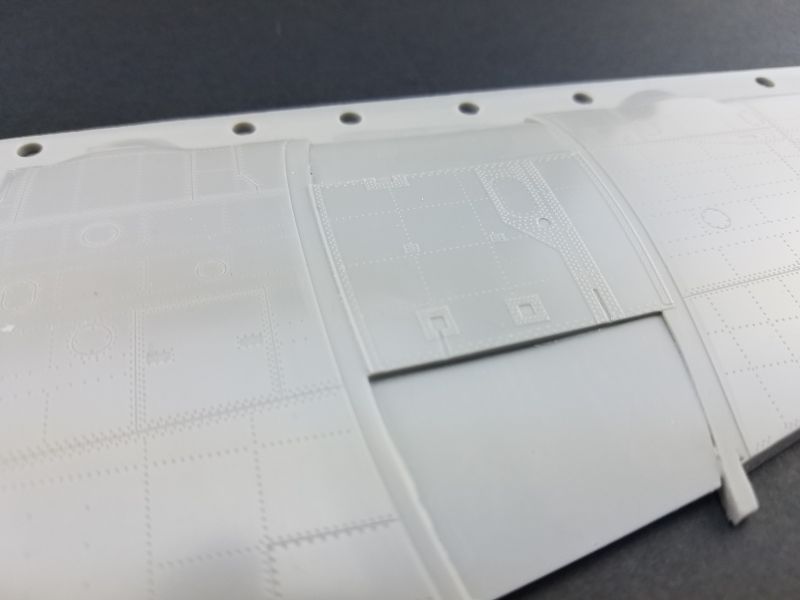
This next section contains the two engine nacelles with a small bag of clear resin parts nestled inside one of the nacelles. The OOB detail on the inside of the nacelles is very well done, with delicate panel lines and rivets, and some very crisp raised detail. Contained in this bag you also get a smaller plastic bag that contains pre colored formation lights and wing tip as well. The thickness (or lack there of) of the clear resin parts is very nice, and appears substantially thinner to my eye than some previous clear resin parts have been:


The clarity of both the clear resin canopy and windscreen is excellent:

Section Four
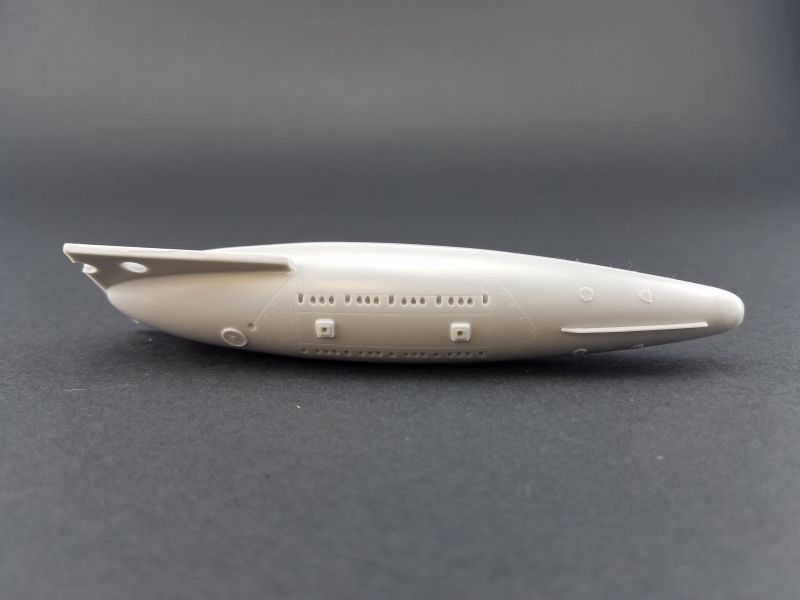
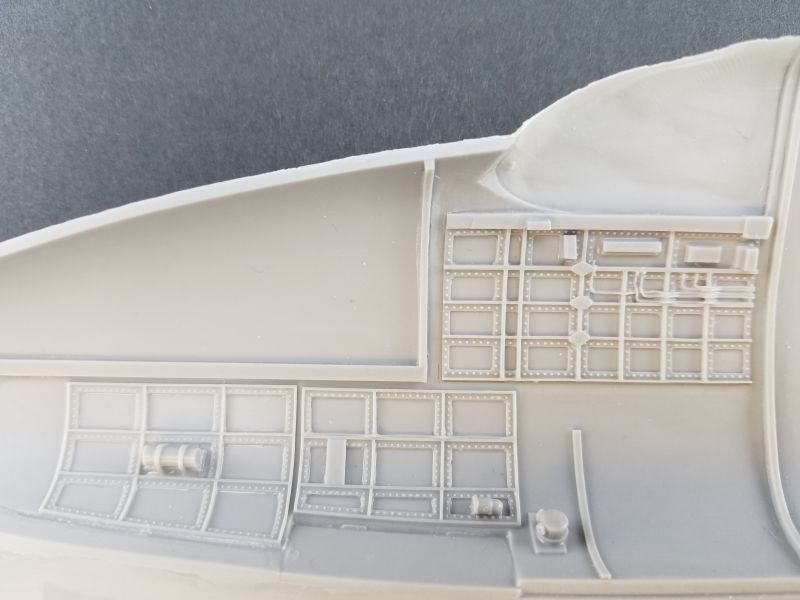
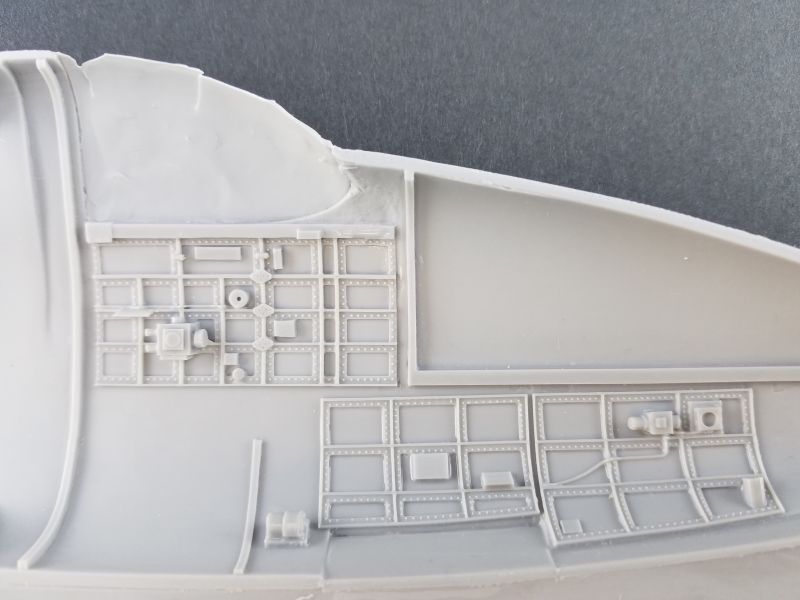
Section four contains the star of the show, the two piece fuselage. The fuselage halves are very well molded with crisp recessed panel lines where appropriate, and some stellar raised detail where appropriate. The fuselage will need to be trimmed in a few areas, but this will be a fairly easy task, as the resin flash covering those parts is only a few mil thick. In these areas, you can easily see through through the resin, and it shouldn't take any time at all to clean them up. The two centrally located holes on the fuselage are the holes where the previously mentioned metal rods will go through to add strength to the wing/fuselage joint. The F7F fuselage in 1/32nd is right at 16 3/4" long:
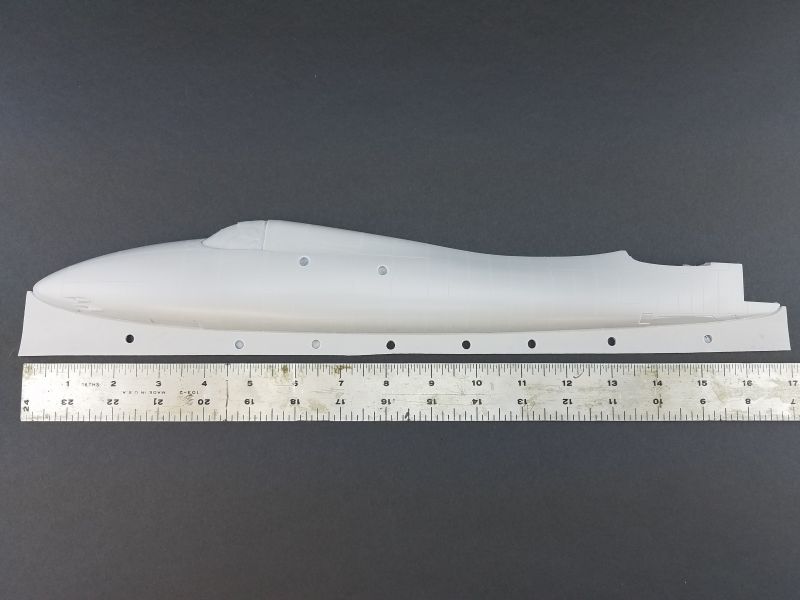


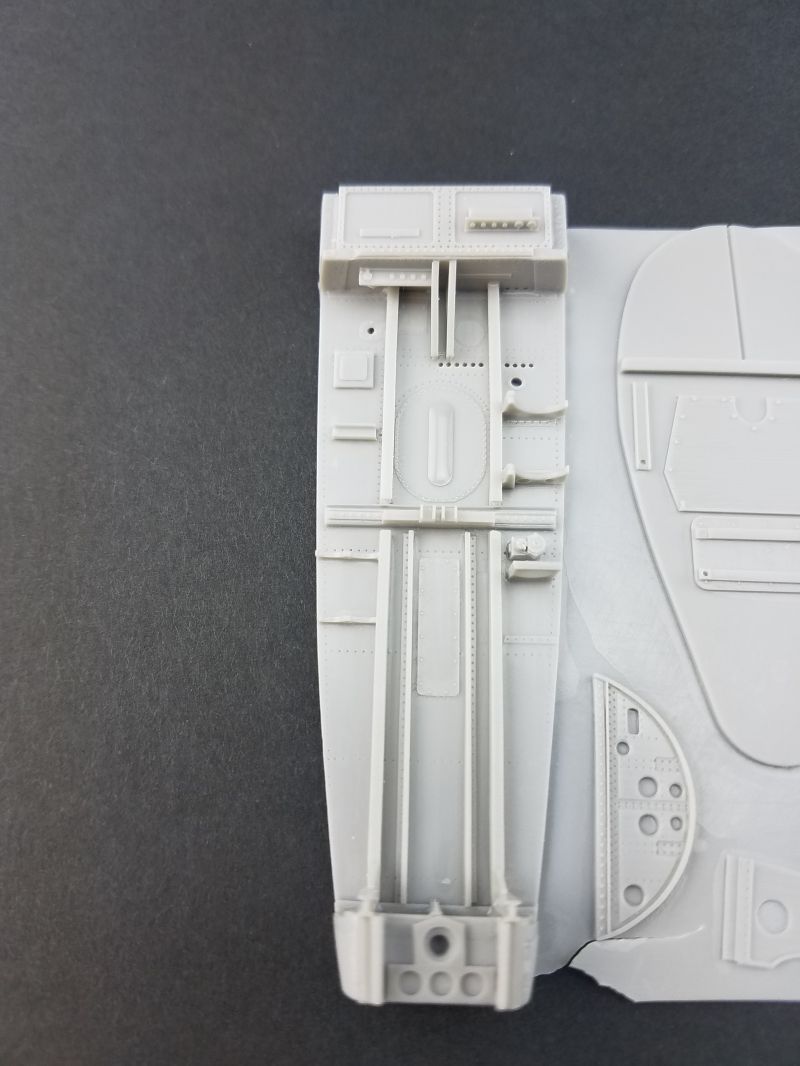
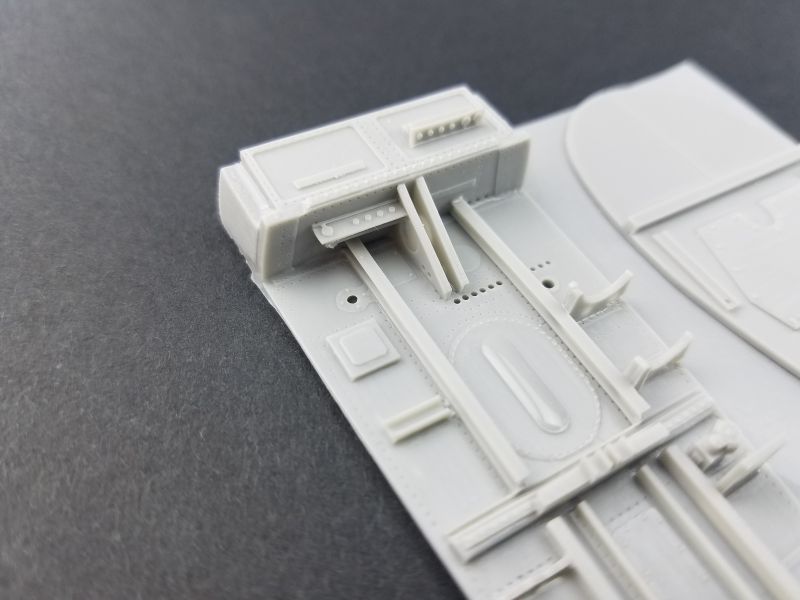
The out-of-box cockpit sidewall detail provided by HpH is also very well done indeed. The sidewall stringers are raised appropriately, and there is wire detail molded on, but it does look good in situation. This detail is very well done, but it will still leave plenty of room for the super-detailer that really wants to take it to the next level:
Section Five
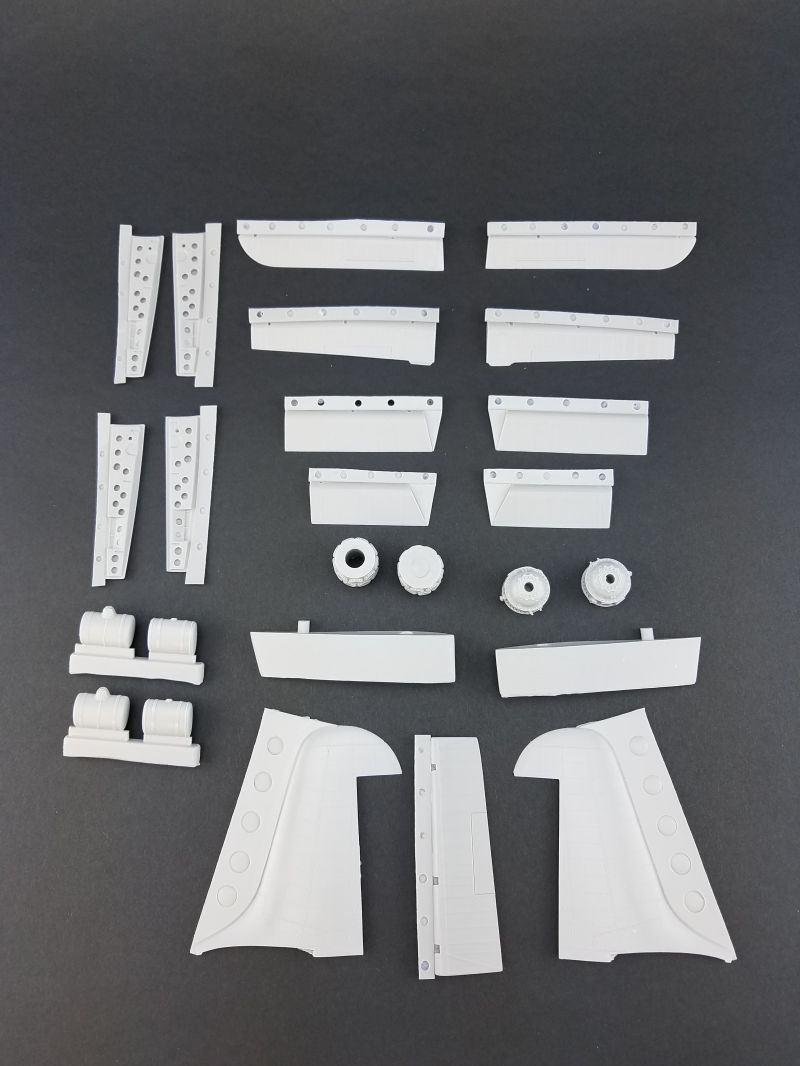
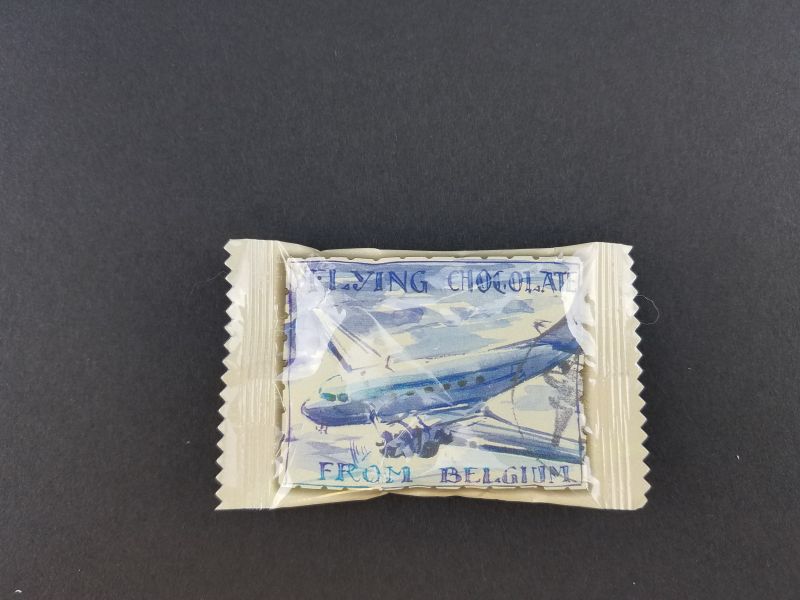
This section of the kit contains four large bags of individual and grouped resin parts in HpH's normal style of a resin "pool" versus pour blocks, as well as the traditional HpH Belgian chocolate:
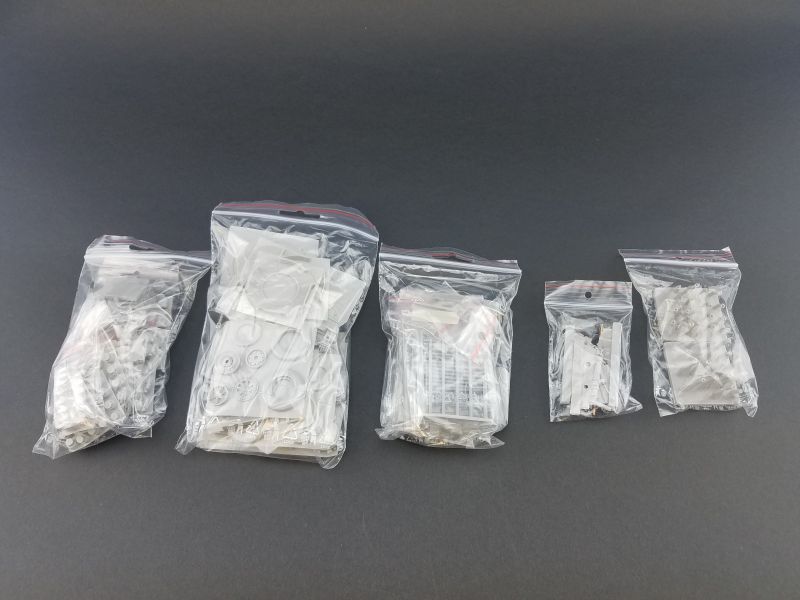
In the past, HpH has also supplied parts in the same resin pool style of molding. It was very laborious in that you really didnt know necessarily where the actual part ended and the resin pool began. Part of the issue in the past was this resin pool was quite thick and it required judicious amounts of cutting and sanding. The difference with this kit is HpH has significantly reduced the thickness of the resin pool. Two good examples of this are the sheet that contains the wheel well upper surfaces, and the sheet that contains the some of the R2800 parts. A sharpie marker and a flat sanding block can go along way in separating and sanding these types of parts:
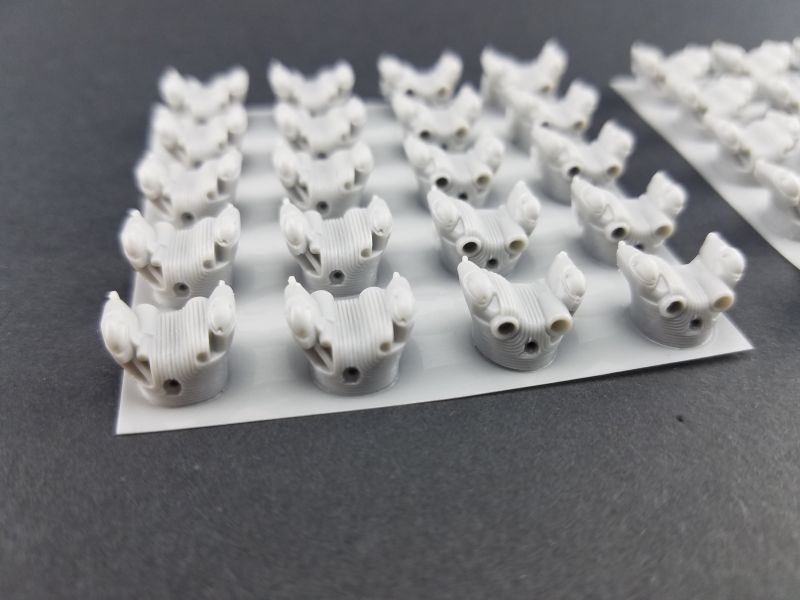
In section five you also get cockpit parts, hollow exhausts, hard wire impregnated resin landing gear, resin wheel well detail and stringers, resin weighted wheels (that are NOT once piece which did surprise me a bit, but glad they are at least weighted) and the rest of the engine parts which also contain some gorgeous looking cylinder heads:


With over 10 Oz of weight in this model, the nose gear will indeed have to be very stout. In this case, instead of going with solid brass lading gear, HpH have chosen to go with a hard wire directly through the center of the resin nose gear, out the bottom and directly through the top of the tire. To me this looks extremely poor, and is very evident as it is one of the first things you notice when looking at the complete model:
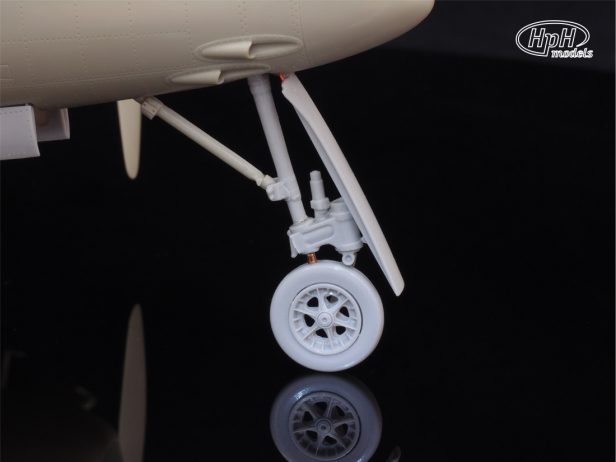
In my opinion this is not acceptable in a very expensive high end kit, and is one of the few disappointments in an otherwise stellar looking kit.
The nose gear is extremely cantilever, but I believe even with 10 Oz of weight in the nose, a solid brass nose gear would support it. The CG of the Tigercat is SO far forward (the MLG are canted forward pushing the CG ahead of where one would think it would be) the model will naturally balance almost neutrally, even with that much weight in the nose:
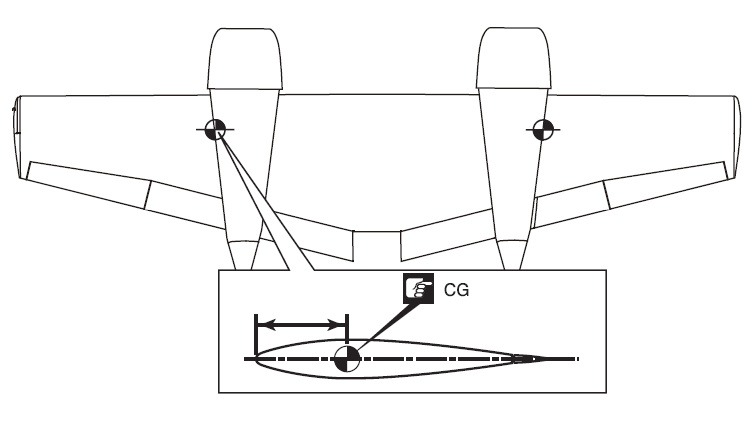
With the MLG canted forward, and with so much weight behind the center of gravity, these forces will cancel each other out, and the nose gear will not actually have to support the full 10 Oz. Most of this weight will be carried by the MLG, which in this case are also wire impregnated. The main issue here is that each of the MLG have a small bit of the hardened wire protruding from the resin in places. Unfortunately, these places are right where the oleo struts are. I am not sure why HpH decided against including brass gear with this kit, but I hope the after market manufacturers come to the rescue here.
Section Six
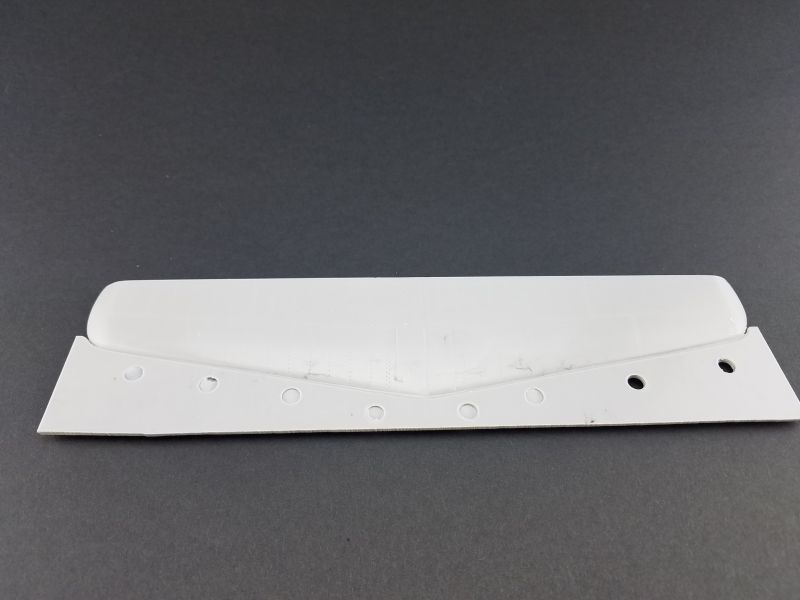
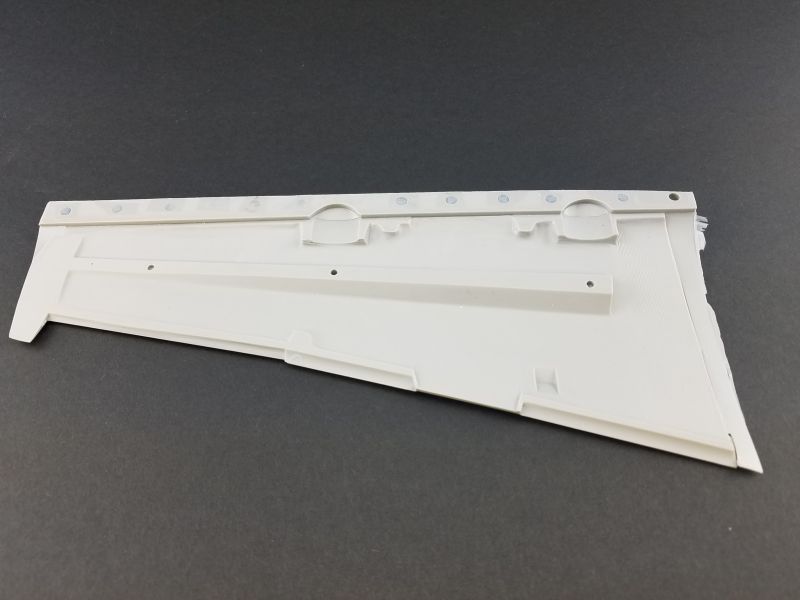
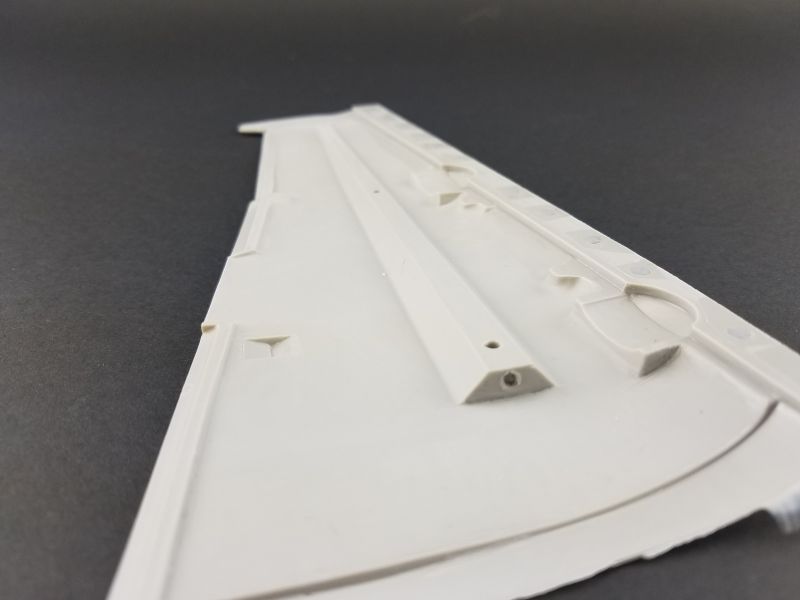
The sixth and final section of the HpH Tigercat box contains the 4 wing half sections, and the one piece solid resin horizontal stabilizer. The solid resin horizontal stabilizer is also another reason this model will require so much weight in the nose, but it is very well molded. Both the wing halves and the horizontal stab have very delicate recessed panel lines, with some excellent looking raised detail on the upper wheel well sections of the lower wings. The wing span will be approximately 20":
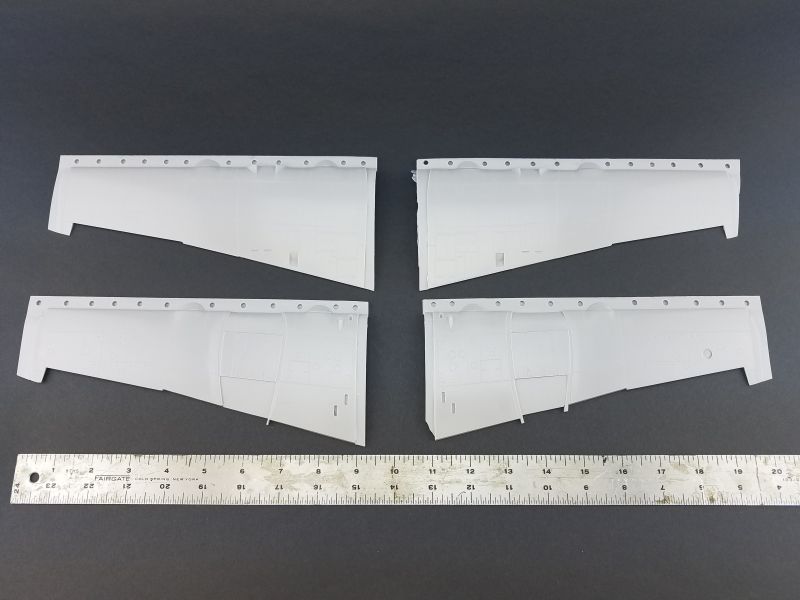


Another new (to me at least) thing HpH has done here is some clever molding in an attempt to keep the resin wings from warping, and to give the Tigercat wings some extra rigidity and strength. Molded on the interior side of each wing panel are some trapezoid shaped bars. These bars are thick enough that they should actually prevent the wings natural tendency to warp with temperature and humidity changes. These bars should also help give the wings some extra strength, and help keep any sagging at bay. My wing copies were very straight and true, with zero evident warping:
Instructions Photo Etch And Misc
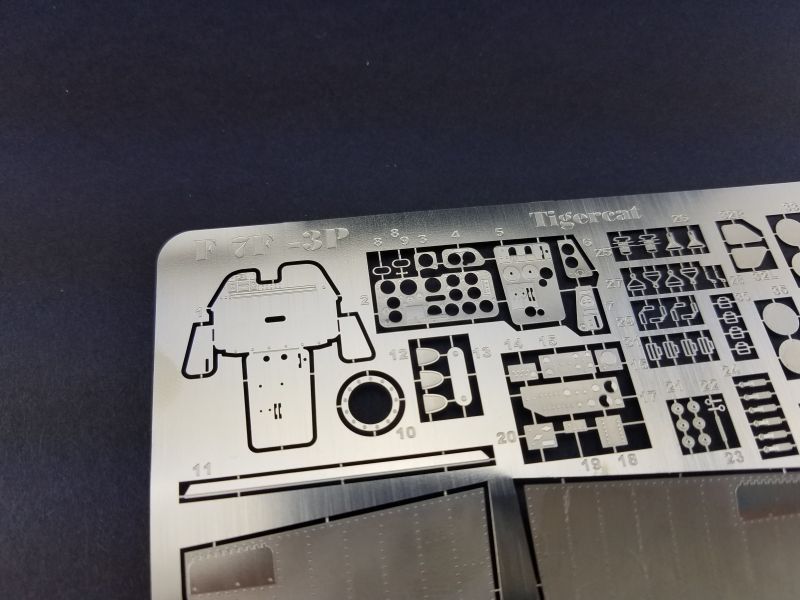
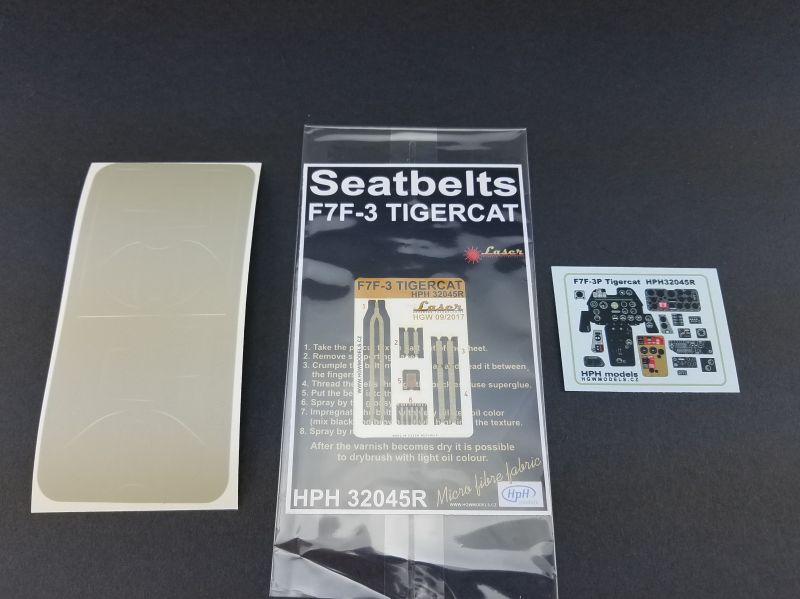
Contained in a large clear zip lock bag, setting atop the segmented compartments in the box, you get a 40 page A5 sized color instruction manual that contains 5 pages of color walk-around photos mixed in with color photos of the actual model being assembled. You also get a large PE fret, a small baggie of brass parts for the under wing rocket bodies and warheads, a set of HGW fabric seat-belts and some vinyl paint masks for both the interior and exterior of the windscreen and canopy:


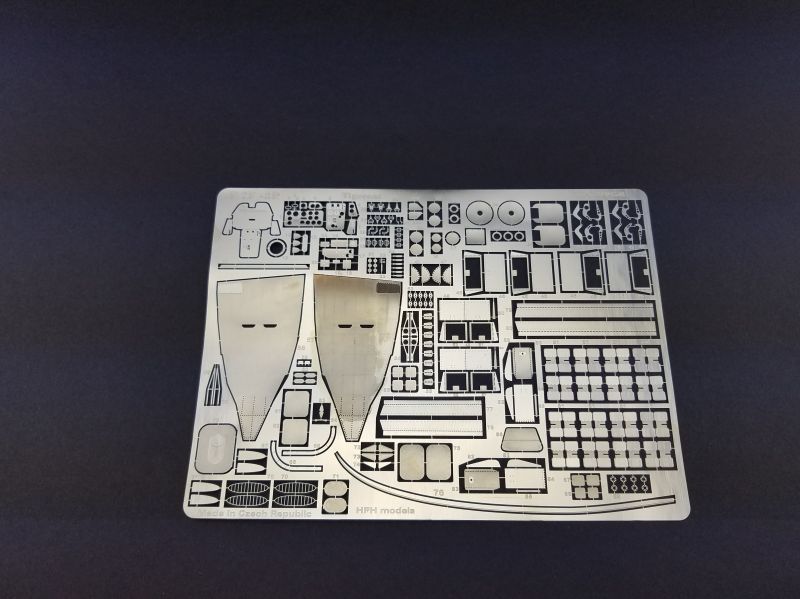
Here is another new twist for me in an HpH kit; no color PE. In this case the large single PE fret contains the cockpit IP, along with the instrument backing, and they are non-color, standard brass PE:
Instead of color PE, HpH have chosen to implement some very nice looking decals for each individual piece of the IP PE. HpH also devotes an entire page of the color A5 manual to how to put these decals on step by step:

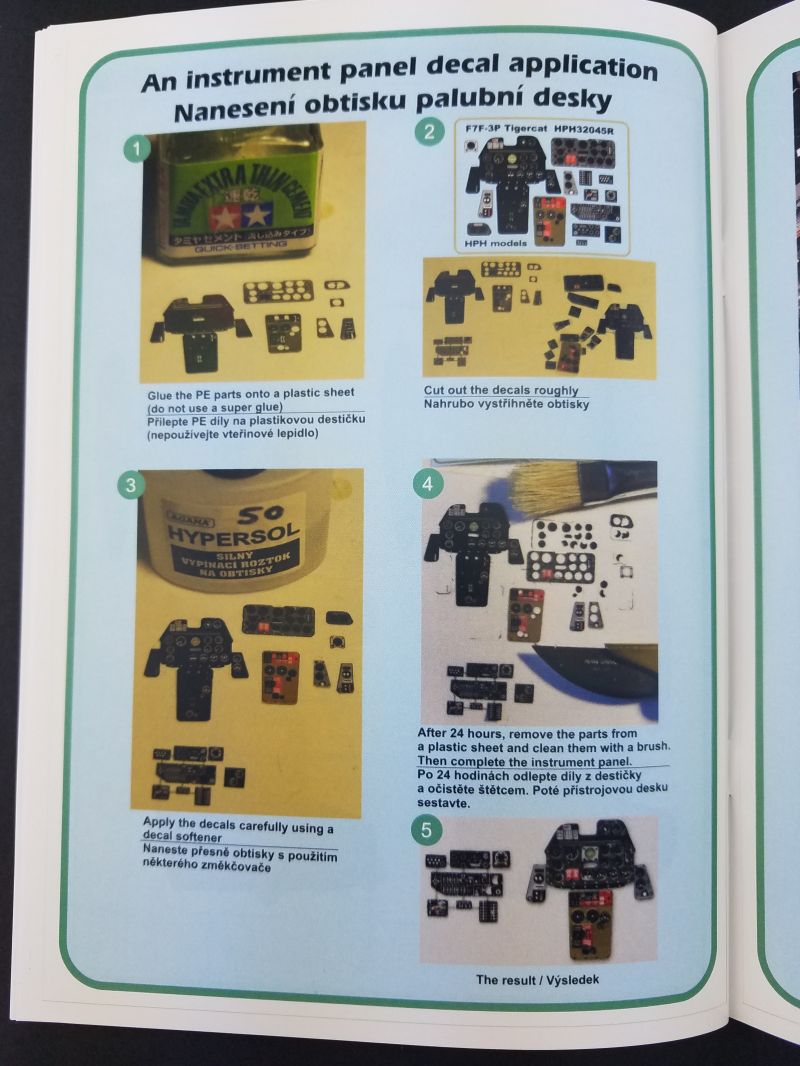
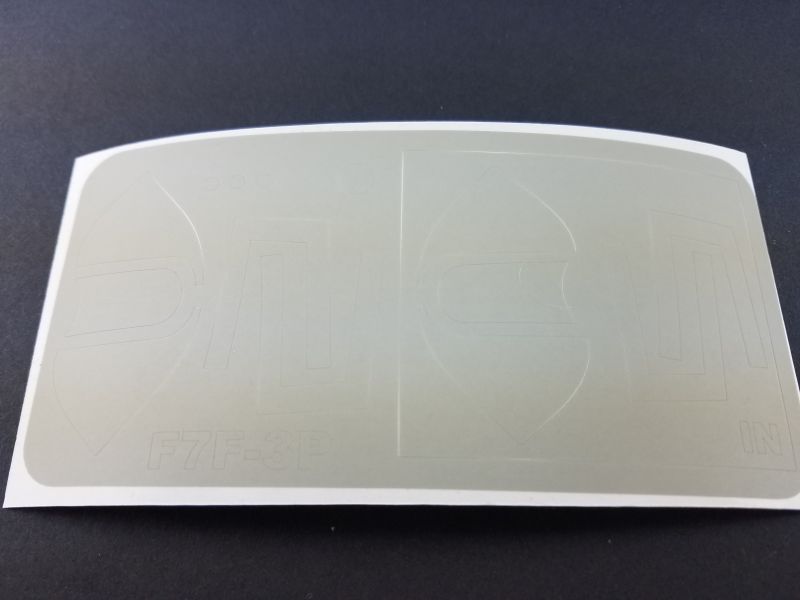
I do like PE, but I have to say that in the past, Eduard's color PE has had a tendency to have the dot matrix off on the colors, or their PE sometimes contained colors that were just plain wrong. If this solution works out well, it could be a nice jump forward in technology where you can retain the very fine minuet details and stenciling that color PE offers without the strange dot matrix issue or erroneous colors. HpH also gives you a set of nice looking vinyl paint masks for the canopy and windscreen, both inside and out, as well as fabric laser cut seat-belts from HGW:
If you look closely, you can see the paint masks labled for IN and OUT. The IN is just a bit smaller overall than the OUT:
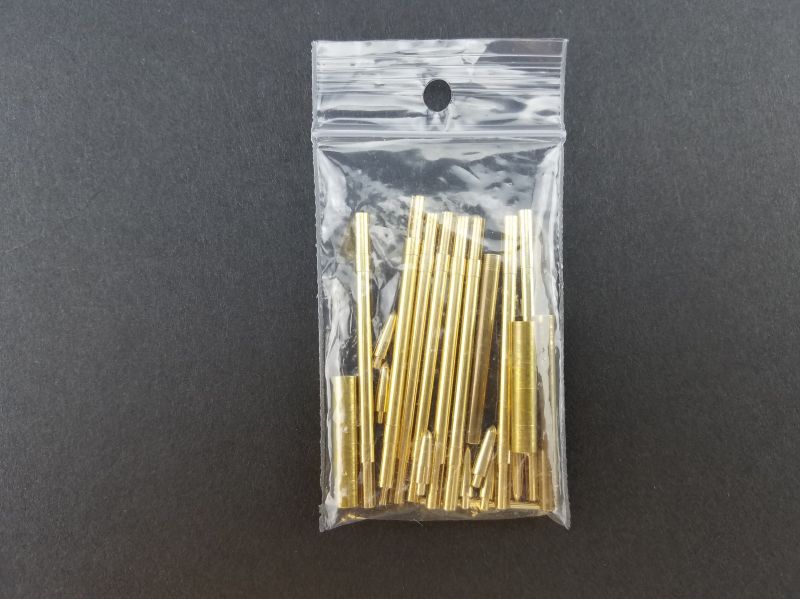
Lastly, in the large clear zip lock bag you get another smaller zip lock bag that contains the turned brass rocket warheads and rocket bodies. These too are very well done using slots cut in the brass tube to attach PE fins. They are indeed a very nice touch:
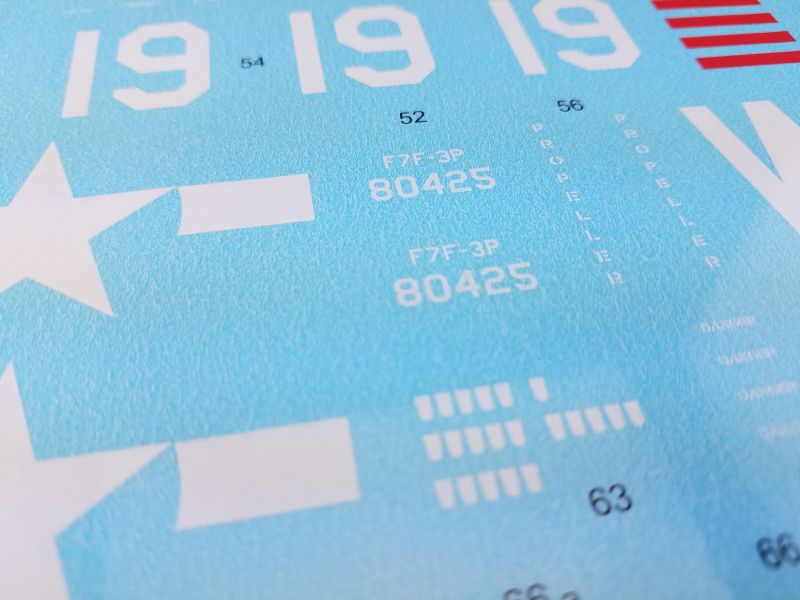
Decals And Markings
Contained in the large clear zip lock bag, you also get a large glossy sheet of HpHs "wet transfer" type deals. They look very nice, and are all in good register, but having never used this type of decal, I cannot speak to how they perform.
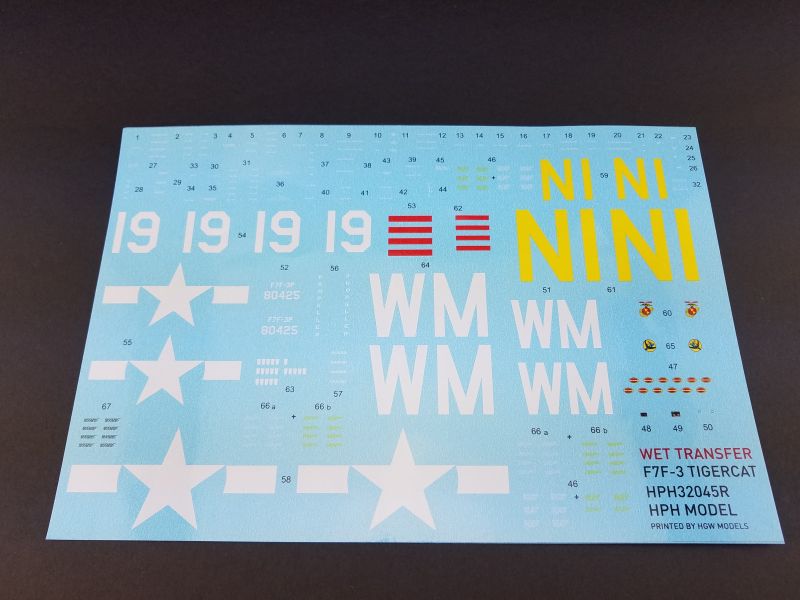
HpH provides decals for two aircraft:
- F7F-3 BuNo.80448:
- VDM-254;
- Oakland CA, 1946


- F7F-3 BuNo.80425:
- U.S.M.C. - MAG-33;
- Phoang, Korea, 1953


Conclusion
Resin kits by their very nature, can be extremely challenging builds. They take time, effort, passion and a specific skill set that can be learned but has a fairly steep curve. HpH's F7F Tigercat in 32nd scale is no exception to that rule. Its a big, complex, highly detailed kit, with a LOT of parts, and although HpH has done everything possible to ensure that it's as straightforward and trouble-free a build as possible, this kit is not going to be for everyone and certainly not for the inexperienced builder.
This is definitely one of the most expensive kits I have ever encountered, but I have to say, with the extraordinary detail, high end resin parts, and just about every accessory a modeler could want included, this kit is a must have for anyone who loves the Tigercat, or Grumman Cats in general.
I definitely would not recommend this kit to a beginning modeler, or any modeler with no resin building experience. I also have come to the conclusion that this model needs solid brass landing gear. Its weight, complexity, and the lack of precision as to how the hard wire was impregnated in the resin gear (some wires are sticking out of the resin in critical places) dictate this model should have solid brass landing gear. I sincerely hope one of the after market manufacturers ends up making a brass correction set, as this is really the only true disappointment in an otherwise astoundingly detailed and complete kit. However, for anyone with some resin building experience under their belt, and especially those who desire a 1/32 scale F7F, this kit is by far the most detailed and accurate F7F Tigercat on the market in any scale.
HpH did a stellar job with this kit, and they have incorporated a LOT of detail, and some really nice engineering features. If you have some resin building experience, love the Tigercat and can afford it, this kit is a great choice. HIGHLY recommended.
© Brian Leitch 2017
This review was published on Sunday, October 22 2017; Last modified on Tuesday, April 09 2019