
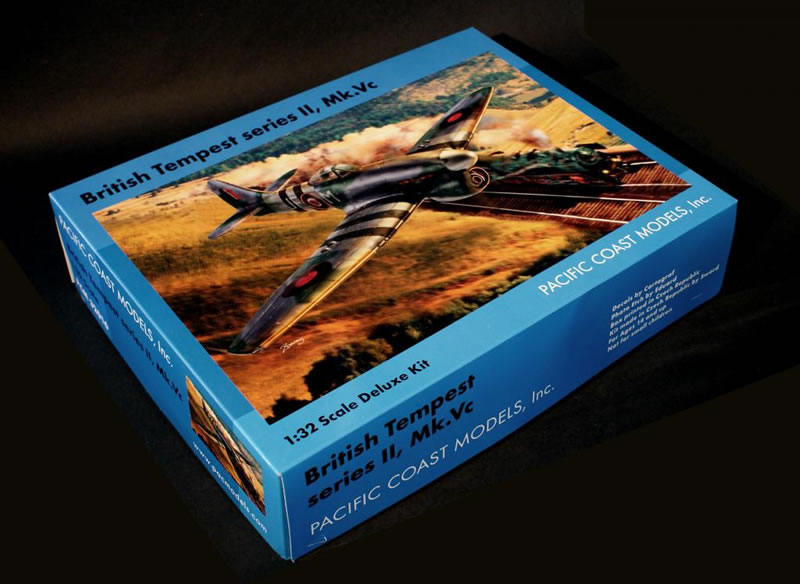
Pacific Coast Models | 1/32 Hawker Tempest MK.V
Reviewed by Cees Broere and Jeroen Peters
1:32 Hawker Tempest MK.V
Short Run Injected Plastic, Photo-etch and Resin
Manufacturer: Pacific Coast Models
Catalogue # PCM32016
Available directly from Pacific Coast Models
Finally, a Hawker Tempest in Our Scale!
The wait has been long but now we have a 1/32 kit of the Hawker Tempest V. Since it hit the shops early July it has been subjected to a lot of web discussion. Talk about loose and damaged parts, wings and fuselage halves being warped, non-fitting radiator inserts and spinners etc. It seemed like this kit was rushed to get it in the shops as soon as possible. The Tempest was dead in the water before it even had a chance to be fully appreciated. This review is intended as an unbiased in box review of PCM’s latest offering.
What’s in the Box?
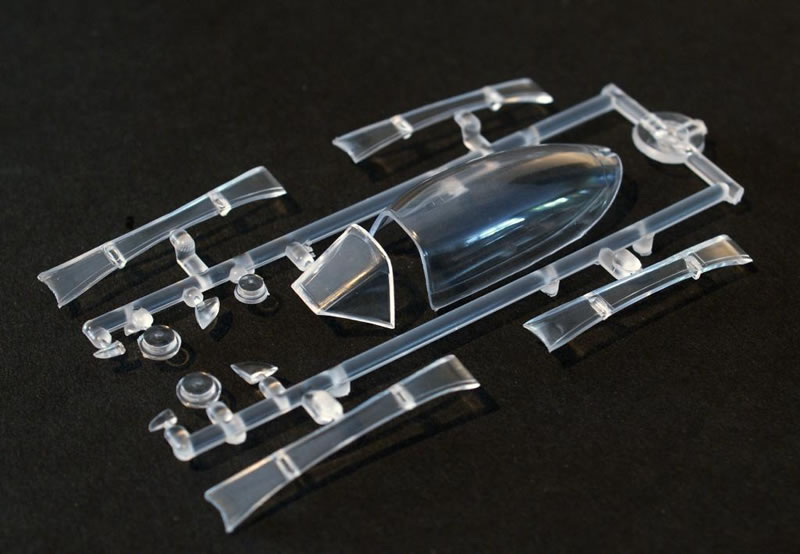
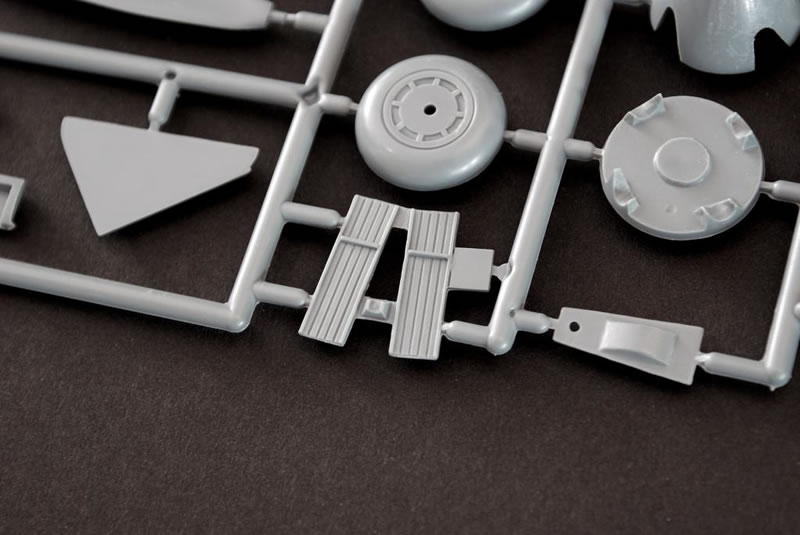
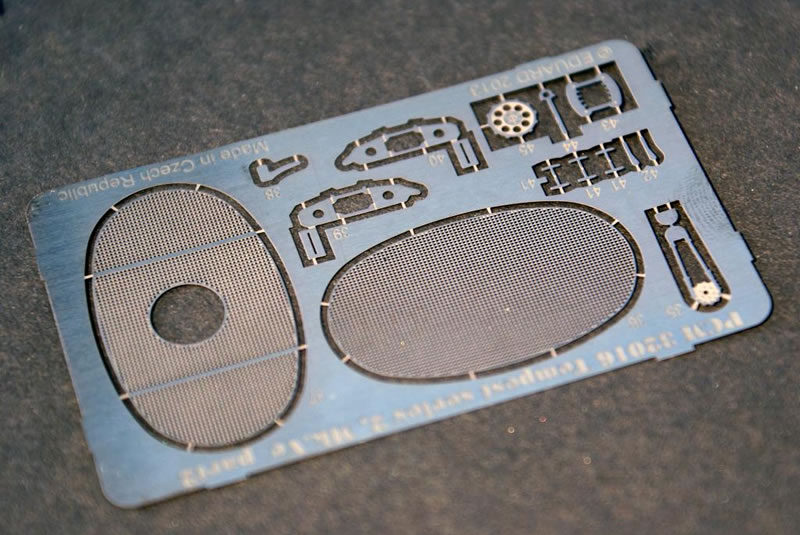
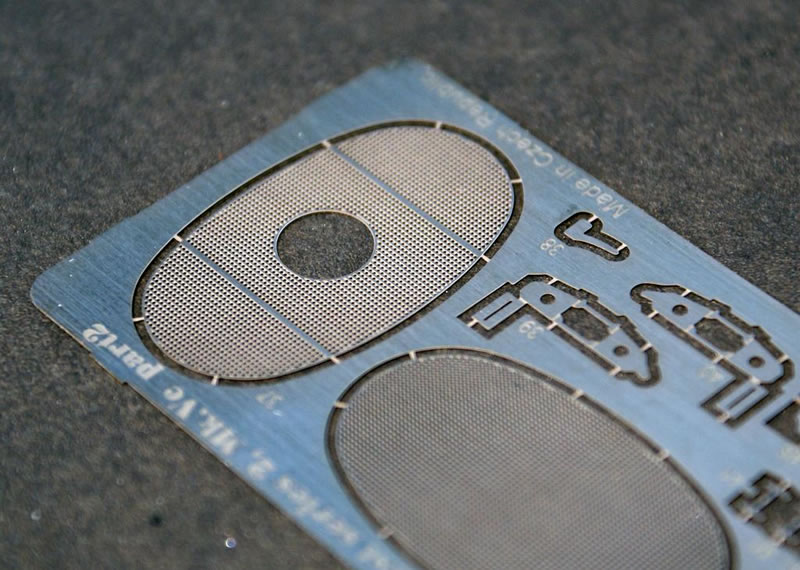
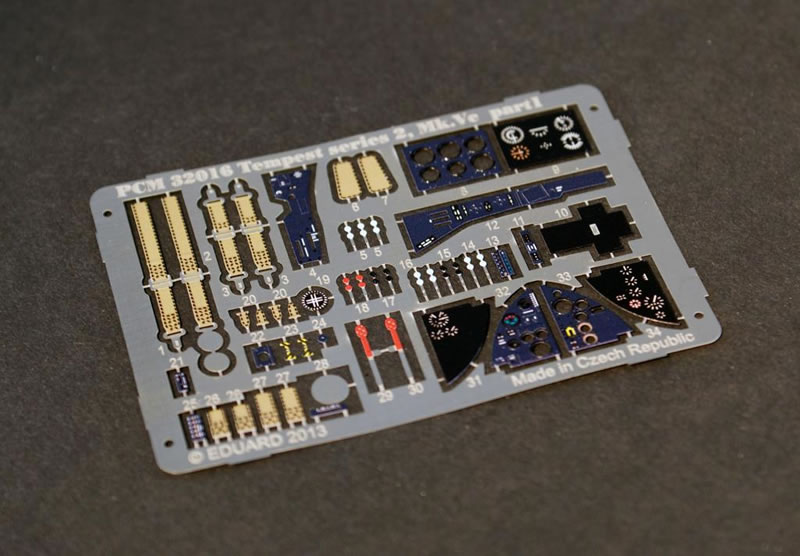
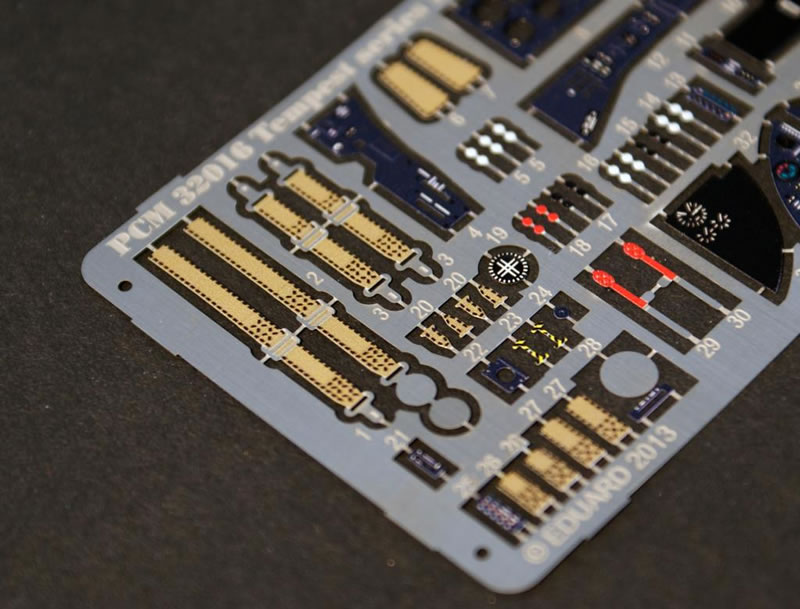
The kit comes packed in a large box with artwork showing a Tempest overflying a steam train. The box is is big enough to contain three kits. Our sample was packed in a zip-lock plastic bag. The transparency sprue is separately packaged avoiding damage. The parts count is surprisingly low for such a large model. despite this the interior detail is quite comprehensive with various levers, fittings etc. Photo-etch is included care of Eduard. This consist of coloured instrument panels, consoles, trim wheels, chains, seatbelt and non-coloured oval radiator faces. Resin parts are provided for the rudder pedals, exhausts with hollowed out ends and wheelbays. The designers really do know their Tempests.
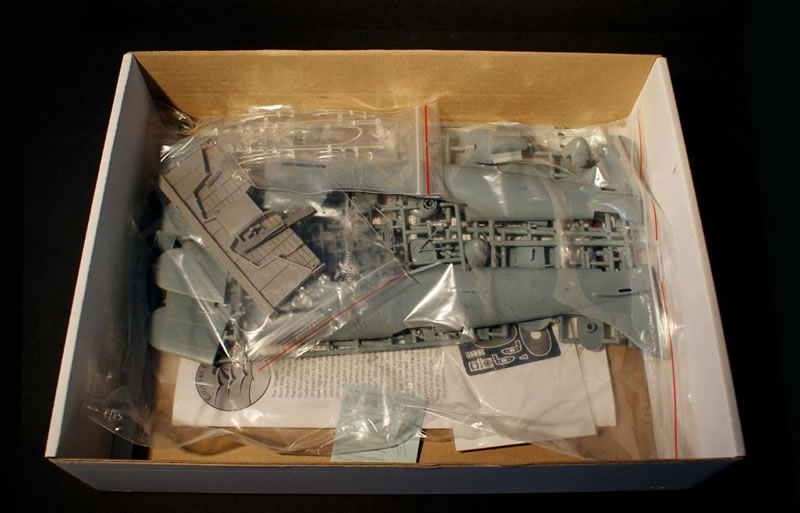
Oversized Box
The oversized box allows the parts to shift. This could cause parts to come loose from their sprues. In our example the chair and radiator back plate came loose.
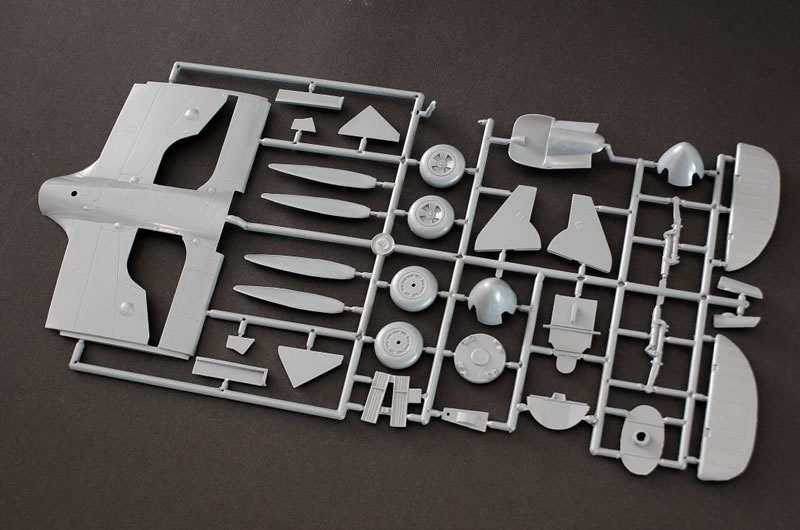
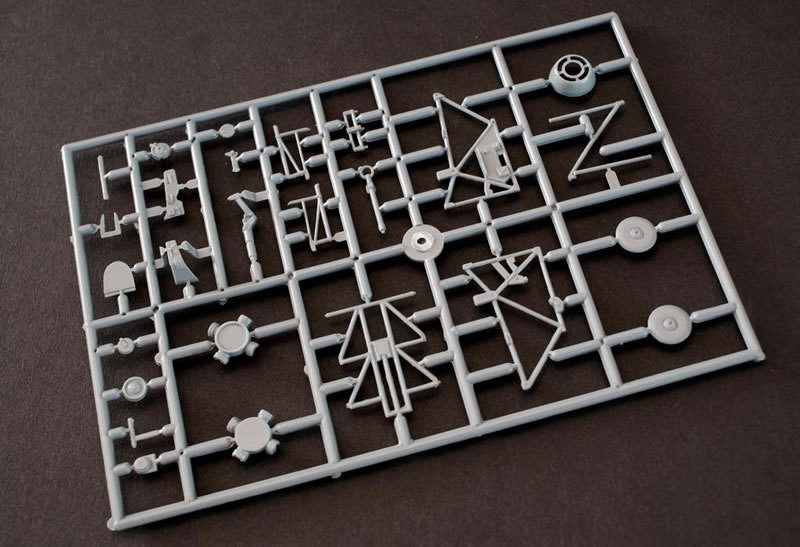
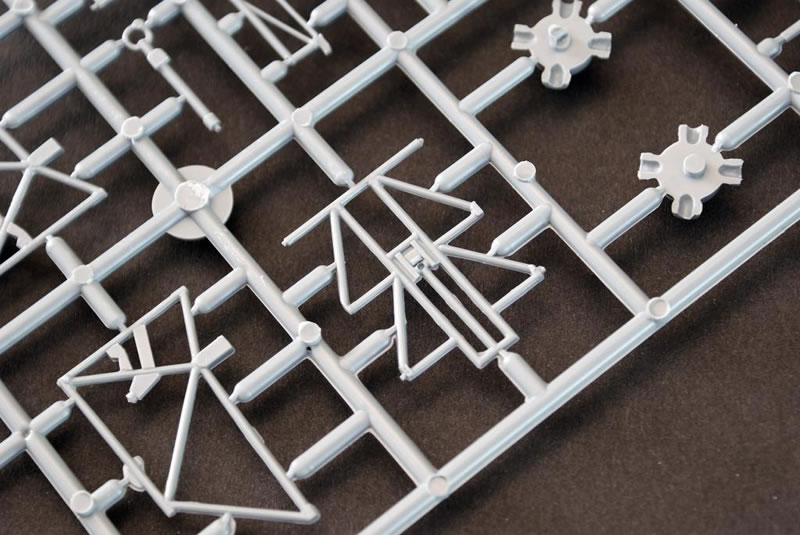
The Plastic
The plastic parts have been made by Sword and come in dark grey thickish plastic. Being limited run low pressure injected there is quite some flash but that is unavoidable with this kind of kit. Some hefty sprue gate towers show this. Most parts must be cleaned up to remove moulding seams or flash. The plastic is what we have come to expect from PCM and that is a good thing. Not too soft and not too brittle. It's easy to work with .This is no shake and bake kit though, and should be treated as such to avoid disappointment. If you want an easy kit then this is not for you.
Panel Lines
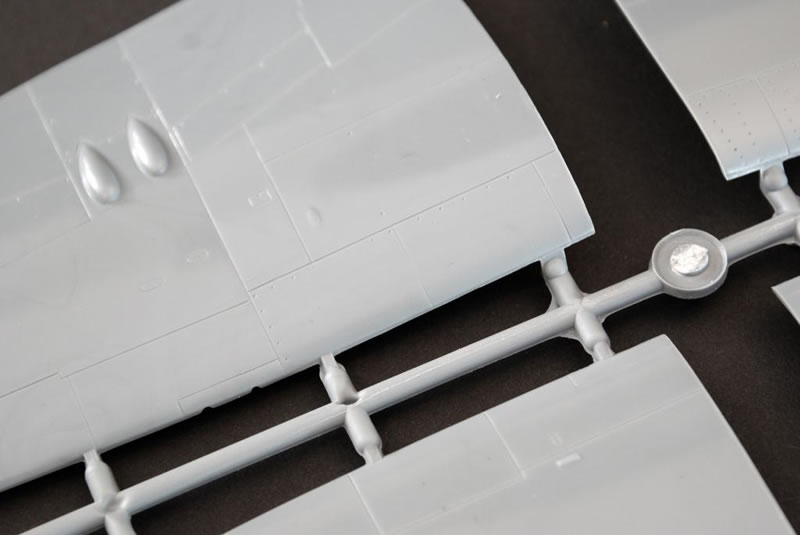
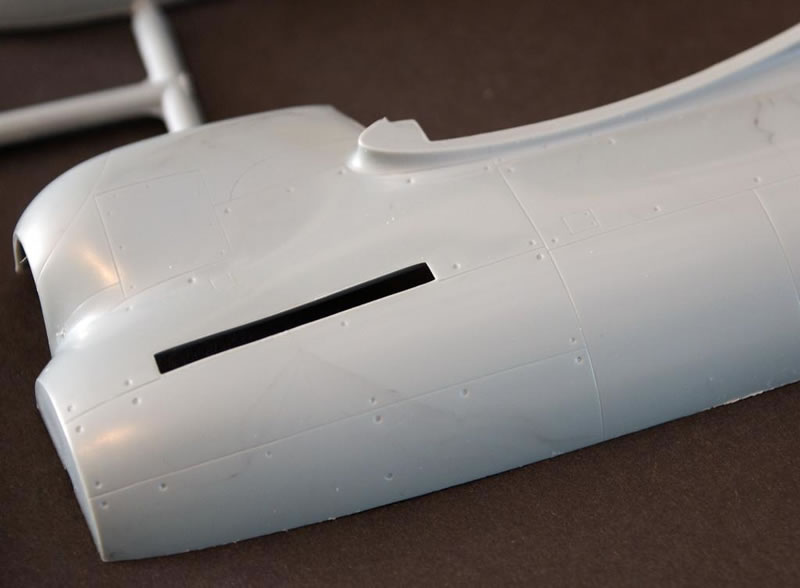
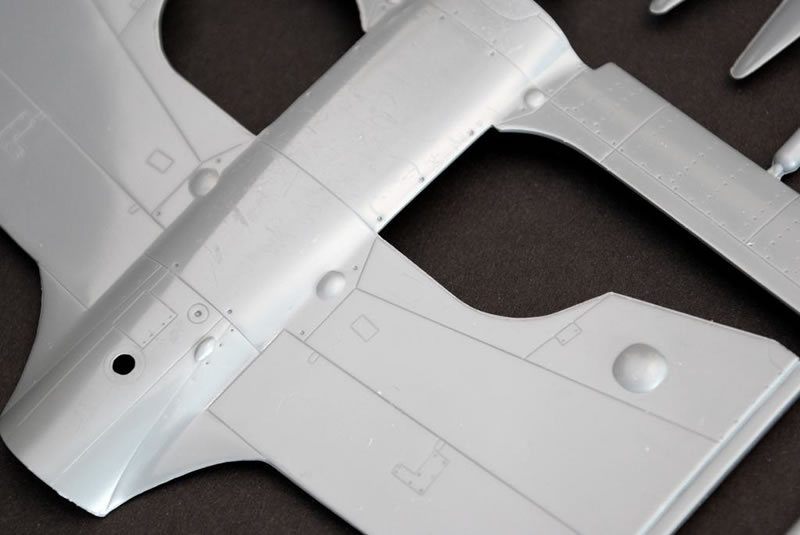
These look very good compared with the various drawings. They are a bit on the heavy side but a coat of paint (or light sanding of the surface) should make them less obvious. The elevator and aileron separation lines are a bit faint. They could have been deeper. Apart from some areas such as inspection hatches and the starboard inboard leading edge there are no rivets. Aside from this the oil tank was located in the port side leading edge and had a distinctive rivet pattern which is nicely rendered here.

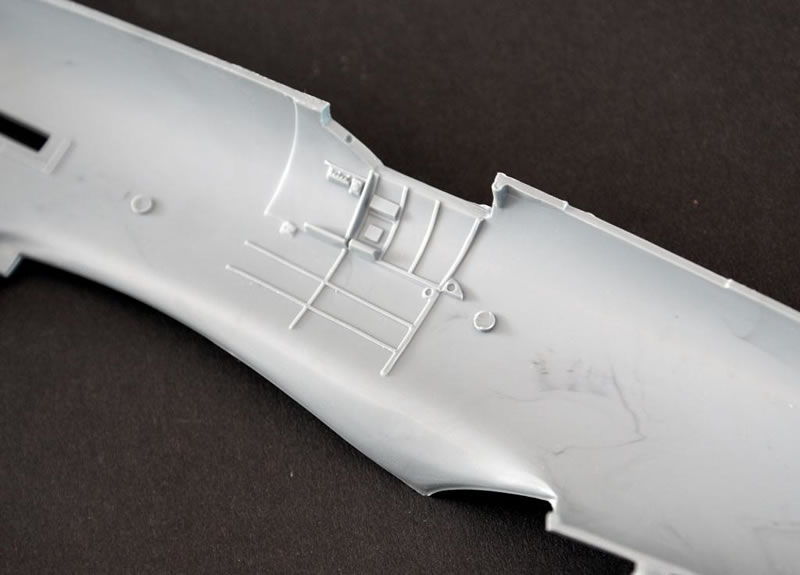
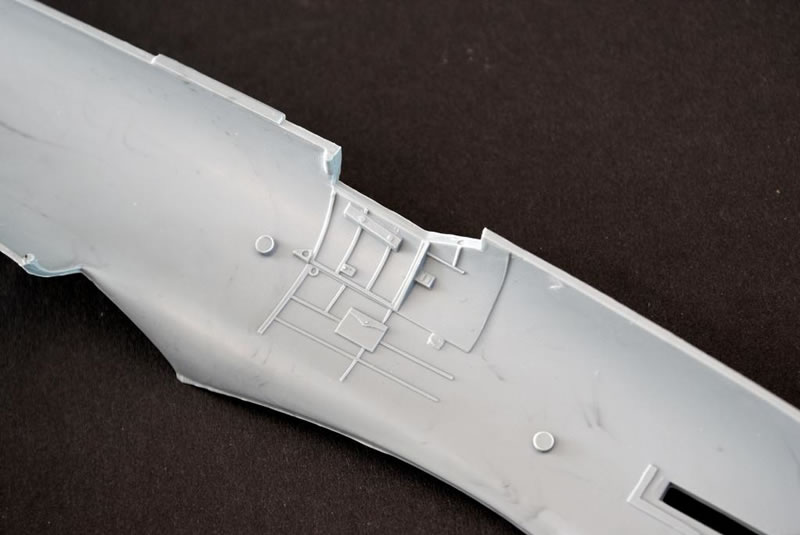
The Cockpit
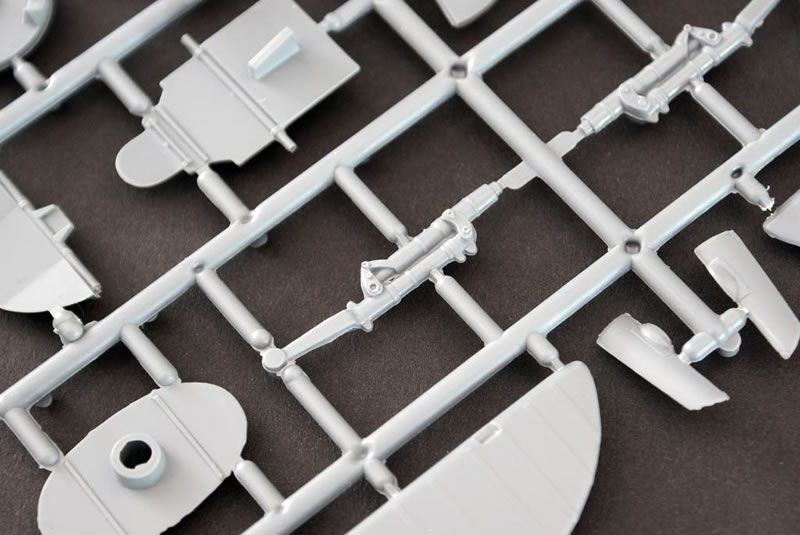
It is very well furnished with almost nothing left out. The basic framework is present with the various consoles, boxes, chains etc. The seat has the characteristic quilted backpad and adjusting levers. Control column and rudder pedals are rendered in plastic and resin and looks good.The attention to detail is impressive as even the undercarriage emergency kick-down pedals are included. Although not much can be seen through the small cockpit opening.
Some points are noted below:
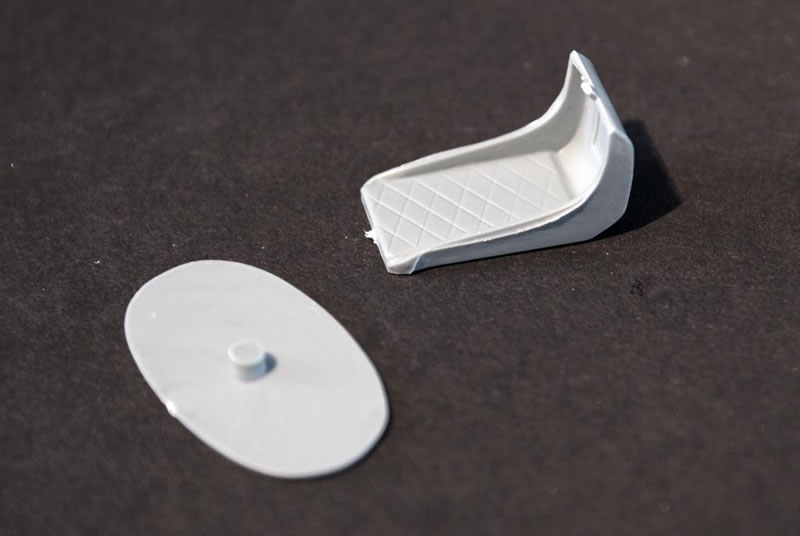
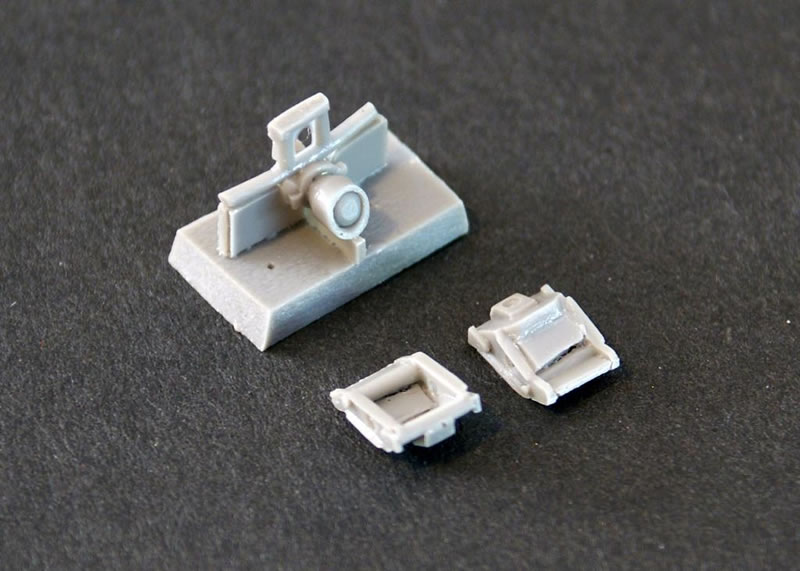
Gunsight
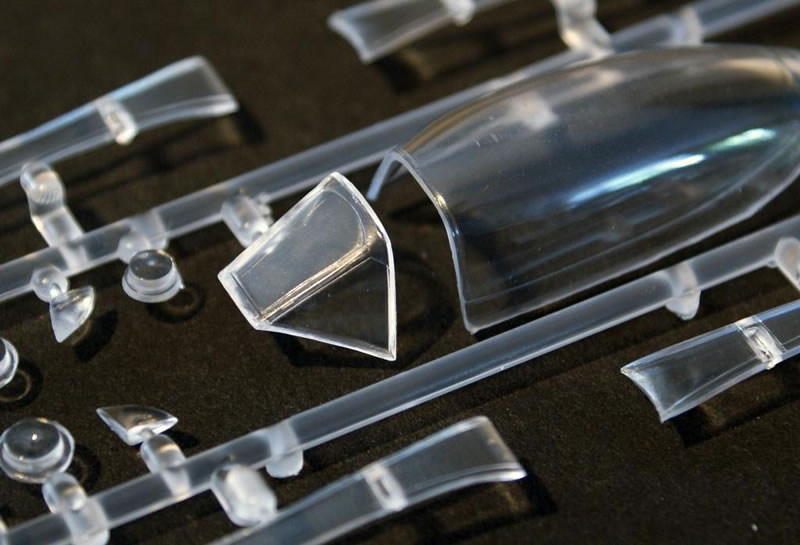
The Tempest did not use a gunsight with reflector glass. The graticule projected directly onto the windscreen. A primitive head up display. This has been correctly depicted in resin in the kit. See photo below. Also in this photo are the resin rudder pedals. Nicely detailed.
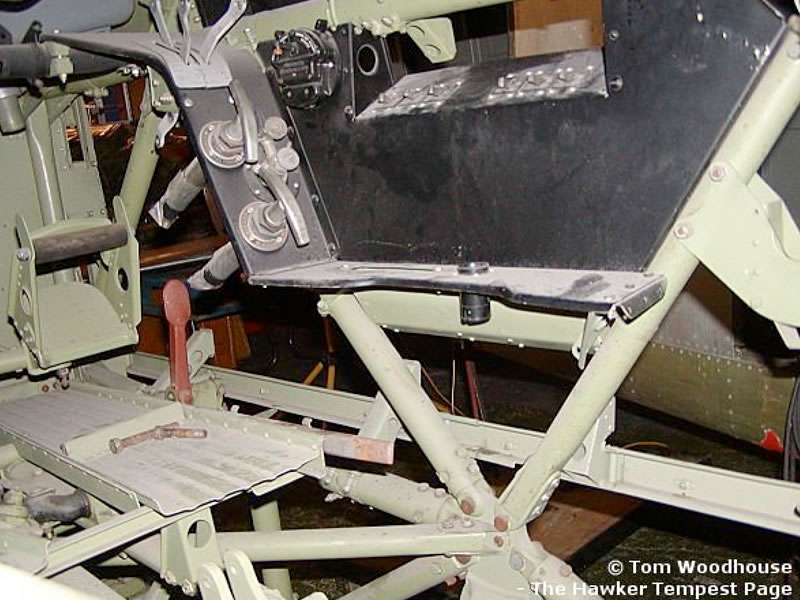
Heelboards
There’s been some controversy recently about the heelboards sloping or not. They are in fact sloping down towards the nose. The pilot would push them down.
Fuselage
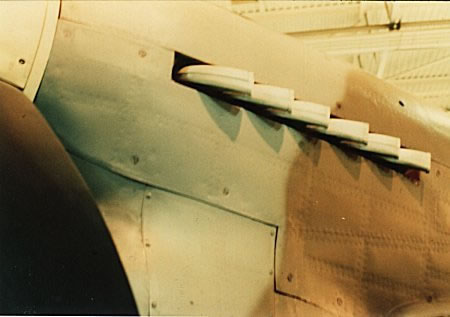
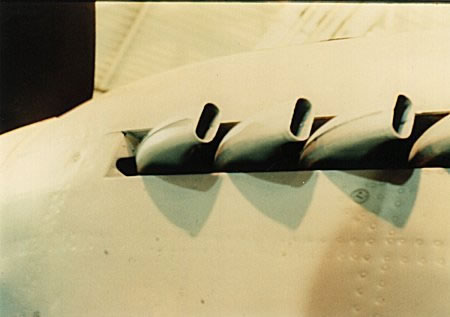
The Tempest is a large aircraft and it shows. The rudder is separate and can be positioned at an angle. The radiator intake consist of a large oval opening. Herein the radiator assembly needs to be fitted. This is detailed with photo-etch parts.But it's the standard radiator core, no cuckoo doors are provided. After D-Day various dust filters were tried in the field. The radiator shutter flap is fixed. This should be cut out and fitted with an actuator (not provided). There was no warping present on our sample. However a dry fit is recommended before gluing.
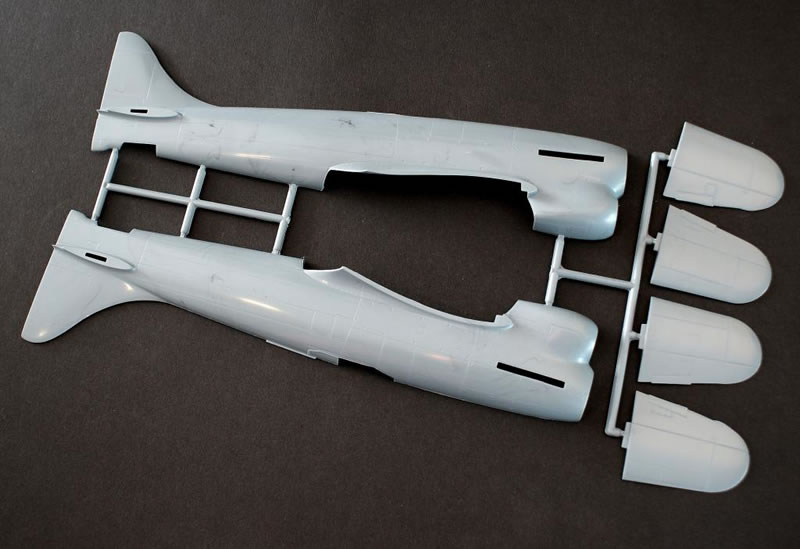
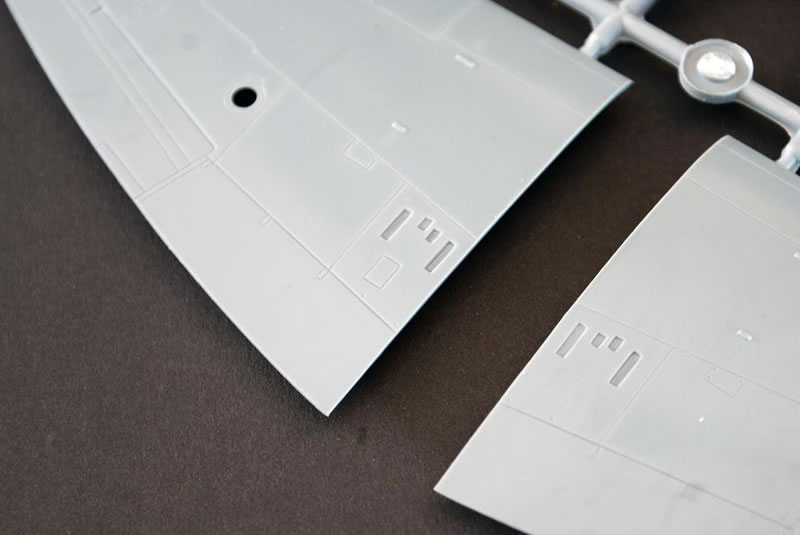
The Wings
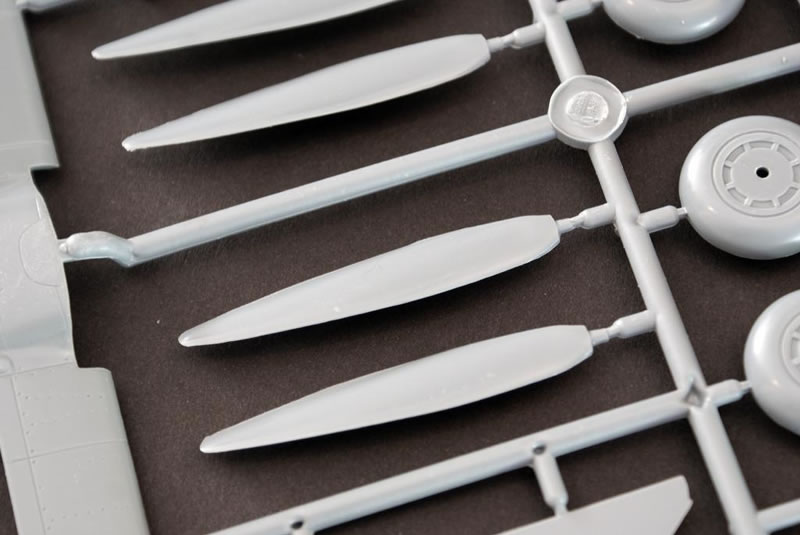
These are large mouldings consisting of five parts. Two upperwing halves and three underwing parts. There was no warping present on our sample. There are no separate flaps or ailerons. The aileron hinge is not pronounced enough. This version has the earlier long barrelled cannon shrouds making it a series II. The shell ejection openings are moulded as shallow indentations. For realism they should be filed out. In the two outer wings a lamp is fitted. The pitot tube is provided as a separate part.
Exhausts
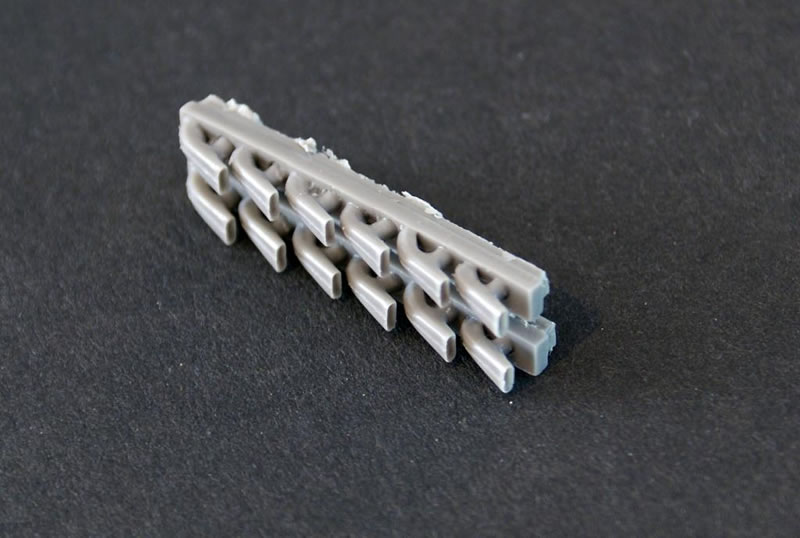
No need for after market or hollowing out plastic yourself (which can be exhausting :). The resin exhausts are nice. Thin edges. Sharp detail. Weld beads lines.
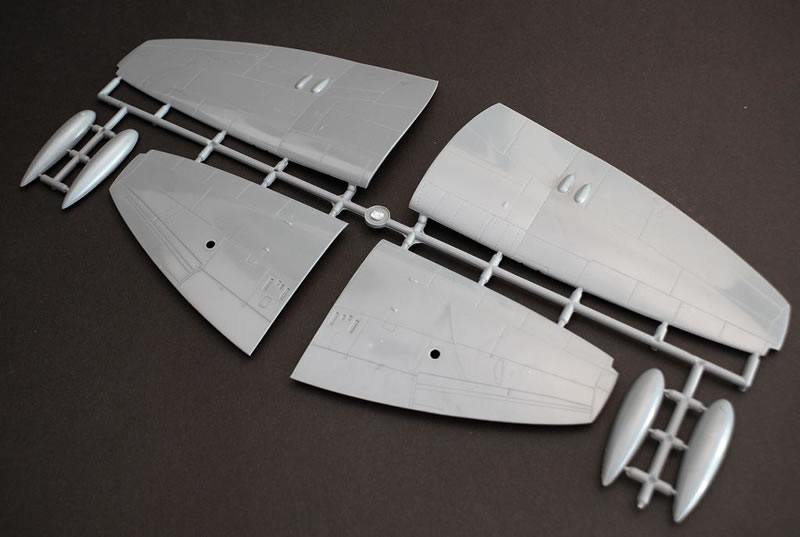
Spinners and Propeller
Two spinners are available in the kit but one propeller. The shorter version was used on earlier airframes and the longer version on later airframes. But it is possible that these were retrofitted to earlier airframes as well. The Tempest V used De Havilland Hydromatic or Rotol variable pitch constant speed four bladed propellers. The kit has four separate blades and a hub. This is the De Havilland version. They look a bit think with flash. When choosing your aircraft check which spinner is needed.
Canopy
The windscreen and canopy shape are well rendered with good clarity. One thing missing is the flared rear that blends it into the fuselage lines. The surface detail is sharp which makes it easy to mask.
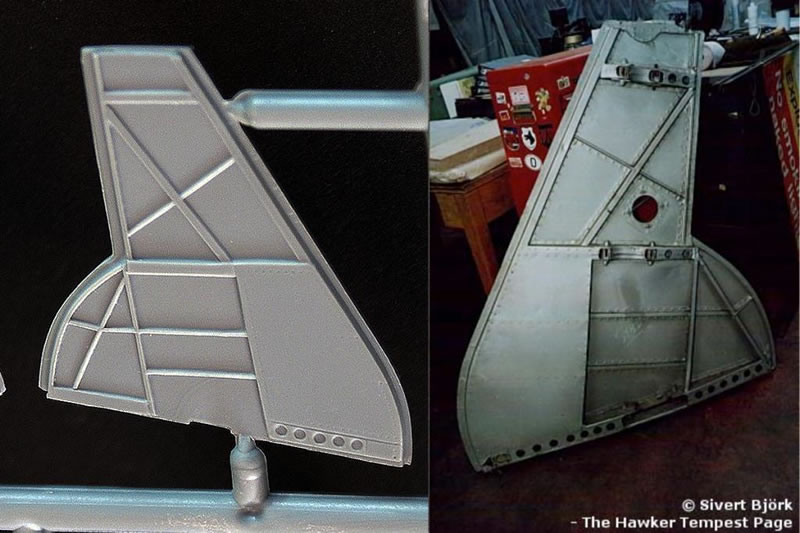
The Tail
The tailplanes are in two pieces but no separate elevators. According to photographs the elevators did not droop. The elevator hinge is not pronounced enough. A point of note:
Navigation Lights Rear Stabilizer
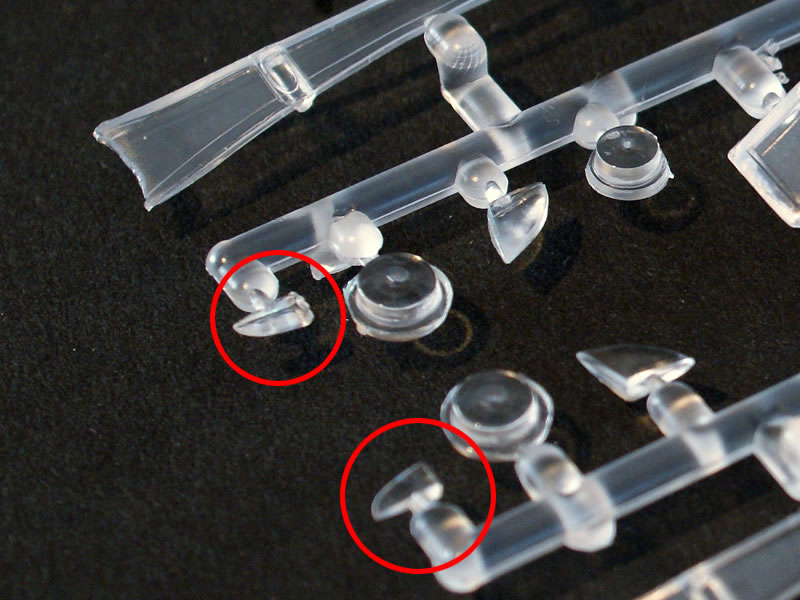
There’s something missing in the instructions. The tail navigation lights are located in the wingroot fairings. The kit has the cutouts in this area. The transparency sprue has two spurious items numbered CP2 which seem to fit here. The instructions however do not mention these in stage 26.
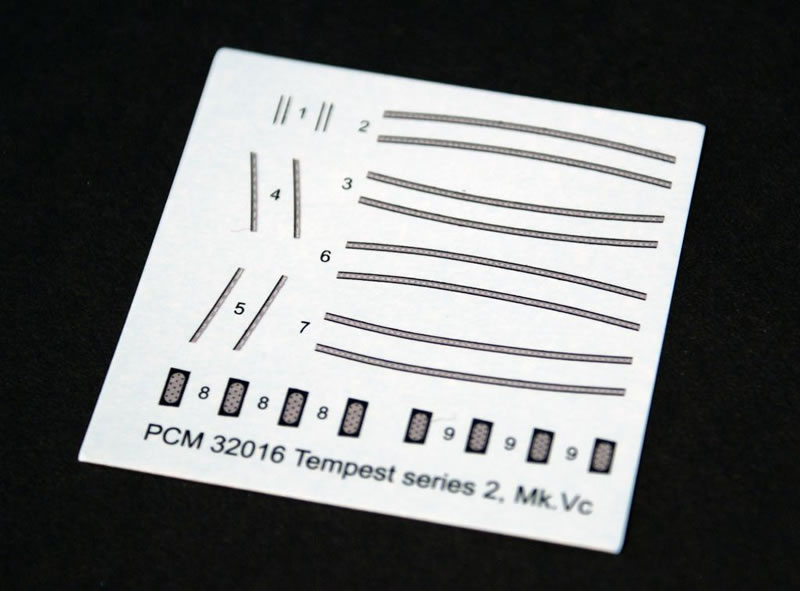
Droptank
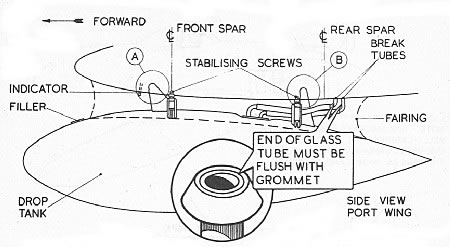
One cool feature that at first had me scratching my head are the drop tank fairings. You will find them on the transparent sprue. Cees however found this logical since many of these were made of transparent acetate. On the inside reinforcement strips were visible. You'll find these on the small decal sheet. See photo above of transparent sprue. See photo below of small decal sheet with reinforcement strips. With the fairing being transparent you may want to add some fuel lines. See diagram below.
Gear (Bay)
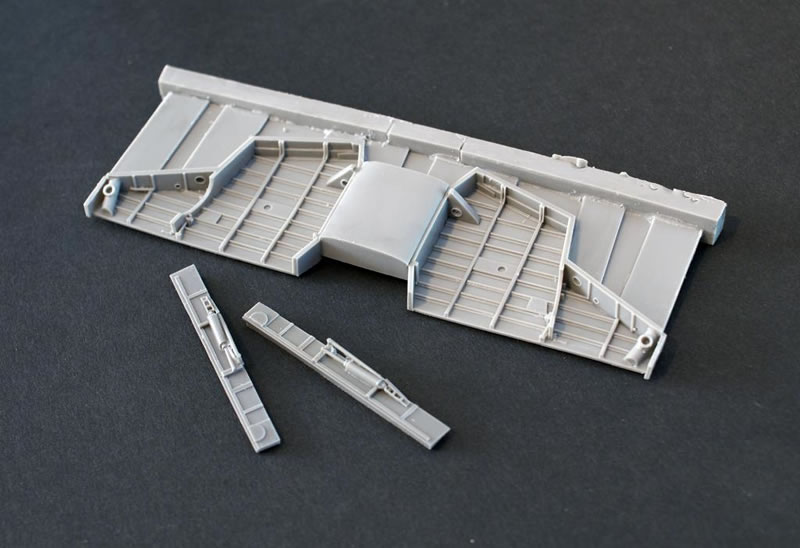
The gear doors are depicted quite nicely and have (almost) all the details you may expect in this scale. Rivets, reinforcements, strips, etc.
For the accuracy nuts: Some additional rivets could be added and the structural holes on the bottom of the door don't match up.
The maintenance hatch shown open in the photo below is depicted on the outside of the door, but not on the inside. However: not much surface detail would show.
All in all, it's an accurate door.
The wheel bays are provided as one large resin casting with good detail. Care is needed fitting these into the wing. Check twice before gluing. Some kits had badly warped wheel bays but ours was flat as it should be. When warped they can be straightened in hot water, Resin has a memory.
The undercarriage legs are provided in one piece. They look basic but acceptable and should look good with the finely detailed undercarriage doors.
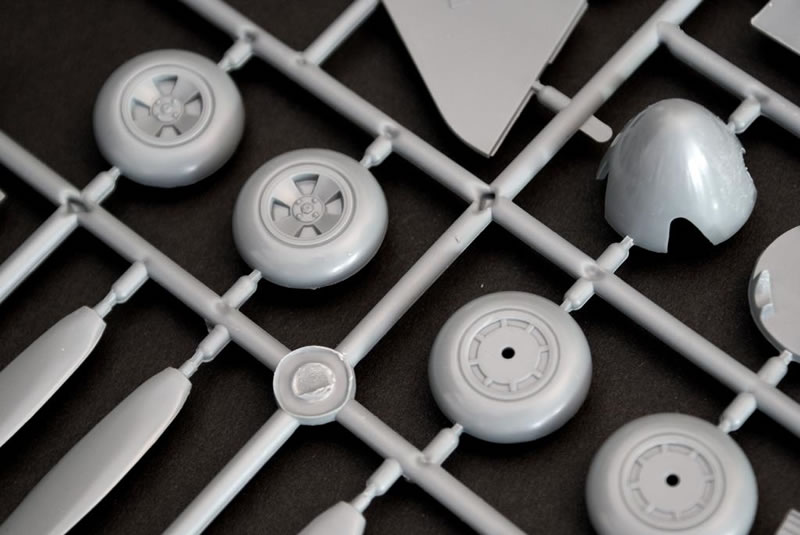
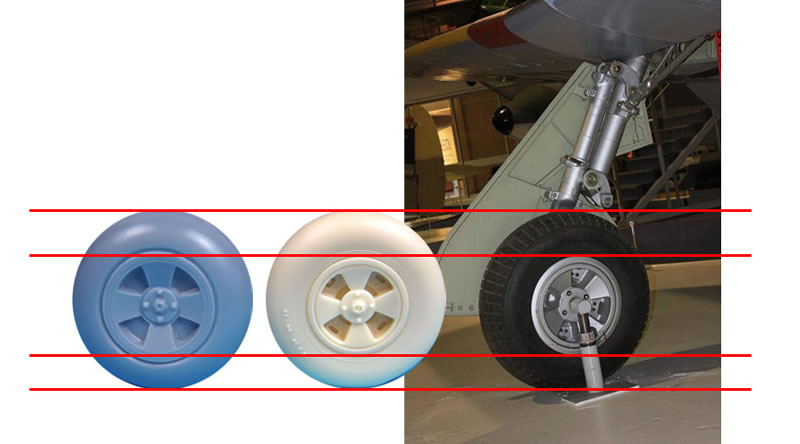
Wheels
The wheels have the correct four cavity wheel hubs and are of the smooth version. Later Tempest had block thread tyres. The wheels themselves look to be a bit undersized and too fat in cross-section. According to photographs the side walls should be flatter with a thinner cross-section.
I have no detailed drawing of the wheels themselves, but then Barracuda Details hit the market with new resin replacement wheels. When seeing these wheels next to the PCM wheels, you can clearly see a difference. All I could do was comparing the Hyperscale photo's to an actual Tempest wheel photo and it looks like Barracuda Details is more accurate. A pity these Barracuda Details wheels did not make it into the kit, but if this is the only after market you need to get, you're still not spending big bucks.
Tailwheel
The Tempest uses a characteristic anti-shimmy tailwheel. The groove inside prevented the tailwheel from oscillating causing structural failure. The kit correctly depicts this. The rim is closely fitted against the tyre.
Sprue Shots
Our sample had little flash and practically no sink marks. Not even on the props where you'll often find them. The gear legs are pretty complex for a WW2 fighter and need to be carefully cleaned up with a sharp blade.
Decals
One big decals carrier is supplied as well as a colour printed booklet showing the different schemes. The sheet covers 5 individual aircraft. The semigloss decals are perfect in register and printed by Cartograf. Easiest way to check the register is to look at the outer border of a roundel. Colours are on the mark too and from experience I know the PCM decals respond well to Micro Set and Micro Sol.

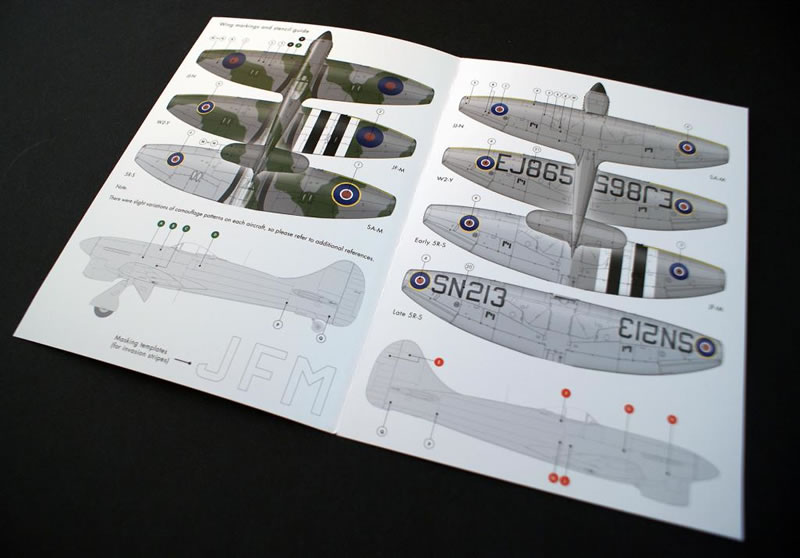
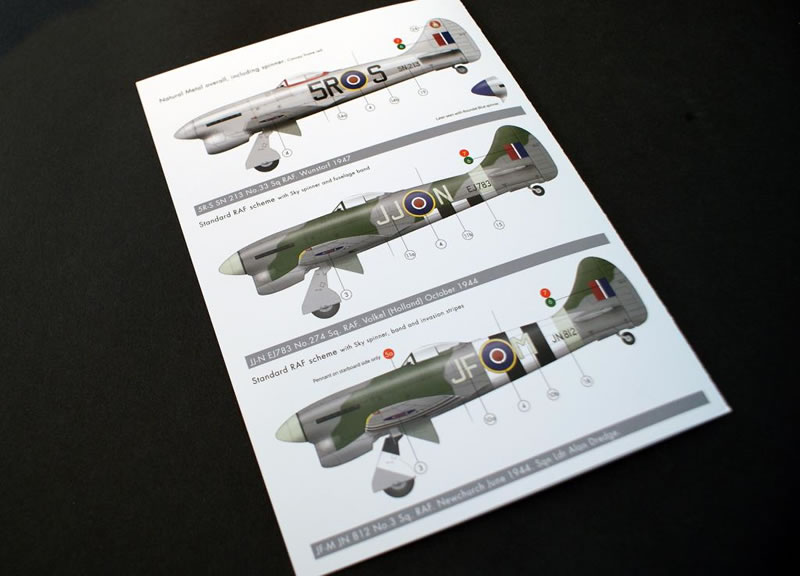
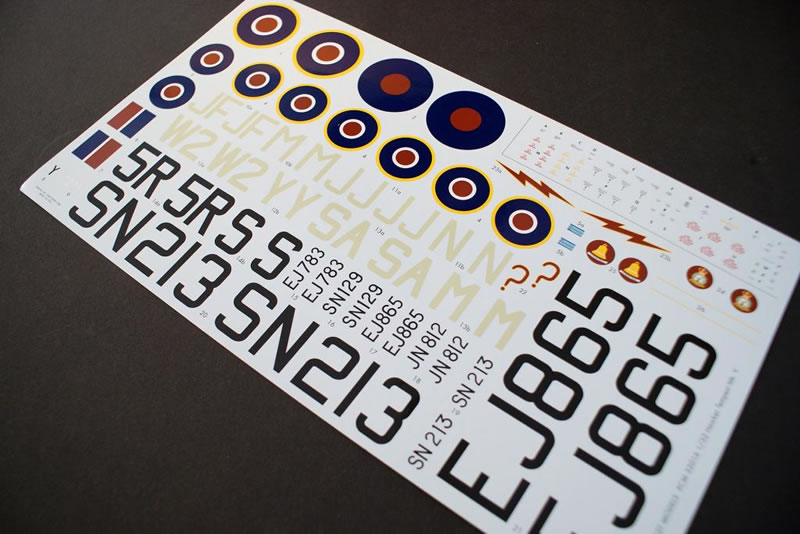
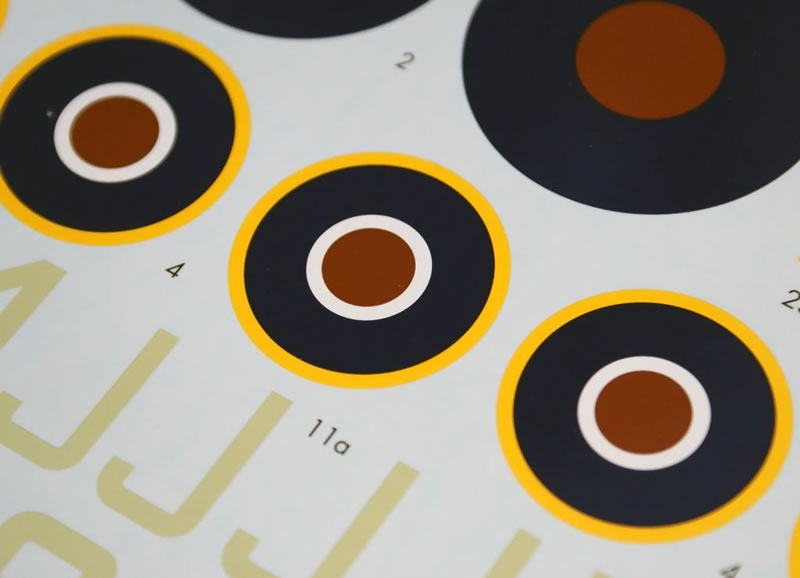
Photo-Etch
'Missing' Parts
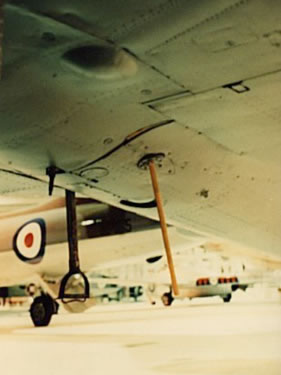
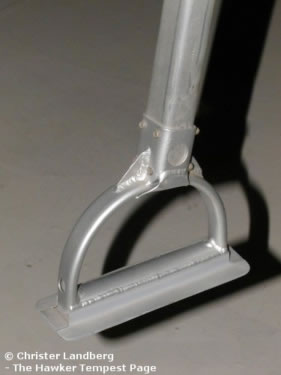
What we did not find in the kit is the retractable step situated in the lower part of the fuselage. Easy to scratch though. Here's a detail pic to help out.
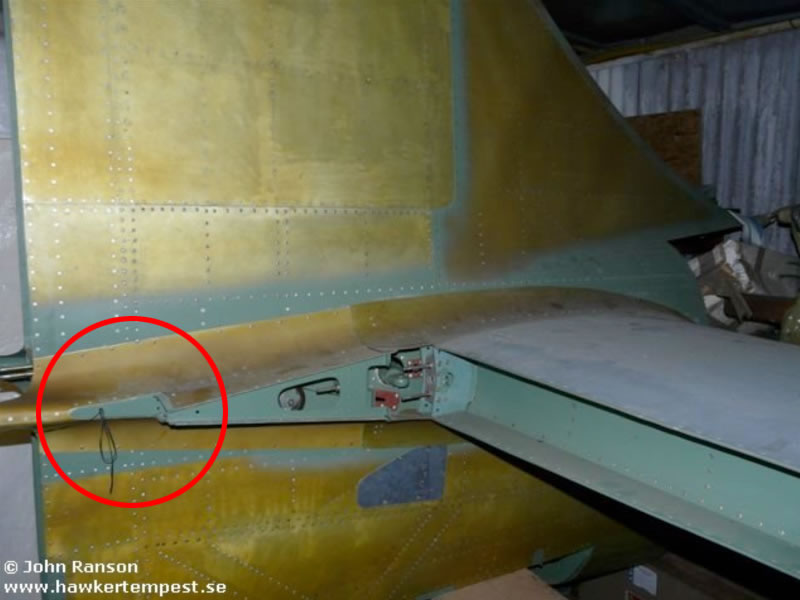
On late production airframes the starboard fuselage just behind the cockpit there should be a static pressure plate. This was unpainted aluminium or steel. It is not certain to us if all airframes had this. (See photo below - source: www.iwm.org.uk.) So check your references.
Overall Shape
The airframe in the box looks good and certainly captures the brutish look op the Tempest very well. Panel lines match the drawings from the reference books we used (see below).
We however did not scale these to 1/32 to see how the matched up as this is an inbox review. We did however check the total length and width.
The Tempest had a 41 foot span (1249,68 cm). Scale this down to 1/32th scale and that gives you 39 cm. This matches the kit!
Construction
This being a limited run kit, presents the usual 'pitfalls' and attention areas.
First of all: limited run kits often do not feature locating pins. This means a bit more dry fitting and extra attention when gluing.
One tip when fitting the wings: I find it easier to first glue the top wing to the fuselage, before gluing the bottom wing to the top wings. This almost always eliminates gaps in the wing roots. Thickness in plastic may vary between models. Therefor it may well be possible that your wheel well needs sanding to be able to fit between the lower wings and upper wings, while someone else on some forum has no problem at all fitting it all in. Which brings me to the radiator. In our sample the radiator fits snug between the fuselage halves. If yours doesn't you may need to trim / sand 1/32 inch around the edges. And last but certainly not least: the short chord spinner is not right. If you are choosing a scheme which uses that (most do), contact Pacific Coast Models. Sword (who supplies the plastic parts) have corrected the spinner and bulk head.
Further: make sure your example does not have any warpage. If so: contact Pacific Coast Models.References
- The Hawker Page by Christer Landberg (thanks Christer for you assistance)
- Hawker Tempest Mks I, V, II, VI, TT Mks 5,6 4+ Publications
- The Hawker Tempest by Richard Franks Airframe & Miniature No.4
Verdict
The Tempest is a beast of a plane, which becomes apparent when opening the box. Even though the box is pretty much oversized. I have built several PCM kits, so I know the standard of plastic, resin, PE and decals. This kit, even with some flaws, surpasses all of them in terms of research, surface detail and attention to detail (like the transparent drop tank fairings and gun sight that correctly uses the front windshield as reflector). Yes the wheels are a bit doughnut shaped and you might want to get Barracuda Details resin ones'. Yes, you might have to check if your kit has no warpage or wrong spinner, but if your kit is like our example you now have no excuse whatsoever to finally build your Large Scale Tempest.
We can recommend this kit and would like to give it a 7.5 out of 10.
One last tip: when ordering it from overseas: ask the store / reseller to put some soft packaging foam / material inside the box. That way you can snip the parts out of the sprues yourself.
Thanks to Ken Lawrence from Pacific Coast Models for choosing to cover this subject and providing us with the review sample.
© Cees Broere and Jeroen Peters 2013
This product is available from the following LSP sponsors
This review was published on Sunday, August 11 2013; Last modified on Monday, August 12 2013