
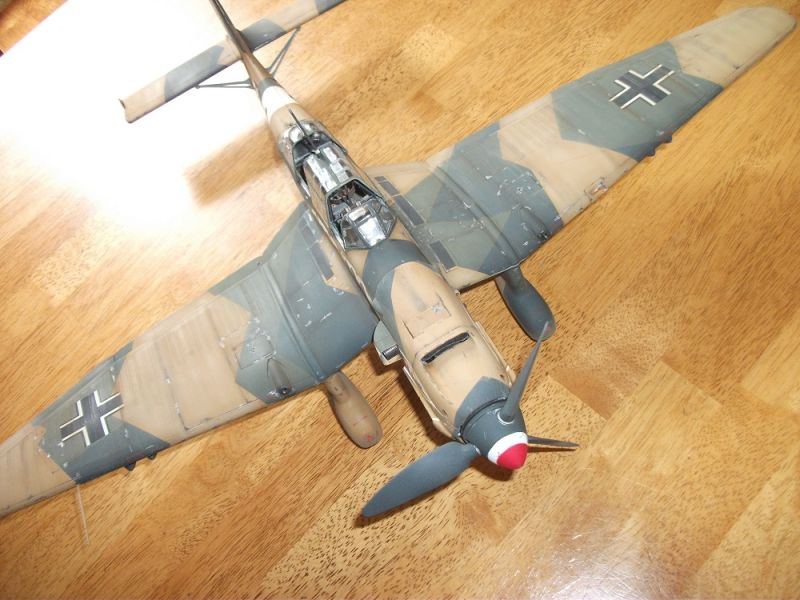
Airfix 1/24 Ju 87B Stuka
By Angelo Picardo
This is the lovely old Airfix kit of the Stuka.
The kit is packed with detail, inside and out and dates back a few years. The detail can be enhanced, either by adding etch or resin, or by digging out the plastic card, wire, sprue and spare parts, but there doesn't seem to be much in the way of aftermarket stuff specific to this kit, just generic items.
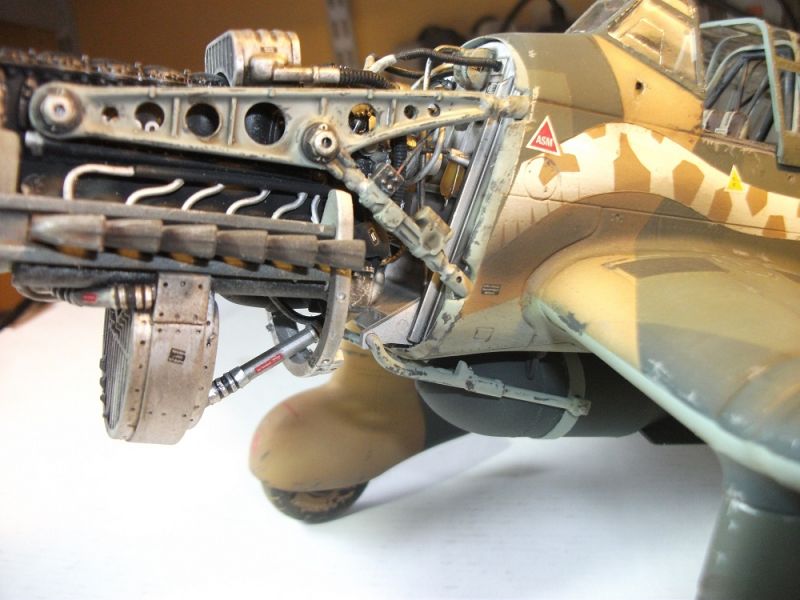
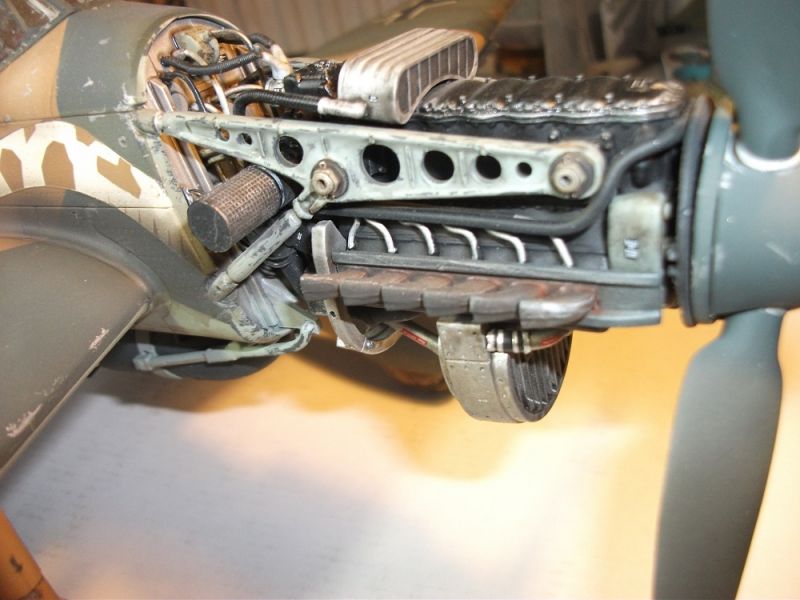
The kit has removable panels over the engine and gun bays. The cockpit is very visible through the canopy. I decided to add detail to the engine and cockpit but leave the machine guns alone. The engine was detailed by enhancing the detail already there, and by adding a few missing bits. A lot of the addition was in the form of wiring and plumbing which was achieved by using solder, lead wire, and various gauges of wire.
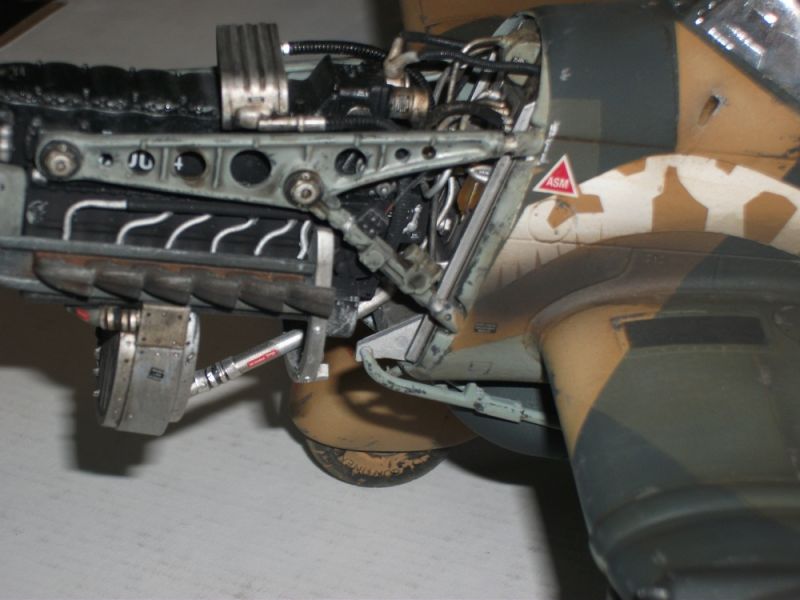
The main things I did want to do was to replace the moulded solid plastic lumps, meant to be the fuel filters with clear parts, detail the air filter, and to enhance the engine mounting bolts.
The fuel filters are moulded to the fire wall. All I did was cut away the plastic part, and then make clear parts from sprue and then paint it with Tamiya clear yellow to represent the fuel inside the clear glass bulb. I then had to add the fuel lines and retaining clips made from wire. These filters are visible between the engine and fire wall, and improve the look of that area.
The air filter in the kit was a bit basic so I replaced with a plastic rod which was wrapped in spare etched mesh. The engine mounting bolts had the centre drilled out. Next I drilled a hole down through the nut from top to bottom through which the distinctive split pins could be fitted.
Another little modification was to hollow out the ends of the exhausts. There is a prominent mould separation line along the length of the exhausts but this also follows the line of a seam on the real things, so I left them alone.
The rest of the work on the engine was just painting and weathering. Airscale produce a set of Luftwaffe data placards which were handy in detailing the engine.
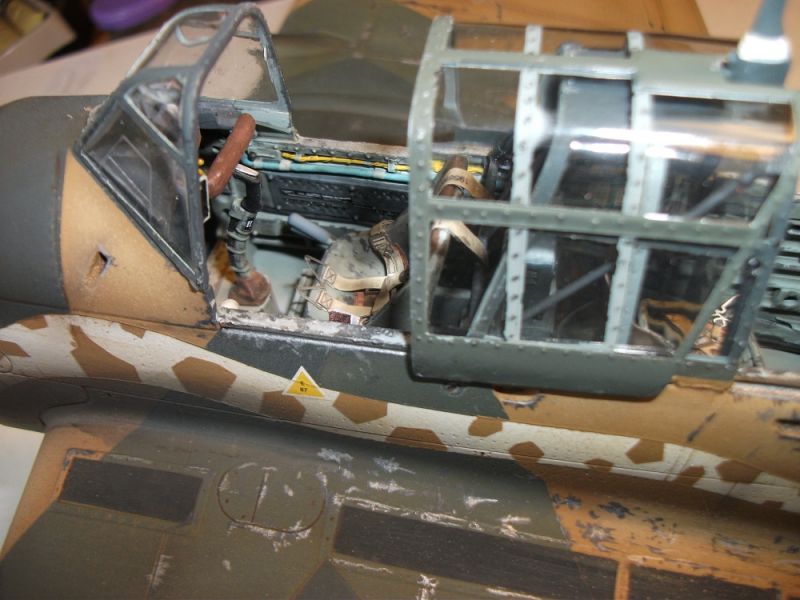
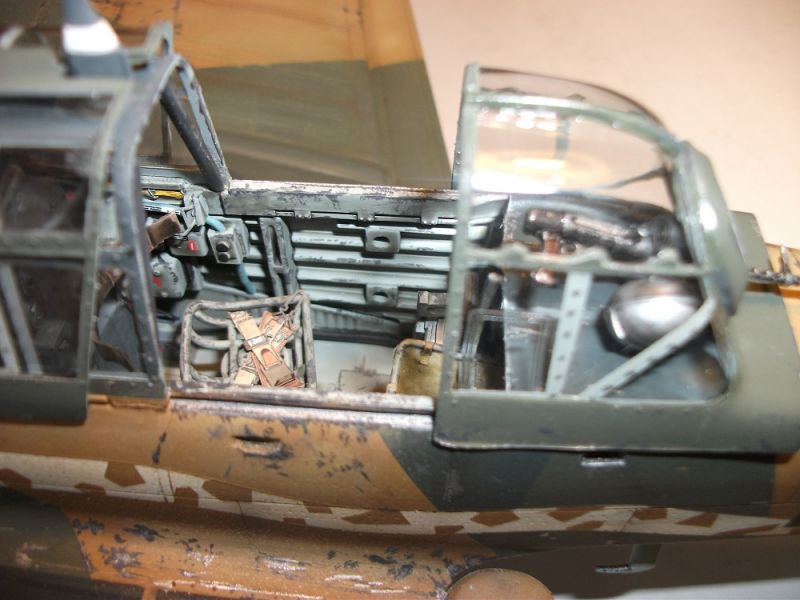
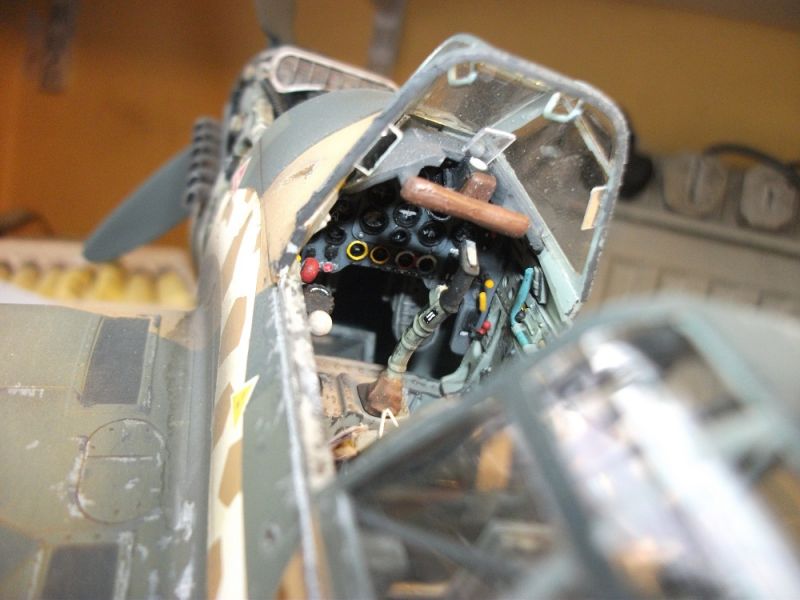
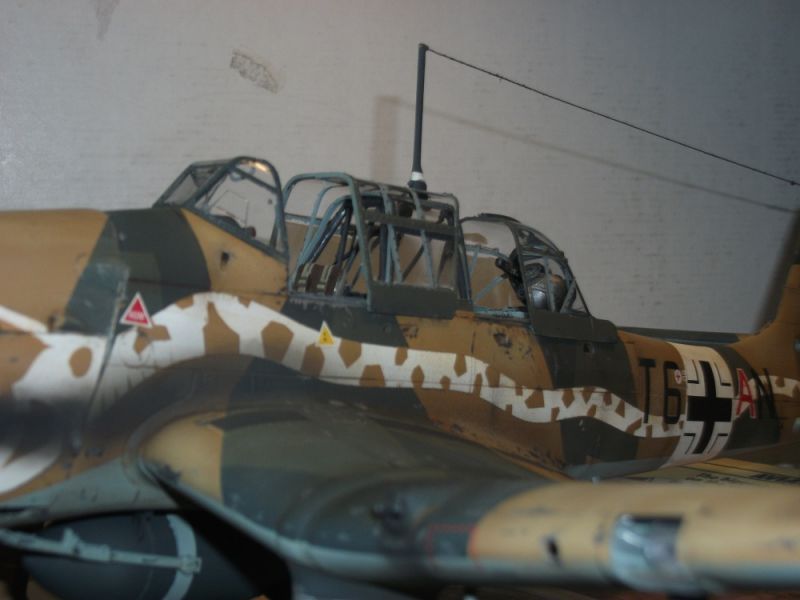
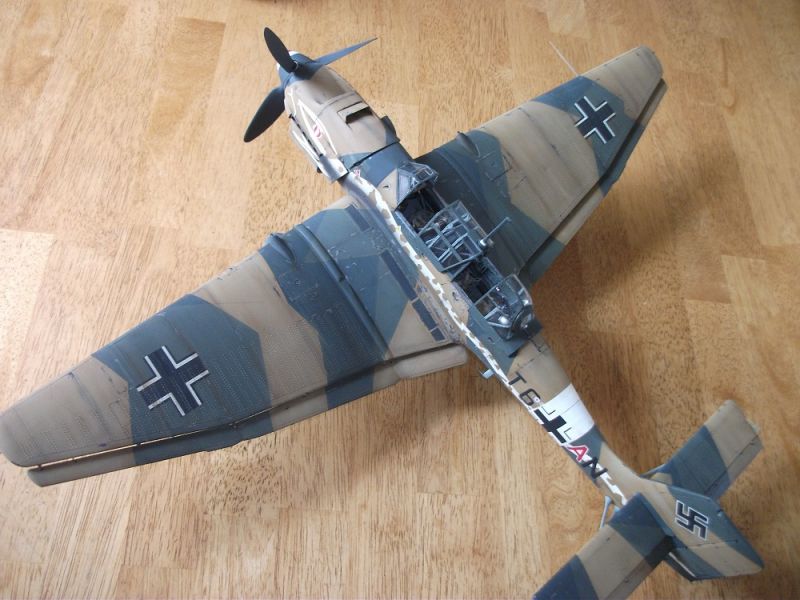
The cockpit was going to be the main area to work in. The Stuka has an extensive canopy. Airfix's transparent parts are clear and thin. After a dip in Klear floor polish, they were even clearer. Various handles and mirrors were added to the inner surface of the canopy.
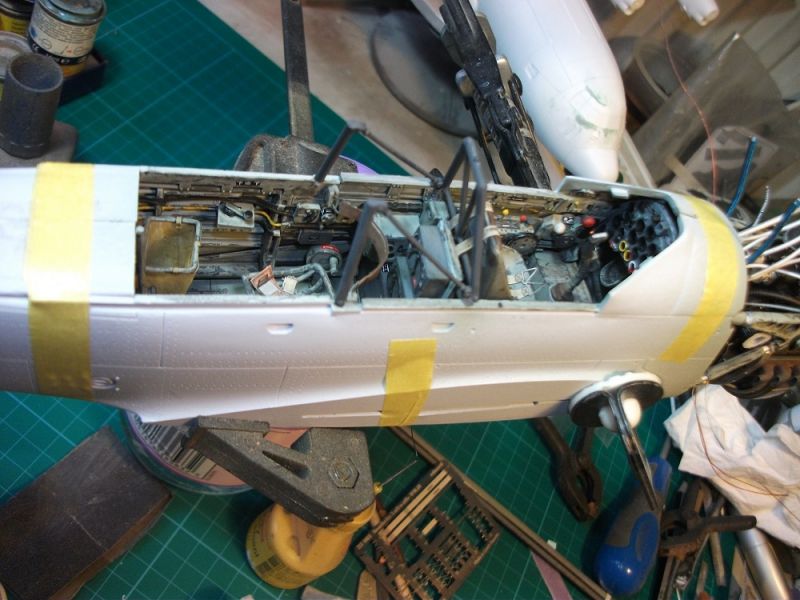
The framing of the canopy has internal as well as external elements and Airfix has moulded them in that way, so careful masking is required.
Anyone familiar with Airfix's big 24th scale aircraft will know how the instrument panels are moulded, with a clear insert, featuring the dials which then fits into an instrument panels with holes moulded where the dials are meant to be.
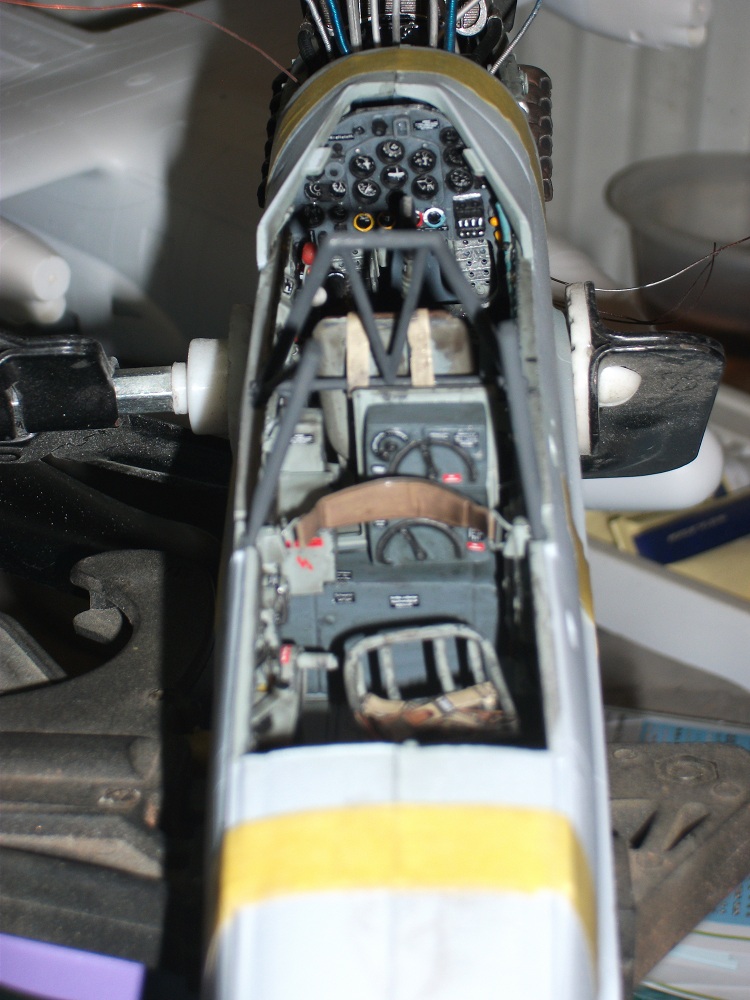
Airscale do an instrument panel decal for the Stuka. To use it the kit panel needs thinning down. I taped some wet and dry to a plate of glass and used a blob of Blu Tac to hold the panels as I sanded it to a thinner profile. I also added various levers and nobs to the panel. The levers were made from scrap parts of etched brass and wire and for the nobs I used the porcelain balls found inside of water filters.
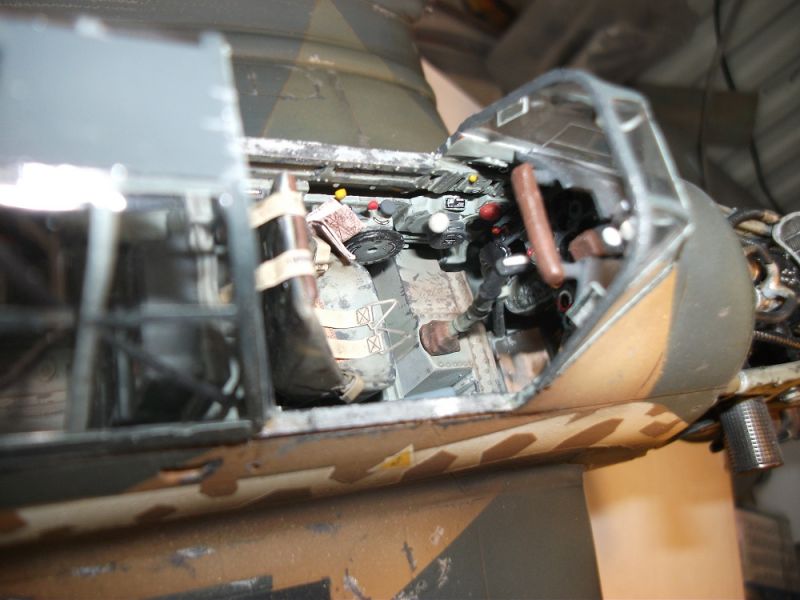
Other details were added with wire, plastic card, scrap etch, and anything else that I found useful. I added, or replaced various wiring looms and piping running along the cockpit walls using various thicknesses of wire, solder, and fisherman's lead wire. Also I added and enhanced levers and switches and I rebuilt the spent case basket from wire and masking tape.
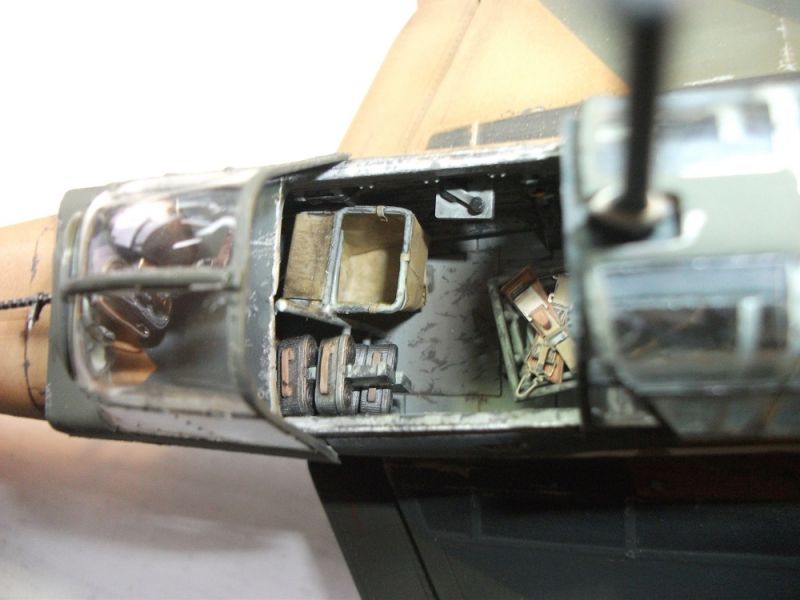
The ammo drums had their moulded on straps removed and replaced with straps made from lead foil.
The gunners back rest was replaced with one made from lead foil and masking tape.
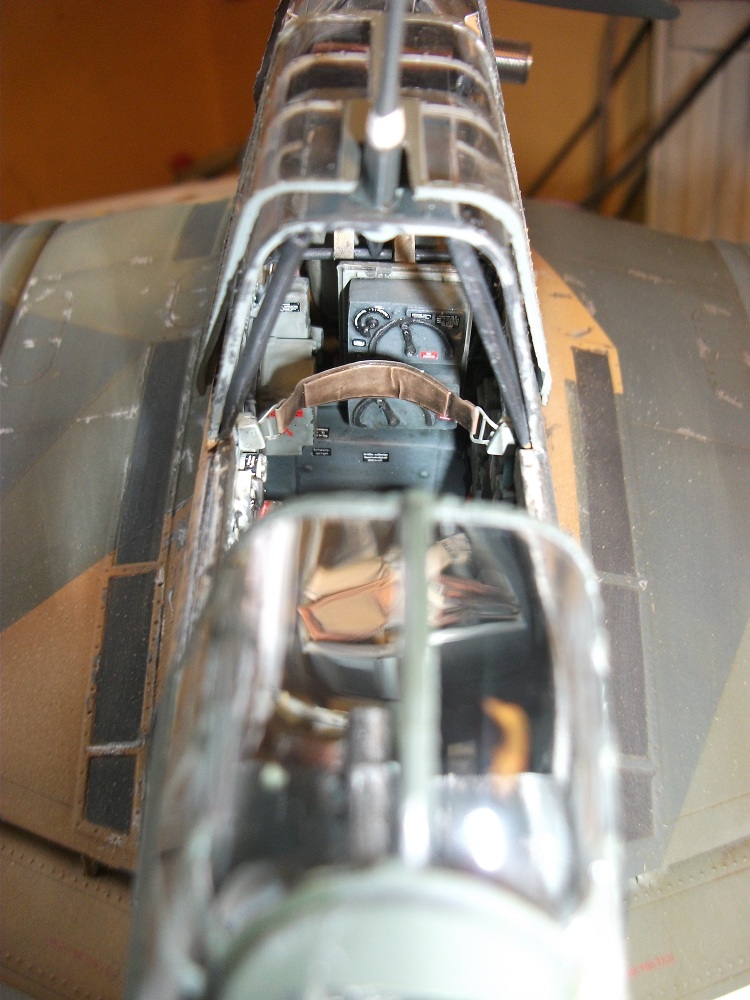
Airscale's placards were added to the cockpit, along with Eduard's excellent etched seat belts. The pilots seat was thinned down, reshaped to a more accurate profile, and had a seat pad added to it.
The gunners seat is well detailed, just requiring careful clean up and assembly.
The interior just needed painting, weathering and sandwiching in between the fuselage halves. Now the fit was not that great and a lot of clamping and taping was required to get as tight a closure of the fuselage halves as possible.
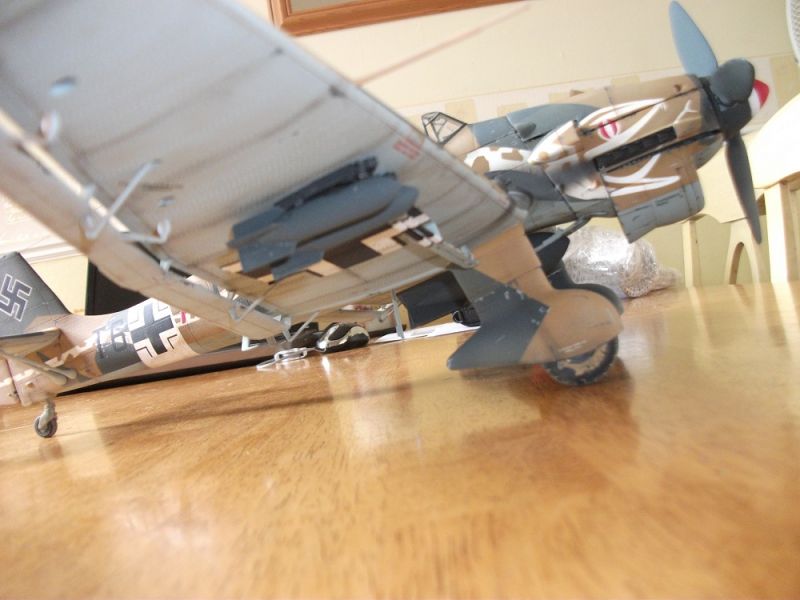
Once all this was done and the seams were cleaned up work could be started on the rest of the airframe. Little work was necessary here. The only major work done was to the cowlings. I thinned these down and opened up the various air vents present. Another quick modification was to replace the kits thick plastic oil coolers vent flap with another one made out of thinner aluminium.
The rest of the assembly was straightforward. The flaps and dive brakes were left off until after painting was completed, and I modified the main wheels so they could be fitted after the spats had been assembled.
The wings come in four parts. They are split along the line where the Stukas distinctive crank in its wing occurs. The fit here was not too good and the joint was weak. I took time to get as tight and strong a joint as possible.
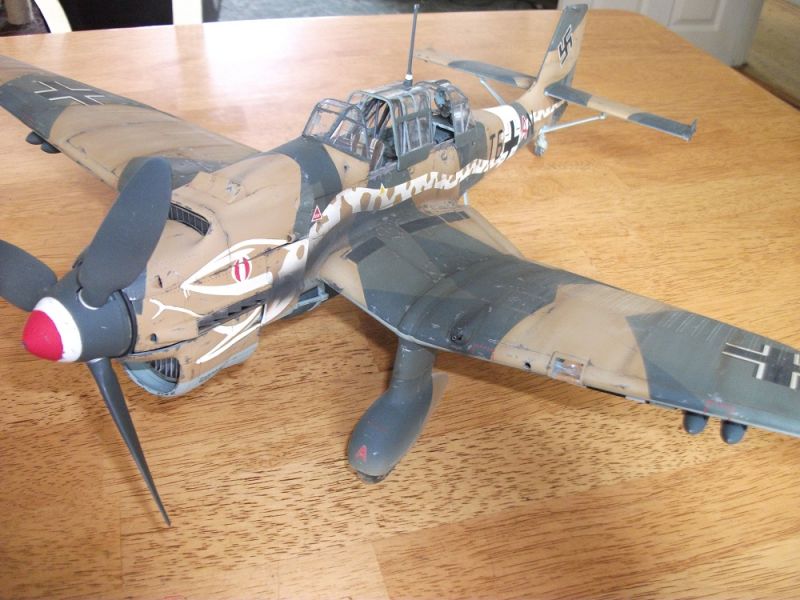
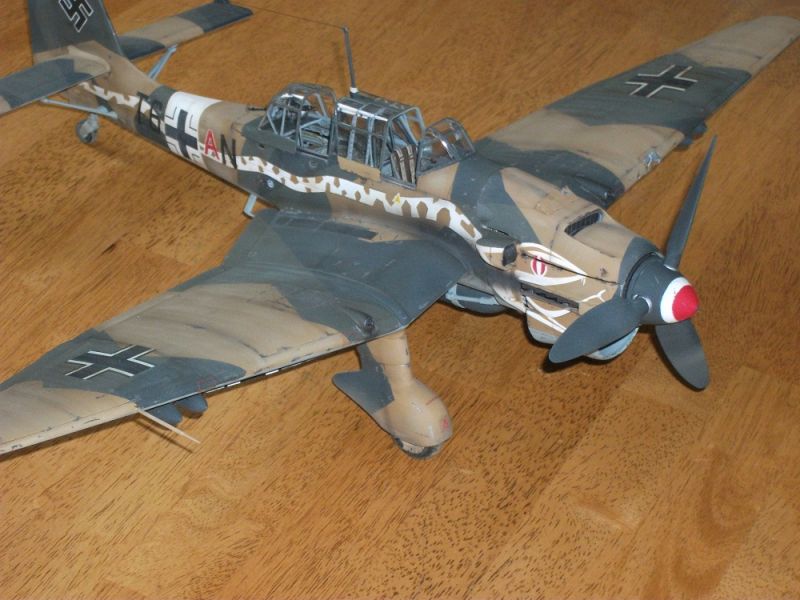
From an early age I remember seeing the Revell 1/32nd Stuka in the window of my local hard ware store. It featured a desert camouflage Stuka with a snake painted down the side.
This scheme has always impressed me and I decided that was what I wanted to do this Stuka in.
I do remember a set of decals being done once but they are no longer available. However, Montex do a set of vinyl masks for the scheme which I was able to get hold of.
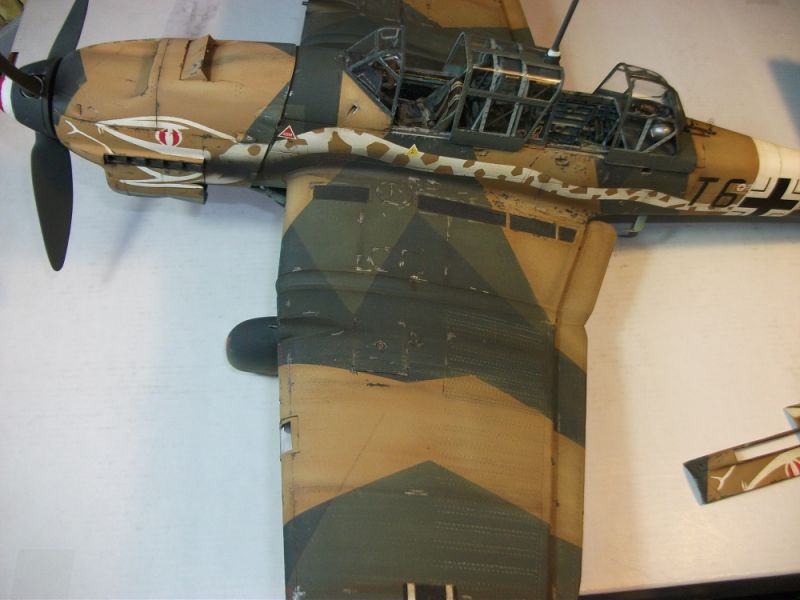
There has been some discussion as to what colour the snake should be. On the Revell box it is red and white but it is now thought to be white over sand/camouflage.
The scheme I was doing was of sand splinter applied locally over the European two tone green camouflage.
I painted the green on green scheme using Xtracolour enamels and then used Tamiya acrylics to do the sand. Before all this, I sprayed the model white, and applied the masks for the snake. The vinyl masks didn't seem to want to stick too well over the surface details. I was contemplating re-cutting the masks using Tamiya masking tape but, I managed to get the vinyl masks to stick and there was minimal creep under the masks.
The kits decals were used for all of the other markings. Montex does provide masks for the markings. But I only used the ones for the aircraft's codes. No Swastikas are provided; they came from my spares box.
Once the model was painted I sealed it all under a couple of cotes of Klear. Then I started to weather. First thing was a wash of raw umber oil paint thinned with white spirits. The next stage was to add various spots of oil paint all over the airframe. I used white, pale yellow, ochre, and raw umber.
I then used a broad flat brush moistened with thinners to draw the dots back along the air frame. This was done a number of times until I received the desired effect.
Next step was to apply chips to the paint scheme using dark grey paint. The chips and scrapes were applied to places were crews would walk and where panels would be repeatedly removed and replaced, and where, in the desert environment, airflow would throw sand and grit against the paint scheme. The next stage was to apply scrapes of aluminium using a silver pencil. The interior was weathered in a similar way and Mig pigments were dusted onto the floor to represent sand and dust that would accumulate in the cockpit.
Exhaust stains and gun stains were added by airbrushing Tamiya smoke on in thin streaks building up the layers to get the desired effect. Mig pigments were used to finish off the effect. Everything was then coated with Humbrol matt varnish. The final stages involved fitting the wings control surfaces, the bombs and the removal of the masking tape from the canopy.
I always wanted Airfix's 24th scale Stuka in my collection, but it had to be in this scheme, mainly because I remember the old Revell kit with its striking box art. Part of me wanted to do the snake red and white, as it appeared on the box, but I decided to do it in what is generally believed to be the correct colours.
None the less, it is a very striking scheme and does look good.
© 2012 Angelo M Picardo
This article was published on Tuesday, January 24 2012; Last modified on Saturday, May 14 2016