
Airfix P-51 Mustang 1/24th Scale - Part 2
By William Joyce
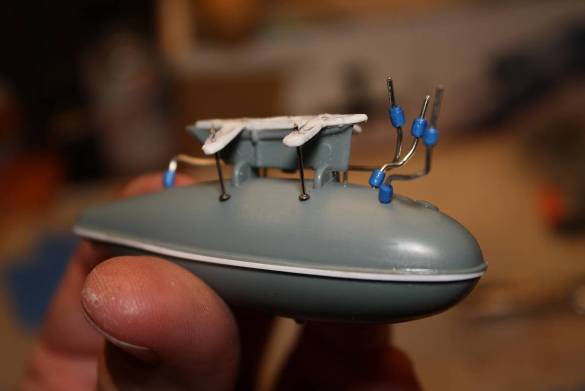
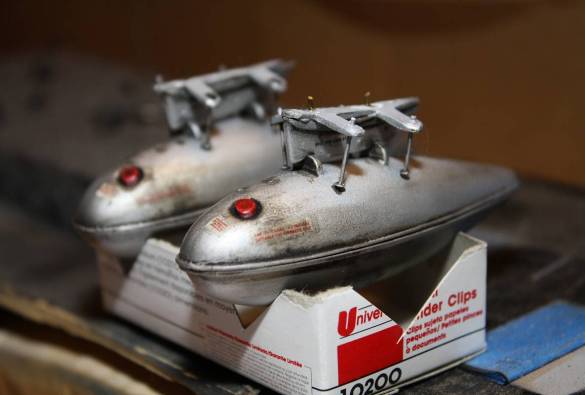
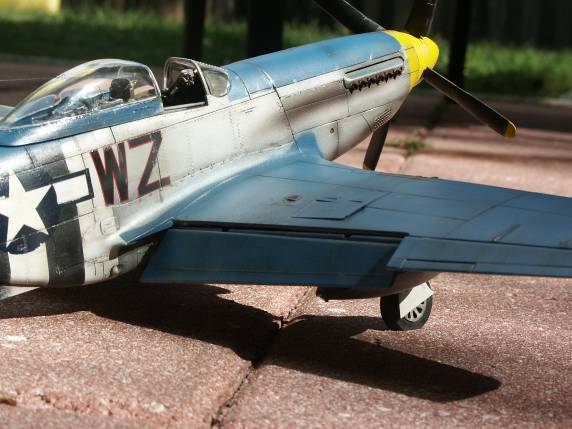
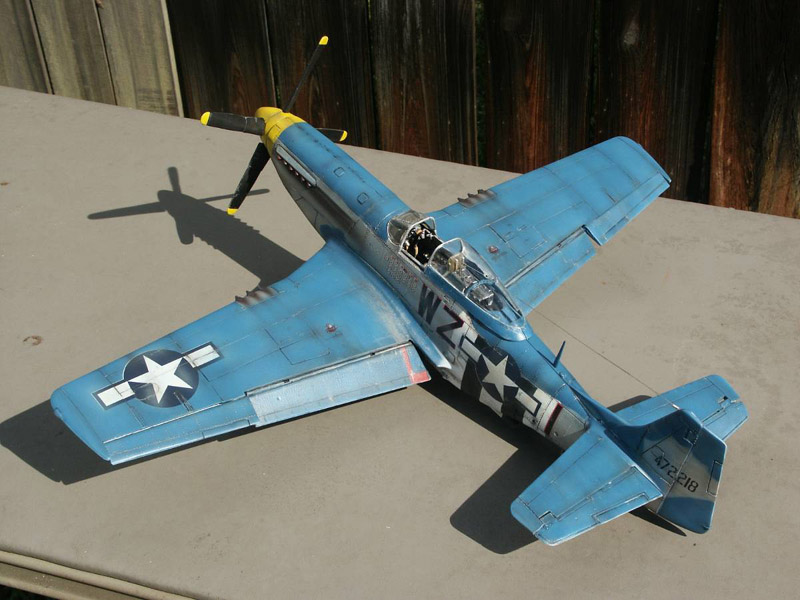
Well its been a while (over a year) since I touched the kit and I know it's a good thing to walk away from a build to get a fresh perspective...but good heavens man a year! I lost my bench due to remodeling the kitchen, which has been completed so it´s back-at-it! I started with the external fuel tanks; I pulled up my LSP reference material to get some ideas on how to enhance the tanks. I used strip styrene, sewing pins for stabilizers, and wire to plumb the tanks, the blue is masking tape cut to size with a drop of superglue. What I love here is that the wing-tanks will be very visible and the plumbing adds depth and dimension with little effort.
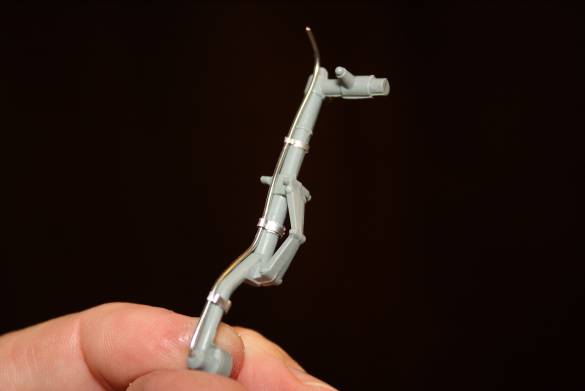
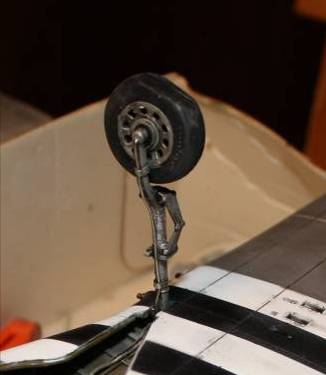
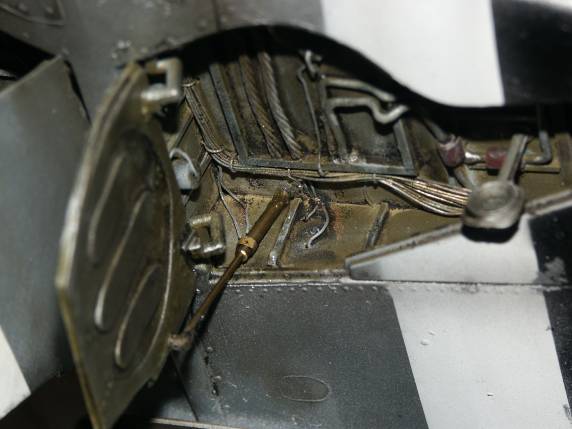
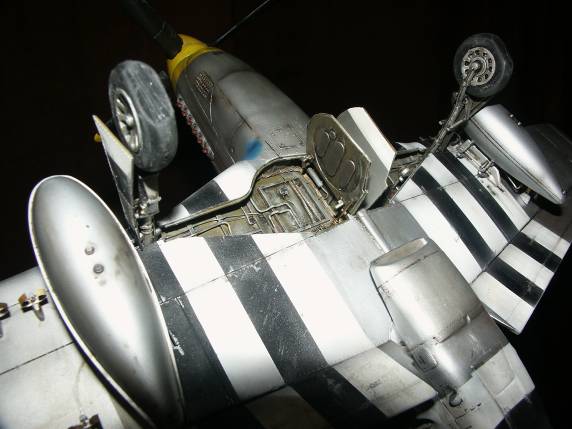
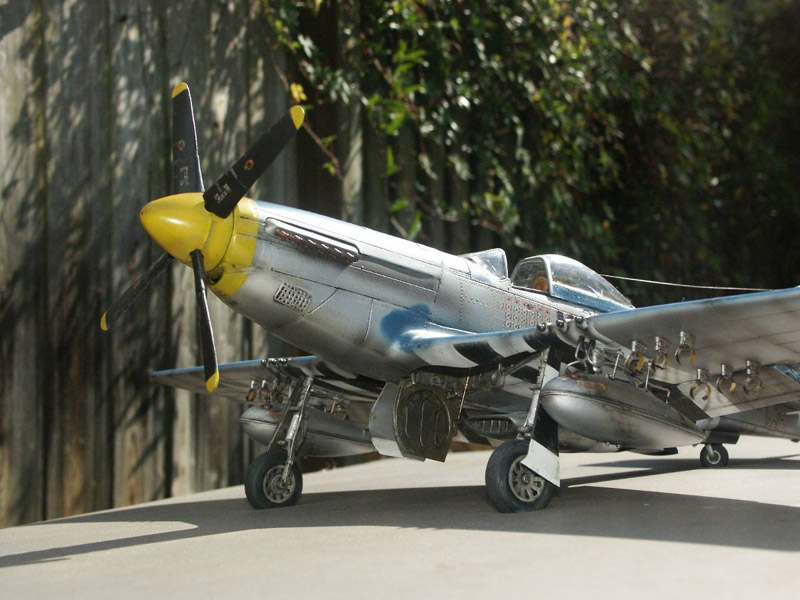
The landing gear was next, all I added were brake lines. I read an LSP article where a modeler used wine bottle foil for seatbelts...well I decided to try it for the brake-line ties and man it really worked well. I used aluminum foil for the suspension rod...It gives the impression of a different surface… the judge is still out on the foil affect (to rough looking)? An oil wash was applied to bring the gear to life.
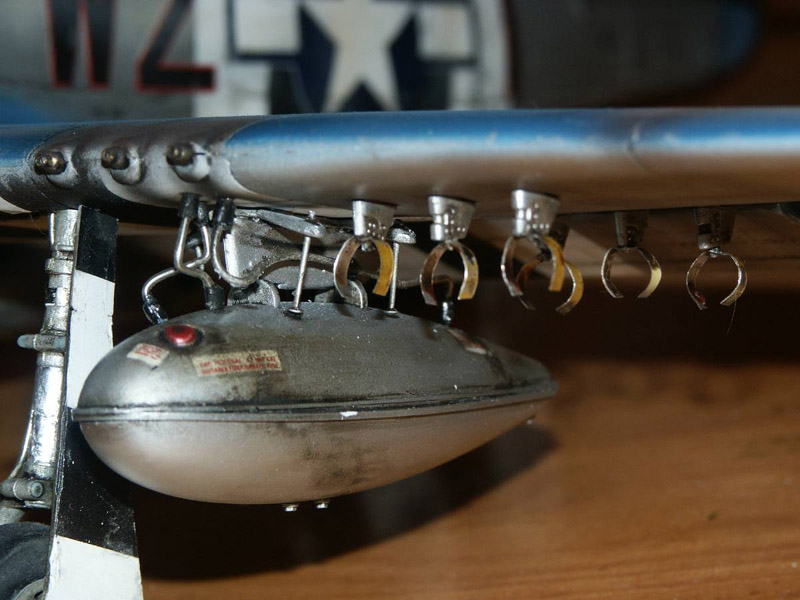
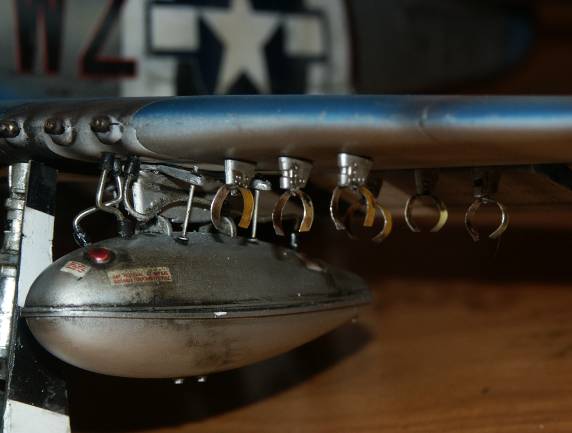
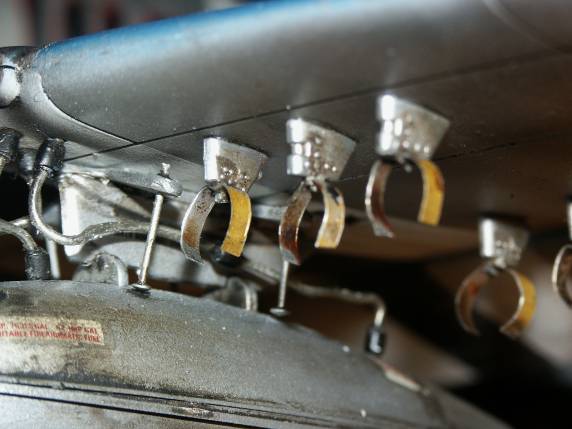
I decided to use the rocket hard-points to add depth to the underside of the wings. I separated the hard-points from the rockets and cut wine bottle foil to size representing straps that hold the rockets to the hard-points, again adding a bit of depth and dimension.
Painting
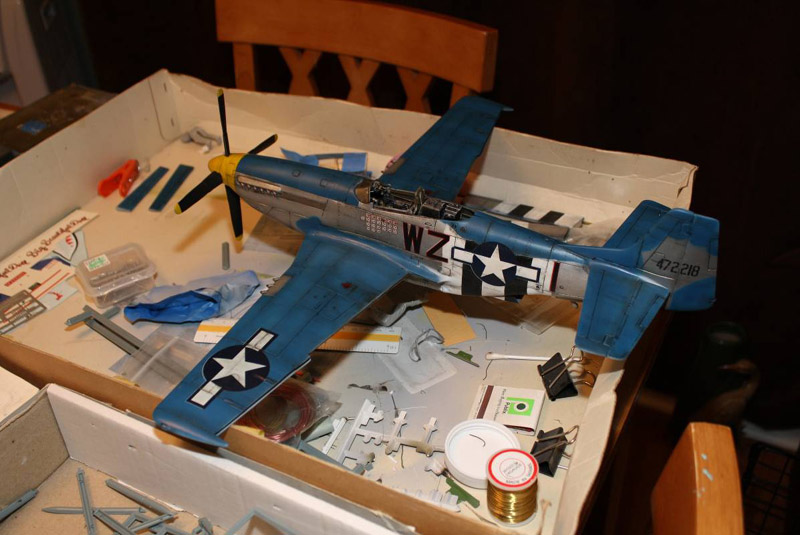
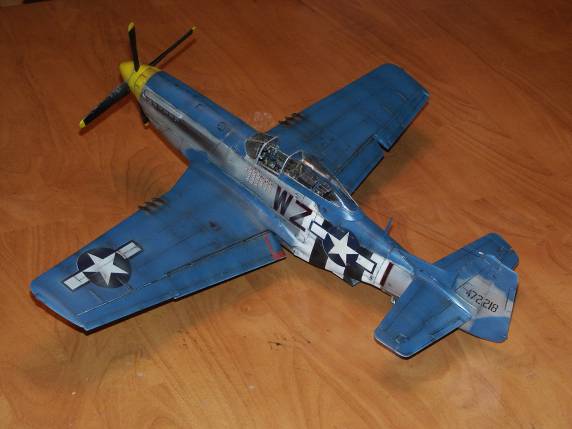
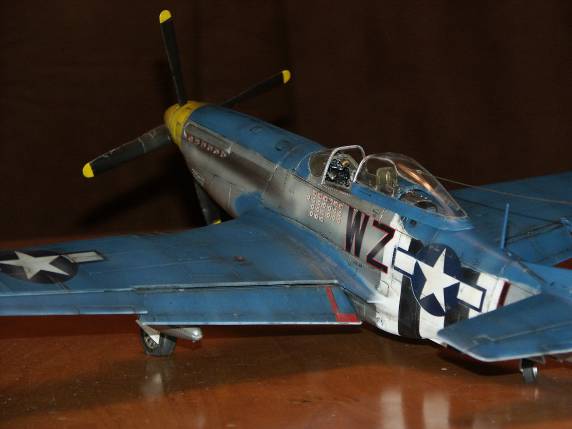
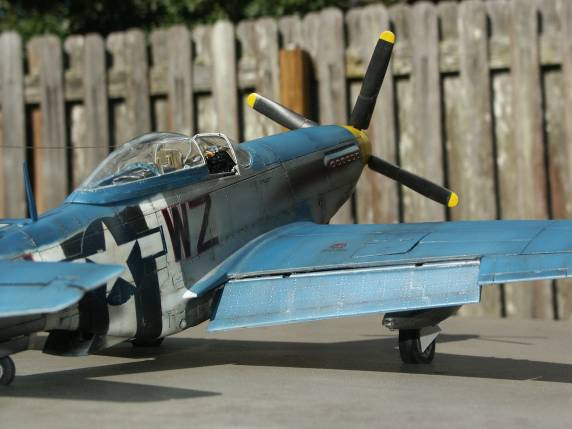
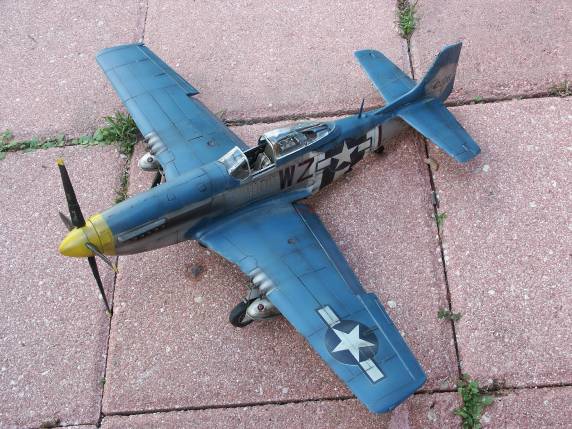
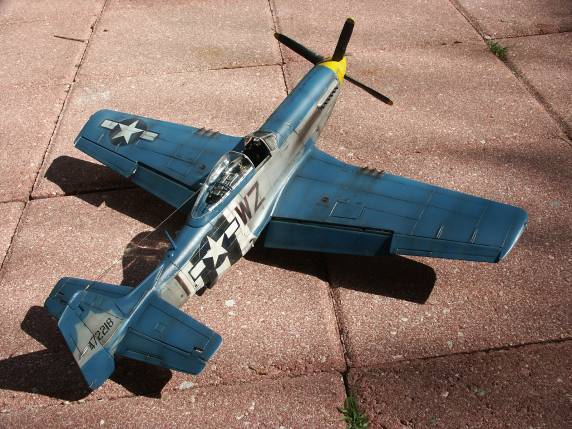
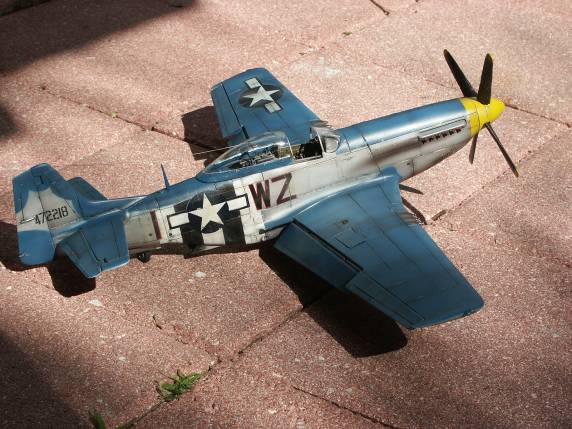
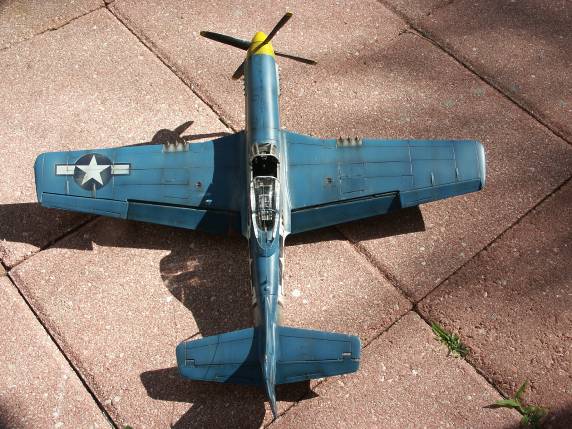
First I primed with Tamiya fine light gray primer (rattle can), then pre-shaded panel lines with flat black. The paint scheme is from a Hasegawa 1/32 kit (I have from the '70s) I love the use of dark blue with the silver and of course the black and white D-Day stripes...gotta love them stripes. The paints I used were:
- Tamiya (acrylic) Lemon Yellow
- Testors Metalizer
- Tamiya (acrylic) Dark Blue
- Testors (acrylic) Black and White
I painted the silver first following the inside out approach (center of panel outward). By the way the Metalizer paint went on like a dream, right out of the bottle no thinning. I will say it covered so well that I had to be careful not to cover up the preshading entirely. After the silver dried I masked off for the blue. I raised cut out patterns to get away from the hard edge look, followed by the yellow nose. I like to layer my paint jobs (fading) so I then took the blue and lightened it up with white (thinned well) and applied on each panel working from the inside out. I feel the layering adds depth and a realistic affect to the build. Now, when applying the lighter blue one has to remember two things, first that Tamiya Buff as a final paint fading affect (optional) will lighten the surface even more, second, when Future is applied (to prep for decals and weathering) the surface darkens backup a bit, must be related to the way light hits the surface now that it has a smooth top-coat applied?
Weathering
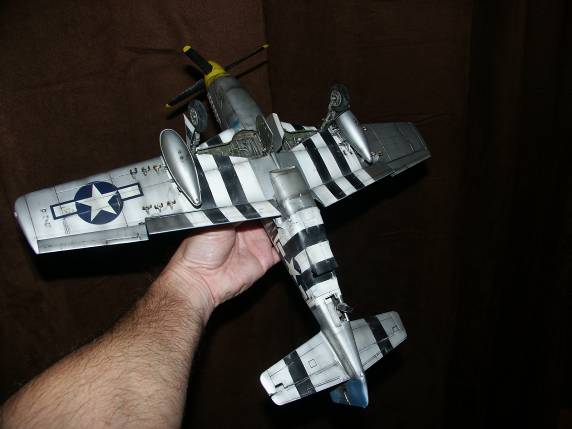
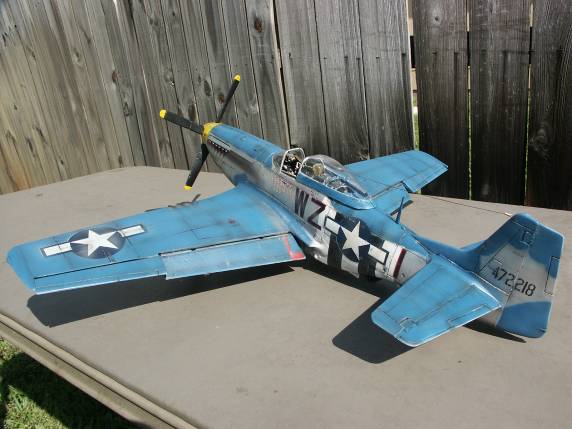
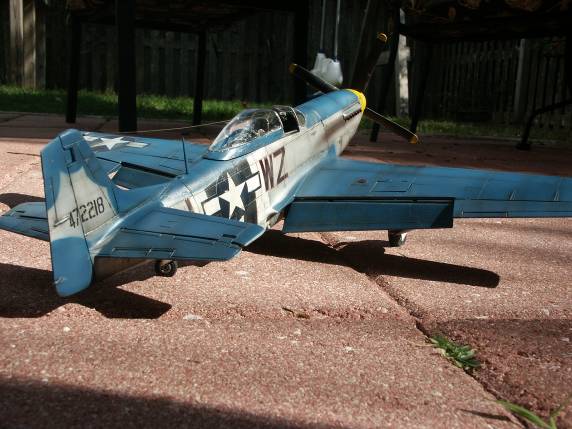
I love to weather, as it has been said many times it just bring a kit to life. I also weather on the heavy side; again I feel you have to fake out the human eye to convince it that it sees a "dirty" aircraft, hence heavy application of an oil wash. I use the standard three colors (Burnt Sienna, Lamp Black and Raw Umber) and wiped excess away in the direction of air flow. Remember let the kit sit for at least two days after applying Future before applying an oil wash, otherwise the turpentine will eat right through your paint job, I learned the hard way on my Stuka build...not a good thing.
I also believe weathering is another layer to be applied to the model. Painting in layers creates depth, along with contrast (important). So I don´t just apply to panel lines I do make an effort to streak the excess wash over and through panels. I don´t apply to the entire surface I use my thumb/fingers to wipe excess wash from the panel lines over the panel surface intentionally leaving excess (very light streaked coverage in the direction of air flow) on the adjacent panel. The beauty here is an oil wash can be removed/managed days after being applied. Silver chips were applied with a pencil and finally attached the antenna wire (wrapping some speaker wire around a piece of brass tubing making a tension spring for the tail end attachment point) and there you have it.
Conclusions
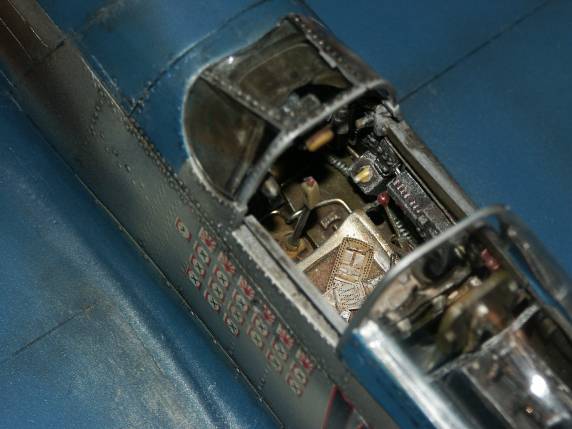
Nothing like the P-51 (perhaps the greatest piston fighter ever) the kit even though old went together well. The use of the darker olive drab for the interior (cockpit and wheel-wells) turned out better than I expected. Once again building my old kits the decals did pose a challenge, these were opaque and the Normandy stripes did show through on the fuselage so I had to paint the stars white to cover. Note to self...purchase aftermarket decals if building an old kit...maybe I´ll listen to my own advice next build...NAAAA!
Next up the Bf 109...I'm still holding off on the Vintage JUG.
© William Joyce
This article was published on Wednesday, July 20 2011; Last modified on Saturday, May 14 2016