
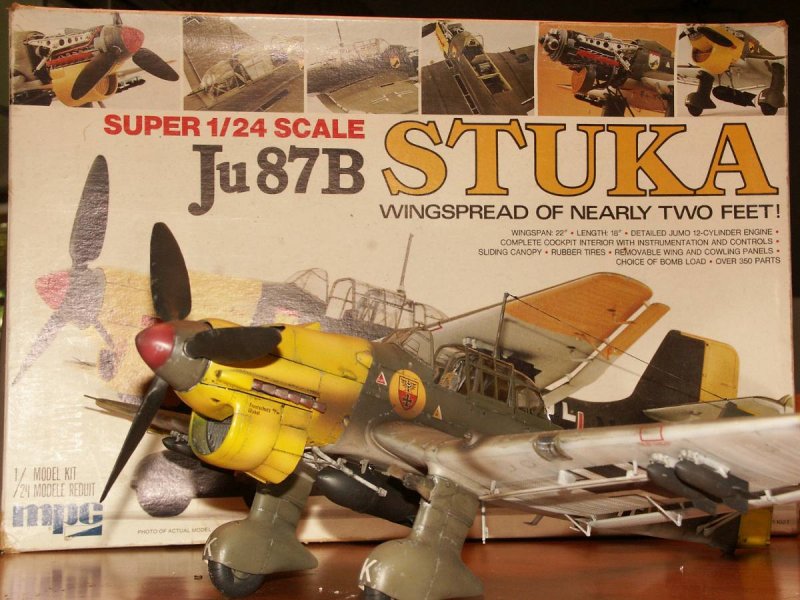
MPC 1/24 Ju 87 Stuka
By William Joyce
My cousin sent this kit to me a few years ago asking that I put it together for him. I said I would get right on it! Well here it is 3-years later and it is finally finished.
Construction
The kit was rather easy to put together and the fit was very good. Now I must say that I have not put an aircraft kit together in many...many...many years. So I did a lot of catching up by reading the “Tips” section on LSP. Pre, post shading, washes, and all these things I did not do when I was modeling. OK on with the construction. Again the kit went together quit well. I used the normal amount of filler putty; I use Nitro Stan’s automotive filler.
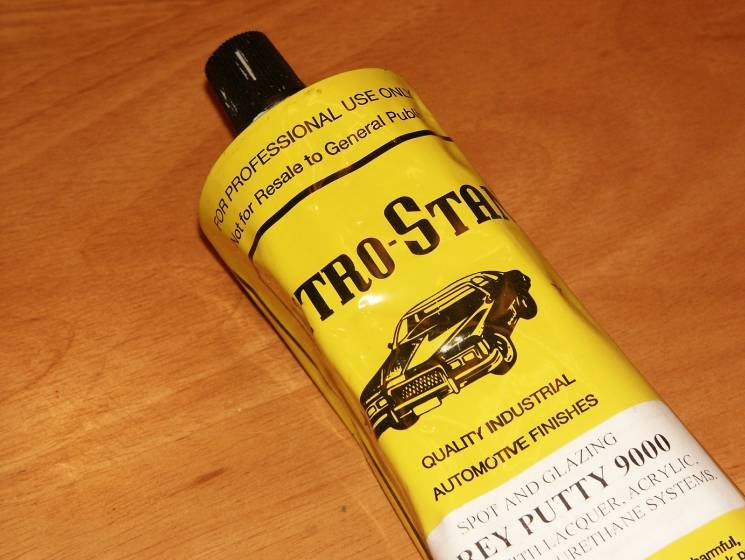
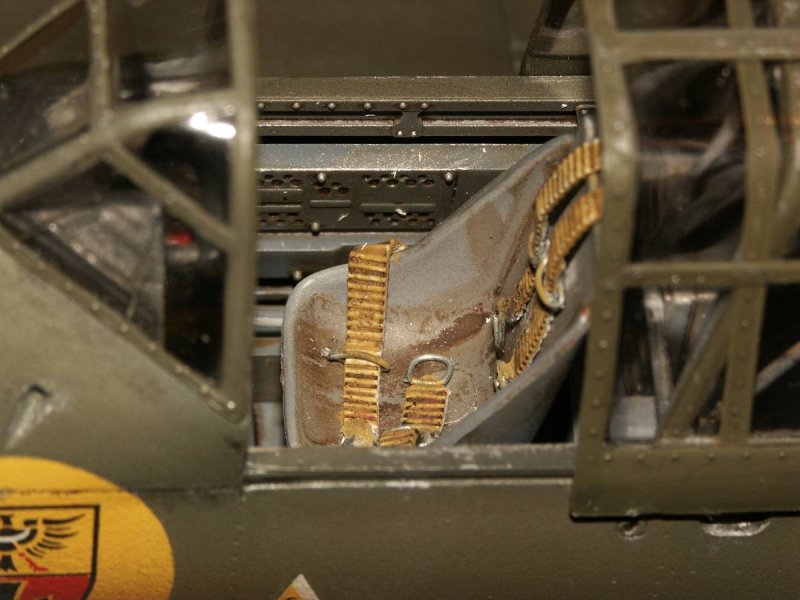
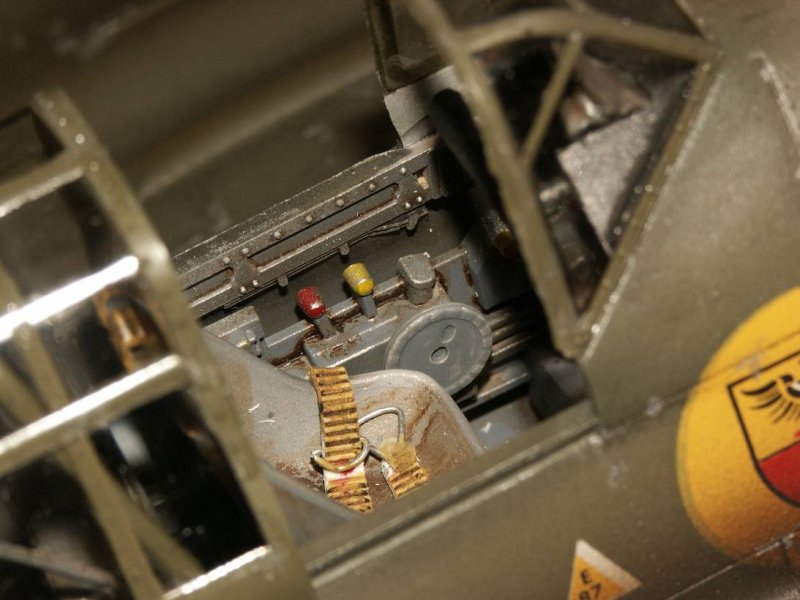
This stuff is great. It is gray in color and dries quickly. I like the gray color because it goes with the Tamya gray primer I use now. I never use to prime my kits, now I do. I did have to use a bit more filler to get the tail stabilizer sections to look right. They just would not butt up against the fuselage. So I filled and sanded and they looked fine. I followed the instructions starting with the engine; I’ll get back to the engine later, followed by the cockpit. I built the kit right out of the box except for the addition of seatbelts made from cut toothpaste tube for the belts and staples formed to resemble buckles and latches.
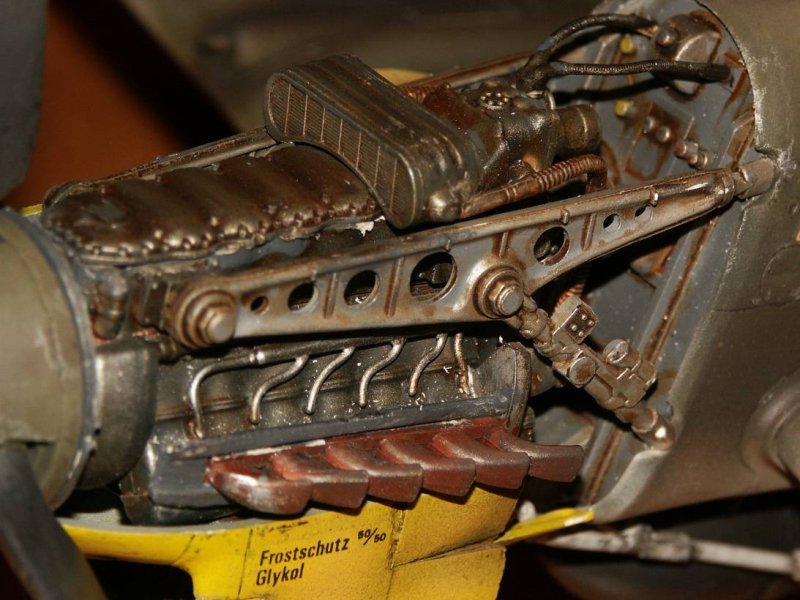
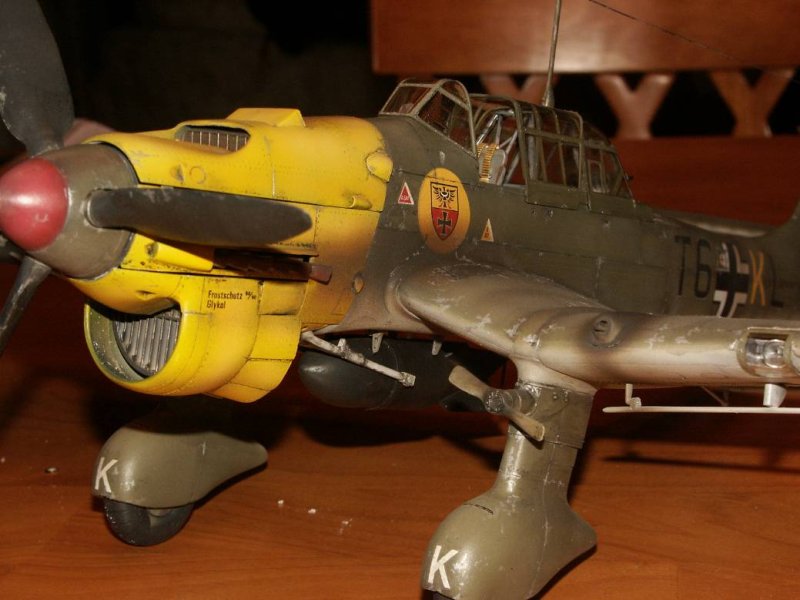
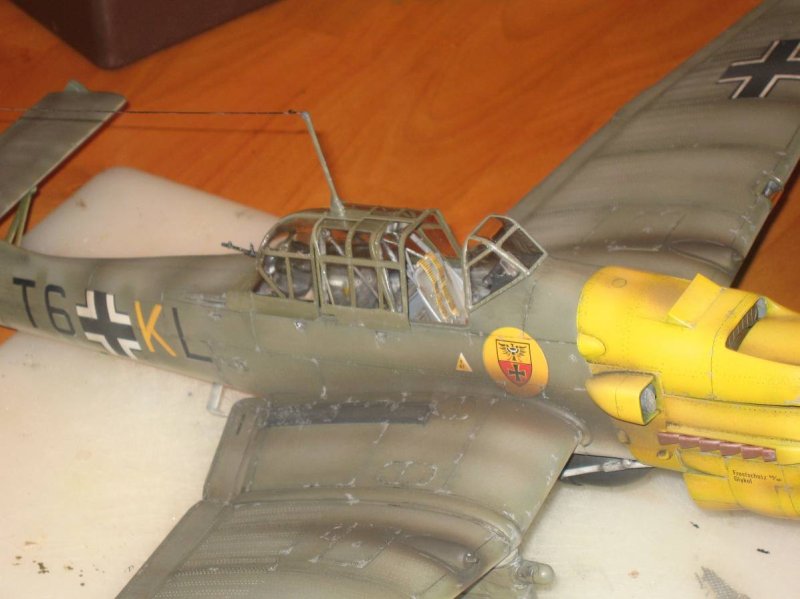
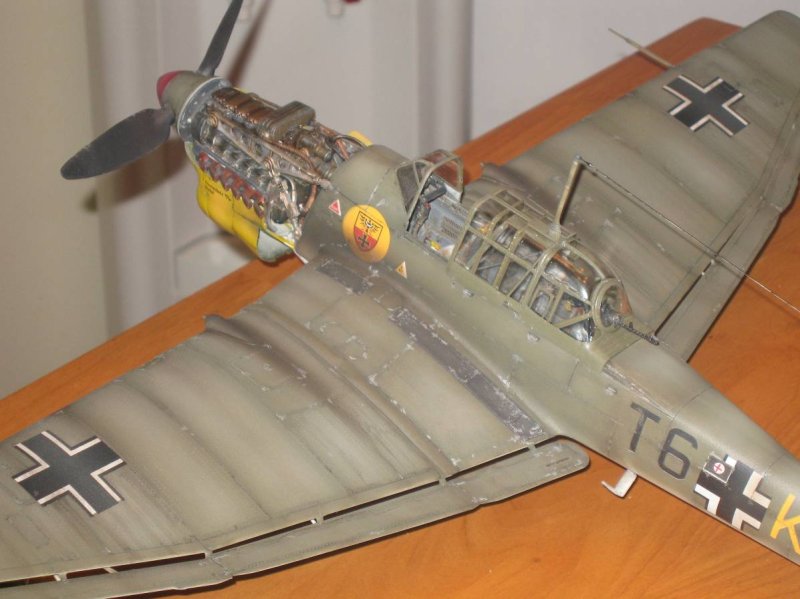
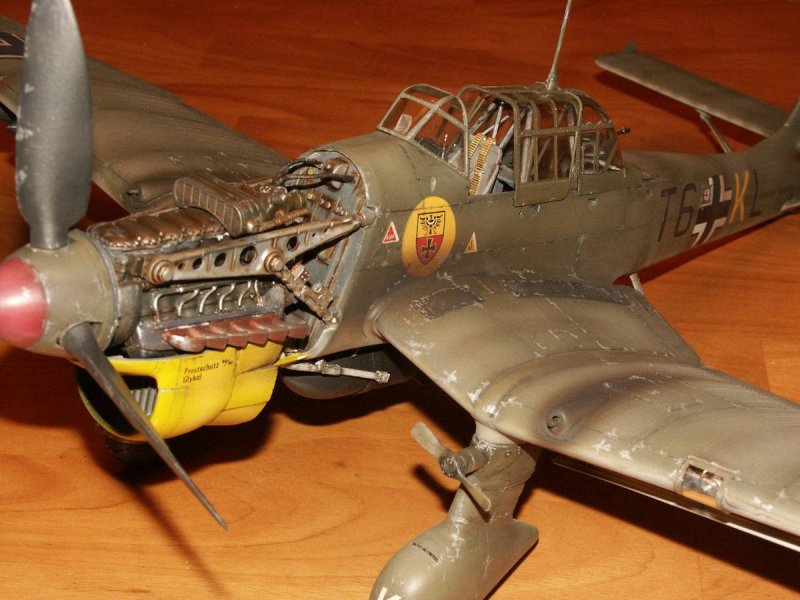
Other than that, right out of the box. Once completed I could not get the engine cowling to completely sit down and close, therefore, leaving rather large gaps, on both sides, between the side and top engine compartment covers. My cousin did not want me to bother with the engine at all but I wanted to build the entire kit. The kit does offer the option to not construct the engine and glue the cowlings together. I opted to display a portion the engine. I liked the detail and now that I have completed the kit I wish I would have added some extra detail here, wire, and tubing but too late, next time. What I did to get the top engine cowling cover to sit down on the side panels was pop off the top of the engine and took off (with the Dremel tool) an 1/8 of an inch, or so, off the top of the engine block. I determined the front of the engine was sitting too high not allowing the top cowing cover to set properly. So I grinded, in a wedge shape from front to back, taking more off at the front of the block. After that was completed the cowling set down and butted right against the side panels. I did permanently glue the bottom and right side panel allowing for only the top and left panel to be removed. I found this to be the only way to get the kit to display properly, with panels on (no gaps). I’m sure there are other options.
Painting
Kit Engine & Cockpit:
First I primed with Tamiya light grey primmer. Great stuff! I use both Tamiya and Testors Model Master acrylics. I painted the engine with a combination of light and dark grays then applied Future, let dry for two days minimum, then several oil wash. I used Lamp Black, Raw Umber and Burnt Sienna for my oil base wash, purchased at Hobby Lobby.
The cockpit was painted with Tamiya neutral gray, Futured, and oil washed as well. Both were then dry brushed with enamel silver paint to bring out the details.
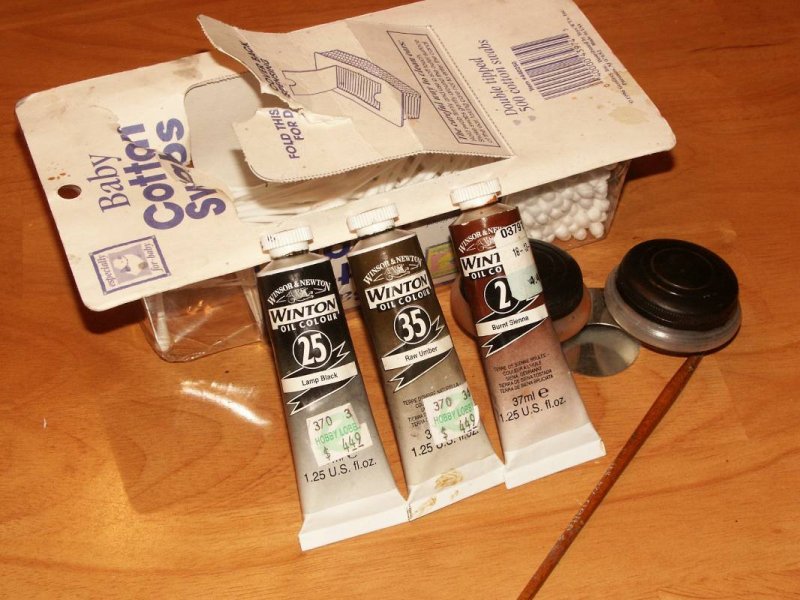
Applying an oil wash is not difficult, as I have found, but you must be patient. I do like oil washing because it is very forgiving and easy to work with. I would recommend those that have not “washed” before read up on the LSP “Tips” section and search up some articles on the web. Washing really brings the kit to life. If you want a rustier look use more Burnt Sienna.
Kit Exterior:
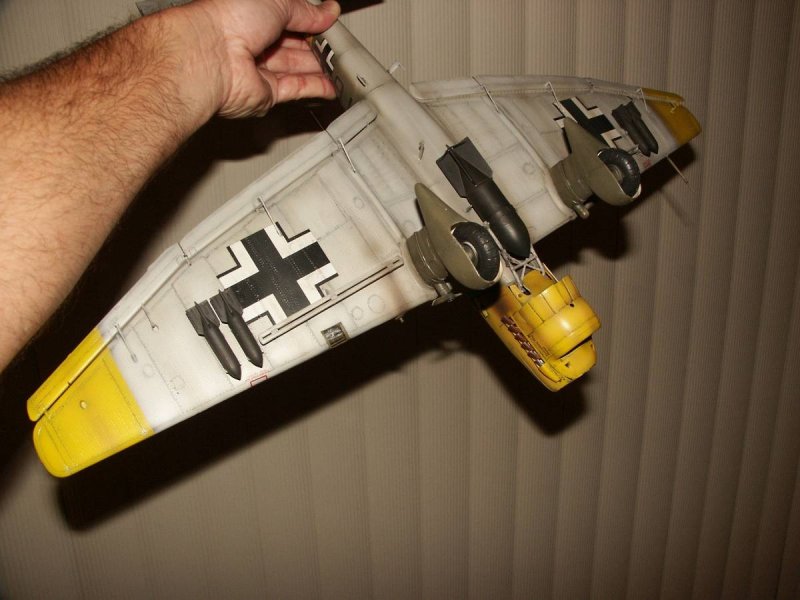
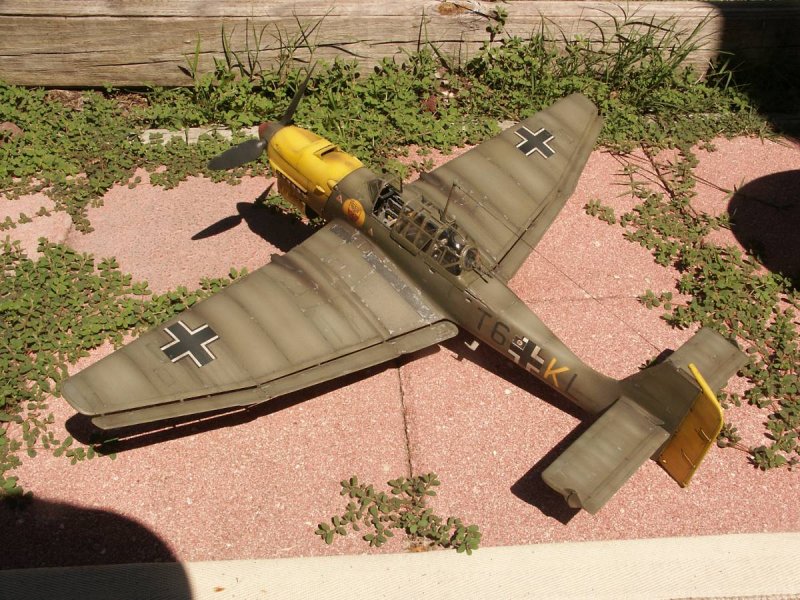
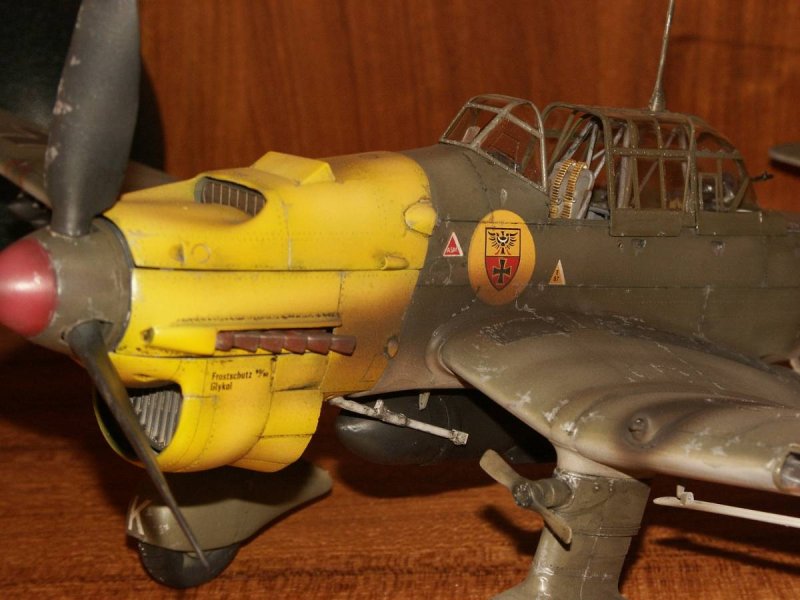
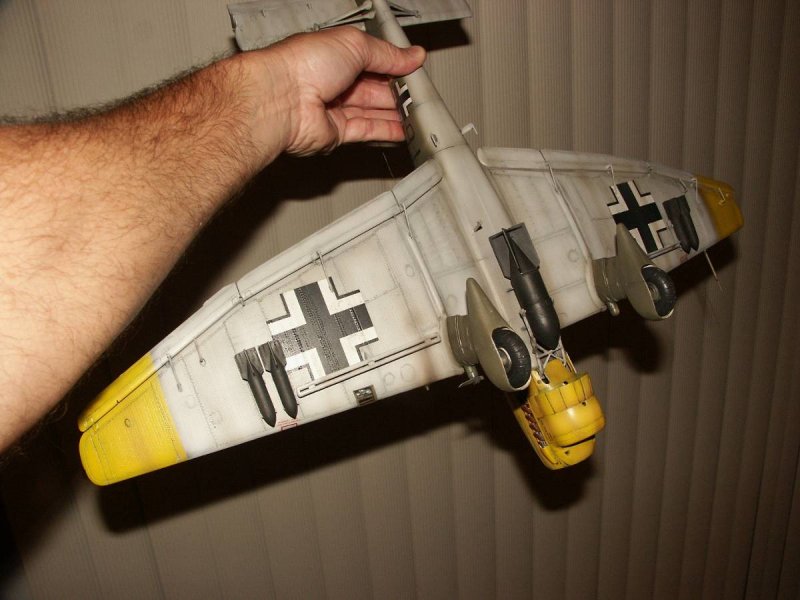
I first primed with Tamiya light grey primer. This primer is right out of the can. I then brought out my new Badger 150 double action airbrush. Yes I broke down and upgraded from my Binks single action airbrush. What a difference, you have so much more control with a double action airbrush. All of my painting was with the “fine” tip for the airbrush. I also bought a pressure regulator and moisture trap for my compressor. Double action combined with air pressure control is the way to go and no more splatters using the moisture trap. I found that I spayed using around 20 lbs of pressure on the average. I also thinned my paints with Testors Acrylic thinner (purchased at Hobby Lobby) applying more coats; this seemed to achieve a more life like finish. Ok on with the job. I primed then preshaded the kit. I preshaded with black hitting the panel lines and areas where shadowing would naturally occur. My cousin wanted the kit pained just like the cover, with the yellow nose and olive drab green. I used Tamiya Lemon Yellow and Testors Olive Drab for the upper surfaces of the kit. The under side was a light grey I mixed from Tamiya white and Tamiya black. Again these are acrylics. Once the preshading had a chance to dry, just a few minutes, I began with the under side first. I painted each panel starting from the inside of the panel moving outward. This prevented covering the preshading all together resulting with a nice life like definition between panels.
This process was duplicated on the upper surface as well with the olive drab. Once the base coat of olive drab was completed I mixed in some Tamiya white with the olive drab and thinned the mixture. This is to fade the paint surface. The mixture needs to thin, I would say close to a 50/50, or more. Again working form the inside of the panel outward, spraying the thinned mixture at low pressure (15 psi). The result is very convincing and life like.
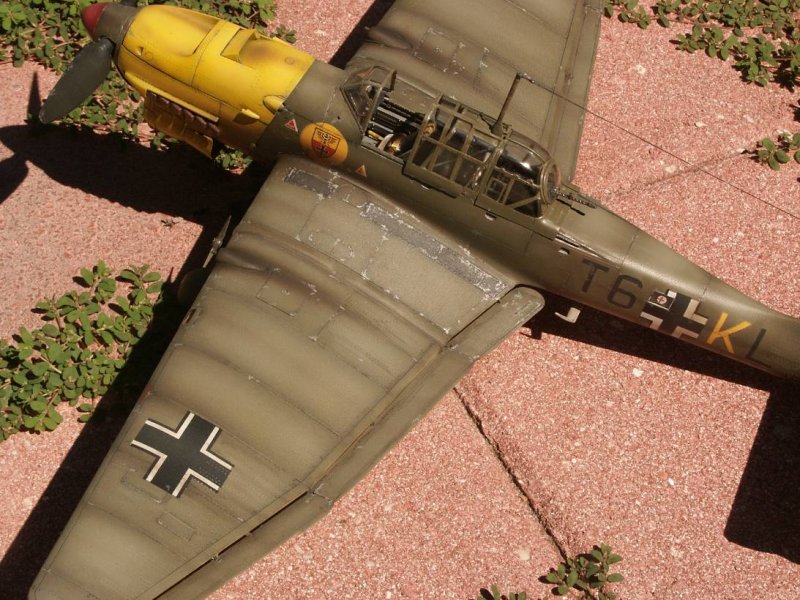
Next I pained the engine cowling, underside wing tips, and rudder with the Tamiya Lemon Yellow using the same technique. Then a couple of coats of Future was sprayed on in preparation of decals. The kits decals were not up to par. This may have been a result of the kits age and/or storage? They just did not want to sit down on the kits surface. Luckily I had the same kit produced by Heller. Now these decals worked flawlessly. I used Testors decal setting solution to apply them to the kit. They really sat down nicely on the rivets and into the panel lines. After all the decals were applied, and dried (say 24-hrs), I applied another coat of Future to seal the decals and prep for my oil wash. The canopy was masked and painted with Tamiya olive drab then a coat of Future brushed on the entire surface (Future is self leveling). This really gives the plastic surfaces a real glass finish.
Weathering:
Once the Future coat had at least two days to dry I applied my oil wash. This really gives the kit panel definition and adds life like grime to the model. When applying the wash I wiped any excess away in the direction of the air flow across the surface. After about 12-24 hours I returned to the kit wiping any additional excess with a combination of a moistened finger tip or cotton swab dipped on turpentine. Be careful not to rub to hard, you could remove the Future clear coat and damage your paint job. Most of the time I roll the cotton swab over the surface to cut down on friction. I like to return to the kit within 12 hours, give or take, that way the oils have not set up to much. I think I applied two oil washes; my cousin wanted the kit to be weathered on the heavy side.
Next I faded the kit one more time by applying a thinned, and I mean thinned, coat of Tamiya Buff. You want to spray a few coats before noticing the fading effect. This was applied to give the decals the faded look. However, I did apply to the entire kits upper surfaces starting from the center of the panel working outward.
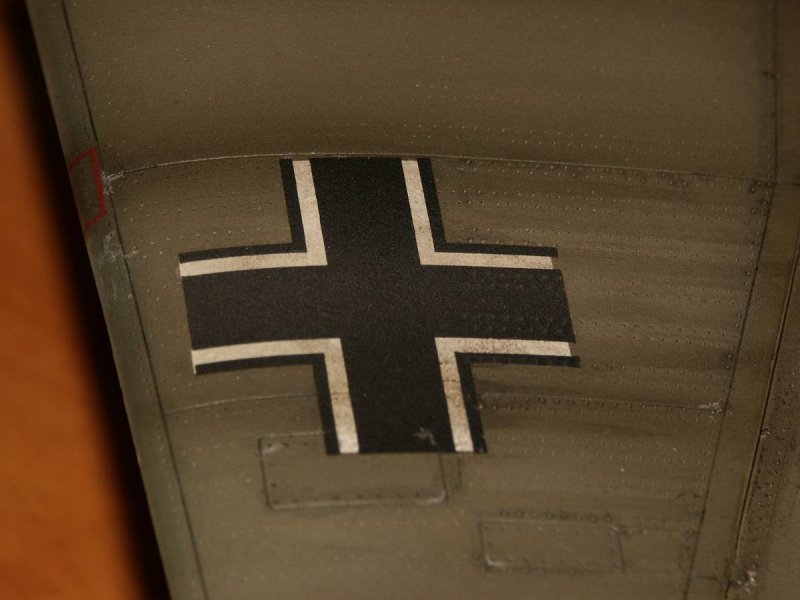
Next I applied “chipping” with a silver pencil, which I purchased at Hobby Lobby. I do not know who came up with this technique but it is the best and simple. It really adds a realistic touch to the kit. I chipped most around the cockpit and engine areas. These areas receive more foot and maintenance traffic.
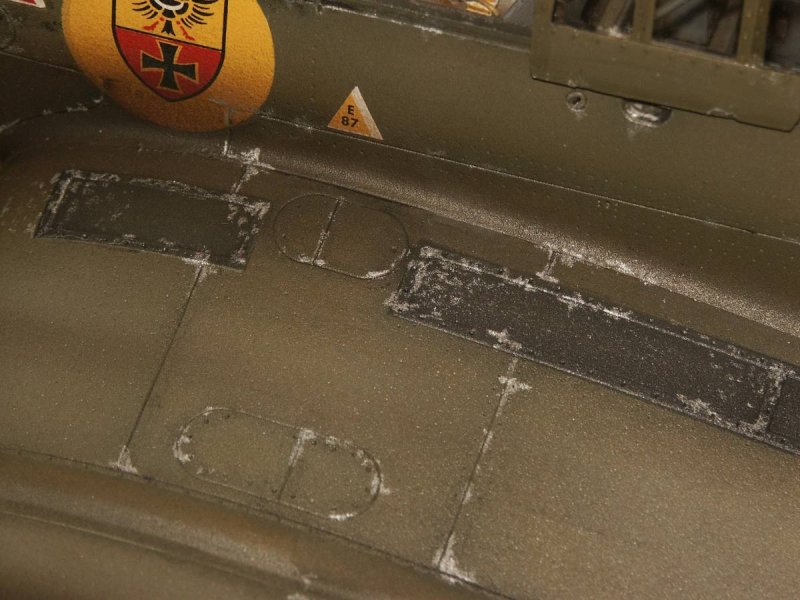
Finally I mixed a thinned mixture of Tamiya Black and Tamiya Red/Brown, at 50/50, and applied my post shading, exhaust stains, and machine gun powder residue stains. Post shading was applied to panel lines, elevator/flap areas, wing roots and also in-between panel line in the direction of air flow.
Next the kit was coated with Testors Clear Flat and the canopy glued on with Testor’s “white” glue, this stuff dries clear and will not damage the plastic clear finish like super glue fumes can. Finally, I stretched some spru for the antenna wire applied and WA-LA…THERE YOU HAVE IT !!!
One final note, be careful not to brake off the tail wheel assembly as I did. I glued it into place per instructions (wait until the kit is completely finished) and was test fitting the canopy, one piece kind of clicks into place, so I had to apply some pressure...snap!! So I cut a portion of a metal screw (small one right scale) and 5-minute epoxied the new assembly into place.
Conclusion
Great kit, I would recommend to any modeler, experienced or not. If you are building the MPC version aftermarket decals may be a necessity? It makes up into large one so be prepared to make room for it!!!
Additional Images

© William Joyce 2007
This article was published on Wednesday, July 20 2011; Last modified on Saturday, May 14 2016