
P-39D Airacobra
By Suresh Nathan

Introduction
I loved the idea of the Airacobra. Building a plane around a gun and having the engine behind the cockpit was a novel idea at the time and although it was to have been a high altitude interceptor and pursuit craft it gained notoriety in Soviet hands as a low altitude attack craft on account of its heavy main 37 mm gun. I was too late to get the excellent Scratchbuilder´s kit some 10 years ago and so was really happy the Special Hobby kit came out.
References
- Aircraft Anatomy fromWorld War II from Chartwell Books Inc
- Cockpit from Airlife
- Allied Aircraft Piston Engines of World War II from SAE International
- A P-39 from the Planes of Fames Museum, Chino, California
- The Internet
The model
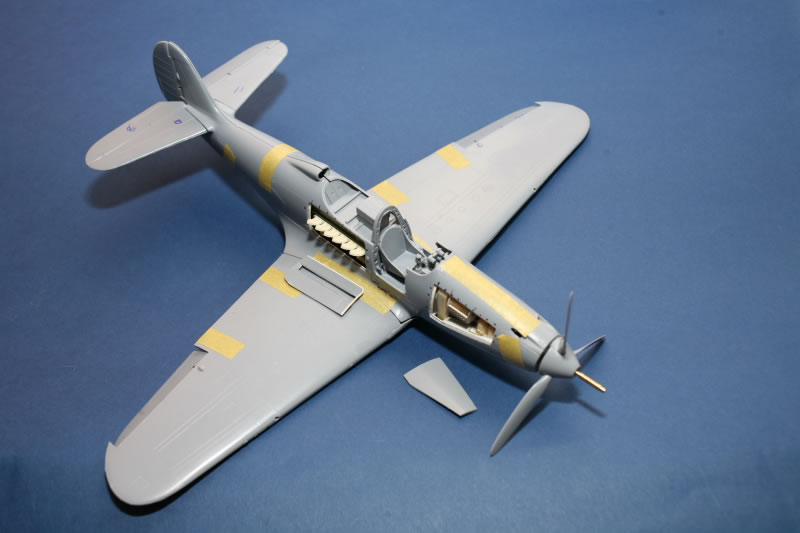
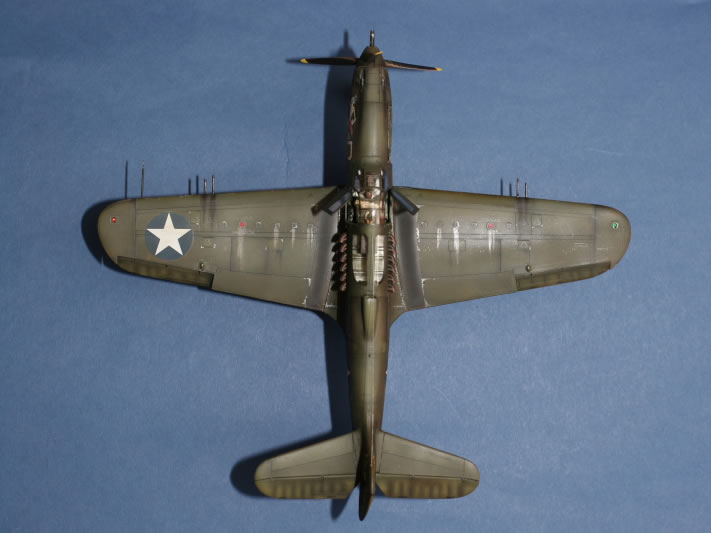
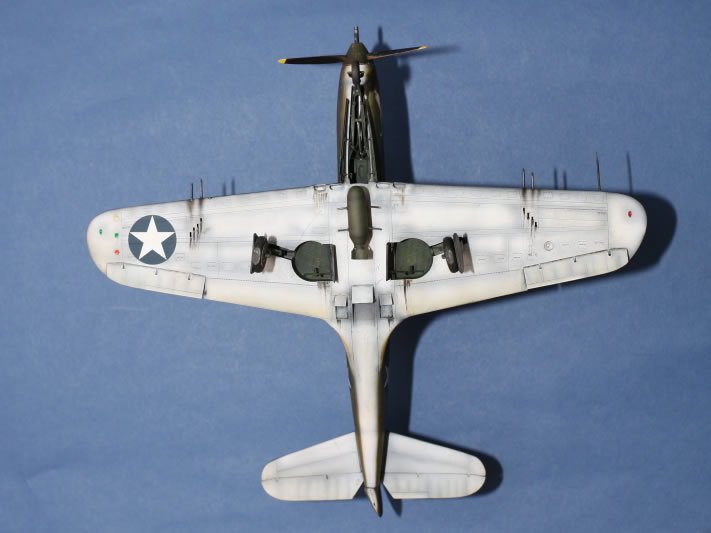
Special hobby makes an accurately engraved plane with fine surface detail. I had determined to open up the gun-bay and engine bay to showcase the wonderful piece of engineering that went into the unique design of the P-39D. This proved to be a difficult process because the plastic was quite thick (Figure 2) and so the panels had to be rebuilt with plastic strip.
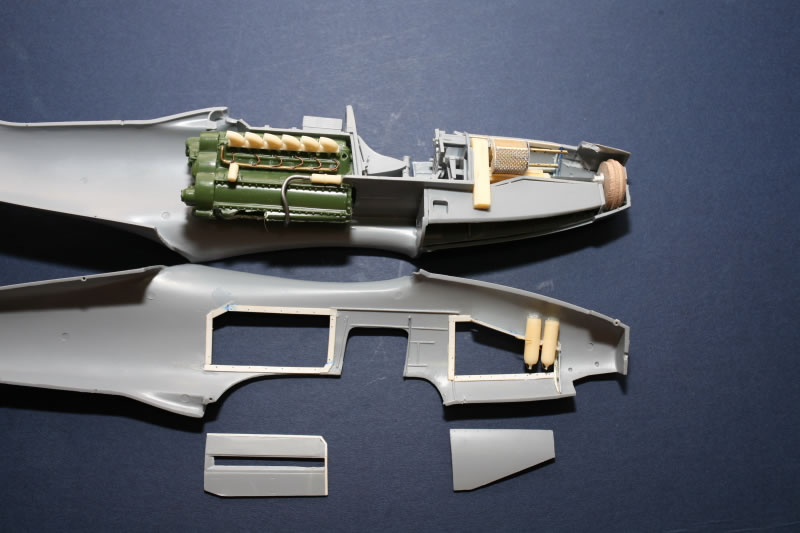
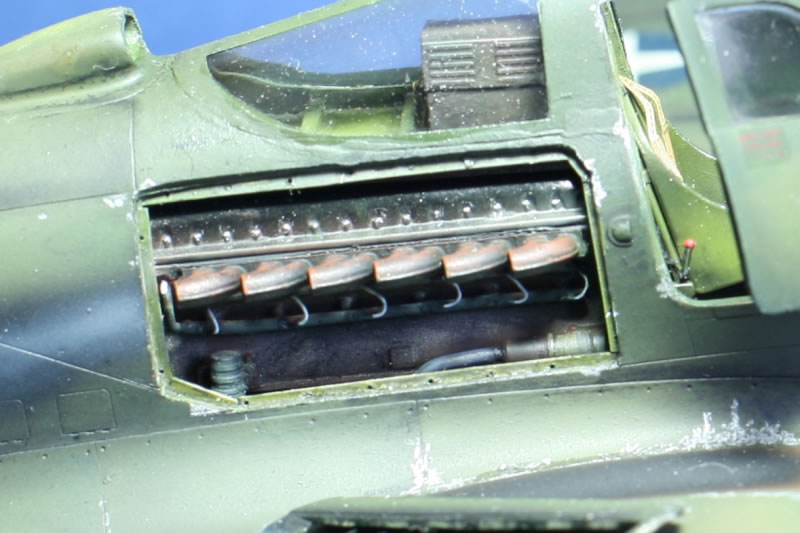
The Allison engine was cannibalized from an old Revell P-40 and modified with brass wire, plastic sheet, solder and resin bits. The kit provided resin exhaust stacks were modified to fit the engine (Figure 3).
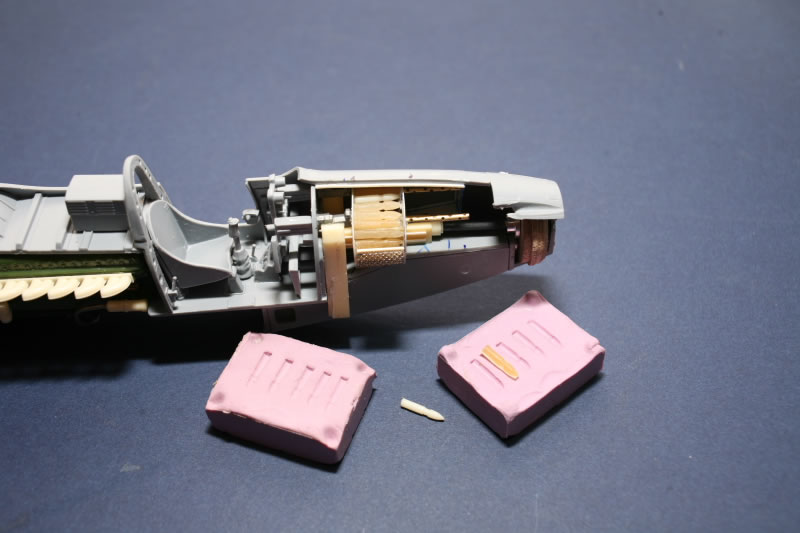
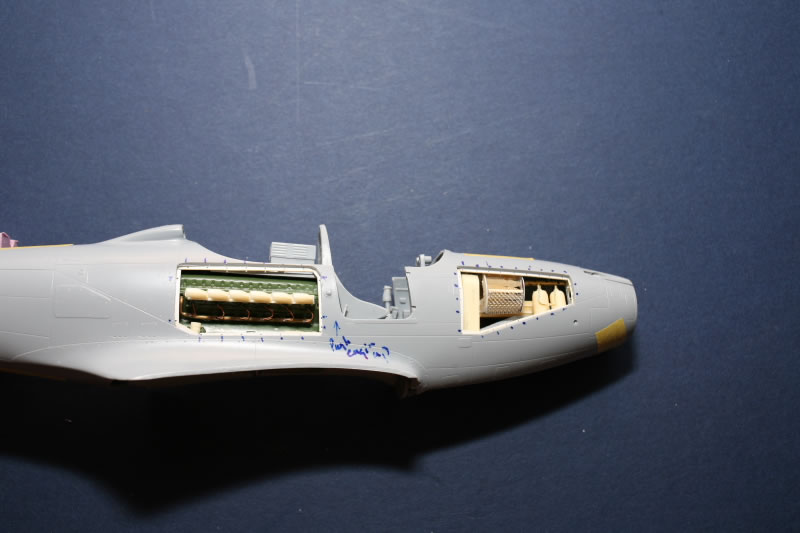
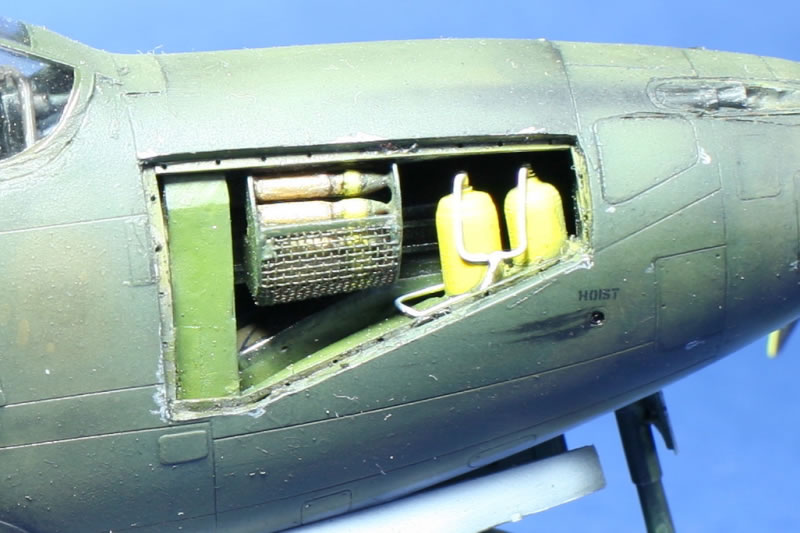
The gun bay was built from scratch with bits of plastic, wire mesh and brass rod turned in a lathe to make the gas cylinders and gun barrels. I could not get a ready source of 37 mm rounds so I turned a few masters out of styrene rod, made a silicone mould and cast 30 rounds out of epoxy (Figure 4). They didn´t all turn out right so I used the masters for the visible ones and used the castings as ´padding´. The overall result was satisfactory. On closing there were some fit issues but in the end I manage to get everything in place (Figure 5). The gun bay and particularly the shells were a challenge to paint accurately but in the end I sought of ignored the deep bits and it turned out alright (Figure 6) - just don´t go peaking around in there. The engine compartment was painted with shades of Alclad before closing (Figure 7) the fuselage.
The kit built out of the box should have some weight in the nose to prevent tail-sitting but by the time I completed the modifications there was nowhere to put any nose weights in the nose - all the space for the nose weight had been taken up by the gunbay details!
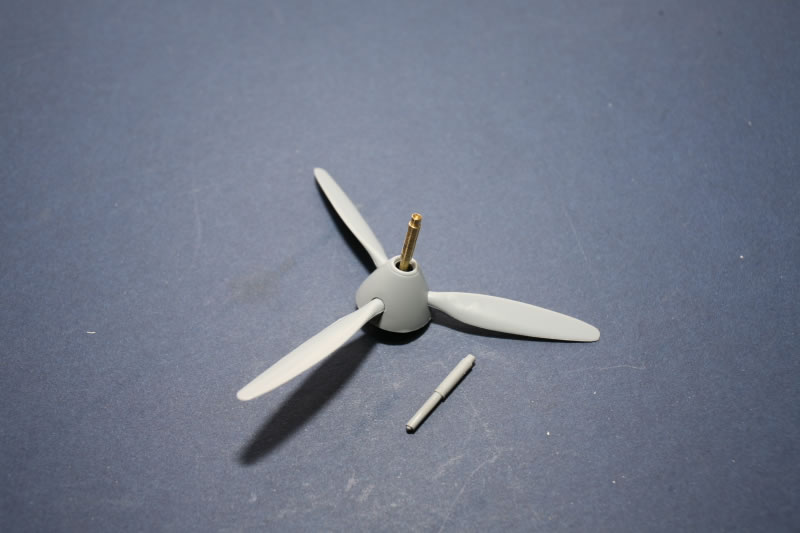
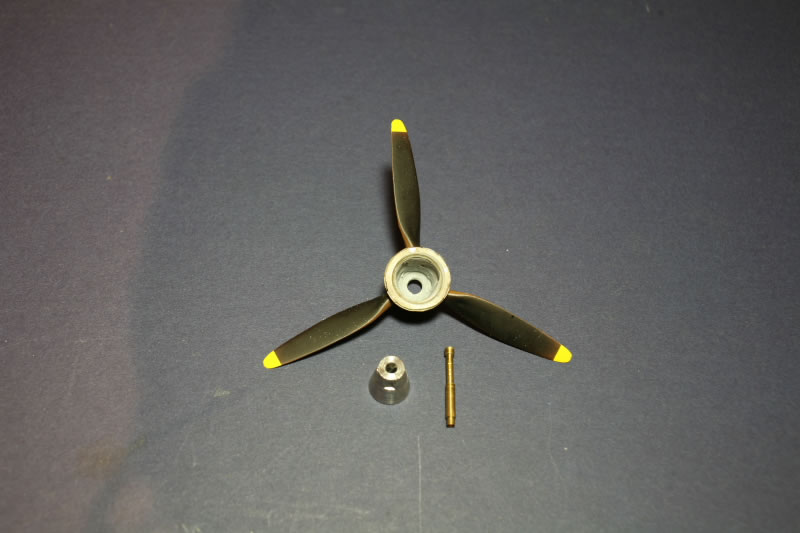
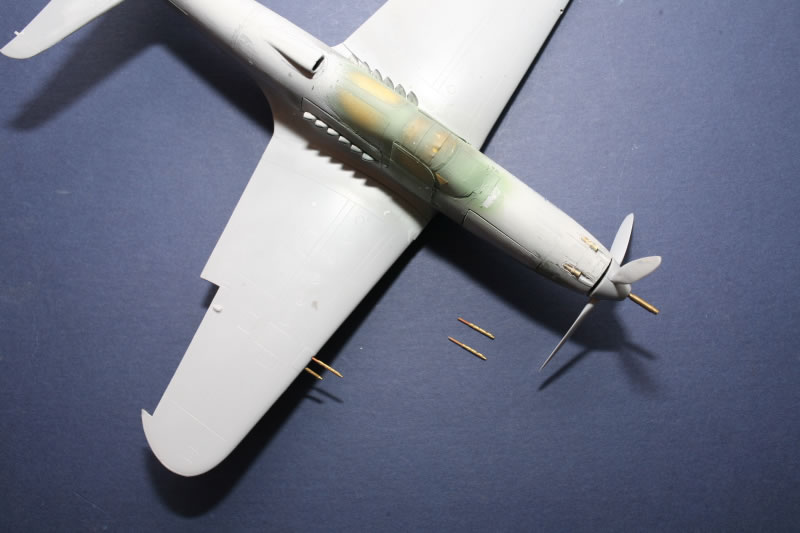
After a long hiatus I returned a few months later with an idea. I would turn a brass main gun and put it in the propeller (Figure 8). That unfortunately wasn´t enough weight. Next I hollowed out the nose. I made a rough mould out of kitchen foil and poured molten lead into the rough shape. I then turned a the rough shape into a nose weight to put inside the propeller hub and secure the 37 mm gun (Figure 9). That was just enough weight to prevent the plane from tailsitting (!).
All the guns were replaced with homemade brass turnings on a lathe (Figure 10). These were a vast improvement over the kit provided armaments which were little more than plastic rods.
Painting
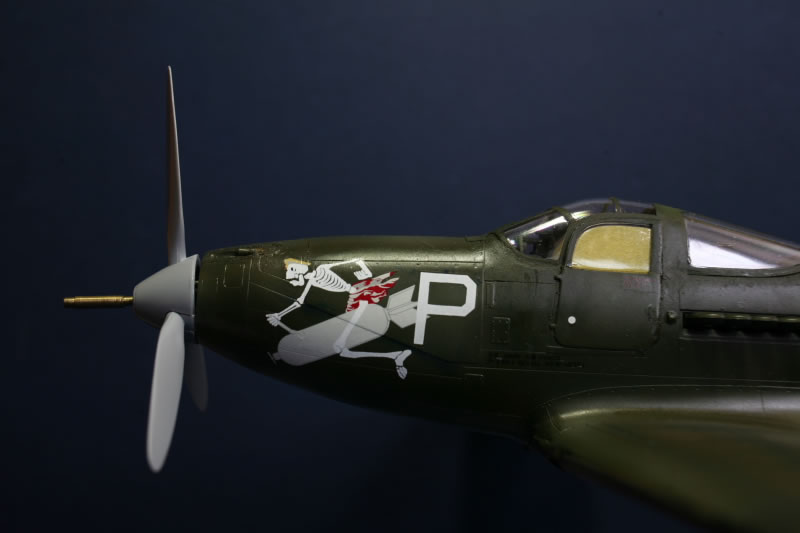
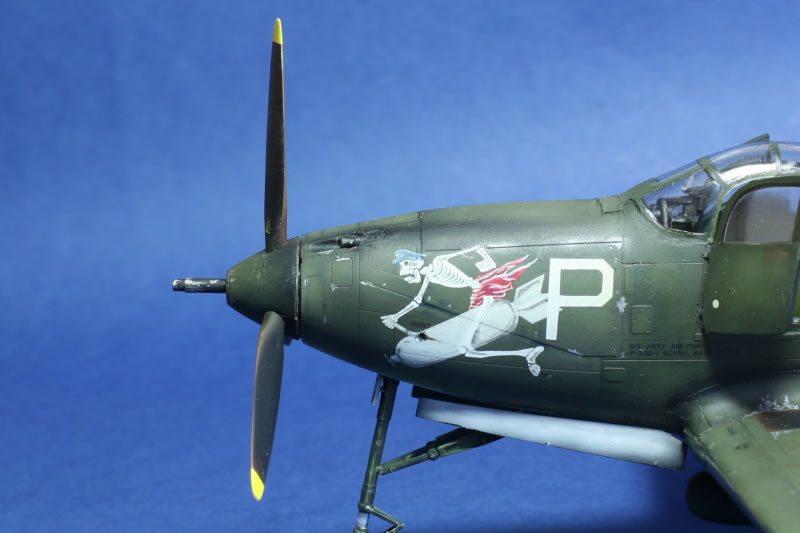
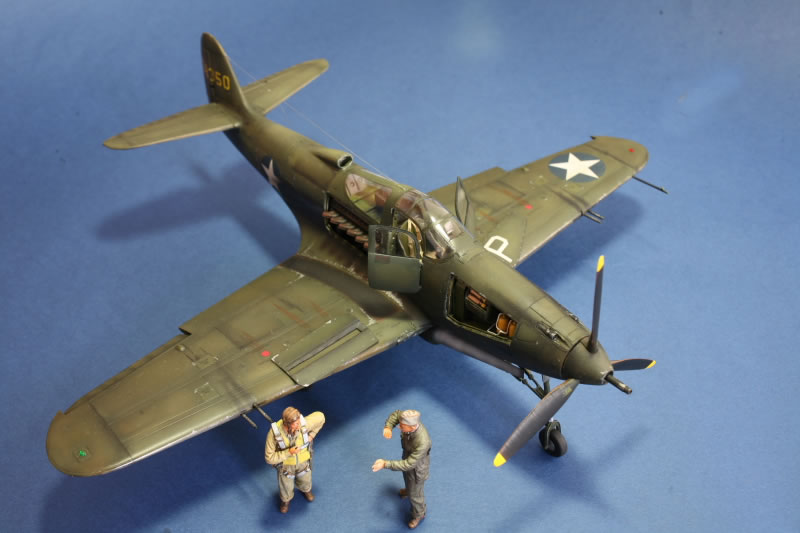
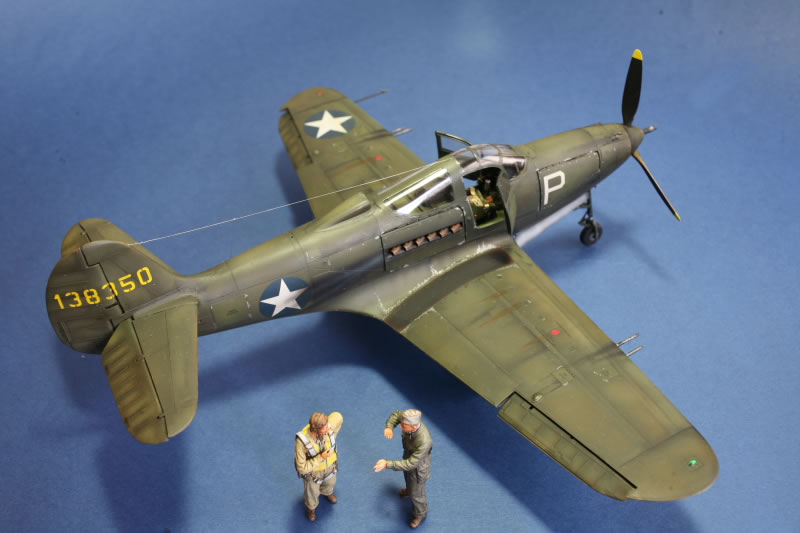
An armor modeler in a past life, I welcomed the opportunity to experiment with the P-39D using armor weathering techniques. Pictures of the plane in service attest to the fact that these planes used to take a beating in service. I applied pre-shading as per standard techniques.The base coat was a mixture of acrylics from Tamiya. Then came the fun. The base coat was protected with Future. All decals were applied and settled with decal setting solution (I use the stuff from Microscale). Incidentally this can dissolve the Future and cause a white residue but the residue usually clears up afterwards. The nose art (Figure 11)was a major reason for choosing this variant but it was quite literally looney (as in it looked like a cartoon from the Looney Tunes). Airacobras spotted some of the most striking nose art of the war and I wanted to do this justice. The nose art was therefore touched up and pretty much repainted by hand according to the boxart reference (Figure 12).
Rowney artist´s oils were used as filters. This technique, common in armor modeling, involves placing a dab of oil onto a panel then blending it in. By varying this effect with colors you get a very subtle battle-worn effect that goes very well in simulating olive drab. The same technique is used for oil streaks, water marks and grease. The exhaust and soot stained were airbrushed and the whole thing sealed with Humbrol matt varnish - a shade I rarely used on planes as it results in a deader than dead flat. On this plane however the color works well.
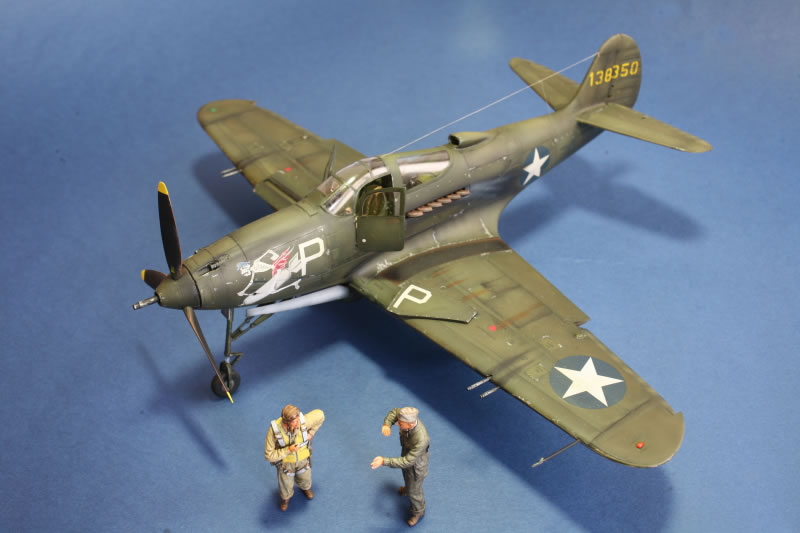
The pilot figures are from Nemrod. These are well moulded and have enough detail to allow wash painting with acrylics. I usually use oils for the faces.
Conclusions
A satisfying build. Hope you enjoy the rest of the pictures.
© Suresh Nathan
This article was published on Wednesday, July 20 2011; Last modified on Saturday, May 14 2016