
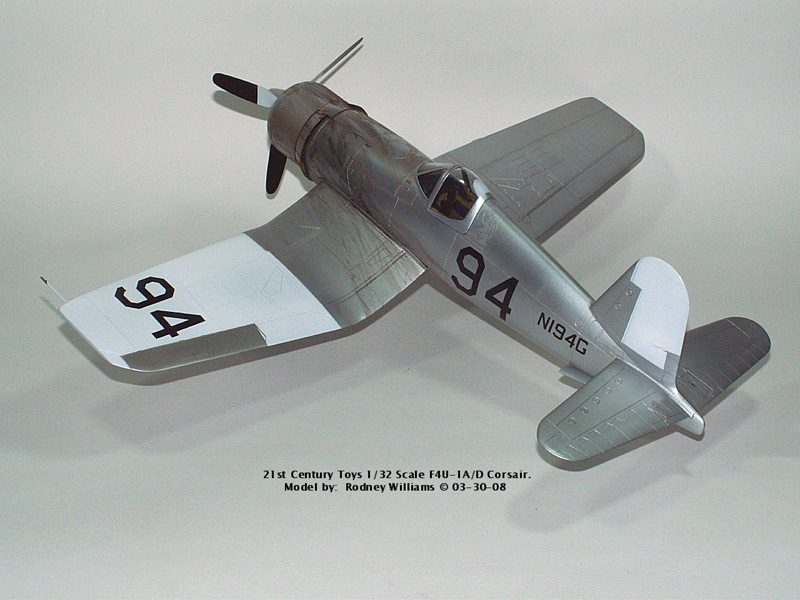
21st Century Toys 1/32 F4U-1A/D Corsair: A Reno, Nevada Air Racer
By Rodney Williams
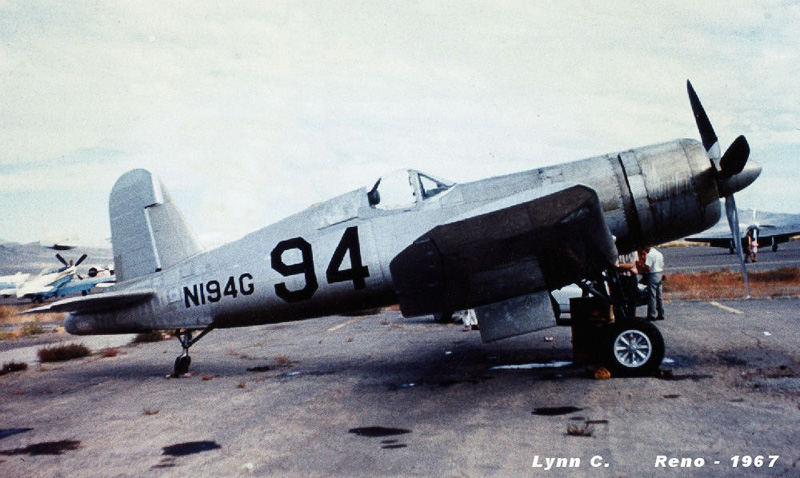
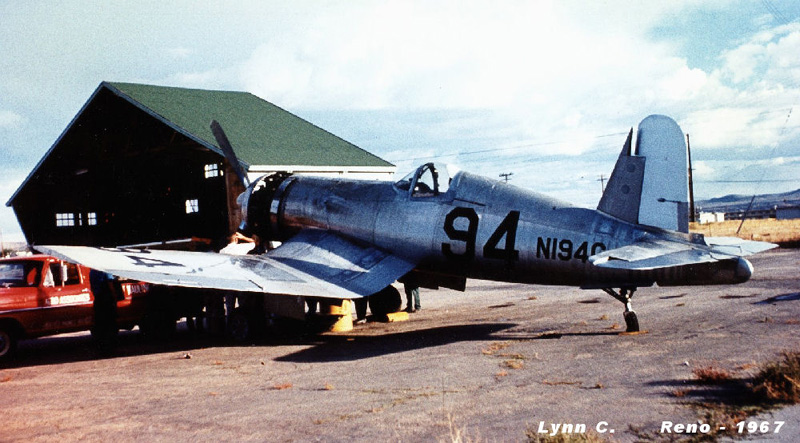
My first photo shows the real Corsair at the Reno, Nevada Air Races in 1967.
THE MODEL
I was at the local "Wal*Mart" store in Cortez, Colorado in the summer of 2008 shopping with my wife. I went looking around in the toy department. Lo and behold, there's a "21st CENTURY TOYS - F4U1A/D CORSAIR" on the shelf. I opened up the box, and it looked "A-OK," especially for a "ten dollar" price tag.
Over the past two decades, I have built 16 Corsair models. I told myself that this model will be my "Very Last Corsair." Guess what? I have built two more Corsairs since then.
CONSTRUCTION
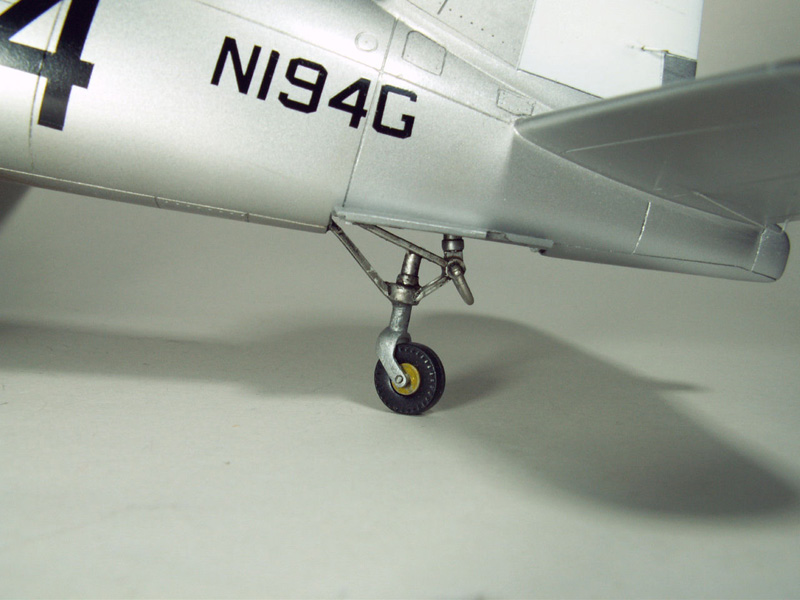
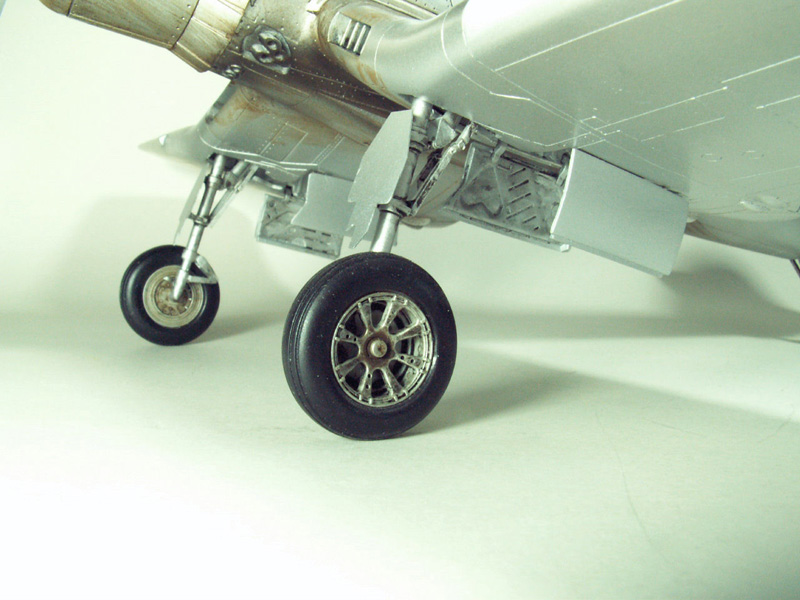
This model comes with a set of screws and some plastic plugs. You just put the parts together, screw in the screws and push in the plastic plugs...presto...you are finished...ALMOST. I applied super glue where necessary. The kits' main landing gears are not very accurate. I had a spare set of my cast resin F2G main gears, so I used them instead of the kit parts.
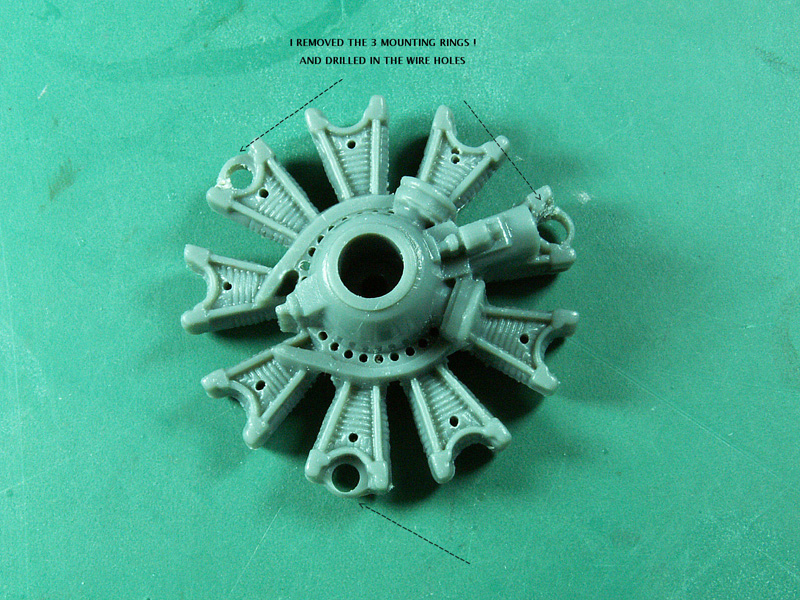
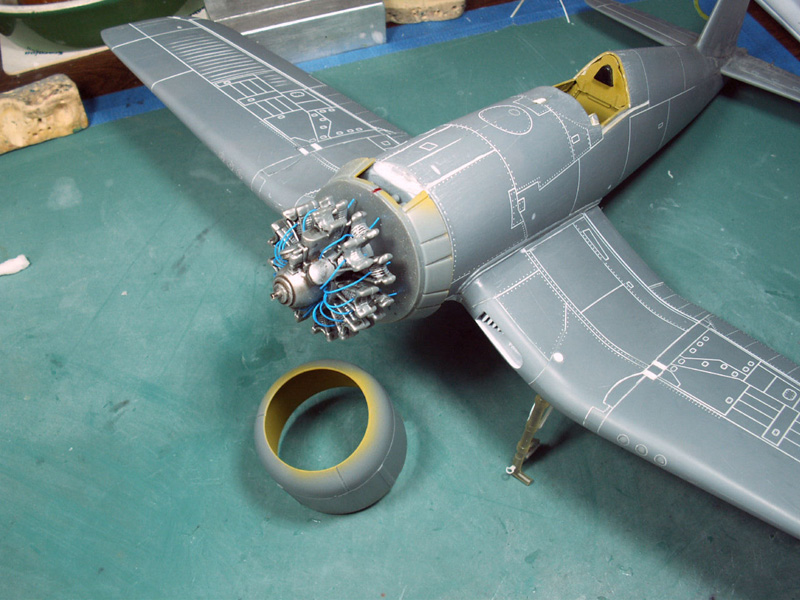
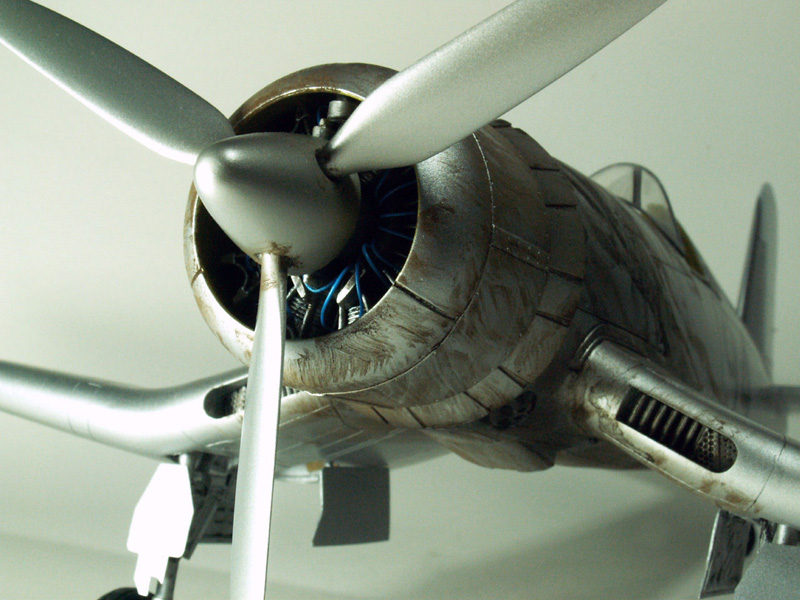
THE ENGINE
This photo show's how I used some blue wire for my ignition wires then attached them to some pre-drilled holes in the kit's engine.
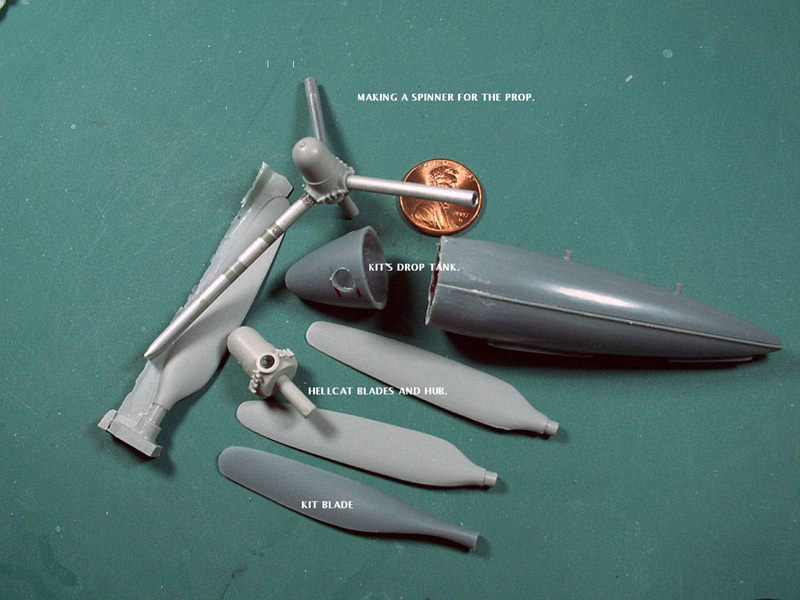
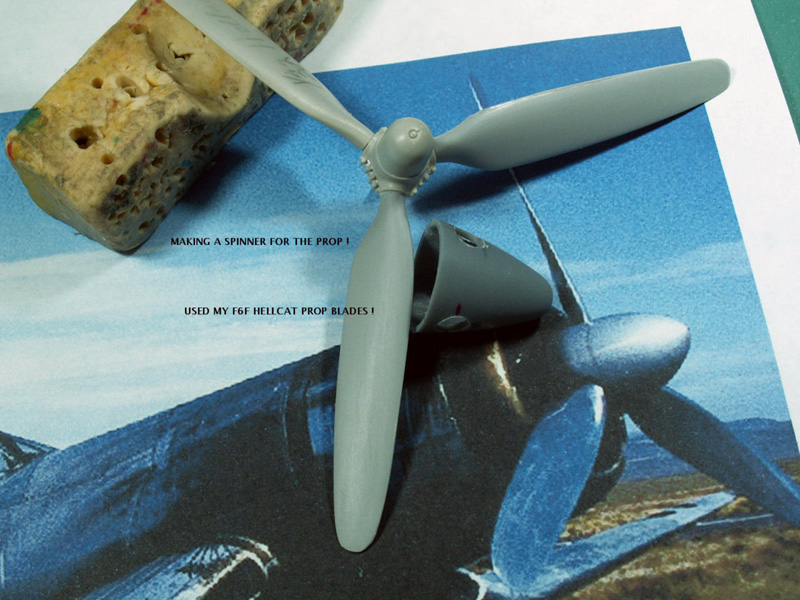
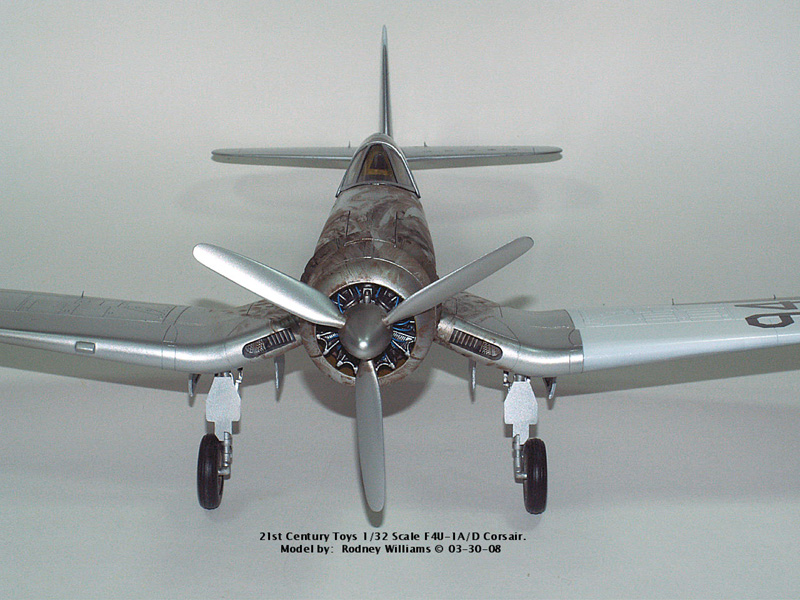
PROP BLADES AND SPINNER
The real Corsair racer had a spinner, so it was scratch-building time. I glued the kit's drop tank together and then cut off the front end and revised this part to accept the prop blades. I could not use the kit blades, as they were the wrong shape. I had several 1/32 scale spare F6F Hellcat cast resin blades, including a 3 blade hub so I used these parts. My spinner is not a perfect match to the photo, it looks ok to me and that's all that counts.
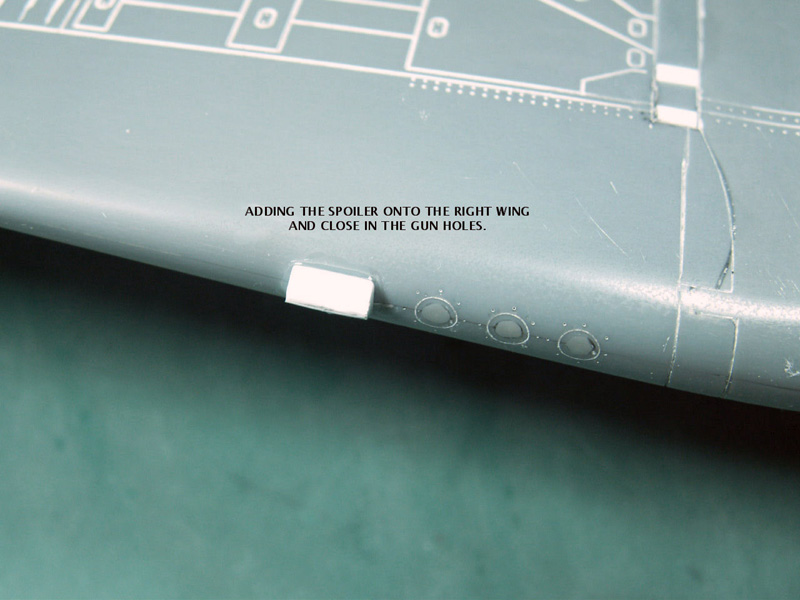
SPOILER & GUN PORTS
I build the spoiler that goes on the leading edge of the right wing and closed up all 6 gun ports. I re-scribed the round panel lines that goes around the original gun ports and added some rivet's with my pin vise.
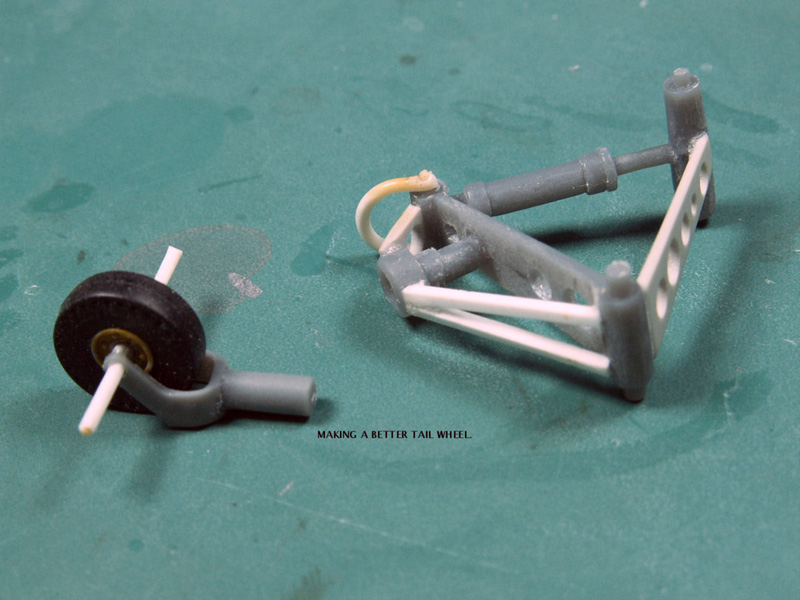
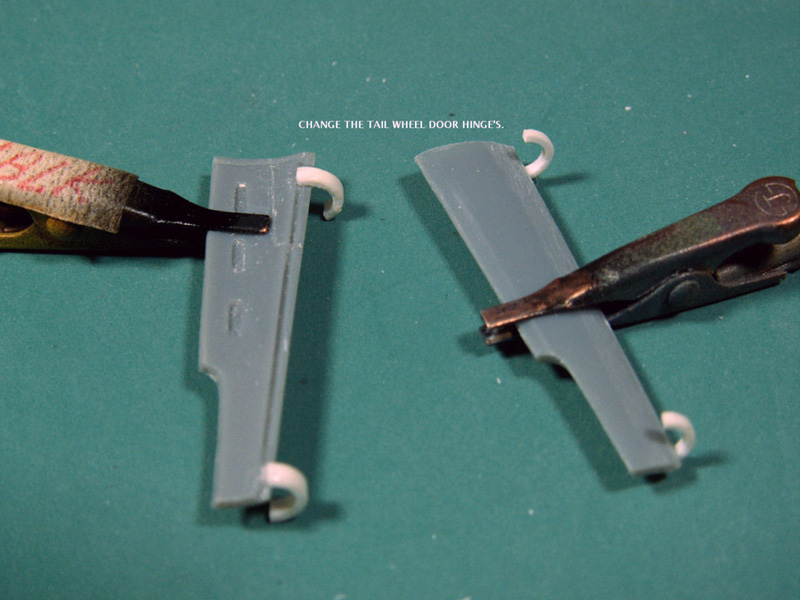
TAIL WHEEL
My next job was to revise and upgrade the tail wheel area and change the door hinges. I used some left-over F2G cast resin tail wheel parts. I bent a .025 diameter round styrene rod for the tie-down bracket. I re-positioned the tail wheel.

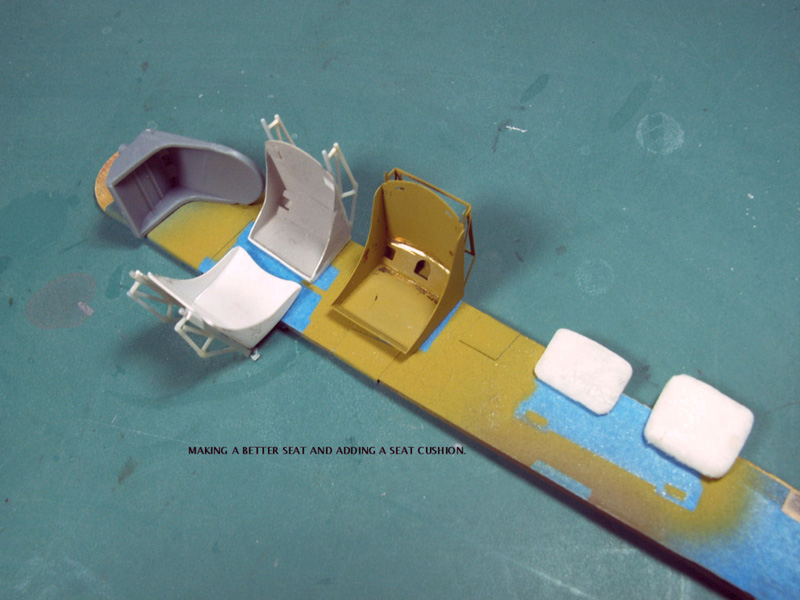
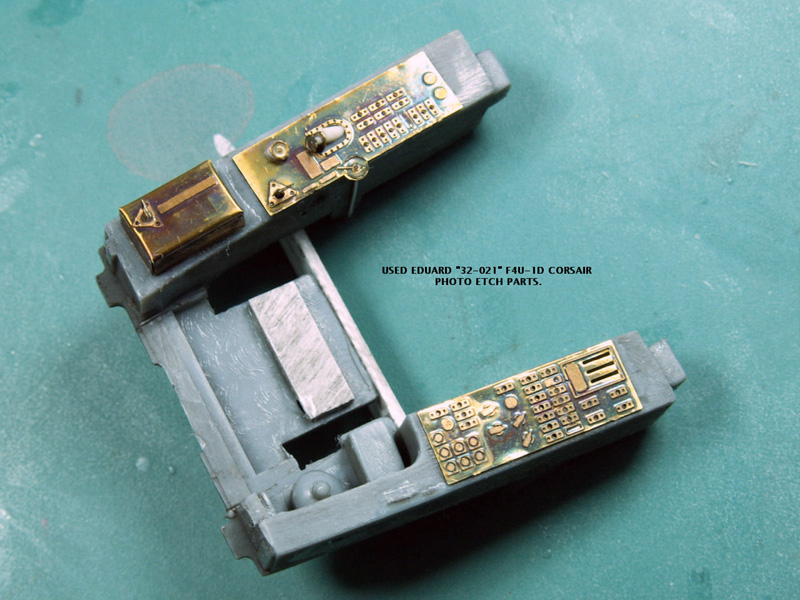
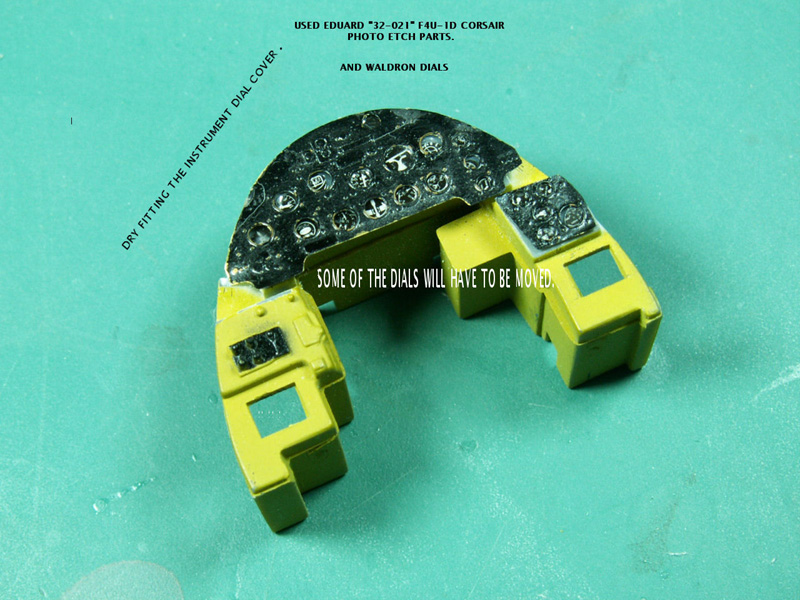
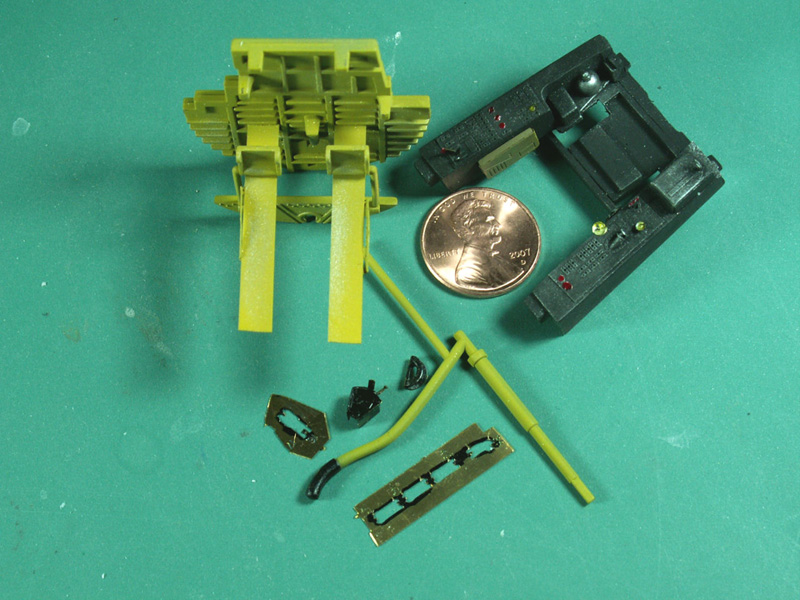
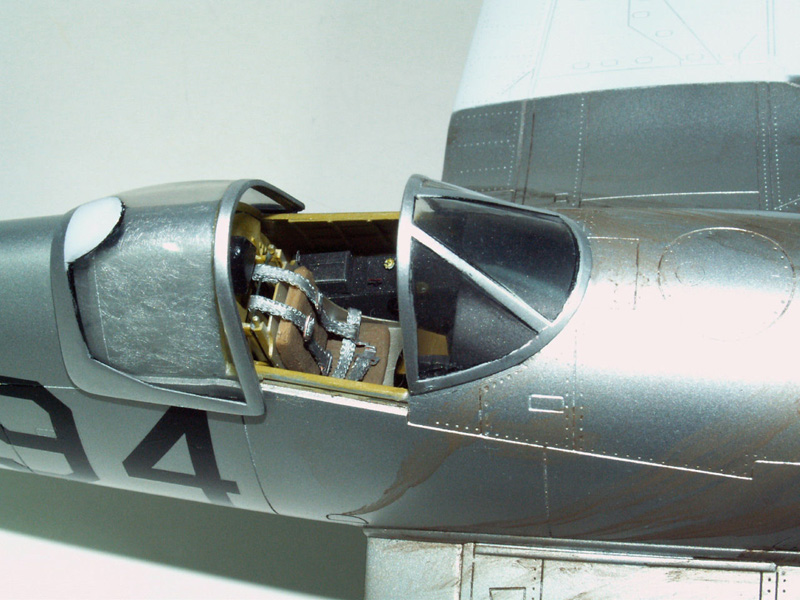
THE COCKPIT
In 1996, I purchase a 1/32 scale photo-etch Eduard Corsair cockpit set, but never used it in any of my F2G Corsairs, (part number is: #32 021 F4U-1D Corsair). It worked out just fine for this model. One photo shows the kit seat with two of my home made seats and Eduards photo-etch unit. I used one of my home made seats.
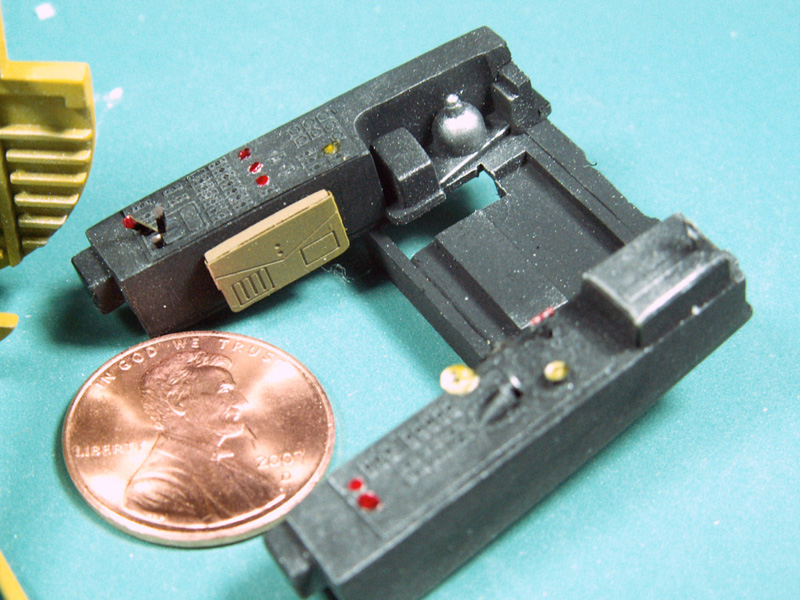
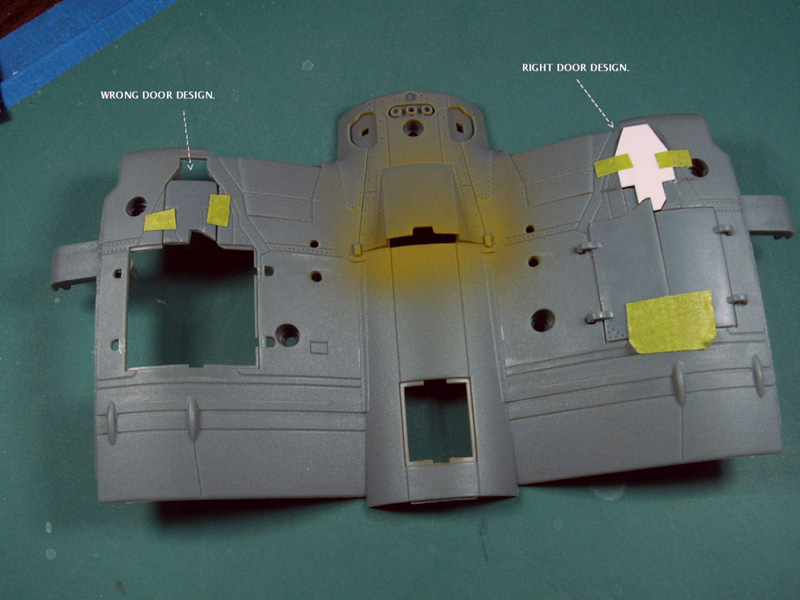
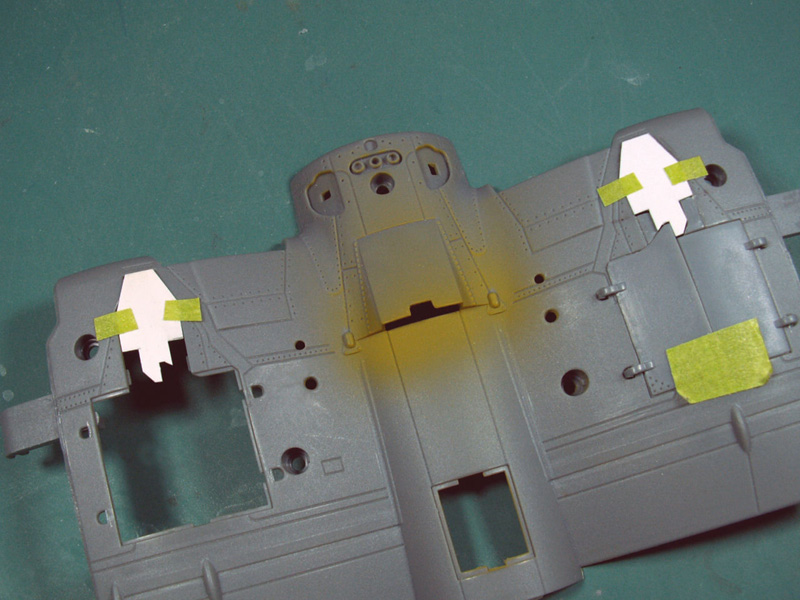
THE FRONT DOORS
For some screw-ball reason, 21st Century followed in Trumpeters footsteps when it comes to the main landing gears front door covers. These two photos relate the problem and how I fixed them.
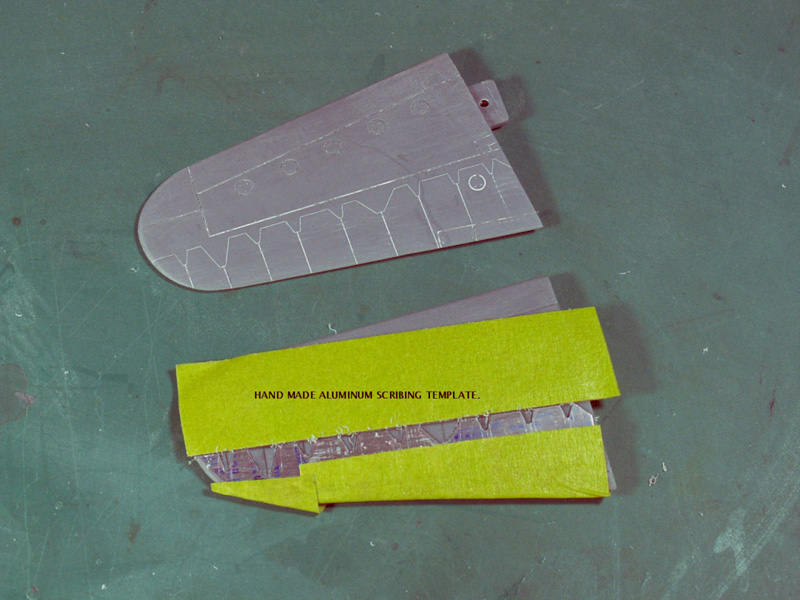
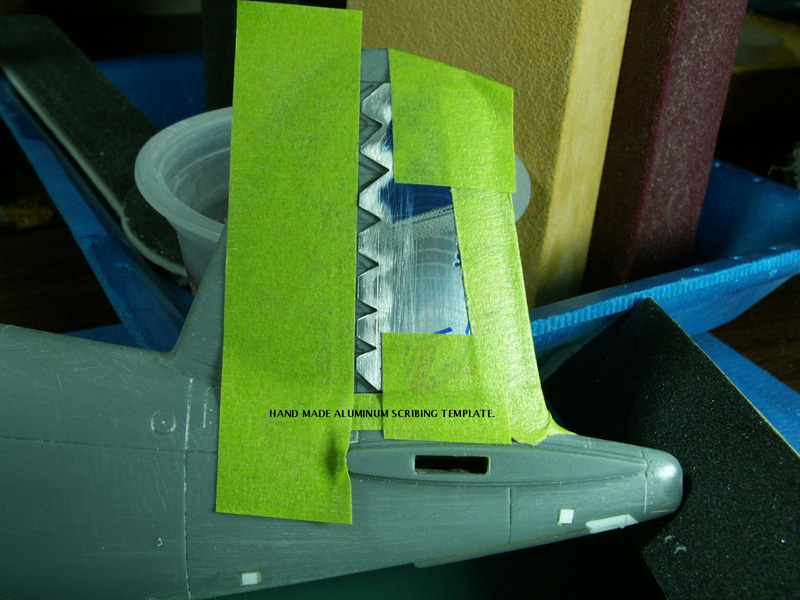
SCRIBING TEMPLATES
I make lots of scribing templates, using .005 thick aluminum. It took about 30 minutes to make these templates for my stabilizer/elevator, including one for the rudder. The end results are worth the effort.
INSPECTION TIME
I apply a thin coat of paint onto the assembled one piece wing, fuselage and tail plane parts, and check for flaws. As always, there are a few imperfections to correct. I find it very easy to work with the larger models, when the darn wings and tail plane is left off. Of course, when the wing and tail plane is attached, it's inspection time again and there are always some seams to fix.

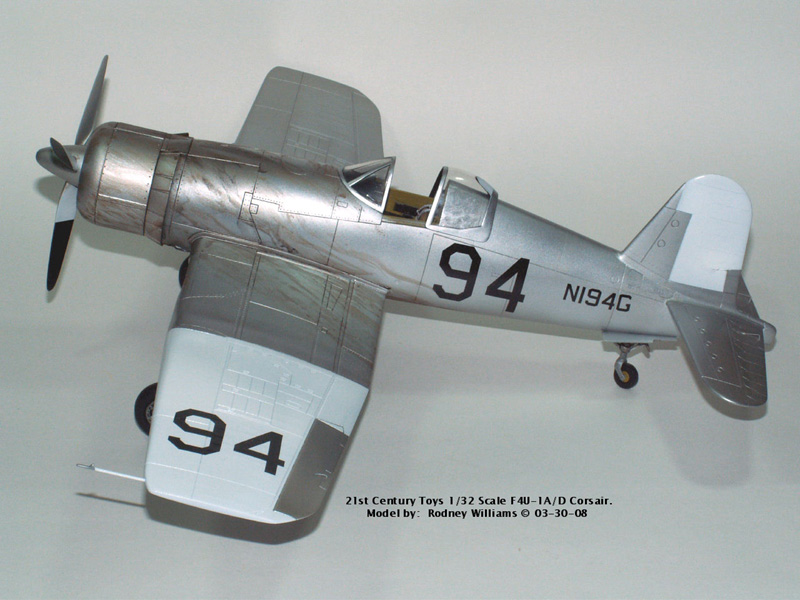
PAINT APPLICATION
I have used Tamiya paint's for about 25 years. I applied Tamiya X-11 Chrome Silver for my base coat on the entire model. I applied my X-2 Gloss White to the rudder and to top side of the left wing. In one of my photos of the real aircraft, it shows part of the underside of the wings. I did not detect any white paint on the bottom of the wing's, nor the number 94.
The back of the prop blades were painted with XF-1 Flat Black and my XF-2 Flat White. The Chrome Sliver was applied to the front of the prop blades and on the spinner. I used some SnJ aluminum polishing powder and polished the blades and spinner.
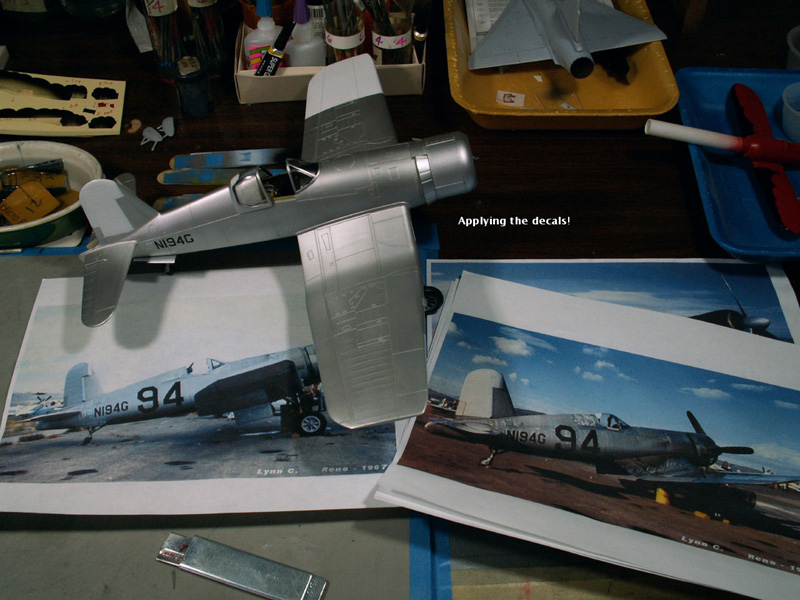
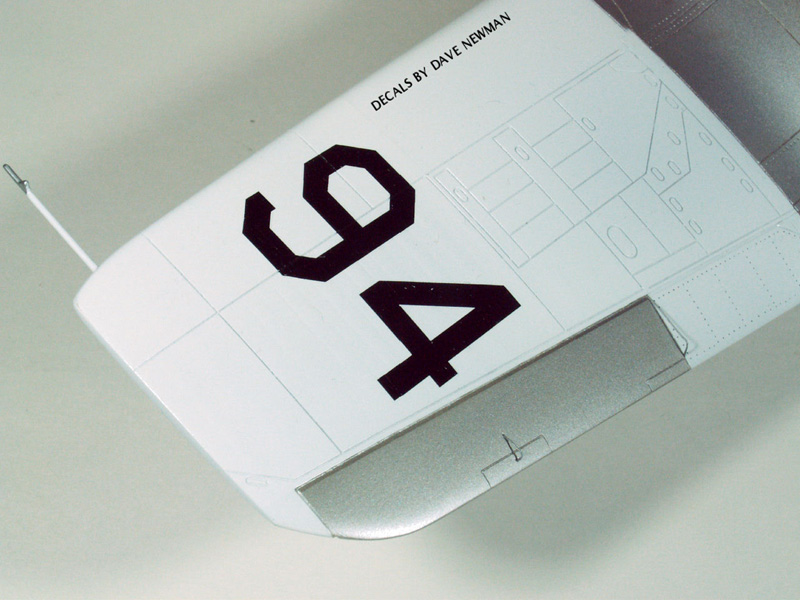
Future Floor Wax, (FFW as I call it) was air brushed onto the areas where the decals were to be applied. A few days later I added the number 94 decals to the fuselage. The slightly larger #94 decal was applied to the top left wing.
(These decals were made by Dave Newman - newmanispwest@yahoo.com ).
The civil number of NI94G was found on one of my old 1987 Microscale decal sheets, (72-0228 and/or on 72-025). The decals were sealed with FFW. I used my standard Tamiya dull-coat on top of the future.
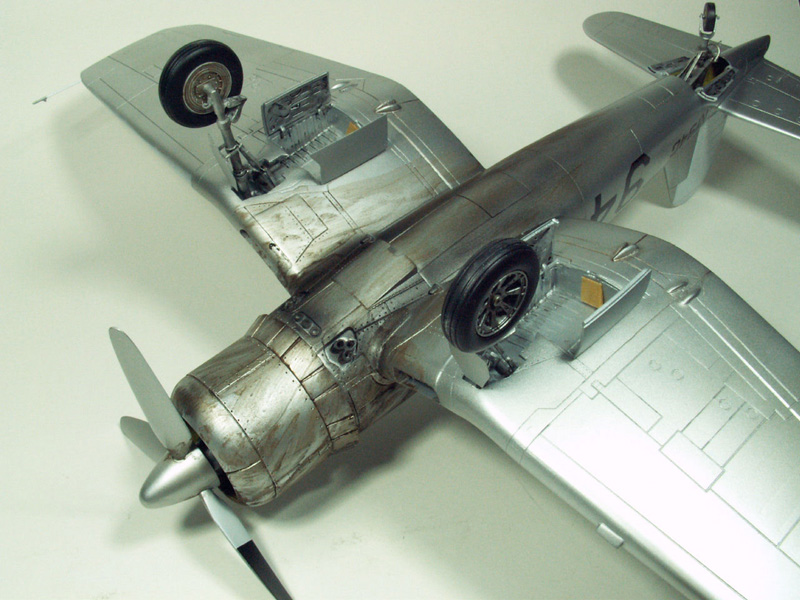
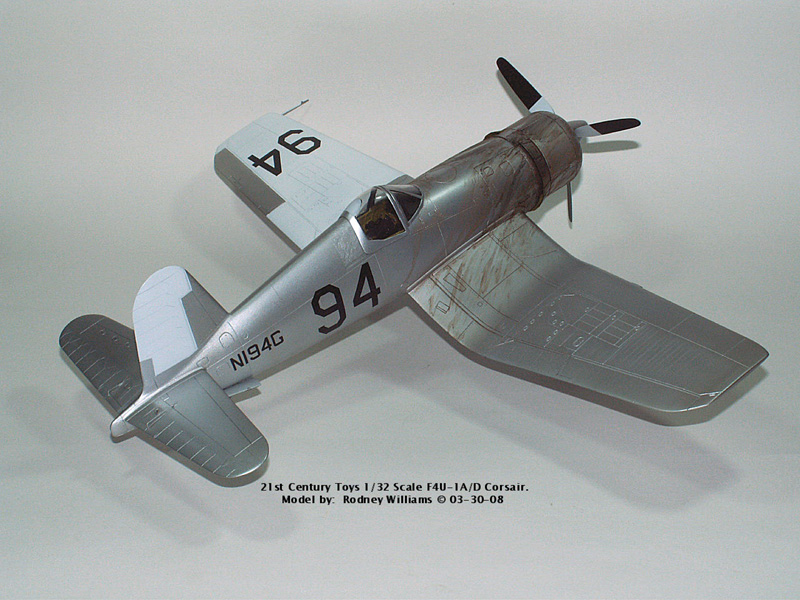
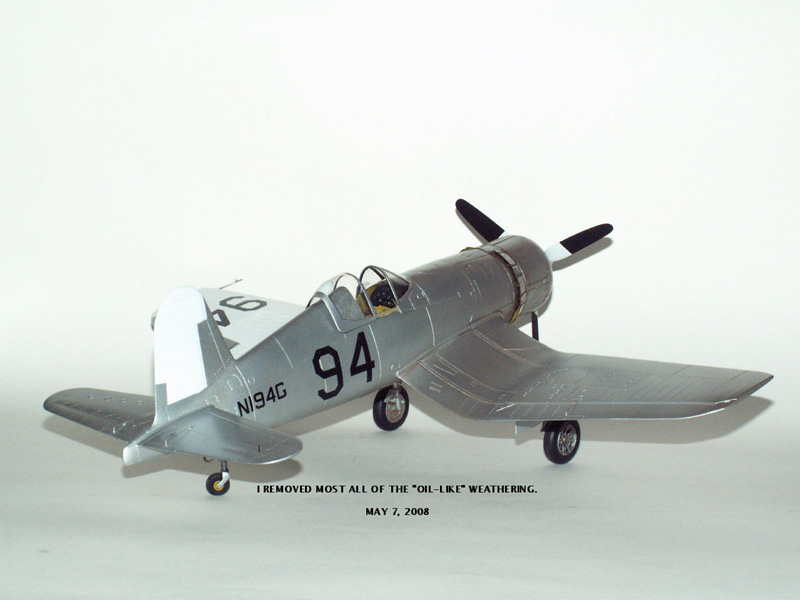
WEATHERING
The real aircraft photos show that the engine must have dumped all of its oil onto the cowling, fuselage and wings. To simulate this, I used brown and black artist oils, which I thin down to a water-like thickness, using Turpinoid.
I have never been good at creating weathering on my models. These photos of the finished model show my weathering, which I think looks like crap, SO…I took off most of the oil-stains.
FINAL ASSEMBLY
On final assembly I put on the windscreen and sealed the edges with FFW. The finished seat went into its location real neat. I made the seat belts out of some fabric and I used some Waldron 1/32 scale buckles. The canopy fits excellent in its' closed position and will slide back and forth in the tracks. The gear doors, tires, air speed tube and the prop were glued on with ordinary white glue.
I did not mention anything about the oversized panel lines. Really, the modeler should sand off all of the panel lines and re-scribe them back in. Other than that, the model is not bad at all. And for the price of ten bucks......go for it!
I forgot to tell you that I also bought the 21st Century Toy 1/32 scale JU-87B/R STUKA. It's a darn nice kit and well worth another ten bucks. This Stuka will be coming to you shortly.
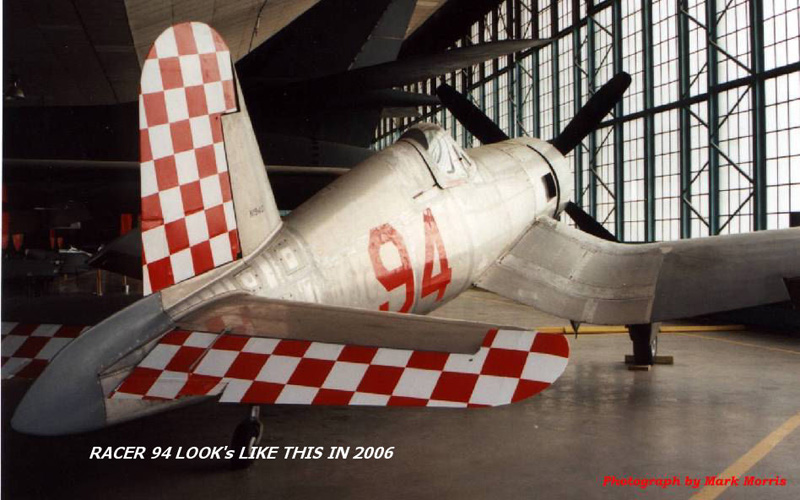
My last photo shows Racer #94 in a museum in 2006.
© 2006 Rodney J. Williams
This article was published on Wednesday, July 20 2011; Last modified on Saturday, May 14 2016