
Trumpeter's 1/24 P-51D Mustang: "Nooky Booky II" Part 2
By Rodney Williams
Part 2: "The Engine, Cockpit, and Fuselage"
Trumpeter's engine instructions; items #1 through # 6 are easy to follow and the parts look great. However, I did not build it, as I did not plan on using the fuselage clear part's B-1 and B-2.
It was easy to follow the cockpit instructions, item numbers 7, 8 & 10. The cockpit parts were removed from the trees and cleaned up, including any sink/punch marks. Trumpeter incorporated the section that holds the big water cooler, its elongated exit vent, gas tank, and radio gear. Just slap the whole unit into the model, how neat! There are about a half dozen nicely molder parts that fit on the left and right sides of the cockpit fuselage.
I "white-glue" all the cockpit parts together, so I can see how well it fits into the right side fuselage section. After the entire cockpit tub is glued into the model, I let it dry, and then test fit on the left fuselage half. To my surprise, the fit is excellent.
On page 7, step #10, Trumpeter calls for "Metallic Blue Green" paint for the cockpit walls, which may have been for the model they were depicting. I changed the colors to the old so called WW-II colors.
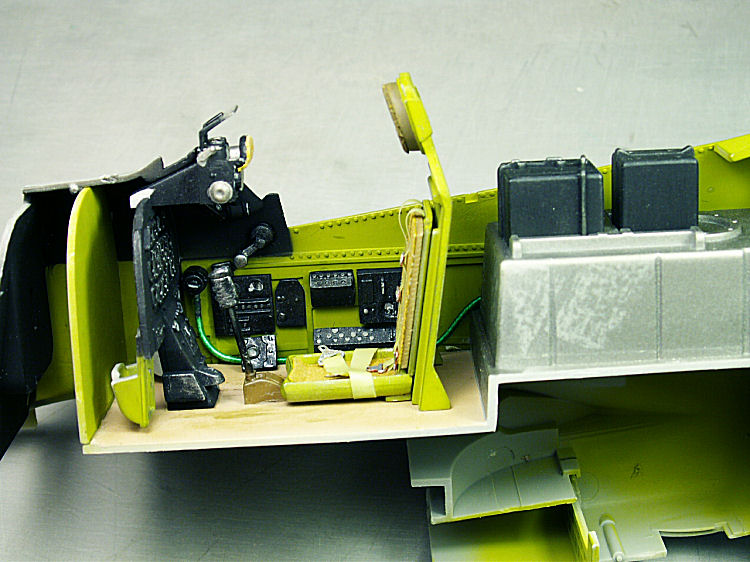
My fist photo in Part 2 show's that you have to fill in the round opening that's behind the head rest on kit part H12, step #7, page 5. This part mates up with parts H1; H10 and H13 which is the seat bucket, armor plate and head rest. Step #12 on page 8 give you a good idea how to installed the completed cockpit tub with all its' "goodies!"

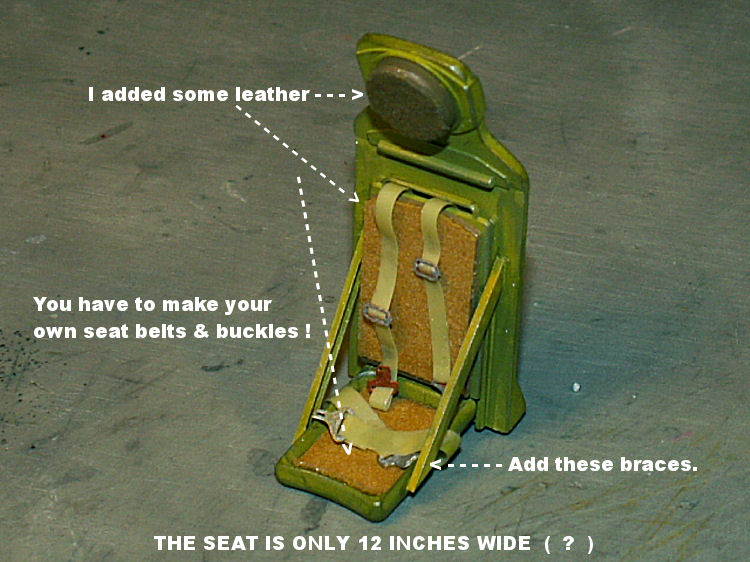
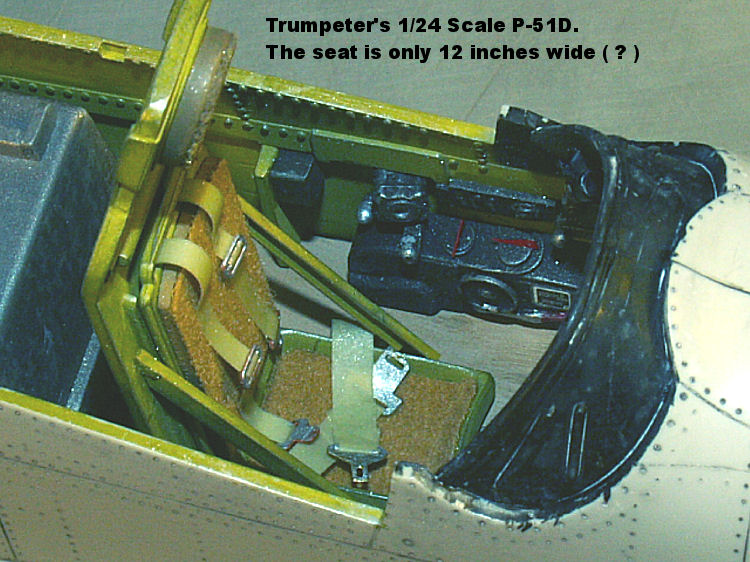
In other model reviews, modelers say that the seat was too narrow. Mine measured about 12" wide. I got out a 1/48 & a1/32 scale P-51 seats from my spare parts box and measured them. Both of those seats measured 18" wide
I could make a new seat, which violates the "OOB" rule.I did add the angle seat braces, including real leather on the seat and head rest. Trumpeter did not supply any seat belt and/or harness straps, or buckles. I bought some buckles and had some nylon strap material that I bought way back in 1985. Presto, they were made, and added the final enhancement to the seat.
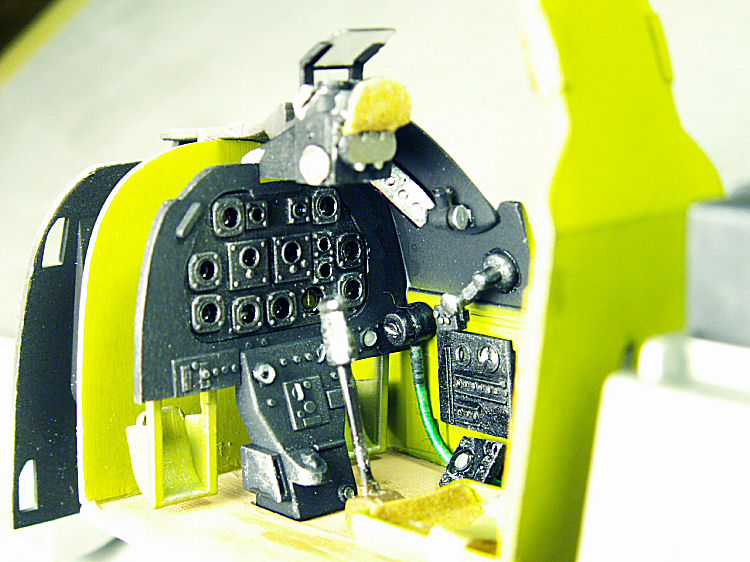
Here are a few photos of the finished cockpit. I did some weathering as I'm sure the cockpit was not in "like new" condition on the real aircraft
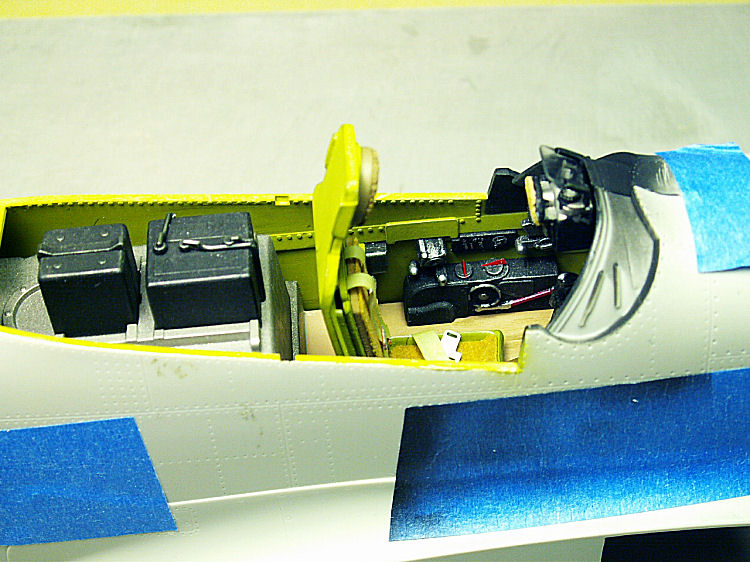

I brush on "SnJ ALUMINUM POWDER." Then I added some artist oil mixtures to add stains in the cockpit. To represent the glass on the instrument dials, I use "FFW."
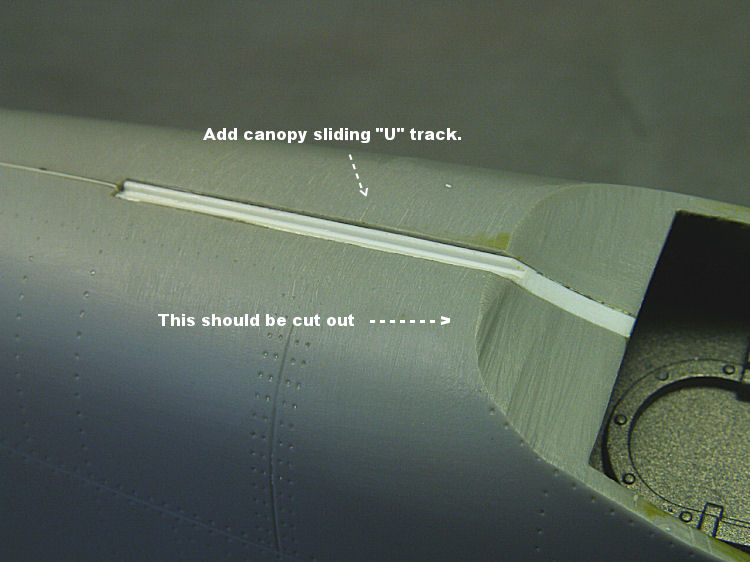
The real P-51's
had a center line canopy track imbedded into the top of the fuselage
spine, therefore I added a "U" track to the model.
The OOB says: (No Major Surgery!)
The main fuselage gas tank, including the radio boxes looked A-OK, including the oil and water coolers. They fit nicely into the model. They were painted and re-installed. Before you glue the fuselage halves together, you must go to Step 19 on page 10, so you can follow the instructions on how to install "J20", which is the oil cooler. And don't forget the tail wheel shank installation.
I started using white glue about 20 years ago. My fellow modeler friend Dave Hansen related problems when you use either liquid and/or super glue. If you glue in some parts with super glue, then break them off, you have to dig out the other broken part. Whereas, if you use white glue and you break/knock off a part, the whole part usually comes off. You just use water and dissolve the white glue and re-glue it on.
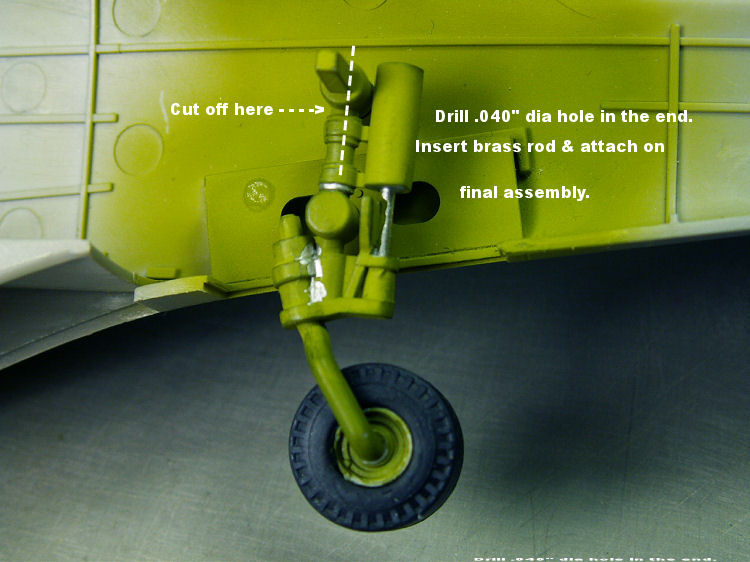
This photo shows the finished tail wheel, which has been revised. It will rotate 360 degrees like the real one does. I cut off the curved axle shank and inserted a brass rod. This way, you can remove the axle and tire and work on the fuselage and not have to worry about breaking off the wheel
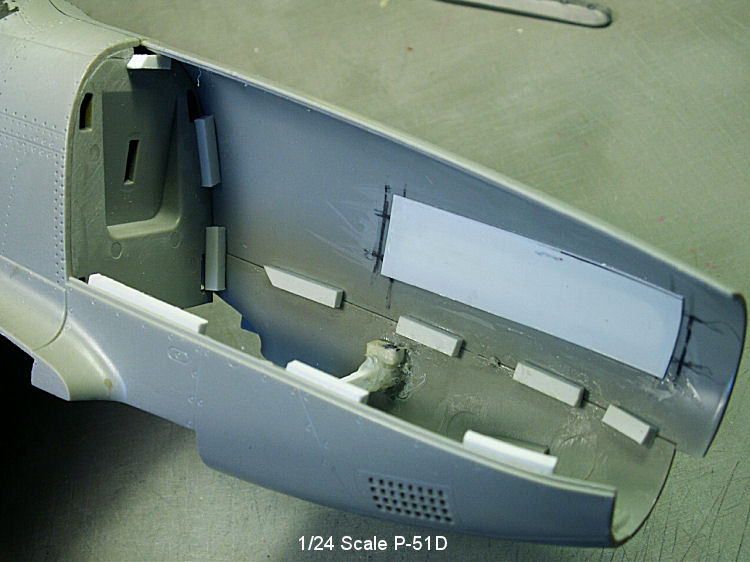
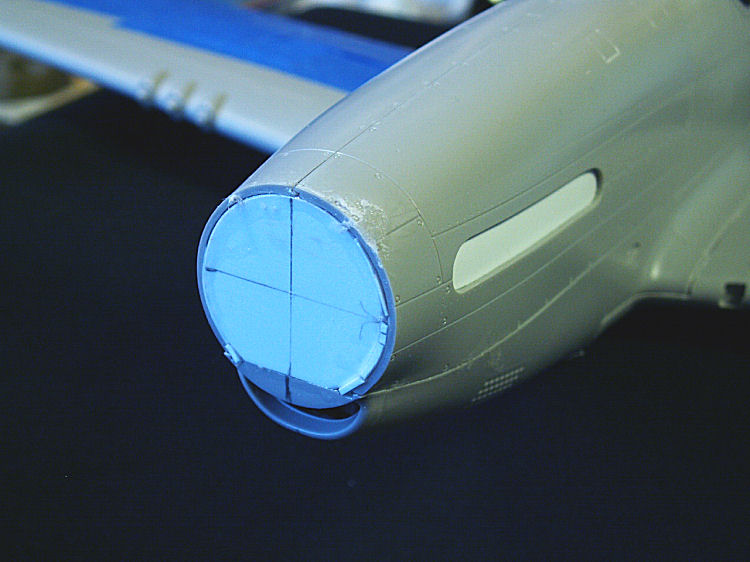
As mentioned, I did not plan on building the engine for the model, and these photo's show how I braced the inside of the front fuselage sides with some flat styrene stock, including the front of the fuselage opening where the prop hub is attached. I added a backing plate cover for the exhaust stacks. This way, the painted stacks could be installed from the outside during final assembly with either white glue and/or FFW.
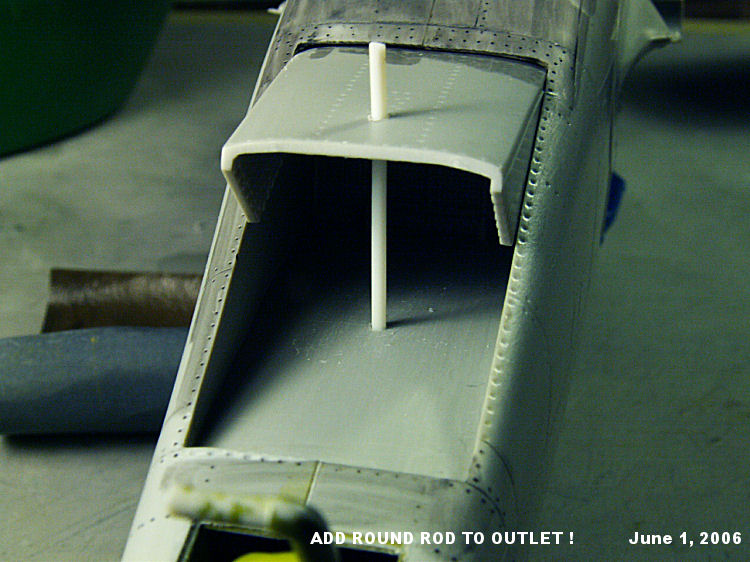
In Step 27 on page 14; I see a tiny round circle drawn on the bottom of the oil and water inlet vent, which is just aft of where you glue on the front bottom air inlet part # M19. On the real aircraft, a round and/or oval shaped reinforcement rod is attached to the top and bottom of the inlet. This rod helps prevent unnecessary vibration. I drilled a hole through the indentation that Trumpeter made on the plastic part, and then slightly drilled in a slight depression into the top section. I slipped a pre-made oval rod through the hole and into the recessed area. Presto! It looks like the real thing. I did the same thing for the rear vent door, part # J29 in Step 19, on page 10. However, I revised this door a bit, so I could install it later on.
Somehow, Trumpeter did not make those two parts.

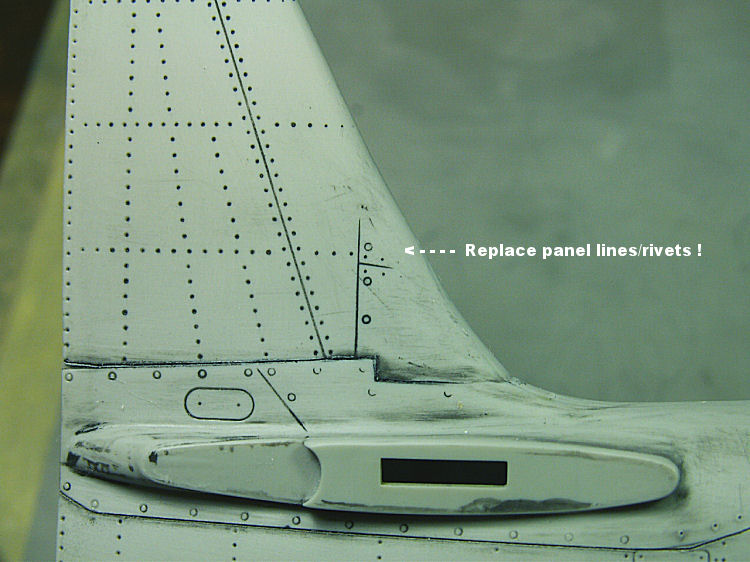
I removed the "fin fillet" on the model as the real aircraft did not have the new fillet installed. It took a few hours to fill in the hole so it looked right.
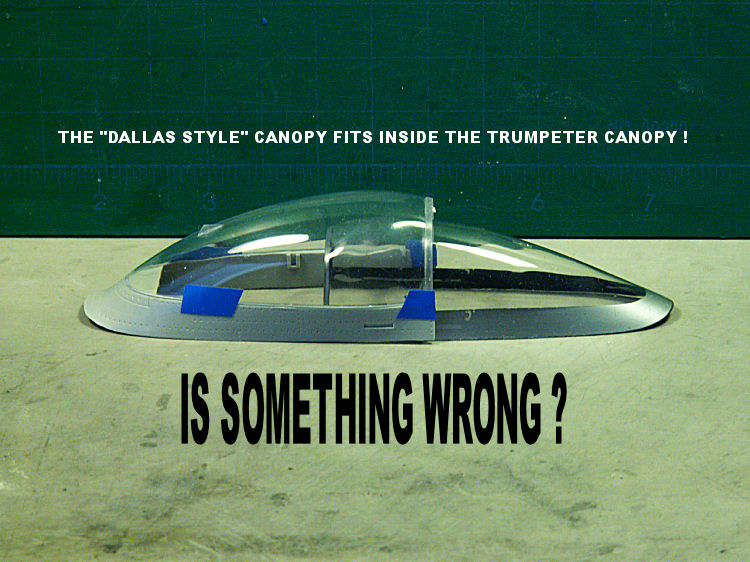
Here are several photos of the weird shaped canopy that Trumpeter supplied for their P-51D. I just finished making a "RENO, NEVADA RACING CD,"that has close to 400 photos on it. There are several dozen P-51 Mustangs on the CD, and not one of the racing P-51D have such a funny shape to their "stock" canopies
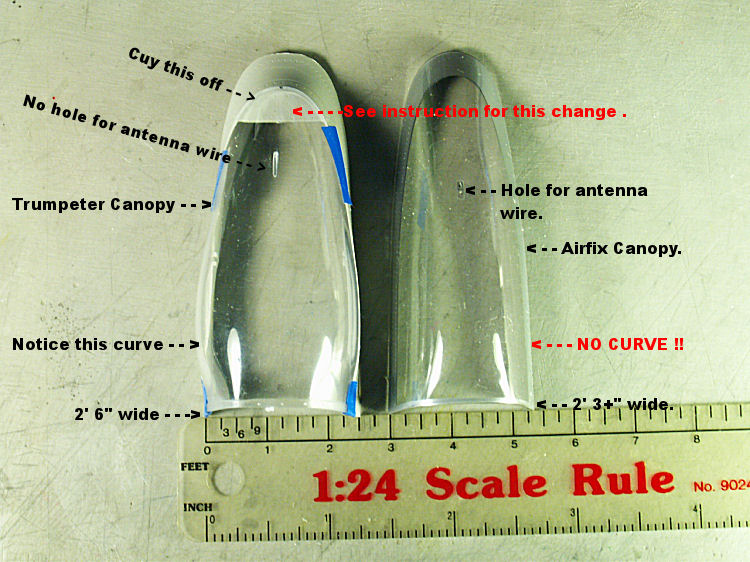

Years ago I built a 1/24 scale Airfix P-51D named "Dallas Doll," (D. D.)which can be viewed on this web site in the WWII Gallery section. This aircraft had what they called a "Dallas Style" canopy installed on it. The canopy was a few inches taller than the regular canopies.Next, I got out my spare 1/48 and 1/32 scale P-51D canopies, they both measure the same length, width and height...so like I write on the photo: “SOMETHING IS WRONG!"
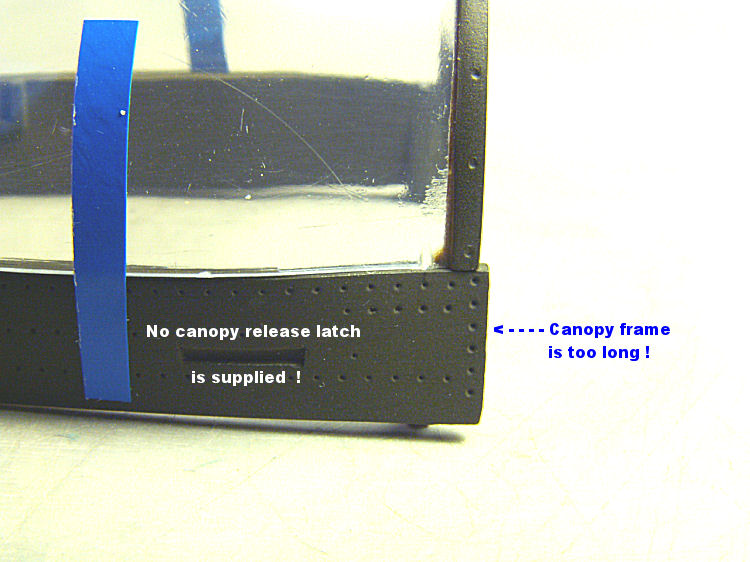
Trumpeter made some impressions on both sides of the canopy frame, yet they did not include the canopy release handles, which by the way, are round on the aft side of the handle
Trumpeter did not make any roller bracket for the aft bottom section of the canopy. On the real P-51s,you can see the roller guide track that's on top of the fuselage spine. If you get inside of a "51", you can see the canopy guide and a roller attached to it.
Trumpeter did not make the proper fuselage "U" style guides tracks that are attached to the fuselage, which is aft of the windscreen. There is a special designed bracket that fits onto the front bottom of the canopy and is attached to this fuselage “U” track. These side canopy/fuselage brackets allow the pilot to open and close the canopy very easy. The rear canopy brackets keep the canopy in alignment.
We wind up with a very inaccurate canopy, including the canopy frame latching system
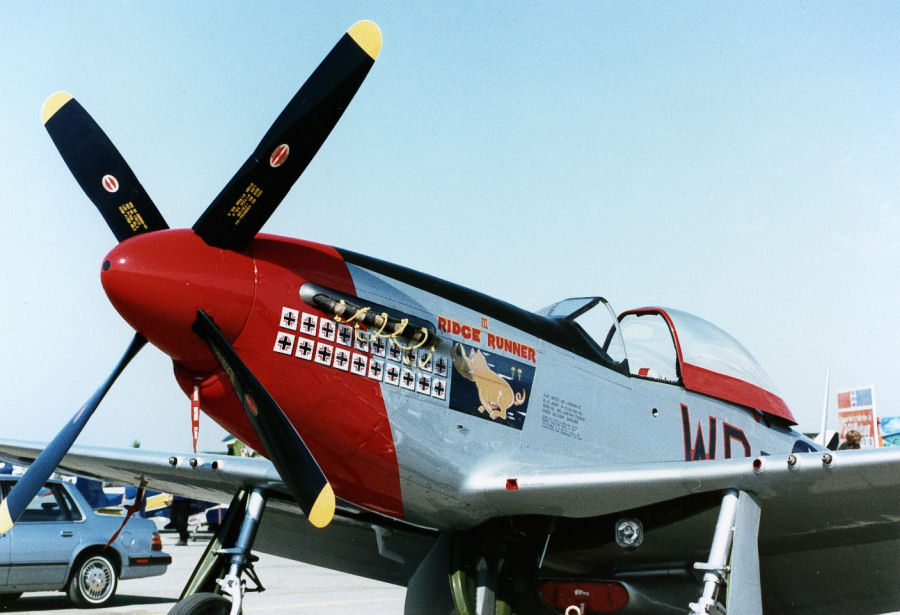
On page 16 of the instruction sheet, Trumpeter shows the canopy square peg attachment bracket.I did not revise the canopy, and after the parts were painted I glued the clear part #D3onto the frame; part #L1 and inserted the cross bar part #J39, with FFW and added my home made canopy release handles. On final assembly, I used white glue to adhere the canopy to the model. Here's one photo of a refurbished P-51D re-named "Ridge Runner”. Do you see any budge on the sides of the canopy, as it's stock?
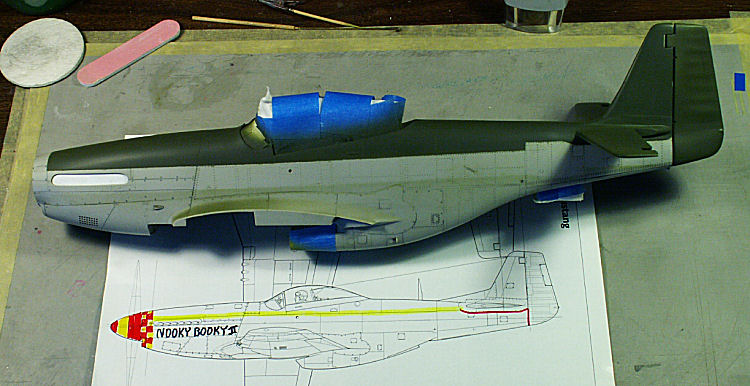
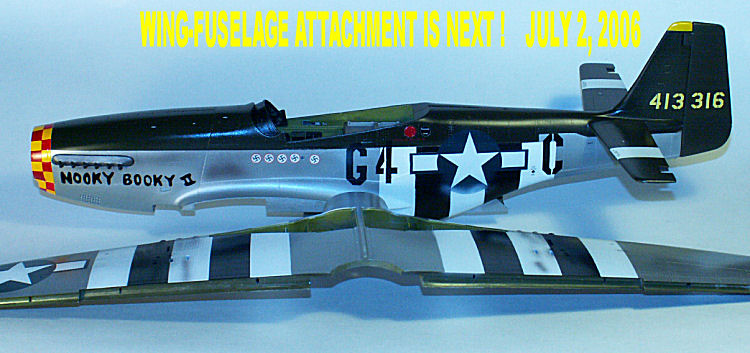
The fuselage is finished, so I apply Tamiya's O.D. to the top of the model, and then I applied the same aluminum paint to the bottom of the fuselage. The next photos show a lot of finished model parts painted.

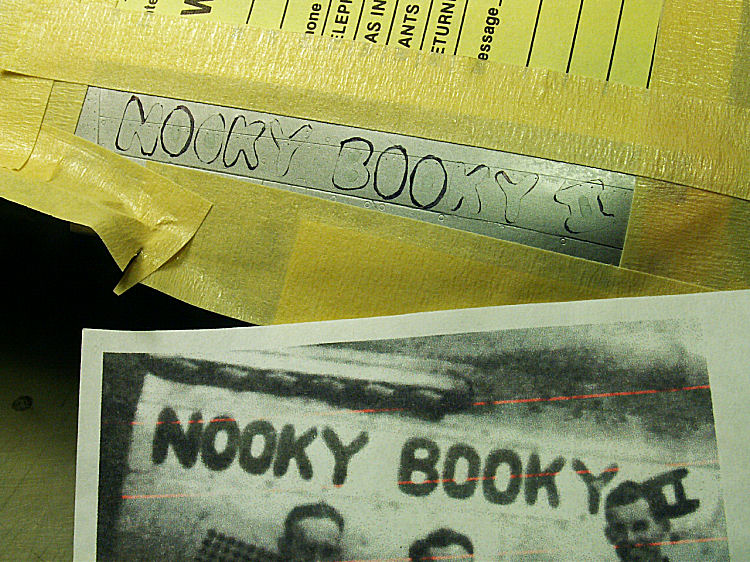
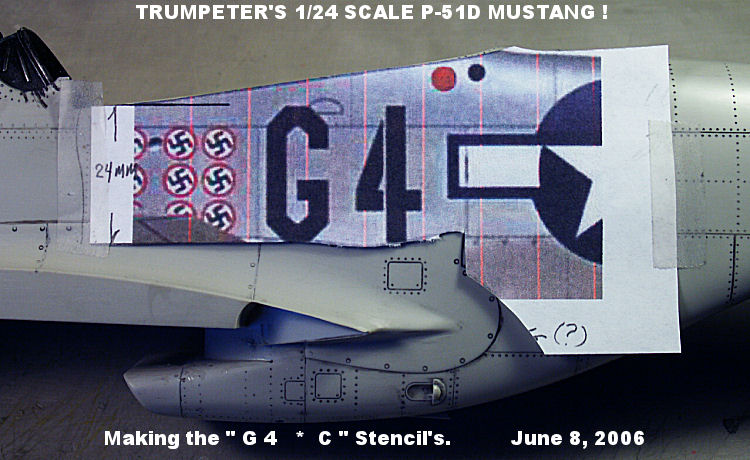
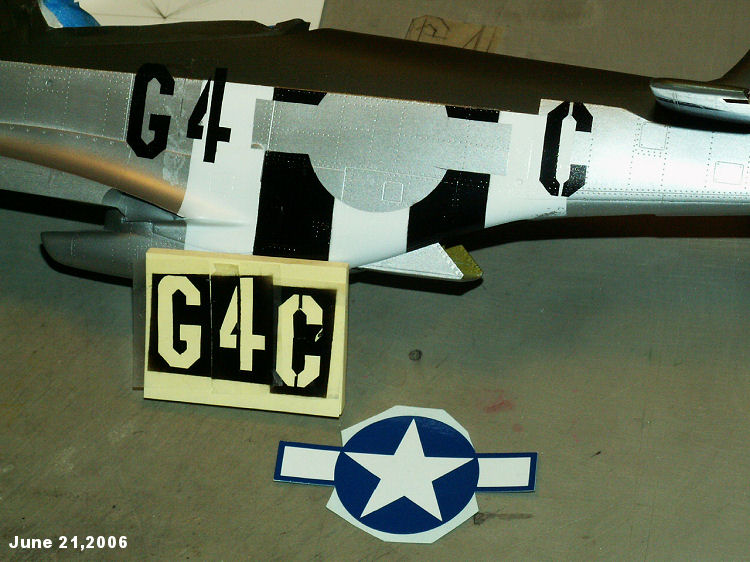
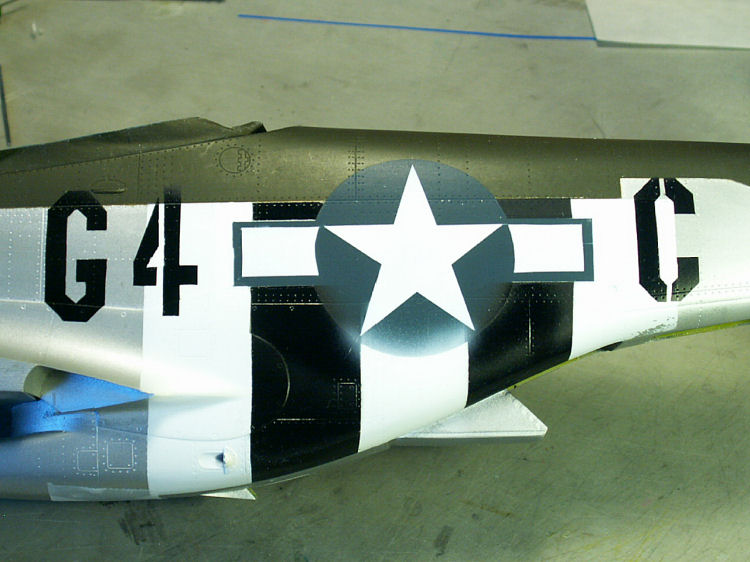
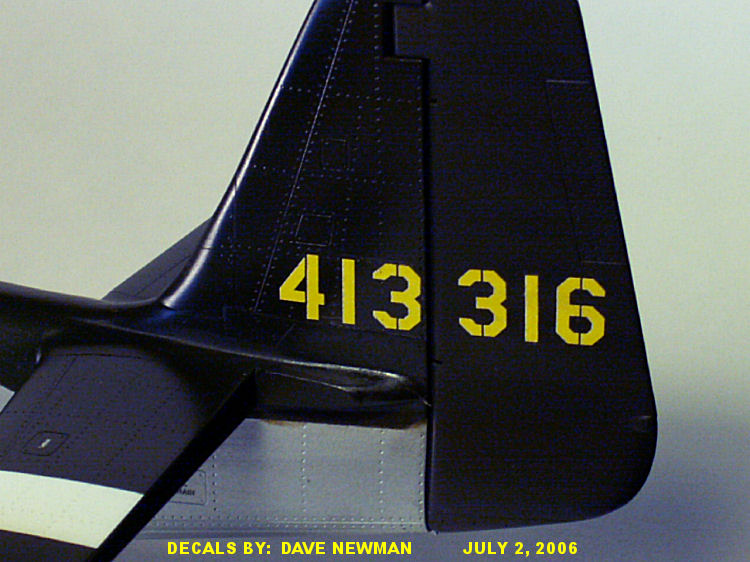
These photos show me making the stencils for the name of NOOKY BOOKY II and for the call letters/numbers of "G 4and C."
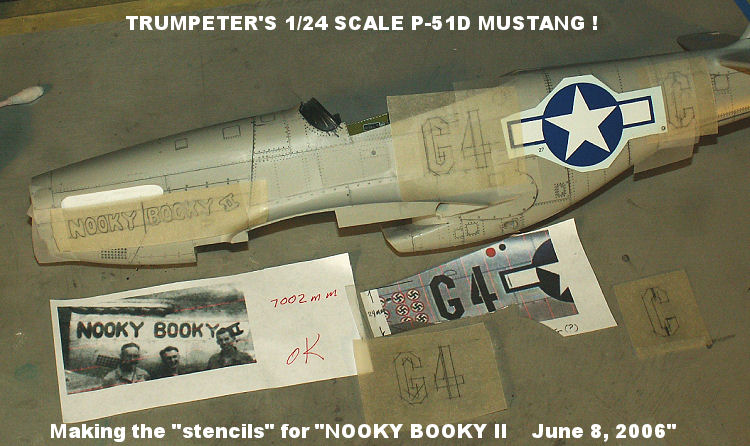
The one photo of the real aircraft shows some over spray on the lower portion of the insignia. I assumed this over spray came from painting on the invasion stripes!
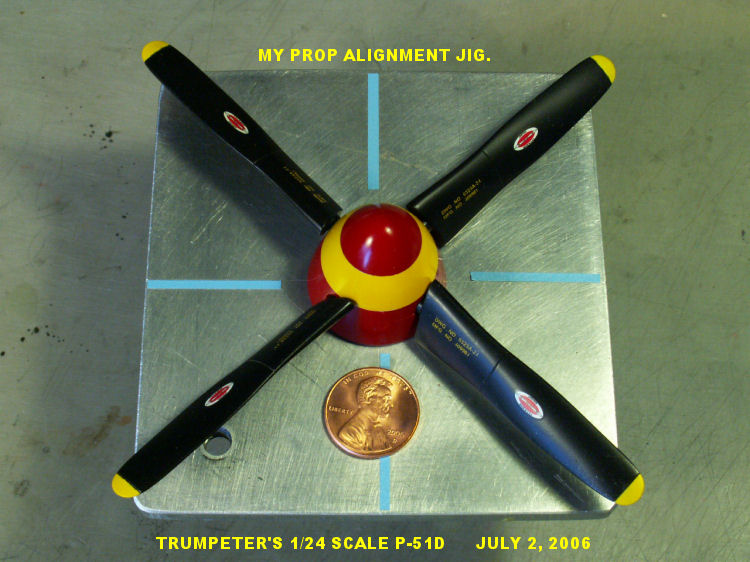
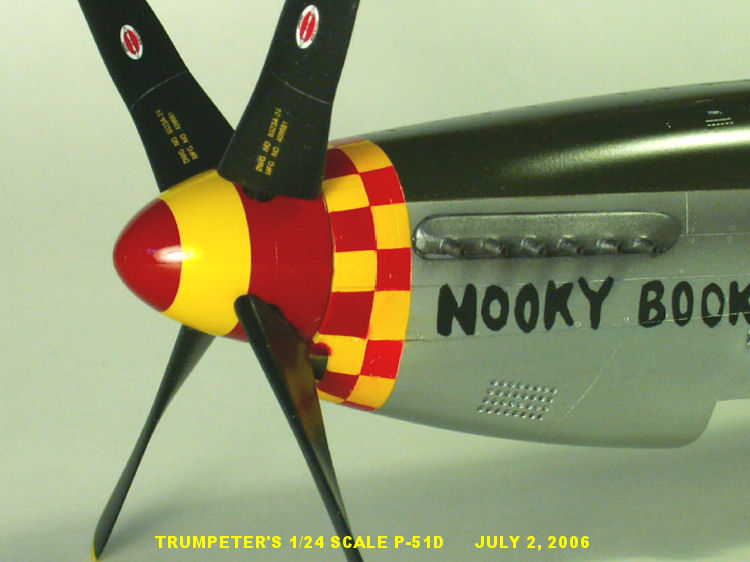
The prop is finished and is in my alignment jig. The blades are white glued in, which gives me time to make sure that the blades are aligned properly. For some screw ball reason, I painted the prop hub three times before I got it right.
The checkered pattern went like this: I applied white paint first, then the yellow, then mask it off and applied the red checks. This by the way was “Heavily” weathered on the real aircraft. Remember to go back to the "B & W" photos in Part 1.
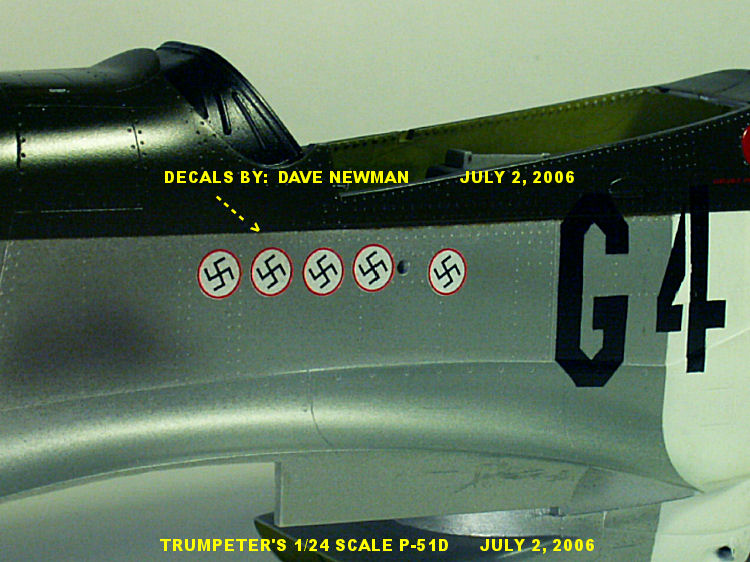
Here are several photos showing my next operation: I scan in some Swastika kill marks on my computer and down size them a few times before I got the correct size. I accomplished a similar operation for the tail numbers. Once I'm happy with the results, I send all this data to Dave Newman via an email attachment. Dave has been making my decals for about ten years.(dnewman@ipswest.com)
HOW I MAKE THE PAINTING STENCIL
This is time consuming.
Now, here is a question for all you modeler's out there. How many hours do you think it took me to make the stencils and paint it all on the model for the following items:( The name of NOOKY BOOKY II for both sides of the model; The fuselage call letters for both sides of the model; including the stencils for the fuselage and wing insignia's. Then you have to add the time I spent on the computer sizing the German Swastika Kill Marks and tail I.D. numbers of 413316 and then send all this data to my Decal Maker, Mr Dave Newman
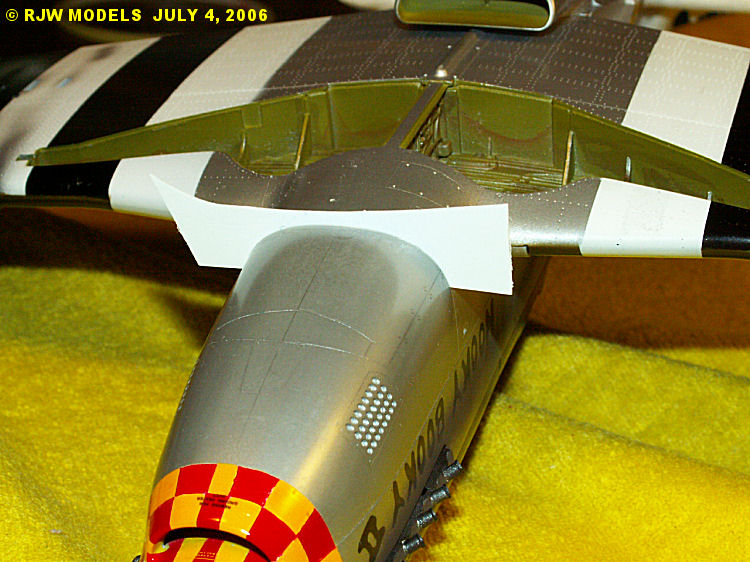
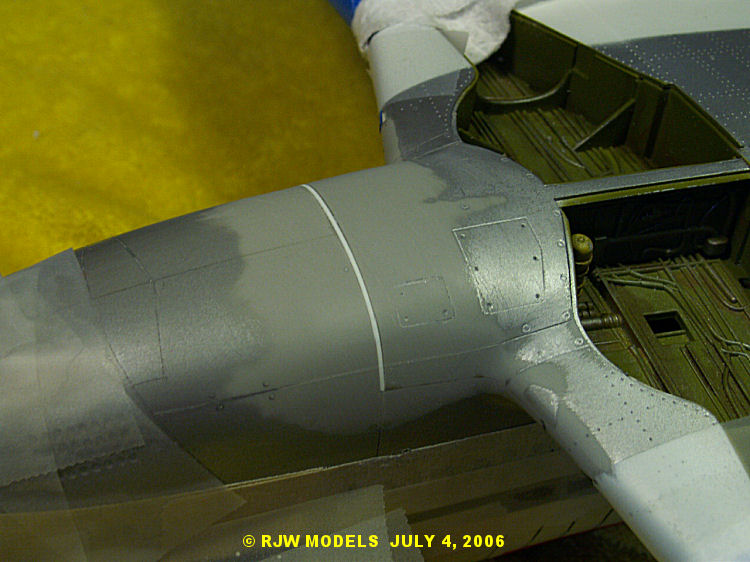
My painting of the fuselage is complete and it's time to attach the wing. These close up photos of the bottom of the model, show's how I slipped in some styrene stock to fill the gap, then sand it smooth, mask off the area and spray on the aluminum paint. I might add that the top of the wing halves fit so tight to the fuselage sides, that all I had to do is apply some Future Floor Wax, (FFW)to the seams. Once this stuff dries, it holds parts together just as good as super glue and much better than white glue.
In Part 3 you will see lots of goodies!
Happy Modeling
© Rodney Williams 2006
This article was published on Wednesday, July 20 2011; Last modified on Saturday, May 14 2016