
Airfix 1/24 Junkers Ju 87B Stuka
By Martin Planes
I have been looking forward to making this model for a long time. Again from the Airfix ‘Superkits’ range this model is one of the last releases in this scale by them and probably the most impressive. This will be my sixth aircraft in this scale and when I first looked in the box the level of detail was immediately evident.
I’m not a great one for attempting to give you an historical overview of the aircraft as in my opinion there is a host of information available if required so I will just get down to the model making. I also like to try and build from the box. Most injection models in the last twenty years are of good quality and I have to admit that I am usually very careful in selecting the right manufacturer for the model I want to build. However, in my chosen scale these days of 1/24th my choice is somewhat limited but the sheer size of these models always makes up for it in detail.
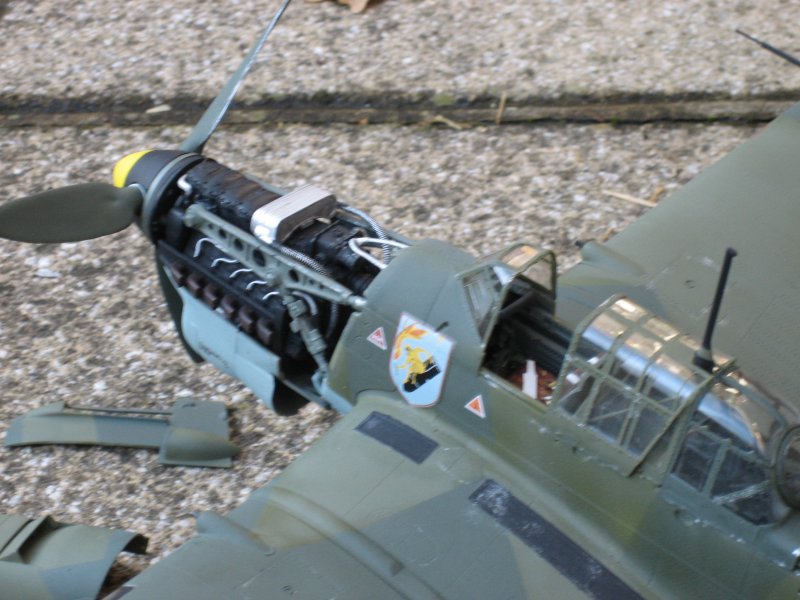
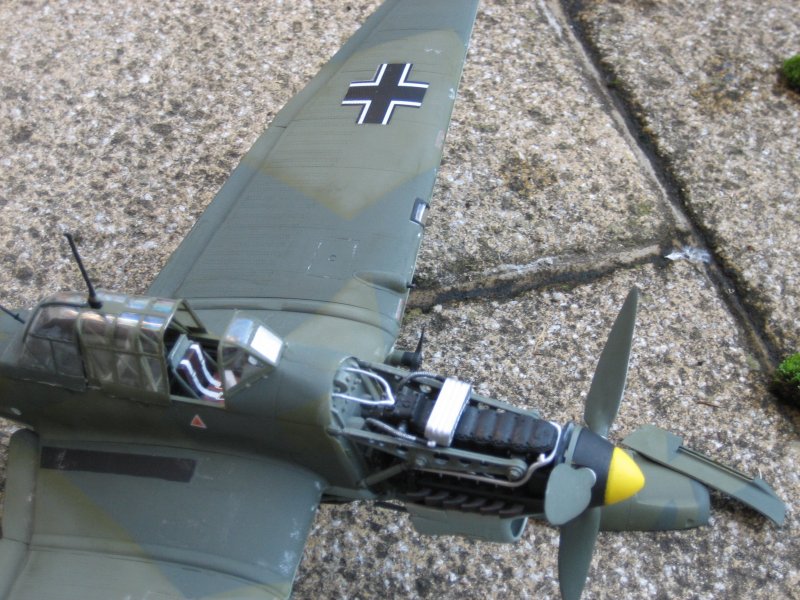
Construction starts with the engine which builds up into a nice little model in its own right with no complications. I gave it my usual treatment of black and various subtle shades of grey and lightly dry brushed in steel.
The cockpit assembly is next and although I thought the rear gunner’s seat was a bit sparse the instrument panel is a little beauty and really does come up well with some careful dry brushing the needles and dials show very well. Now its time to start thinking about putting the fuselage together.
Generally it fits very well with the engine installation a synch fitting directly with the engine braces already moulded to the fuselage halves. However, you do need to be alert when sandwiching the cockpit section. I had a number of dry runs and eventually decided to just fit it in loose and cement the halves together. (Don’t forget the small compartment window at the tail end which I nearly did!) After a little swearing and a small dose of model filler the fuselage was then sanded and it went together ok.
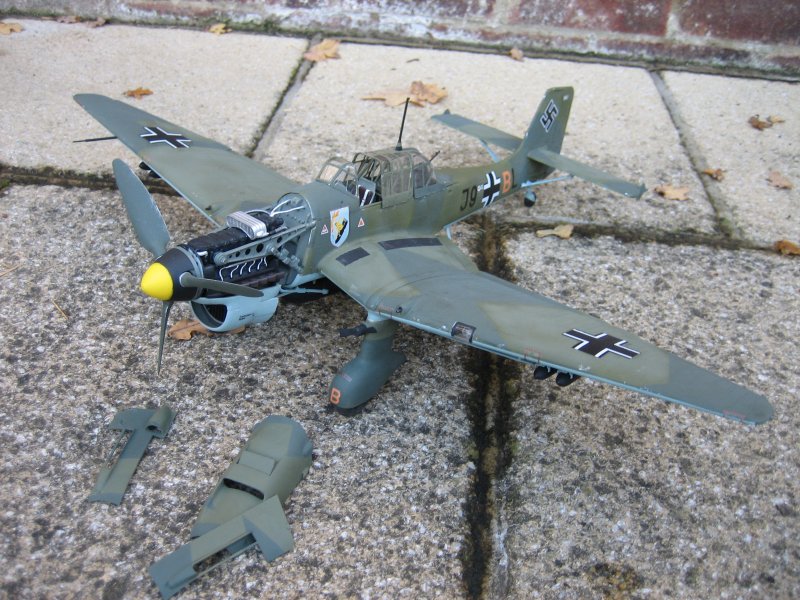
It was then time to attach the wing roots. The plans give you an indication on the dihedral but it goes together fine. Assembly of the dive brakes were a delight and all fitted perfectly. The rest of construction also had very little problems.
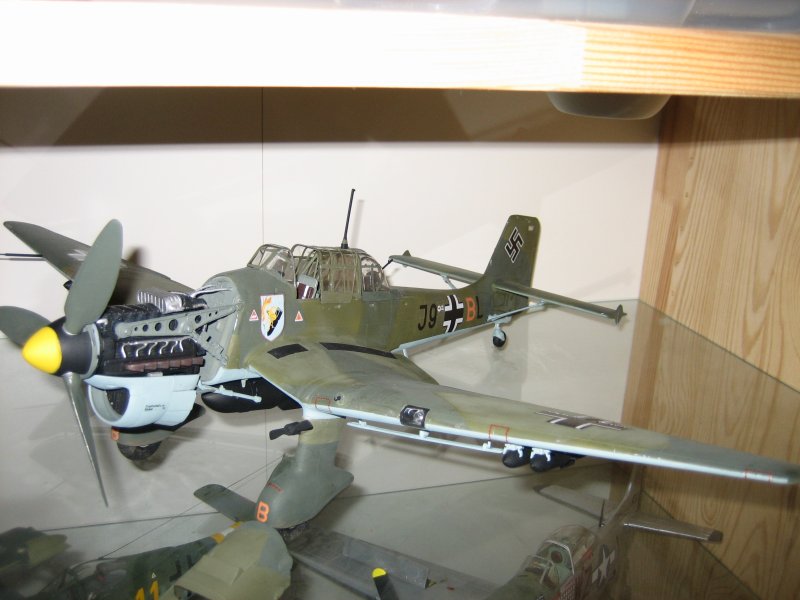
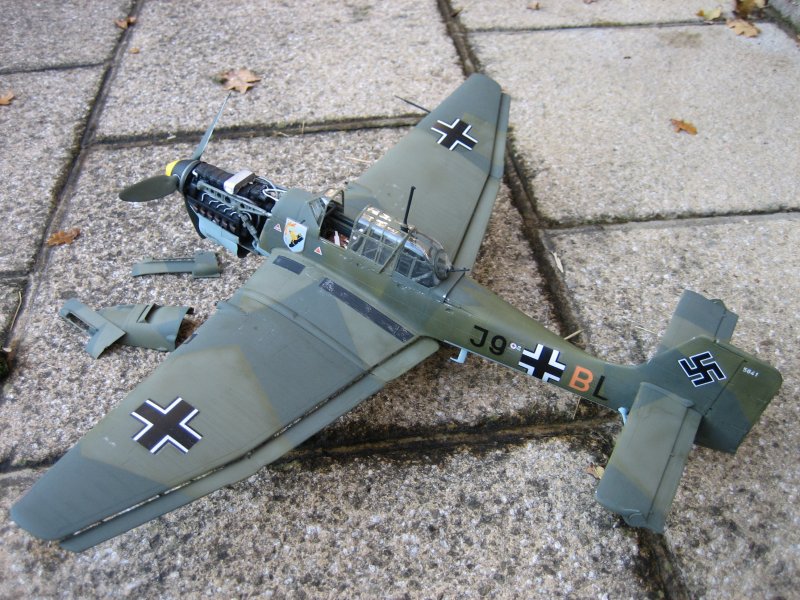
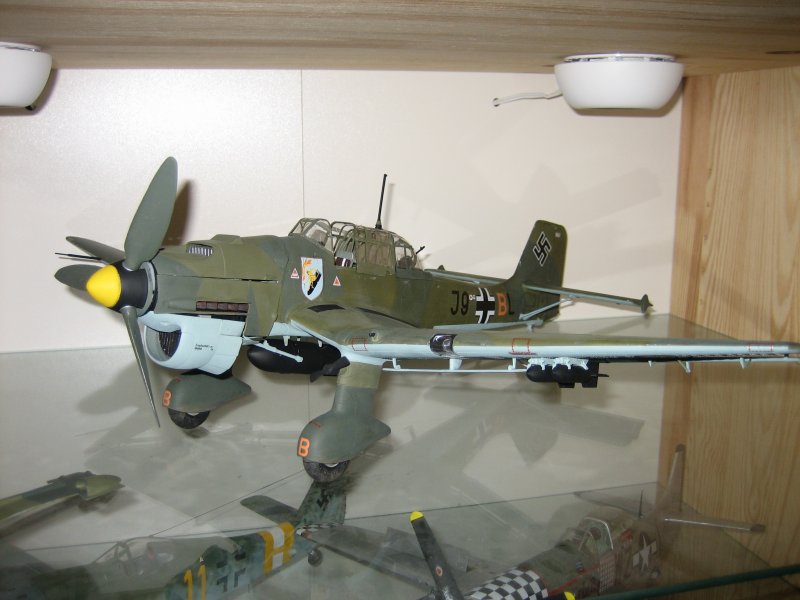
Now its time to start masking and spraying. I used Lifecolor Hellblau 65 for the under surfaces. I have read a lot about these paints with a number of mixed reviews but personally I like them and I have used them on all my other 1/24th scale models. I think they give a really good scale appearance and don’t dry to dark. I then sprayed the upper surface in Lifecolor dark Green which although it isn’t the required Dunkelgrun in my opinion it gives the same desired effect but a bit faded. Now for the splinter pattern.
I don’t know how this was applied during the war and I find it difficult to comprehend that they actually went to the trouble of masking the airframe to give the pattern. However, as I could not find any reference on how this was done I dutifully went through the motions with good old Tamiya masking tape and lifecolor Schwarzgrun. After some alterations and a number of patient ‘touch ups’ the overall scheme looked convincing although at first I was a little disappointed with the effect.
It appears that during their Blitzkrieg of France and the low country’s they found themselves in St Omer in a bit of a hurry. For reasons best known to himself the Fuhrer decided to take a bit of a break for a few weeks and go sight seeing and admire his newly acquired domain which caused a pregnant pause between the fall of France and the Battle of Britain. Subsequently as the Wermacht and the Luftwaffe literally overran the French positions where they stood a comprehensive collection of provisions were left in their wake including field paint. It would appear that in some cases French artillery green was used to re-paint/repair some of the aircraft which just goes to show that never be afraid to use a bit of artistic licence when you’re modelling.
One final note. Usually markings of any type never phase me and I always seem to get satisfactory results with perhaps a little ‘silvering’ here and there (even using the superb microscale system!) However the Airfix ones were very thin and difficult to position without damaging. The eagle eyed amongst you will have noticed that on one side of the fuselage of the aircraft's ID letter ‘B’ is a different colour than the other side. Yep I totally destroyed it in a poor attempt to apply it. I wasn’t confident to paint it so found a black one instead. A bit of artistic licence again here but who’s to say it didn’t happen at some stage anyway!
In Conclusion I enjoyed making this although I have to admit the difference between the Trumpeter kits and the Airfix ones are worlds apart. But why shouldn’t they be with a minimum of twenty years between them!
My next project: Vintage fighters P-40 Kittyhawk.
© Martin Planes 2006
This article was published on Wednesday, July 20 2011; Last modified on Saturday, May 14 2016