
Trumpeter 1/32 Scale P-38L-20-LO Lightning
By Jay Wheaton
Introduction
The Trumpeter P-38 is in my opinion a spectacular kit, and a good thing too because unlike it's two famous WWII USAAF brothers the P-47 and P-51, there is not much to choose from in larger scale P-38s. The Revell, if you can find one (I found one on E-bay), is replete with problems of all kinds as one would expect from such an old kit. Jerry Rutman has many good resin update parts for either kit; the Revell needs the updates badly. The Trumpeter can be made into a very convincing replica with little update at all. I had a lot of fun with it, even though I did not really pull out all the stops. This model as you see it is mostly OOB. I have seen incredible modeling efforts on LSP - but hardly any of this kit. Come on guys - get going! This is an awfully sexy kit with limitless potential!
Just a little bit on the interesting history on the P-38 for those not familiar - the P-38, P-39, and P-40 were the United States' first serious response to the growing world-wide war risk in the mid 1930s, as far as fighters go. The Lockheed P-38 was to be America's dream fighter plane, and among those three it did indeed stand out. It arrived on the scene a couple of years sooner than the subsequent fighters which it is usually compared with - the P-47 and P-51. The P-38 had a history of development problems which gave it a checkered record especially in Europe. This was partly due to the unavailability of any other in-line engine other than the less-than-spectacular Allison. Few know that the primary reason the P-38 is a twin is that Lockheed felt the aircraft could not best meet the AAF's specifications with a single-engine Allison-powered aircraft. Also the P-38 at the time of its introduction was a real technological ground breaker in many ways - and was the first American aircraft (maybe first period) to be fast enough to bump up hard against the compressibility problem. Except for the late war "J" and "L" models which were truly superior fighters and finally what Lockheed and Allison and the USAAF had always envisioned, the P-38 although effective in many ways, just never adapted very well to the cold and high altitudes of Europe especially in the winter of 1943 when it was so sorely needed to escort the bombers. Problems included the Allison engines and their carburetion, the superchargers, and horribly cold cockpits. But in the Pacific the P-38 and its pilots literally ruled the skies as soon as it showed up, where the temperatures were generally warmer and the operational altitudes a few thousand feet lower usually. The two highest scoring aces of the entire war flew P-38s in the Pacific. Like the P-47 though, it gave way eventually in both theaters, at least in the escort role, to that war winner - the P-51. Still the P-38 has a rich history and was a major player in the world wide allied war effort.
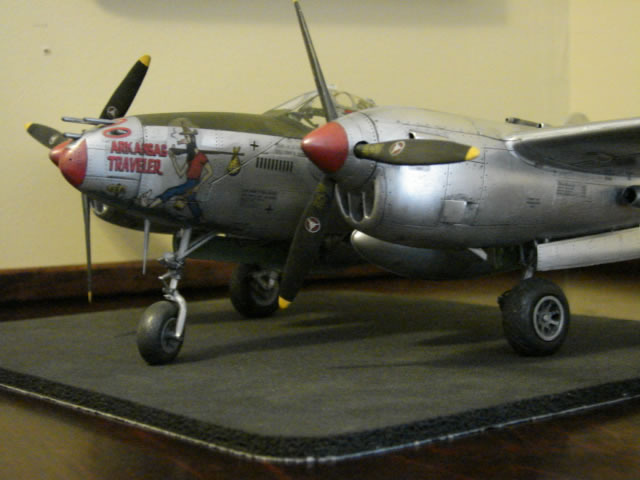
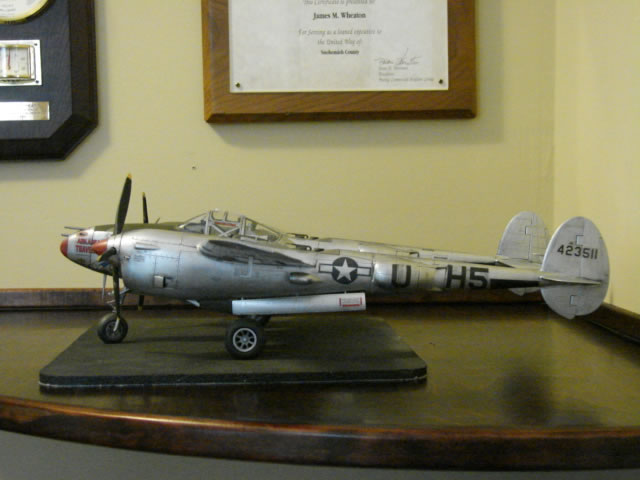
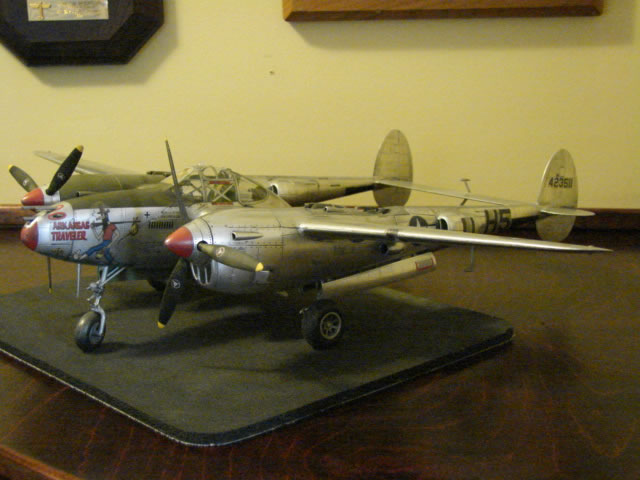
This model represents the P-38J "Arkansas Traveler" from the 9th AF, 367th FG,392nd FS stationed in Carentain, France (post-invasion). Pilot was Owen Fincher. From what I have read, and from the looks of the aircraft's scoreboard, it was involved in a lot of ground support which is dangerous business indeed.
The kit is big - it takes up a lot of room on the table (and sucked up a lot of paint I might add). It is also not a real easy build - there are no easy P-38 builds that I know of what with the dual booms and tails. Although part fit is generally superior, the modeler must pay attention to make sure all parts align so that the wing dihedral is symmetrical and the tail booms are parallel, something I could have done a bit better at. Also it is going to be heavy if you want it to stay on its nose wheel - I put enough ballast in the nose and engines to keep it from tipping backwards, and it took a lot. As much or more than any other kit I have built, I think this one shows, without a lot of extra work with after-market stuff, just what the aircraft is supposed to look like. The P-38 was a big, sleek, lethal weapon, and to me this model brings that look across. Let's examine the "Arkansas Traveler" up close.
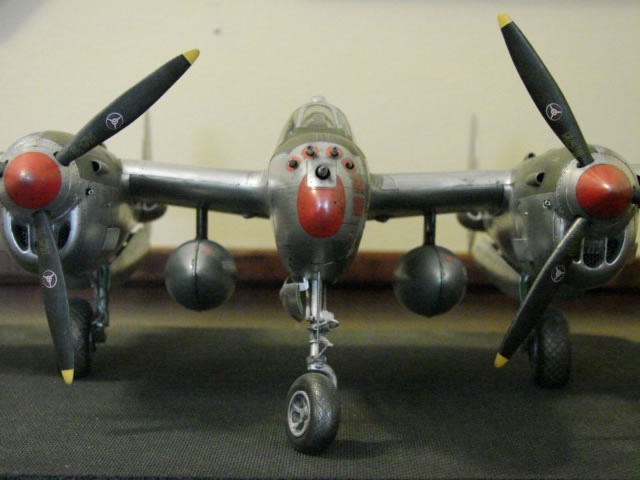
Center Fuselage Pod
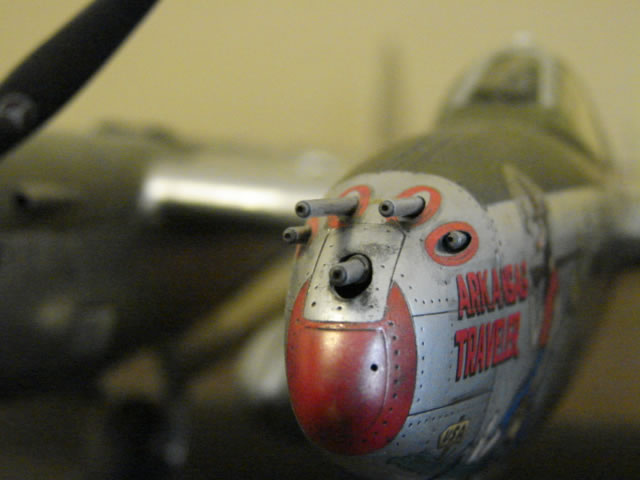
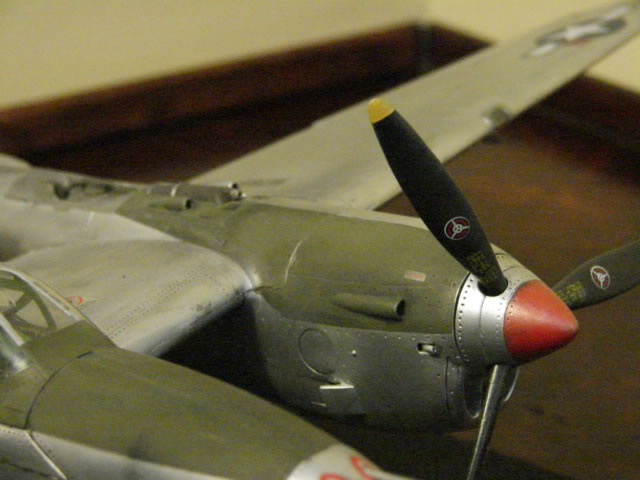
Trumpeter did a nice job (this is a continuing theme in this write-up) on the business end of the big fighter. I drilled little holes in the already excellent machine guns and cannon, and that was just about it. The nose piece is just beautiful although rivet patterns could have been a bit more mild (a common Trumpeter criticism). I can say that for the entire model. The two gun bay doors behind the nose are meant to be shown either closed or open. If the modeler wants them open, he has a lot of work to do in the gun bay. A lot is there, but a lot is not. I chose to simplify the problem and leave them closed. Fit is crucial of course, and although not perfect, Trumpeter's nose parts fit up well enough so that the modeler can make it good with little effort.
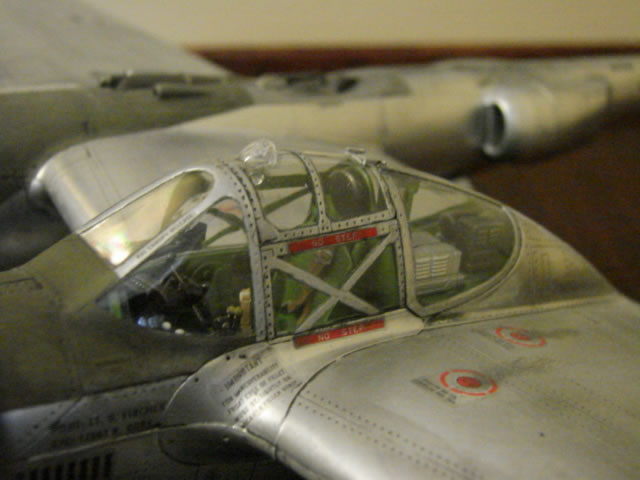
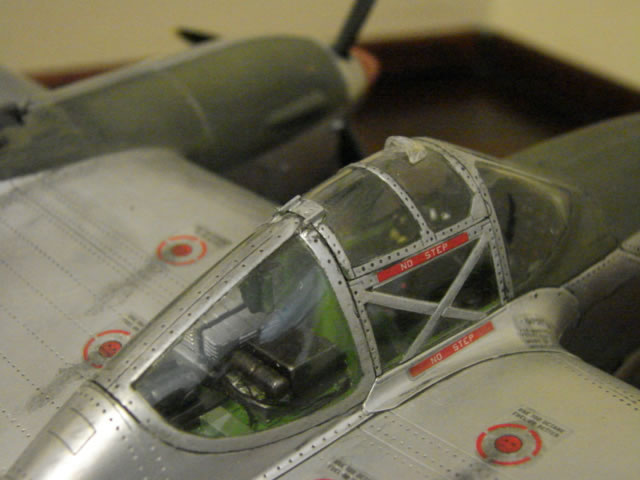
The cockpit looked kind of sparse so I called on Jerry Rutman and his cockpit update kit. This is an extensive kit that is meant for the Revell model, and I used not all but a good bit of it. As some of you know, introduction of Rutman parts ups the ante with regard to effort; you no longer can just throw it together. His parts are "diamonds in the rough" and need much whittling and filing and filling to be what they are intended to be. My cockpit turned out pretty nice but cannot be seen well due to Trumpeter's wonderful five-piece canopy. Actually it's six-piece including the rear-view mirror. Here again, the canopy can be modeled with the top open but I chose to show it closed. You will enjoy building the canopy.
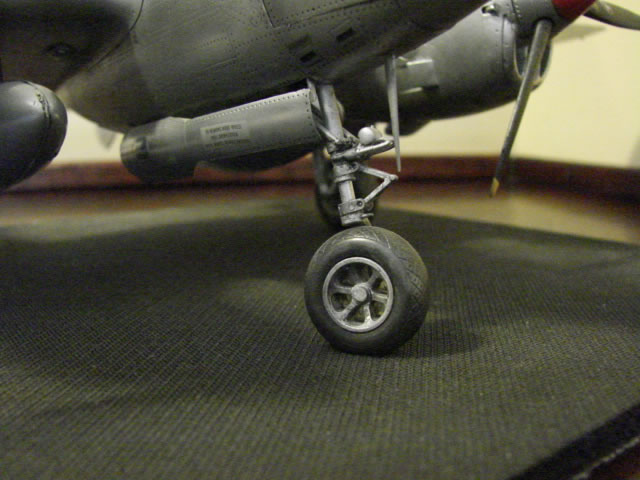
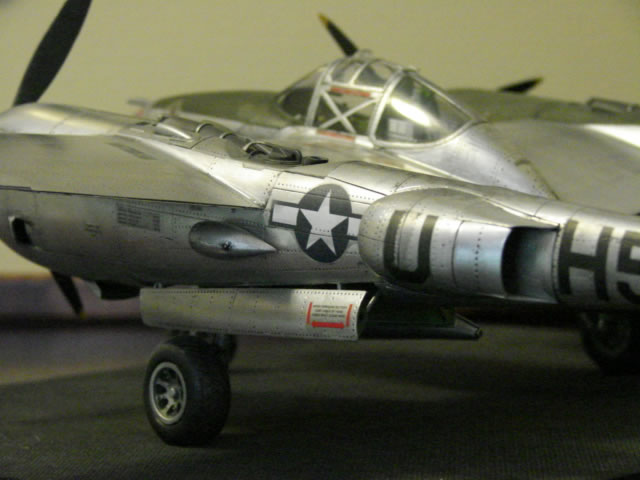
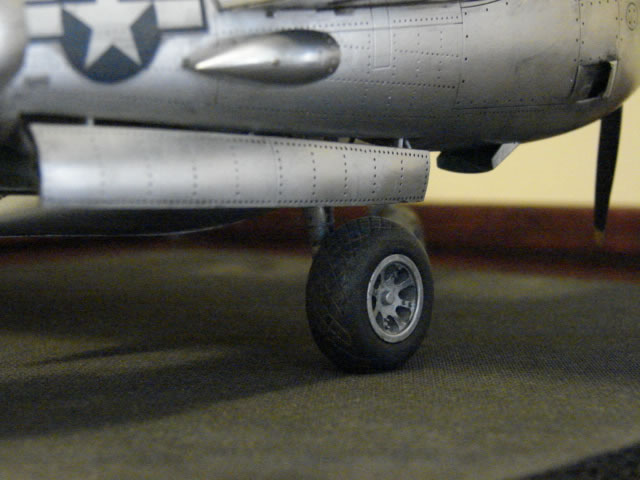
I was very impressed with Trumpeter's effort on the nose landing gear. I wanted to show the nose gear turned, as it so often is in war photos. That meant sawing that beautiful gear in half (a bold move), carefully drilling holes in the two ends and inserting a new oleo tube in the holes. Then I could turn the wheel wherever I wanted it. I had to also decide how much the oleo was to be extended, as a P-38's attitude relative to the ground varied greatly depending on how much it was loaded up with ordinance. Mine favors nose up (tail down). Once that is decided then the torque links must be stretched as required (or if necessary broken apart and re-glued in the proper orientation). The oleo tube received a coat of natural metal paint and was vigorously polished to try to get a chrome plated look. Also, the flat I ground on the nose wheel was tricky - due to the gear's combined turned orientation and rake angle the flat area on the tire wants to go off center and take on a non-perpendicular angle. I modeled it on the computer with a drafting software package, made a crude template, and it came out precisely right. I used the Trumpeter vinyl tire not because I like the vinyl but because I had little other choice, and the shape is acceptable. The front tire from another of my Rutman P-38 update kits I purchased for this effort was completely out of round and unusable. Otherwise I would have used it instead. I now see you can get aftermarket wheels from other companies; too late. Vinyl is amazingly tough to modify but I managed to whittle that flat in the tire. Get a load of the spoked wheel - very cool and OOB. And also please note the (properly oriented) hydraulic steering unit, also very cool and OOB.
A few words on the NLG wheel well and door - the bay is a potential treasure trove of detail but Trumpeter doesn't provide it nor did I create it. A modeler more patient than I could do a great job in there but will have to scratch build it all because I don't think there is any aftermarket product for the wheel well. The door needed a hydraulic actuator which I made out of tube and rod stock. Also the door hinges should be better than the blobs Trumpeter provides - but it would be practically impossible to convincingly represent the insanely complex looking scissors apparatus Lockheed fashioned for these components.
Twin Booms and Props
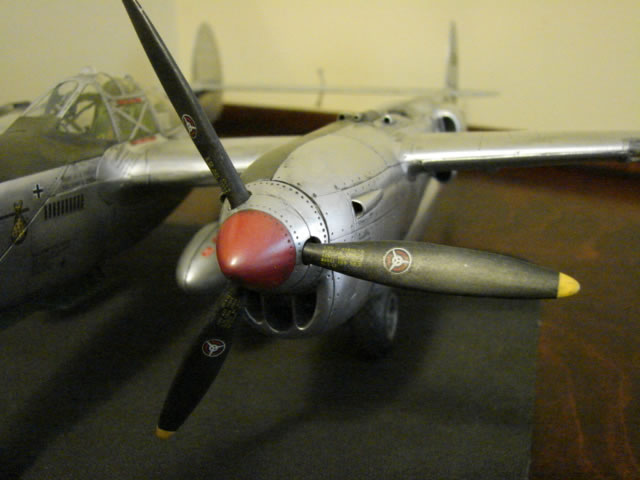
The propeller blades provided by Trumpeter are misshapen - this is about the only serious gaff I can find with the kit. They must be replaced, and Rutman comes to the rescue with a good set of resin blades. But as usual, when using the new resin blades the means of attachment is no longer viable so properly locating and orienting the blades becomes an important and painstaking task. I used a fixture of sorts and got them real close. The very accurate looking spinners are supposed to spin and are mounted on shafts that protrude out through the front of the engines. But the shaft is a bit loosey-goosey and allows the prop and spinner to sag. So I sacrificed the "spin-ability", and glued them in place with the proper spinner-to-engine cowling gap (I think I used a playing card). Amazing how people consistently touch the props to see if they spin…. Speaking of the engines, they are nice little projects of their own and then get closed up inside the cowlings with no way to look at them. A favorite Trumpeter trick, but I don't mind since I had no intention of showing them anyway even if there were an easy way. I left many parts off the engines because of that, essentially using them only as lead shot and putty ballast containers.
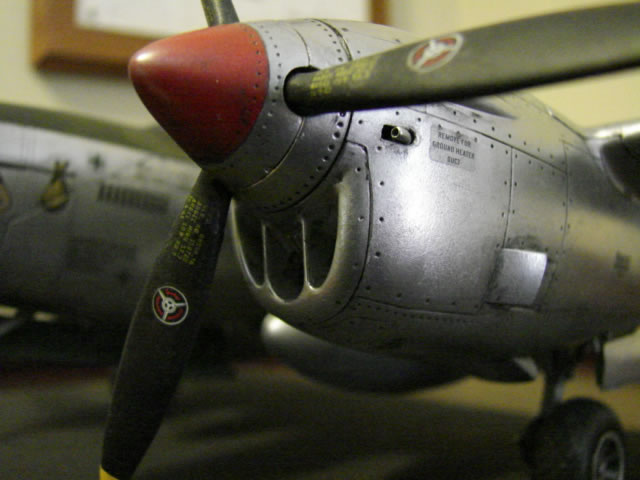
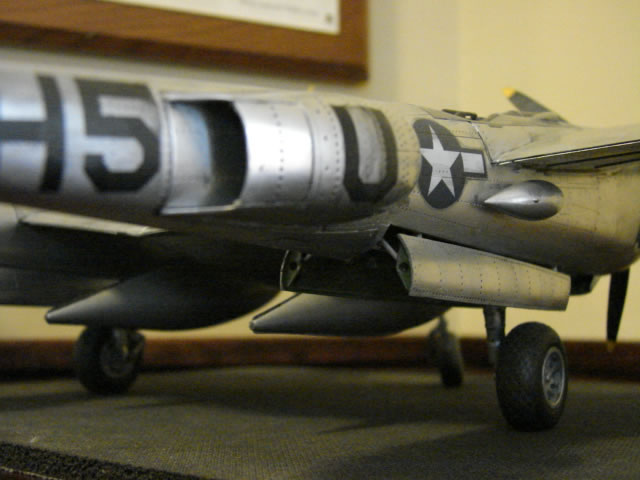
The inlet chins look very nice and the metal screens provided are a nice touch if not perhaps a bit "coarse". Other inlets and outlets (there are many) are of varying degrees of quality. If I had to do it over (and I might), I would scratch build the opened doors on the sides; they don't look that good and all the war pictures I have seen show them closed.
Take a look at this supercharger. This is really nice and it is OOB. I did whittle away some material on the front inlet tube to make it look right, but that was no problem at all. The fairings around the supercharger are very well done too, and as they were in true life steel instead of aluminum I gave them a slightly different natural metal hue.
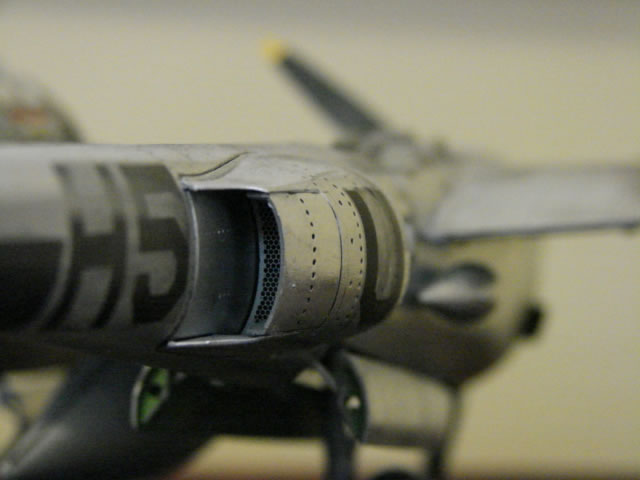
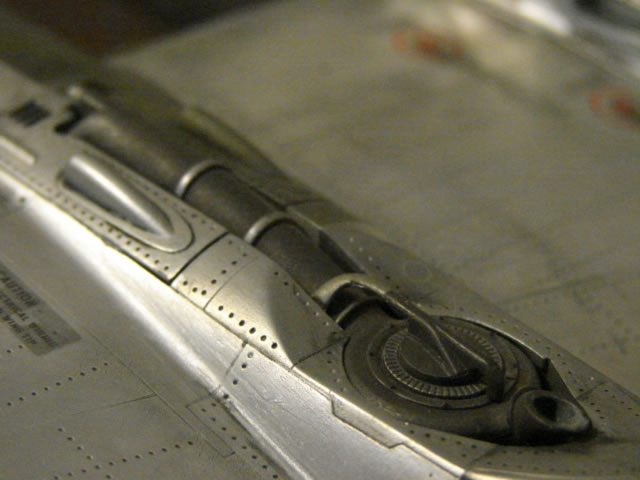
Other protuberances on the booms are some bullet shaped scoops for who knows what, and of course the radiator inlet/outlet scoops. These are also beautifully done moldings by Trumpeter, and the fit is good. This is important for that busy P-38 look. Closer inspection deep inside reveals the same sort of metal grilling that was provided for the chin scoops - a nice OOB provision.
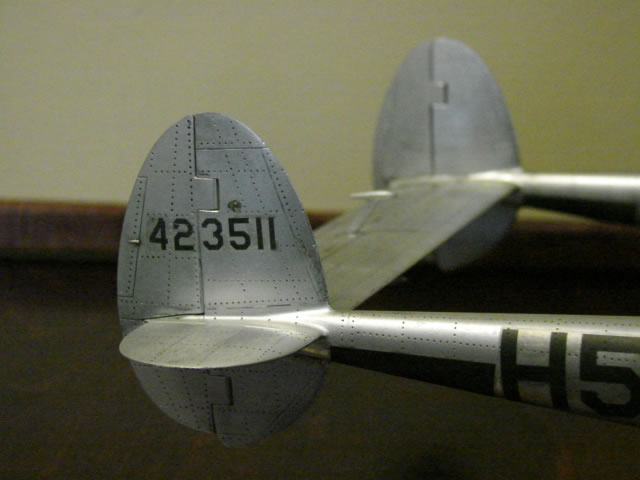
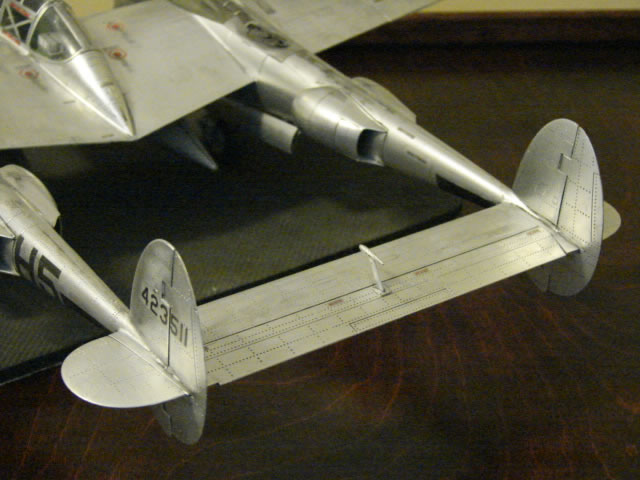
The tails are nicely shaped and fit together very well. Separate movable rudders and elevator are provided and fit well. Tail lights in clear plastic are provided, and are so small so as to be nearly impossible to work with, so I used a favorite trick of applying a drop of 2-part epoxy in the hole. It worked a lot better than the plastic parts would have.

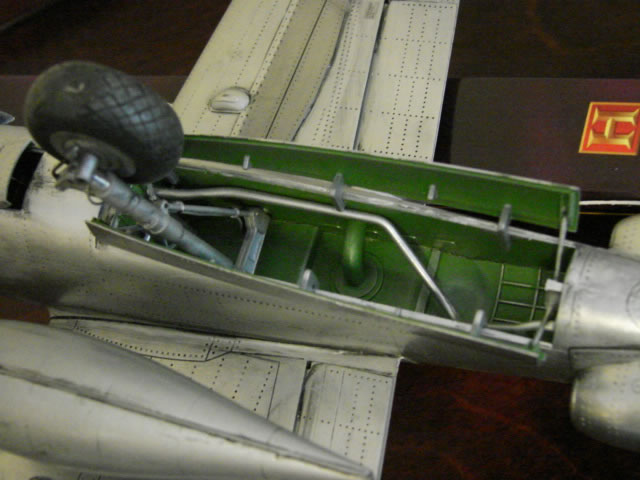
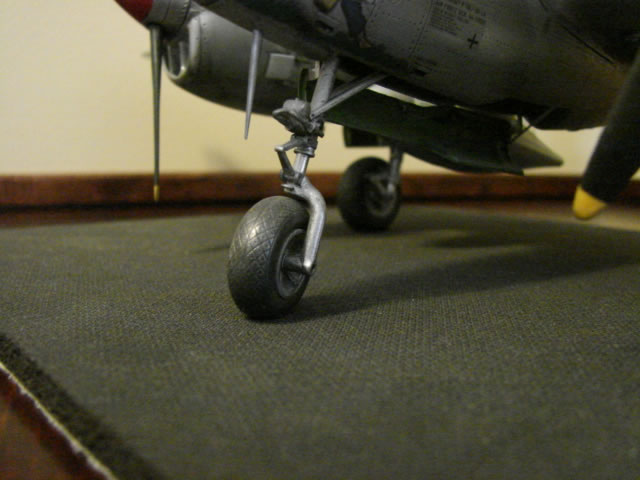
The Trumpeter main landing gear are not quite as nicely done as the nose gear in my estimation, but they are still nice efforts. The torque links are not accurate at all but the rest of the components look very nice. And there are plenty of components to them - it was enjoyable to build them up. I used those burley looking Rutman tires/wheels and they really added quality. I fashioned wire to depict hydraulic lines to and from the brake drums. Similar to the nose gear wheel well, the main gear wells are ready for embellishment. Trumpeter supplied a frugal amount of plumbing and wiring, etc. But there is so much more that could be done. I didn't do it.
The main gear doors needed work - the hinges are blobs like those of the nose gear door, and I don't know how to fix that. The links which actuate doors are also poor efforts by the people at Trumpeter, and they left off some important frames and formers. But this situation is fairly easily modified with stock styrene, which I did.
Wings
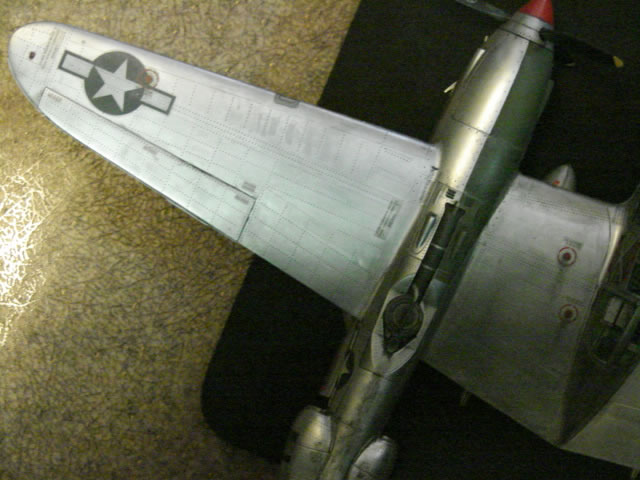
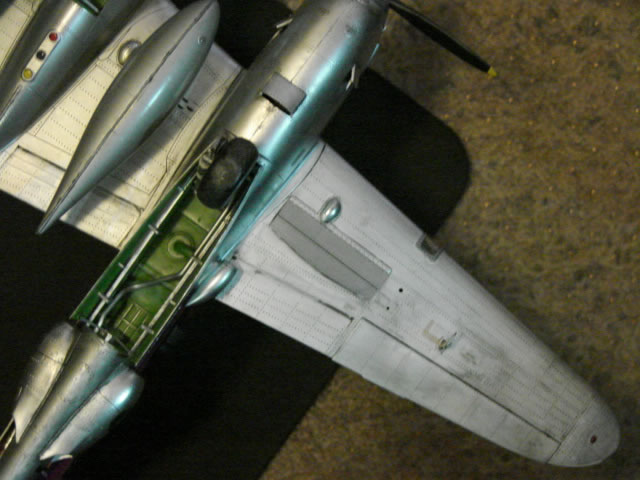
Man - this airplane has big wings. The pictures don't do it justice. The wings are one piece on the top half, and multi-piece on the lower half with a pretty good fit. But the modeler has to pay attention to the lower half joins at the booms. Dihedral is not easily adjusted at all; the modeler is almost at the mercy of the part fit. Some shimming and trimming may be necessary for the outboard sections where they joint at the booms.
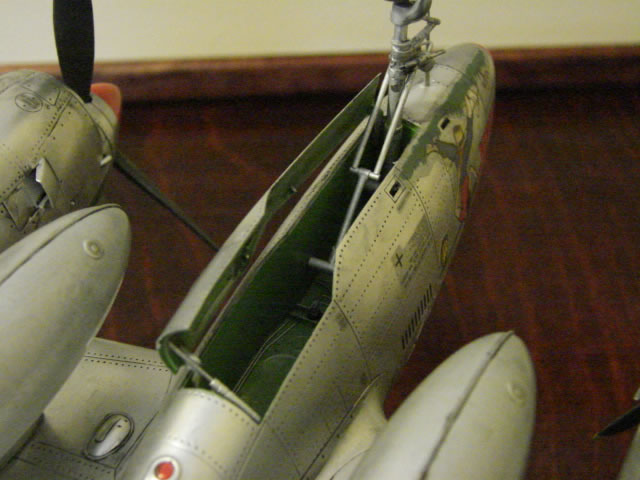
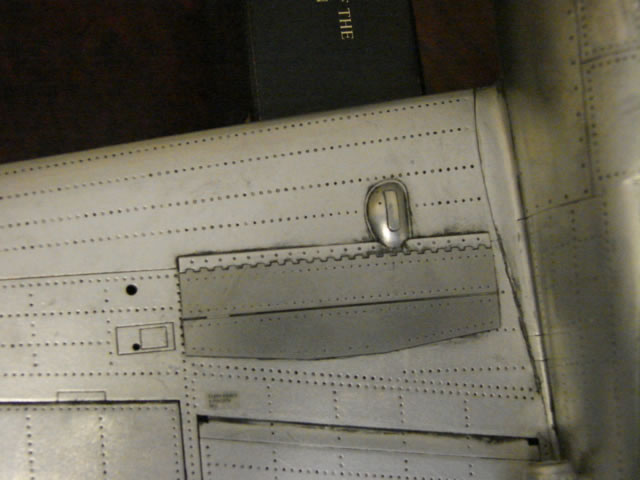
Separate flaps are provided, with metal support tracks. Truthfully it's pretty rinky-dink. So in keeping with wanting the model to be in its sleek high-speed trim, I installed the flaps full up. It appears in war photos that parked Lightning's had flaps up anyway. Ailerons are provided as separate units and they are really nice. They are designed to be moveable but I have fixed mine in place. As I did with the fin, the tip lights were done with a small drop of 2-part epoxy. Before I applied, of course I painted the inside of the hole with either blue or red depending on which wing.
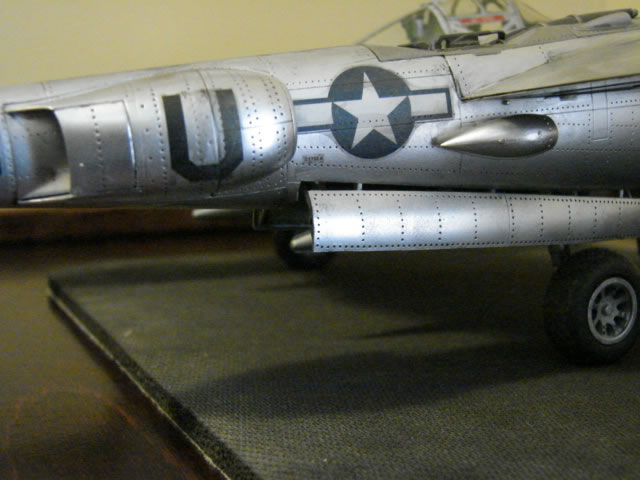
Notice on the bottom of the wings just outboard of the engines, OOB dive flaps are provided (metal), which were an effective fix for the terrible tuck-under problems P-38's exhibited in dives at compressibility velocities. These items, once introduced, were an unwelcome surprise for the Luftwaffe too. J and L models received this important modification, either retrofitted or in production.
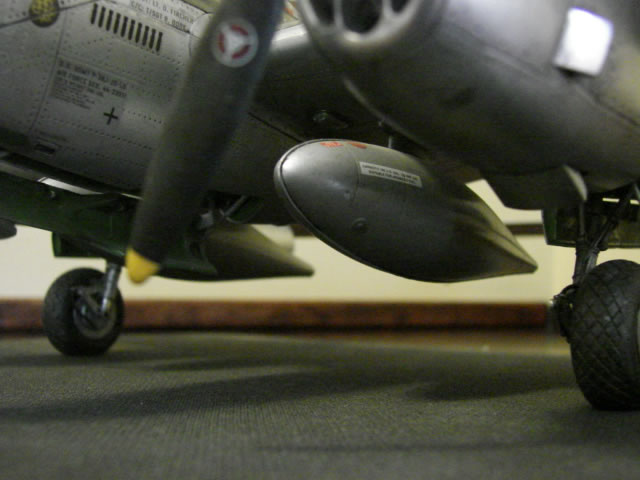
P-38s had terrific payload carrying capability and had available huge external fuel tanks to address the range requirements for bomber escort or other long range missions. So that is what you see here. Plumbing was apparently hidden inside the pod, so the meticulous modeler has one less thing to worry about. Final Finish and Decals:
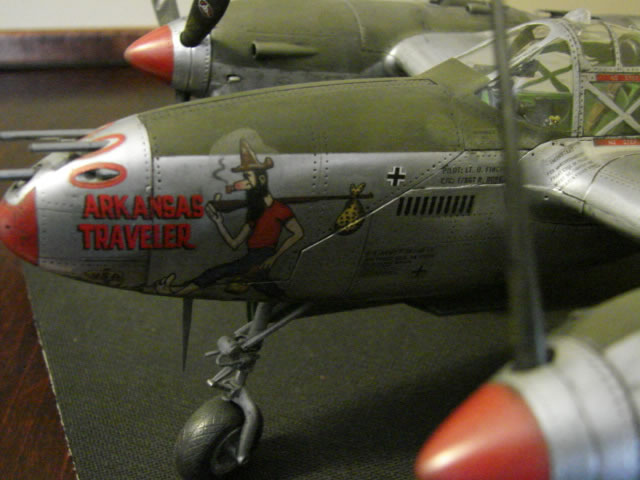
The whole airplane was painted with Testors aluminum metalizer and then polished. It took a couple of cans. Red accents were applied first, then the NMF. Decals came from the Revell kit, and were fairly easy to work with and set down nicely with microset/microsol. However when it came time for the water-paint wash, some of the decals became stained. That was a minor disappointment. But the wash brought out panel lines and rivets about right, and gave it a weathered look.
Closing Comments:

Trumpeter has really proliferated in the large scale model market the past few years, and I have built several of those offerings. Some kits are better than others and the latest kits are usually (but not always) better than the earlier ones, and always better than the ancient kits they replace. Some Trumpeter kits have amazing mistakes which clearly show (for instance the bulging canopy on the 1/24 Mustang). But this kit leaves very little to complain about IMO. Replace the propeller blades and wheels and you can do the rest OOB with outstanding results. Add aftermarket stuff and scratch building and it gets better still. Bravo Trumpeter.
I hope you enjoyed the presentation. Here is what I used on "Arkansas Traveler":
- Trumpeter 1/32 Scale P-38L
- Revell 1/32 Scale P-38J
- Rutman cockpit update kit
- Rutman update with wheels
- Rutman propeller blades
- "P-38 Lightning in Detail and Scale - Part 2" - Squadron/Signal Publications
© James M. Wheaton (Jay)
This article was published on Wednesday, July 20 2011; Last modified on Saturday, May 14 2016