
Revell 1/32 P-47 The Reluctant Jug Part 1
By Jaime Carreon
I'm not really sure when this story starts, but I suspect that this model came to me as a birthday or Father's Day gift from my wife or kids. A 1/32 Revell Razorback P-47 in the RAF South Pacific scheme. I opened it, gloated over the parts, stuck a few of them together, daydreamed color schemes, then put it on a shelf and went back to making a living, taking care of my wife and young kids and hoping that the aviation maintenance field of the 1980s didn't collapse and leave me unemployed.
The Jug got moved a few times: twice in my hometown of El Paso, TX, and then in the big one that brought us to Houston. It languished in a box full of unassembled kits until 1992, when I landed a part time job in a hobby shop to pay for my radio control addiction. The shop owner was looking for a way to spice up the store, so I dug out some of the plastic models I had built as a teenager to display in the shop. I found the Jug, and worked on it a little more. Life intervened again, and she was consigned to a back shelf in the garage, along with a few other unbuilt kits I had collected along the way.
In the meantime, we added an extra son to the three kids we already had, went from working on real airplanes to telling others how to do it, and became truly burned out on the radio control hobby. My youngest son received a Monogram P-61 Black Widow kit this year for his 11th birthday, and with all his excitement evident, asked me to help him build it. We bought some paint and brushes, and while rummaging for some other tools, uncovered a box of Model Master paint and other supplies I had bought while working at the hobby shop. I also found the Jug.
In the previous 20-some odd years, I had gotten as far as assembling the fuselage and tail feathers, and filling the seams with some unidentifiable white putty. The wings were glued together. Since the box top wouldn't fit with the model inside, I had covered it with an old towel. The whole thing was coated in a thick layer of dust; there were dead bugs in the bottom of the box and in the cockpit. The decal sheet disintegrated in my hands, the instructions were yellowed and dusty. A section of the box was cut out, sent in last century for some long forgotten freebie from Revell. The stick was missing from the cockpit (lunch for a cockroach, perhaps?), but, surprisingly, everything else was intact and in good shape. And David said, "Dad, you need to finish this one." What could I say?
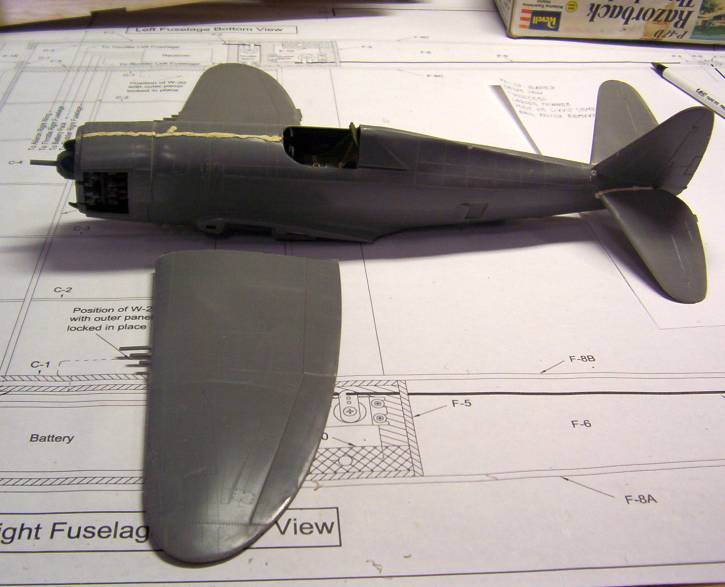
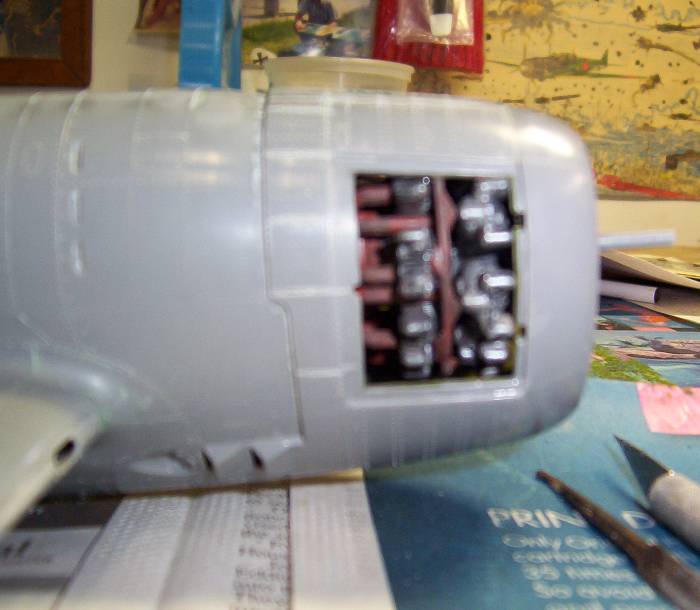
First item of business was to clean everything up. A few shots of air from my compressor got the dust and bugs out of the cockpit, and a good washing took care of the rest of it. Then I got down to sanding of whatever putty I had used to fill the seams. That went OK until I got to the stabs and had the brilliant idea to use my Dremel with a soft rotary brush to knock off most of the putty. Good intentions, bad idea! I ended up with a small trench on one side and a divot on the other, and had to reputty and sand the seam again. So much for labor saving! I rescribed the damaged panel lines with a small needle chucked in my pin vise. It's not the greatest job in the world, but it came out looking OK and will probably look better under a coat of paint. If you can't fix it, hide it!! A visit to the LSP trader forums netted me a new control stick (thanks, Larry!), and the cockpit was whole once again. The engine was touched up a bit to repair some scrapes and dings from being in storage for so long. As it was already installed, I opted not to add any additional detailing, it looks just fine as it is and this one won't be doing any contests. There were some HUGE sink holes in the back of the prop-these were filled and sanded.
Wings got worked on next. Much as I love the old Revell kits, the ridiculous guns had to go, to be replaced by appropriate tubing later on. Leading and trailing edges were sanded smooth. Having spent some time on various plastic modeling sites, I knew the kit had some deficiencies, but decided to leave this one pretty much OOB. Three things influenced that decision - nostalgia (this was the one big Revell model I hadn't built in my younger days), the model was already partially assembled, and the fact that I really didn't want to sand all those rivets off! That sounded entirely too much like work...this is supposed to be fun, right?
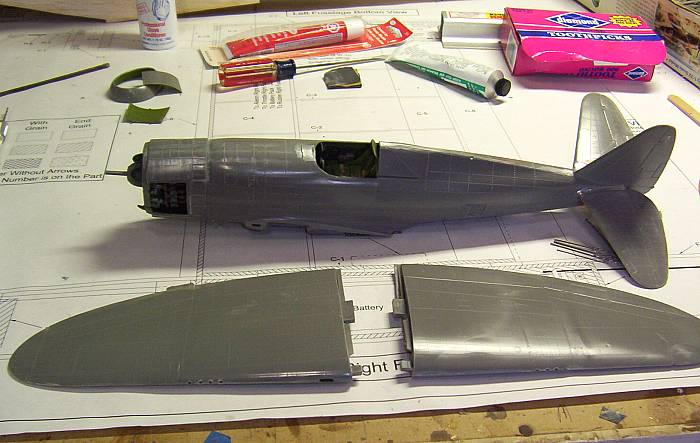
The day finally came to attach the wings. I did a LOT of sanding and dry fitting and managed to minimize the seam on the upper surface quite a bit. The lower side was a different story. Some thick CA glue and Green Stuff took care of that. My friend Darin Bellis sent a tip about seam filling that eliminated sanding-you fill the seam and remove the excess putty after it sets for a few minutes with a Q-tip dipped in nail polish remover. It worked like a charm on this model, even for filling the gaps in the wheel well where the wings attach. The nose cowl ring was also glued on at this point, and that seam was also filled, as the join line was anything but even. Hopefully, all will look well when painted. The landing gear struts were next. When I dry fitted them to the model, it was obvious they were too tall, so I cut them down a bit using the TLAR (That Looks About Right) method. They were reinforced with a small piece of .040 safety wire before being glued back together. I didn't cut them at the oleos as I should have-laziness came into play here.I didn't feel like reworking the torque links! Some modeler I'm going to turn out to be!! The kit wheels are absolutely horrible; I'll be looking for aftermarket replacements. The axles were broken off the struts long ago and will be replaced as soon as I get the new wheels.
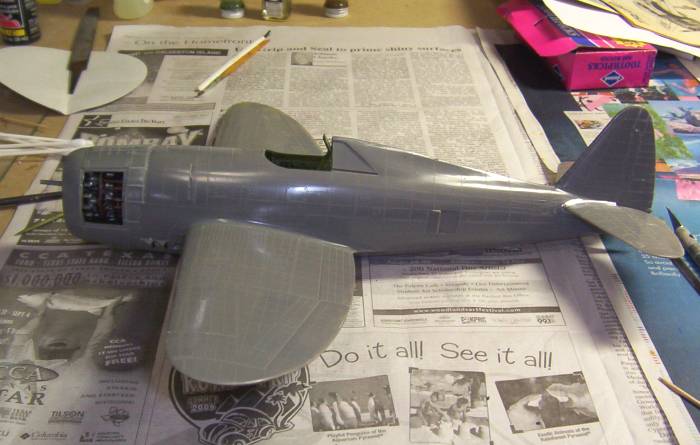
She's ready for paint now, as soon as soon as work and the Boy Scouts allow time to do so. Not having decals posed a problem, as I wanted to do an OD over gray scheme to help hide the rivets and all my mistakes, but couldn't find anyone who had such decals in stock. Chris from LSP (I'm really beginning tolike this place) came to my rescue, and there's a sheet on its way to me as I write this. She'll be in the markings of the 325th FG Checkertails. Stay tuned to see if I still know how to use an airbrush!!
Part 1 | Part 2 | Part 3 | Part 4
© Jaime Carreon 2006
This article was published on Wednesday, July 20 2011; Last modified on Saturday, May 14 2016