
Revell 1/32 Hurricanes Comparison
By Gino Dykstra

Hawker's Hurricane was always the ugly stepsister of the elegant Supermarine Spitfire, but historically the Hurricane was the real workhorse, especially during the Battle of Britain. There, the Spitfire would rise to challenge the German escorting fighters while the Hurricane, with its eight .303 machine guns blazing, would close in to finish off the bombers. Later it the war, it went on to serve in other capacities -- as a light fighter-bomber and as a tank buster with 37mm cannons, among others. At one point they even tried installing a detachable second wing in order to extend range!
Revell's 1/32nd scale Hurricane (now Revell/Monogram) has a venerable history, first being released around 1973. The original release was a Mk. I, in Battle of Britain markings featuring a flashy black/white underbelly. In those days, it was pretty much top-of-the-line as 1/32nd scale aircraft models went, although it still had some flaws.
British magazines in particular were quick to note that although the kit was dimensionally correct overall, the prop spinner was oversized and the fuselage lacked the noticeable "rise and dip" on the underside of the nose that typifies the original. The interior was also a bit rudimentary, with a seat that was part back plate/part flooring, and side console details that did a poor job of representing the open tubular framework of the Hurricane.
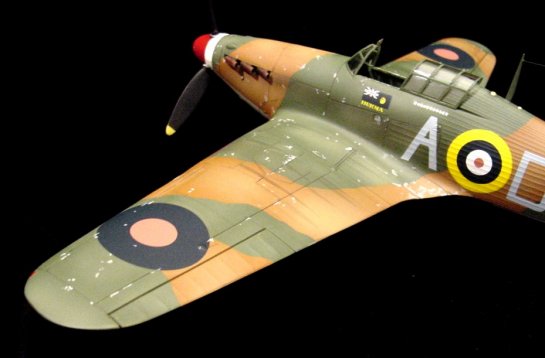
Just about seven years ago, the molds underwent something of a transformation, with Revell of England modifying them to represent a cannon-armed variant. They also included for the first time a desert filter for the nose. Unfortunately, in the process they effectively eliminated the ability to produce the earlier variant from these molds, so if you happen to have the Battle of Britain version, hang onto it!
I was asked recently by a customer to build the earlier variant for his collection, and I happened to have a spare of this kit in my collection, so I agreed. Along the way, I decided to make a cannon-armed version from the newest release.
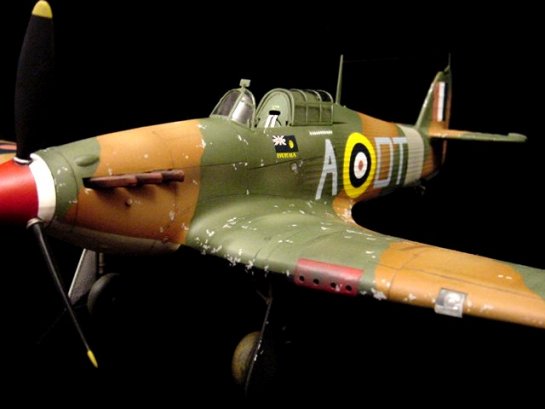
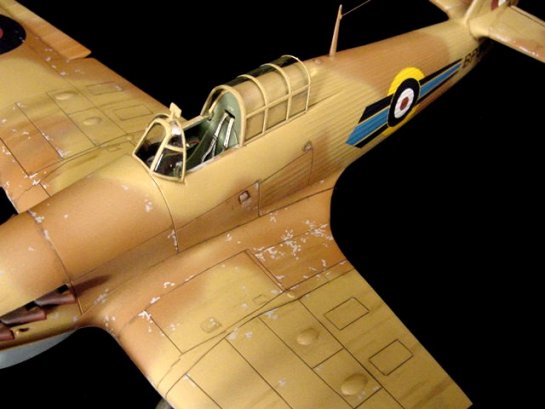
First, I assessed these kits from a 21st Century standpoint. With both versions of the kit, the extensive fabric-covered portions of the fuselage and tail has been done pretty well. But the metal areas had been liberally covered with . . . well, not exactly rivets . . . more like tiny open circles that were supposed to represent rivets. In any case, they looked silly and needed removal. I decided to rescribe the panel lines and sand off both the raised lines and the little dots. This job was surprisingly easy, as the only surfaces that needed addressing were the wings and the forward part of the fuselage. An extra note here - the original eight-machine-gun-armed version of the Hurricane had some distinctive triangular-shaped reload ports on the upper wings. When Revell redid the kit as the cannon-armed variant, they didn't bother to remove these. They simply added some additional lines to represent the cannon breech areas. To be accurate with the later versions, be sure not to scribe these triangular panels. Refer to documentation instead to scribe the correct, rectangular panel lines for the cannon-armed variants.
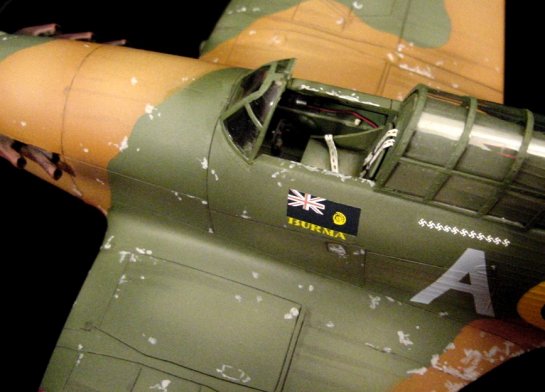
I then addressed the interior, which needed a bit of work to look passable. The seat was the main culprit, requiring sawing out of the relevant sections of both back panel and flooring in order to make space for a scratchbuilt replacement. Seats of this nature are actually fairly easy to make - I simply cut a strip of thin plastic to the width of the replacement seat, then bend a good curve into it. By gluing two flanking pieces on the curved plastic, you force it to dry in that curved shape. Then it's simply a matter of cutting and sanding the three pieces down until you have a "seat" shape. Since most WW2 seats were pressed from thin sheet metal, this does a good job with minimal effort.
Although I really should have replaced the side consoles with open tubular framing, it was obvious that they wouldn't be visible once the fuselage went together. Instead, I drilled out the oval hole in the back plate where the upper safety belts come through, then made those belts with lead strip from a wine bottle and some small plastic bits.
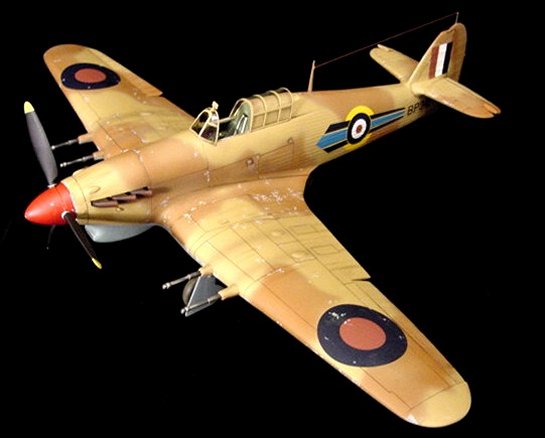
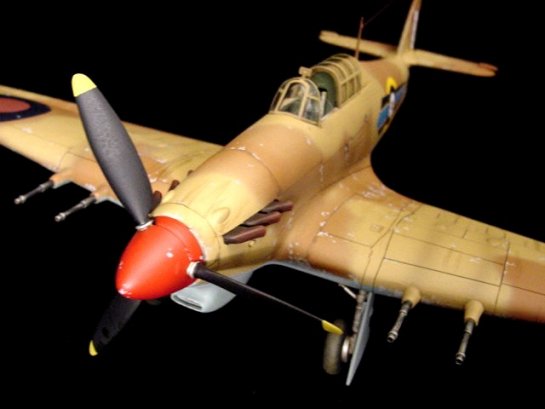
In checking the diameter of the spinner, I could see what the British mags had been talking about. It was at least 1/8 inch too big, hanging over the nose in every direction (note: the newer, cannon-armed versions have a different spinner which does not have this problem). But how to trim it down evenly?
Finally, a thought occurred to me, and using the spindle from a sanding head, threaded it through the spinner plate and chucked it into my Dremel. With a little finesse and some medium sandpaper, I managed to hone it down to an appropriate diameter.
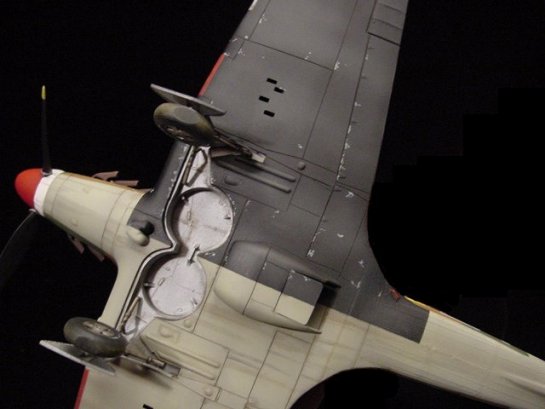
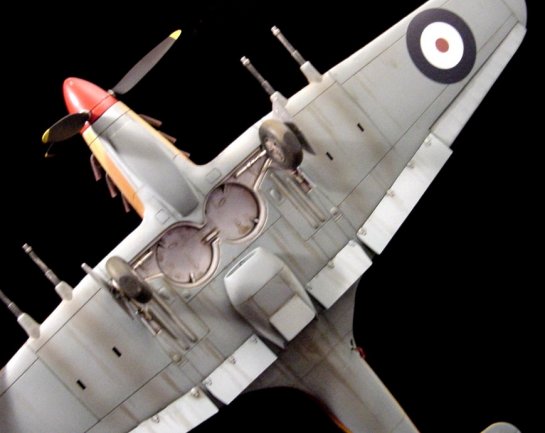
I then inserted aluminum tubing in the gun ports of the machine-gun version, as the holes were far too big and lacked depth. I also replaced the cannons for the others completely, as the cannons provided are grossly overscale - more like 45mm than the 20mm actually carried. Once again, I used aluminum tubing, with fine solder wrapped around the backs to represent the recoil mounts.
I tried to come up with some clever way to get that gentle curve-and-dip look to the underside of the nose, and frankly couldn't come up with anything straightforward. If I do this model again in the future, I might attempt an extension to the nose and try sanding that to shape. But after all the trouble of scribing the kits, I was getting a bit burned out!
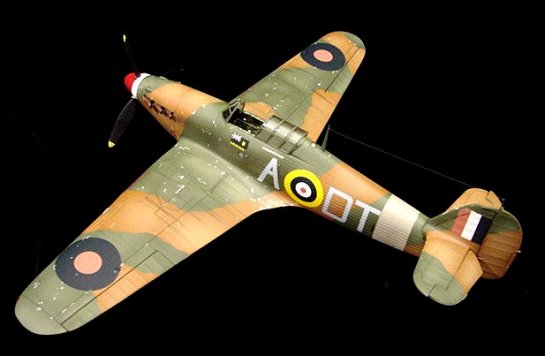
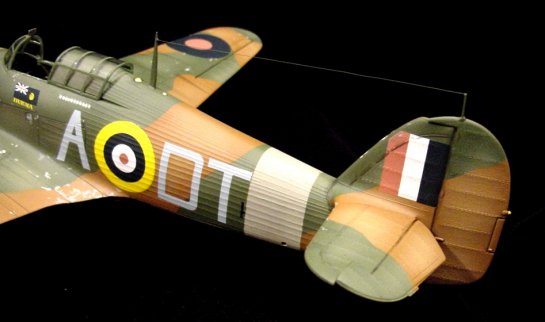
Even so, I decided to include some articulation with each model. The B of B Hurricane had its rudder tipped to one side, as well as having the tails drooped. The rudder mounting on the fuselage is thick enough that there's very little filling to do once you snap these parts off. The tails are thicker, oddly enough, and require a bit of filling to look right. On the other Hurricane, I did both these and added tipped ailerons as well as dropped flaps. These are a four-part affair which run partially under the fuselage, so I made extensions for the flooring with sheet. I finished boxing them in and added some triangular ribs, and that was about it. The flaps themselves were mostly just plastic card with a few details thrown in.
I then used a piece of fine wire to make the grab handles for the boarding steps for one of the aircraft, and actually drilled out and scratchbuilt the boarding step for the other. I also drilled out the engine exhausts and the small mounting holes near the rear of the fuselage. Final detailing included drilling out the carburetor intake and detailing the underbelly radiator with a central splitter plate and open vent plate for a more candid appearance.
For these kind of aircraft, the hardest part is the upper camouflage. Despite many models painted otherwise, most British aircraft of the time had a hard-edged camouflage. In finishing the real aircraft, they used large, thin rubber mats as masks. In my case, I simply used wide masking tape put on a piece of glass. I then cut the masks out according to documentation and placed these after the first color was sprayed on. I then softened the whole effect with a light dusting of thinned earth tone to get the colors to blend. The British, by the way, were very practical when it came to camouflaging their aircraft. The original brown/green combo was designed for easy modification in other theaters of operation. In the desert, only the green was oversprayed with Midstone. Later on in Europe, the brown was oversprayed with gray. In all cases, they never needed to paint more than one color to adapt them - smart!
I'm glad to see this kit coming out yet again through Revell of Germany. Despite some of the flaws, it effectively captures the look of this old classic Hun-Hunter.
© Gino Dykstra
This article was published on Wednesday, July 20 2011; Last modified on Saturday, May 14 2016