
Hasegawa 1/32 Bf 109G-6
By Frank Crenshaw
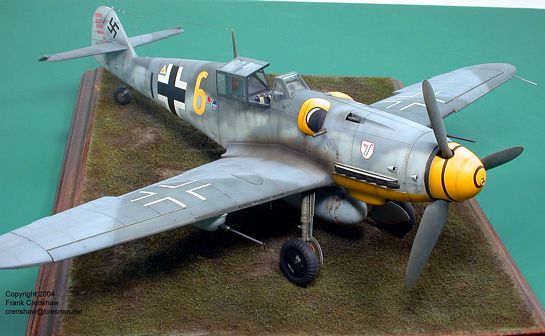
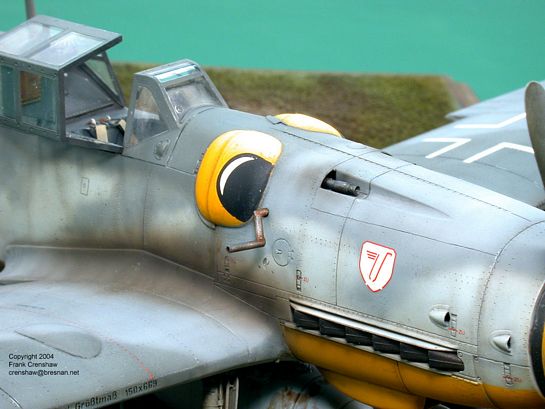
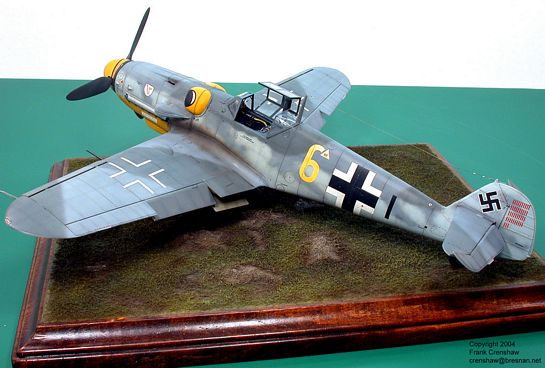
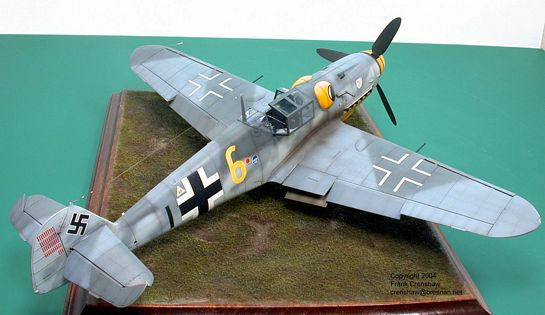
The Bf 109G-6 is one of the most easily recognizable variants in the 109 lineage. This model represents the colorful mount of 9/JG 3 pilot Alfred Sarau in fall of 1943, as it would appear just before a mission. This plane represents a fairly early G-6 model. It carries a simplified camouflage splinter of RLM 74 gray-green, RLM 75 violet gray over RLM 76 Blue. It carries the FuG 16 zy antenna mounted under the fuselage, rather than out on the wing as seen in many later examples. It is also equipped with the FuG 25a antenna just under the cockpit.
On October 14, 1943 Sarau took off in this bird to engage 8th AF bombers that were headed to strike the Ball Bearing factories at Schweinfurt. Some 60 Bombers would be shot down that day, a heavy price, but the Luftwaffe took hits as well . Sarau was one of those shot down and killed in the fighting that day. While the allied losses were quickly replaced, the Luftwaffe wasn’t so lucky.
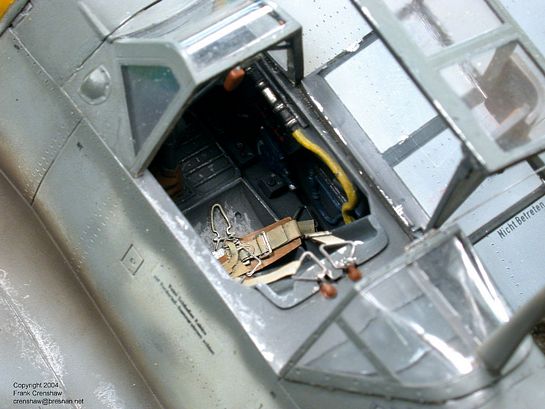
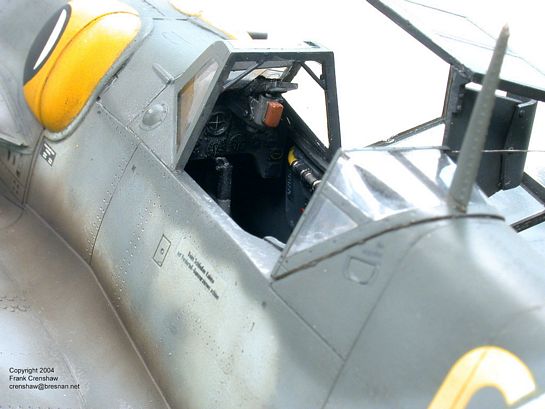
This is the 1/32 scale Hasegawa Bf 109G-6 almost out of the box, but with some minor details added. The cockpit was built essentially OOB. Being dark, there isn’t much visible in there, so the the cockpit is actually pretty good right out of the box. I carefully shaved the raised detail off the instruments on the instrument panel. I used my Waldron Model Products punch and die sets (I have both sets) to punch the individual instruments faces from the kit supplied decal sheet and placed them on the corresponding bezel on the panel. I then gave each instrument face a coating of Future floor wax. In retrospect I wish I had added some wiring to enhance the pit . I scratch built a seat backing by vacforming over an aluminum master, then adding the side and top pieces with strip styrene. I scratch built the seatbelt mounting points on the rear of the cockpit from brass wire, using super glue to build up the shape that was shown in my reference books. I used the Eduard 1/32 scale Luftwaffe seatbelts, and they are magnificent; I usually don’t like etched belts because they tend to look too “stiff, ” but these belts were fantastic. I painted the belts Pollyscale Dirty white and the lap pads Pollyscale Kaki. I also added a leather-securing strap to the compartment hatch on the rear of the cockpit made from paper with snaps punched from styrene.
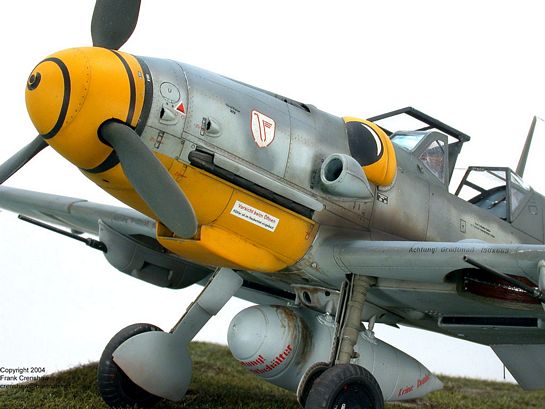
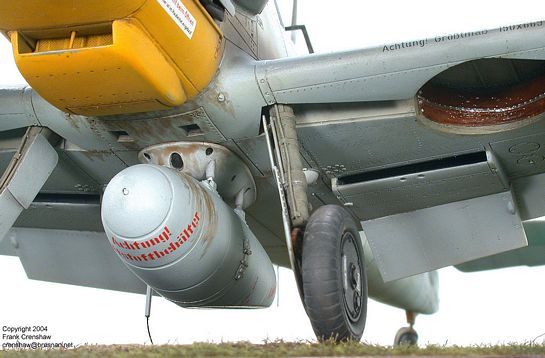
The covers in the rear of the landing gear bay were made from thin copper sheeting glued to the sidewall, with snaps punched from styrene. The zipper in the cover was made by running a pounce wheel over thin aluminum, and cutting out a thin strip were the indentations are. The gear doors were thinned to look more realistic, and some detail was added as per my references. The flexible rubber brake hoses were added between the tires and the struts, and the tires were flattened a bit to look more realistic. I used a scriber to trace around the bracket on the rear tail wheel to make a cut that gives the effect of the parts being separate. This gives a very good impression of a tail wheel and totally negates the need to replace the part, and best of all it’s very easy to do. I cut the tail wheel bracket and added a support post made from brass rod and glued it back on so that it was turned to one side (these planes had a free floating tailwheel and it could be turned almost any direction as the ground crew moved the plane– even backwards). The exhausts were hollowed out using my Dremel tool; this really improves their look. I added a strap to the drop tank made from thin aluminum, and scratch built a starter crank from styrene rod to finish off the model.
Rivet detail was added by using a pounce wheel. I mixed up Tamiya paint to paint the base colors of RLM 74, RLM 75, and RLM 76. I do not pre-shade, but instead post shade. This involves using variations of the base colors to change the coloring of the base colors. Sort of doing a glaze wash using your airbrush. I work around the panel lines to accent the rivets, panels, and use contrasting tones of glaze. This results in a pleasing and realistic looking weathering effect that is very subtle. Once the painting was completed, the model was given a coat of Future floor wax . I used the Microscale finishing system to apply the Eagle Cal decals. Their decals are thin, and of very high quality, and went on with no trouble at all. After the decals were finished I did my weathering – which consisted of adding the exhaust stain, an enamel wash of burnt umber and black, and chipping using a silver artist pencil. The oil streaks were added last using brown ink.
I really enjoyed this model; it made me fall in love with 1/32 scale hard. I have plans to do many other 109s, and am hopeful that there will be other subjects released of the caliber of this kit in the future.
© Frank Crenshaw 2004
This article was published on Wednesday, July 20 2011; Last modified on Saturday, May 14 2016