
Trumpeter 1/32 P-40B/C
By Damian Murphy
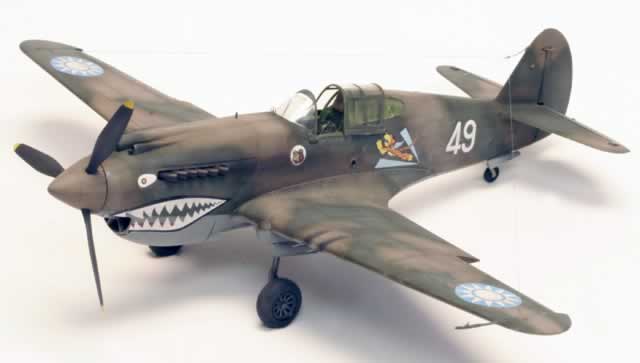
Last year after building the Trumpeter F4U-1D I thought to myself how do I top this great kit, so off to the old hobby shop I ran? I have always had a fascination with the AVG flying tigers so when I saw my next subject I thought this is going to be a fun one. The P-40 in 1/32nd scale was and has always been a fun kit to build, and it had been a long time coming to really see a quality kit like the Trumpeter kit. For this is not anything like the old Revell kit of years gone by.
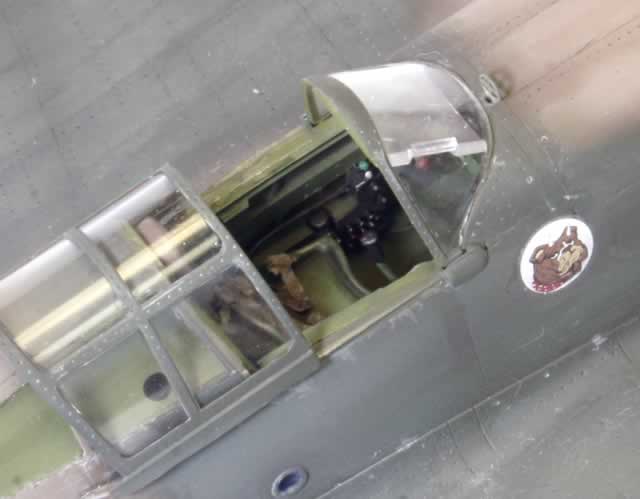
The recessed panel lines and detail of the P-40 was outstanding as a matter of fact the entire kit with the exception of the cockpit is well done. The kit cockpit it seems in most of the Trumpeter kits that I have seen are lacking on the details that are required to keep up with the same price Japanese kits like Hasegawa or Tamiya.
I also thought that this kit should have had rubber tires like Trumpeters F4U kit that I had built last year.
I had intentions of building this kit out of box, but with the shallowness of the cockpit and lack of detail I decided to scrap the kit cockpit and pull out the builder's sheet of evergreen plastic. With some really great pictures of P-40 cockpits on the internet and reference information from P-40s in action book I started to fabricate a complete new cockpit with the correct depth and detail. I did use the kit rear bulkhead with modifications made to it, also the kit seat with additions of new seat rails.
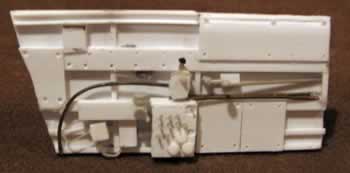
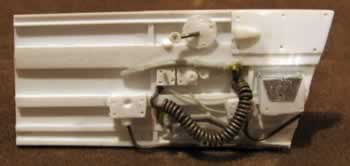
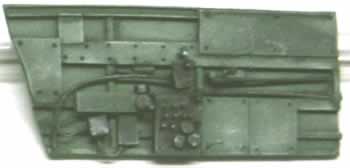
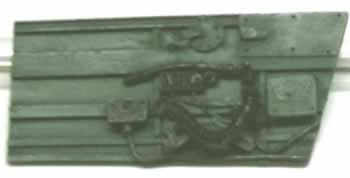
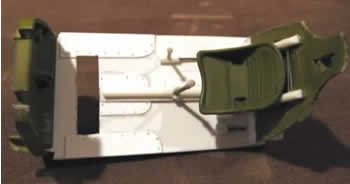
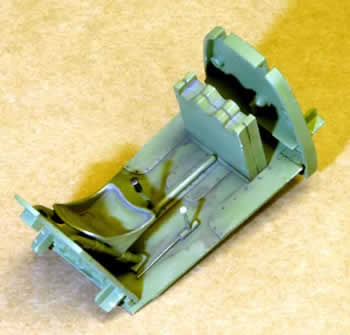
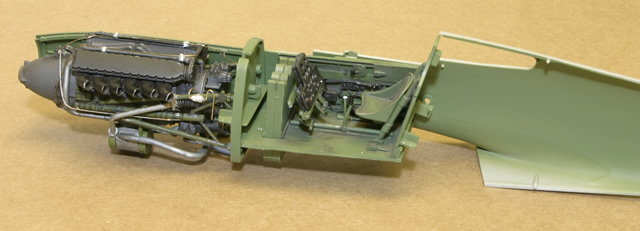
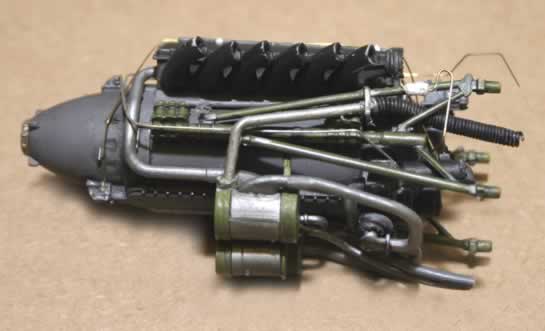
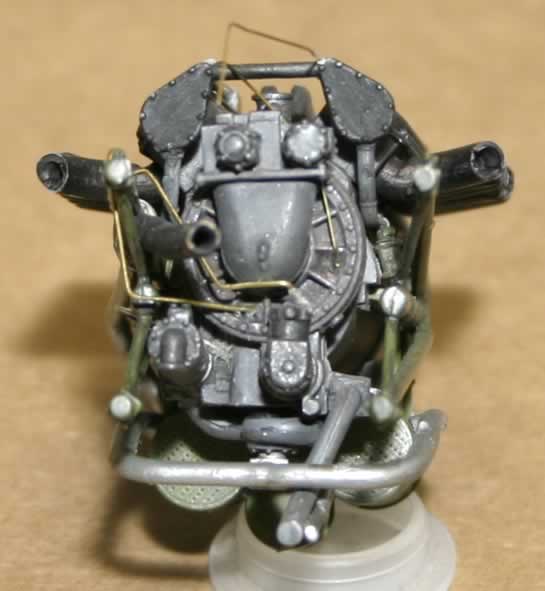
In addition to the newly fabricated cockpit, cast resin production style weighted wheels were added. I wanted to and additional detail to the engine, tubing and lines were constructed out of brass and copper wire. I had decided to remove all the engine access panels and I did so, but after completion of the engine and assembly of the fuselage I was not satisfied with the aesthetic look of the completed hull so out came the glue and back on with the panels hiding all the hours of detail and work to the engine, but hey I had the fun of doing it and I have the pictures too.

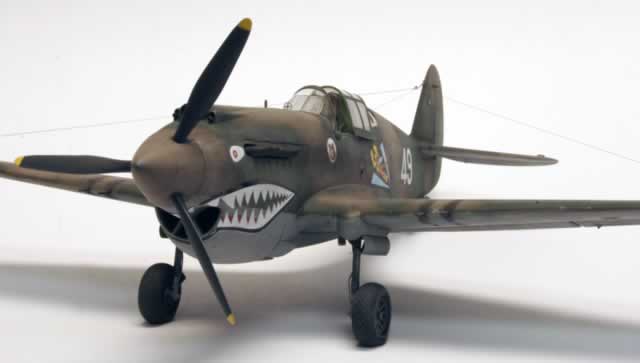
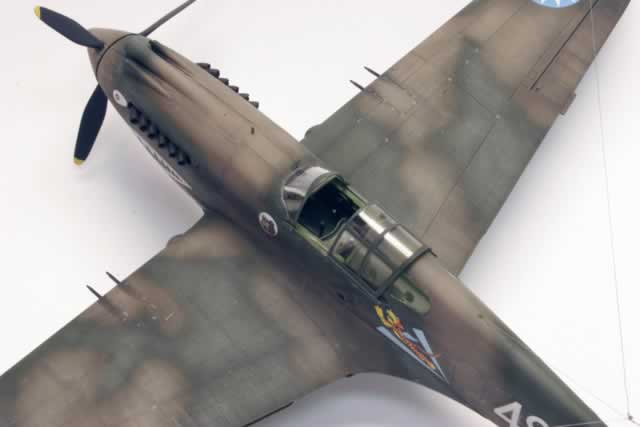
With the completion of the model kit construction, I turned my attention to color scheme of the model as I said I like the American Volunteer Group the AVG were a group of young men to be admired fighting in conditions that were to say the least barebones with a shortage of spare parts and against heavy Japanese odds these men were the true hero's of days and wars gone by.
To that end I had decided to order some great limited edition flying tiger decals from Cutting Edge if you have never used there product just let me say they are great, no other decal I have ever used has ever worked better in my opinion. So I chose to replicate one of the P-40's from the 3rd Pursuit Squadron, China 1942.

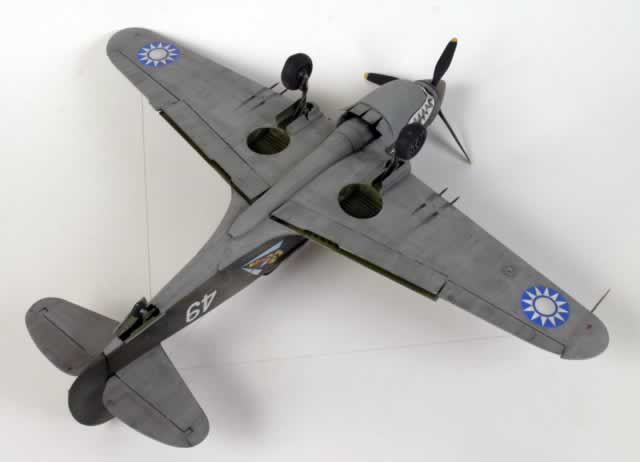
I like to paint, I really like to crank on the old airbrush to me this is the best part of the whole hobby, I use a Thayer and Chandler Professional airbrush made by Badger. Cutting Edge describes the paint scheme as DuPont 71-065 dark brown, DuPont 71-013 dark green and aircraft gray. I have always used Testors Model Masters Acrylic paint I like it the most out of all the paint I have ever used to me it is just the old standard I have come to know best. I mixed up the shade as represented in the Cutting Edge decal paint chip description preshaded the aircraft and starting with the underside of the aircraft applied the shades of gray. I like to paint inside the panel's first then pull back a bit and mist over the entire underbelly of the kit. After the gray has dried and cured I masked off the underside and applied the base brown color to that I started spraying the green camouflage onto the kit. Some people like the hard edge camouflage I have never I have worked on military aircraft for the last twenty five years and have seen a number of them painted so I believe most are always paint soft edge so that is my choice.
After the base coats are dry, I mixed in white to the base shade paint to do some fadeout of the initial color, this adds a layer of realism to the model after achieving the desired shading, and the model is allowed to dry cure over night. In the morning I started to apply the black-brownish enamel wash over the recessed details of the kit, allowed this to dry completely and using cotton swabs and small amounts of thinner streaked the wash in the direction of the airflow, this will highlight and subdue the entire paint job. I like to strive for realism in all my models so I really never have a pristine painted model. Decals are applied with Solvaset solution and allowed to dry.
The last portion is a weather process that I always follow exhaust streaking, gun residue and paint wear. Exhaust streaking I accomplish with a mix of black, brown, white and tan pastel oil chalk applied with a dry brushing. Gun streaking is applied with black only in the same manner. And the last weathering is applying paint wear with a silver pencil and dry brushing with silver paint.
The model is then covered with a final coat of dull coat to seal over the weathering and to give the decals the all important painted on sheen.


I hope everyone likes this kit I enjoyed sharing it with all of you.
Damian Murphy lives in Lancaster, Ohio USA and works for the Ohio Air National Guard a reserve component of the United States Air Force as an Aircraft Maintenance Technician.
© Damian Murphy 2006
This article was published on Wednesday, July 20 2011; Last modified on Saturday, May 14 2016