
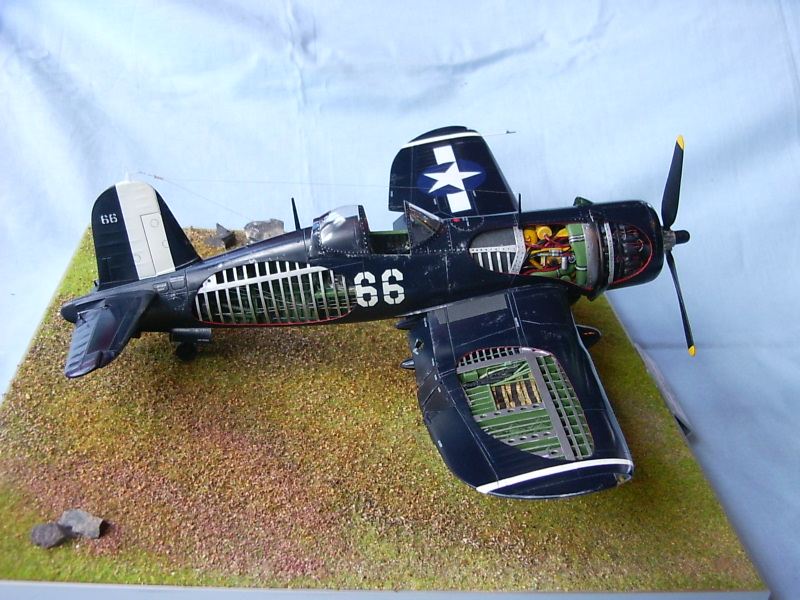
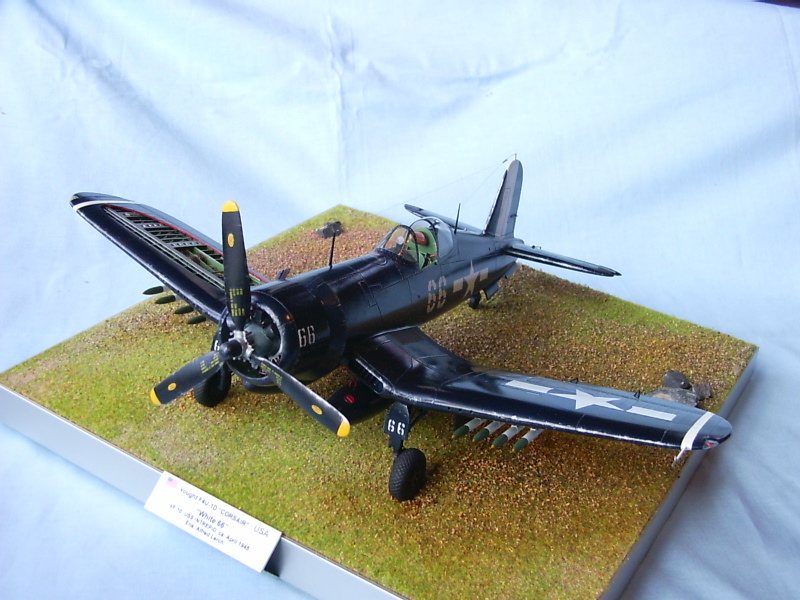
Revell F4U-1D "Corsair": "White 66" Ens. A. Lerch, USS Intrepid
By Chris Novak
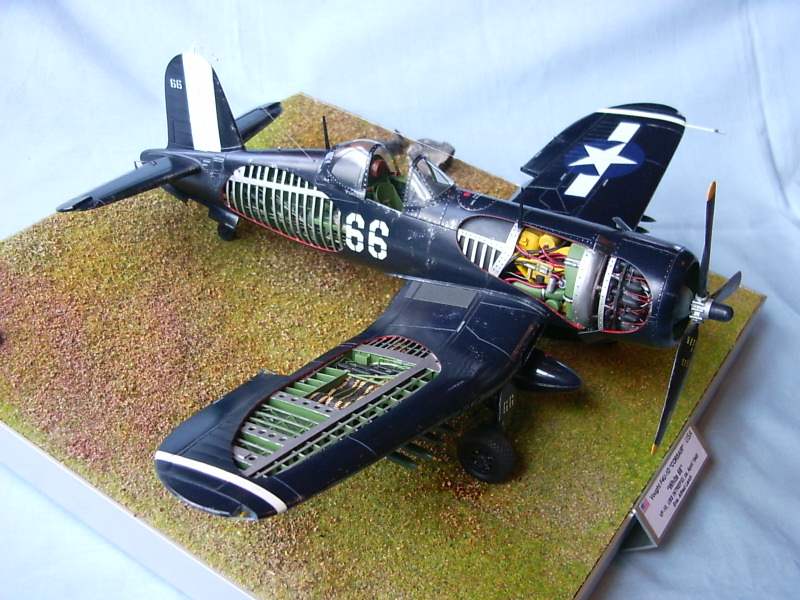
After having the great chance to take lots of detail-shots from a original Corsair at an air-show in July 2004 the decision was made: Ok, the "whistling death" will be the next! At least 5 of the old Revell kits were waiting in the storage, so nothing more to do than take one and start the "Navy-collection".
Although TRUMPETER has released two new engineered 1/32 kits in 2003 I decided to take an old Revell kit 'cause although there are lots of additional work to make it look accurate I really love those old releases, and to modify an old Revell kit is real modelling fun...or madness?
The main areas to rework are: cockpit, main landing gear and wheel wells, tail wheel and tail hook construction and last but not least flaps in "down" position.
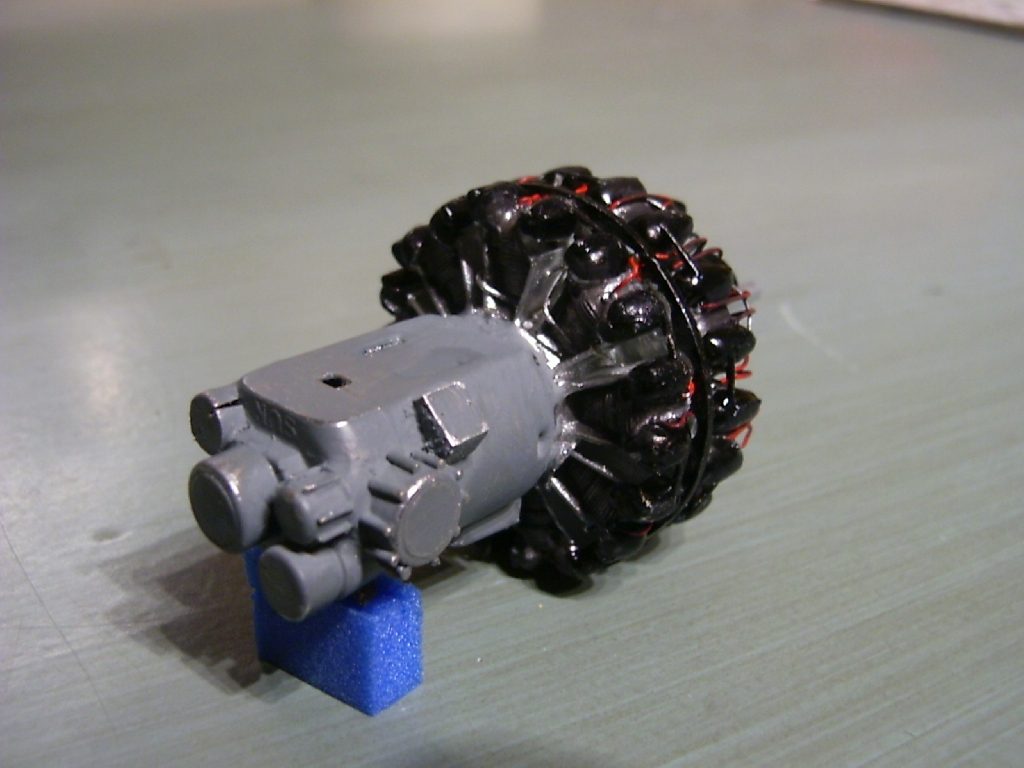
As usual I started my work with the motor. The Revell motor is not too bad, nevertheless I added a bit wiring and some more details and, as always, an electro- motor to make the prop work.

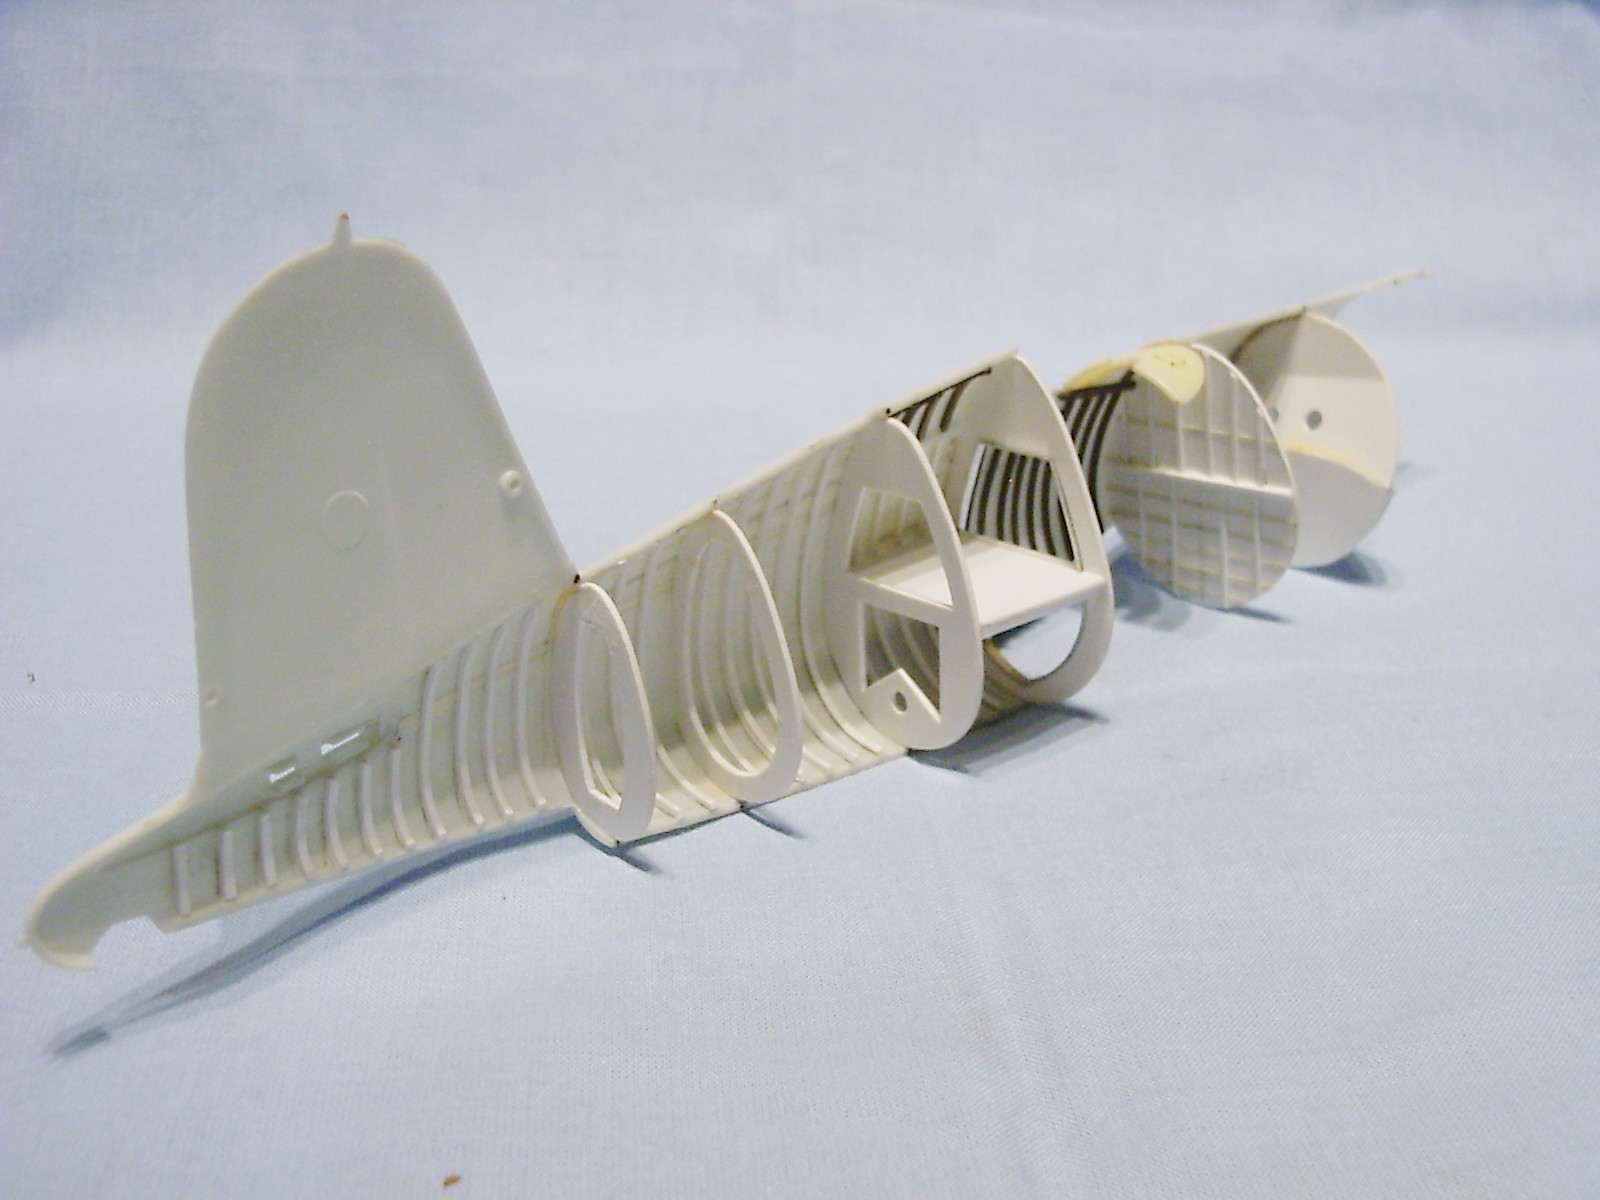
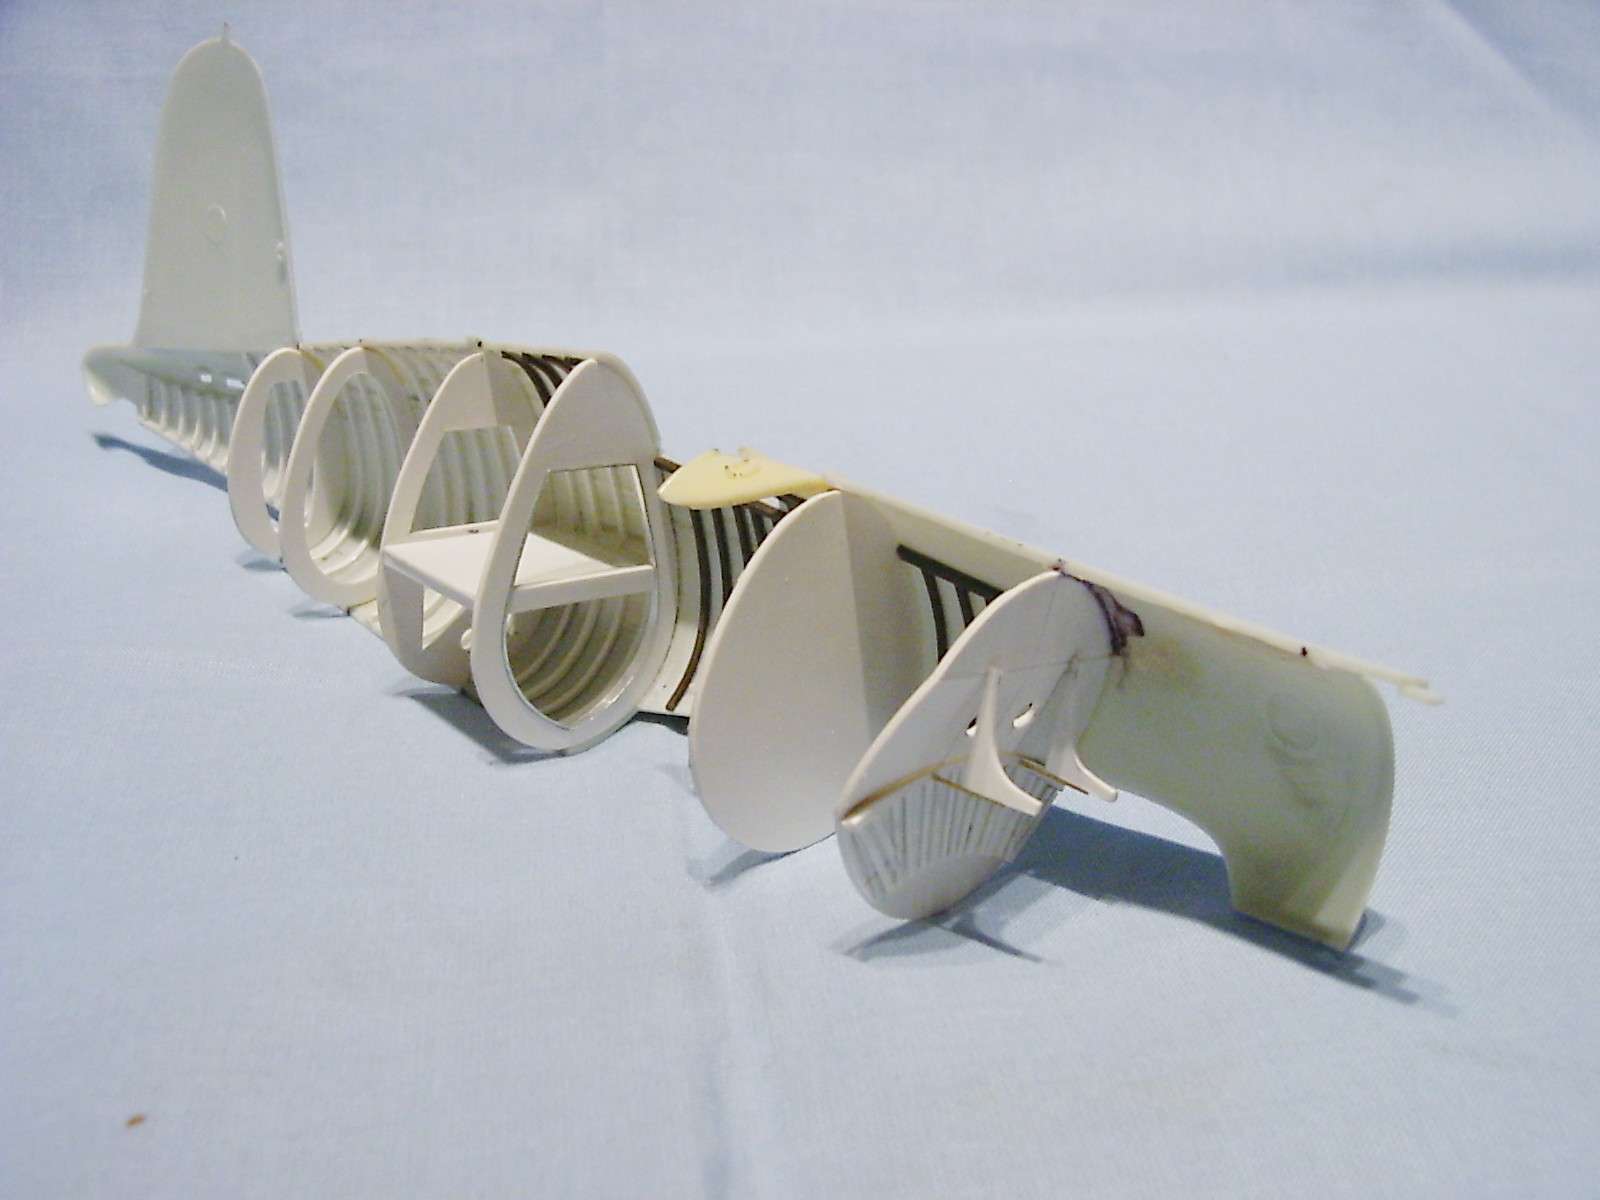
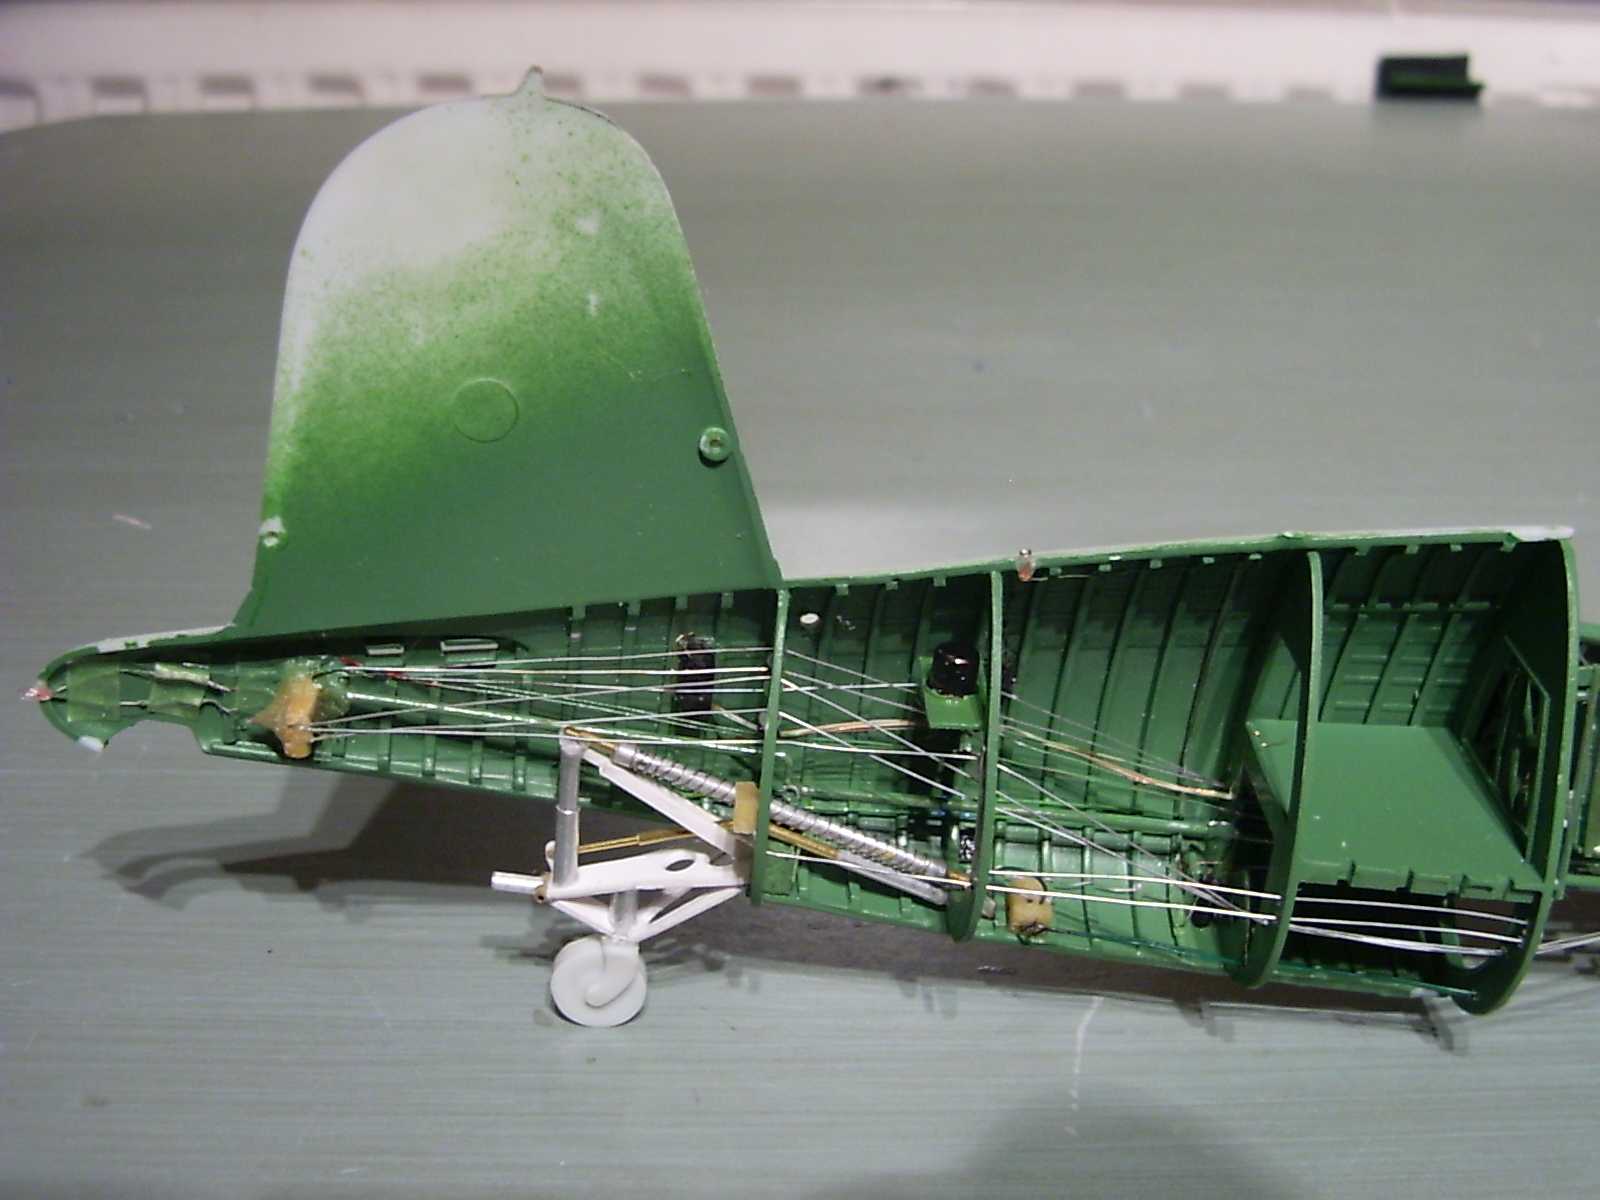
For sure this plane was also done as a cutaway and so the next step was, after doing lots of research-work (especially for the inner-fuselage) starting the fuselage construction / framing. The bulkheads 1-6-12 and 16 (from cockpit backwards) are "normal" bulkheads, means they are massive parts, giving the fuselage its shape, the parts between them are "fakes", a bit like vertical stringers to give the fuselage–construction enough strength. Contrary to most other planes the Corsair don't have much vertical stringers, except from cockpit forward to the firewall. The firewall and the first wall forward the cockpit are also "normal" ribs. All these parts are made from styrene.
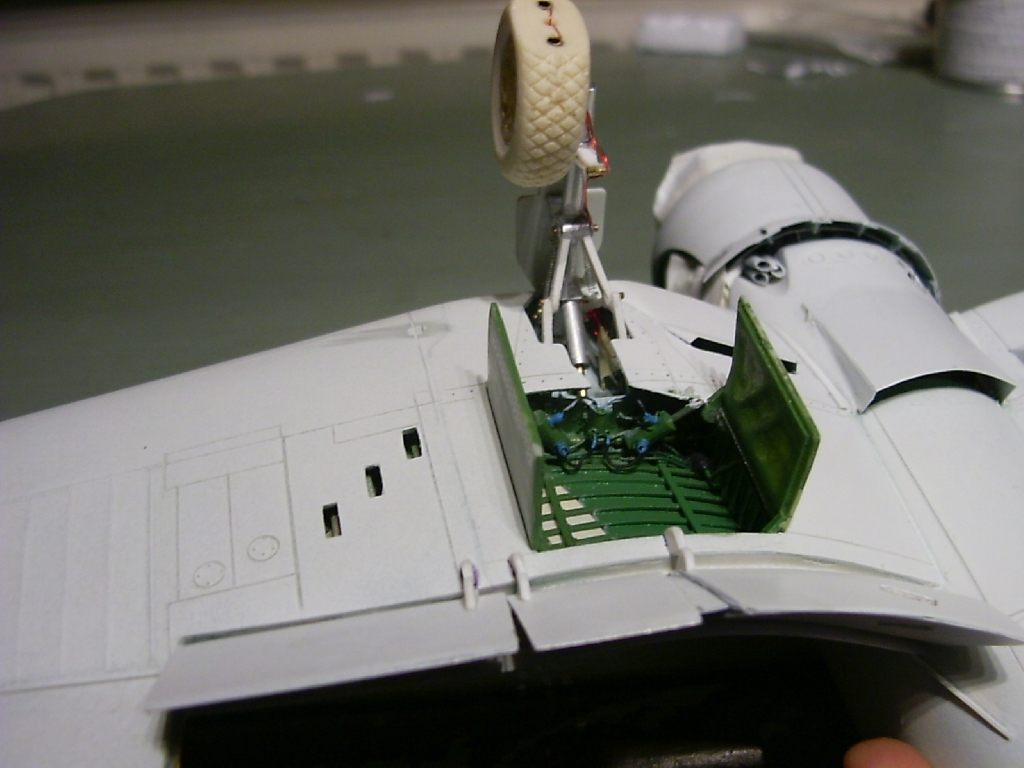
After priming the fuselage halves the next step was the cockpit which was mostly scratched, only a few spare resin parts were used. When the pit was finished and painted the turkey...sorry, the aft-fuselage - was filled with interior like radios and the wiring for tail-rudders and a modified tail gear and tail-hook was mounted. Also the area forwards the cockpit was filled with fuel-tank, oil-tank, motor mount and the massive aluminum bulkhead right before the motor and all this interior was painted before mating the fuselage halves.
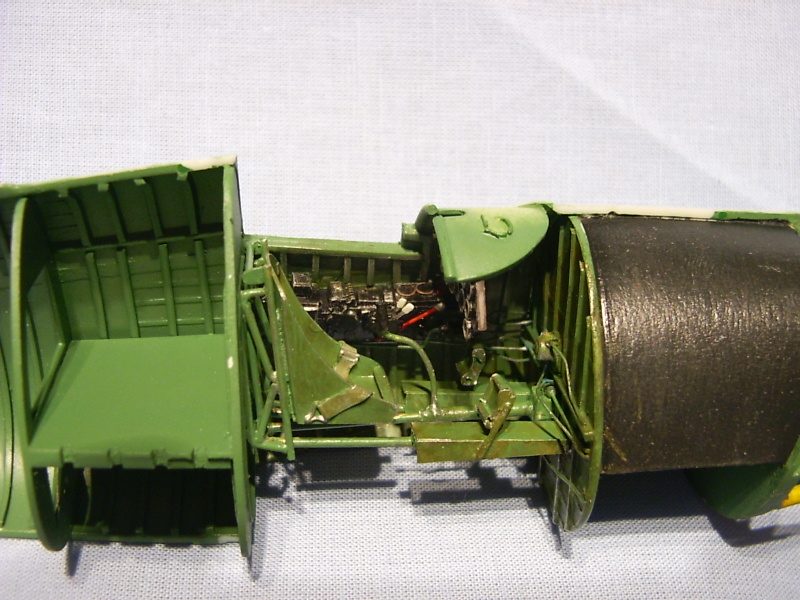
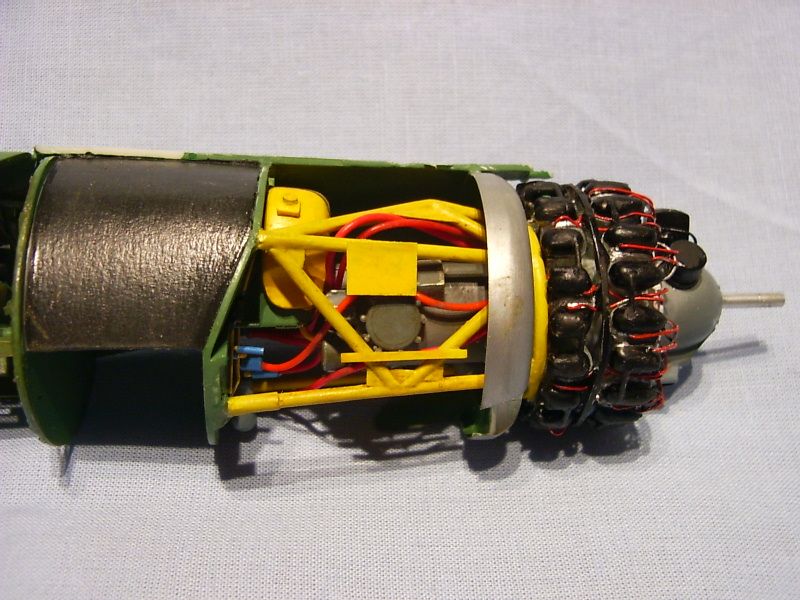
After inserting the complete motor including its frame a bit of pre-detailing in this area was added ( final detailing in this area was done when fuselage, wing and cowling were on their places), then the starboard wing construction started, beginning with the wing root: adding modified cooler intakes and framing of the wheel-bay. Then the outer wing was added and ribs from styrene were glued onto their places. After priming the whole lower-wing half the guns were mounted and ammo-belts were added.
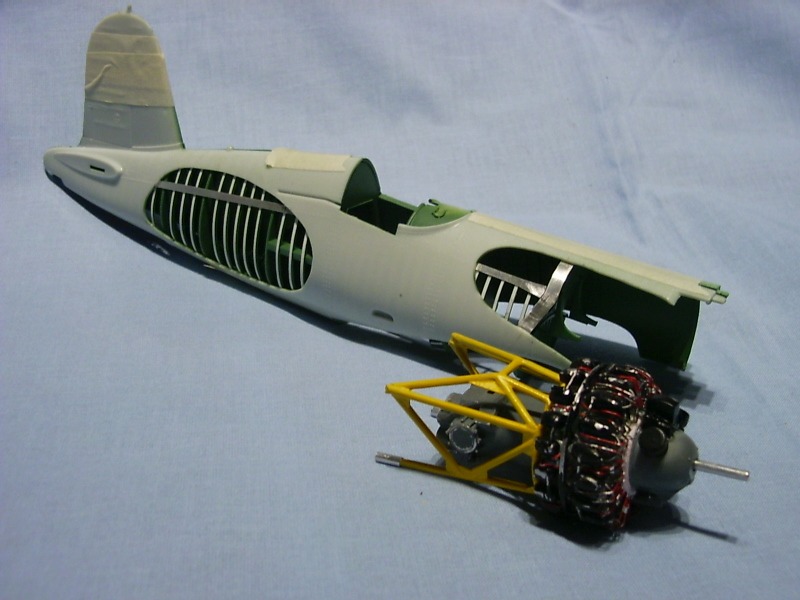
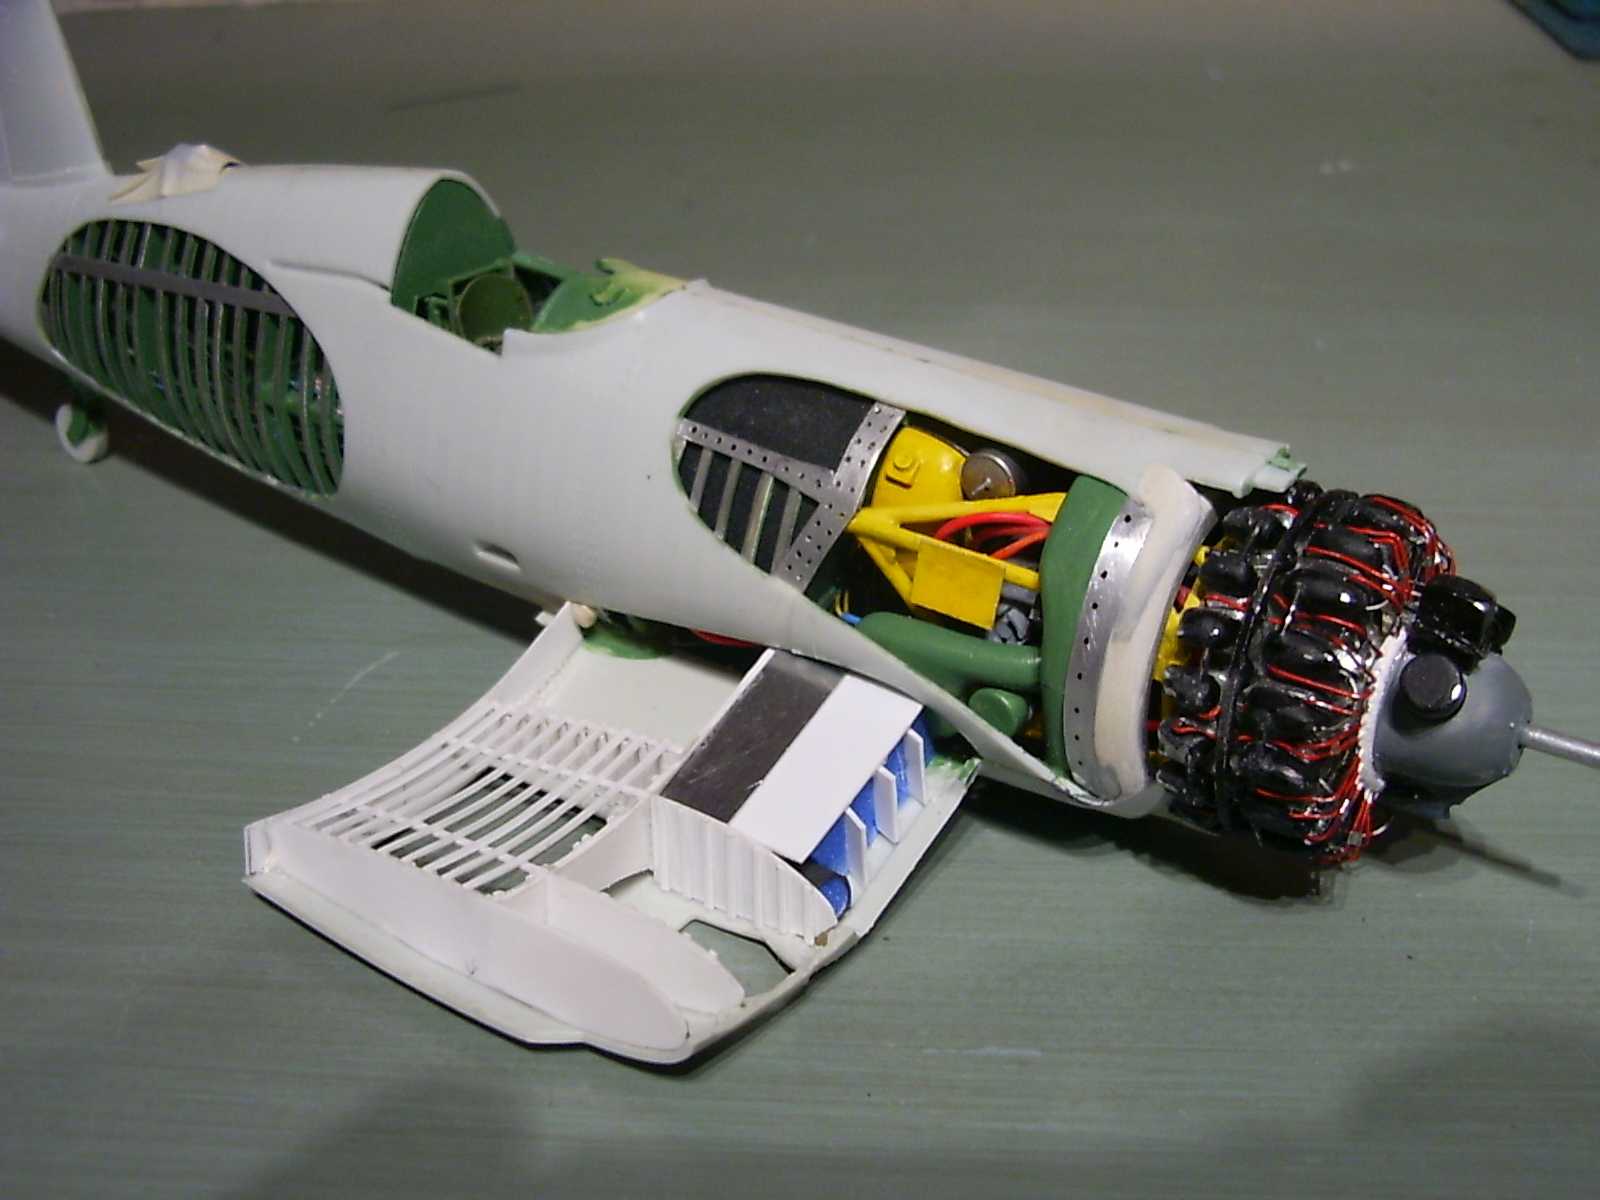
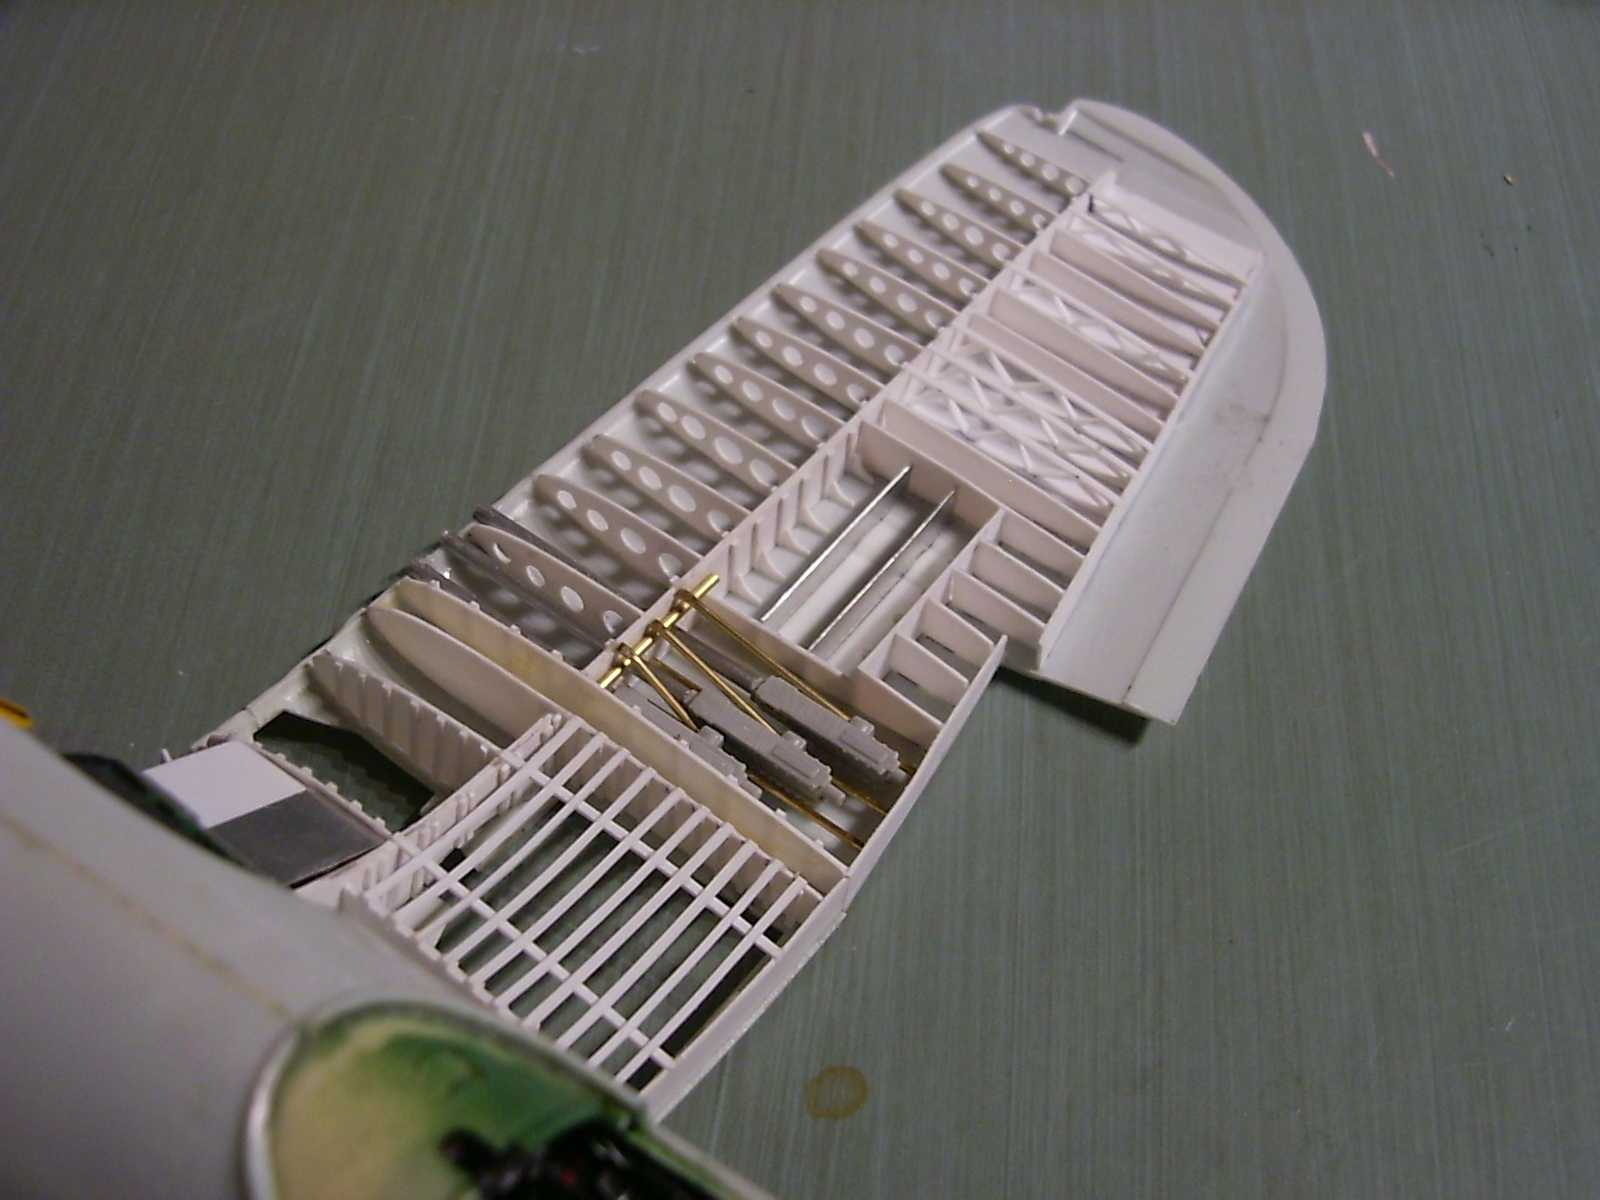
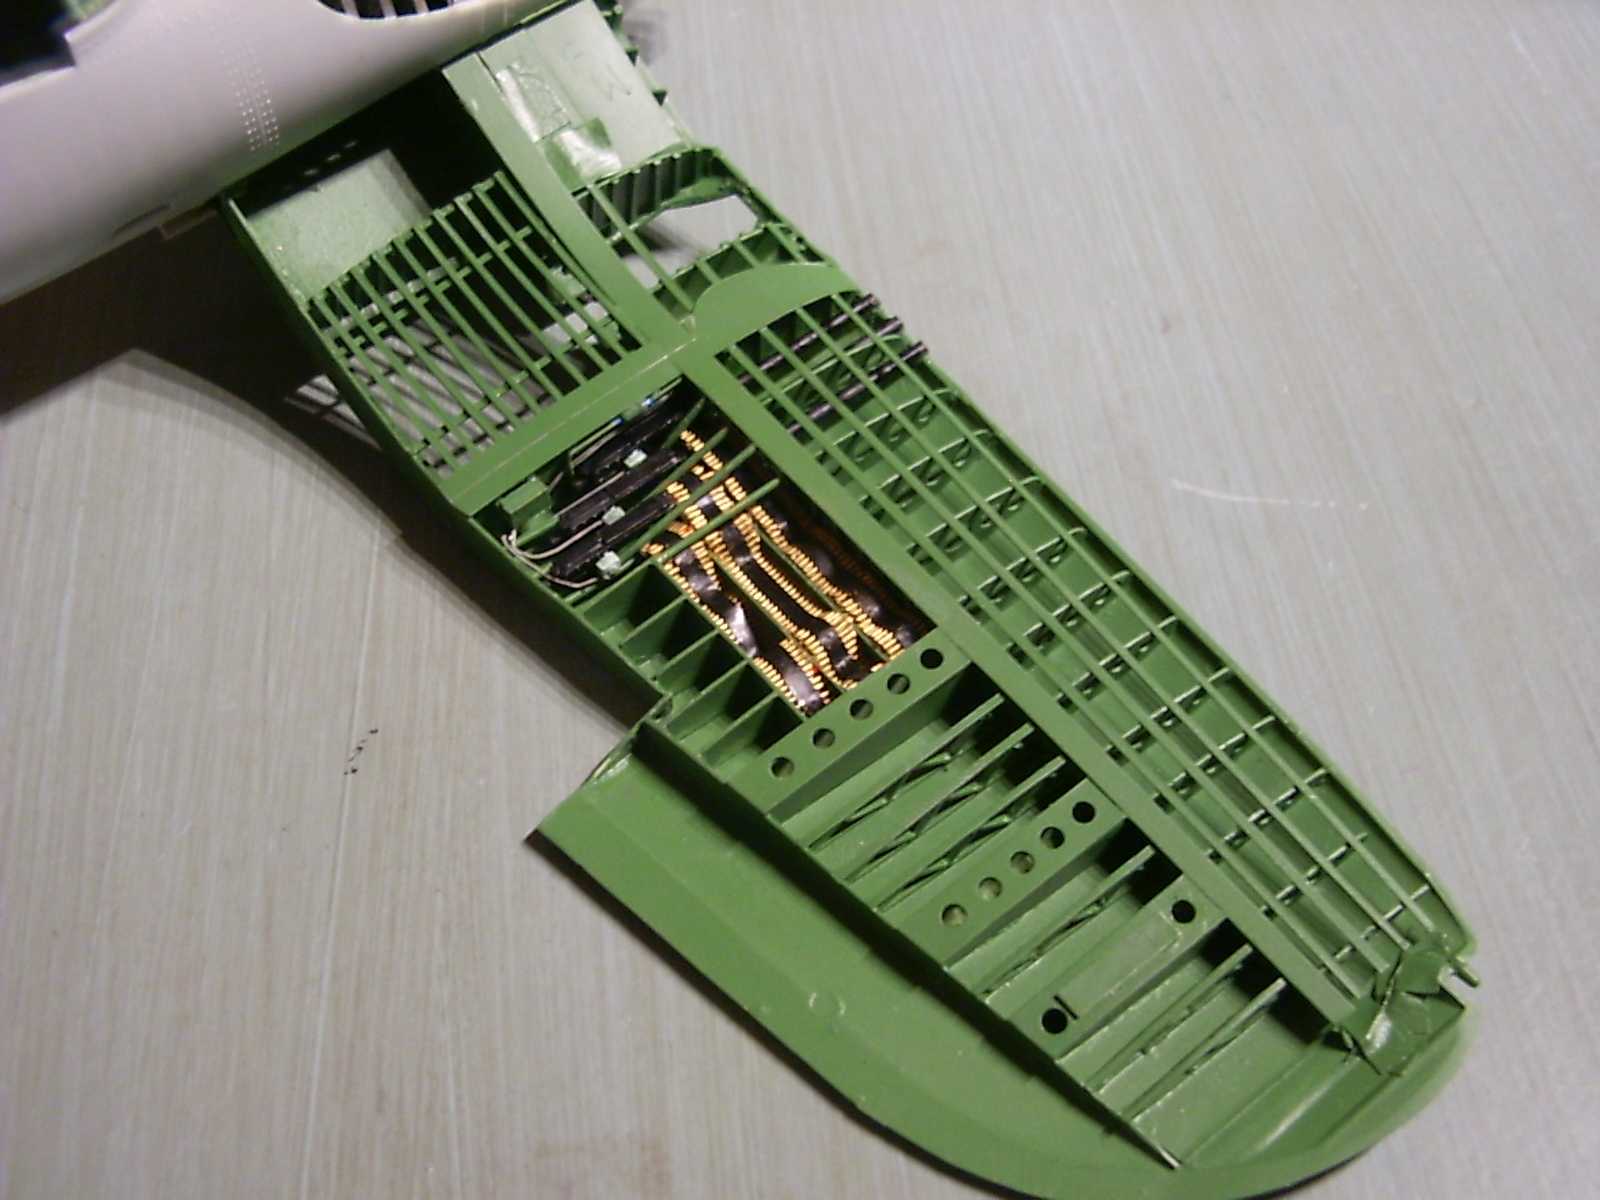
The original cowling from the kit was corrected by replacing the molded flaps with aluminum-flaps, including the flap mechanism. Also a bad major-part of the old Revell kit had to be corrected....or better replaced: the landing gear. Both gears were scratched from aluminum-tubing in different diameters and pieces of styrene and the gear-bay covers also were modified by gluing a piece of styrene on them and then milling out the structure. The wheel on the pic is only a test fit of a Trumpeter wheel, the finished lady got JR resin wheels (great stuff Jerry, as always!). After mounting the gears the wheel wells were detailed with oleos, drains and so on.

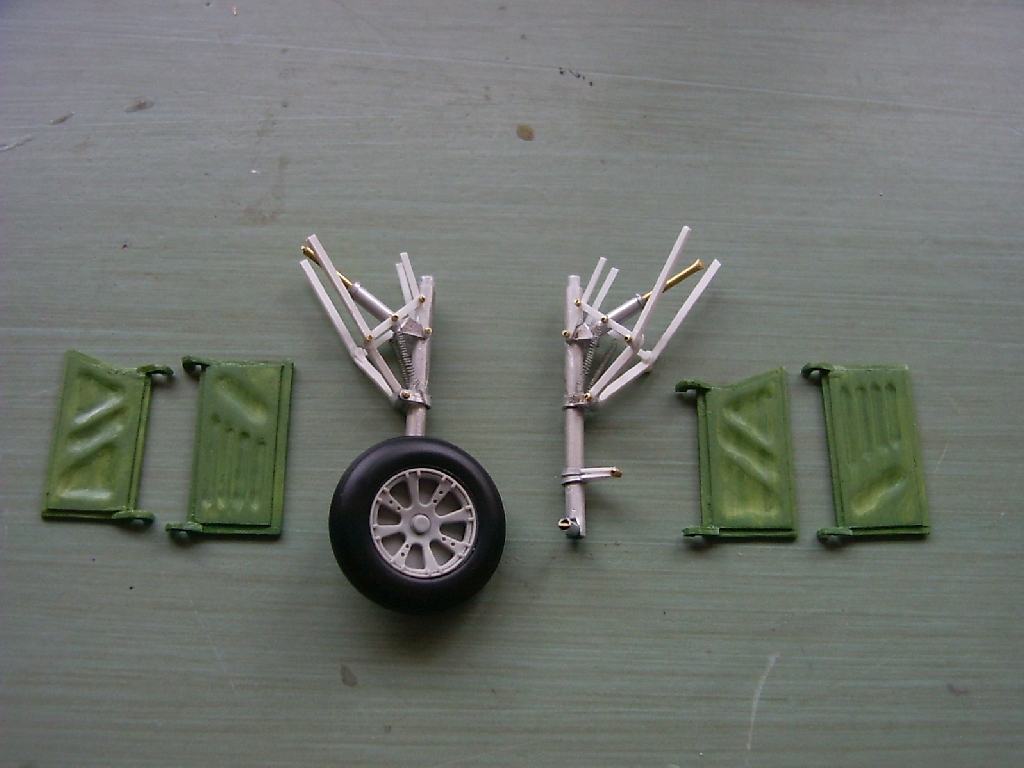

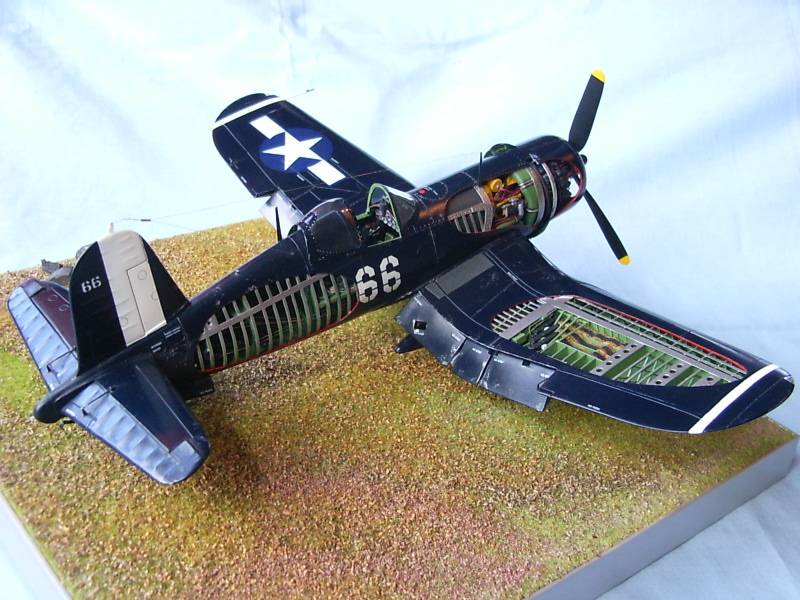
The main problem on the old Revell Corsairs is that they are coming without separate flaps. If some want to show them in "down" position (what is nearly a must if you show this bird in "parking-position") you have to separate them and fix them into the right position. This is, because of the Corsairs complex flap mechanism on this gull-wing bird, no easy job and may need a few tries (so it did) but finally it worked out right, although the Revell Corsair has a completely wrong shape on the end of the wing roots where the flaps are mounted. I did the flaps from a balsa-core, did some test fittings and finally covered them with aluminum, also included are the visible parts of the flap-mechanism/ push-rods.

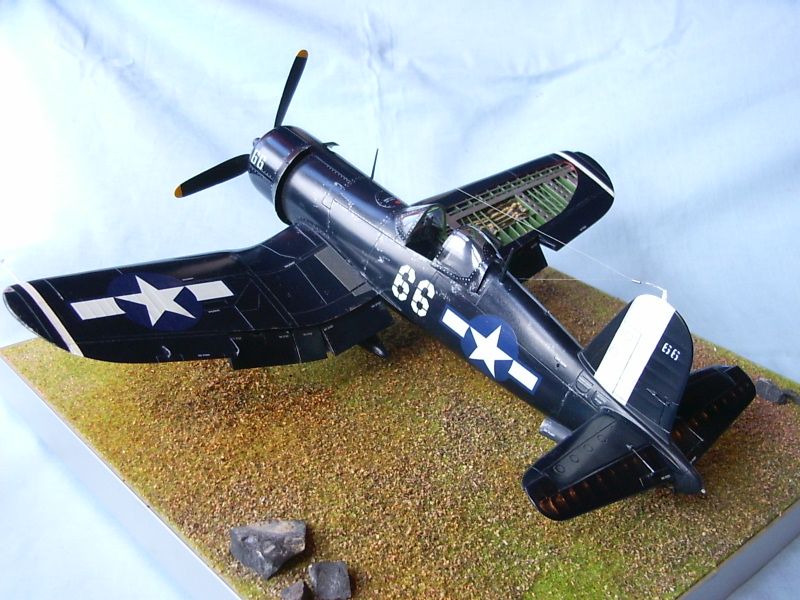
After mounting the cowling a lot of sanding, filling and scribing-corrections (most of the rescribing was done before assembling the main parts) had to be done, but finally the bird was ready for the paint job. After doing my photo session on the real F4U-4 of the flying-bulls I´m absolutely in love with those late-war Navy birds and so I decided to give her a full "gloss-blue-over-all" coat (which made the paint job a lot easier) I used a blue from a spray-can which looks very great, and sprayed it with an airbrush. The markings are a mix of spare decals and hand-painted numbers, then she got her prop (which also comes from Jerry Rutman) and received a bit of paint chipping and weathering and finally I donated her a full load of two drop-tanks and a set of rockets.
That's it, a very, very BIG THANKS goes to all LSP´ers who helped me with pics, details and drawings while doing the research: Thanx mates, with your help this build was real fun!
Enjoy this bird like I do, cheers Chris Novak
© 2005 Chris Novak
This article was published on Wednesday, July 20 2011; Last modified on Monday, July 02 2018