Making Your Own color Profiles on the Computer
By Vernon Rabbetts
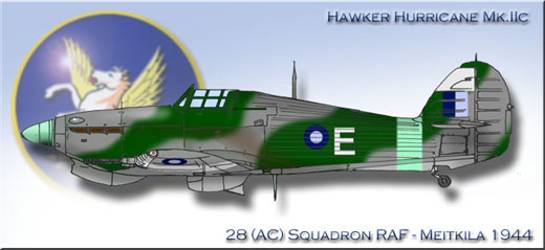
Introduction
I like modeling, unfortunately living in Hong Kong, work coupled with a wife and child leave virtually no time for doing any. So in the meantime, I buy models and accessories and I research and dream of the time when I can file, glue, putty and paint to my heart's content. I'm not depressed about it because the research has become a whole lot more fun than I ever thought it would, especially when takes you down "the road less traveled."
Hopefully the first fruits of that research should be published on this website soon in an article about the airport I grew up next to when I was a kid. One of the frustrations of following this path though is the lack of colour profiles in existence. One possibility is to go to someone like Bob Pearson, Chris Banyai-Riepl, Tom Tullis or August Horvath. But this is going to cost money that I'd rather spend on plastic, resin and photo-etch. So the only other option is to do your own and this is what this article attempts to show you.
Getting Started
Equipment that I use is as follows:
- Research Materials. (Anecdotal evidence, photographs etc.)
- Drawing Paper
- Tracing Paper
- Fine point (0.1mm) permanent marker with black ink. (Or Rotring technical pen.)
- Scanner
- Computer
- Adobe Image Ready
Stage One
The main part of this stage is getting the basic aircraft line drawing done, there are two ways of doing this. One is to produce your own using the paper and tracing paper and then scan it into the computer. If you're going to do this, use the ginest pen point you can when doing the drawing. The pen I've used on the Hurricane I think is a bit too much. The other is to scan an line drawing of the aircraft in question from something like an Aero Detail book. However, this may well breach copyright laws in your country so I cannot recommend it. Besides drawing your own can be way more fun.
When you call up the image to Image Ready (or like product) you should have a very large image, mine was 2400 pixels wide. This is good as it will work out much better in the final two stages. Your scanned image should look something like this.
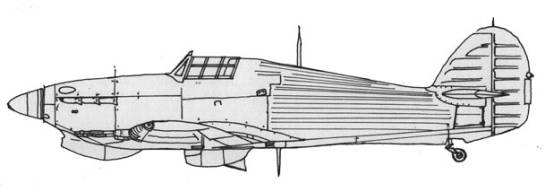
The only clean up work I've done is to delete the space surrounding the aircraft and paint it white with the bucket function.
Stage Two
At this stage, I add another layer which I paint red and put this layer behind the aircraft. Using the Magic Wand function I then select the panels on the aircraft and delete them either one by one or in clumps. The next image shows this process 90% done with the red background showing through nicely.
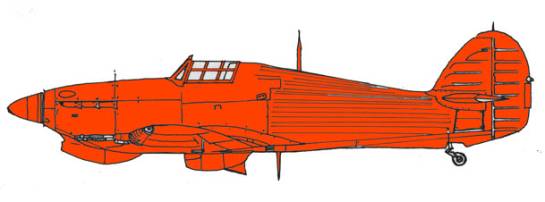
Once you've completed this process your ready to move on.
NOTE: Save a copy of this as you could use this format to produce multiple aircraft profiles and save yourself no end of time see end of article for proof of this.
Stage Three
For this stage, I normally work on the basis that each colour needs it's own separate layer. So I start off by using the magic wand function and selecting the white surrounding the aircraft and then inverting the selection. Create a new layer and then spray or paint bucket the lightest upper surface colour.
Create a new layer and then spray your darker colour on top of this. Work your way through new layers as new colours are needed and you'll end up with something like this:
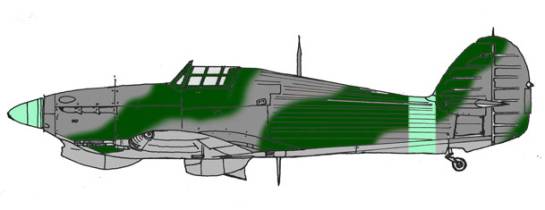
As with airbrushing your real models, using the feather controls on each layer adds a nice element of "authenticity" to your finished work. Once you're happy merge the block colour layers together so you end up with three layers, the line drawing, the block colours and the red drawing.
Stage Four
The next stage is equivalent to decaling, and involves the adding of markings. Work your way through them, creating separate layers per colour and then merging as necessary. Once you're happy then just add the final details and you should have something that look like this:
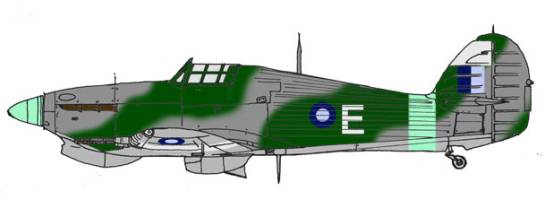
This is very similar to the sort of profiles you'd see on the Aeromaster decal sheets and is good enough by itself. However, if you're anything like me and an arty-farty bastard at heart you'll want to go to the next stage.
Stage Five
This is the shading and highlighting stage of the operation as well as the final details. Create separate layers again, but take the transparency of each layer to anything between 20 and 50%. Add as many layers as you want to get the effect that you need, it's the same in many ways as post-shading your model.
One good tip is to build up layers of higher transparency (20%) colour than one layer at a lower setting of say 50%. Keep working your way through until you've got something that looks similar to this:
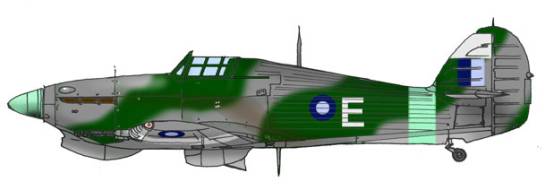
What I normally do then is to make the line drawing transparency from 100% to 80%, (it tones the lines down,) and then merge the layers or flatten the image.
The last thing to do is to reduce the image size (I reduced to 25% on the Hurricane). There are two reasons for this. Firstly, you save memory space in your computer, the final image is about 8 mega bites in size so reducing makes a lot of difference. The second is that it smoothes out the colours.
Arty-Farty Again
August Horvath thinks that adding backgrounds to profiles is a sin, but I disagree. Go nuts, it's your profile, I ended up with profile you see at the top, because it fit's with the other two I've done for 28 (AC) Squadron (see below). But equally you could do something overboard and do something like I did for the Desert Mk.IIc.
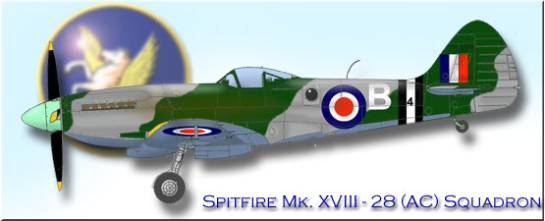
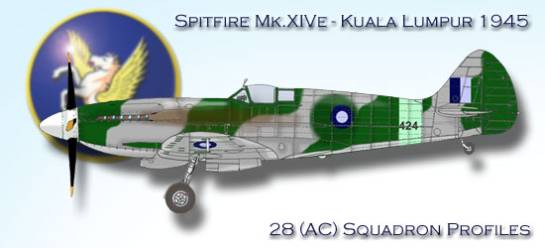
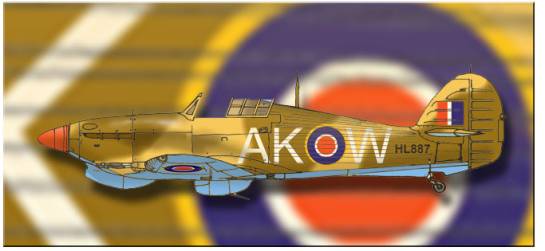
I don't know if this article has been of any interest to any of you, but I honestly hope it was and that you'll be able to try some of your own. It's not as difficult as you might think and when you just can't get time to do real modeling yourself, maybe this will give you another option.
This article was published on Wednesday, July 20 2011; Last modified on Saturday, May 14 2016
