
Special Hobby 1/32 Westland Whirlwind Mk I
By Suresh Nathan
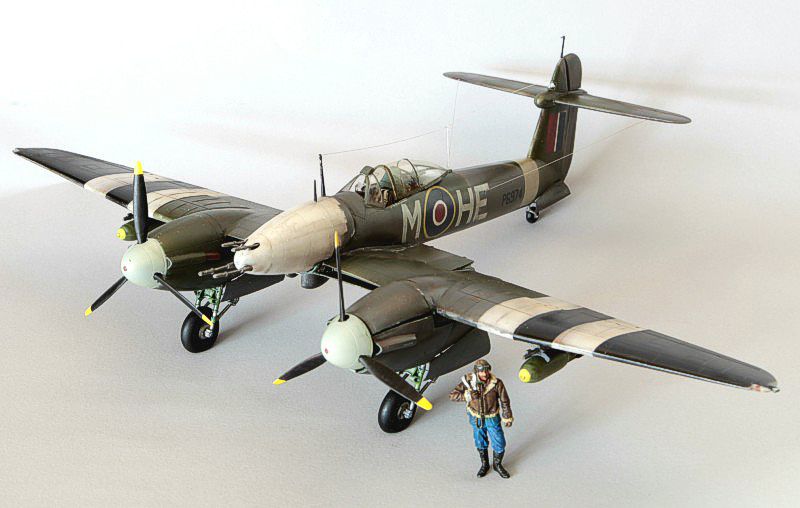
Westland Whirlwind FB Mk.I, No. 263 Squadron (P6974 / HE-M)
Introduction
The Westland Whirlwind occupies a unique and somewhat tragic place in RAF history. Compact, heavily armed with four nose-mounted 20mm Hispano cannons, and blisteringly fast at low altitude, W.E.W. "Teddy" Petter’s design was lightyears ahead of its contemporaries in 1938. However, its operational career was fundamentally constrained by its powerplant: the twin 60-degree V12 Rolls-Royce Peregrine engines.
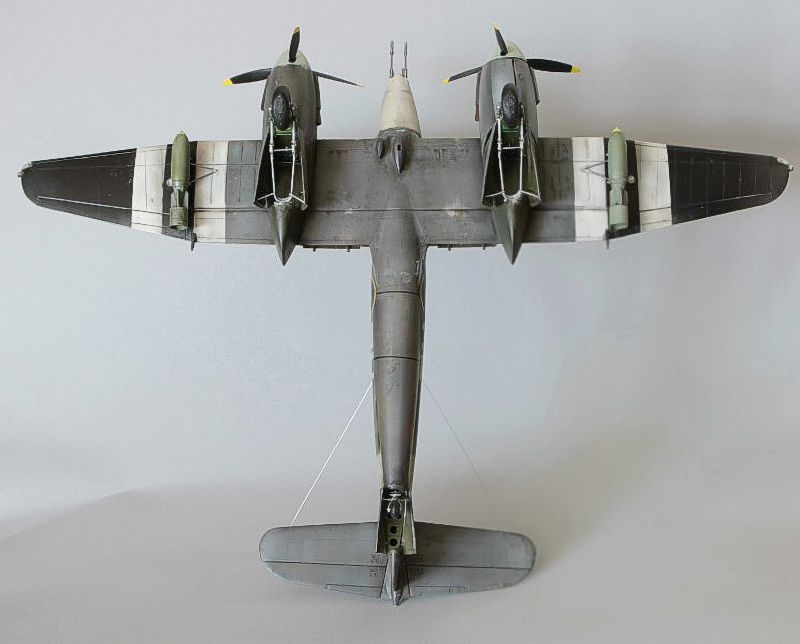
Though the Whirlwind was physically present in small numbers during the summer of 1940, its operational deployment during the Battle of Britain was heavily restricted. Early in the war, Air Ministry security concerns and strict operational secrecy surrounding its classified 20mm cannon armament—coupled with severe teething issues with the Peregrine engines and a lack of spare parts—kept the type held back in Scotland and out of the primary southern sector skirmishes until late 1940.
Model Kit
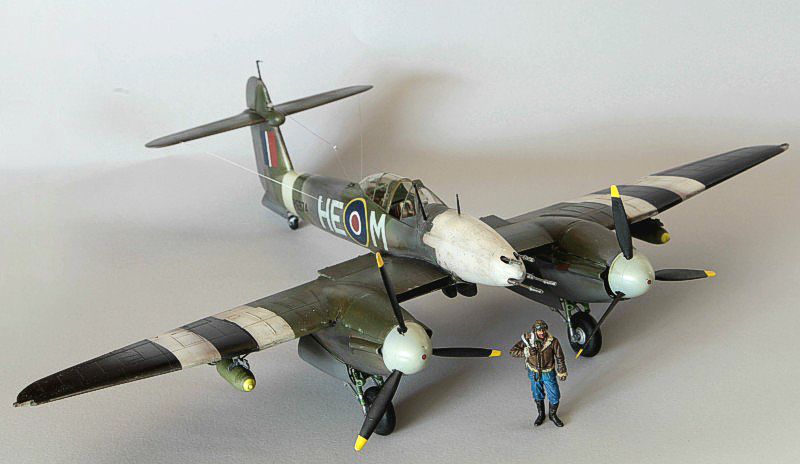
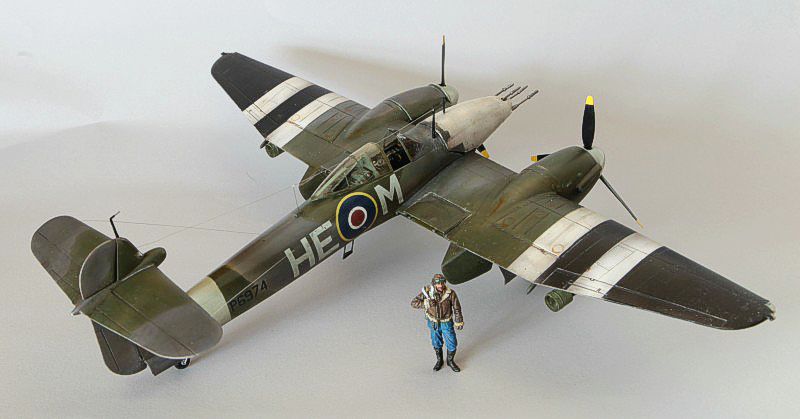
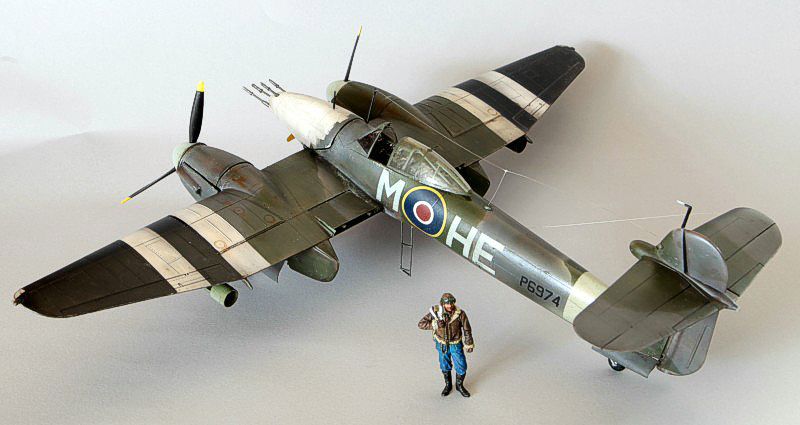
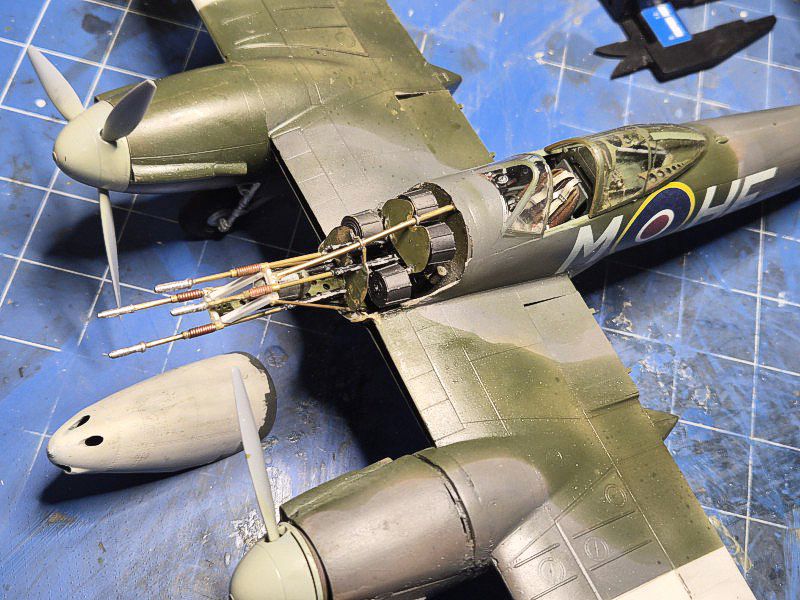
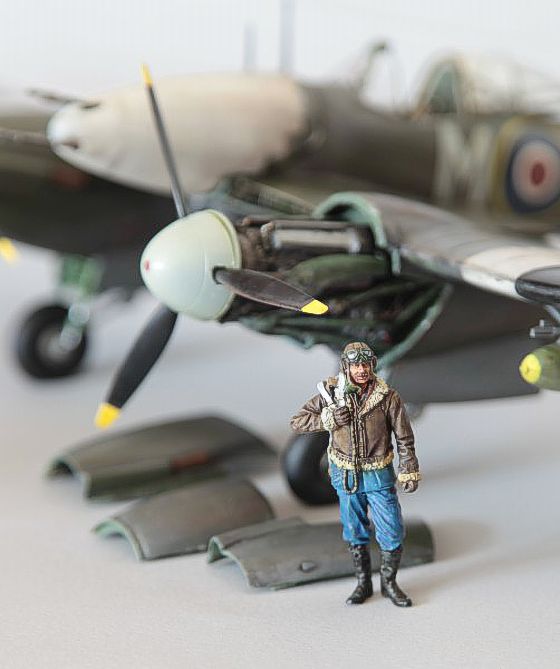
When planning this 1/32 scale build using the Special Hobby Hi-Tech kit (32088), I chose to represent serial P6974 (HE-M) from No. 263 Squadron during Operation Starkey in late August and September 1943. This temporary, field-applied recognition scheme—featuring bold black-and-white wing stripes and a solid white nose—was designed for rapid front-aspect identification by Allied naval and air forces during the amphibious deception exercise. Because these markings were painted hastily at forward airfields using water-soluble distemper over operational camouflage, they weathered rapidly under gun blast and engine exhaust. Capturing that visceral operational contrast meant displaying the model with one engine nacelle and the nose gun bay fully un-cowled.
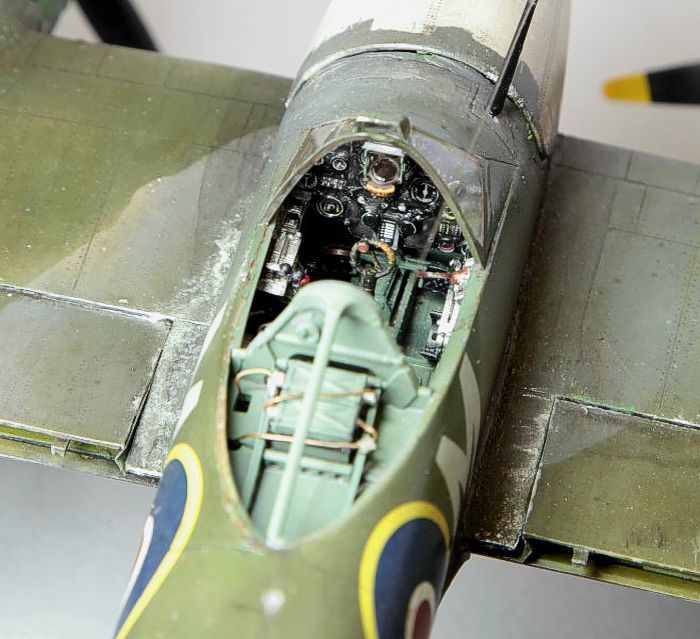
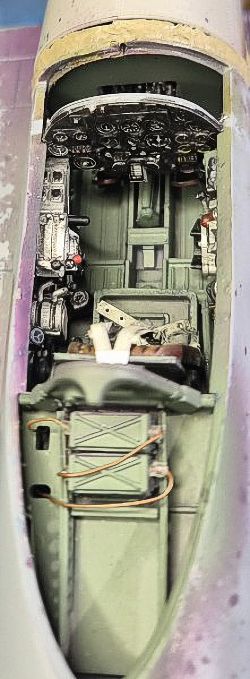
Canopy & Nose Fairing Restorations
The Special Hobby Hi-Tech kit is demanding, presenting several major fit and engineering flaws right out of the box.
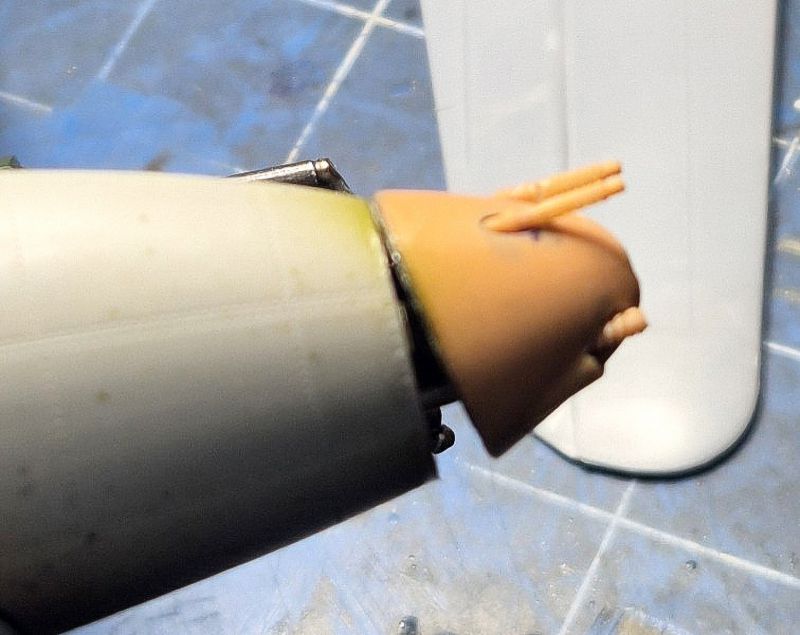
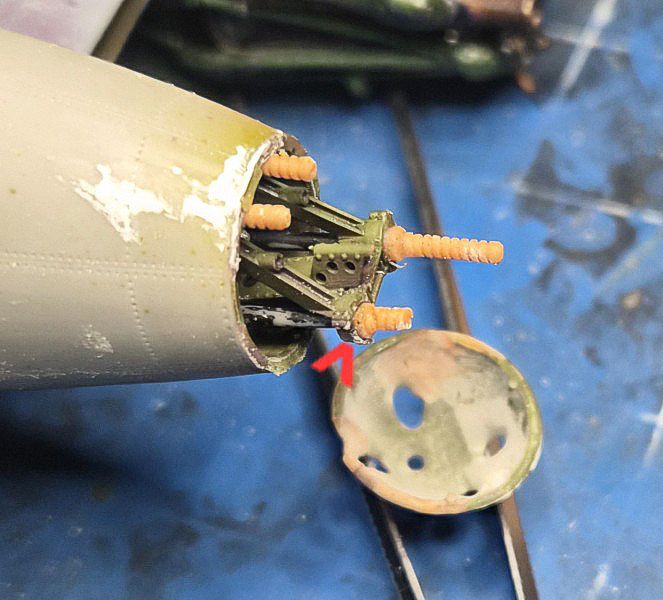
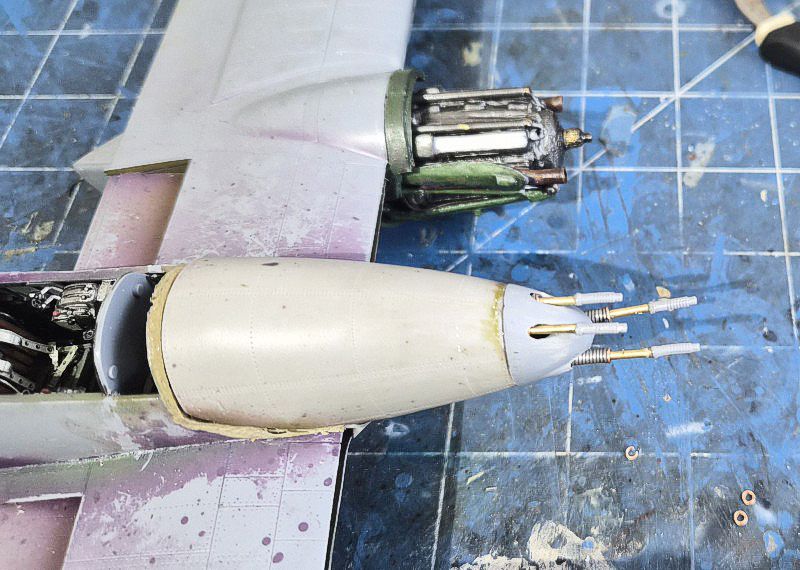
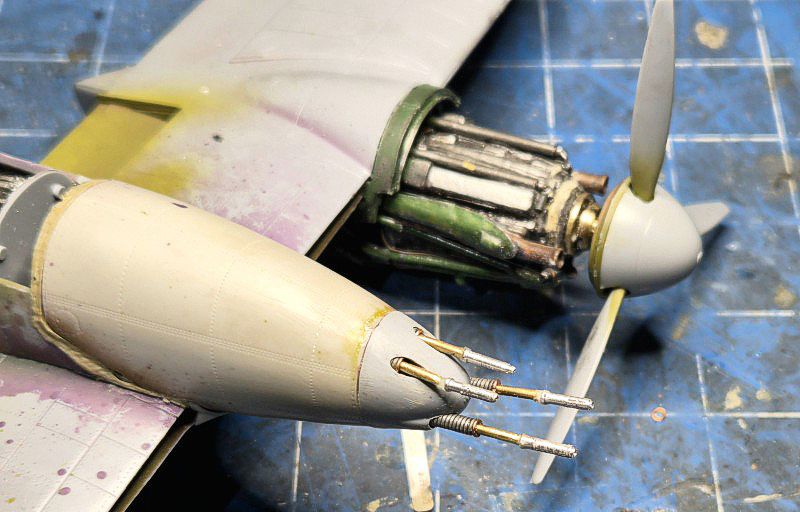
A technical challenge lay in the nose section. The resin panels supplied in the Hi-Tech kit are far too thick, while the underlying kit gun mount is crude. When assembled, the resin cowlings would not fit over the cannon array, leaving massive gaps and distorted lines or breaking off the interior details altogether. Overcoming this required extensive structural rework: rebuilding the gun array to precise scale tolerances, extending the panel boundaries using a plastic solvent solution to fill and rebuild the edges, and applying a heat gun to carefully stretch and shape the plastic until the removable nose cowlings sat flush against the fuselage framing. Almost all struts were replaced with brass.
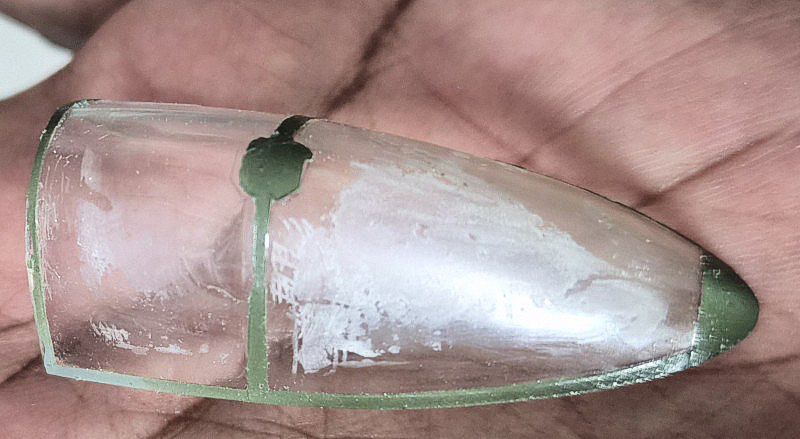
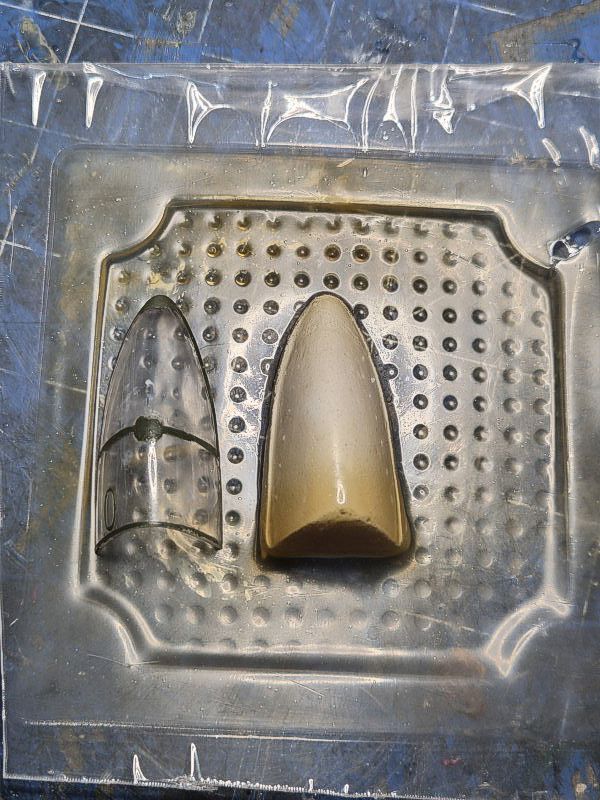
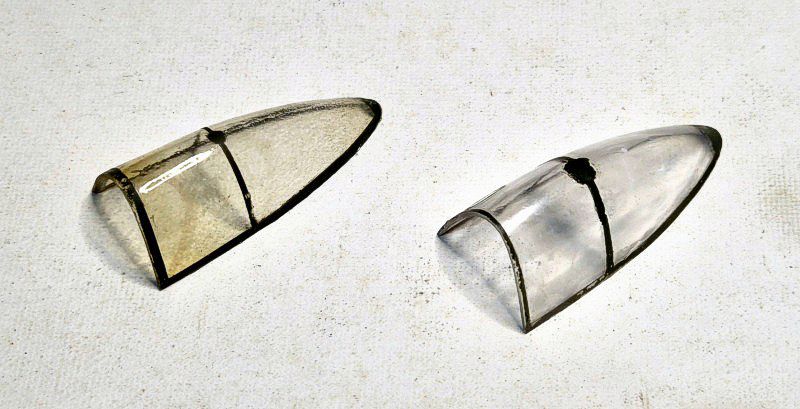
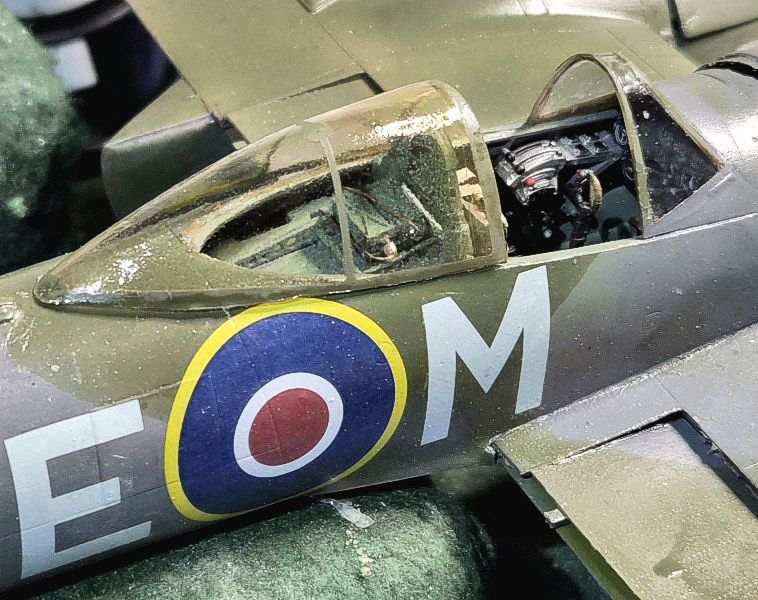
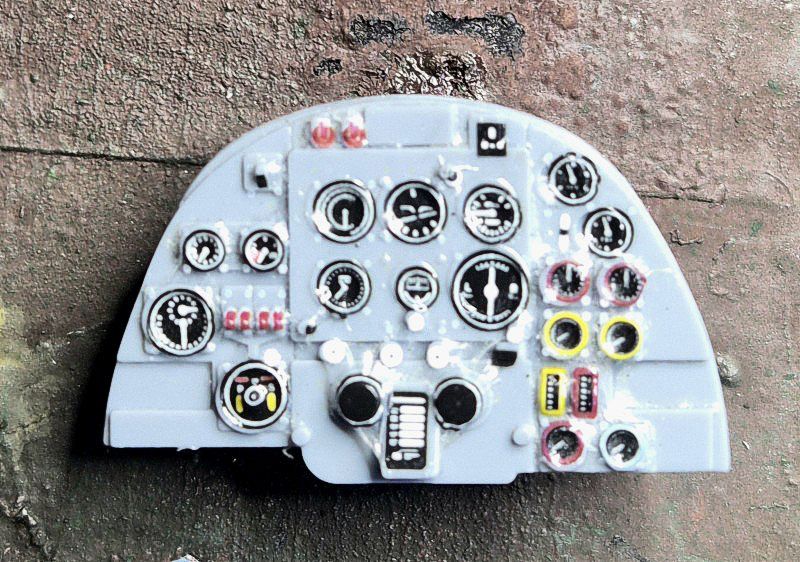
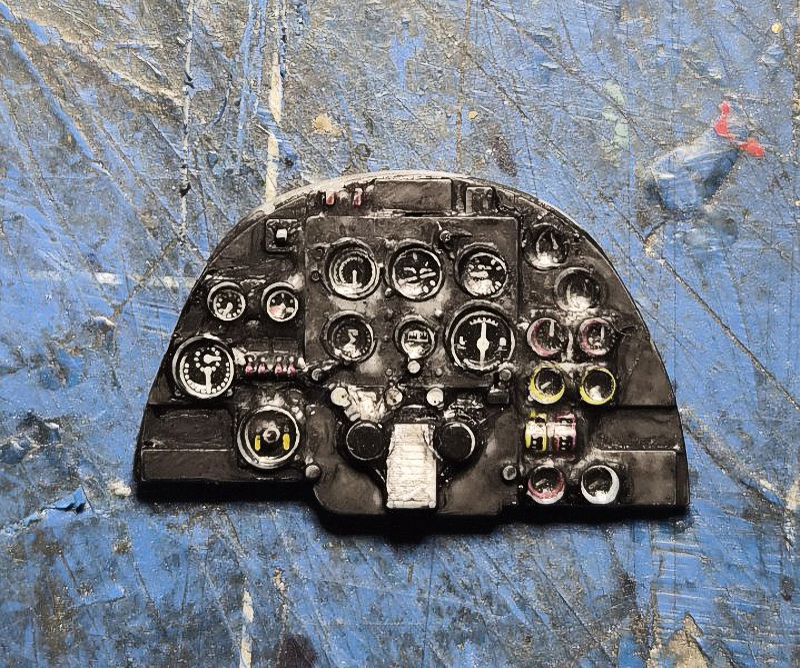
The kit-supplied adhesive masks were poorly produced, allowing paint to seep underneath and mar the clear plastic surfaces beyond recovery. To resolve this, I vacformed a new, crystal-clear canopy from scratch.
Scratch-Building the Rolls-Royce Peregrine V12
There is no commercial aftermarket 3D-printed or resin Peregrine engines anywhere on the market for a 1/32 scale Whirlwind. To display an exposed engine bay on a 1/32 Whirlwind, the entire assembly must be built from scratch. This was an important part of the build to complete the Whirlwind story.
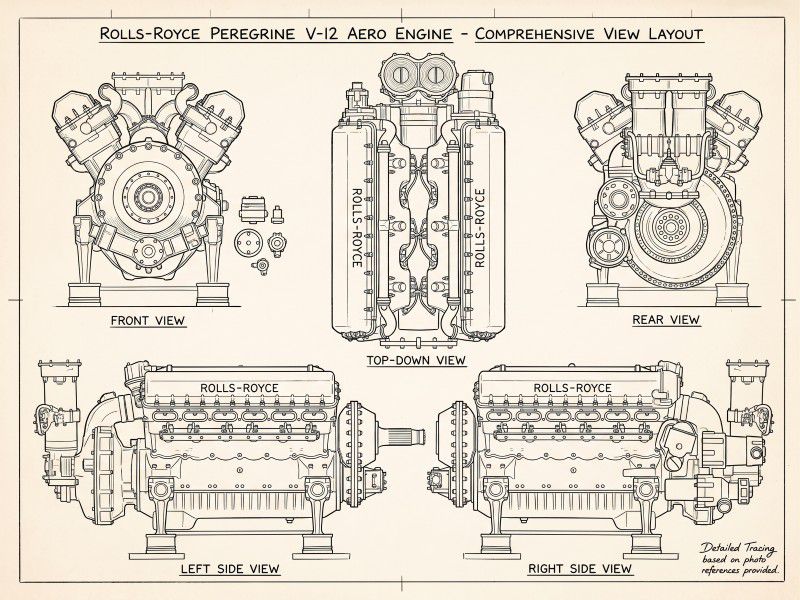
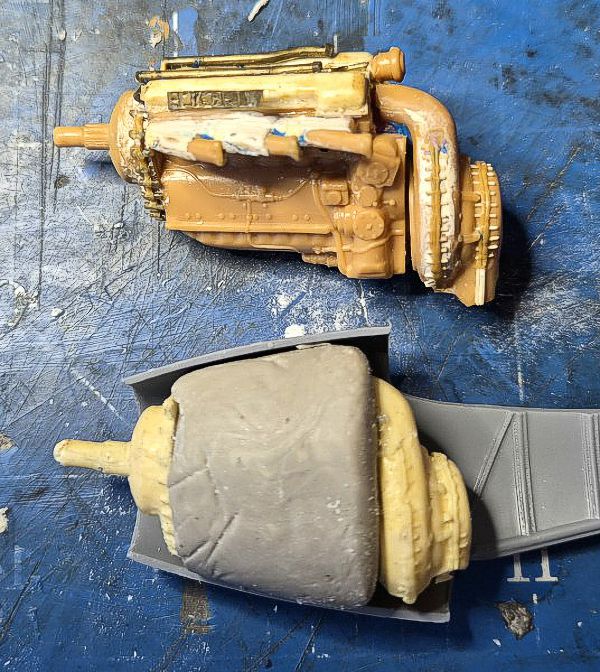
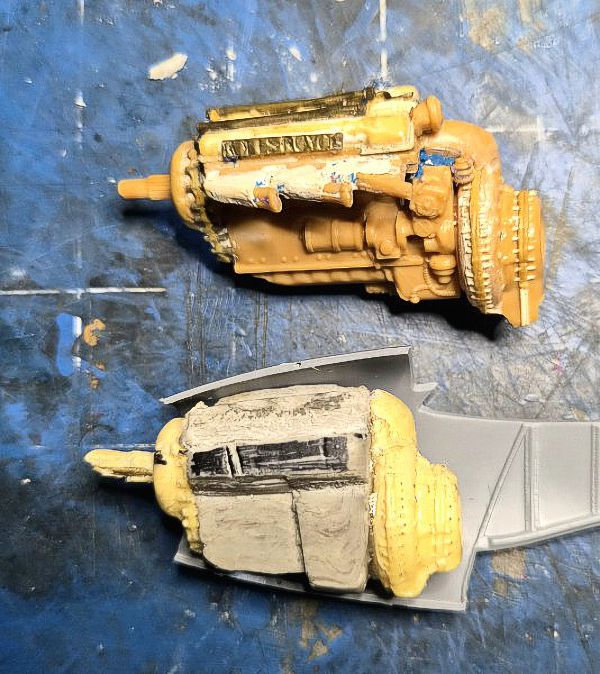
Rather than relying on sterile geometric prints that lack physical grain, I fabricated the V12 engine block using traditional hands-on methods. The engine block was first sculpted in epoxy putty directly within the tight confines of the kit's plastic cowl halves to guarantee spatial alignment. Once fully cured, the blank was removed and carved into its distinct V12 profile.
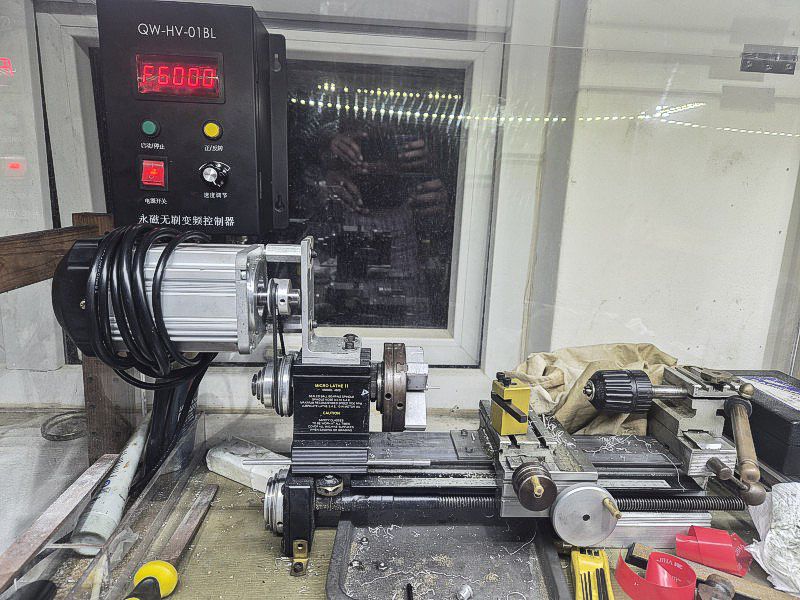
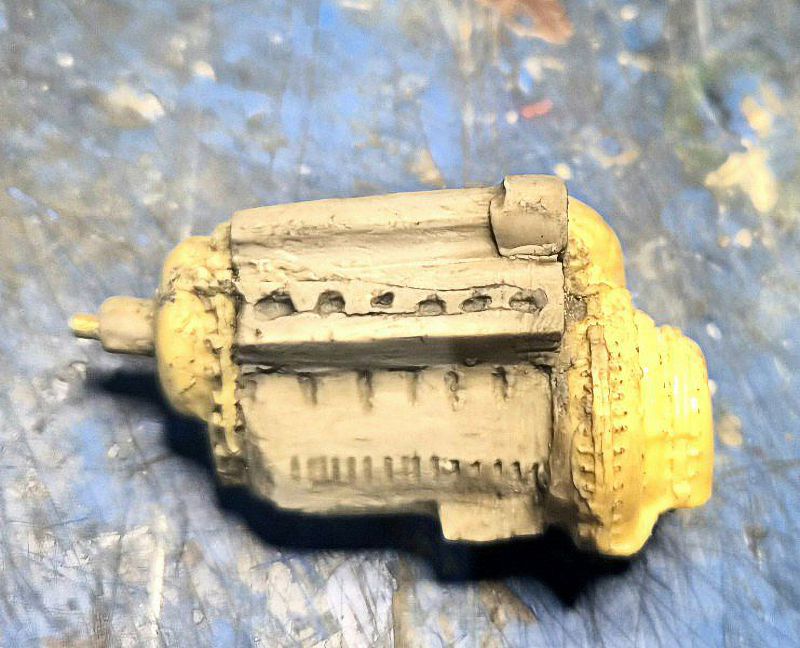
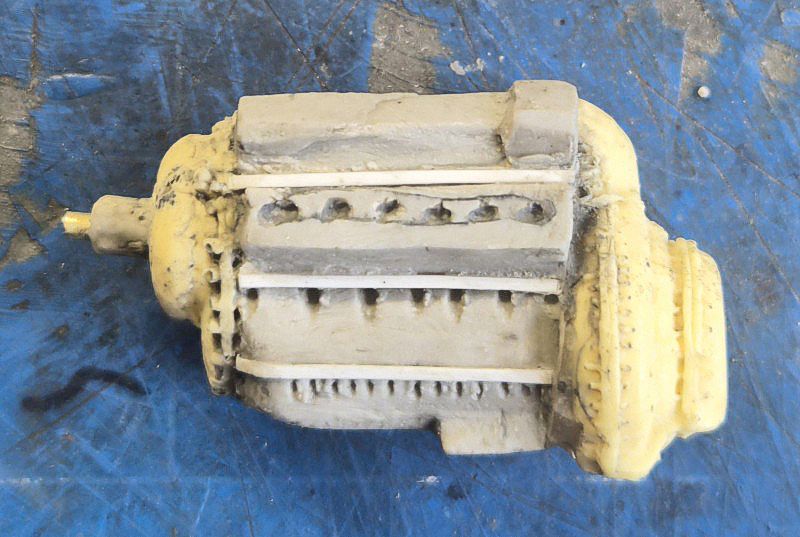
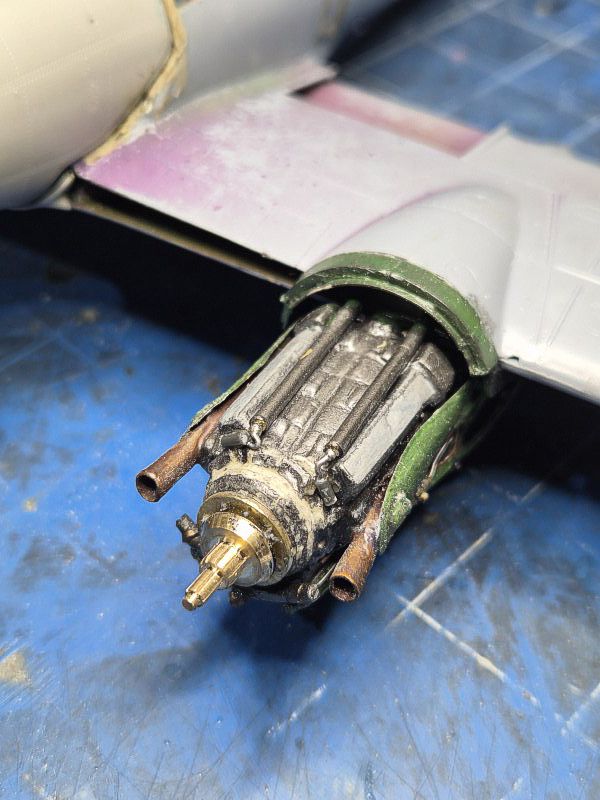
To create the forward reduction gear casing, I repurposed a previous Merlin sculpt for the general geometry of the construct. A new crankcase cover was turned from solid brass stock on a lathe. The prominent longitudinal splines and ridges along the propeller axle were indexed and cut cleanly using an indexing wheel I made for this purpose and setup on the lathe.
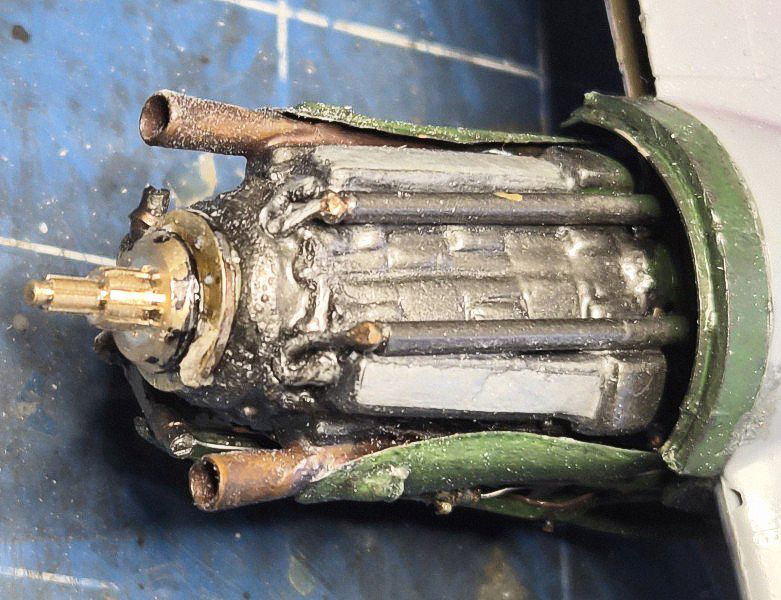
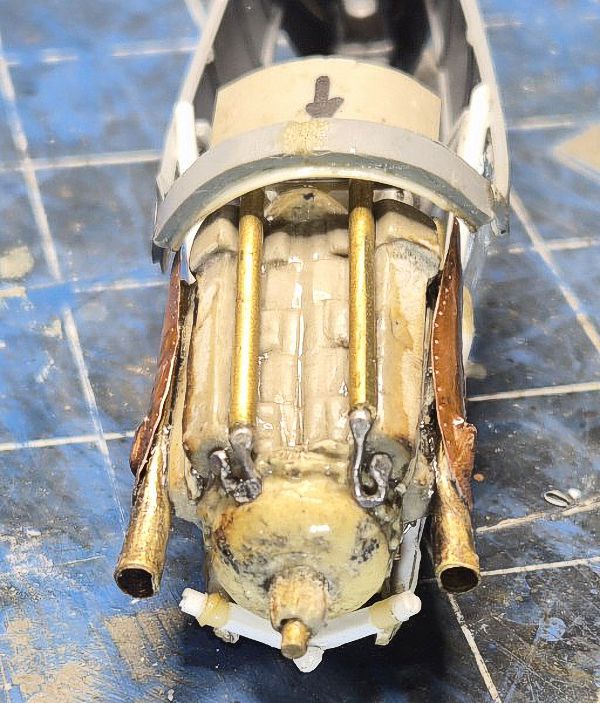
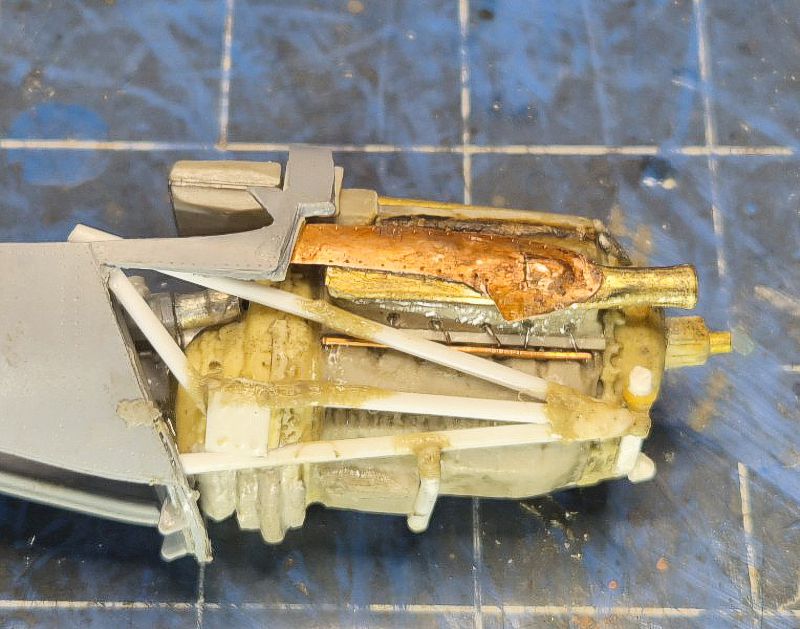
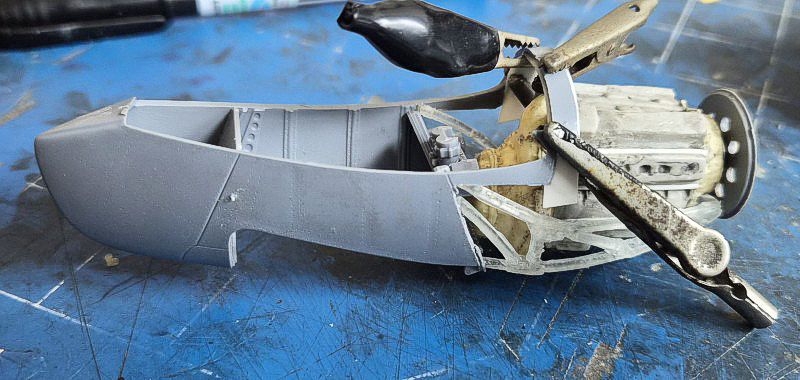
At 1/32 scale, the main engine block measures approximately 57 mm in length. Tubular engine mount trusses were built up using rigid stock, maintaining exact geometry to anchor the engine into the wing nacelle frame. The initial attempt with a cast frame was not adequate. The cylinder covers were painted in natural aluminum with raised "ROLLS-ROYCE" plates picked out in brass with black lettering. This was cast from an earlier project.
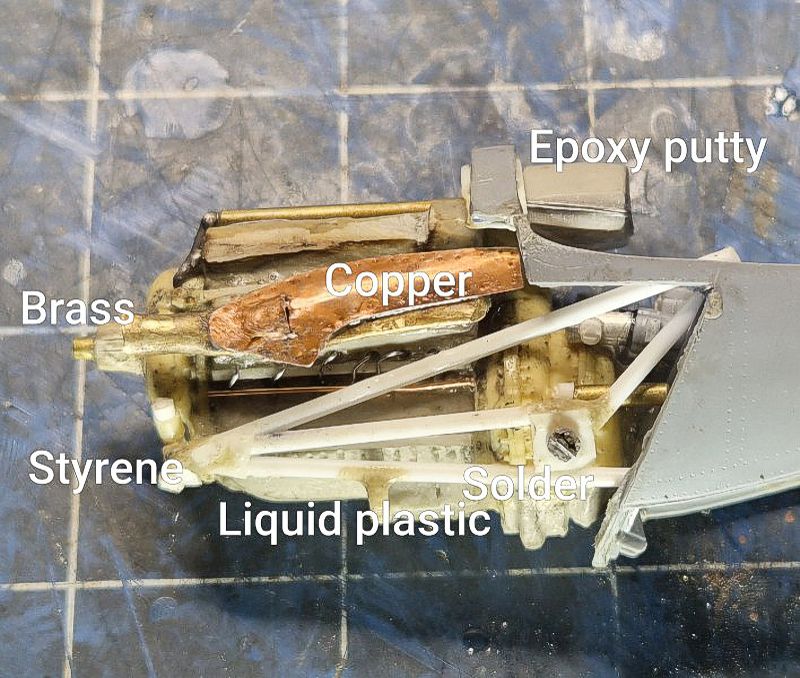
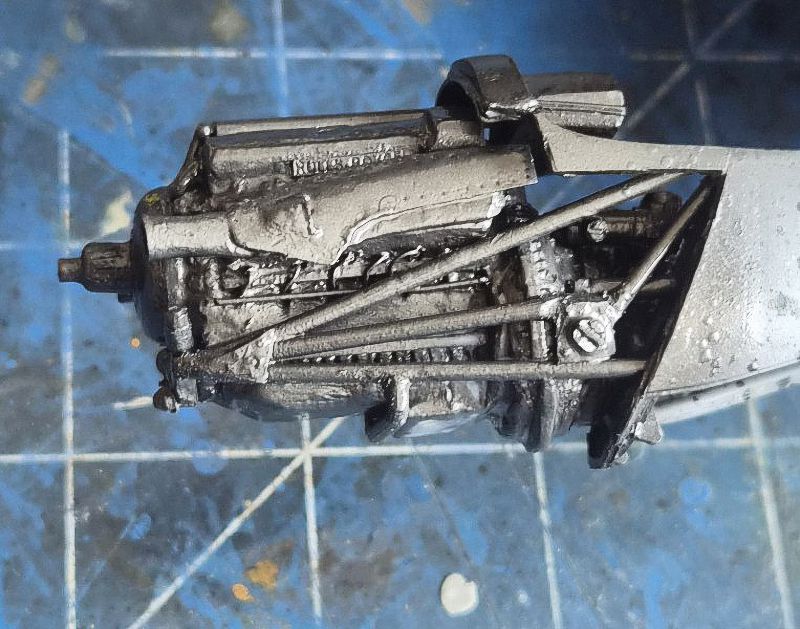
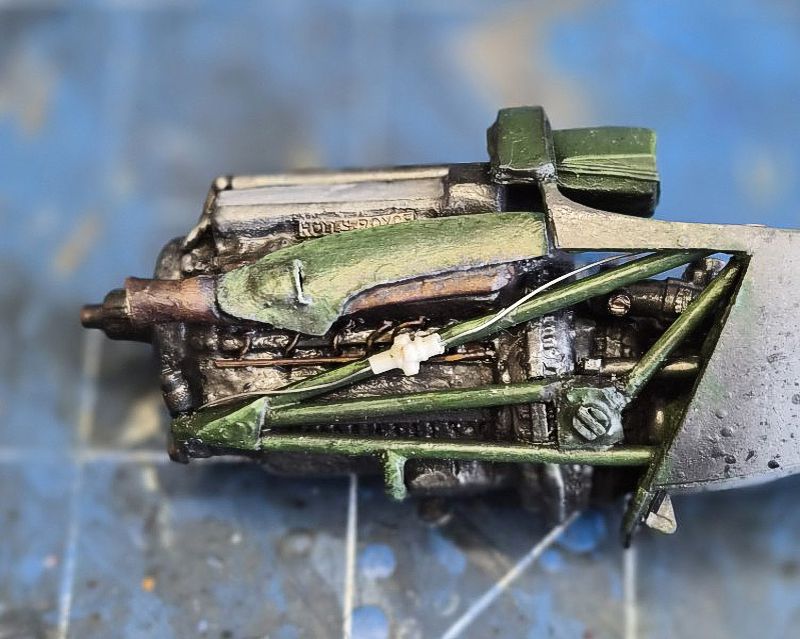
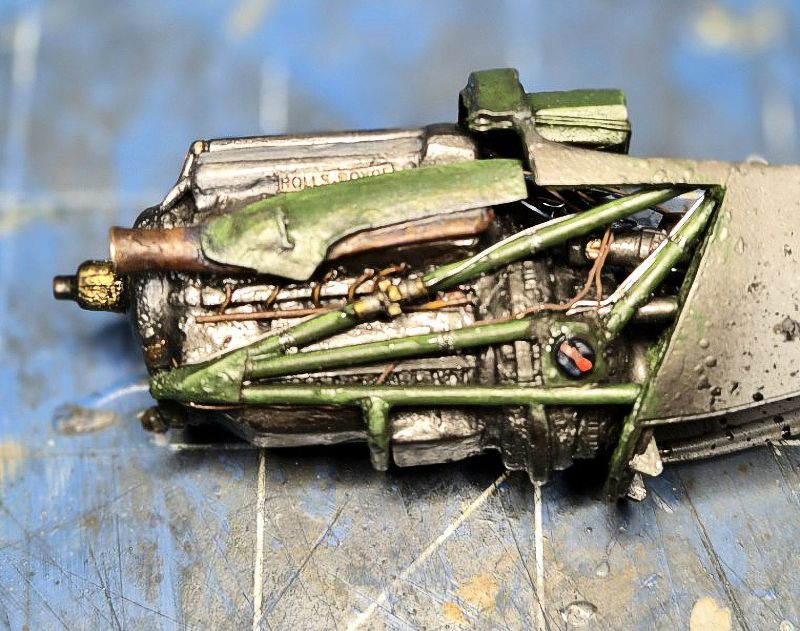
The exhaust collector shroud posed a distinct metalworking task. I shaped the manifold from copper sheet, beating and annealing the metal to capture the subtle hand-formed irregularities of real aircraft sheet metal. Red-brown insulated wiring was used for the ignition harness alongside copper and brass coolant return tubing. Rather than over-saturating the metal with harsh rust, I weathered the exhaust manifolds with heat staining: soft blue and purple iridescence near the cylinder head merge points, tapering into bronzed, tarnished brass tones further down the collector pipe.
The Nose Gun Bay & Flash Suppressors
Detailing the forward fuselage presented another challenge. The Czech Models aftermarket 3D-printed gun upgrade set was too brittle, arriving broken out of the box and beyond repair. Furthermore, the kit-supplied fire suppressors were noticeably oversized for 1/32 scale.
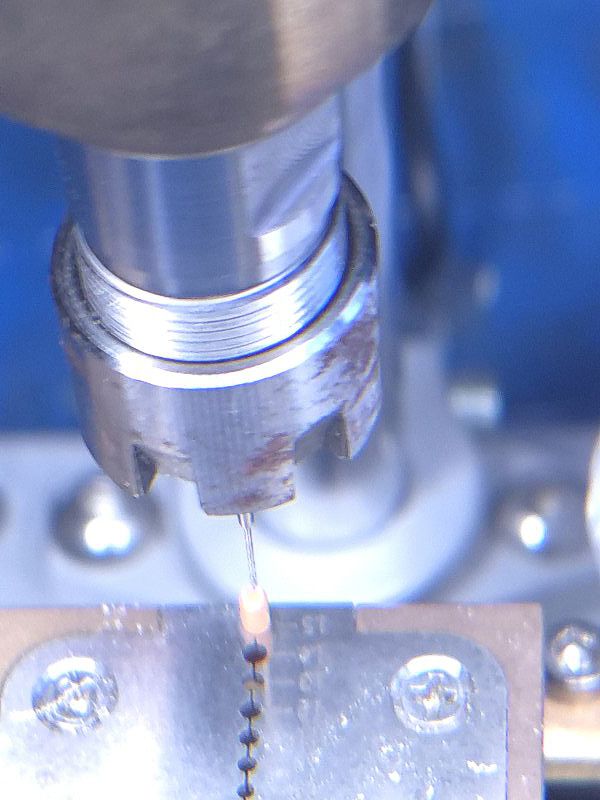
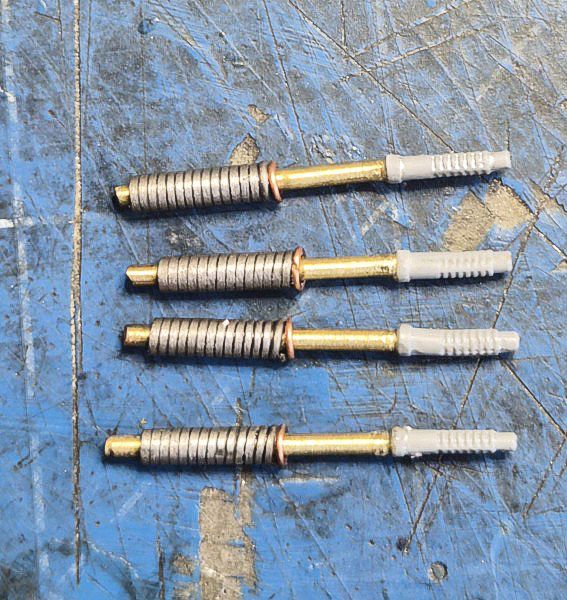
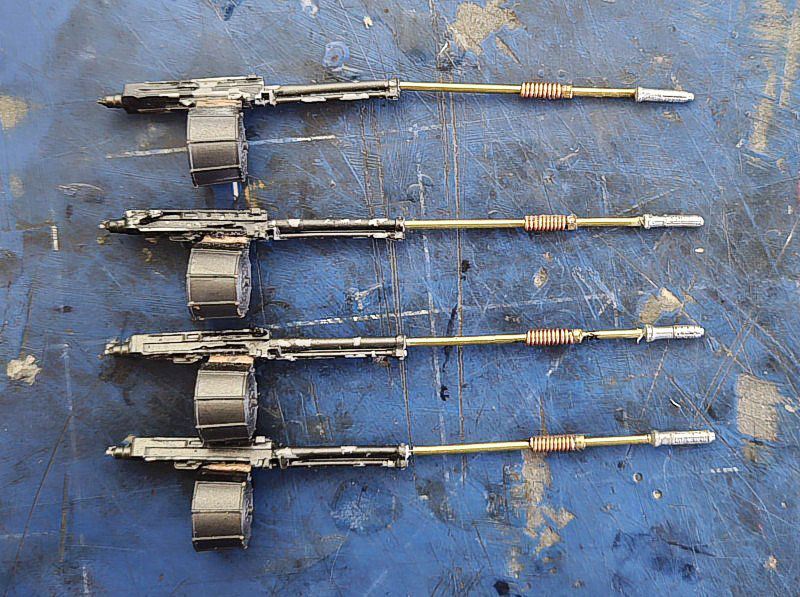
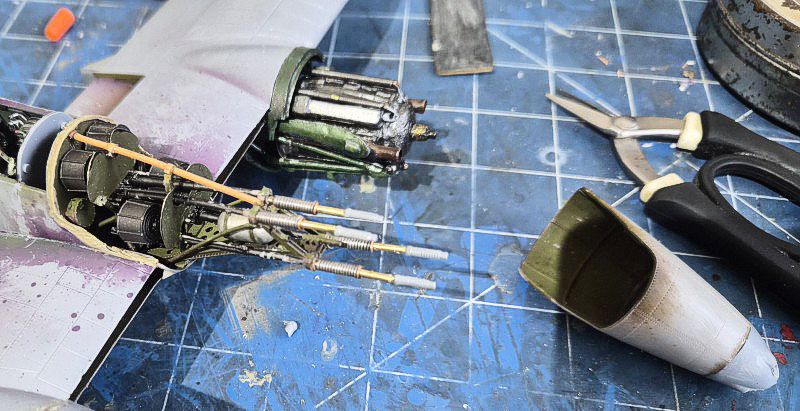
Left with no choice, I scratch-built the entire gun bay array from raw stock. While fabricating a single 20mm cannon flash suppressor is straightforward, turning out four identical units by hand was a grueling test of consistency. The breakthrough came by breaking the fabrication down into a strict, step-by-step process:
- Housing Cylinder: Turning a 9 mm cylindrical housing section from stock rod (made maybe 15 of them).
- Barrel Attachment: Fitting a 1.6 mm barrel extension to establish the core step-down shoulder.
- Vents & Angles: Scoring eight longitudinal cooling vents uniformly around the housing, followed by scoring the precise faceted angles at the barrel tip (5 successful).
Executing this process systematically yielded four uniform flash suppressors (one was too long) that fit accurately within the nose framework and cleanly beneath the re-engineered nose cowlings.
Paintwork, Figure & Assembly
The airframe was finished in standard RAF Day Fighter Camouflage (Dark Green and Ocean Grey over Medium Sea Grey) using Humbrol enamels.
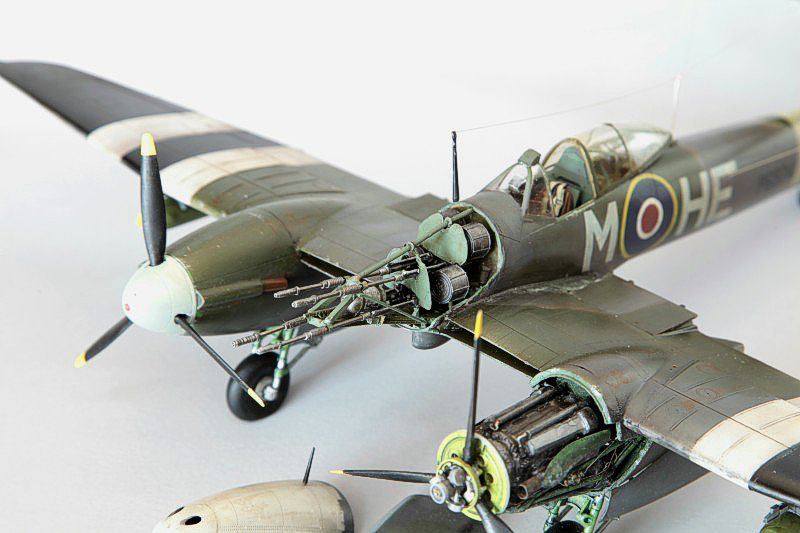
The Operation Starkey white nose cap and wing bands were applied to reflect the temporary distemper used in the field. I deliberately kept the white finish worn and chipped around the panel edges to simulate gun blast residue and engine oil grime. The engine block was finished in semi-gloss black enamel, contrasting against the interior tubular mounts finished in RAF Interior Grey-Green. Final weathering was accomplished using subtle washes and dry-brushing to emphasize the deep mechanical layers of the open nacelle. Chipping was a combination of green and silver around strategic areas.
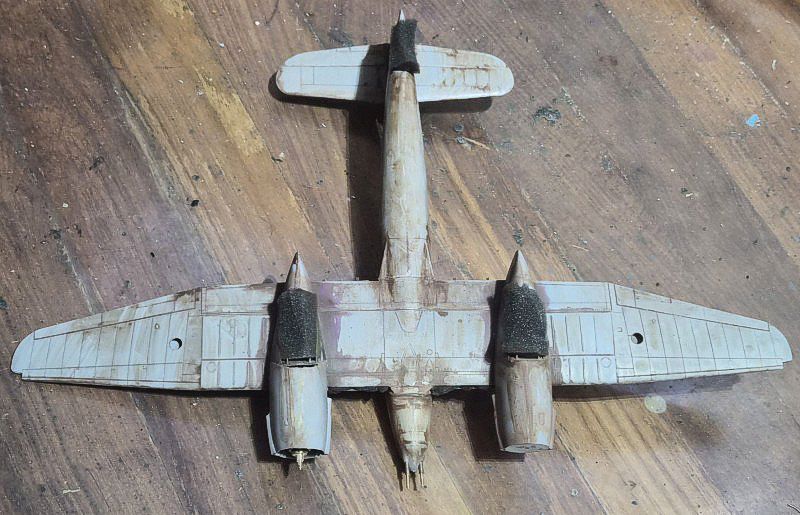
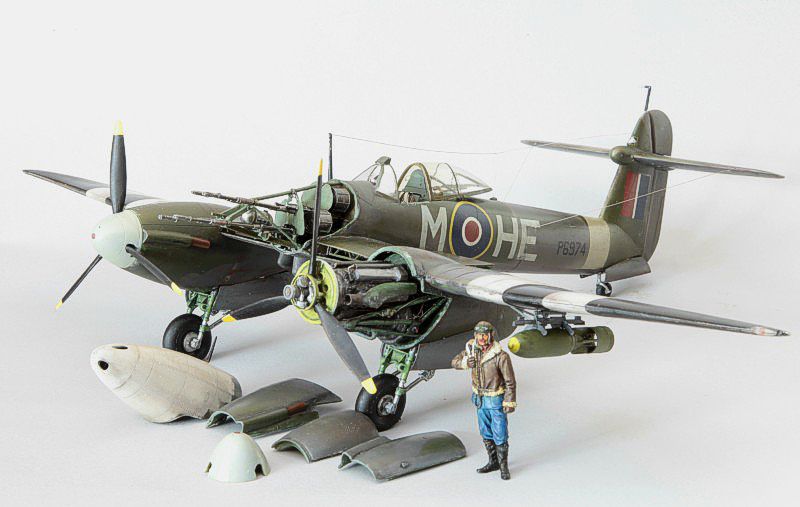
To complete the display ground scene and provide an immediate sense of scale, a pilot figure from Elan 13 Figures was added. The figure was painted entirely in acrylics, using thin layered glazes to render the sheepskin collar, leather flight jacket, and RAF blue trousers with realistic fabric depth and highlights.
Conclusion
Building a 1/32 scale Westland Whirlwind from the Special Hobby Hi-Tech kit with a fully scratch-built Peregrine V12 and gun bay requires a massive investment in corrective bodywork, vacu-forming, lathe work, and metal shaping. However, overcoming the kit's inherent flaws and bringing raw copper, brass, and hand-carved materials together provides a level of physical authenticity that is very satisfying. Coupled with the rare Operation Starkey markings and the Elan 13 pilot figure, this build serves as a fitting tribute to a unique RAF fighter.
© Suresh Nathan 2026
This article was published on Saturday, October 24 2026; Last modified on Wednesday, October 28 2026