
Richard Bong's P-38L in a Hanger, Pt. II
By Suresh Nathan
Building a Generic Hangar Display in 1/32
Introduction
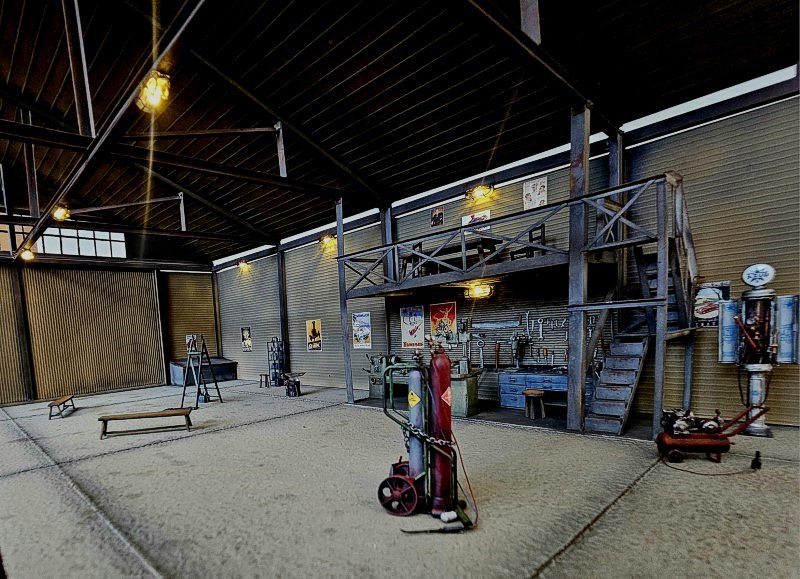
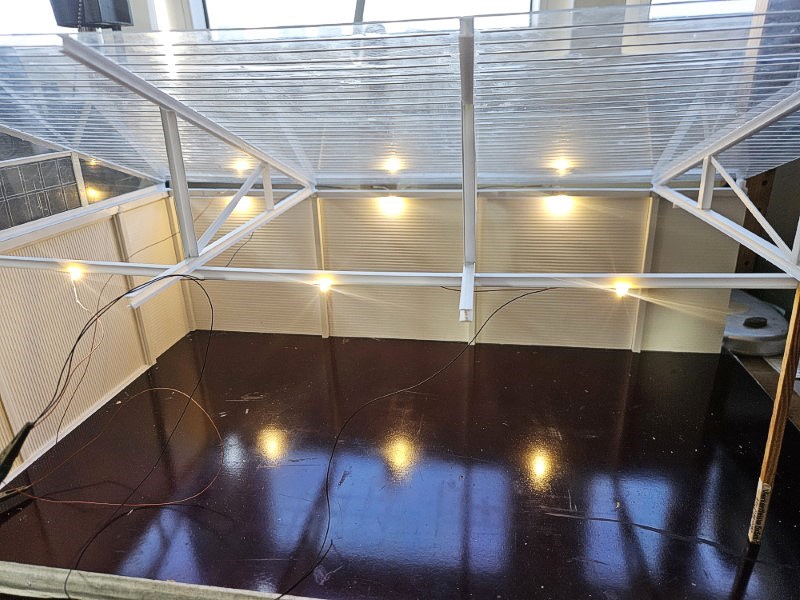
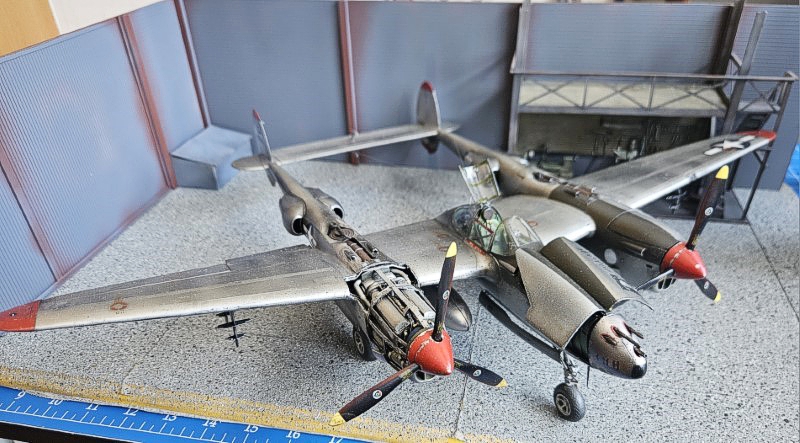
Just about every aircraft modeler wants to own a hangar display for their models. In larger scales in particular, the engine, gunbay and cockpit details are especially amenable to a hangar display with ground crew. Unlike a normal diorama it’s a fairly daunting task. It requires a lot of accessories and tends to be huge so you really can’t have too many of them. After years of toying with smaller projects (see here and here) I decide to bite the bullet. Conceptually, this would be a shadowbox with lighting. The walls and roof would have to be collapsible for transport. I also wanted it to be nationality neutral and amenable to change with a few accessories strategically placed.
Construction
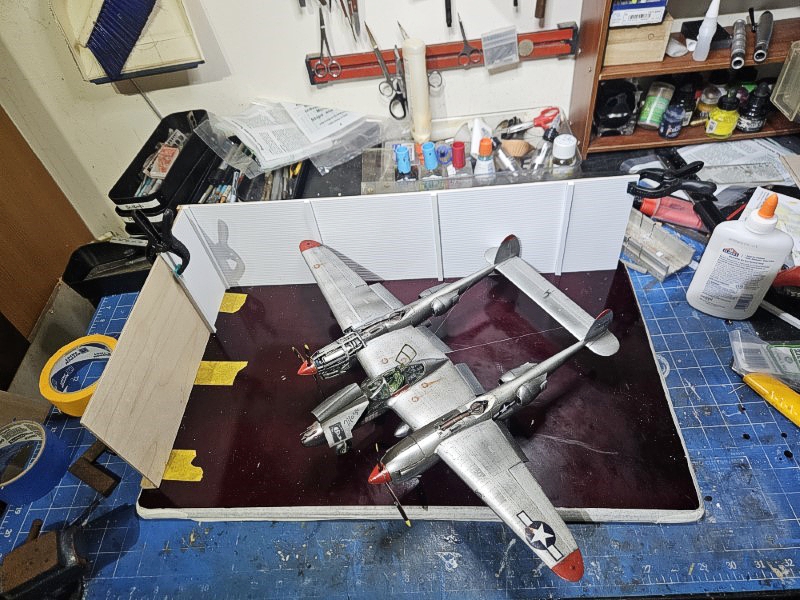
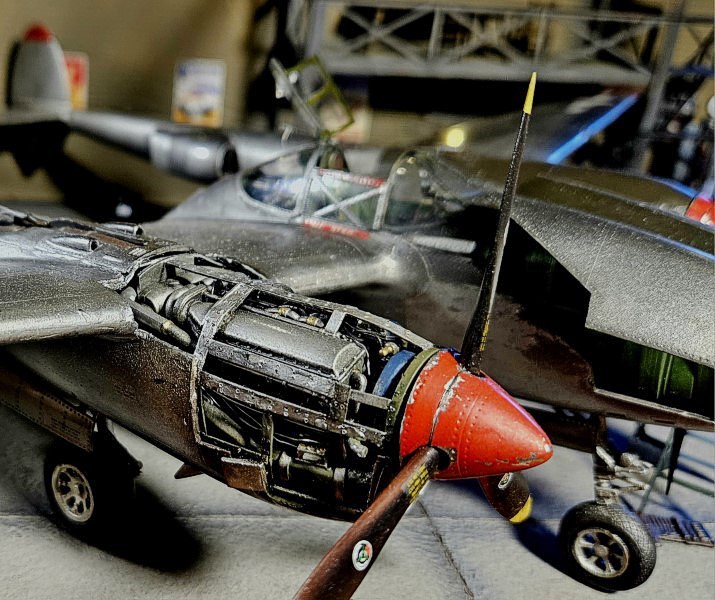
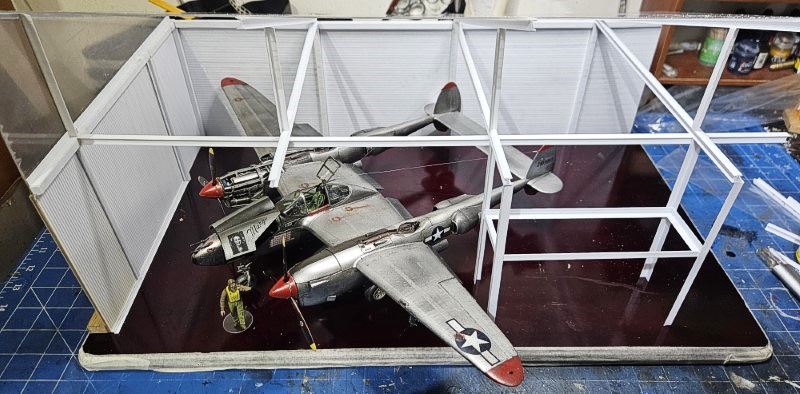
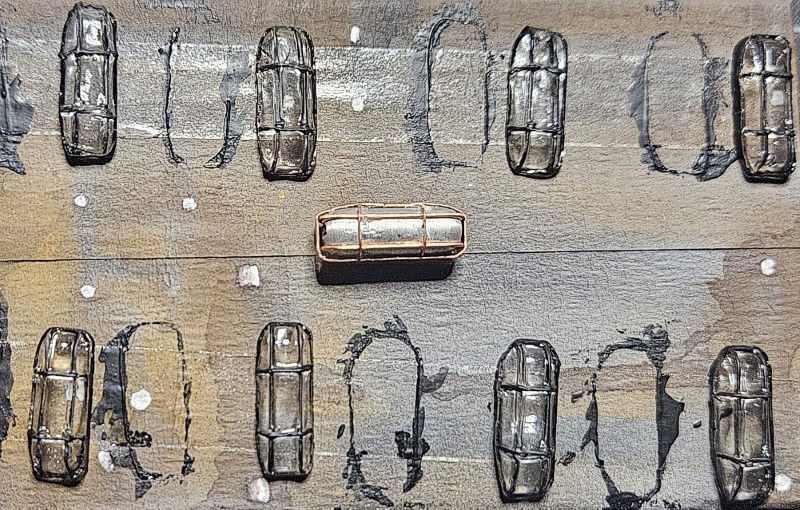
The first thing was to choose a base large enough. I have a few lying around from High Planes Models. I made a rough frame around this to get the general layout and used my most current project for a size reference. This happened to be a P-38 lightning which works well because of its large size. From this I made measurements of the height to accommodate the size. I constantly refer to photos on the internet. Hangars come in all sizes but basically accommodate bombers or fighters.
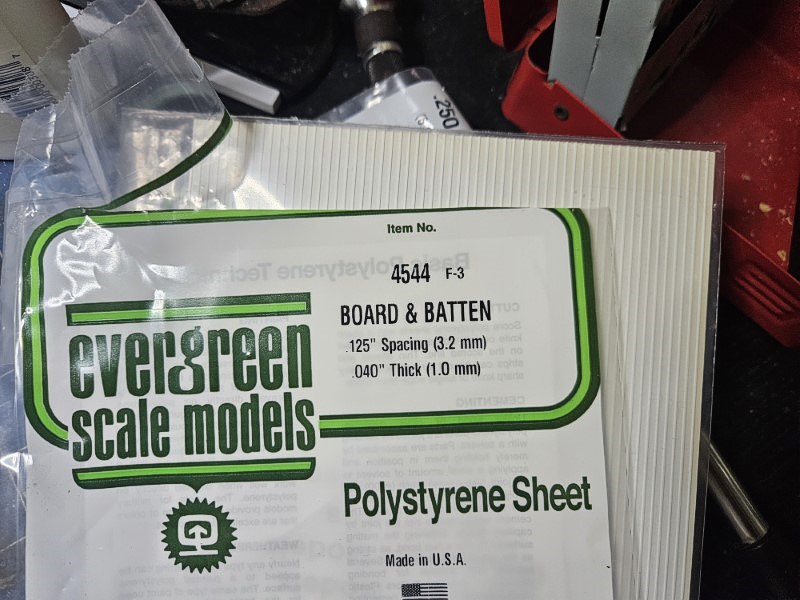
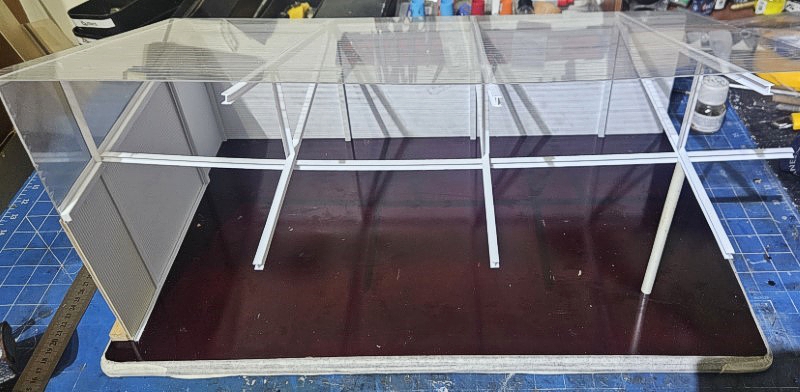
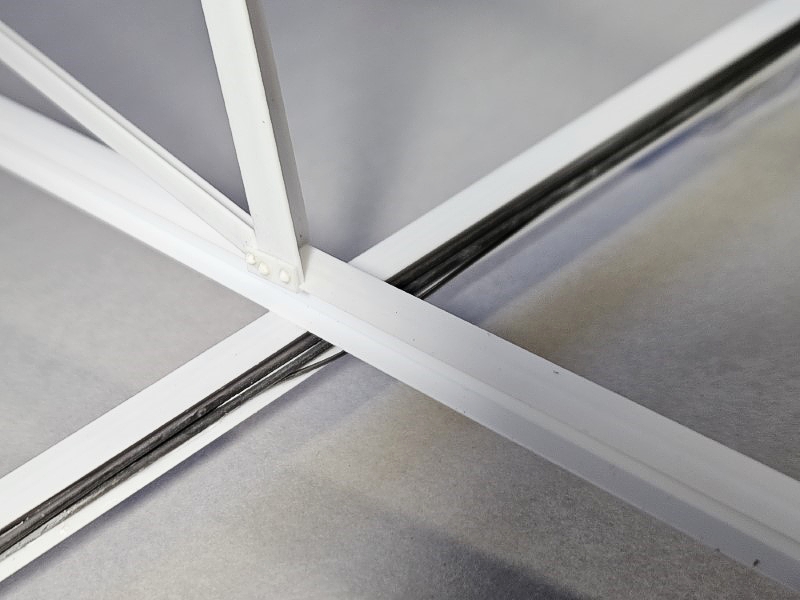
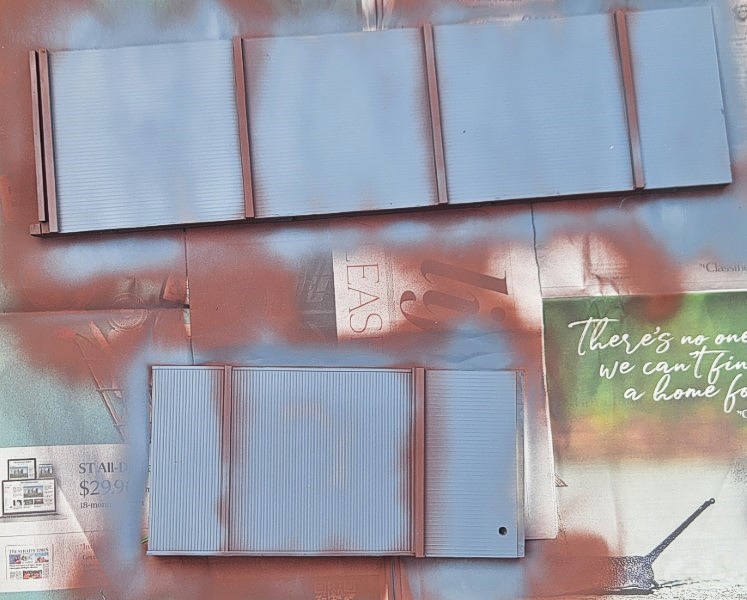
I then drilled and secured neodymium magnets on the edges of the base and correspondingly did so on the walls. The walls were surfaced with corrugated panels and beams from Evergreen.
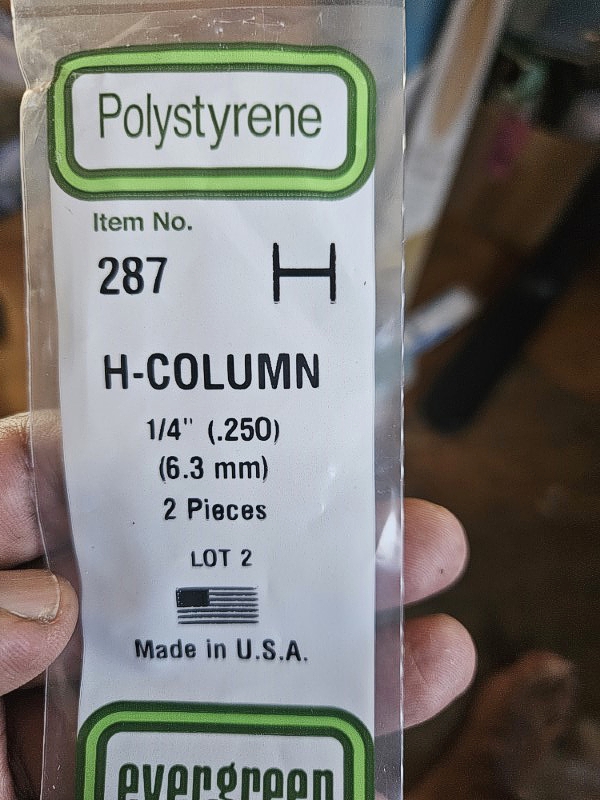
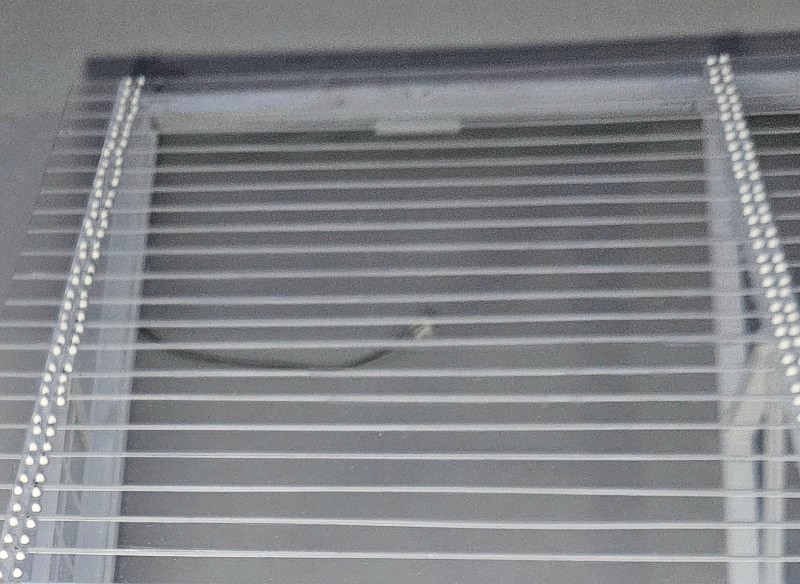
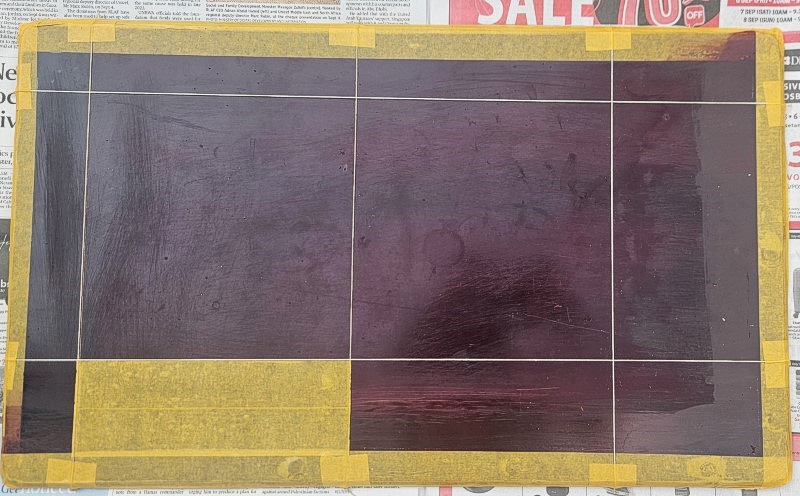
For the roof, I got the largest single sheet of styrene and cut it to shape. You could do this in panels, but it will be fragile and difficult to handle. I scribed panels directly onto the sheet top and bottom. I built the framework around the sheet. At this point one has to choose between an arched roof (which is cool) or a straight edge. I found that straight roofs are more common even between nations and so this is what I went with. By sticking to a clear sheet for the roof I could also mask off windows to improve the appearance and create interest. For the framework I stuck to the most generic looking structure I could find that would provide support and still accommodate a plane.
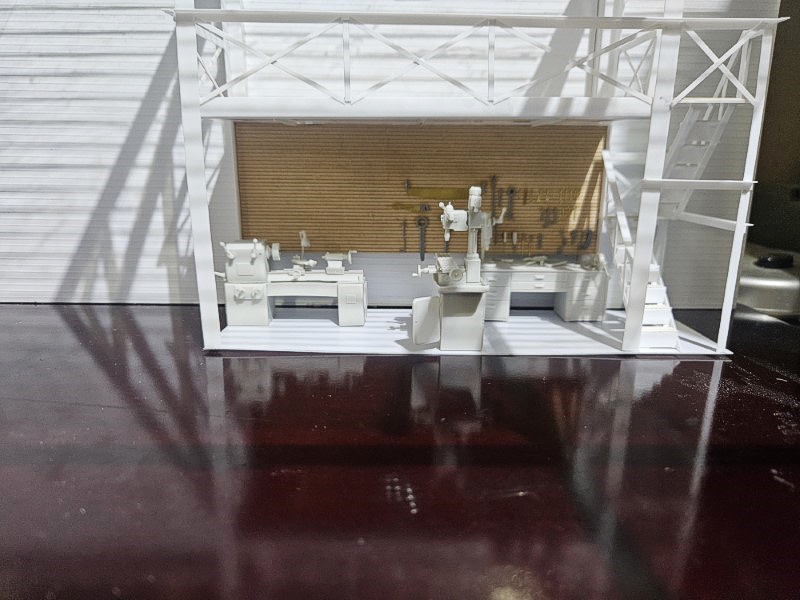
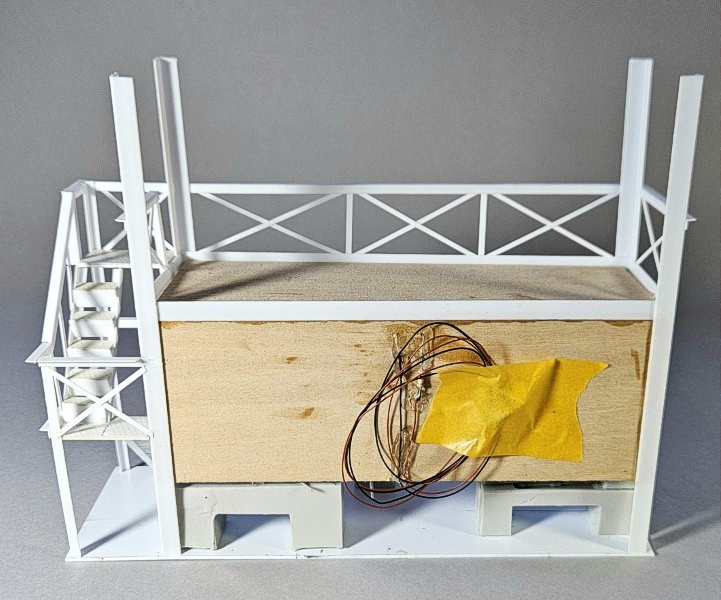
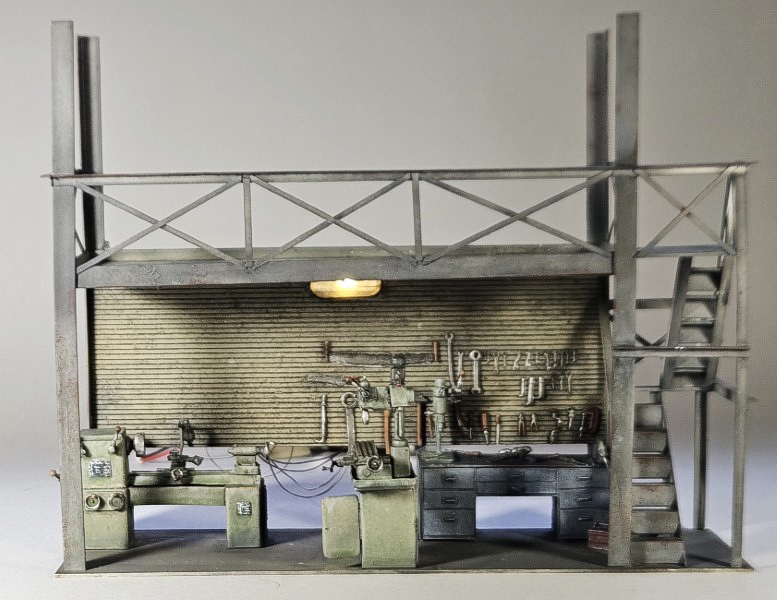
Once the basic framework was done, I drilled and secured magnets into the junction of beams on both sides. This was secure but tended to tip over without support because of the unsupported corner. I therefore created a machine shop island to prop this corner up.
Now that everything was secure, I worked on the lighting. This is provided by 3V LED lights and powered by a 9V battery that goes into the dumpster beside the sliding hangar doors. Accordingly, there were 2 parallel rows of 3V LED in series and a third parallel 3V LED with a 1200-ohm resistor. I get my LEDs from fairy lights. One length will last a lifetime of projects. You need roughly 400-ohm per LED equivalent. All of this was tested on circuit board – a legacy from a misspent youth.

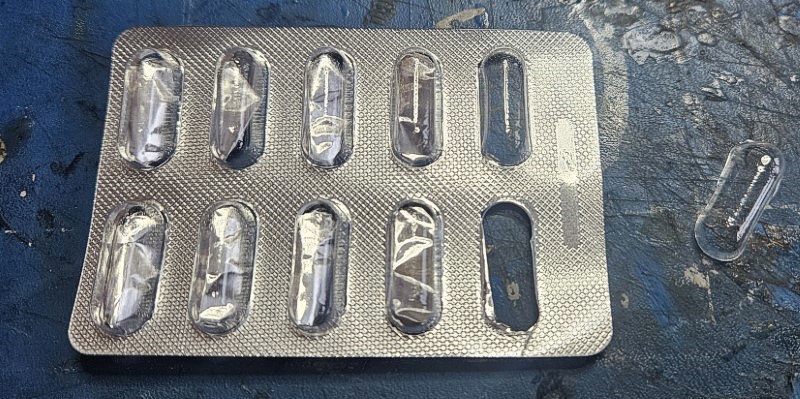
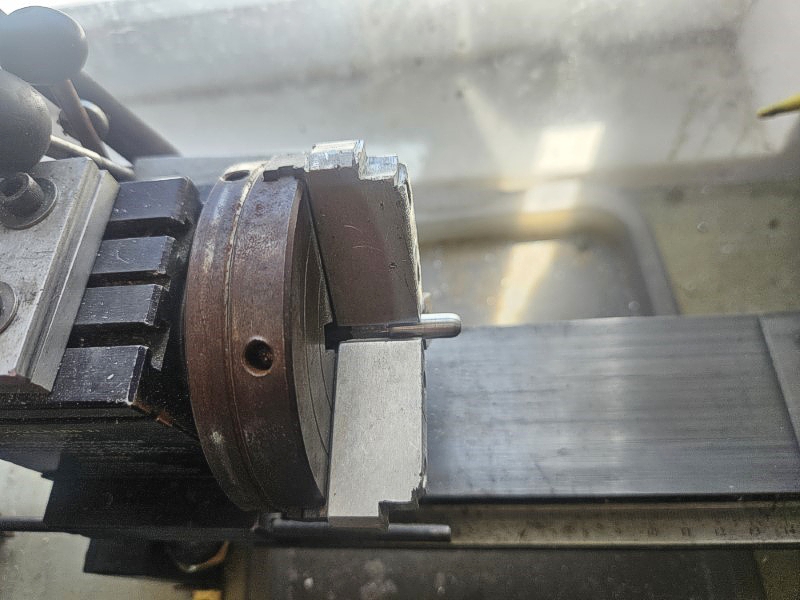
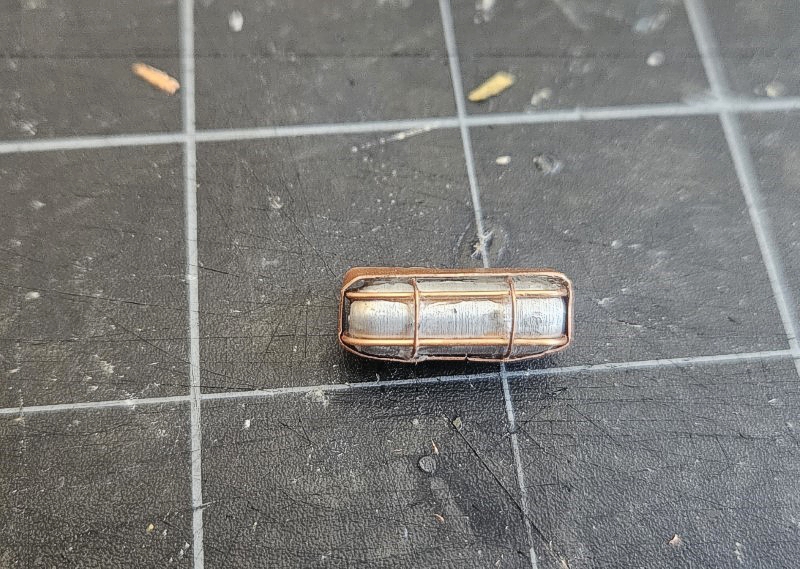
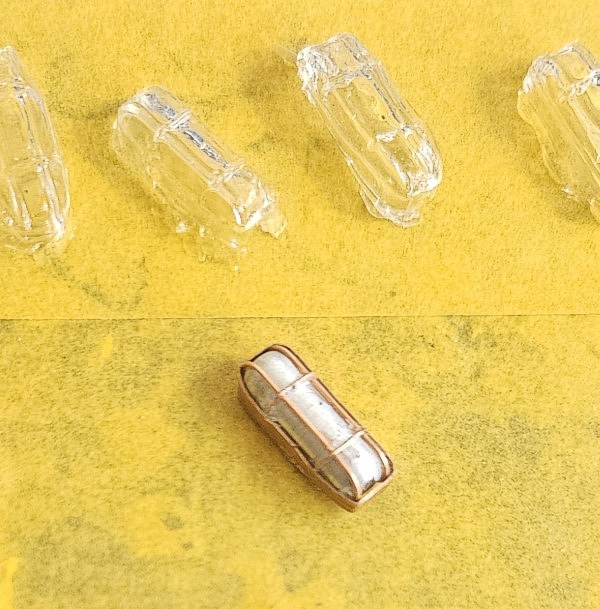
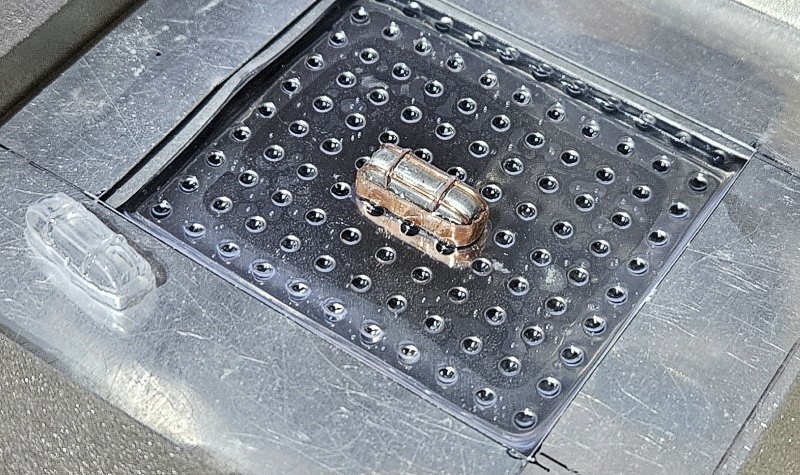
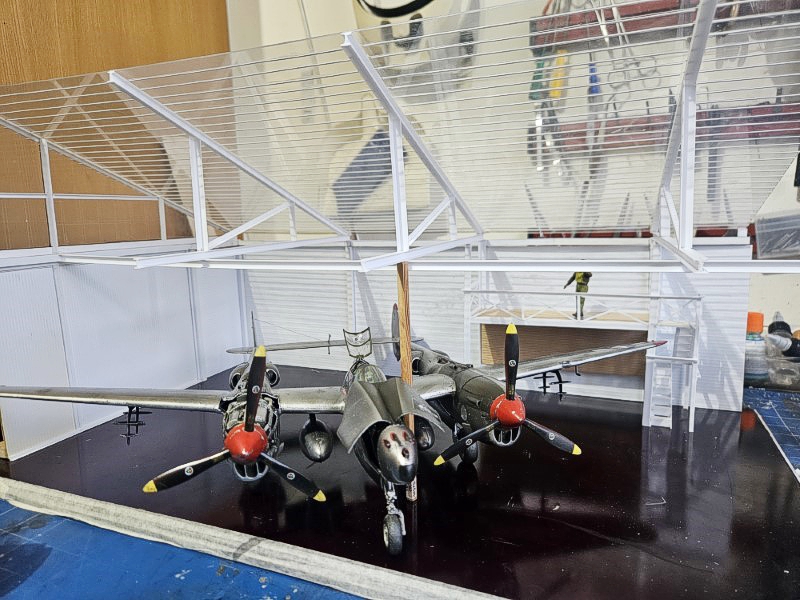
These were all secured in place on the workshop island and framework and tested. Then the wiring was soldered in place. Once I was sure everything worked, I made some light covers. I tried using medicine capsule blisters but those were too big and lacked detail. Still, I used them as masks for painting. In the meantime, I made a master from aluminium on a lathe. This was detailed with copper sheet and wiring. I made a mould of this and cast a bunch of them but they turned out to be too shallow to accommodate the lights. So, I re-did the lot by vacuum forming which turned out to be more satisfactory.

Now that everything was structurally sound and working, I turned to the detailing. All the joints have rivets with the roof having around 600 of them secured with white glue/ future. The lower surface has ribs of styrene. The backboard of the island is balsa wood. Solder wire was used to simulate wire and cables. I used accessories from Milart and Verlinden.
Painting
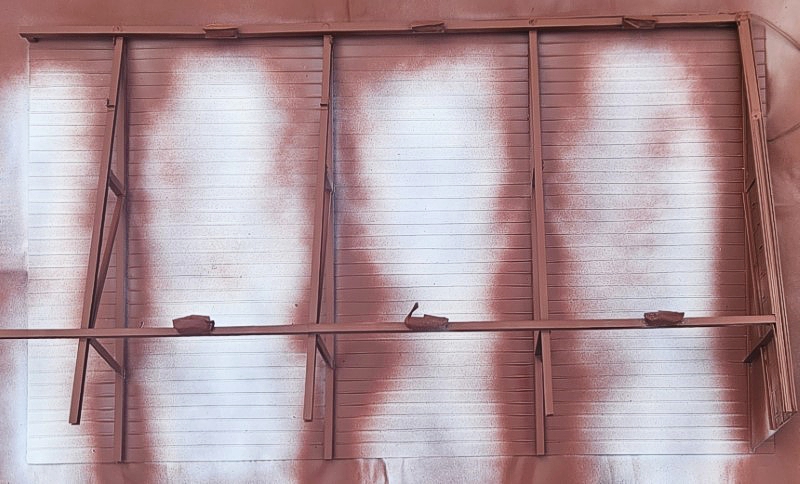
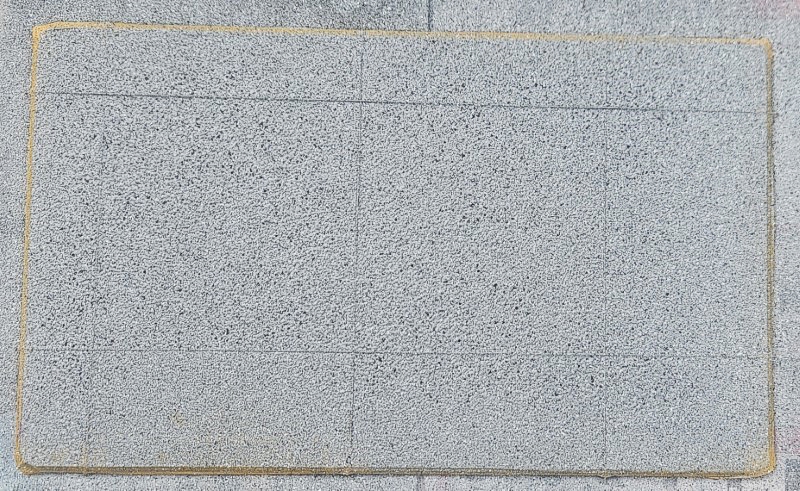
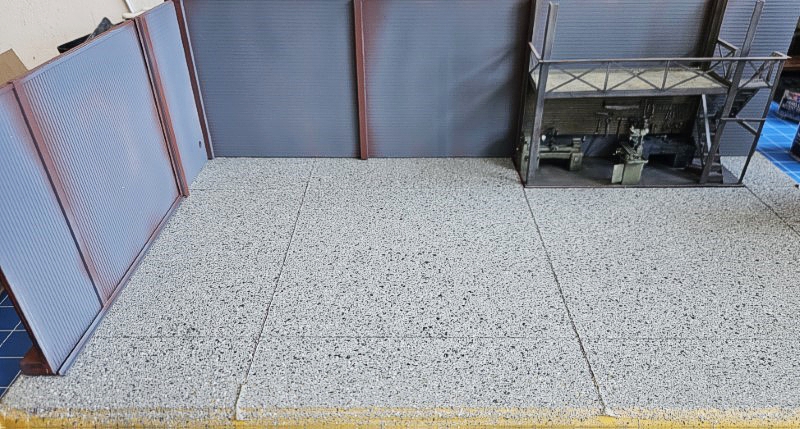
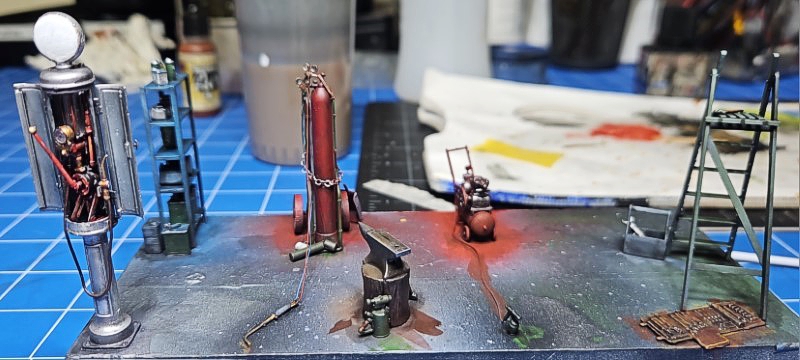
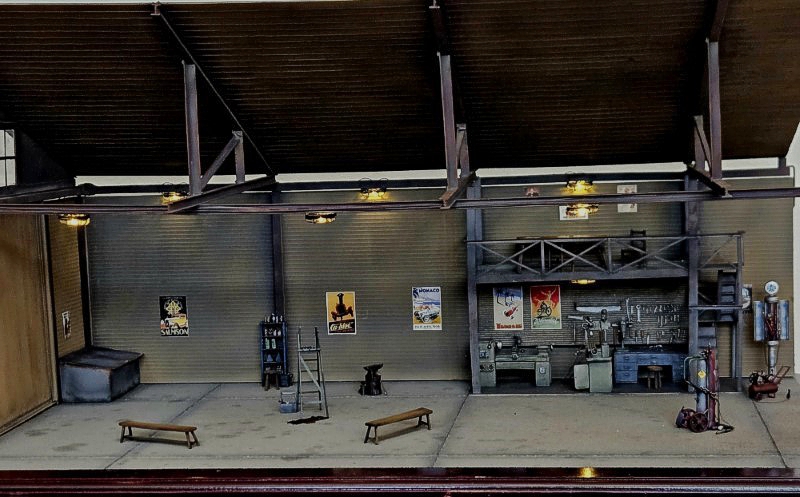
I used various pictures on the net of abandoned World War 2 hangars as a colour reference. I marked off the floor panels and masked the border. Windows were masked off. The floor was sprayed with Rustoleum Stone texture. The main structure was sprayed with Rustoleum Grey and Red primer. Next came a layer of grey for pillars and sand for the paint. I added rust stains on the roof. Washes and weathering complemented the job. The accessories and lights were painted and cemented in place, and we were done.
Conclusion

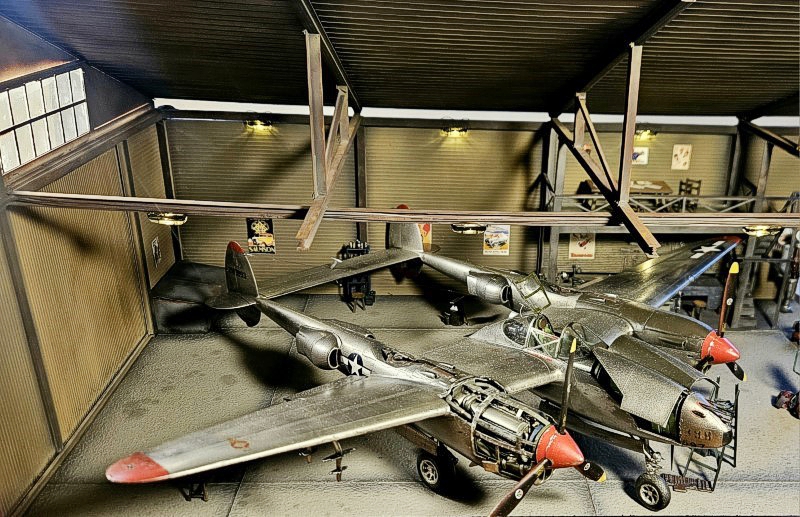


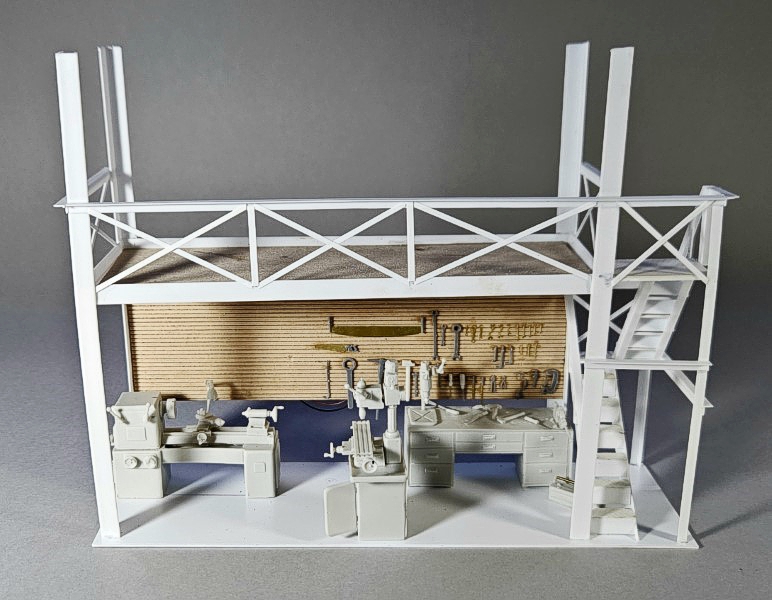
In the moment of truth, I plugged everything in and they all worked! Really happy I attempted this. All in it took about a month to build from scratch. I think that is not too shabby. I now have a display booth I can customise for aircraft of all nationalities. I hope you like it.
© Suresh Nathan 2024
This article was published on Saturday, October 12 2024; Last modified on Sunday, October 13 2024