
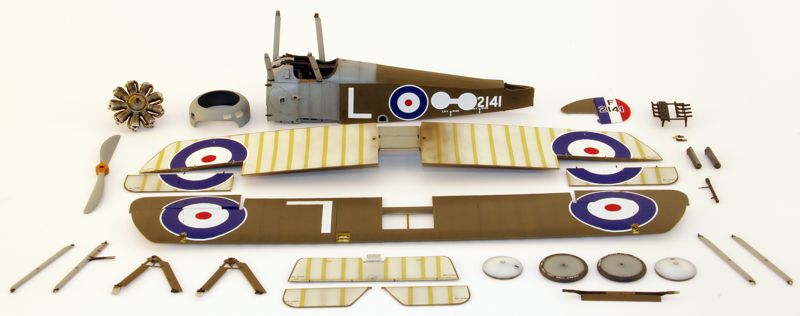
Wingnut Wings 1/32 Sopwith Camel
By John McIllmurray
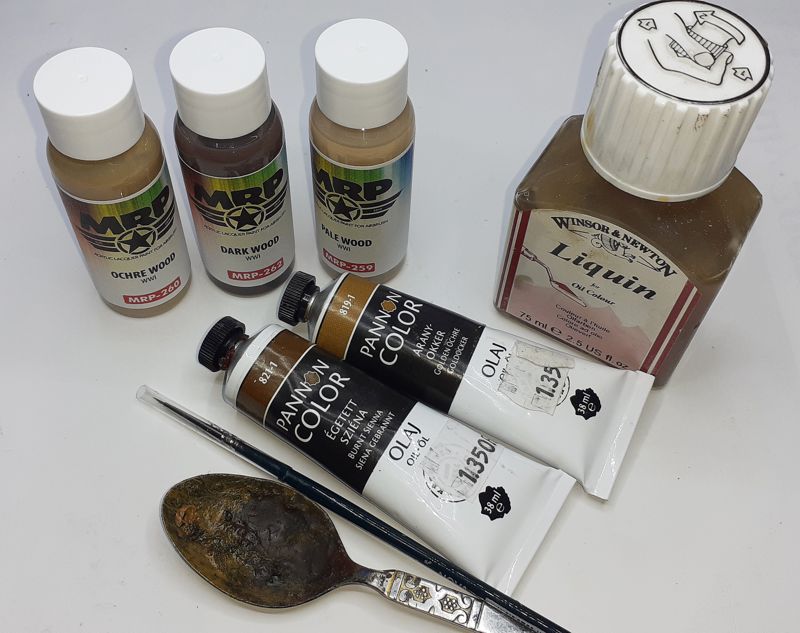
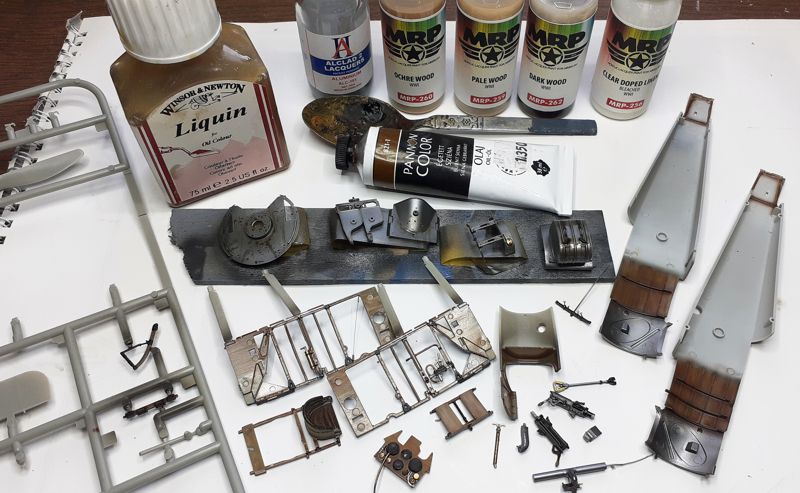
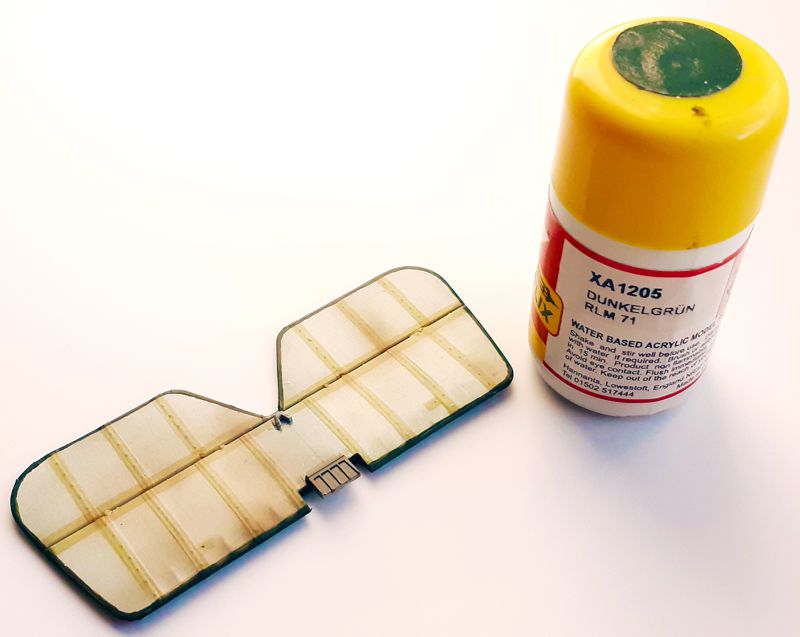
Well, the time had finally come to start my first WnW kit and first 1/32 WWI subject full-stop, actually! One of the five that I have and the first one I purchased. I am scared stiff to be honest and just practiced by making 2x 1/48 Eduard kits which you may have seen elsewhere. Got my paint range apart from the grey and thanks to the WnW website photos and the excellent walkaround and build photos on this page I have enough to give me a working knowledge of the subject - I just need to get over the initial mental block preventing me starting an out of production kit when I have only done 4 biplanes in my adult life!
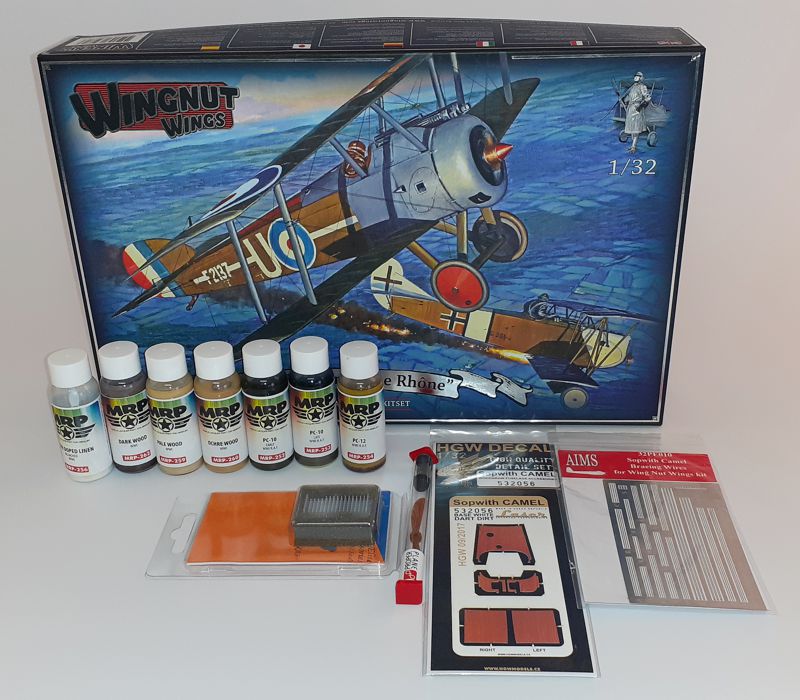
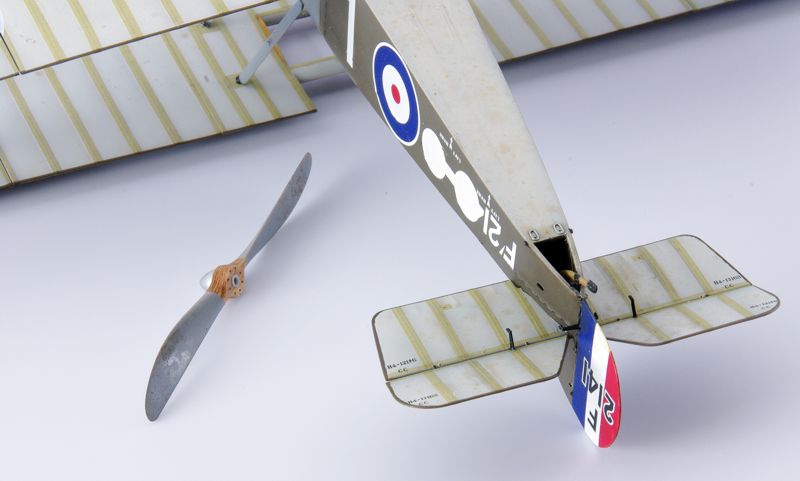
I have some aftermarket goodies including my own AIMS bracing wires, naturally, but I want to say a big thank you to Proper Planes for the gift of the propeller and Aviattic for the fabric decals.
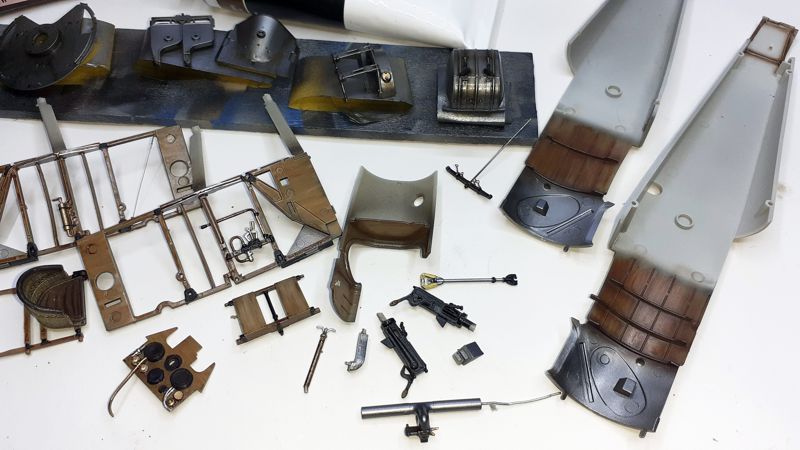
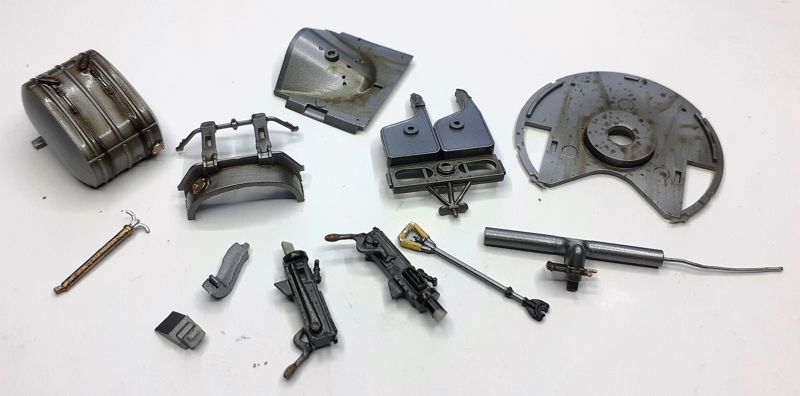
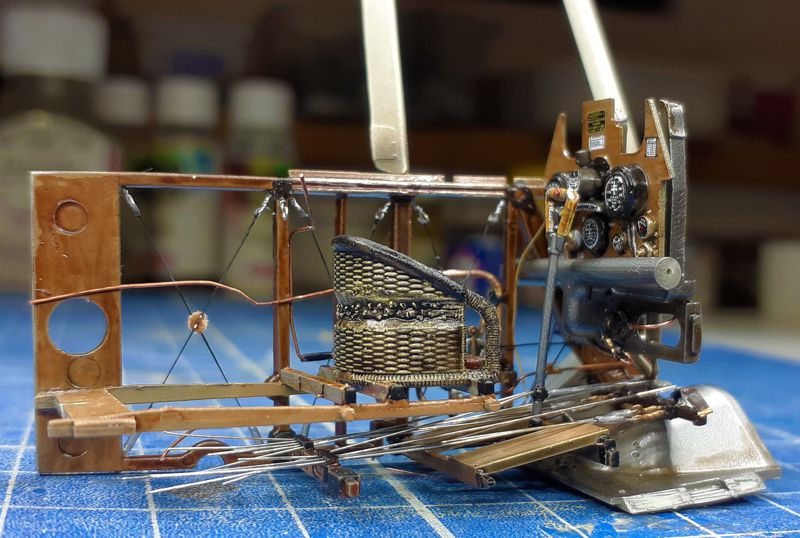
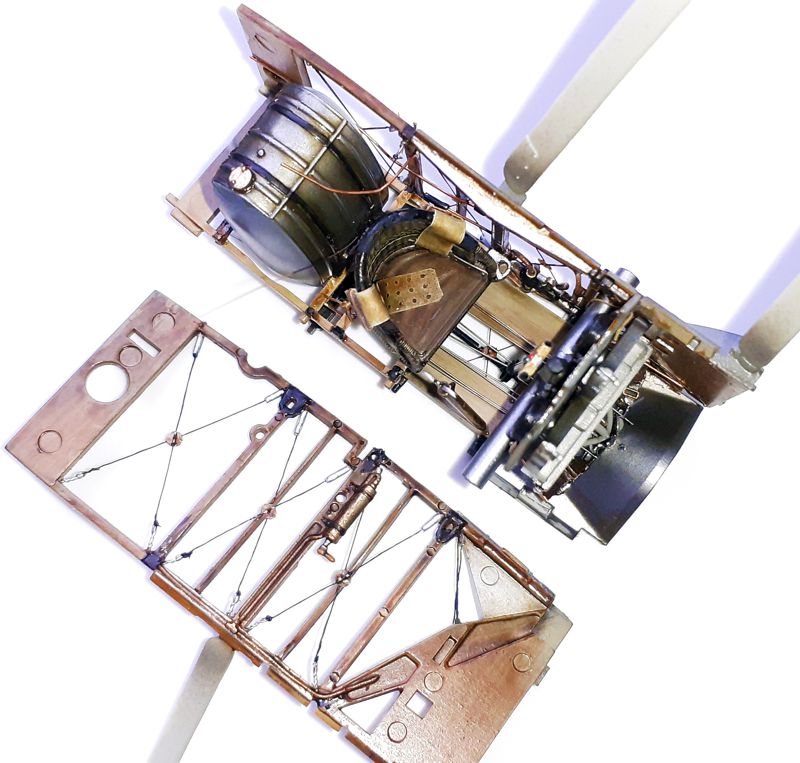
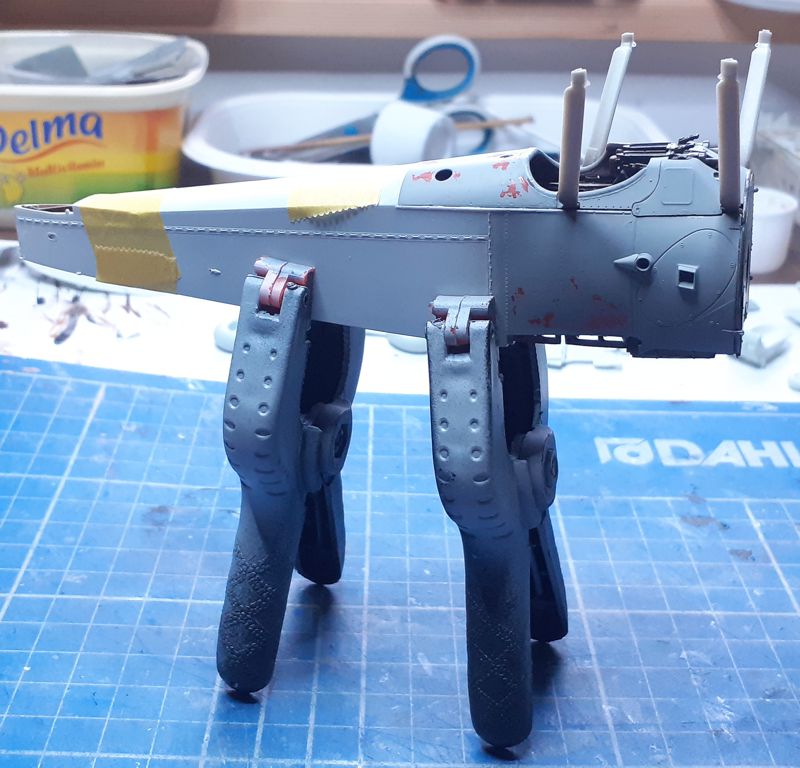
I have made a start with the main colours and a wash - after this lot dried I finished the dash and did the cross bracing and some extra plumbing and cables, etc. I am well out of my comfort zone, but I do see the attraction!
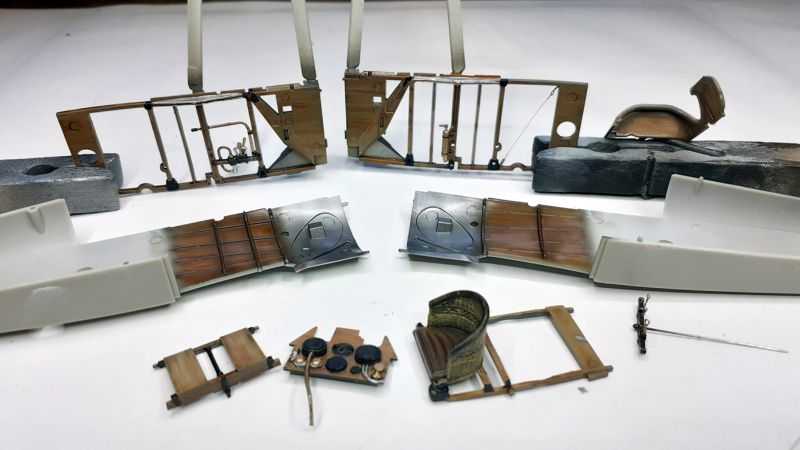
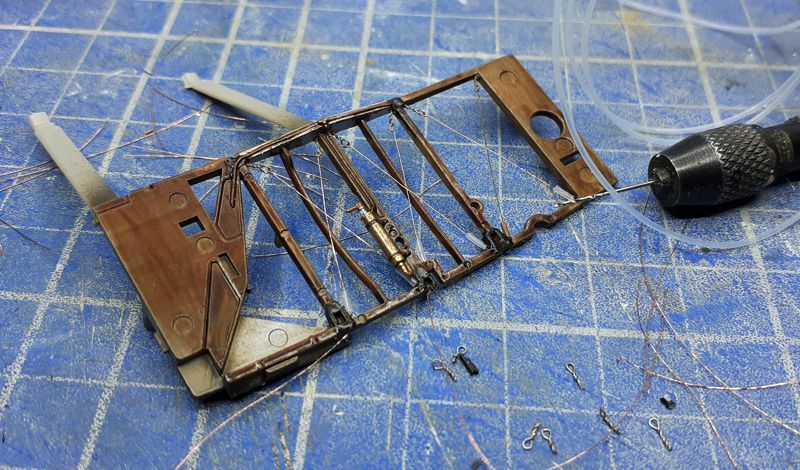
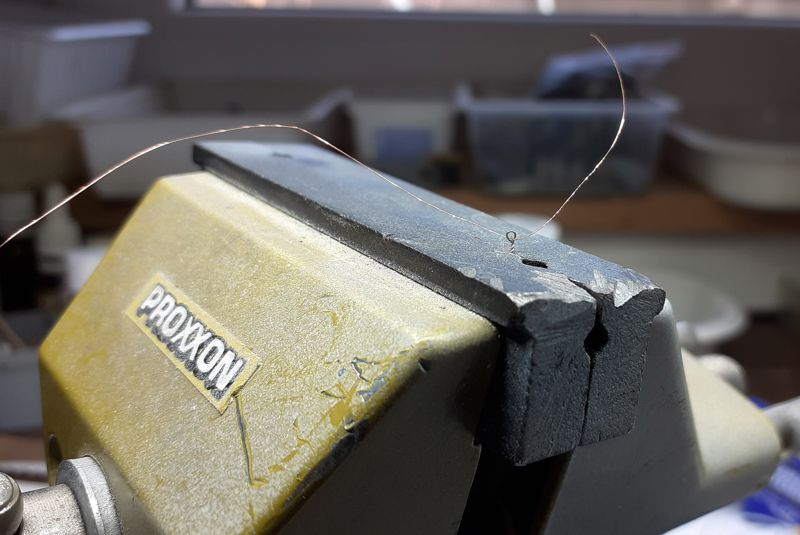
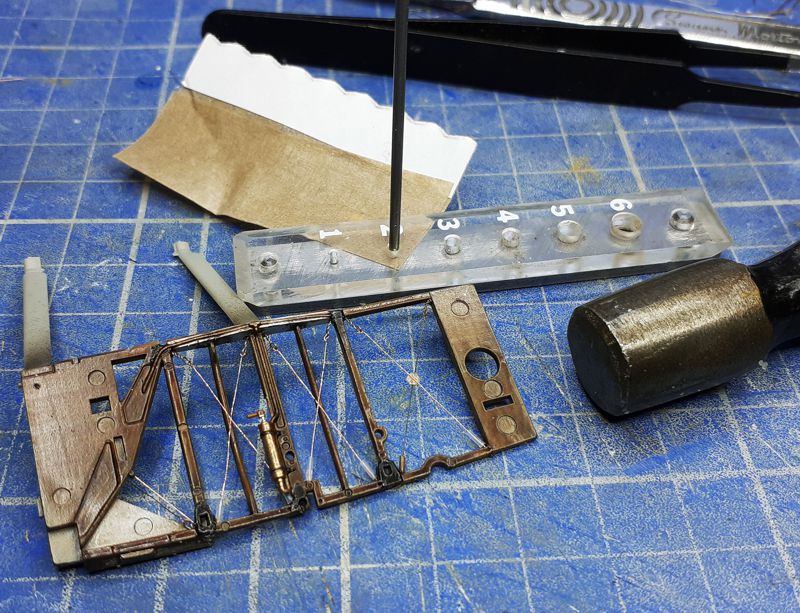
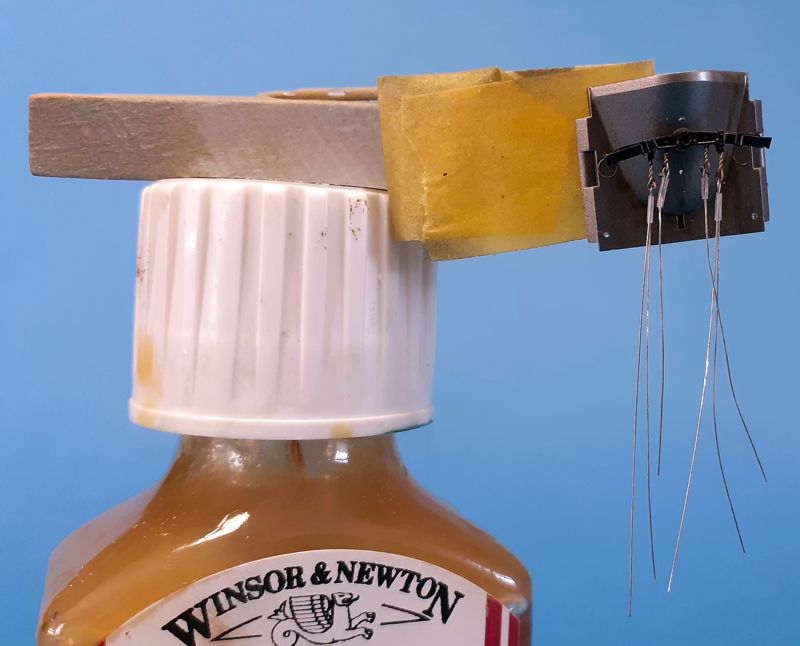
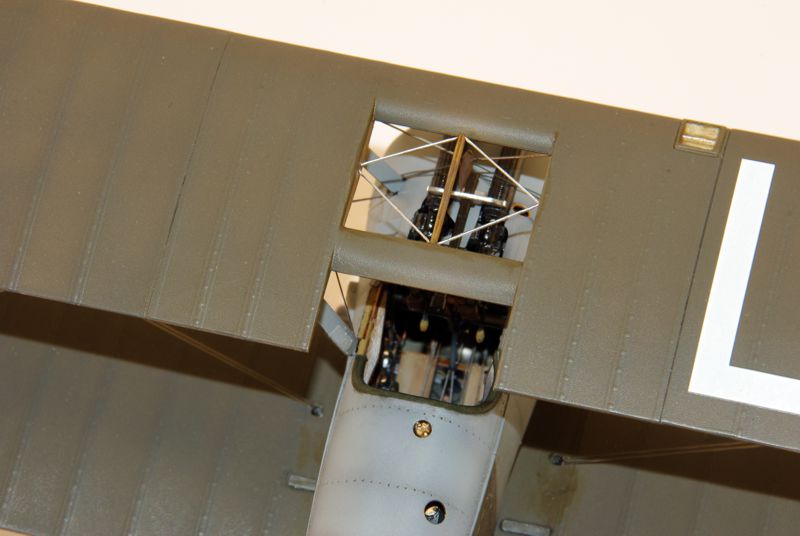
I have spent the day playing with the cockpit cross bracing and I feel like a fly fisherman! I now know after 10 years of fearing to start this kit that you guys that build these subjects all the time are officially mad!!! I thought using actual wire would be cool but even with pulling it through the bottom of the framework via pre-drilled holes and pulling it tight at an angle, but it just cannot keep the tension as those of you with such experience will attest and so I used my black EZ line on the other side. So, I made twisted wire eyelets and tied off the fuse wire to them - snipped off the excess and threaded onto the other end some plastic sleeving. Then as I said pulled the end through the frame and glued them in place. After painting the wires black I punched out some tan fabric parcel tape that I had folded over on itself - glued them into place and used a dab of white to represent lacing. I could have made 2x Ju 88s by now! Actually, I am really enjoying this Camel.
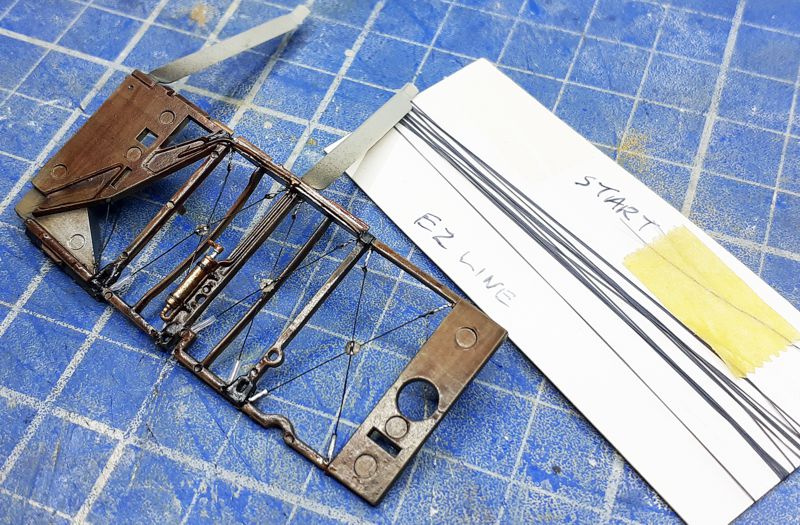
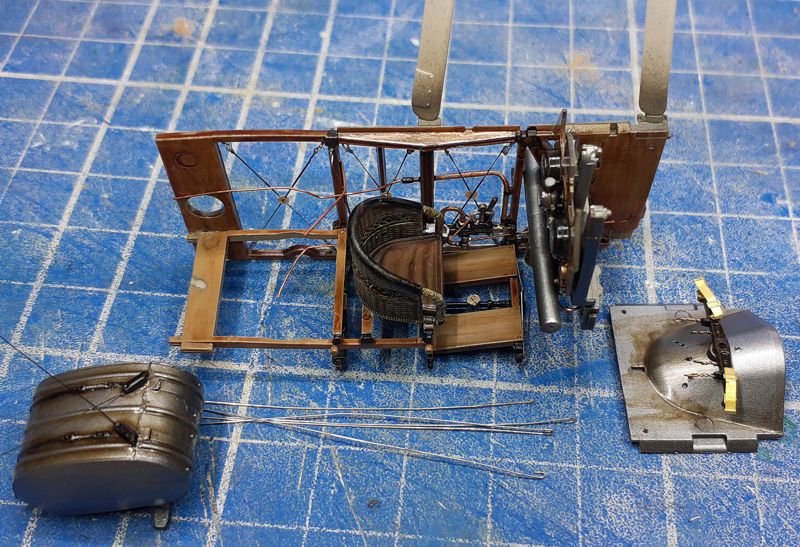
More work in the cockpit: The EZ line was great for tension as opposed the fuse wire but the fuse wire was much better for looping to tie off as well as for threading through pre-drilled holes - hands down! It took twice as long to use the EZ line but the tension is much better - such is life!
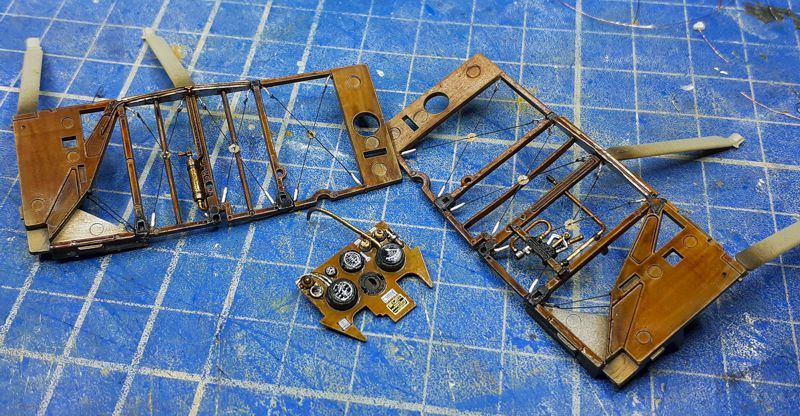
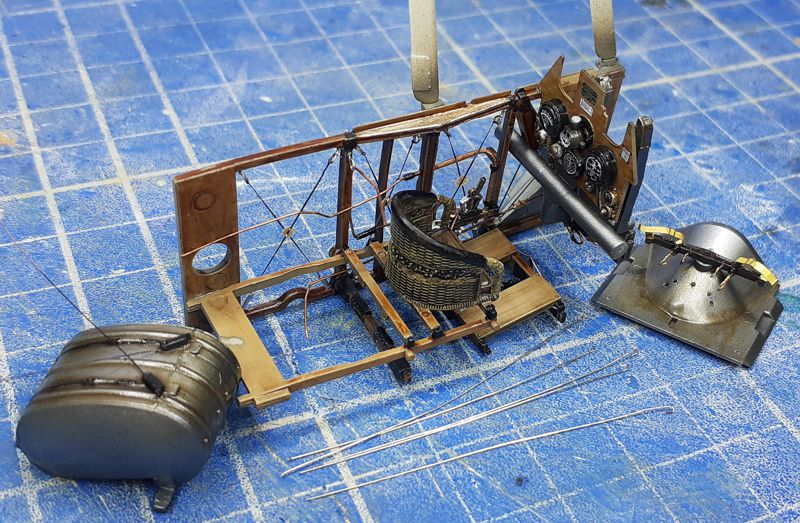
Plumbing - just did a little pipe work - I was so concentrated on getting fuse wire the same thickness as in photos that it was not until after reviewing the photos I noticed that it would have been better to have first removed the kits over-scale plumbing - anyway it is just representational. After the HGW seat belts I ordered arrive - I will run through the control cables and put it all together.
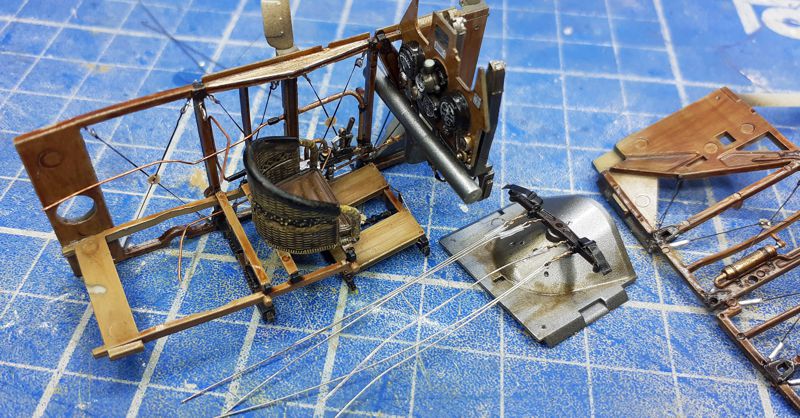
Rudder cables - got the 'dreadlocks' looped in just need the HGW seat belt to button this up!
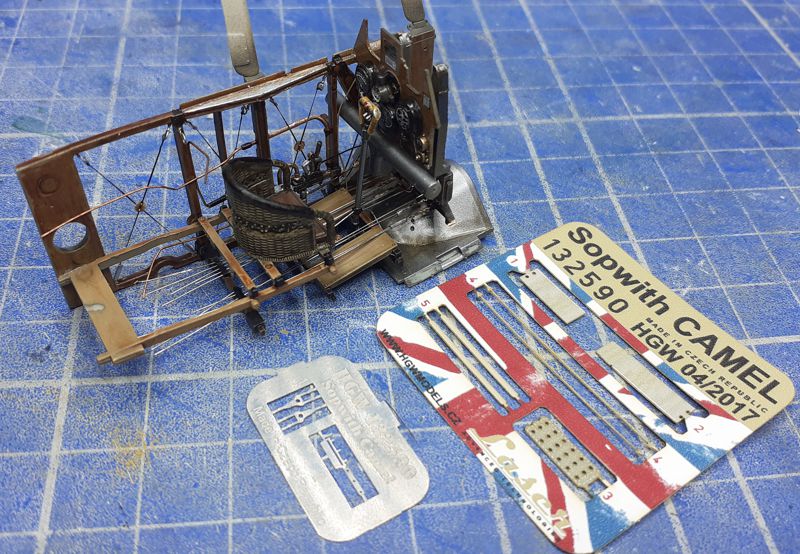
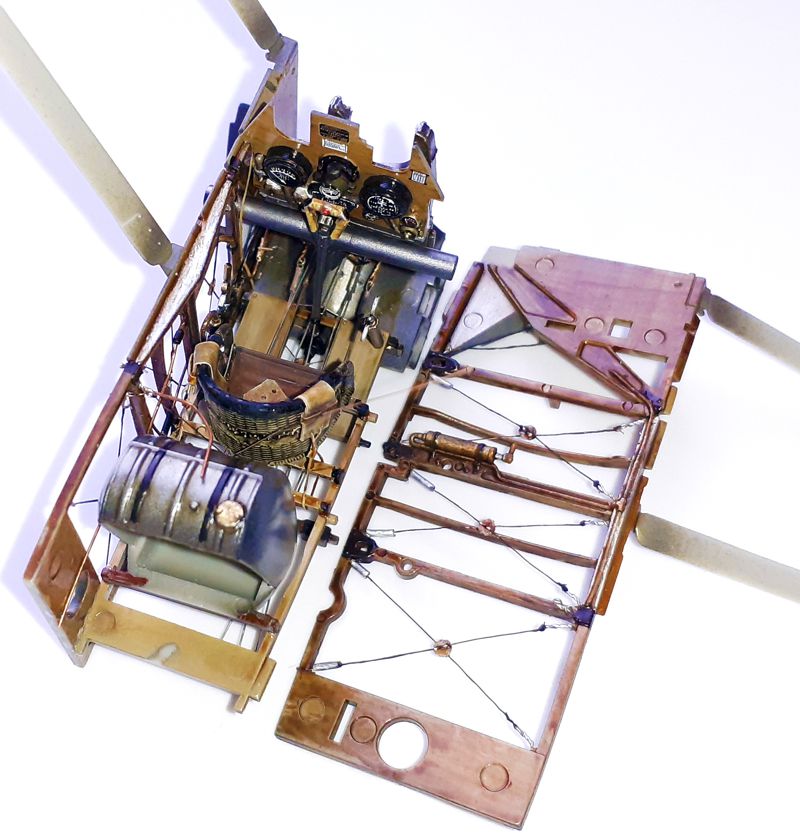
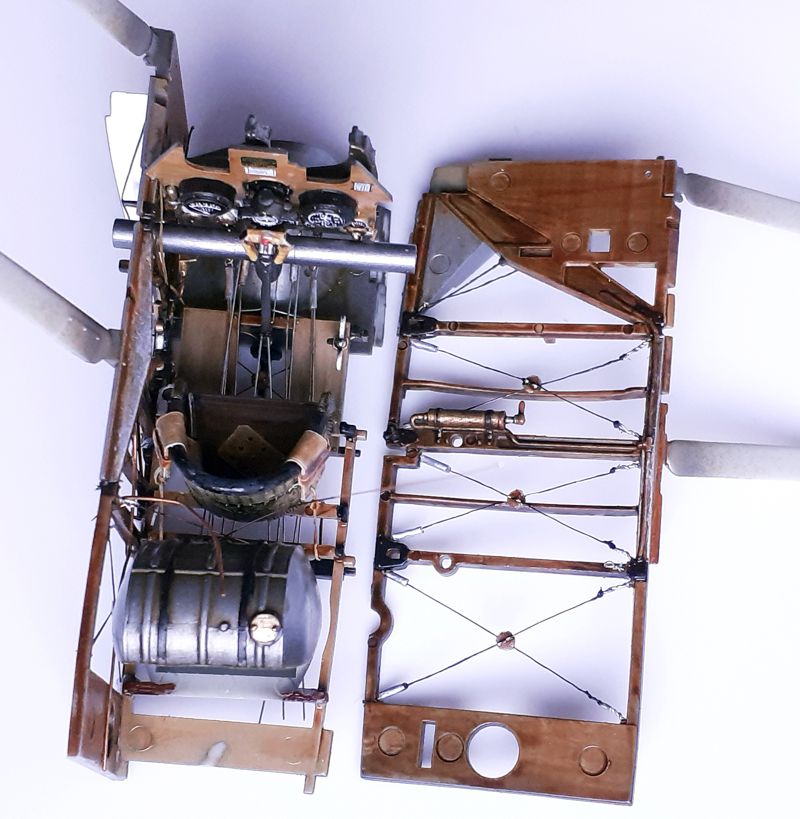
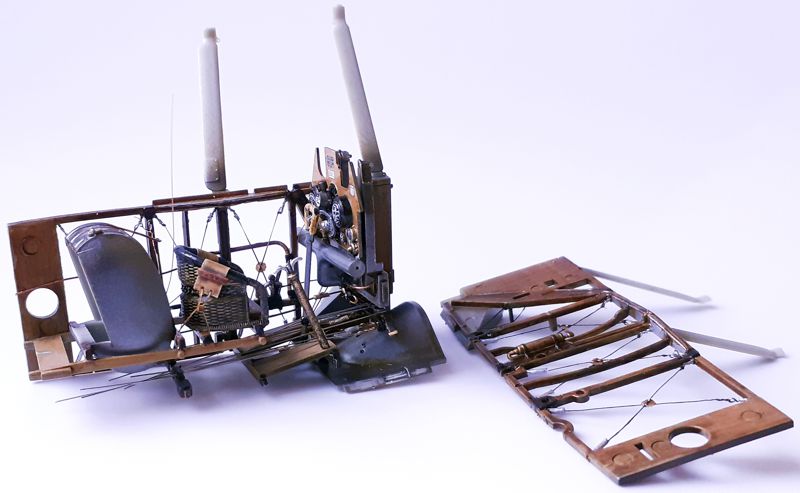
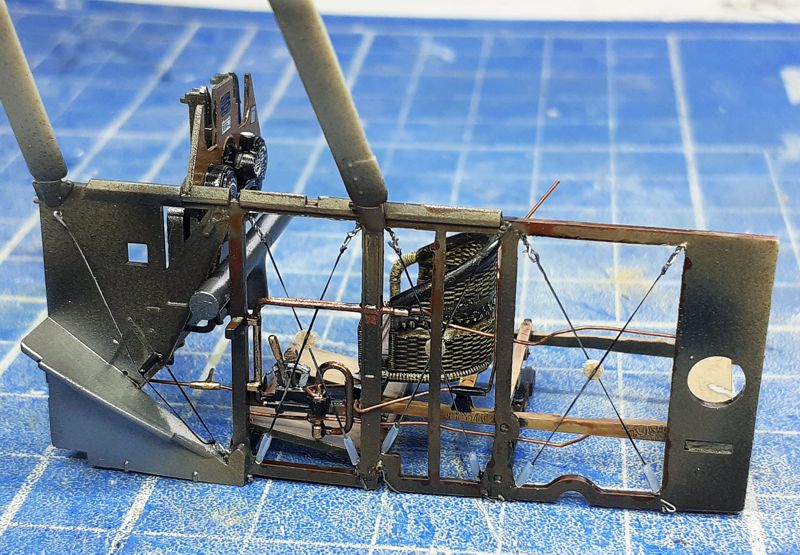
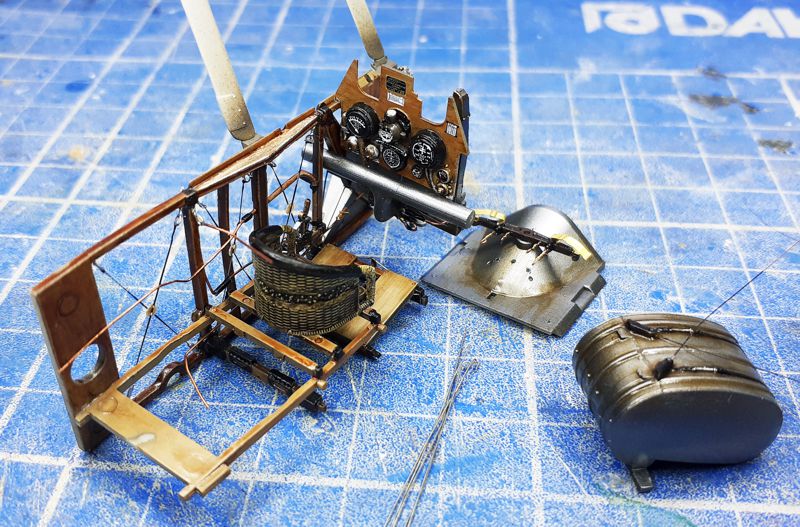
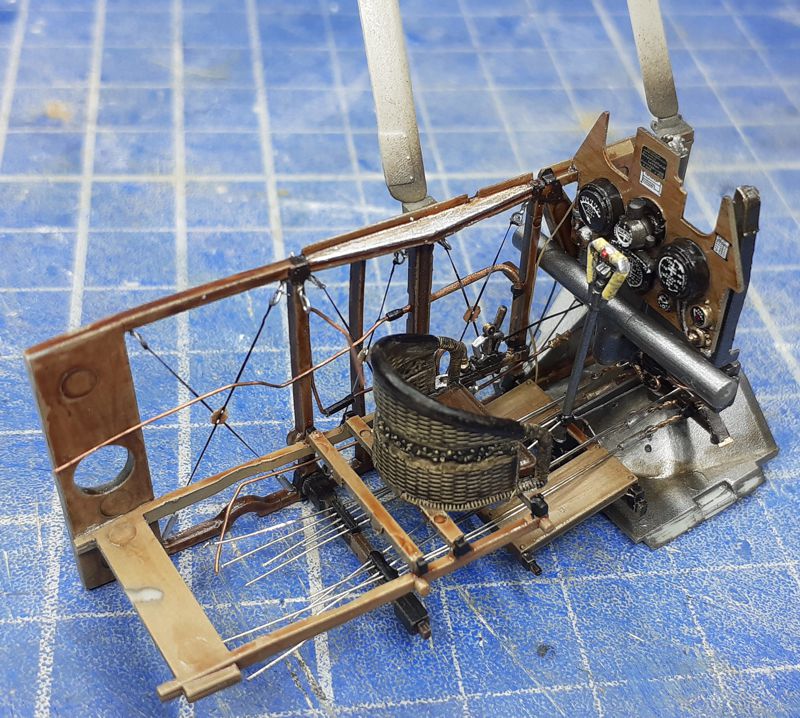
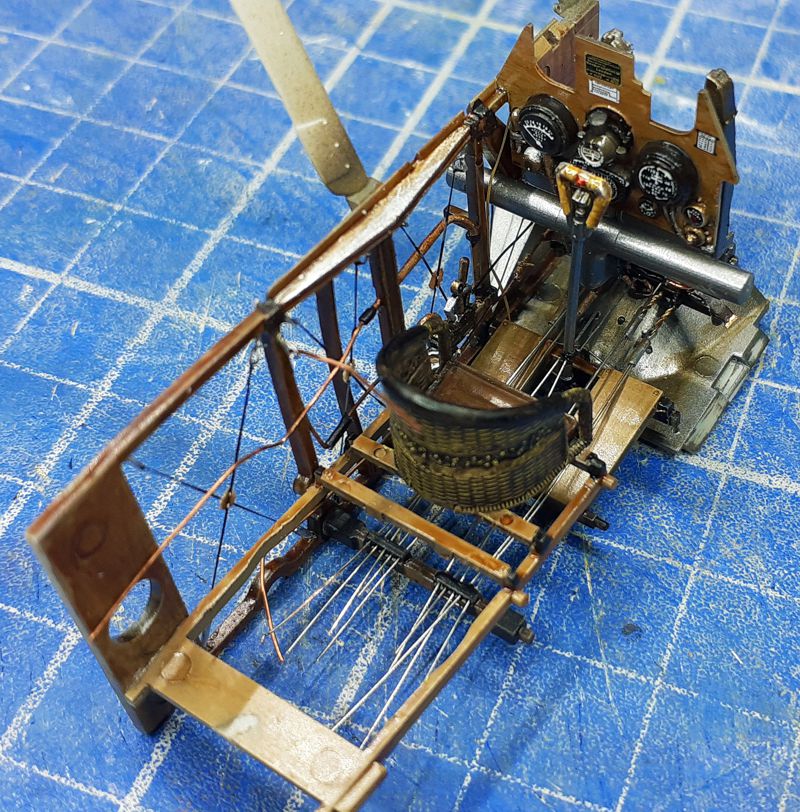
Cables - I finished off the cable work as well as an electrical feed for the weapons. Really happy so far although I now wish I had tried to delete some of the injection pin marks! The HGW Camel seat belt arrived a few days later so that is the cockpit all done and I can now proceed.
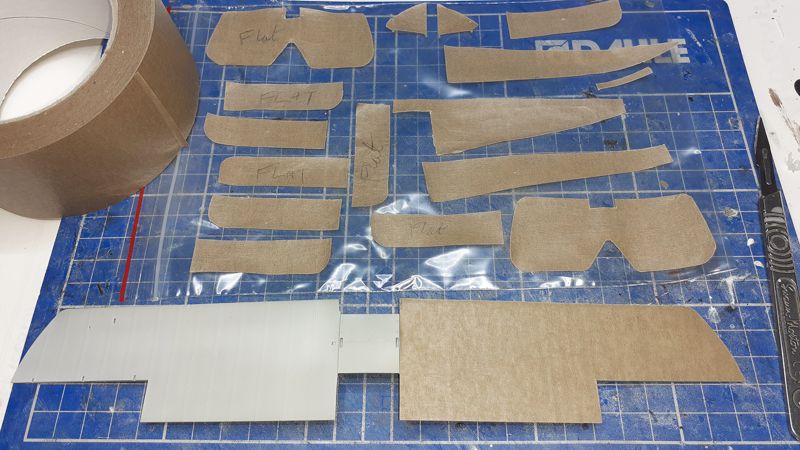
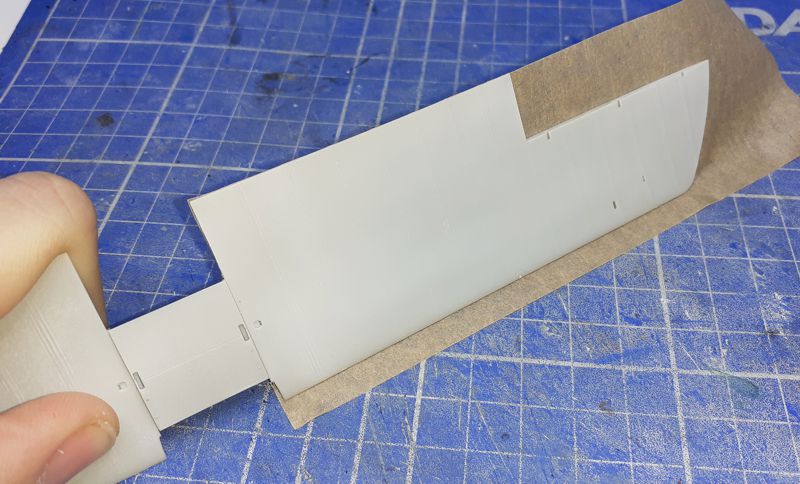
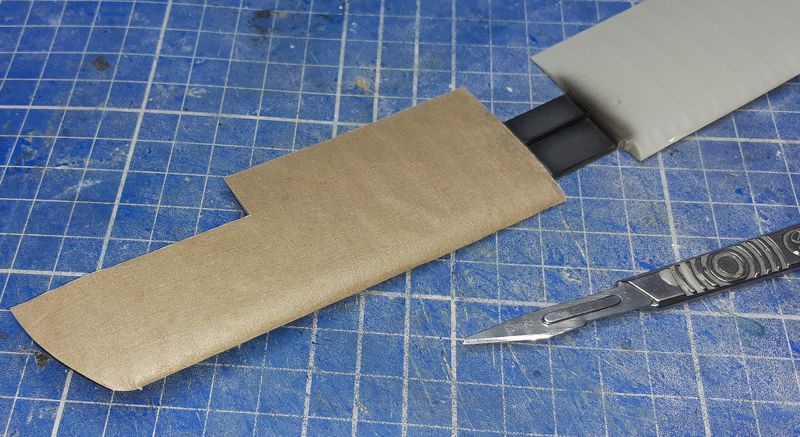
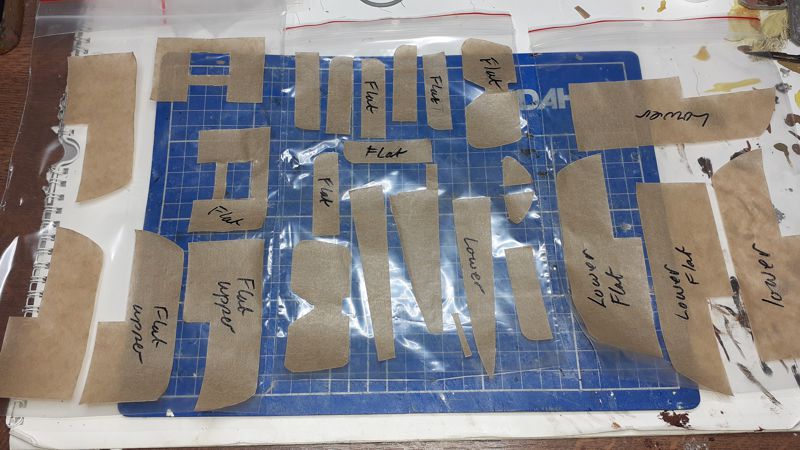
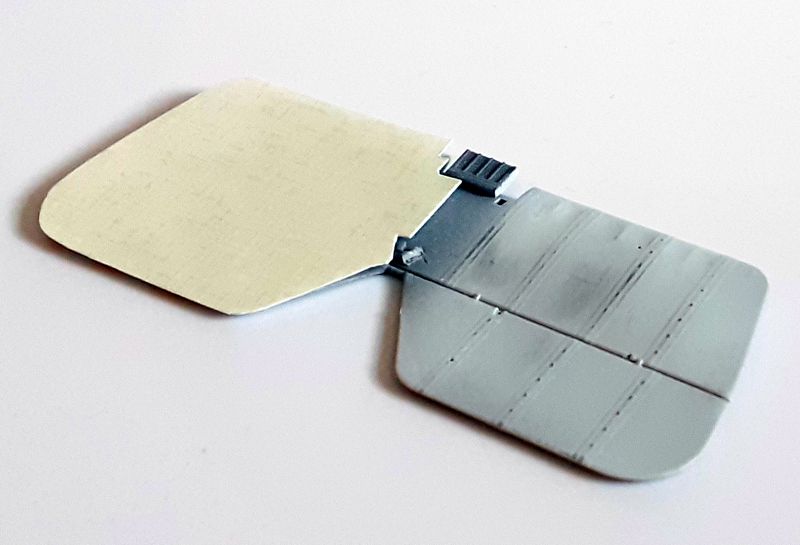
Aviattic fabric decals - I got the templates ready today using recyclable parcel tape which is very low tac - I tried a little on top of a corner of the Aviattic PC 10 or CDL when they arrived just to make sure - then I will take them off my decal bags and put them on paper and use them without any tac.

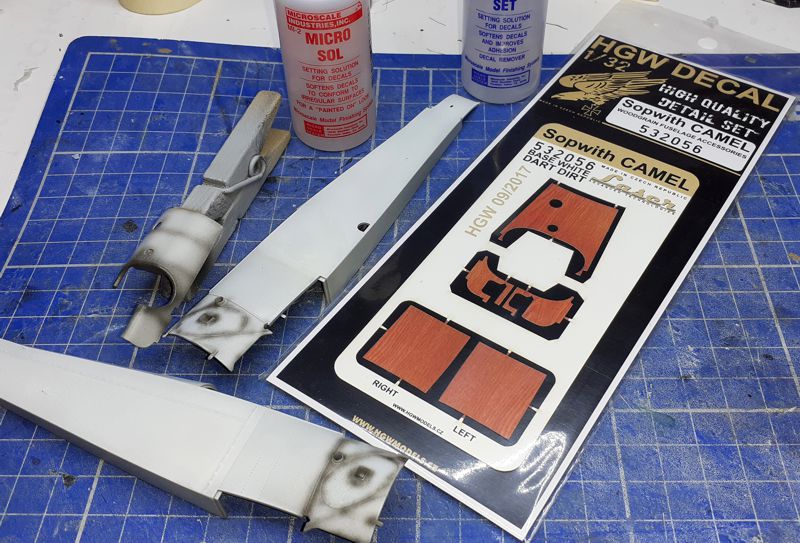
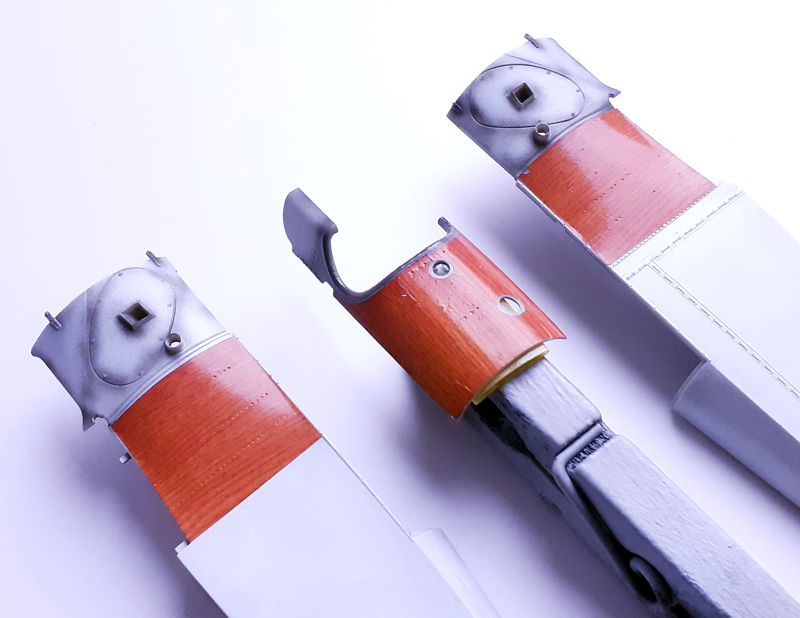
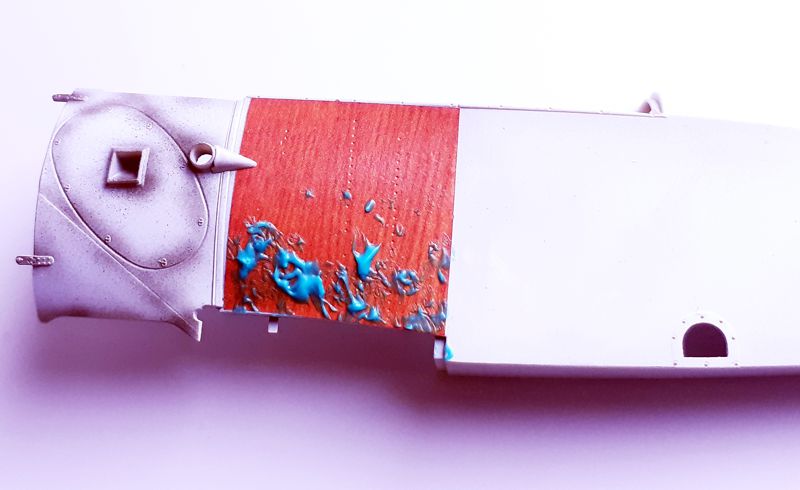
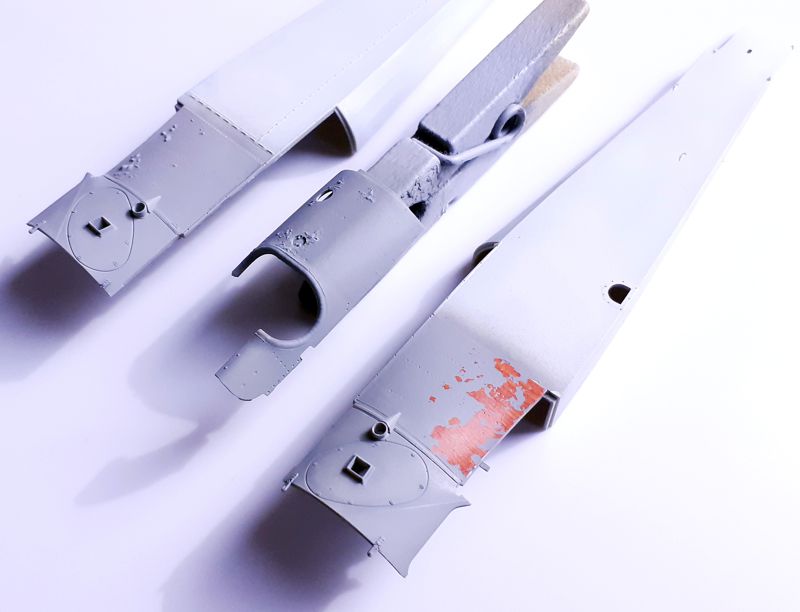
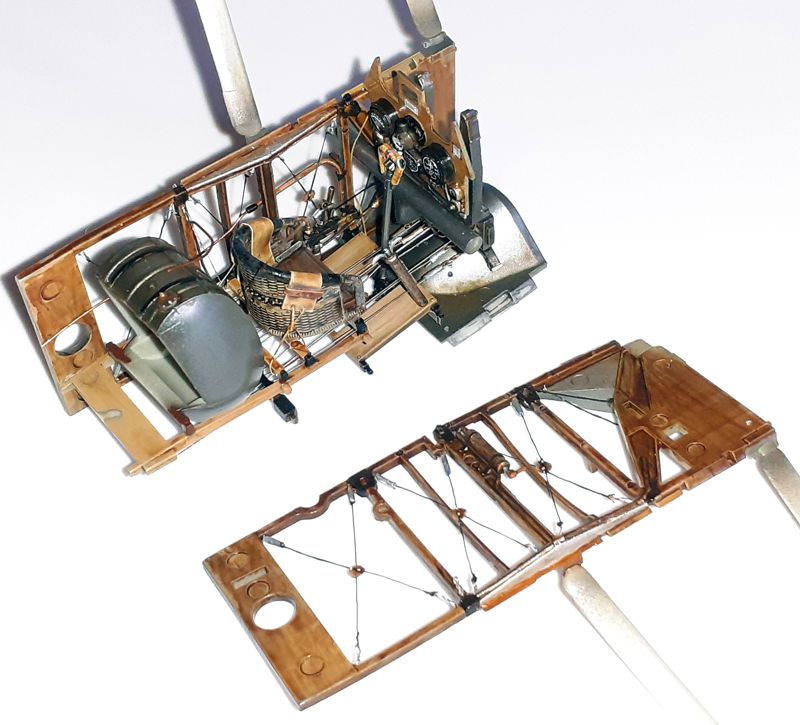
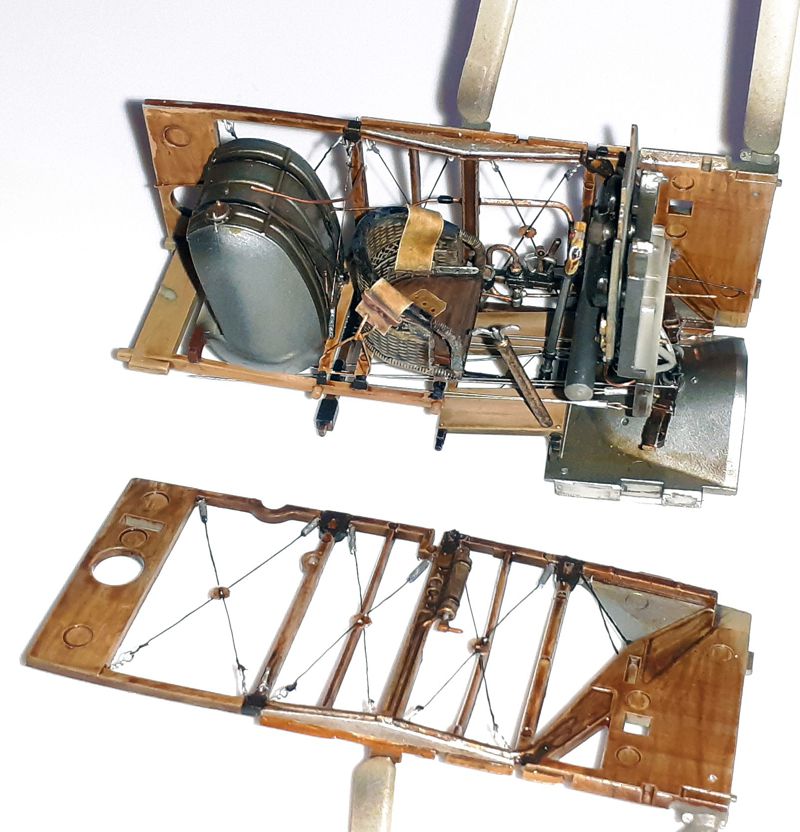
I got the HGW wood panels on my MacLaren Camel - made a mess of the upper coaming as it fractured in half immediately and leaving it to settle created additional folds that did not disappear. I sanded the problems flat today and once all was sealed with varnish I applied a little Mr Hobby masking fluid (I know the photos show the upper coaming and right side panel in pristine condition but I elected to make a little damage there also). After the acrylic paint was dry the rubber mask was rubbed off and I was pleased with the effect.
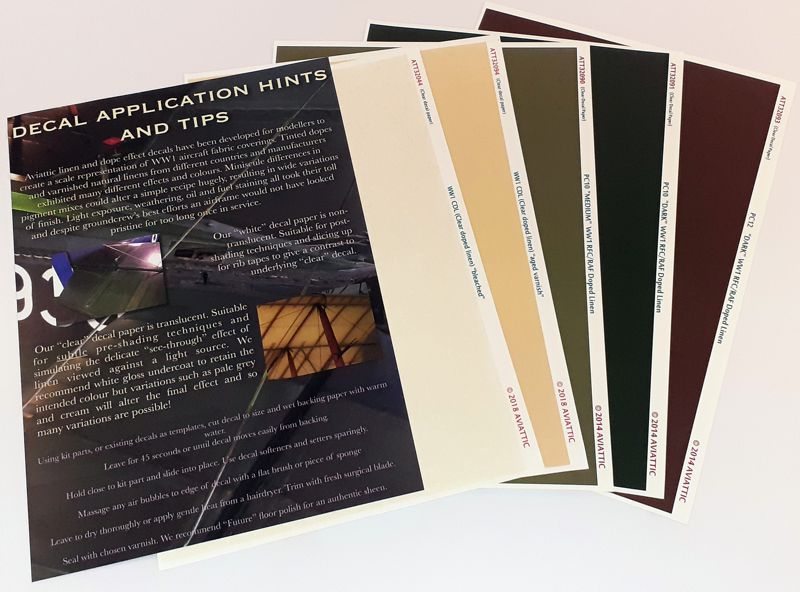
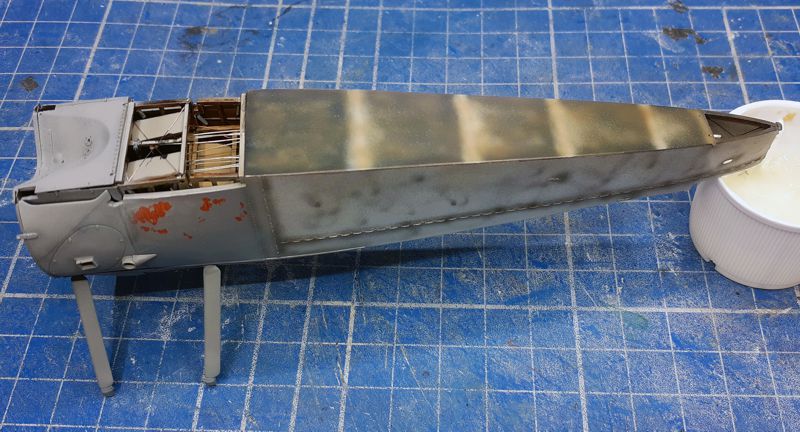

I finally got to a stage where I can start using the Aviattic decals on my Camel fuselage bottom and sides. Why the sides? Because I will be cutting the area of the Aviattic PC 10 fuselage template to replicate the missing PC 10 from MacLaren's machine. A little test first revealed that my dirty lower surface was too strong for the Aviattic translucent decal and so I went over everything with MRP Clear Doped Linen after the photo and when dry used the decals and I have to say I am well impressed with how flexible they are and easy to bed down - great product.
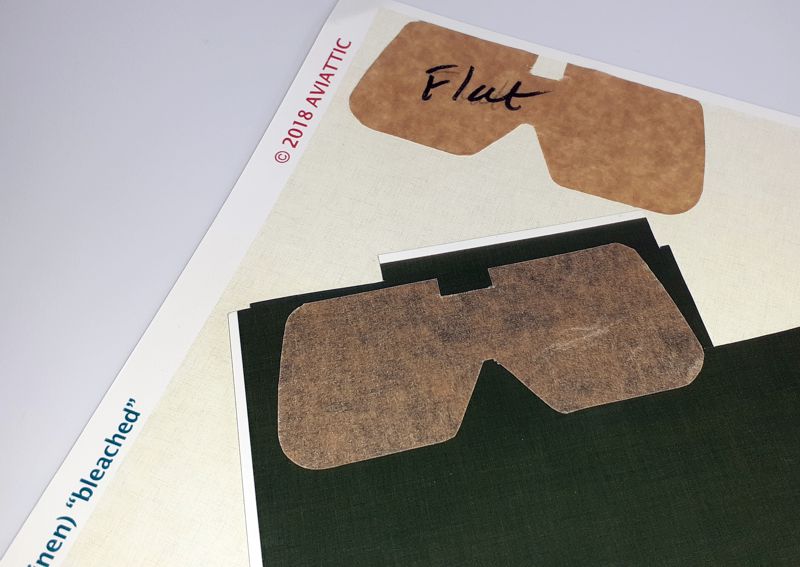
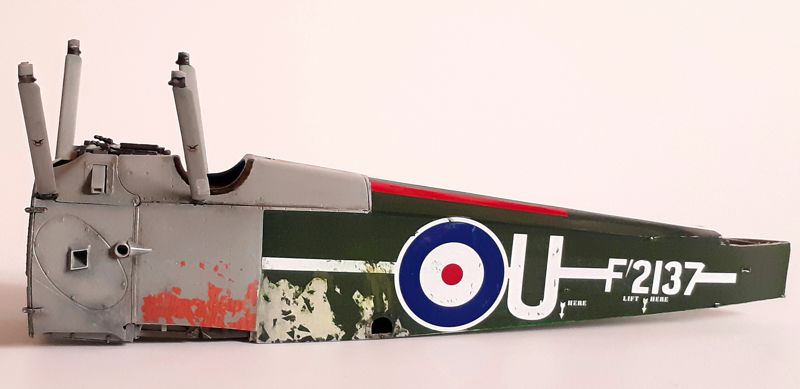
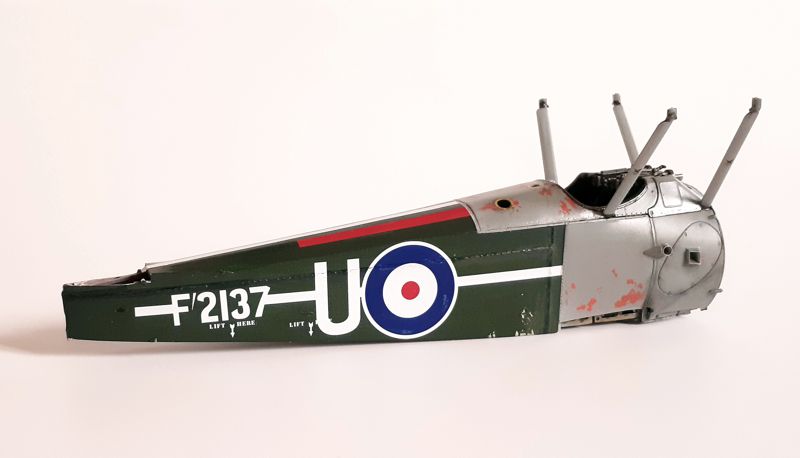
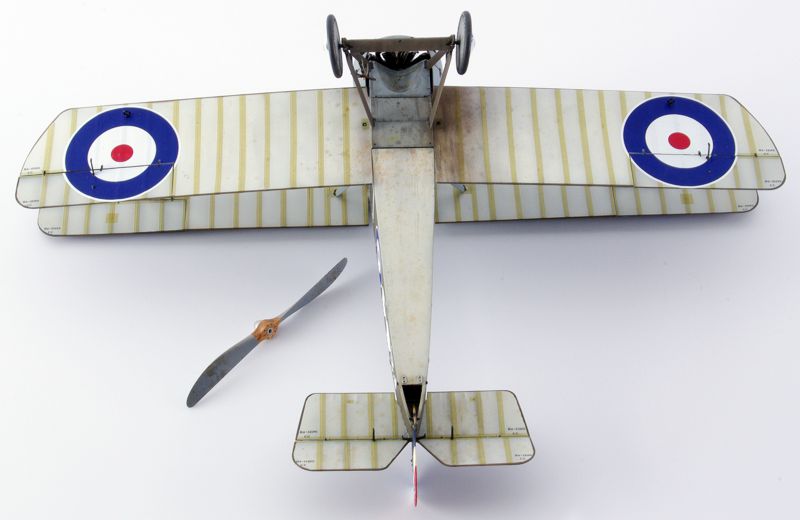
Using the Aviattic fabric decals has really slowed me up and with it being my first 1/32 WWI kit I am learning along the way what I like and what I don't like and what I can and can not do! I love how elastic the Aviattic decal material is - making it the best decal to lay over a large surface and gently push out any air with a damp cloth (I use the cloth you get with a pair of glasses). The downside of super elastic decal is the difficulty in trimming - even with a brand new scalpel blade I can not do it and have not been able to get the look I had hoped for cutting an area away on the fuselage sides to show the Aviattic CDL underneath. Reading the instructions again I see you need to use a brand new razor blade and then I discovered that trimming was easy but obviously this is no good for the paint damage I was trying to reproduce. I have really enjoyed using the Aviattic CDL over the lower wing and tail plane weathering - it really looks to my eye like it is soaked in oil. On the other hand I have had problems with the PC 10 as I made the pre-shading far too dark which shows right through the decal. I had to over-spray the ribs to make them more like the surrounding fabric as in real life. As for the trim around the bottom edge of the wings and tail plane I just could not get a paint that matched and that was a frustration but I tried my best.
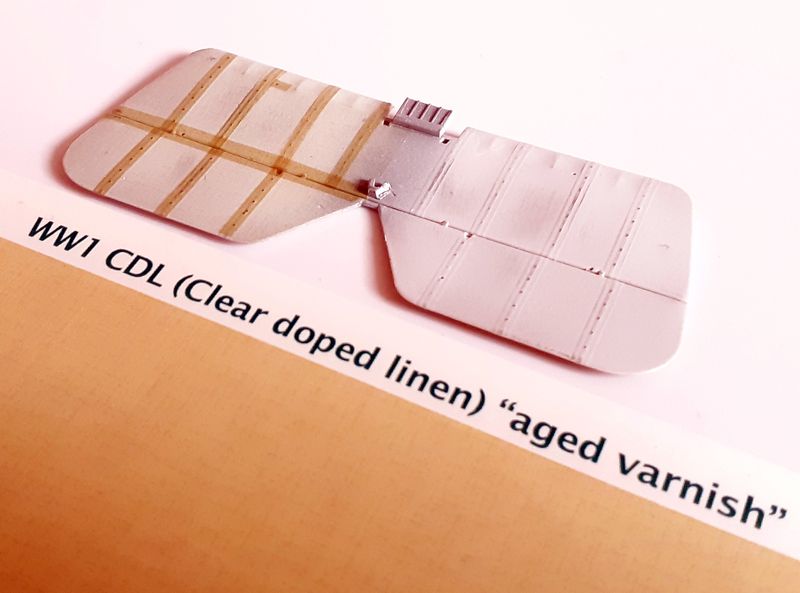
Disasters - I needed to do a little masking as the Tamiya masking tape touched the grey side panels - immediately I lost a whole area of HGW wood grain back down to its white backing paper! If that was not enough - not only was I already frustrated at my own inability to match the Aviattic PC 10 for touching in but in the clear light of the next day I discovered that the setting solution I had used the previous evening to try and bed down the compound curve of the Camel's wing leading edges had burnt the Aviattic PC 10 into a raised rubbery mess in 5 places and I found it impossible to sand the damage away or touch it in. I thus had to try and remove all the upper PC 10 decal but in doing so ruined the lower CDL surfaces that I had been so happy with! And...I nicked the Aviattic CDL on the belly and made a massive blister! I could have cried - everything was going wrong with my first ever WnW kit! Fearing that my first ever WnW kit would become my first ever 'shelf of doom' kit I did something drastic and so I took everything back down to the bare plastic and started over with another of the kits decal options on top of MRP late war PC10 and Clear Doped Linen paint. I was not through with the Aviattic decal products as all the problems with them had been of my own making and as I said I had loved the CDL lower surfaces but I had used it all and so over the top of the MRP CDL paint I applied Aviattic's 'Aged Clear Doped Linen' as rib tapes - preferring this to the white tapes often seen.
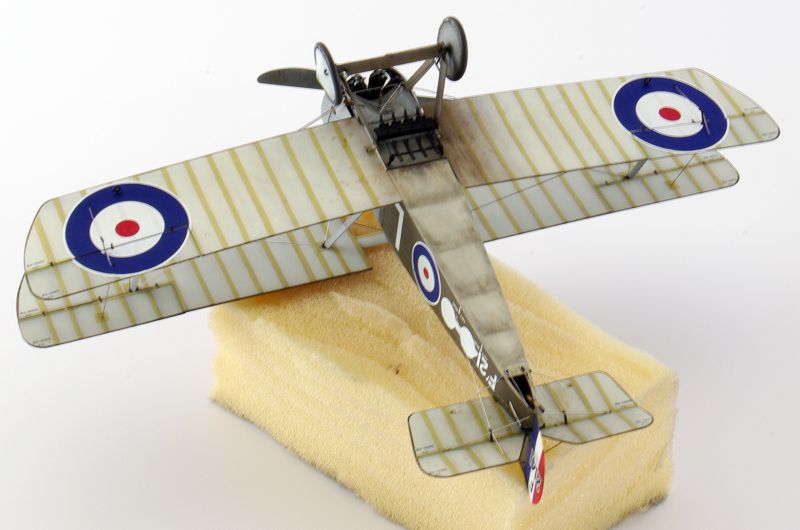
The end was now in sight although even when removing carefully the parts from the low tac masking used during spraying matt - I lost one rib tape which pulled off and part of the upper wing roundel where this brittle decal material had not bedded down enough over a raised rib! I have to say that I loved the WnW kit but hate the Cartograph decals - working with cardboard would have been more flexible.
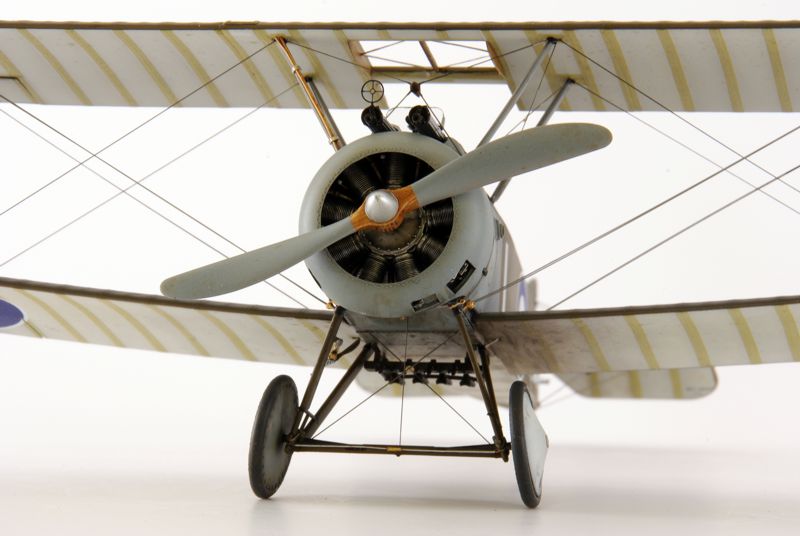

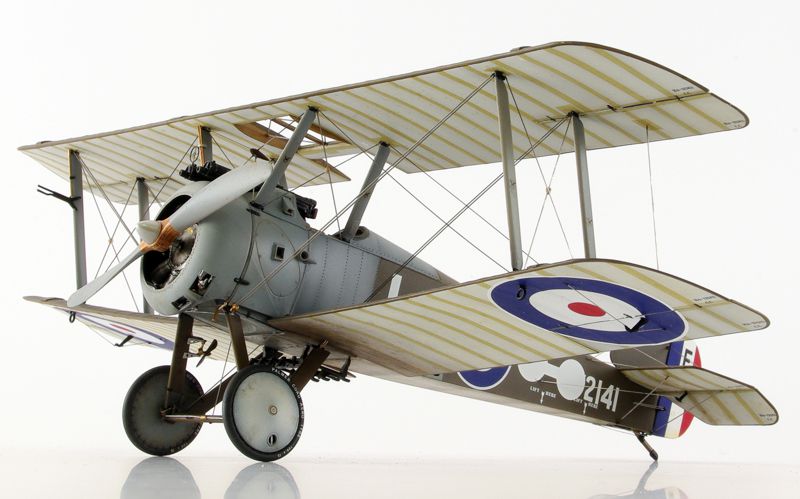
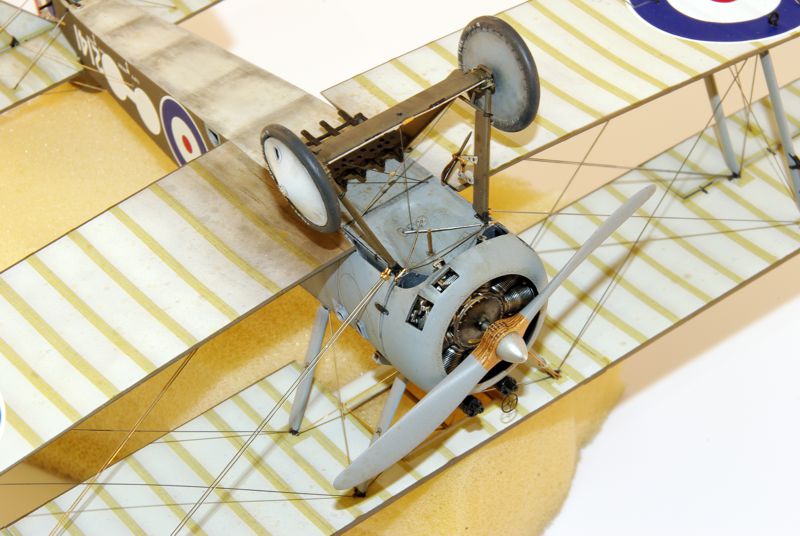
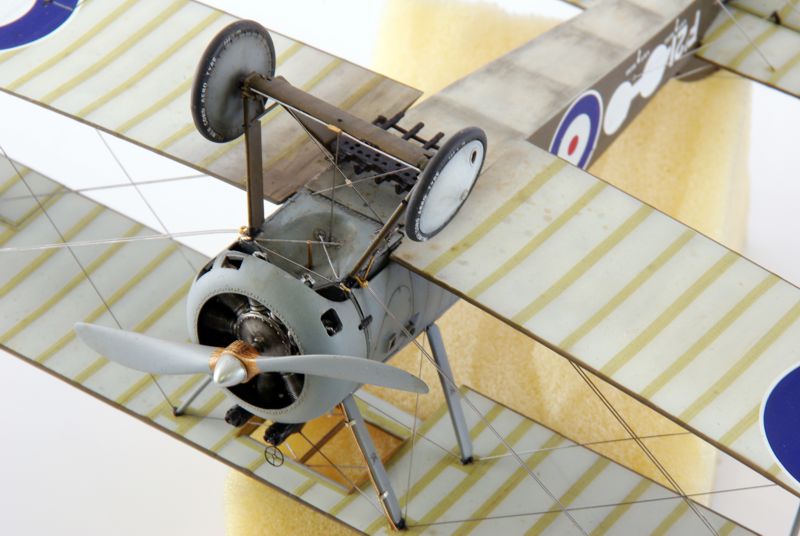
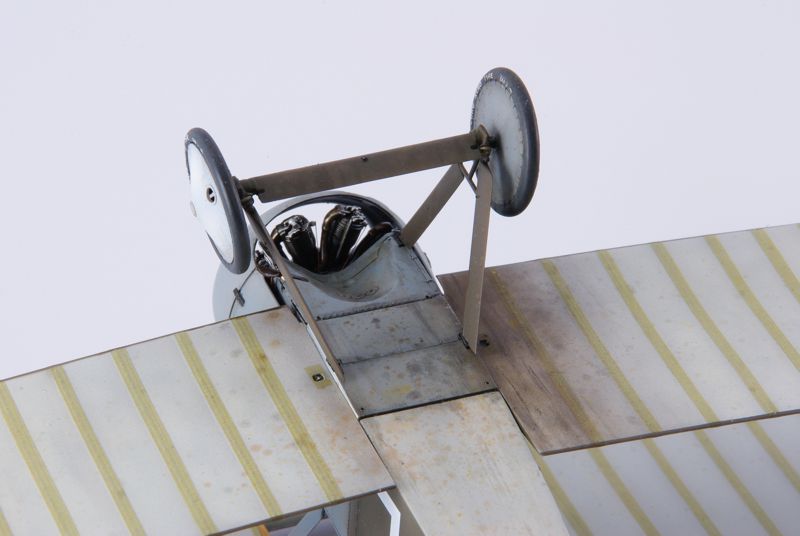
I enjoyed getting her all put together and afterwards started one of my favourite stages where I get to flick different consistencies and colours of artists oil paints all over the place and watch as the weaker mixtures soak into and nearly disappear in the matt varnish. Next up - rubbing pastel into the belly section bearing in mind the airflow effect sucking in the fabric - then on to using my drop in AIMS bracing wires. I have to say I really like the scheme of F2141 - it is nice and bright - both with the nice contrast between the grey and the white with the olive drab but also with the aircraft having the larger upper wing window as well as part of the left side cockpit coaming missing - there is in a way more light getting in everywhere.
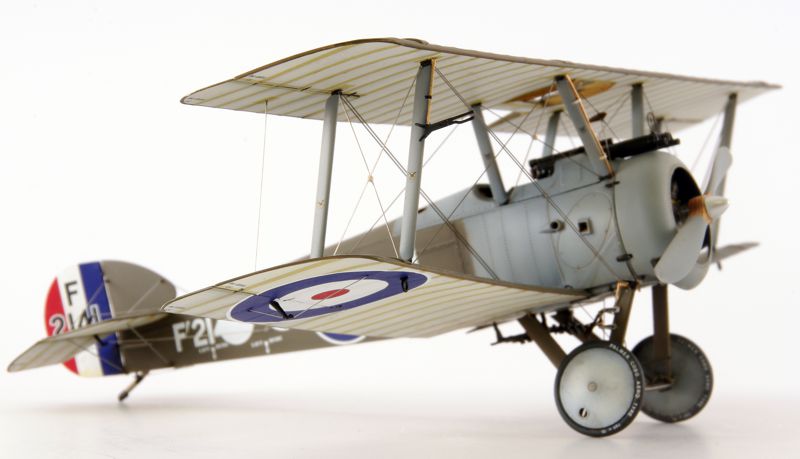
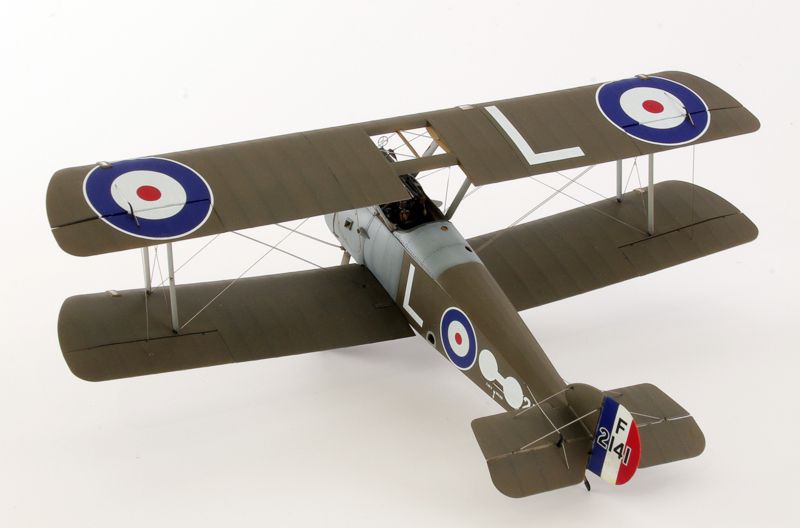
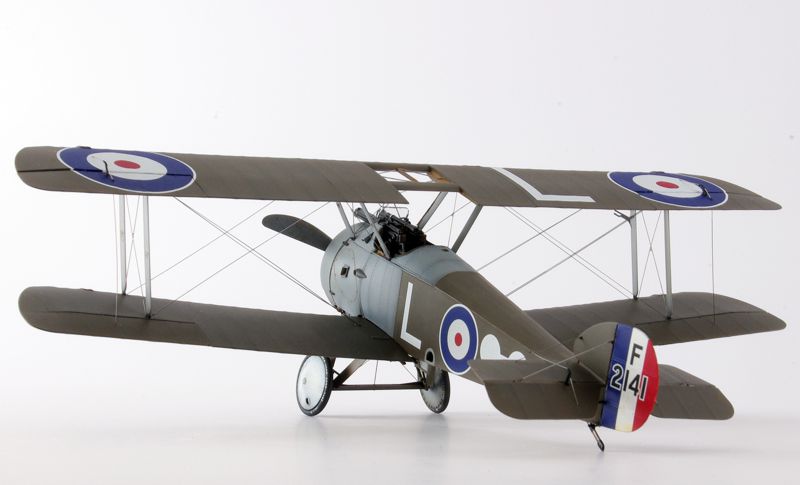
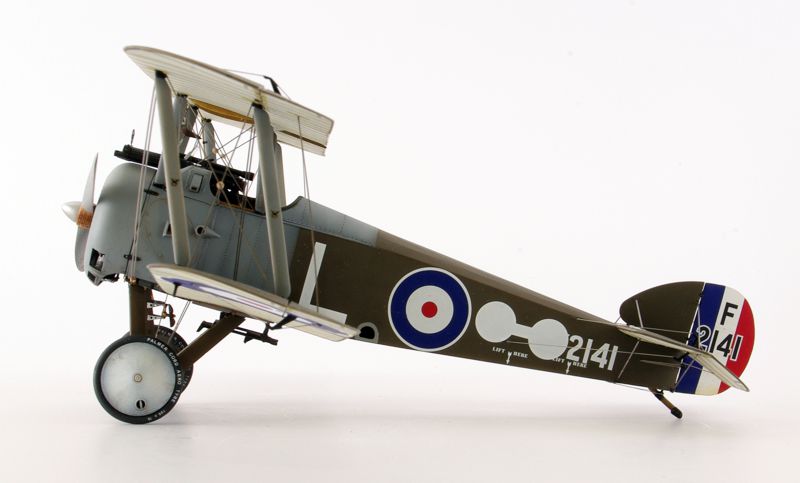
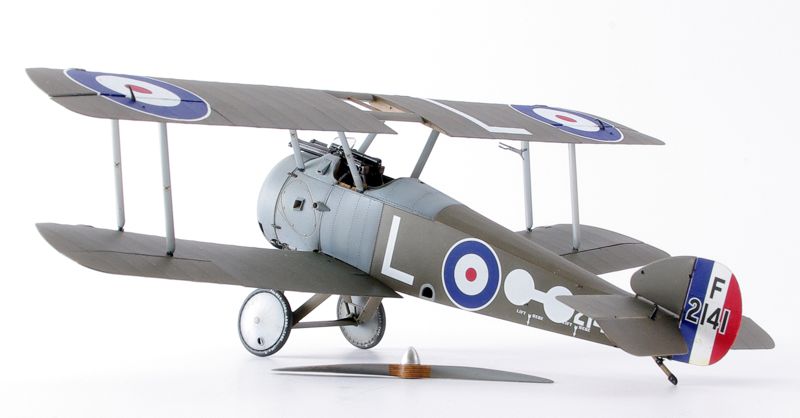
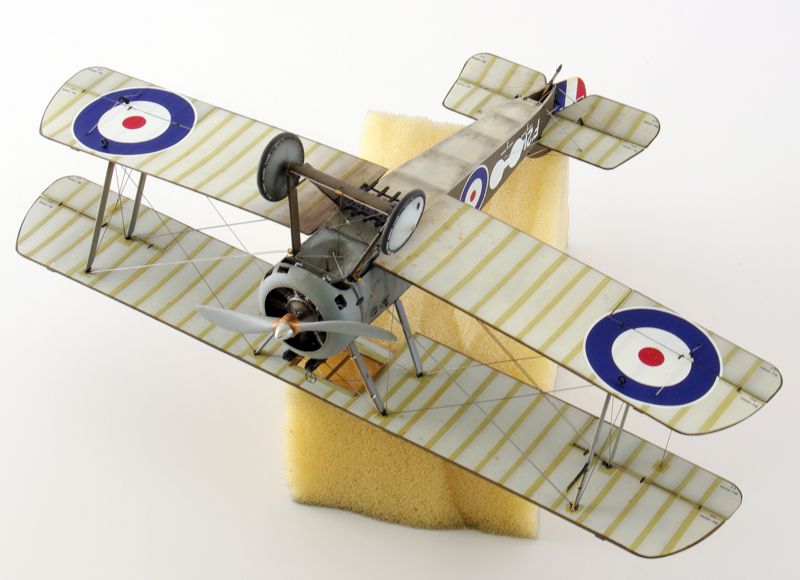
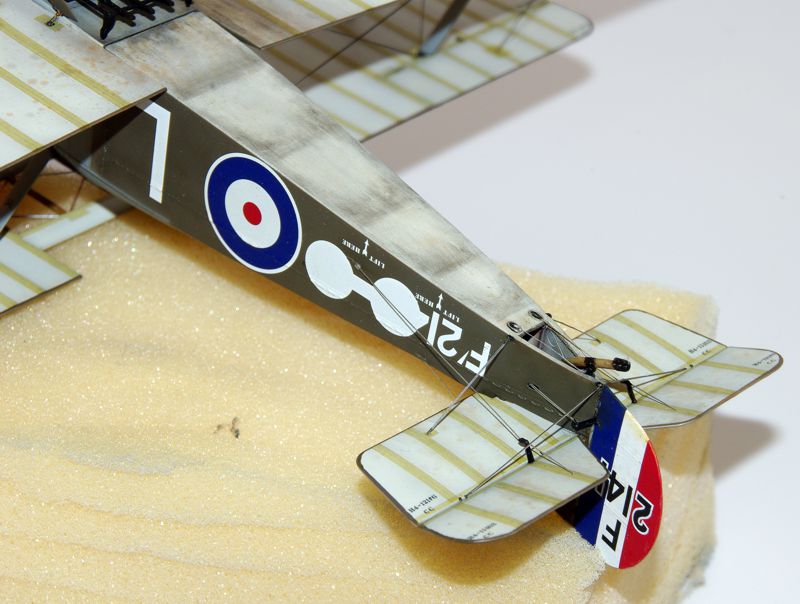
Now my first ever WnW kit is finished. It was a bumpy ride but I got there in the end with a standard and level of detail I am happy with for someone who does not major in WWI subjects. I know from watching other people’s builds that so much more could have been done - especially in the problematic area of representing turnbuckles that are not wider than the flat part of the bracing wire and so too easy to over-do but with painted pva glue and with the Gaspatch buckles doubled up for the front double wire lower connection I am happy enough. With all the problems I am having with my right hand I am happy I could do even what I have done. Thanks also to the guys at Proper Plane for the gorgeous prop - sorry I had to paint over most of it! Thanks also to Richard for the great Aviattic fabric products - sorry I made a pigs ear out of them - all my own fault and not these products - but thankfully I was at least able to make a comeback using the aged CDL for the rib tapes.
Best wishes, John.
© John McIllmurray 2023
This article was published on Saturday, June 10 2023; Last modified on Sunday, June 11 2023