
Wingnut Wings 1/32nd Felixstowe F.2a Late
By mgunn
I started this build on 11 January 2021 and wrapped it up on 17 May 2021. It was/is a very enjoyable build. I built it out of the box except for Bob's Buckles Tubes and Eyelets, Gaspatch Turnbuckles and various rigging material.
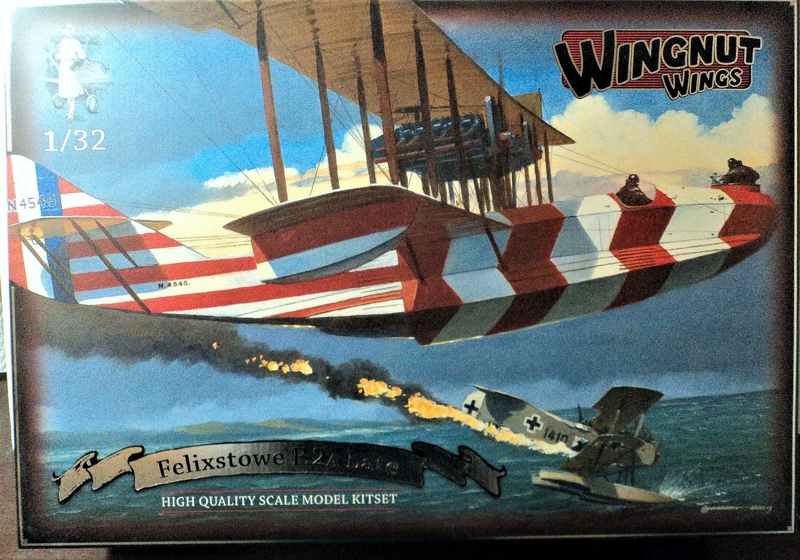
First up, the box. Great artwork by Steve Anderson. I found an inspirational image for the paint scheme I did. It varies from the instructions in that there is a natural wood panel. I thought it was pretty neat.
And of course, a source of reference:
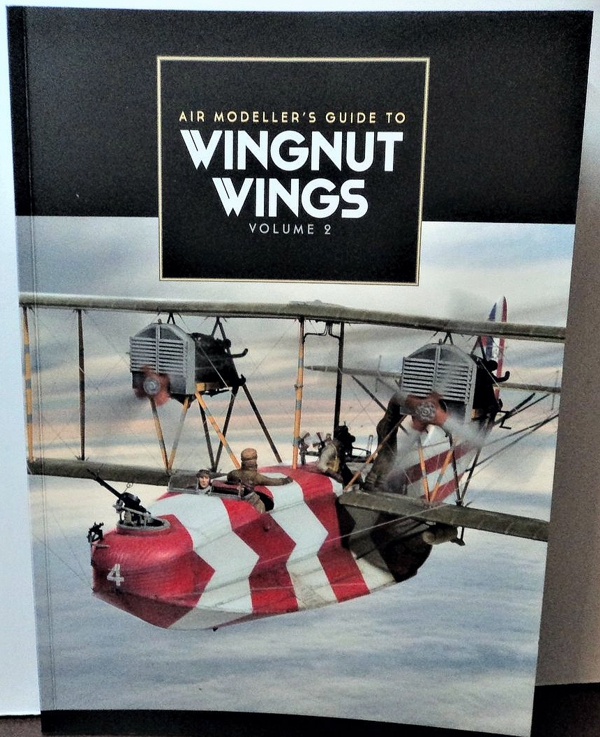
The book is a potpourri of various Wingnut Wing Kit builds, I found the section on the Felixstowe interesting and helpful.
I did not follow the steps in the direction booklet; I started with the cradle to support the hull, built the engines, guns, bombs and then moved on to the normal step by step construction.
I left the guns, windshields, and props off until the very end. The instructions would have the modeler attach the lower wings to the hull and then attach the bombs to the center section. I chose to attach the bombs to the center section prior to fixing the lower wings.
Wingnut wings offers the modeler the choice to not cement the wings to the center section to allow easy removal for storage. I think this is a great concept, but suspect the execution of removing and re-attaching the wings could preclude a disaster, so I chose to fix the wings to the center section. Otherwise, the build progressed without any major issues.
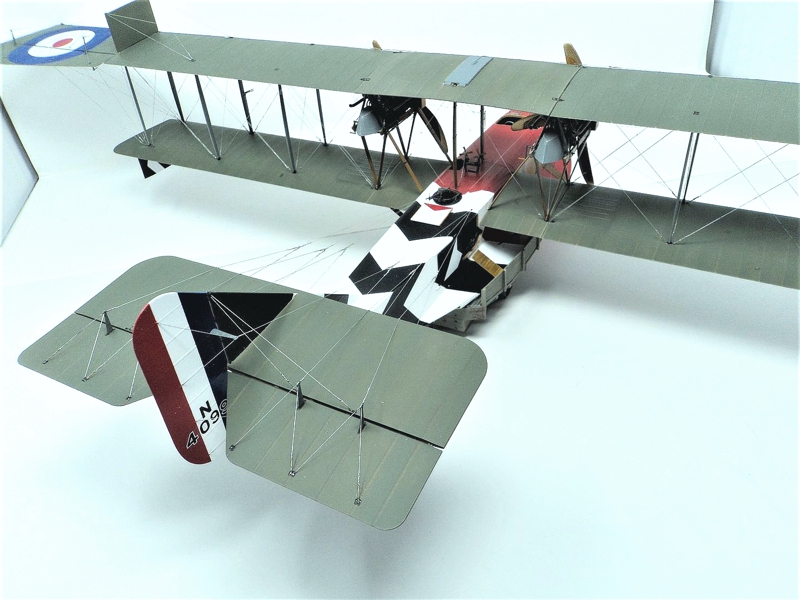
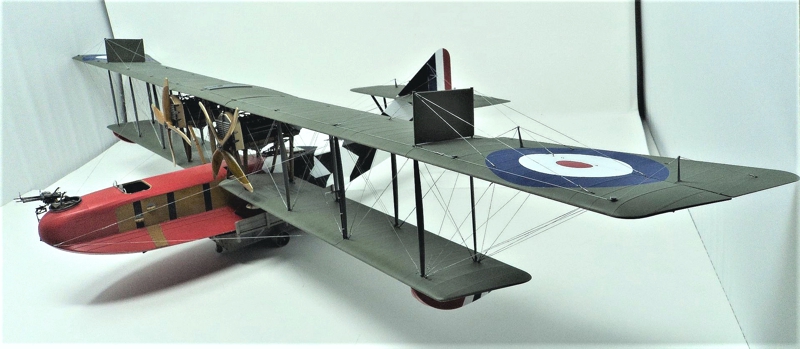
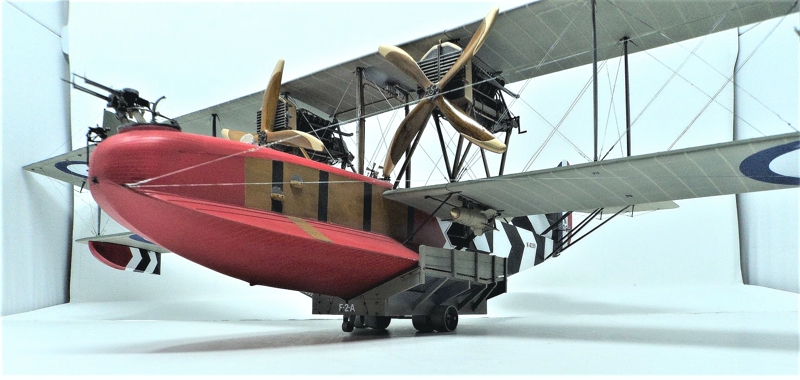
In hindsight, (always 20-20) I would paint the chevrons starting from aft and work my way forward to get the proper spacing; the same goes for the floats. I also chose to have the chevrons on the upper portion facing aft vice forward. There were really no clear images of the top of the hull, so I went with aft facing. So, on with the show.
I decided to go with unbalanced ailerons as that is what the aircraft was delivered with, the balanced ailerons were a field modification. I like the looks of the unbalanced ones better anyway.
The rigging looks complex but is actually quite painless to install. I did it as I went along.
When rigging the bays, I used a Chameleon brand monofilament for the center section and the first inboard bays for strength and rigidity, for the rest I used Infini line. I leave the struts off and pop them in one bay at a time. For the bays with the mono line, I leave the line loose, pop in the struts and then tighten. For the stretch line, I rig per normal and then pop the struts in, works pretty slick and you don't have to work around those struts. The key is to keep the struts in their order and not get them mixed up. I know. IF the modeler chooses to paint the lines silver, like I did, don't, as the line sags when painted and doesn't return to it's former tightness. Next time I will use a silver Sharpie or leave the lines black.
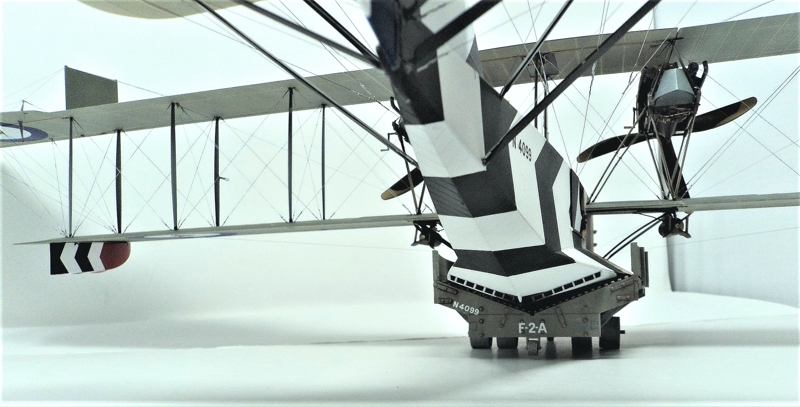
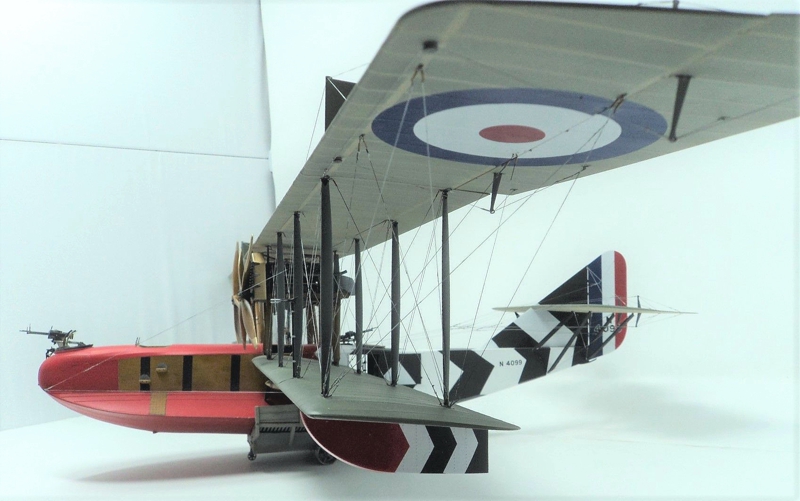
The references weren't clear as to the color of the underside: was it black or did the dazzle colors traverse the aircraft? In the model I chose to have the colors traverse the model per the painting of the aircraft.
The upper wing surface has the aileron control lines exposed. The fairleads are molded into the wing and I would imagine that WNW would have the modeler drill out the fairleads to run the line through. Well! Brilliant in concept but again a bit flawed in execution. With in the box thinking, I couldn't get a drill to drill into the material, so I cut them off and used Bob's Buckles tube. A perfect fit and now the lines didn't float but sat down nice as I was able to run them through. I added them to the undersurface as well, even though none were provided as the line didn't sag.
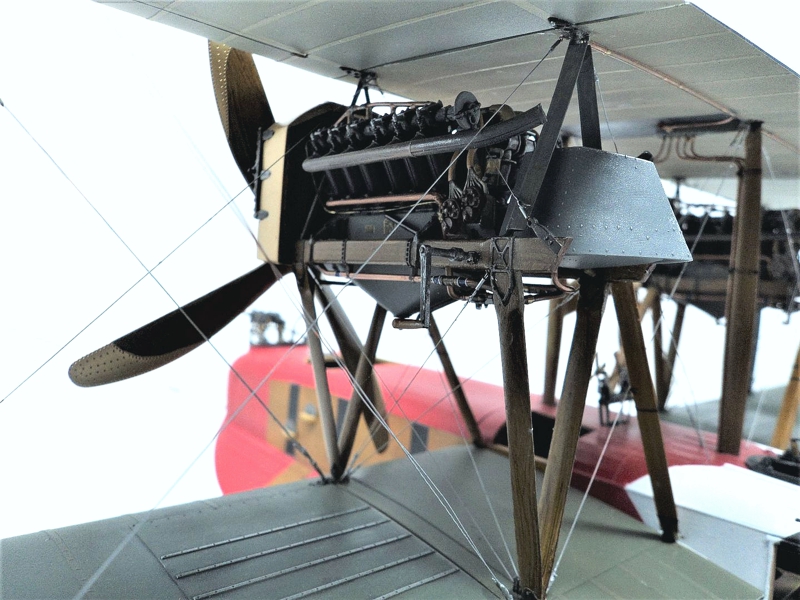
The Engines, although complex looking, were a very nice simple assembly with maximum results. Care must be taken to ensure the radiators and cranks are on the correct sides as there are pulleys that need to be located correctly. I pinned the cranks to the frame as they kept breaking off during handling.

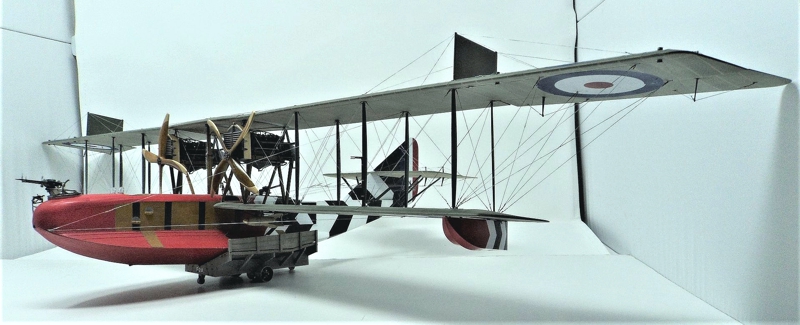
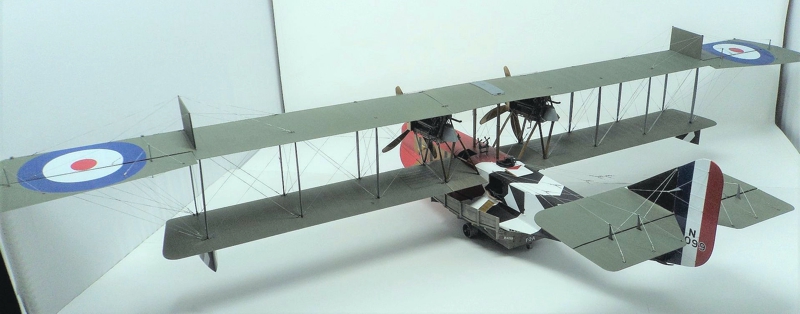
I like these "Ground View" shots as it emphasizes the size of the actual aircraft and the model. The wingspan is about three feet.

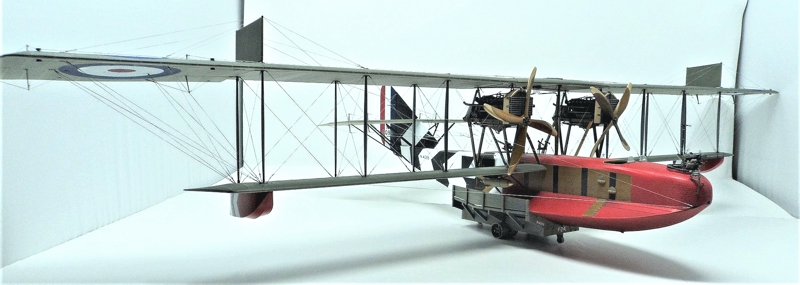
As you can see, much easier to attach the bombs with the lower wing off.
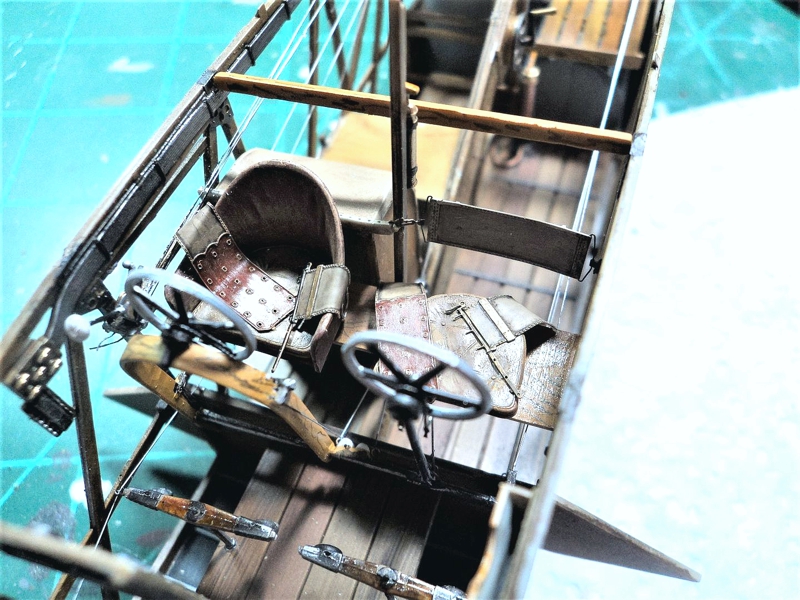
Even though not a lot of the interior will be seen, enough of it will depending on which version you are doing (Early or Late). Therefore the modeler should ensure to do as much detailing as possible, paying attention as to how the lines are routed.
Thanks for looking in.
© mgunn 2021
This article was published on Thursday, May 04 2023; Last modified on Saturday, July 17 2021