
Wingnut Wings 1/32 Gotha G.I
By Przemysław Litewka
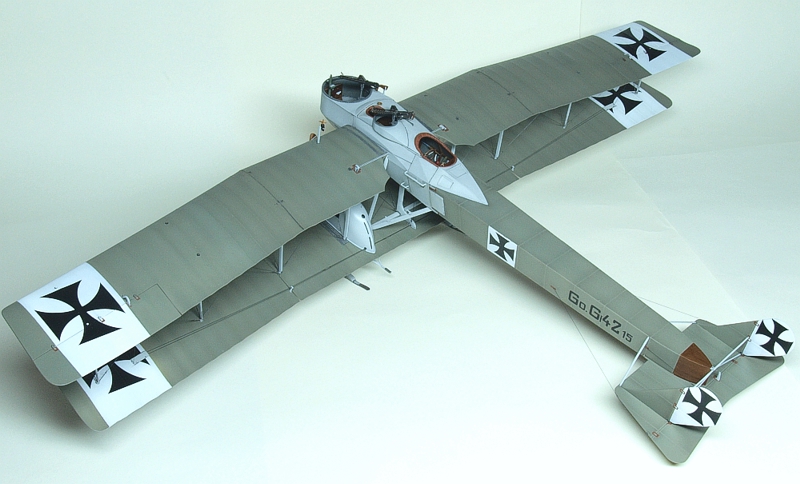
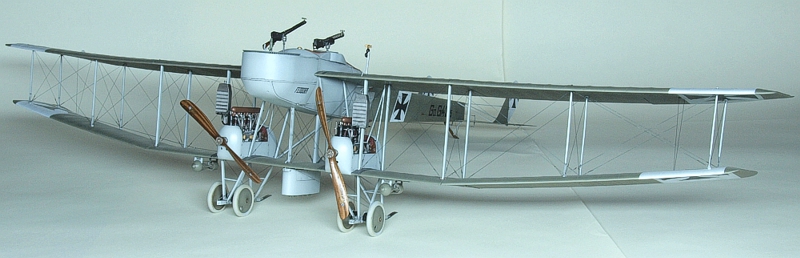
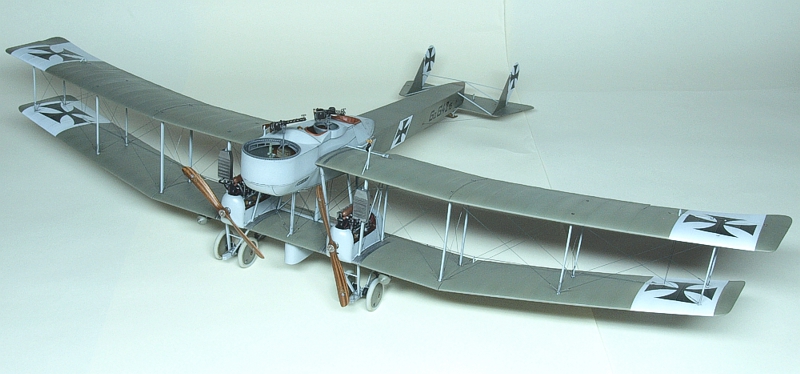
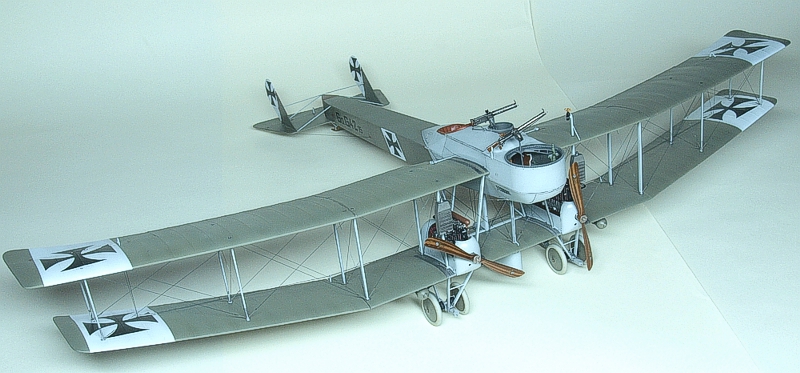
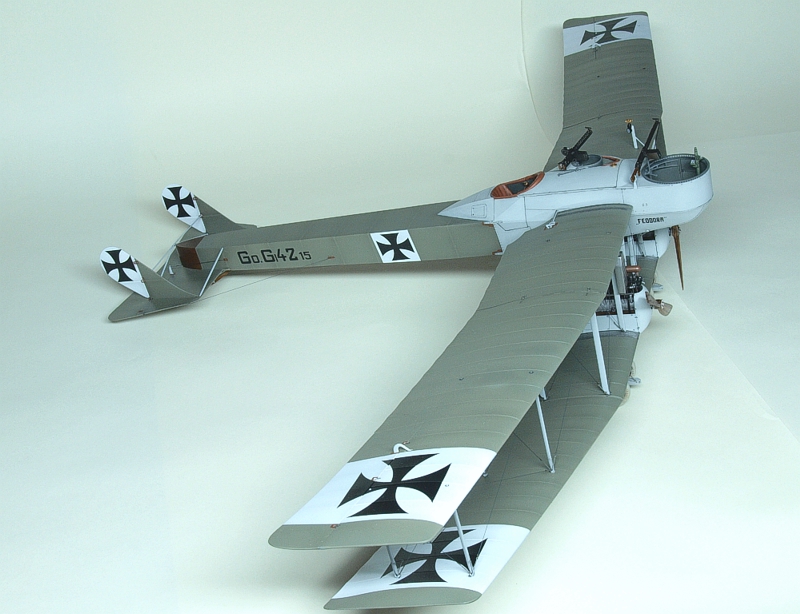
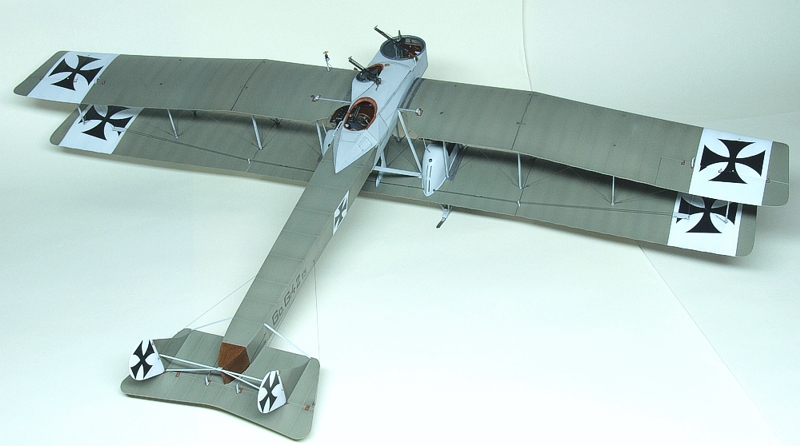
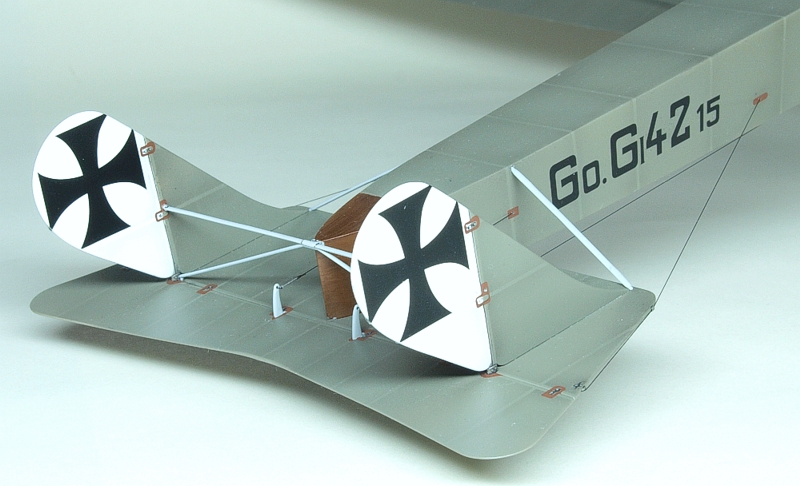
The Gotha G.I was the first type from the line of later heavy bombers used by Germany in WW1 to threaten Britain during night raids. But before those successful G.IV and G.V versions appeared the company gathered experience from earlier less efficient designs. G.I was deployed in 1915 when the ideas for using aircraft in combat were only developing. In that time one of them was to create the large and heavily armed aircraft to achieve the air superiority. Reality quickly showed that this task should be appointed to more agile, lightweight single-seat scouts and thus the idea of Kampfflugzeug failed. Yet the experience on large aircraft structures gained by Gotha company allowed to proceed to bombers. And G.I version is left in history as one of most bizarre aircrafts.
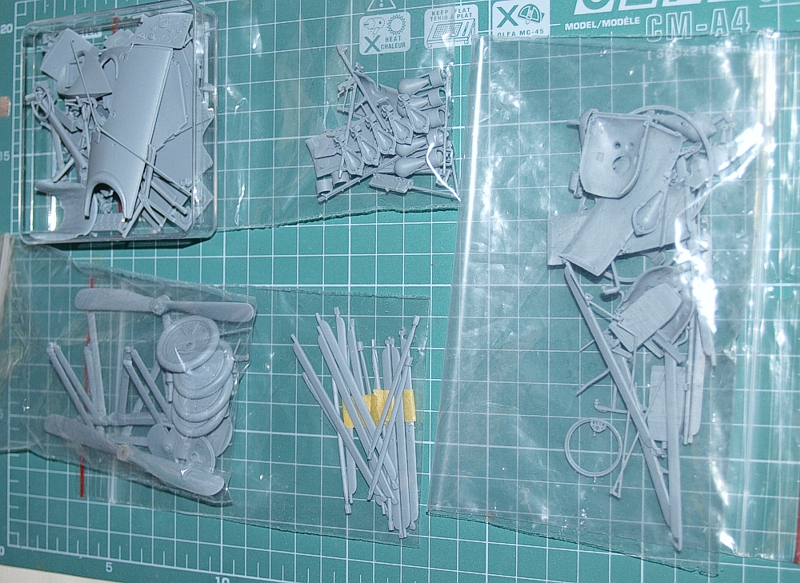
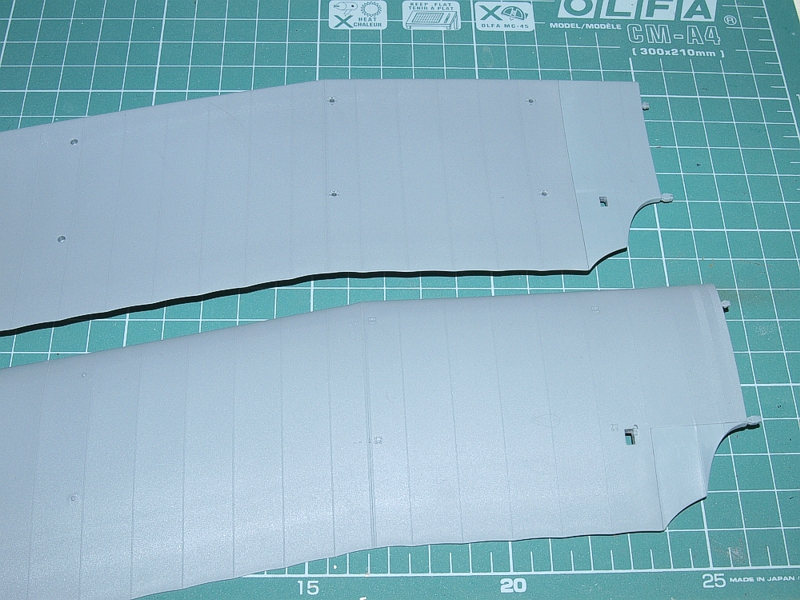
When Wingnut Wings released the kit of this aircraft the enthusiasts worldwide were very much in shock. But as for me, I decided immediately that a model of such a weird aircraft must land in my cabinet. I decided not to wait until it was available in my country but rushed to feel that thrill, which was so common a few years earlier, when the freshly released WNW kits were flying via airmail from New Zealand. And thus, I have taken this huge box with me for summer holidays. I spent several afternoons and evenings cleaning the parts from a lot of flash and traces of mould halves misplacement. Yes, I insist the quality of WNW manufacture decreased in those final months of the company existence. But even so, when you spend some more time than usual with sanding paper, files, and scalpel what emerges from that work is still top-quality kit elements with excellent fit. I managed to clean all the parts and put them thematically into separate string-bags. I had done some basic assembly, too – for instance the upper wings root bits, which required care with the seam lines. Doing this, unfortunately, I had to remove one stitch line over the rib deciding to remake it later.
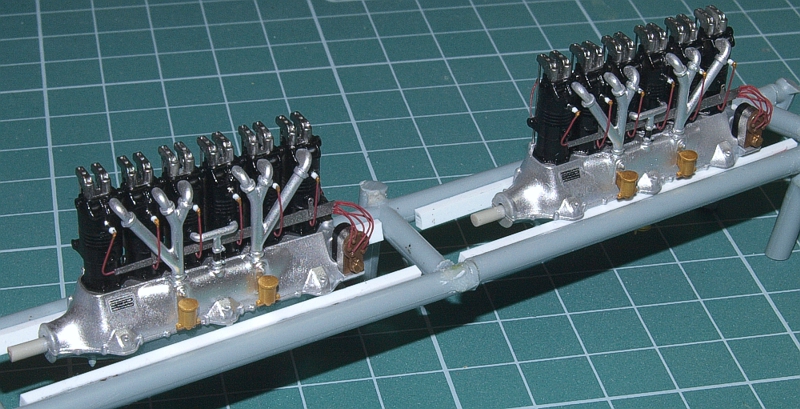
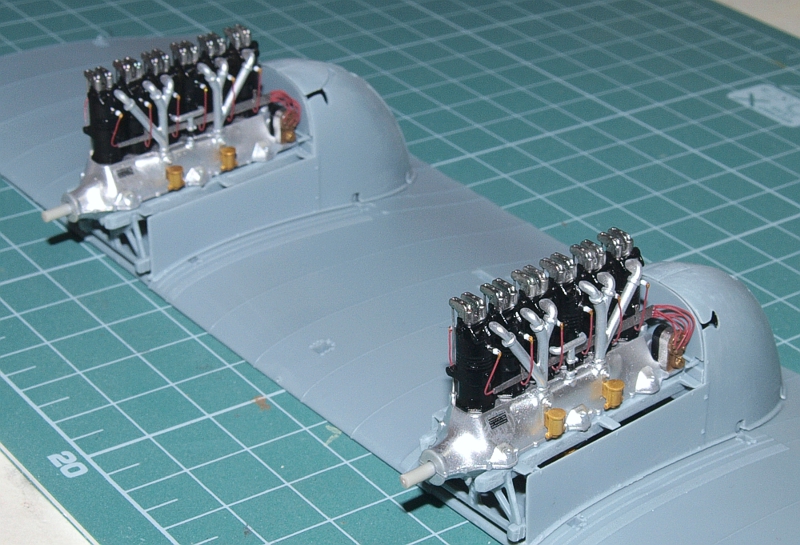
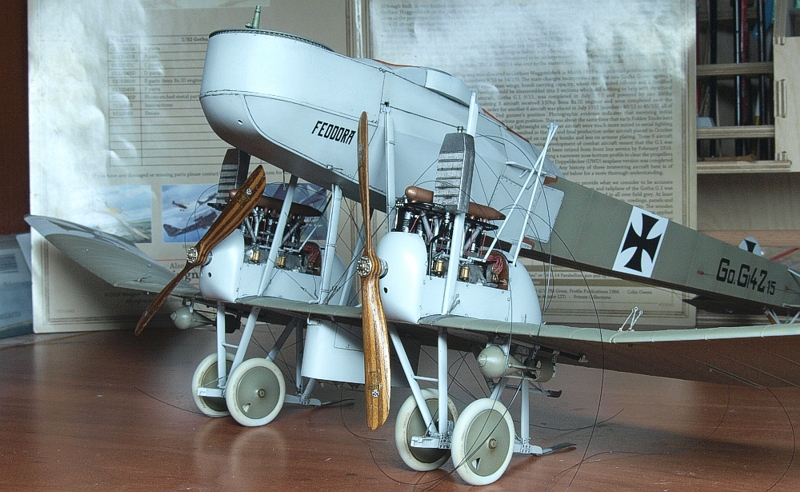
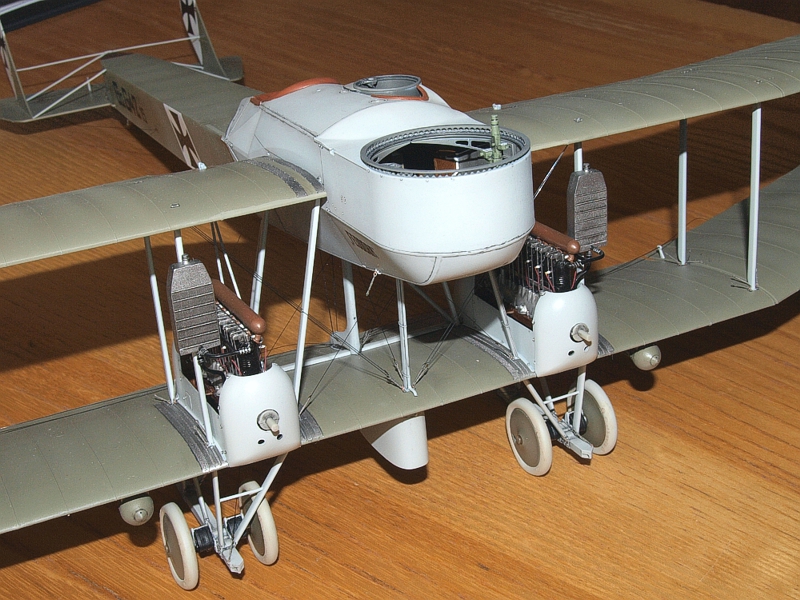
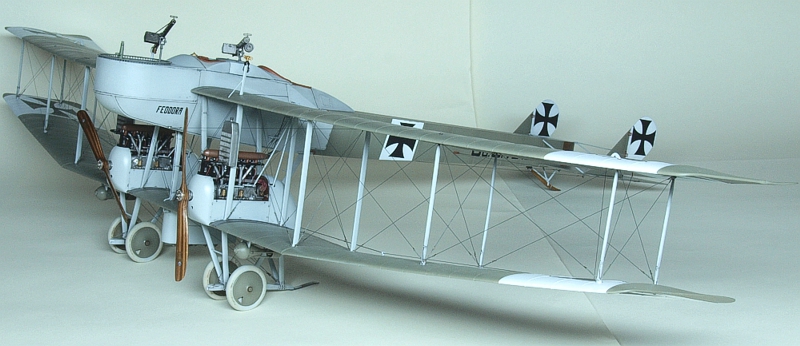
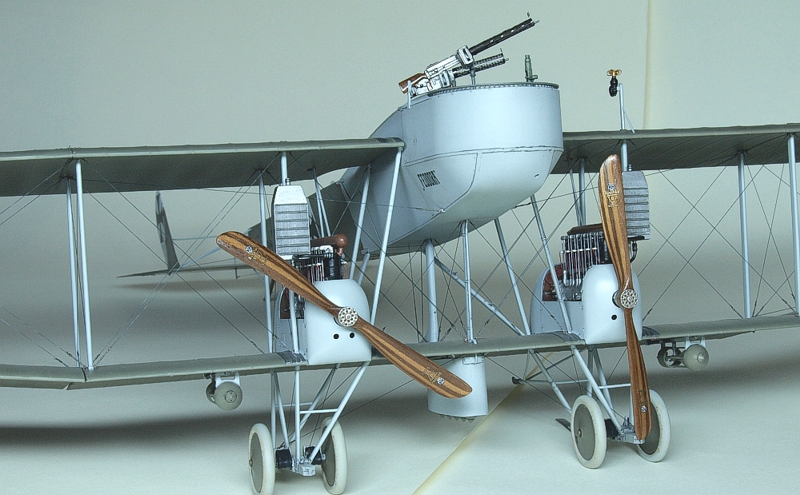
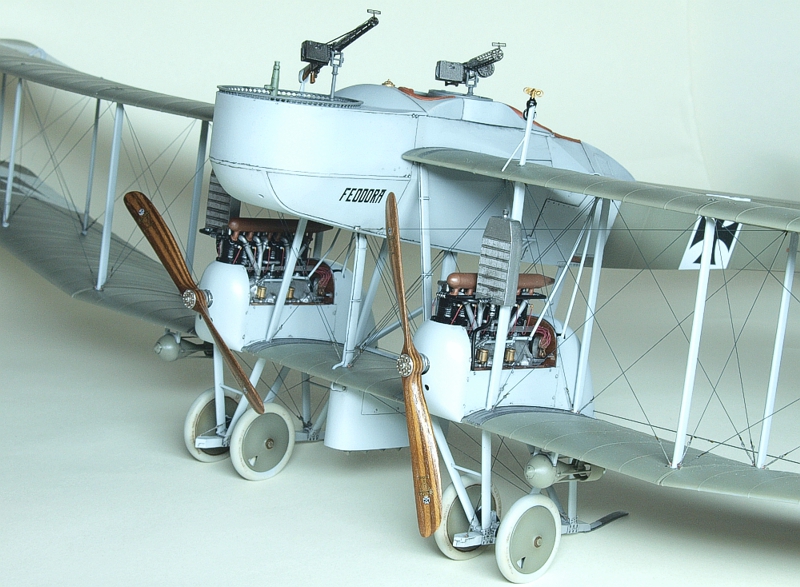
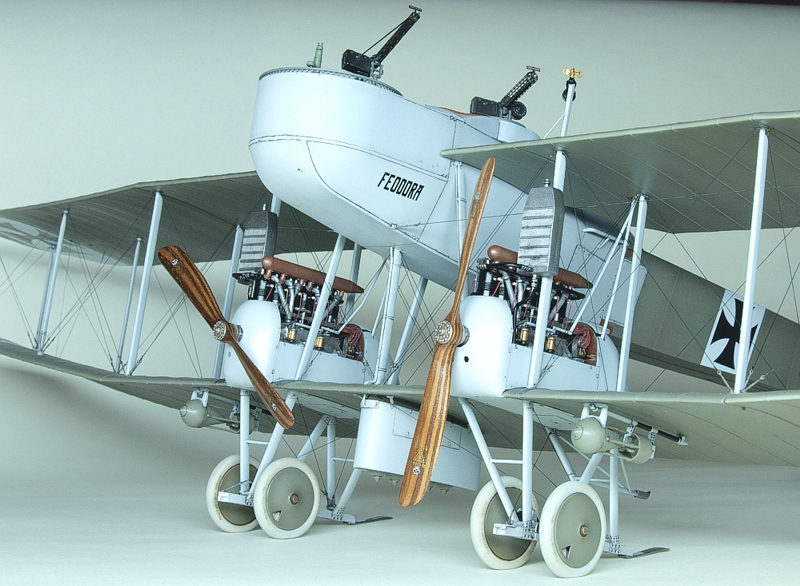
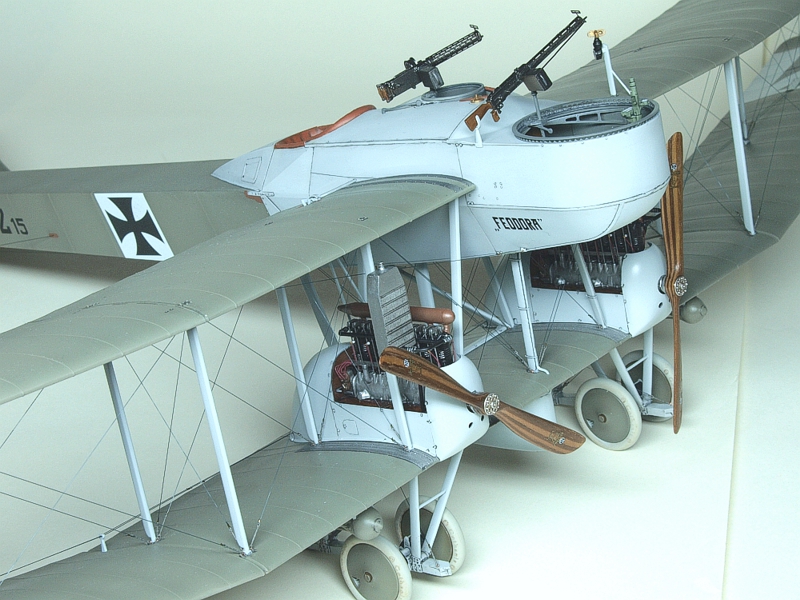
After the holidays, back home I could start with proper assembly. I decided to start with the Benz Bz.III engines where I added electric wires and valve push rods as the plan was to build the model with side engine covers off.
Then the engines were tentatively put on the bearers and test fitted with nacelles to the lower wing center section.
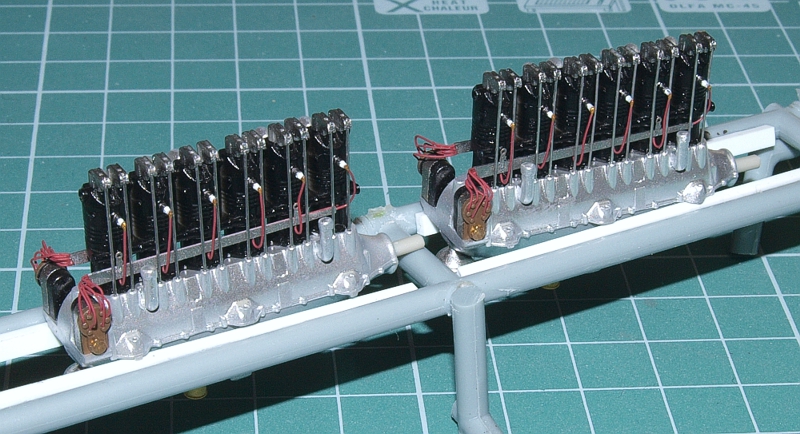
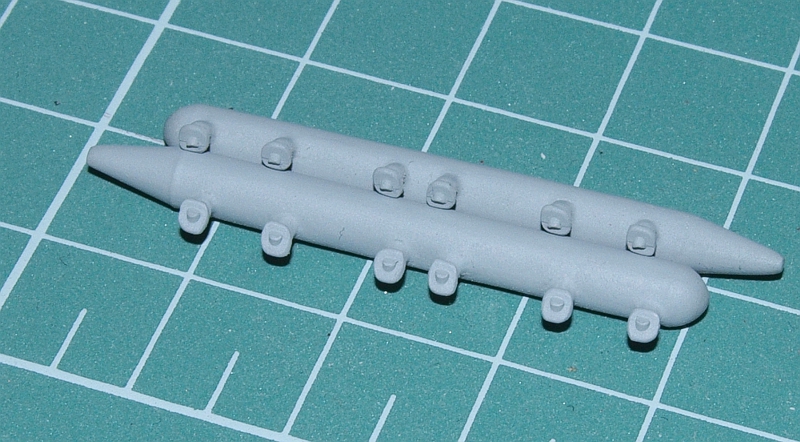
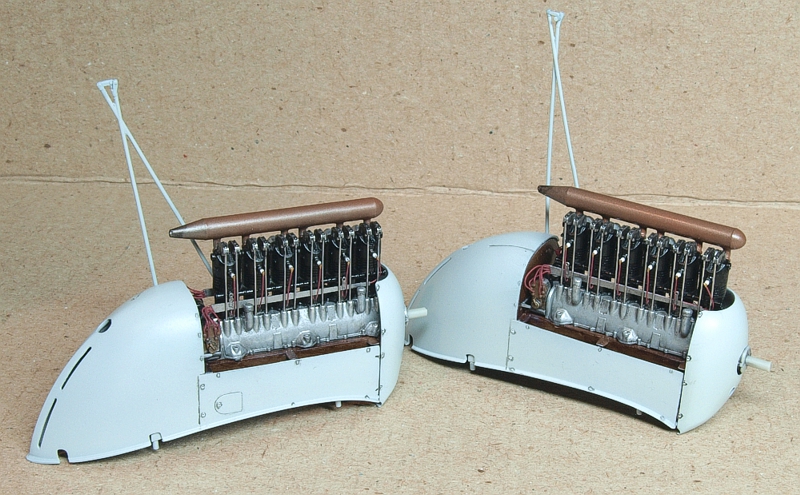
Also, some substantial filling and sanding was necessary with the late style exhausts and after a primer coat it seemed they were ready for final colouring and assembly.
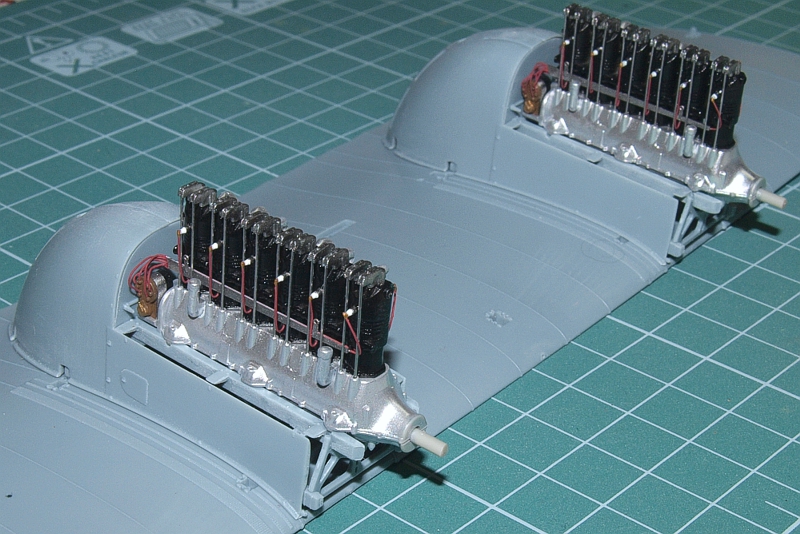
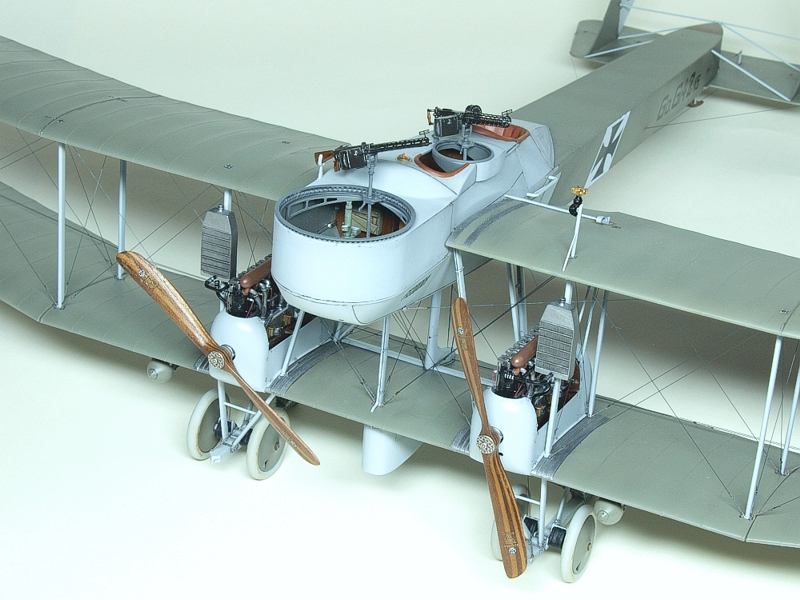
Engine nacelles were painted inside, assembled, and put temporarily on the central section and the weathered engines added to see the fit and the play of the colours.
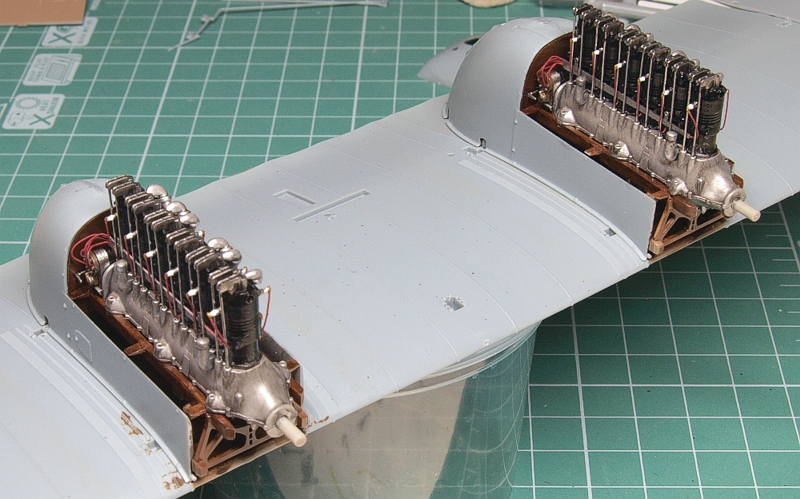
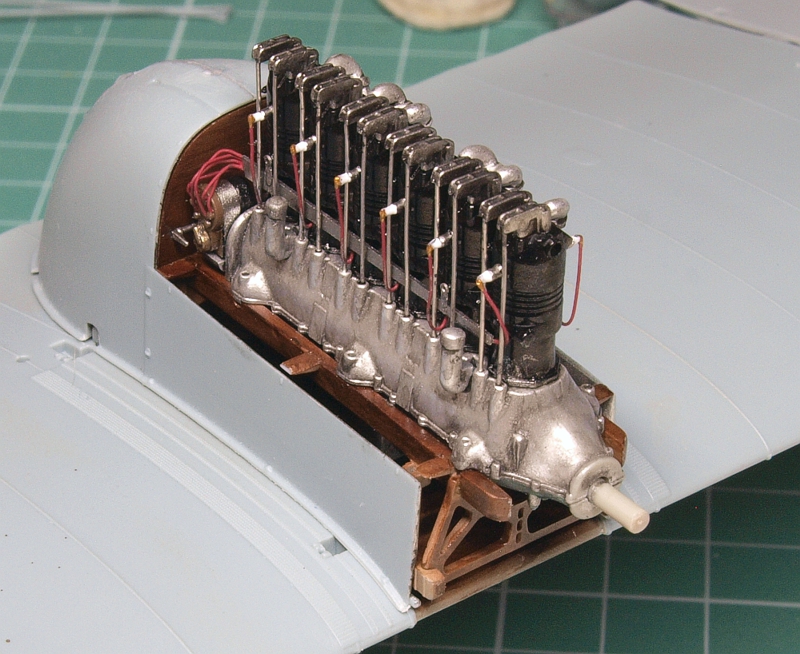

Completed engine blocks were set aside waiting to be installed. Here the front cowlings were just put on, as they could be attached for good only when the blocks were fitted to the wings. This was going to happen much later, only after the wings had the seams cleaned and holes for rigging drilled and painted.
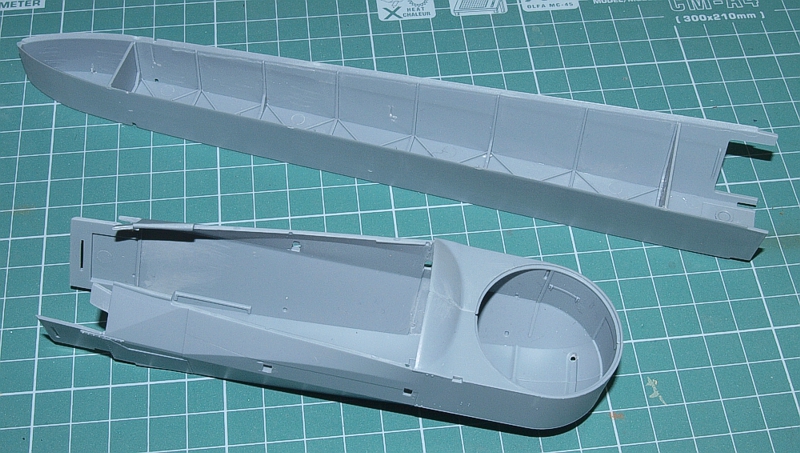
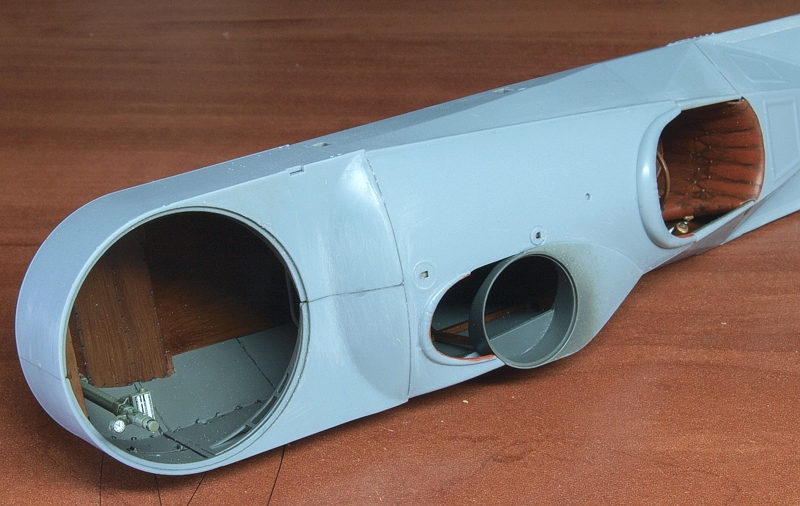
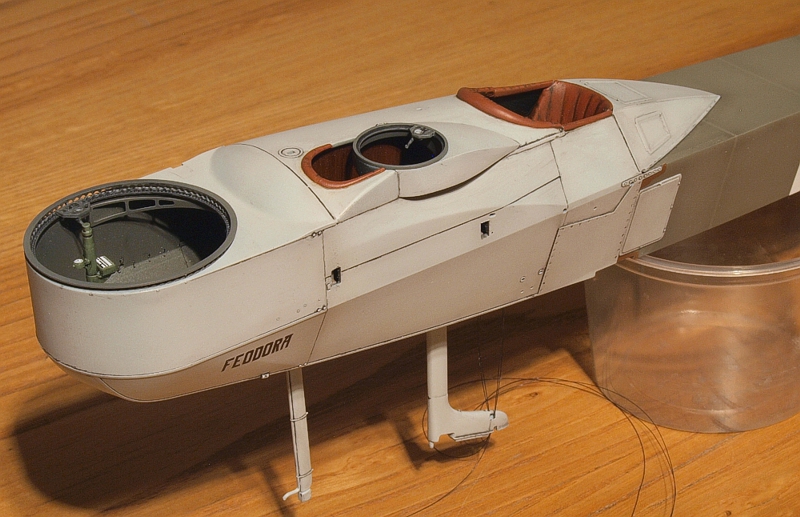
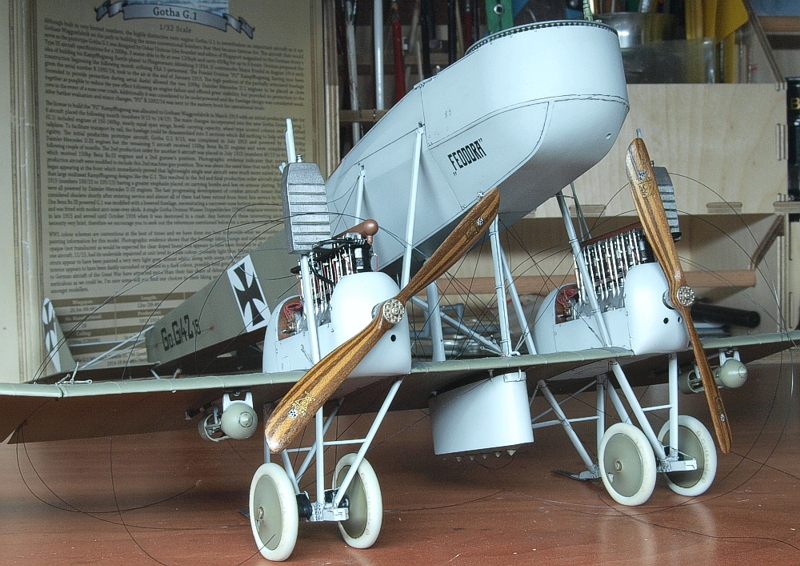
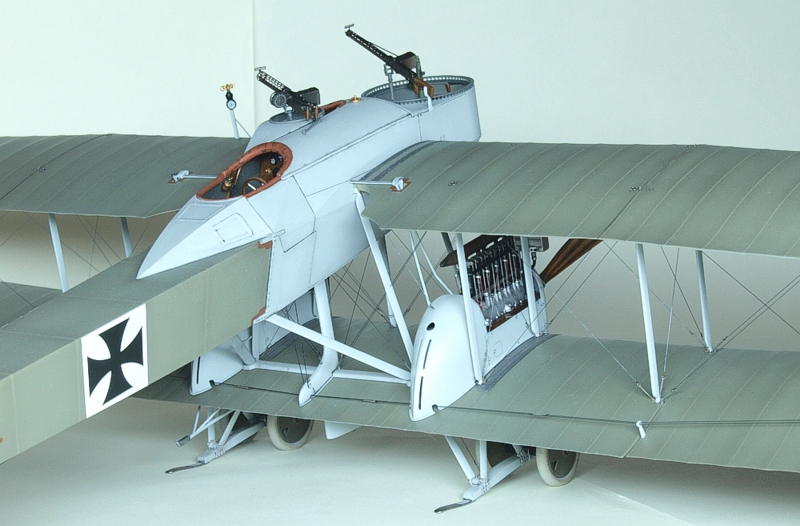
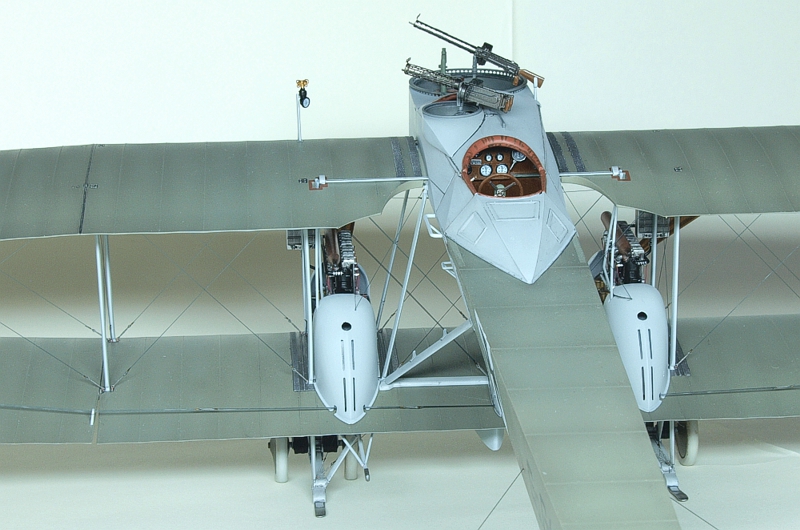
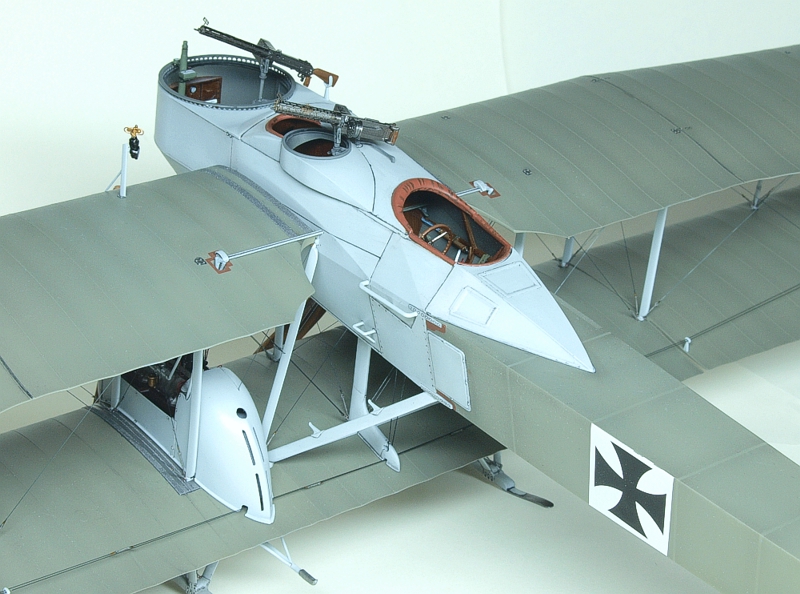
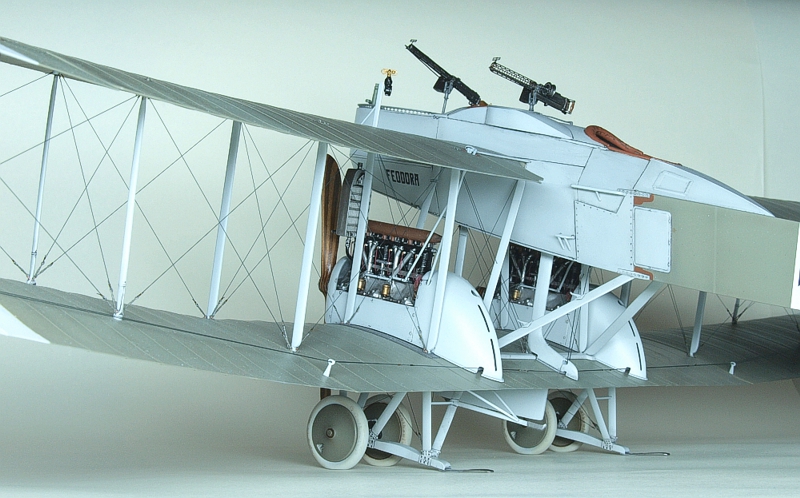
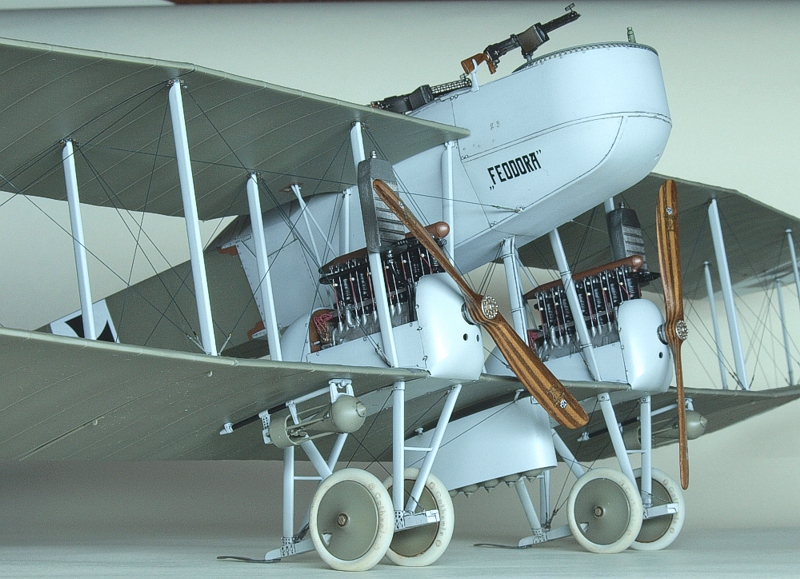
The fuselage interior was not too busy in my chosen example. It was done mostly out-of-the-box except for the control lines and the small oil pump which I lost in cutting off the truss side from the sprue and had to rebuild it from some spare parts. For the interior dark wood, I chose acrylic brown transparent paint from Minitaire range to give the final coat.
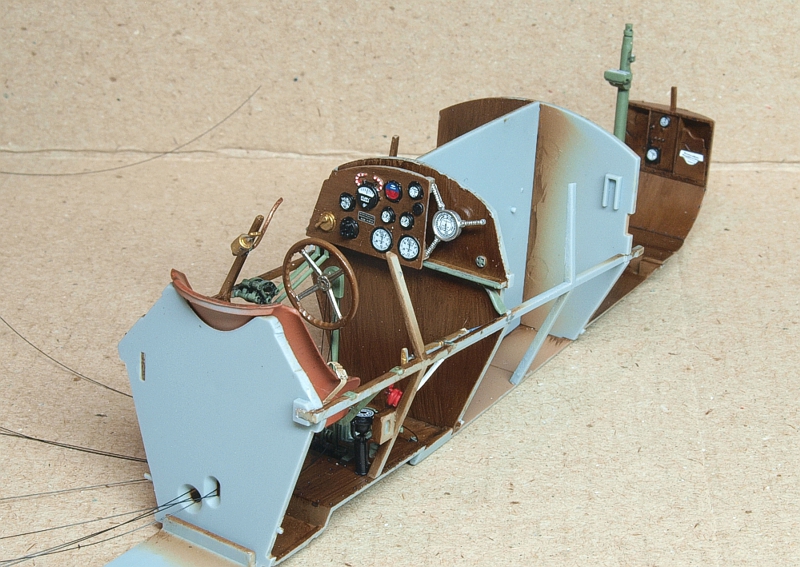
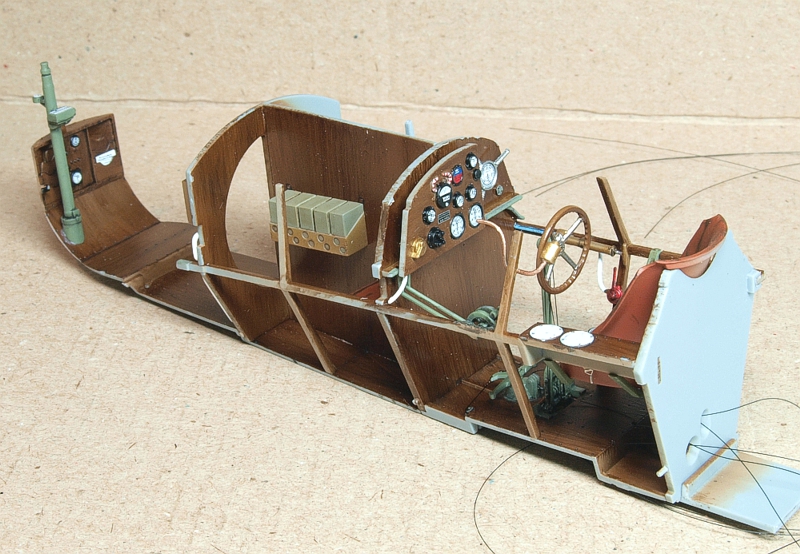
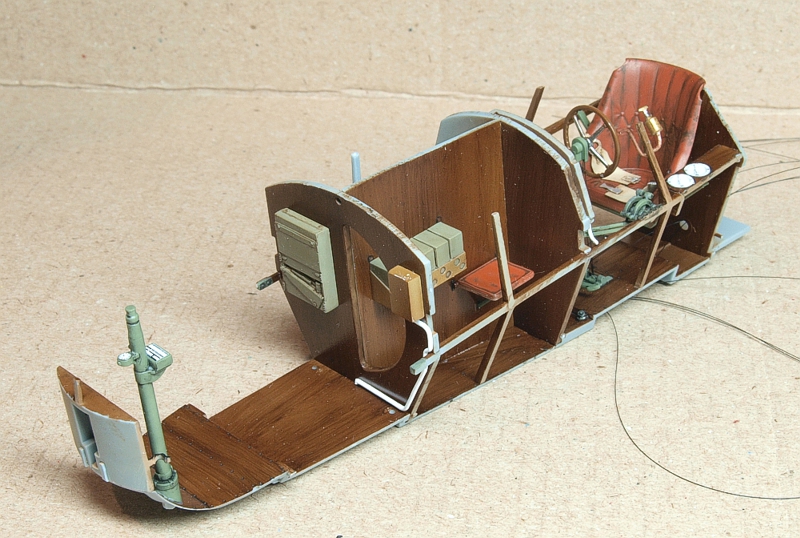

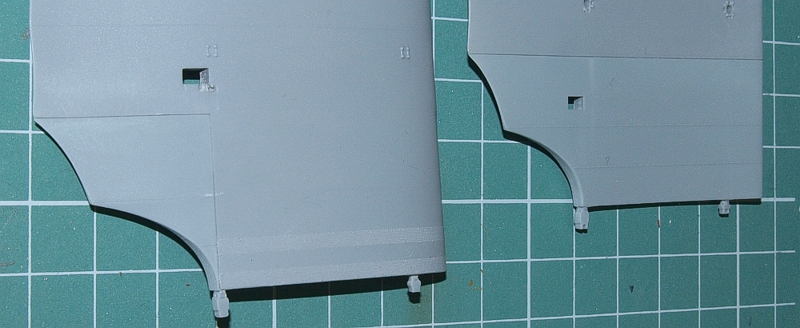
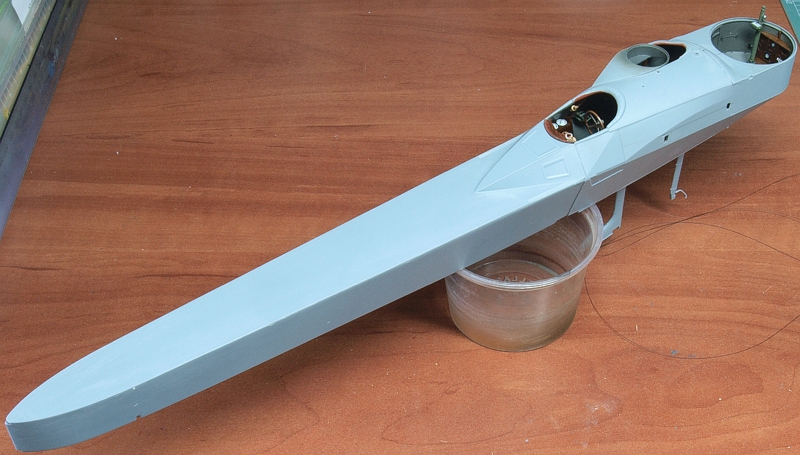
Then the fuselage could be assembled, the cockpit innards buried inside. The fit was very tight, and I actually did not manage to get rid of the slots. They were filled with the liquid CA glue (visible as dark lines), sanded, and tested with some primer later. The upper cowling and the fuselage rear also had their seams treated likewise.


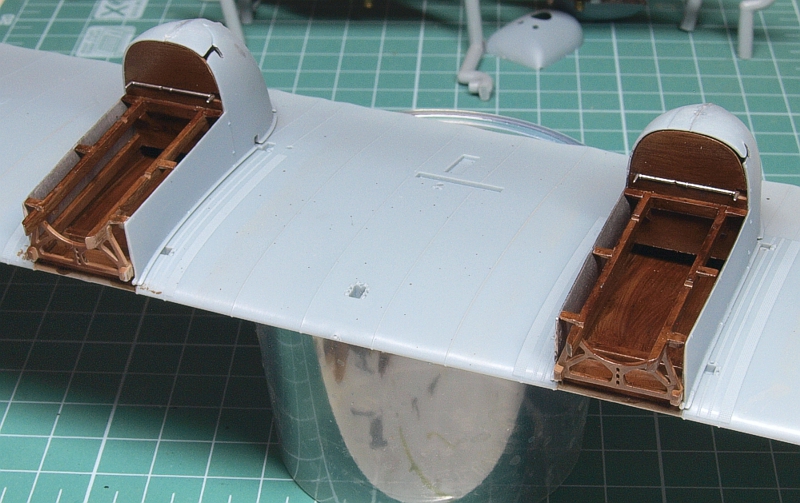
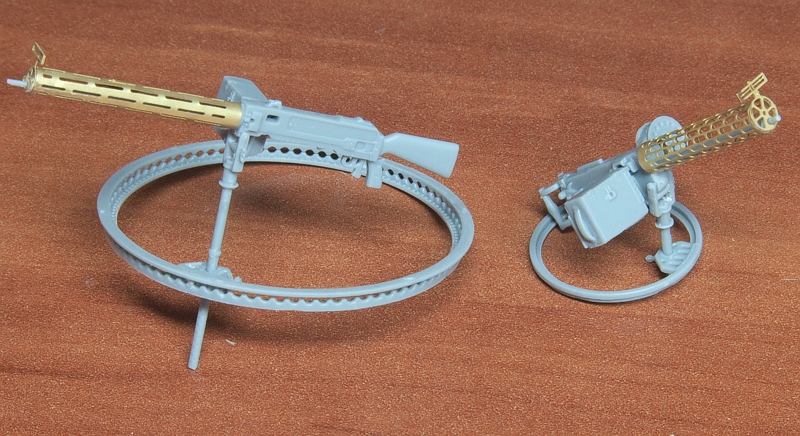
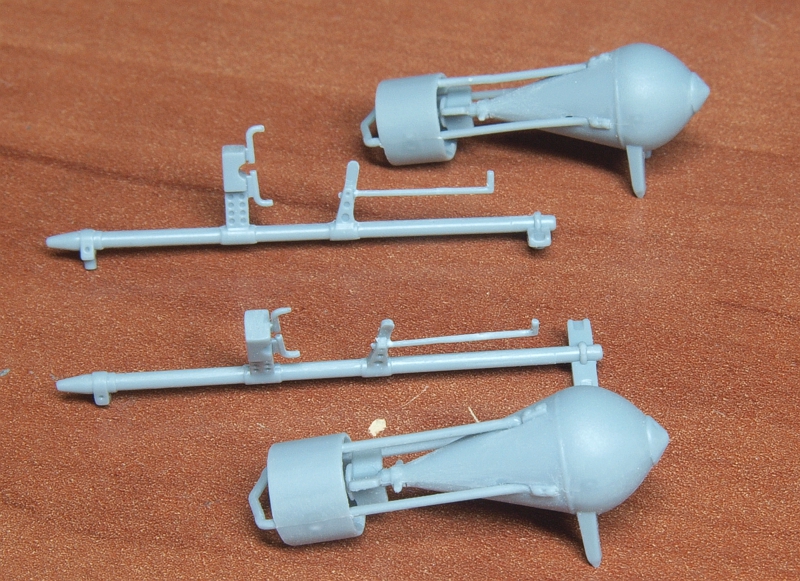
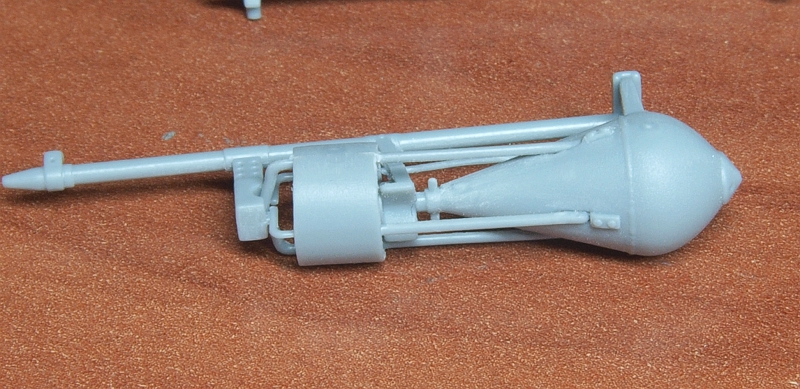
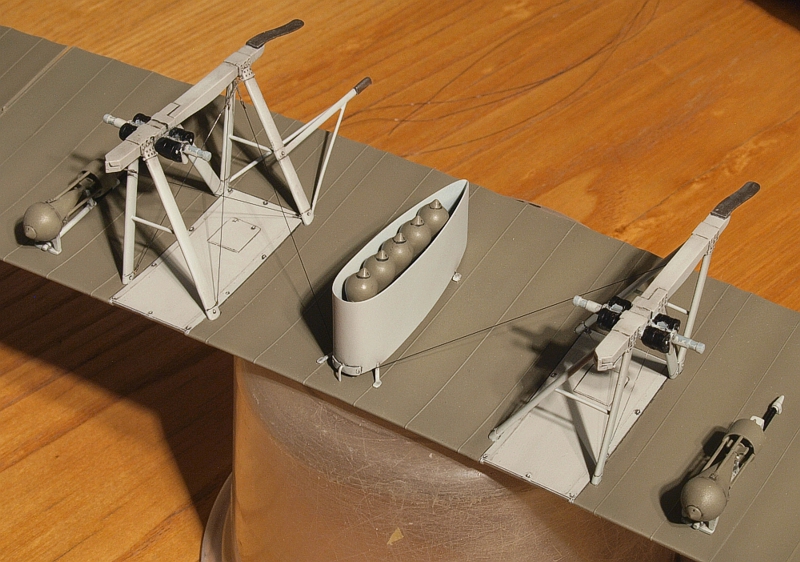
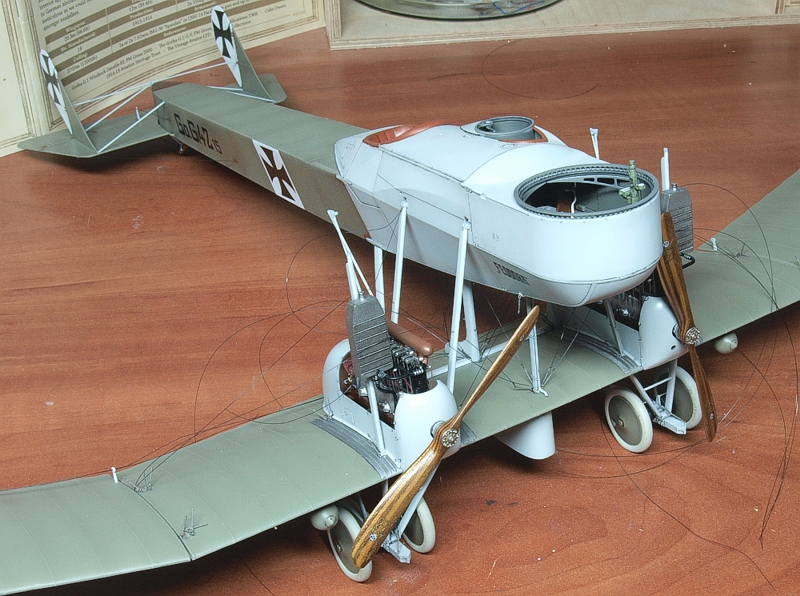
Then I prepared the gunners armament and the ordnance. The latter required some care with the joints. This concerned the bombs and the central fairing. Here the WNW plan to install the bombs and then join the fairing halves would cause problems with sanding the seams and masking for airbrush. So, I cut half-open the mounting holes to u-shape which allowed me to slide the bombs load after treating and painting the fairing.


Two main 50kg bombs were also designed in a weird way. The racks had some bits which were bomb parts and vice versa – a painting problem again.
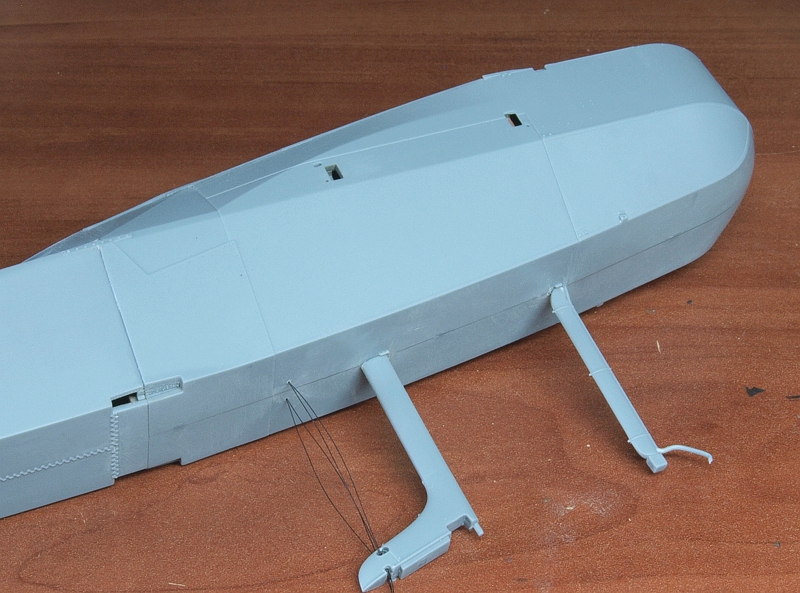
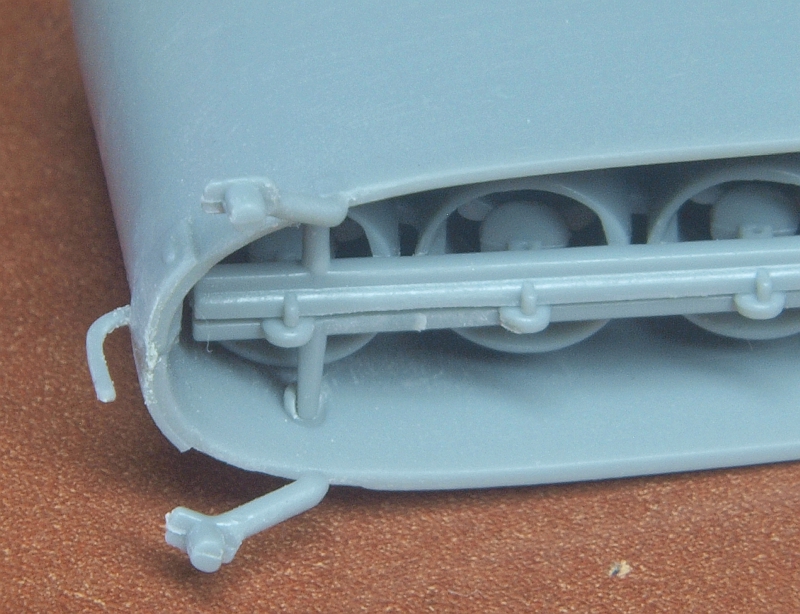
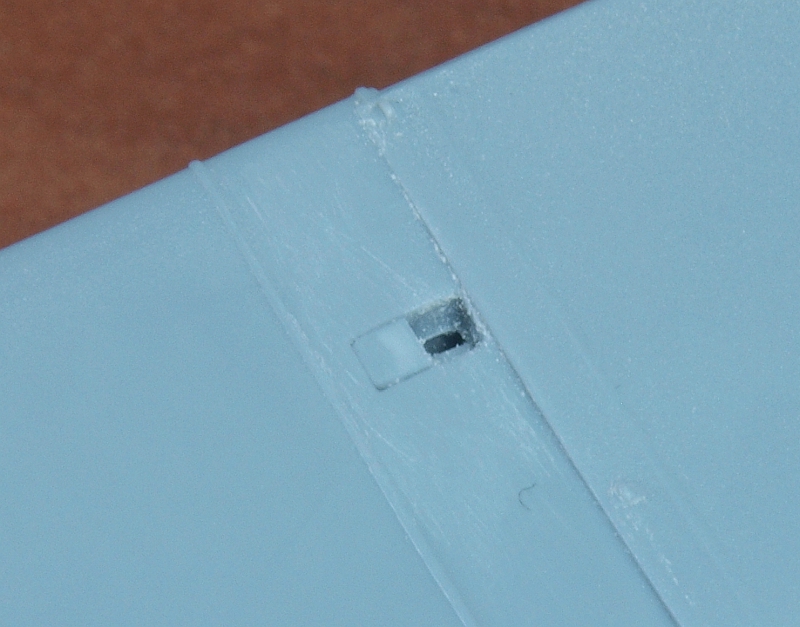
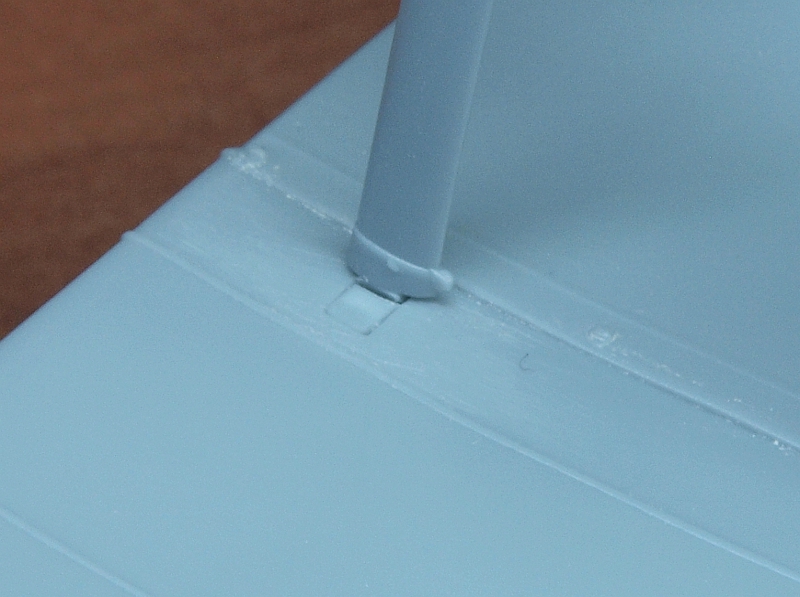
The u/c assembly was supposed to jump into the holes in the wing with some side tabs which did not ensure tight fit – thus leading to another sanding/painting problem. I cut the side fragments of the tabs, glued them into place, filled and sanded and this left me with slots for the remainder of the tabs.
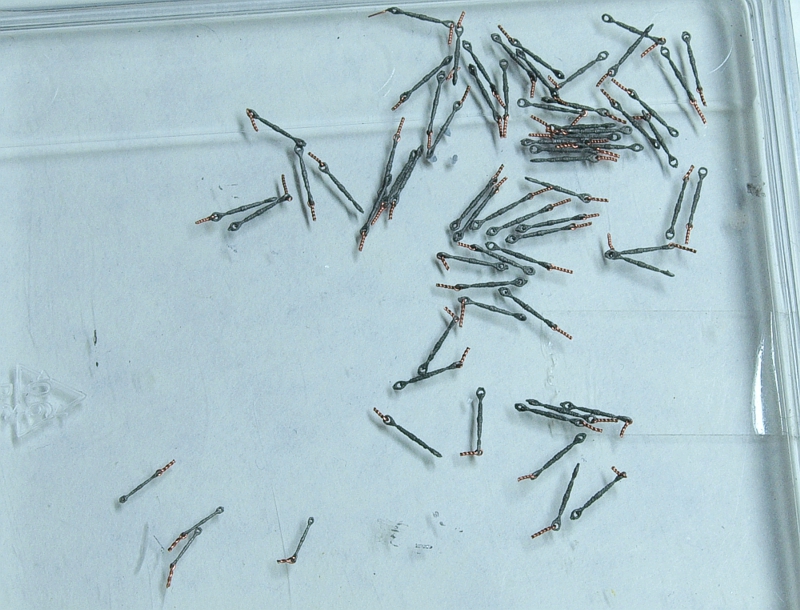
For the rigging I prepared Gaspatch 3D printed C-type turnbuckles arming them with eyelets. Thus, I ensure the proper hinge connection which helps to avoid unrepairable bends which usually occur when the turnbuckles are glued fixed to the holes in the wings.
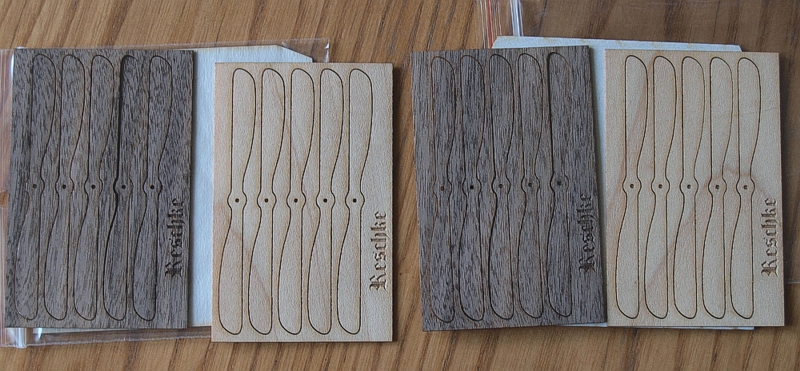
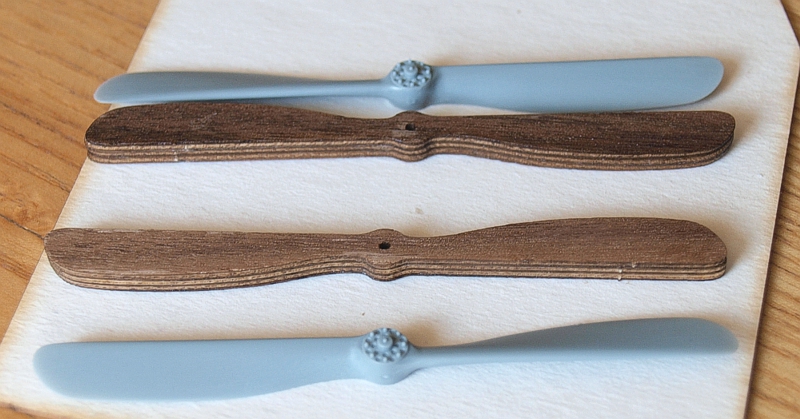
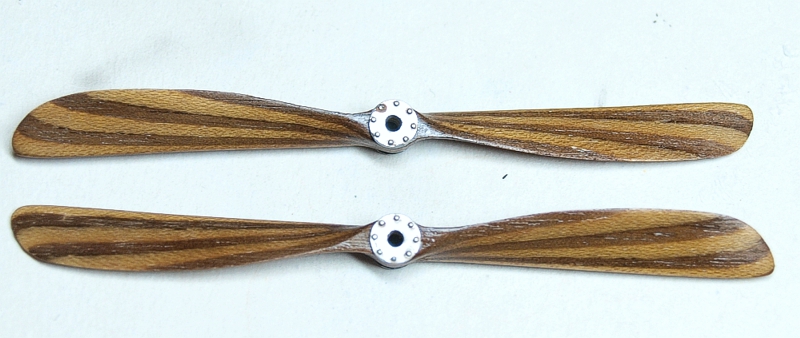
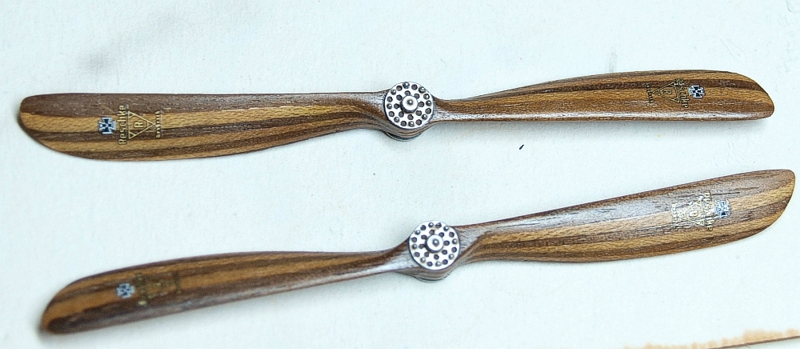
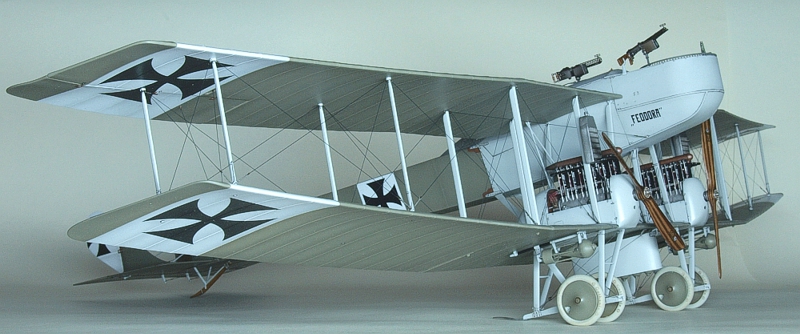
To build Reschke propellers I used the brand-new veneers from KoTeBi. The layers were glued together and soaked with liquid CA glue. After the fitting it turned out that 7 layers would be enough and it is exactly how many are seen in one of the photos of Feodora in Windsock Datafile – three bright and four dark ones. Then the veneer blocks were cut and sanded to shape. Boss plates were cut off the kit parts and underwent some sanding on the back sides. I have also enhanced the kit anemometer using some wire bits.


Then the final assembly could start. I opted for a different sequence than what is suggested in the kit instructions. What I feared most went without problems – the two largest bits were glued together!!!

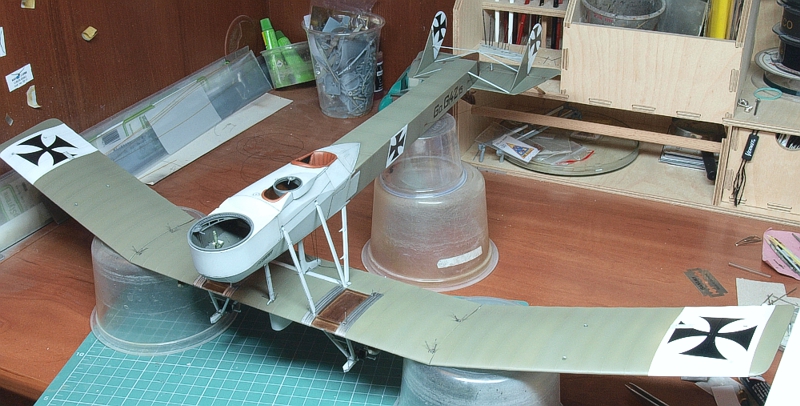
And then the beast could finally stand on its own feet (wheels).
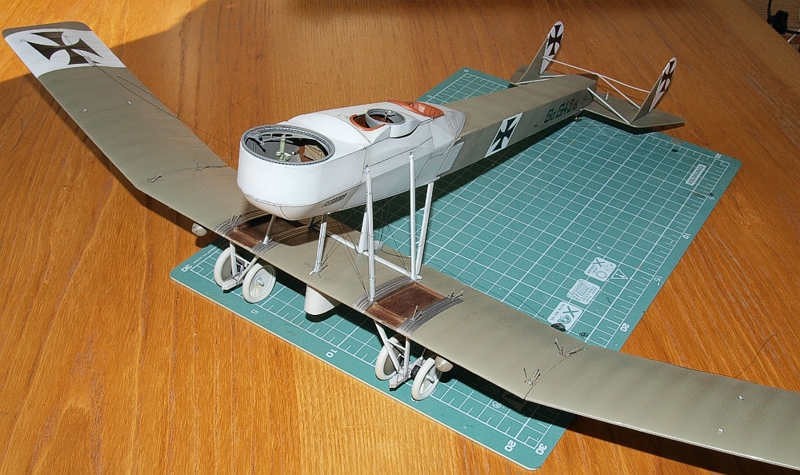

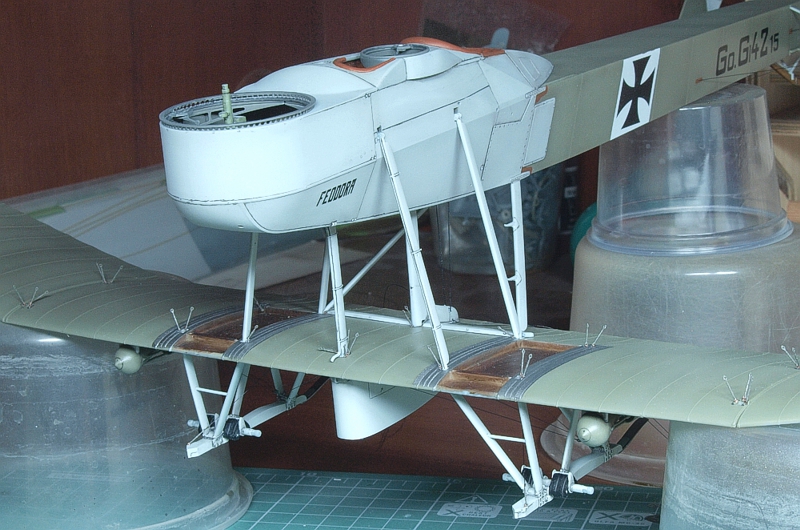
The undercarriage was completed and engines placed aboard. The rigging between the fuselage and the lower wing was completed at this stage, too, as it would be problematic later with the upper wings limiting the access with tweezers. Also, the tail had the control lines for rudders added at this stage.


At this point I realized that I feared putting the struts and upper wings even more than joining the lower wing with fuselage. I was not sure if the struts and engine controls would fit the wings. But luckily WNW quality won once more. The center bay struts and the upper wings jumped on, the engine controls fitted perfectly!

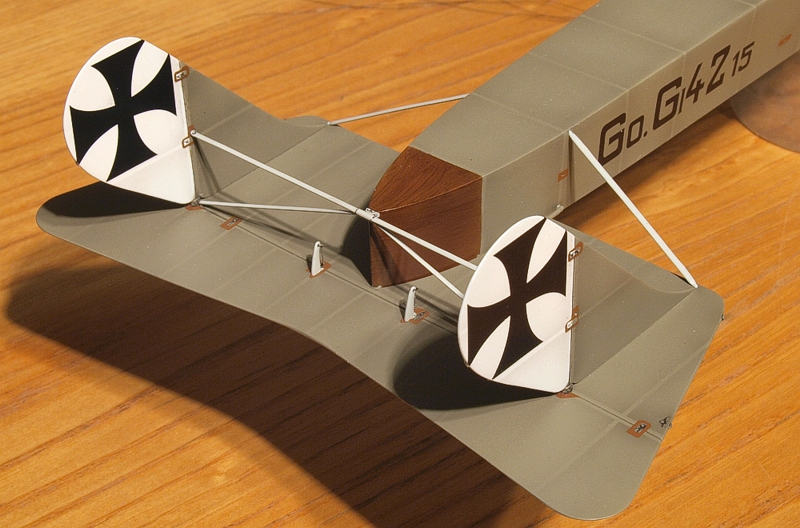
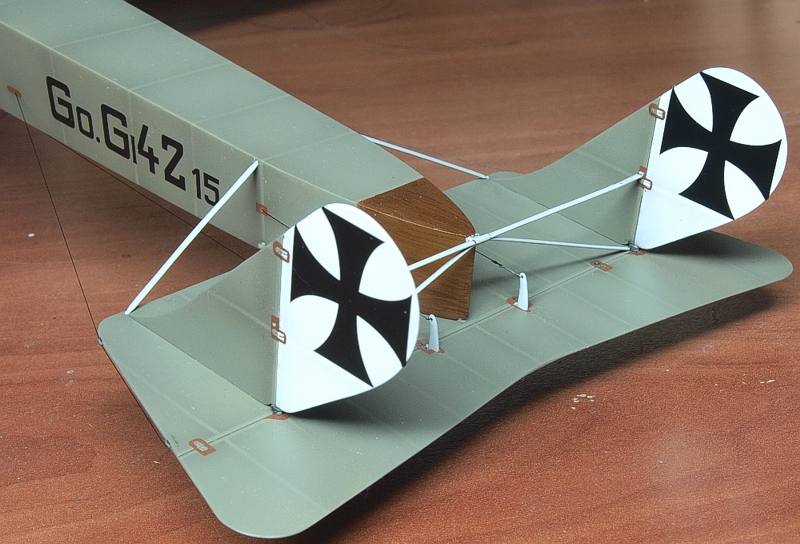
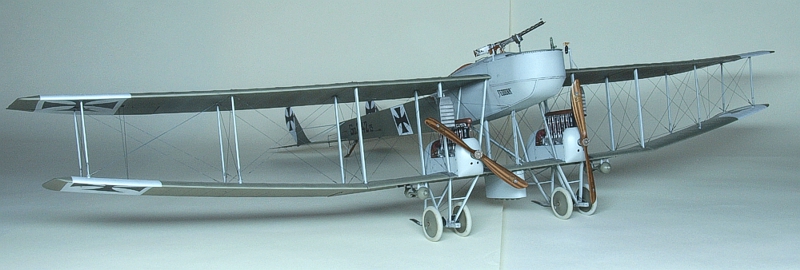
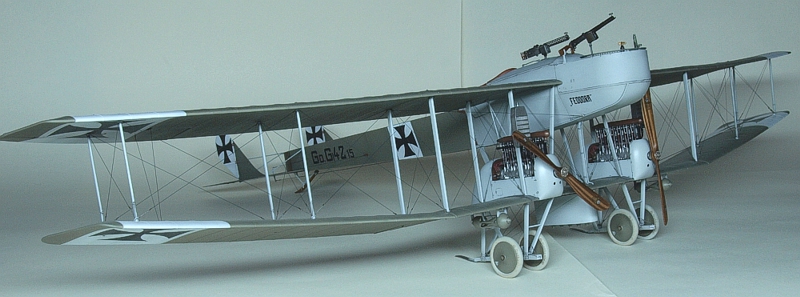
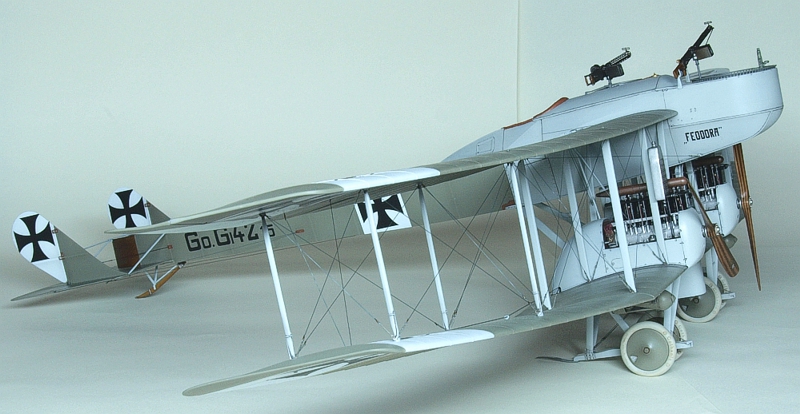
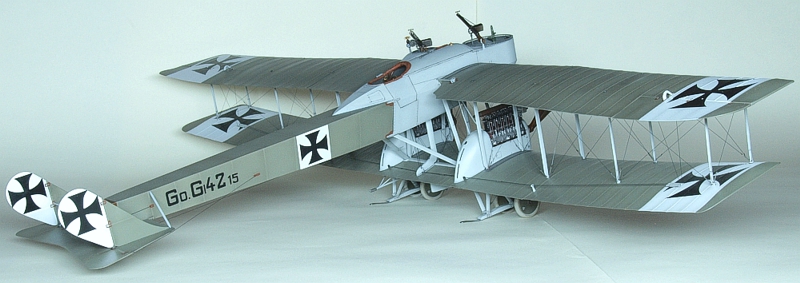
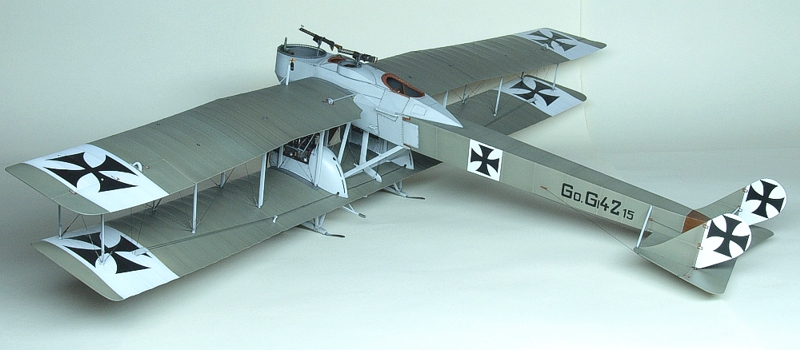
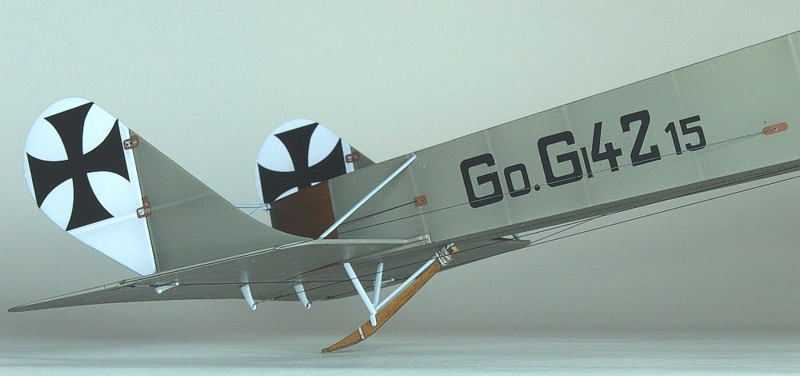
The last problem was with the outer inter-wing struts which proved to be longer than the gap. The first dry fitting revealed also that due to the dihedral of the outer wing panels the holes in the wings were not fully aligned with the struts and when I squeezed one strut into its holes the strut took an S-shape. Yet, I completed the rigging of four inner bays before pressing those remaining struts. And luckily no trimming of strut knobs was necessary. They were pushed into place to enlarge the gap between wing tips and then some delicate bending to straighten their shape was enough. After this rigging of the outer bays, adding the armament and final touches took a mere two days. And so my Feodora 42/15, apparently the only Gotha G.I bearing a kind of individual marking, was ready. Not my largest model, as I also have the WNW Felixstowe at home, but definitely the most weird-looking aircraft model I ever had.


© Przemysław Litewka 2021
This article was published on Wednesday, May 12 2021; Last modified on Friday, May 14 2021