
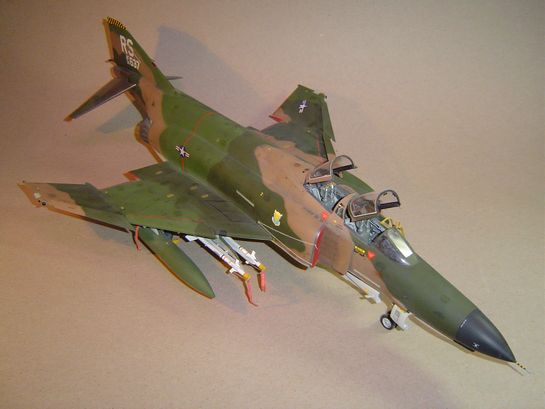
Revell/Monogram 1/32 Scale F-4E
By John McCormick
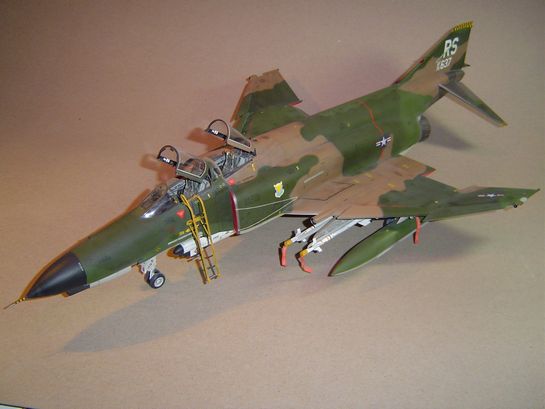
At the risk of boring the readers of LSP with another F-4 article, I offer you my own version of Revell/Monogram's F-4E "Mig Killer" kit. I have always loved the F-4E and have built numerous versions of Revell's offering from the mid '70s. However, my modeling skills have vastly improved from 25-30 years ago (at least, I think they have), so I figured I'd take a shot at building a version I could be proud of. The inaccuracies of this kit are well documented, and, from what I understand, Tamiya's offering of this plane is far superior. However, I wanted to build a slatted wing version, and Tamiya's kit is an early, unslatted version. Since Tamiya's option is pushing $100 U.S., and adding the Cutting Edge slatted wing set would add another $40 or so, I set my sights on the Revell/Monogram kit.
Cockpit and Photo Etched Sets
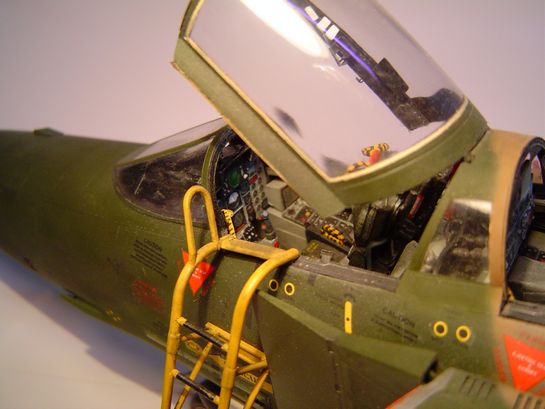
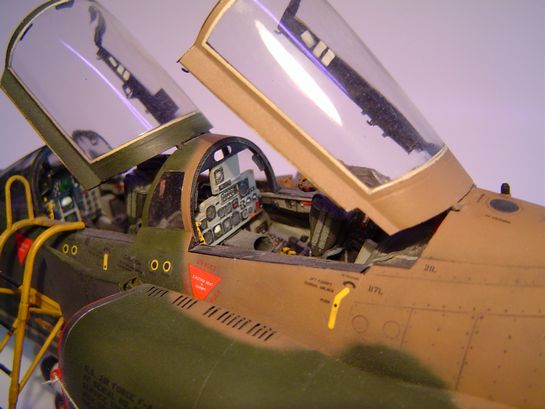
I picked this kit up for around $35 on eBay about a year ago, and then started to do my homework on after market kits. For the cockpit, I used Legend's offering. The review of this set by Mark Proulx was most useful in helping me decide on whether or not to buy it. It is the only aftermarket cockpit set available specifically for this kit (as far as I can tell), and Mark's review is right on the mark as far as the set's shortcomings. However, the model's cockpit had even less detail, and the Legend's sidewalls and ejection seats are excellent. So I bit the bullet and bought it. In addition to the Legend set, I purchased Eduard's F-4F interior and exterior sets (the Revell F-4E and F-4F kits are very similar to one another, so the F-4F sets fit the F-4E just fine). I only used a few pieces of the interior set to help spruce up the Legend set; specifically, the Radar hood on the WSO instrument panel, various handles, and the pieces for the canopies. The cockpit detail is rounded off with copper wire and guitar strings used for the wiring behind the WSO instrument panel, and guitar string (low E) for oxygen hoses. The kit engine cans were replaced with the parts from the exterior set. This set includes the close formation light strips as well as various vents around the nose and air intake area, and these look great once they are installed. The FOD covers supplied with the exterior set are a must for this kit since the intakes are horrendous!
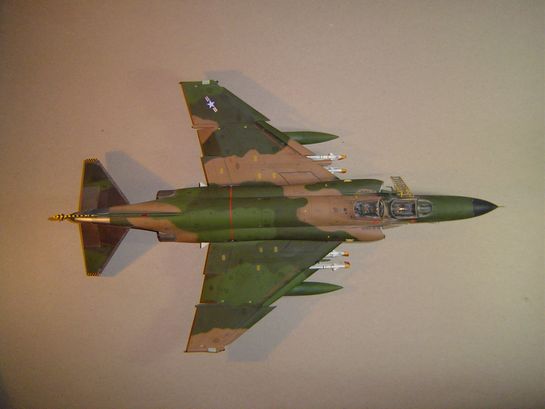
Wings
I love the way the Phantom's wings look when the slats are extended, so I used Paragon's inboard-extended slat set. I thought I was doing myself a favor by gluing the actuator struts to the slats before gluing them to the wings. Big mistake! Because of this, I couldn't get the downward angle of the slats correct; they were too level to the wing. I ended up buying another set of slats, removing the old slats, and replacing just the actuator struts. Anal retention is not always a gift. The outboard sections of the wings did not fit well. If I glued them on at the correct upward angle, I ended up with a big gap on the top side of the wing, which would require a lot of filling, sanding, and rescribing. If I glued them at an upward angle that was too drastic, the big, nasty seam was on the bottom. After about a week of agonizing over this, I decided to make the angle wrong and put the additional work on the underneath. I don't mind the exaggeration of the angle because the upward angle of the wings is one of the things I love about the Phantom. Besides, I figure it's better to keep the difficult bodywork underneath where it's less noticeable. Lastly, the flaps were cut out and repositioned in a slightly down position.
Modifications
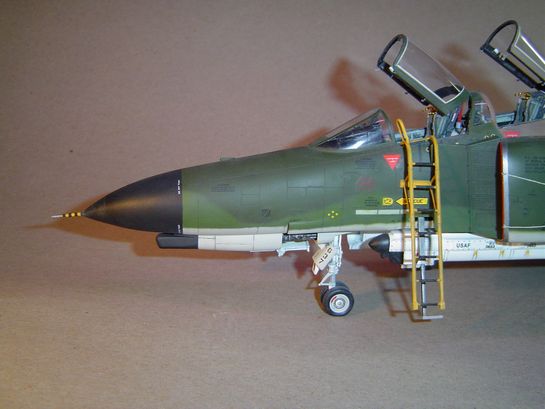
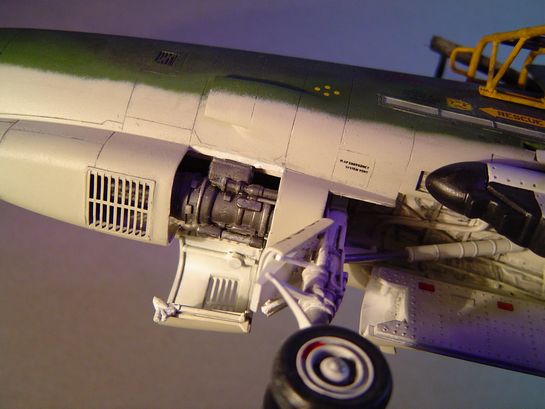
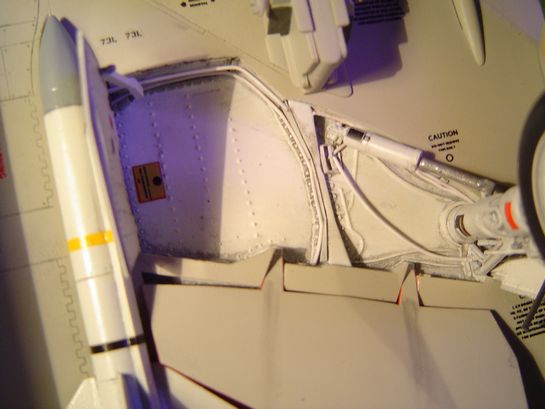
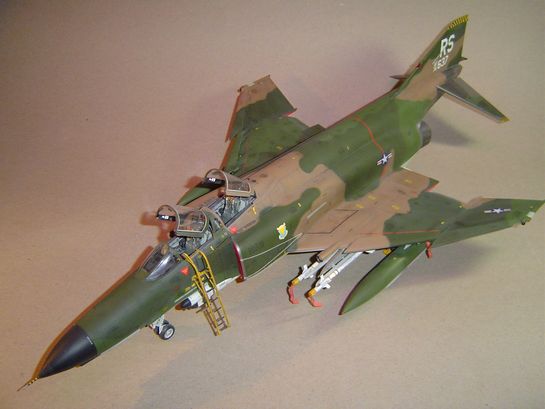
The TISEO sight on the inboard port wing was scratch built using parts of a telescoping TV antenna as well as scrap pieces from a brass photo etched set. The wing root was drilled out using a hand drill (that was an experience!), the tube was inserted and glued into place, and the seam was smoothed out with putty. The lens is from the tip of a GBU-8 from my Trumpeter A-10 kit. The Vulcan 20mm gun breach door was cut open, and parts from a Hasegawa F-16 were used to build the gun. Brass tubes were used for the gun barrels, as they can be seen through the slits in the Eduard grill underneath the nose. Speaking of the nose, I had to reshape the radome, as the kit piece is too long and pointy. I used putty to give it a more parabolic shape. The front landing gear strut supplied with the kit is too thin, so I rebuilt it using scrap pieces. Copper wire was used to construct brake lines, and these were added to both the struts as well as the wheel wells.
Painting and Decals
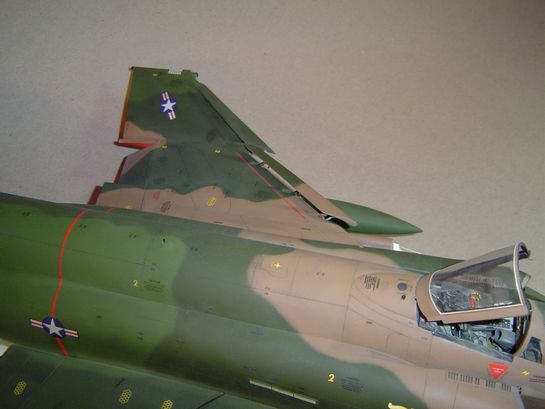
I used Master Modeler's enamels for the paint. The colors were used straight out of the bottle with the exception of the medium green. To create the scale color, it was lightened up a little using both Insignia Yellow and Testor's Green (you know, the bright glossy standard color that's been around forever). The photo-etched Close Formation Lights presented me with a challenge regarding which paint color to use. The photo-etched pieces replace decals, but there are no pieces to replace the decals for the lights on the ends of the wing tips. To match these decals, I used RAF Sky, which I had left over from a Spitfire model, and it matched almost perfectly. After several days of drying, a sealing coat of Future was applied in preparation for the decals. This was the first time I used Future as a gloss coat for decals. I must admit, I was apprehensive to say the least, but it worked quite well. The Future coat brought out all the inconsistencies and irregularities of my paint job, and I was close to panicking when I saw them. However, once the decals were added and a coat of clear matte was applied, the result was outstanding and the plane has a smooth, consistent finish.
I used the Air Doc stencils and "Early USAFE Phantoms in Germany" decal sets as well as Aeromaster Early F-4 stencils. The Air Doc decals are exceptional and are beautifully printed. The stencil set includes over a hundred little numbers that appear all over the plane, and it took me about a week to get all the decals applied. One error I noticed in the instructions was that they had all the numbers ending in "L" on the right side of the plane, and all the numbers ending in "R" on the left side. After placing my right hand on my heart for reference, I reversed these decals. The Early USAFE decals offer an abundance of Phantom options from which to choose. However, since I added the TISEO tube, my options were somewhat limited based on the instruction sheet. I ended up combining two different options of planes. The serial number I used, 74637, is shown in the instruction sheet based at Ramstein Air Force Base around 1978 and is painted in the SEA Lizard Wraparound scheme. However, I like the standard SEA scheme better because of the light gray undersides, so I used that paint scheme instead and followed the instructions for another earlier Phantom based at Ramstein. The Aeromaster decals were very blurry; however, they went on well and don't look bad after all is said and done. A coat of Future was applied to seal the decals.
I weathered the plane with a black wash made from a product called opaque, which is used in the offset printing industry. It's a water-based, viscous liquid, and I thinned it down with water and a little dishwashing detergent to help it flow into the recessed panel lines. Any overflow is wiped off in the direction of airflow and/or gravity, and I think it does a great job simulating grime. I didn't weather it too much as most reference photos I saw showed relatively clean aircraft. A final coat of MM acrylic matte coat was applied to seal the wash and give the plane a nice matte finish. This is the first time I used the acrylic, and I did not like the result. It looks milky and makes the model look almost dusty. Let's face it, it's going to get dusty anyway, why rush things?
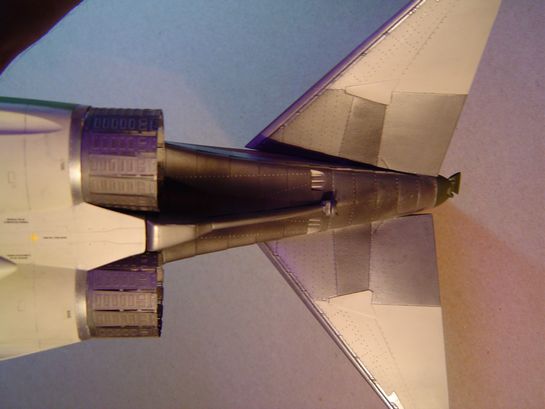
The metallic portions of the tail section were painted last. I had masked these sections off before painting the rest of the plane so the plastic underneath would be nice and shiny. I figured it would be easier to paint these areas at the end rather than painting them first and risk wrecking them with masking material(s). I used MM metalizers, and individual panels were masked using wet tissue paper. The subtle tone changes were created by mixing a little of one color with another.
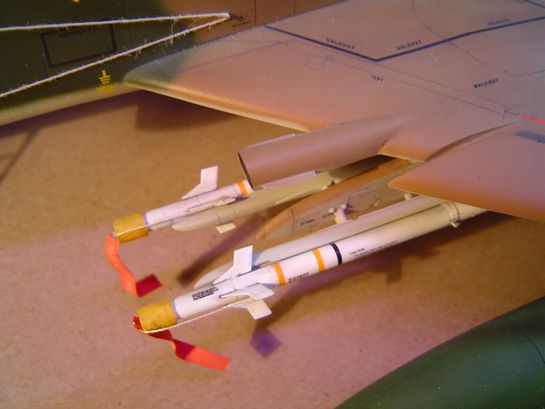
Armament
For armament, I used the kit's AIM-7 Sparrows, an ALQ-119 pod from my A-10, and Cutting Edge AIM-9J Sidewinders. The ALQ-119 pod that came with the kit didn't look right to me; the nose was too round. I had originally used AIM-9L Sidewinders, but these were not used on Phantoms at this time (thank you Murph at ARC for this info), so I dished out another $25 and replaced them. The protective covers for the Sidewinder IR seeker heads were made from sections of the ink tube in a ballpoint pen. The ends were filled in with a piece of plastic, puttied, and sanded smooth. Sewing thread was used to simulate the tie lines for the covers as well as for the FOD covers. RBF tags were made on my ink jet color printer and attached with either steel wire or string.
After everything was finished, I saw that Eduard came out with set of placards for Tamiya's kit, so I bought that and added any placards that could be used on my kit. The entire project took about 8 months, and I am now tackling an even bigger project: a 1/1 scale finished basement. It's not nearly as satisfying; I can't find any aftermarket kits for it.

© John McCormick
This article was published on Wednesday, July 20 2011; Last modified on Saturday, May 14 2016