
Transport of Models
By Brian Cauchi
Introduction
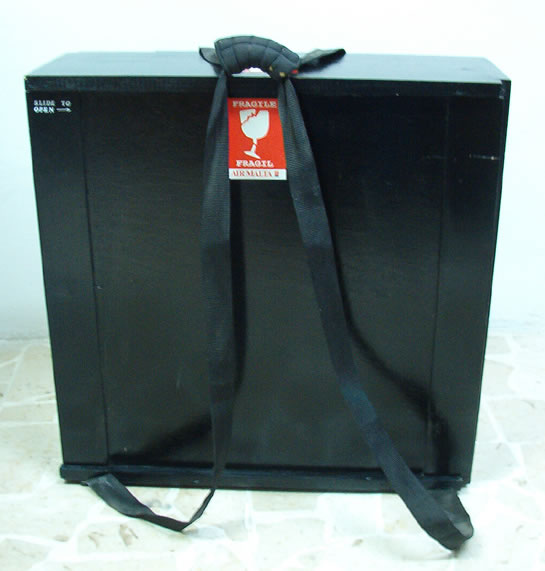
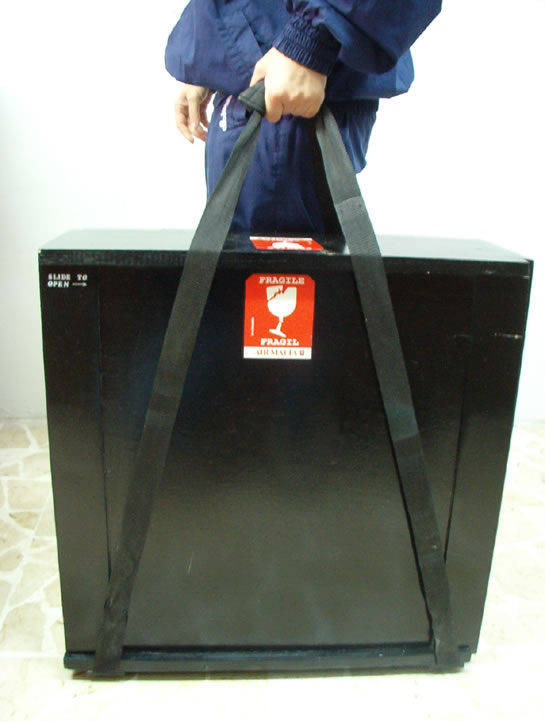
Following is a brief article showing how I normally transport my models abroad. This very box which is still stored at home allows me to safely carry my 1/32nd scale Heinkel 219 virtually anywhere I please in safety. Proof of this, a trip via planes, trains and automobiles from Malta to Telford in the UK and back. The box is 60 x 60 x 20 cms.
General Considerations
The way I secured the model to the base is not the method I normally use. My usual method is to use a thick flat sheet of styrene large enough to accommodate the model. Appropriate holes, slots and gaps are cut out to allow for the undercarriage, lowered flaps, radiators, aerials and any other protrusion. When this is done, the model rests on a flat surface with most of it in contact with the styrene. This is the ideal method to use which results in a very sturdy and secure fixing to the styrene base. It allows for absolutely no movement and there are no resultant stress points on the model due to the securing to the base.
However, due to the complexity of the model, this could not be done in the case of the 219 and an alternative support system had to be devised. Knowing how the model is built, I decided on the best points for support which resulted in no stresses on the wings, fuselage and any other fragile areas. An important point to consider even when building the model with the intention of trasport is to have as many removable parts as possible. Therefore, I do not like to fix propellers in place, engine and hatch doors and any opened panel unless it is absolutely necessary or was hinged on to the aircraft in the real thing.
The Box
The most crucial step is the design of the box, how the base and model are going to be held inside the box. This important decision must allow for secure and tight fixing of the components, especially the model to prevent movement during the trip.
Don't forget that: Movement = damage
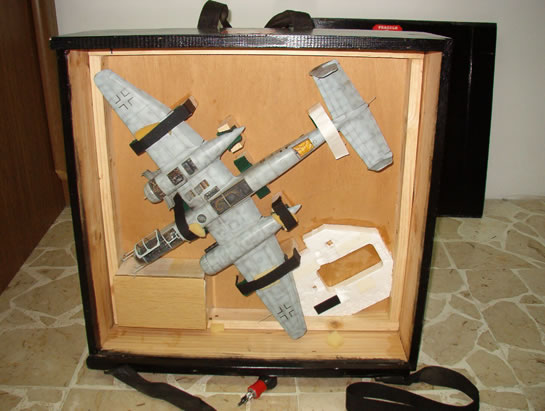
In this case, I decided to house the base in a separate compartment underneath the model. The model would then be secured onto a tray which is in turn screwed to the sides of the box. This will serve two functions, keep the base in place and hold the model.
The size of the box is to be kept to a minimum. This is dictated by the size of the base of the model or the model itself if no base is to be carried. In my case, the base is slightly smaller than the model since the wingtips protrude from the base and so the box dimensions were calculated on the model. The smallest box always results from positioning the model diagonally in the box. Clearances between the model and the box should be kept to a minimum to further reduce the overall size of the box. This is arrived at by careful measurement and sometimes even producing sketches of the envisaged arrangement.
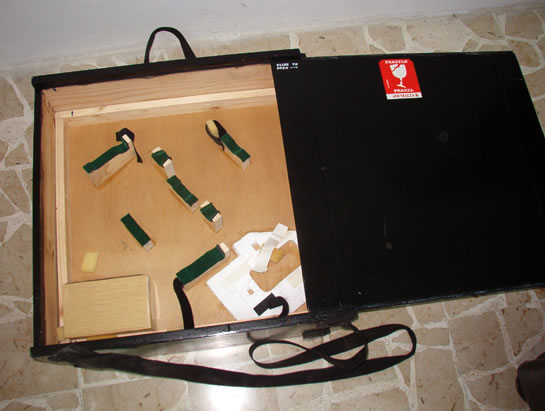
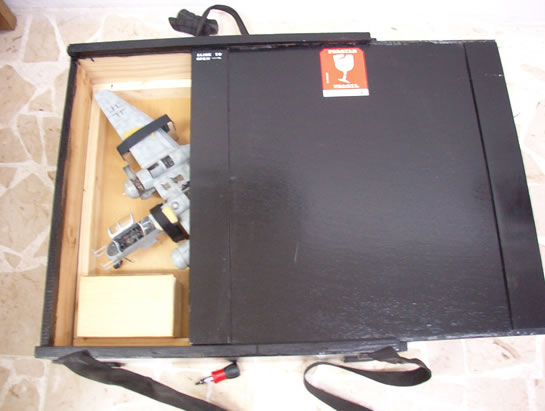
Having decided on the size of the box, suitable material may be chosen. I normally like to use plywood since it is easy to cut and is comparatively thin and light. The sides and bottom were cut and glued together having before decided on the method of opening of the lid which in this case slides open. Two grooves were therefore made in the two sides which are slightly higher than the opposite sides along which the lid would slide.

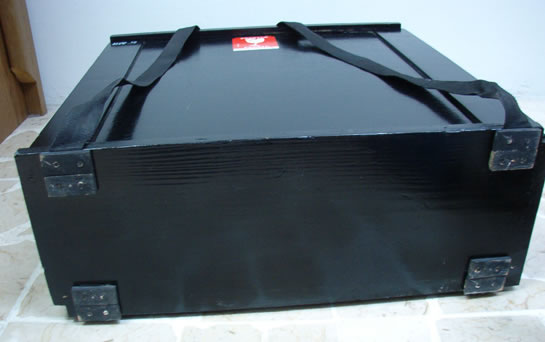
One of the most important aspects to watch out for when designing the box is the strapping arrangment. This should be strong enough to withstand the weight of the box and the straps have to be fixed to the box in a foolproof manner so that there is no chance that they come undone. I screwed mine with bits of plywood to the bottom of the box so that five screws had to give way before any part of the strap came undone. The screws obviously pass through the stap material before penetrating the wood.
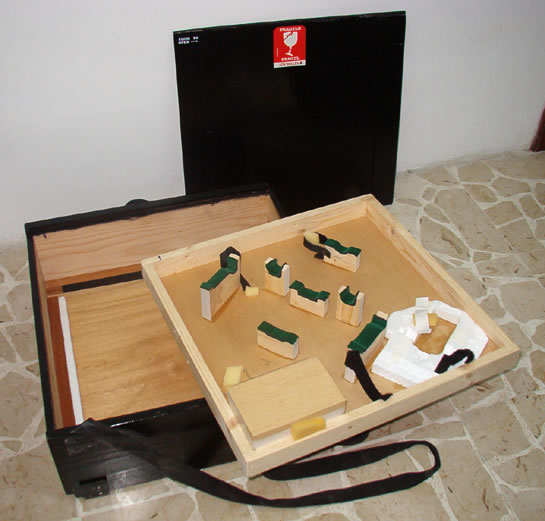
Once the box was complete, the model's base was placed at the bottom. Since this was smaller, filler strips of wood were fixed along the sides. These were lined with self adhesive rubber strips so that the base to box is push fit tight. These also prevent the base from getting scratched. Spaces were left to allow for the removal of the base from the box. At least your two fingers should fit into a gap and allow you to pull the base away from the box.
The Model Tray
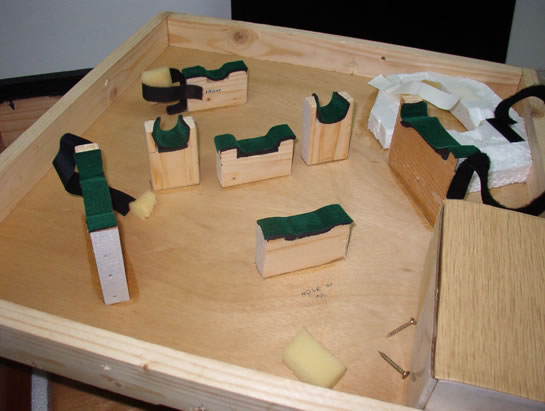
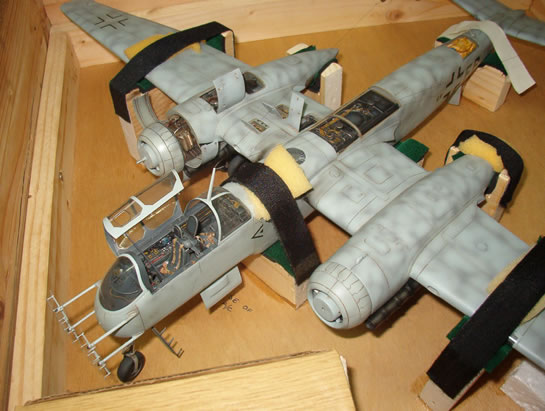
The next item to be produced is the model tray. This should be constructed to fit the box dimensions as closely as possible once again to disallow unwanted movement. This was made from slightly thicker wooden stip for the sides which would allow for wood screws to fit securely and a very thin plywood bottom. Wooden formers were cut out from the same wood used for the tray frame to fit the contours of the model at predetermined places. These were finished with a flat bottom and screwed to the base after careful measurement. The area which comes into contact with the model was lined with self adhesive felt for obvious reasons.

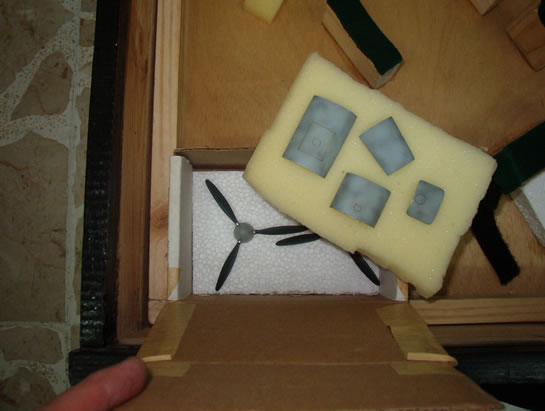
A cardboard box was also fixed to the tray in a convenient location to house all the smaller parts such as the props, bay covers and any other removable parts.
A lot of trials are the order of the day during this stage which is the most crucial.
Once complete, aids in the form of many notices are written on the tray in ink. Some of the important marks on my tray are the following:
- Coinciding arrows on the tray and box to indicate the way the tray should be placed in the box.
- Marking the front from the rear so as to orient the aircraft properly especially if the layout of the supports is symmetrical.
Procedure for Packing the Model
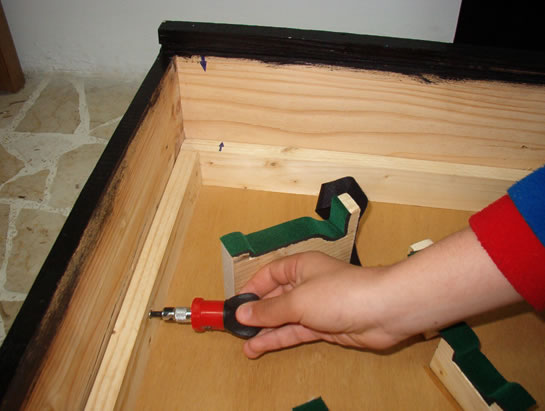
The base is placed in the bottom of the box and checked for movement. The empty model tray is then put in place and aligned according to the markings. It is then screwed in place.
The model is stripped of all removable parts such as propellers and opening covers and these are securd in place in the small parts box fixed to the tray. These were sandwiched between layers of foam so that their movement is restricted and theya re kept in place. They should not be located so close together to avoid movement and scratches or even worse, damage.
The model is then carefully put in its place over the formers, care being taken to make sure that everythingis properly aligned and no part of the model touches the tray, side of the box or the supports themselves.
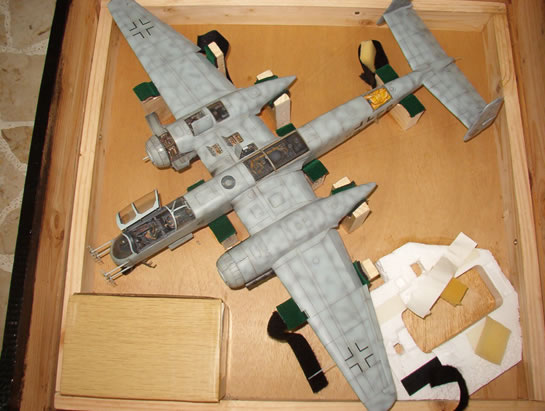
Once the model is firmly in place, this is secured by strips of Velcro passing over pieces of foam which prevent direct contact with the model. These are secured to the support sides.
When this step is complete I like to test for movement and turn the box so that the model is hanging as it would during transport but with the open box. Any possible movement is detected and the straps adjusted as necessary. The photo shows the way the model will be oriented in the box during travel.
The box is then closed and you are ready to go.
© Brian Cauchi 2003
This article was published on Monday, November 02 2015; Last modified on Monday, November 02 2015