
Using a Magnetic Polisher
By Chris Shannon
Just recently I was browsing through a forum that I hadn't visited for a while and found that there was a number of them using a magnetic polisher, now I am a sucker for a new tool and firmly subscribe to the saying "The right tool for the job!" so I wend ahead and ordered me one!
So what is a magnetic polisher I hear you ask and what will it do for me?
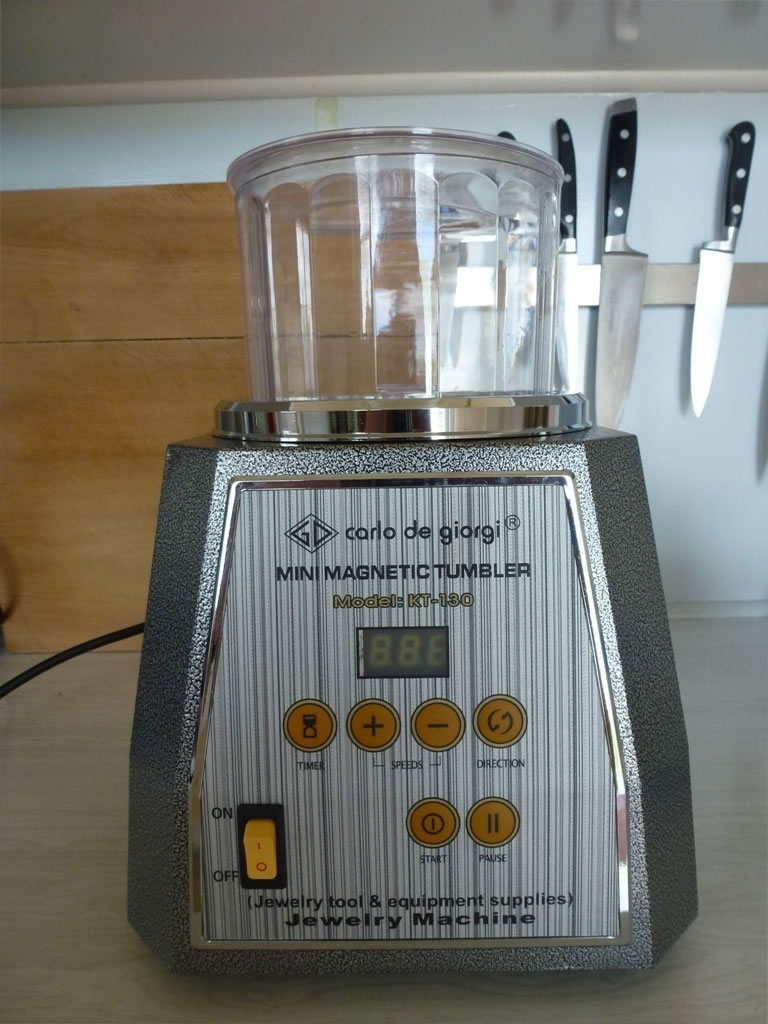
A magnetic polisher is a automatic device used in the jewellery industry to polish rings and other metal items by a burnishing process. This gets into all the small hard to reach places. Where a Magnetic polisher really shines (pun intended), in our hobby is for people who make kits with a lot of white metal parts, while these can be cleaned up by hand it is a tedious and more importantly (for me) very dirty job. Imagine just dropping all those tiny hard to hold onto parts into a bowl, and then 30 minutes later you have nice shiny parts without feeding the carpet monster!
Now most of the guys on the other forum (F1M) reside in the USA and they where recommending purchasing through Otto Frei, but because I live in New Zealand and we have 240v power not 110v this would mean that Otto Frei only had very expensive options, over $1,100.00 USD plus postage for the size I need.
This clearly was not going to be an option, I can do a LOT of polishing for that kind of money! So I started looking on eBay to see if I could find a second hand unit cheaper, straight away I found many Chinese models on offer at much better prices but no matter how hard I looked I could not find any reviews on them. After much searching I found this model on Aliexpress for only $265.00 including postage to New Zealand, for this kind of investment I thought it a worthwhile risk!
After a long wait this finally turned up yesterday...now with the wife away overseas for a couple of months the most logical place to set it up was the kitchen.
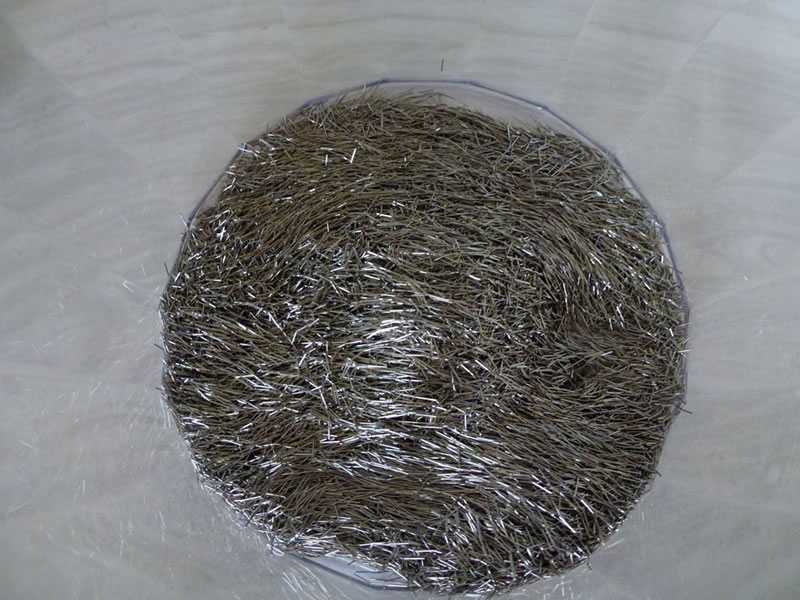
If you want to try this at home then there are a few extras that you will need, burnishing fluid and the steel pins. The pins are available in a range of sizes from 0.2 up to a massive 0.5, all in a 5mm length.

Here is a macro photo of the 0.5mm pins:

Here is a comparison between the 0.5 and the 0.3 pins with a 1:43 wire wheel to give a idea on size:

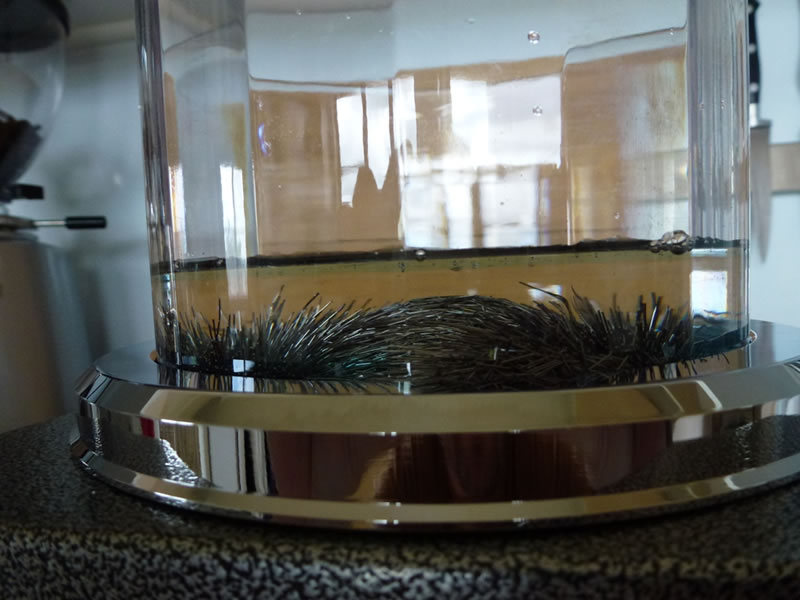
Before you use the polisher for the first time the pins must be cleaned. To do this first add some pins to the plastic bowl, I put the bowl onto some scales and added 200g.
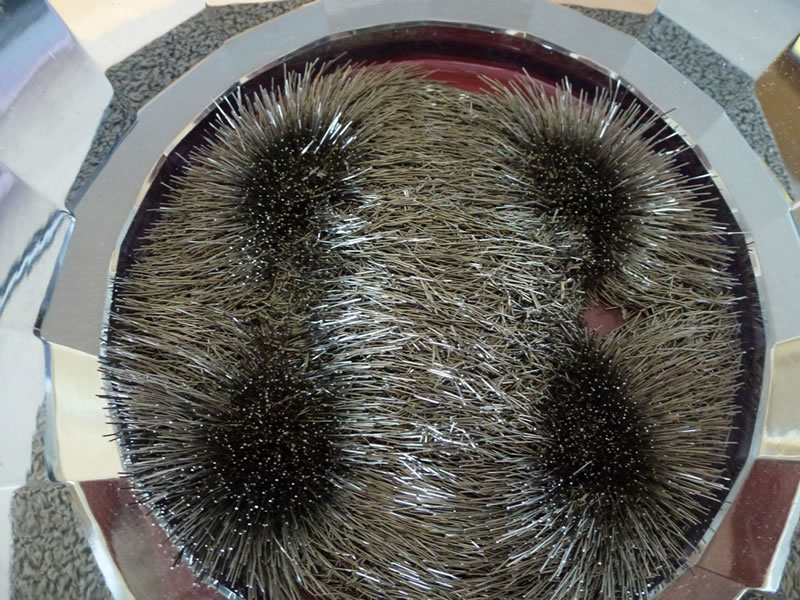
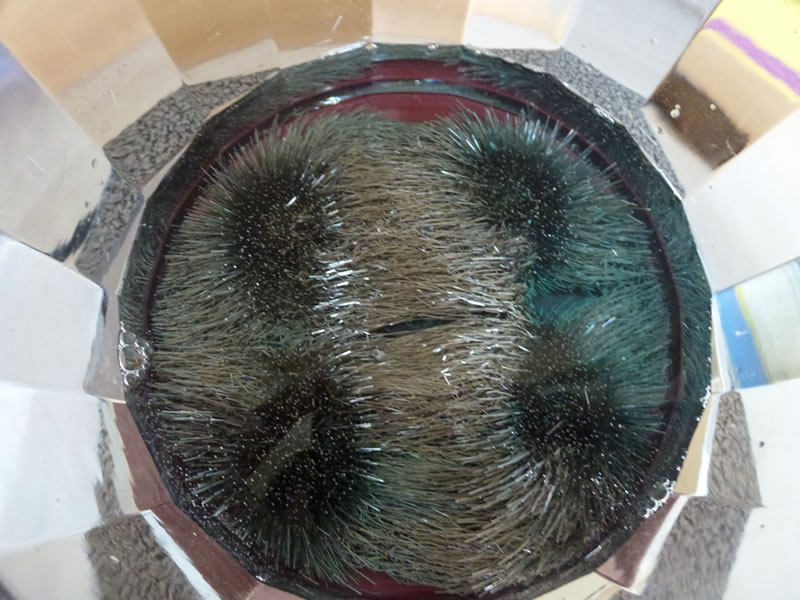
When the bowl is placed onto the base you can see the strong magnets:
I then added 300ml of water and a cap full of burnishing fluid. There where no instructions so I employed the TLAR principle judging amounts from photos on the net.
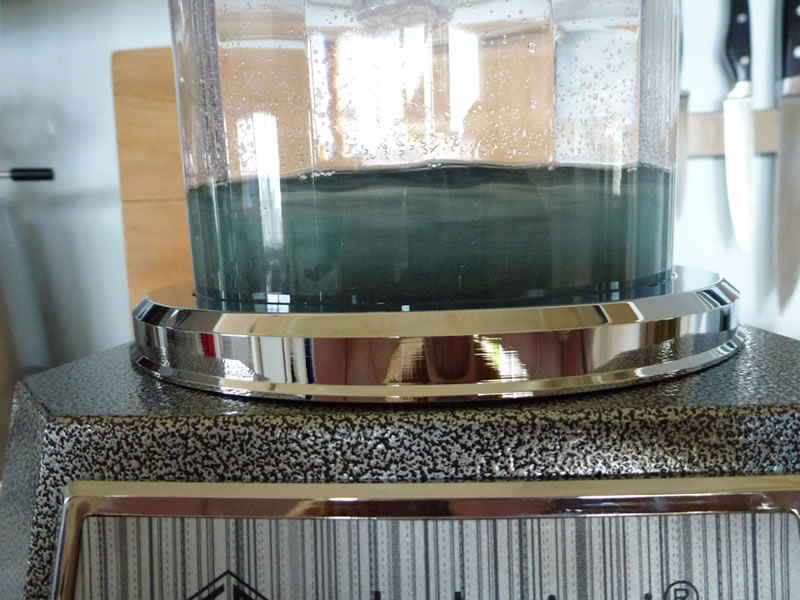
Side on of what it looked like:
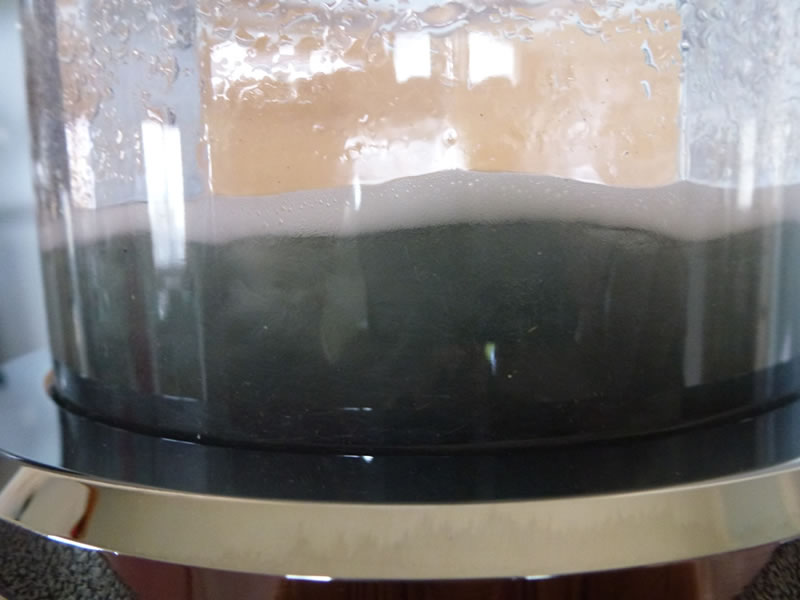
I then set the timer for 30 minutes and pressed the go button!
After just a minute the water started to turn black:
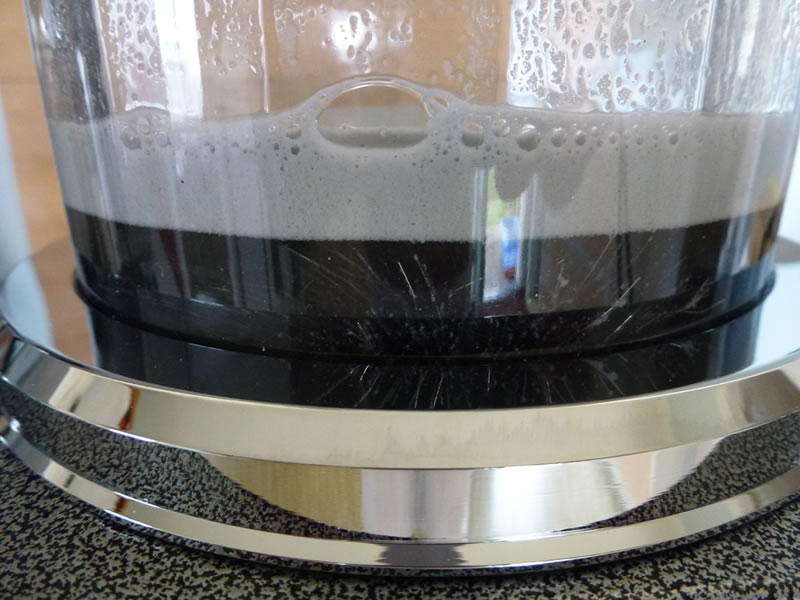
After the 30 minutes where up the water was extremely black with a thick scum layer on the top. Goes to show the importance of cleaning before starting to use on our expensive models.
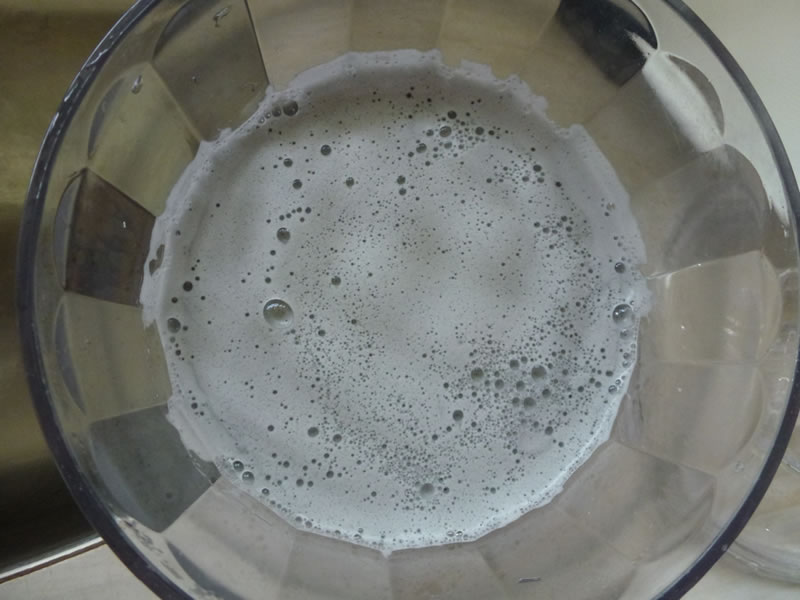
I then drained the bowl using a paper filter for paint, the type car painters use. Then rinsed everything with plenty of fresh water.
Time to give it a try on some parts!
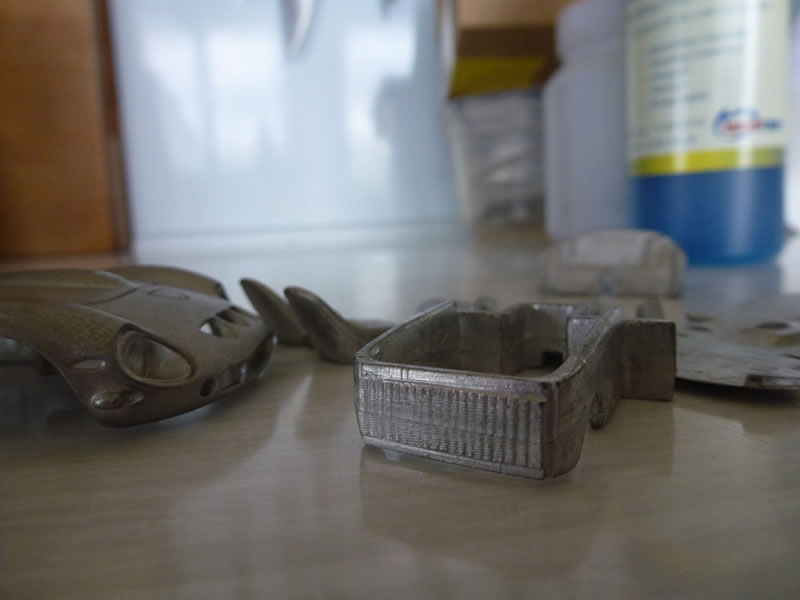
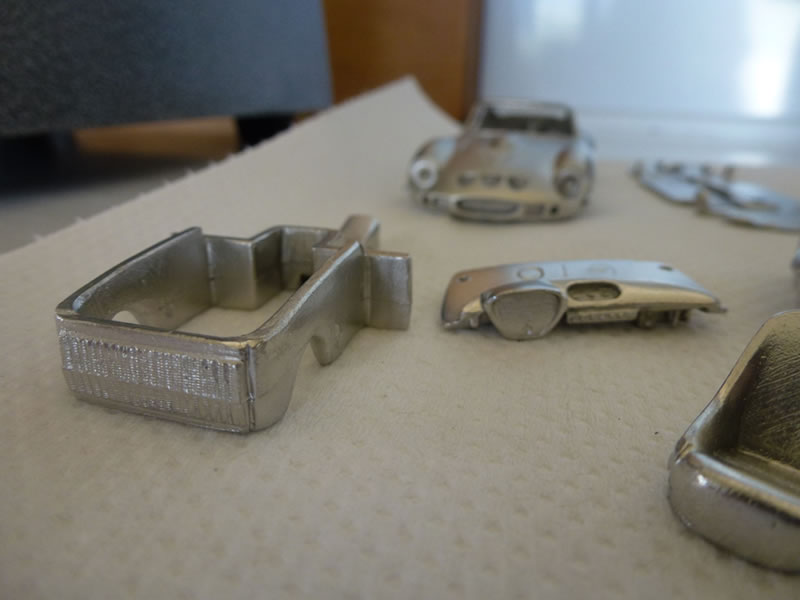
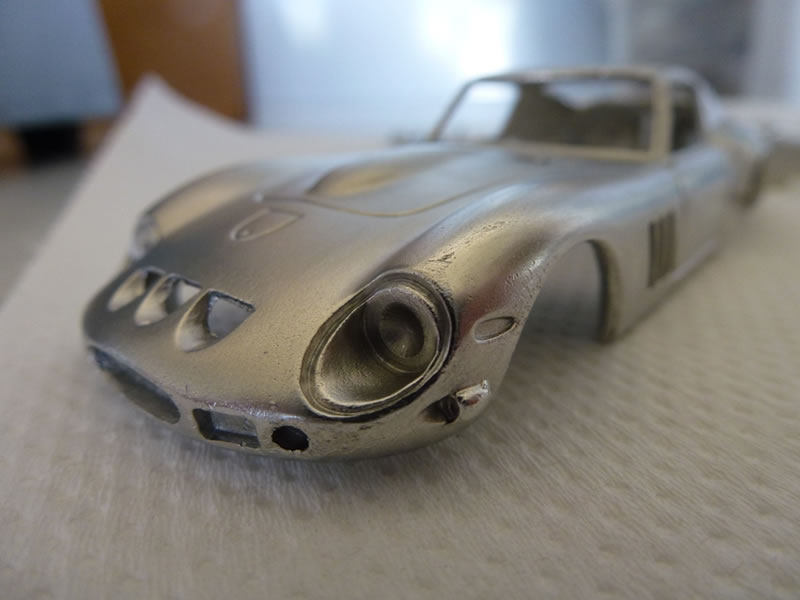
For my test I chose to use a white metal 1:43 Ferrari 250 GTO that has been sitting on my "shelf of doom" for far too long. I had previously brushed the body with a wire brush, but had not yet cleaned up the mould lines. All the other bits that I put into the magnetic polisher had not been touched.
This is what they looked like, notice the oxidized surface.
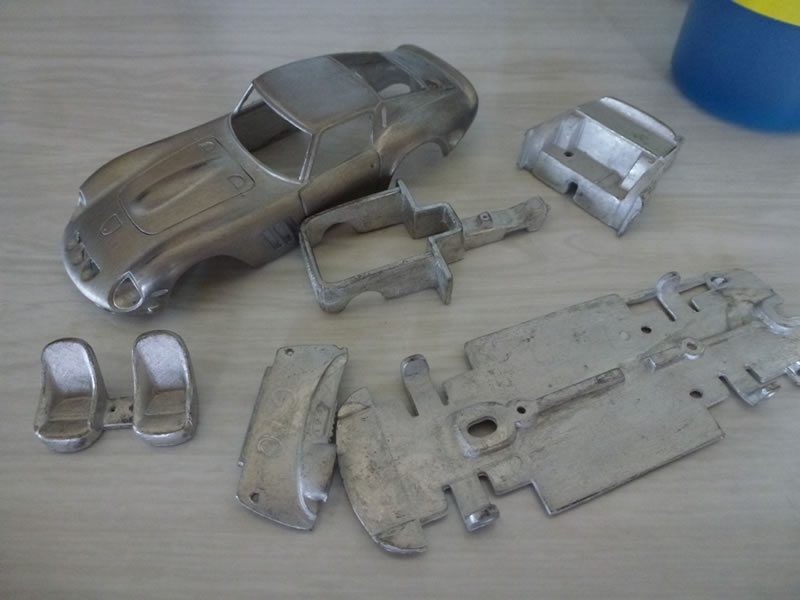
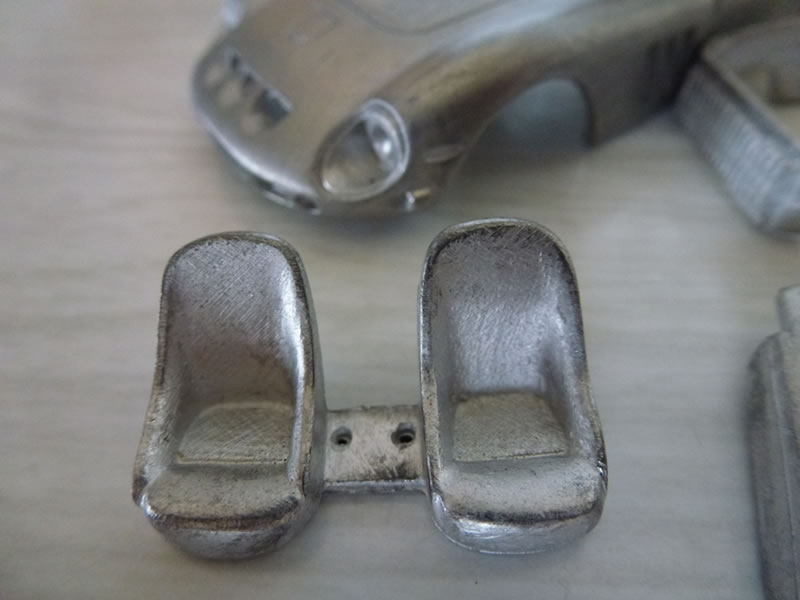
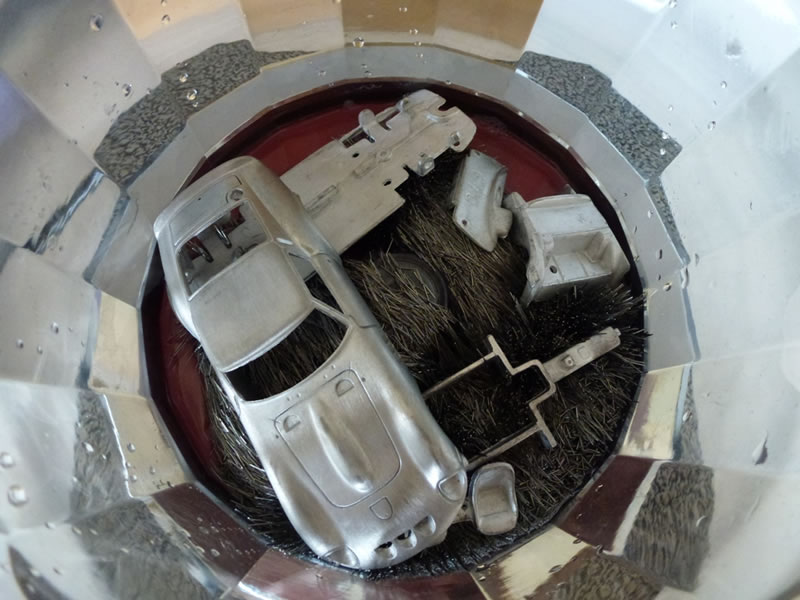
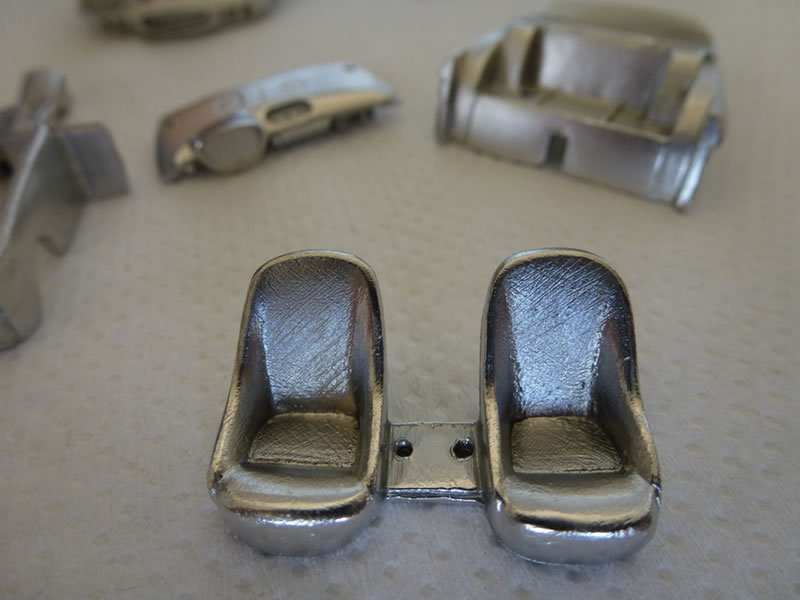
Here are all the bits in the bowl, with hind sight, I should have left either the body or the chassis out. Then covered the parts with water and added a cap full of burnishing fluid.
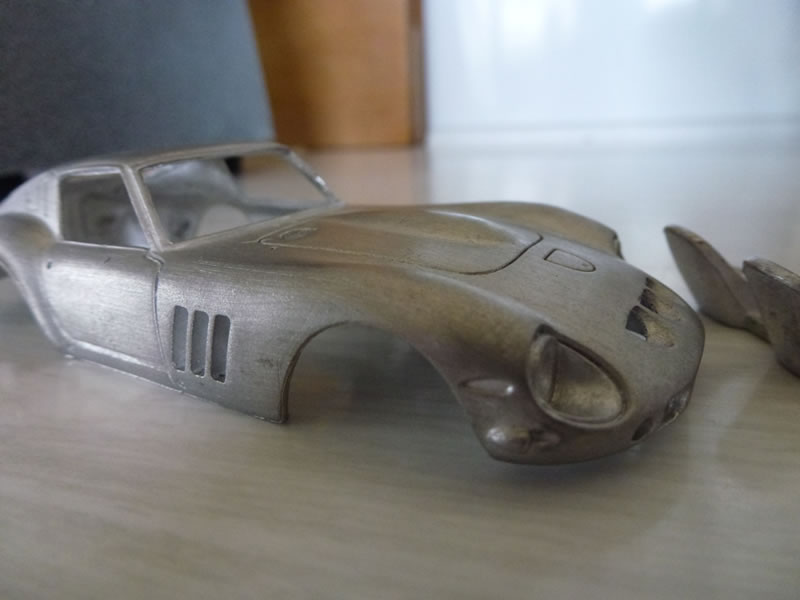
30 minutes later I went from this:
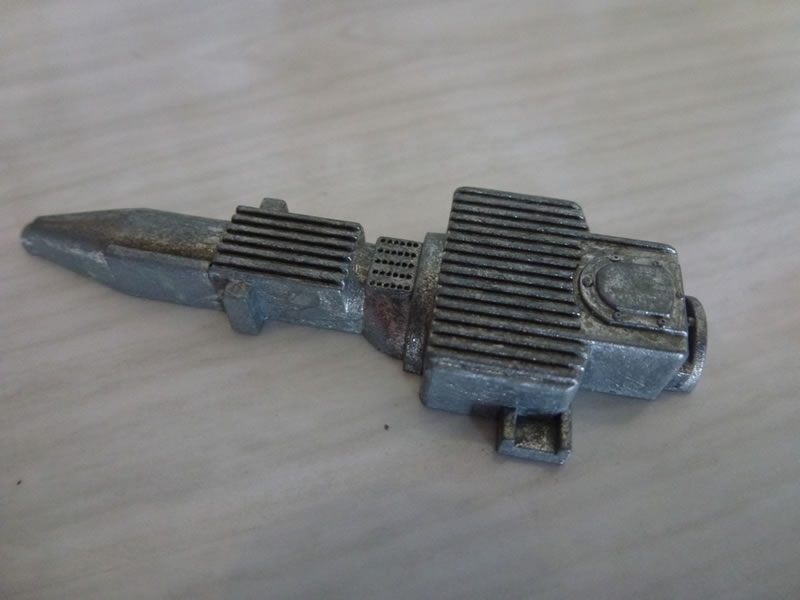
To this:

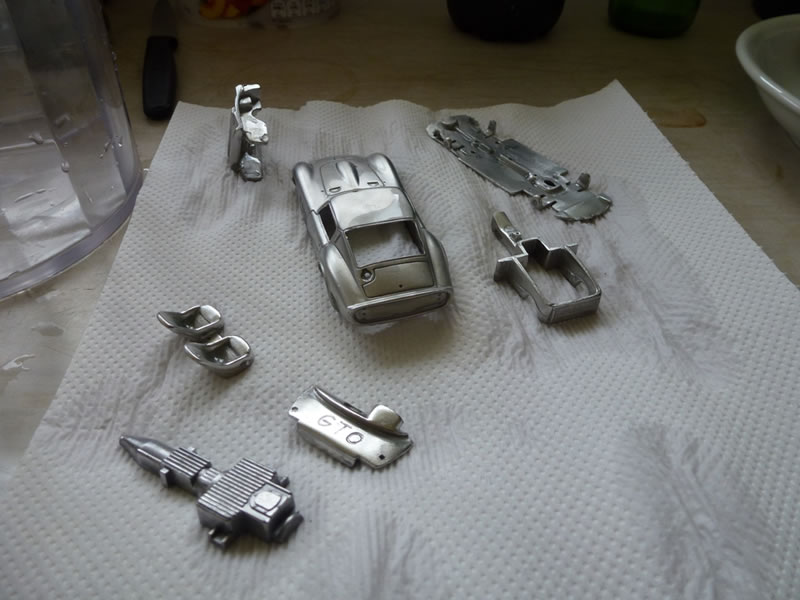
I drained the bowl, washed the parts and the pins with water and put the parts out onto some paper towels to dry:
So to Sum Up...
Could this be done by hand? Yes, but this was much easier, cleaner and faster.
Will this make me a better modeler? No, not likely, but I have a new tool so I'm happy!
Overall I'm very happy with my purchase, it's not for everyone but if you have a lot of white metal kits like I do then I think it is a worthwhile investment as the time saved in cleaning means more precious time available at the bench...looks like my carpet monster will be on a diet too!
A couple of foot notes:
When storing the magnetic polisher DO NOT store the pins in the bowl ON TOP of the base, this will cause the pins to become magnetised and stick together instead of swirling around individually.
You do however need to keep the pins submerged in water and some burnishing fluid. I *think* to stop them from corroding as we have stripped off all the protecting oils in the first step!
This is a very gentle process, many people have experienced cleaning and polishing fragile parts that they would otherwise often damaged during the cleaning process. There is no loss of detail, sharp edges are retained and undercuts and troughs like cooling fins are cleaned thoroughly.
However there is a learning curve just like with any new tool, I found that I had over loaded the bowl. There where times during the 30 minutes when the parts would lock together. Knowing this I will be keeping an eye on things going forward, putting similar sized parts together and if things jam then it would be very easy to just take to lid off and lift out 1 piece.
The body of the car was damaged, nothing that cannot be fixed, I have just found the limit.

Thanks for taking the time to stop by and read my ramblings, I hope that someone will find the above information useful.
© Chris Shannon 2015
This article was published on Monday, March 30 2015; Last modified on Monday, March 30 2015