
"Chippy-Ho!" Building Hasegawa's F/A 18 in 1/32 Scale
By Howard Weaver
Hasegawa's 1/32 scale F/A-18 has been around for quite some time now and as of this writing, this and the Revell offering are the only Hornet kits offered in this scale. Unfortunately both of these kits are manufactured as prototypes, not as production run Hornets. The only way to achieve a production Hornet in 1/32 scale is to modify one of these kits. I have done both kits, but this article will concentrate on the Hasegawa offering, using the Paragon conversion kit and Tiger Wing decals for VF-195’s "Chippy-Ho!", the CAG’s aircraft at the time aboard the U.S.S. Independance.
The kit right out of the box will make a very good prototype model with only a few improvements, but to do a production version, will require quite a lot of work. I chose to drop the flaps and slats as well as add in the resin bits and the photo etch pieces that came with the conversion kit.
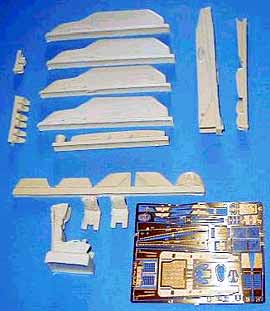
Above are the parts supplied by Paragon. All of these pieces were used on my model with the exception of the spotlight that was provided for the Canadian aircraft and one of the ejection seat inserts. Two seat inserts are provided so either the U.S. or the Canadian versions can be made.
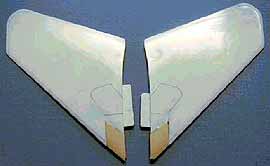
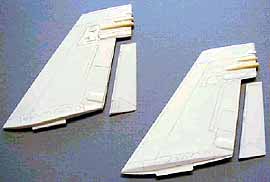
I started the conversion work by modifying the wings. Below are the wing upper and lower halves poior to modification.
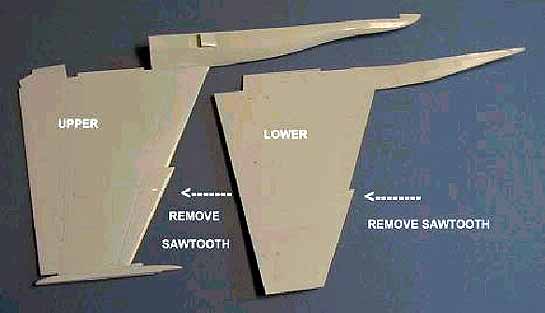
The sawtooth edges will have to be removed and the leading edge of the wing sanded to the correct profile.
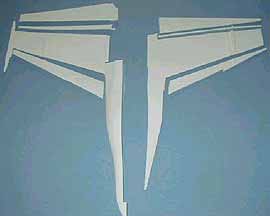
To drop the slats and flaps, the upper and lower wings need to be cut as in the following photo. Note that this photo is of both the upper as well as the lower section of one wing half or side.
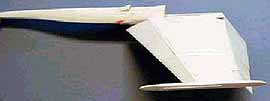
Now the component parts need to be fitted and re-assembled together with the desired locations of the slats and flaps as in the photo below.
At this point, the wing was sanded smooth and re-scribed. I used the opposite wing as a guide, and alternated wing halves to get the scribing done. The wings were now set aside and the fuselage was done next.
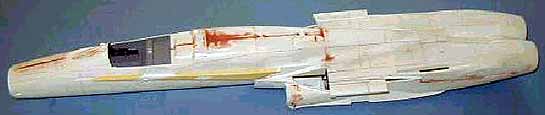
The fuselage was assembled pretty much as to plan. The instrument pannel was modified with photo etch, painted and installed per plan along with the cockpit assembly.
Now the LEX openings are filled with the resin filler pieces. The following photo shows the fuselage assembled with fillers and also with some seams filled with putty. The fuselage was now sanded smooth and re-scribed. This can be difficult because the whole model is molded from white plastic which is very difficult to see when scribing pannel lines. Go slow and be as accurate as you can. A little pencil lead graphite rubbed into the lines will aid in scribing. Accuracy here will pay dividends later.
The horizontal stabilizers were modified next, scribed, and set aside until final assembly.
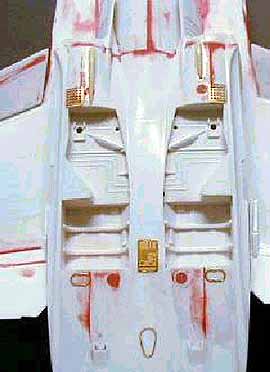
Now more photo etched pieces are added to the underside after additional seam filling was done.
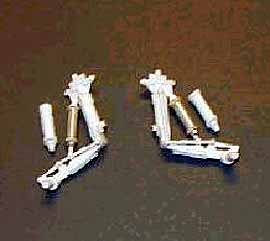
I don’t know why, but the landing gear as molded by Hasegawa is skewed and not made square to itself. Instead of trying to build a totally new landing gear, I opted to just replace the main shock absorbers.
In this photo, the shocks are already replaced with new ones made from aluminum tubing. The old ones are shown next to the assemblies.
The wings and stabilizers were glued to the fuselage and all seams were filled and sanded down.
The vertical stabilizers were sanded smooth, modified,scribed and the rudders separated and re-positioned as shown. I offset them to starboard.
Next the nose cone was modified to accept the new resin gun ports, and the hole that was for the old pitot tube filled in. After modification, this assembly was glued to the fuselage.
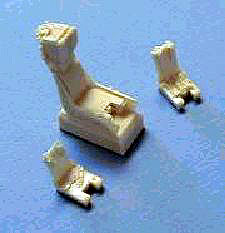
The seat is very well done and as mentioned before comes with two inserts, one for U.S. versions and one for Canadian Hornets.
The underwing stores’ pylons were located under the wings and installed per instructions supplied with the modification kit. No drop tanks were supplied with either kit. Paragon has some, but they are expensive and also I didn’t want to wait for them, so I made my own by modifying some that I had in my spares box. Chippy-Ho required two. These were made by cutting to the appropriate length and wrapping with sheet styrene to achieve the correct diameter.
One other thing is worth mentioning at this point. The canopy has a seam molded into it that runs directly down the center. This was sanded down and the canopy polished out.
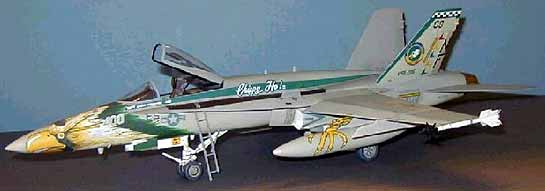
That’s about all there was to this mod. The Tiget Wings decals were gingerly applied and several applications of Solvaset were applied to get them to set, but they eventually settled down. The model was painted with Model Master enamels and weathered. It was quite a lot of work, but what the heck, I enjoyed it.
Happy modeling, Howard Weaver.
© Howard Weaver
This article was published on Wednesday, July 20 2011; Last modified on Saturday, May 14 2016