
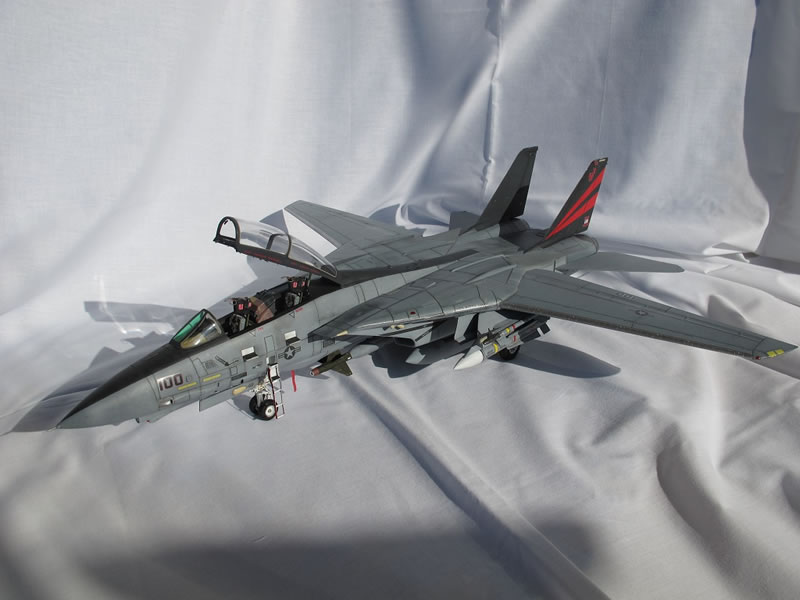
Tamiya 1/32 F-14A Tomcat
By Karim Bibi
The kit is Tamiya's F-14A Black knights boxing. To that I added the Eduard Big Ed set...I also used 4 different reference books, the DACO book, two Squadron/Signal books and one more, but I cant remember the name at the moment.
The kit has a couple of shortcomings that need to be dealt with to get it up to today's standards, including raised panel lines all over, horrible intakes and a couple more issues. To be honest, some of the sprues in the boxing are date stamped 1980, and you find some flash and some fit issues all along, but nothing that cant be fixed with some loving care and patience.
I'll list the items done in a random manner below.
I sanded down the complete kit then rescribed it correctly as some of the Tamiya panel lines are in the wrong place, some shouldn't even be there (beware of the reference materials I came across a couple of panel lines that were different in different books. At the end the main one I relied on is the FANTASTIC DACO book). The scribing took a while to be done, but at the end it was worth it. I made the anti slip coating on the top part of the intakes using putty and stippling it with a brush, did the GBUs fire retardant coating the same way too. Also sorted out a way to get the intakes to become seamless using acetate sheet, pretty simple work and the results were very satisfying.
I added some plumbing to the wheel bays as those are pretty bare in kit form (fuse wire, soldering wire, vinyl tubing...etc) as per references.
I used the whole of the Eduard Big Ed set on the kit with the exception of the slime lights that came with the set, as I found those to be the same colour registry as the decal provided ones, but thicker.
Used Tamiya paints for the turkey, used a mix for the light and dark ghost gray, and used the instruction call outs for the skunk line on the back. The skunk line was hand masked and painted as those come in the kit in decal form and the decals overall are on the thick side (and you can't weather decals like you could with paint). I used a new technique on the kit called black basing that Matt (DoogsATX) has come up with, and I will post a link to his blog where he explains the technique in detail in case someone wants to get to use it, along with a link to my WIP thread for this build, as there are some techniques I used that might come in handy to you guys too...
The black basing gives the paint finish a faded and mottled look, and on top of that I also used the salt chipping technique on the top part of the aircraft...
The aircraft was finished as a boss machine, VF154 Black Knights CAG bird.
For the weathering, on top of the black basing and chipping, I used a dark gray wash, and oils for streaking and fading. Oil colours used were dark gray, light gray, buff, old rust and brown.


Well, that's mostly it, I'm sure I might have forgotten some stuff, but this is the majority of it.
© Karim Bibi 2014
This article was published on Sunday, December 28 2014; Last modified on Tuesday, March 01 2016