
Hasegawa 1/32 F-16C Viper “Alaska Aggressor”
By Jeff Herne
The Markings
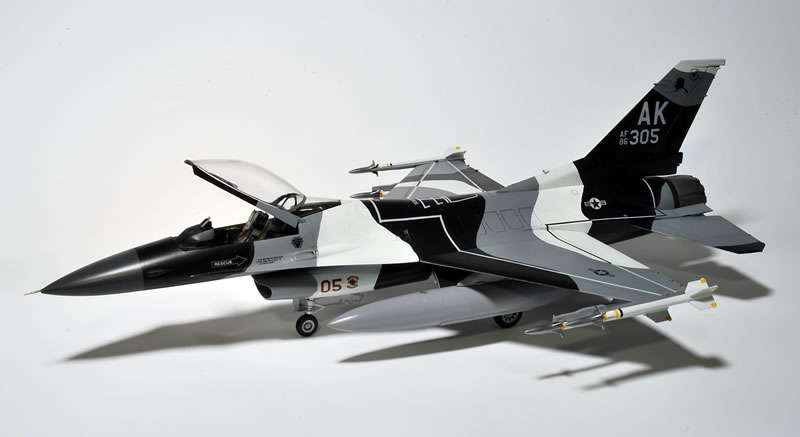
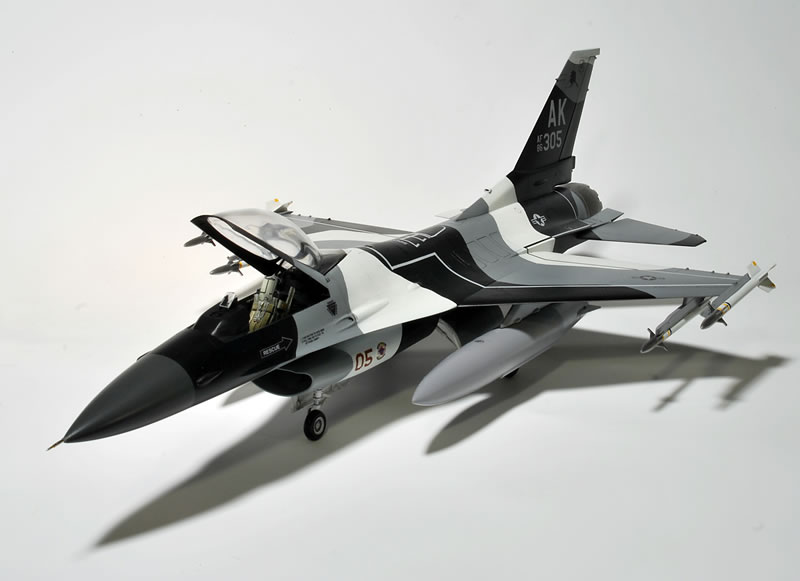
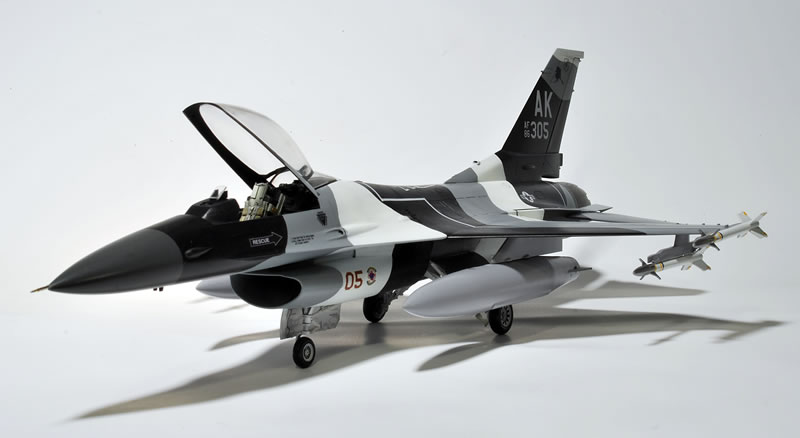
A few years back, F-16s from Alaska and Washington were painted into “Aggressor Schemes” for the 2008 Red Flag Alaska war games. They consisted of the Lizard Scheme, green and grown and tan, the Flanker Scheme, with blues and grays, and the Arctic Scheme, with black, white and gray. Each of one these schemes transforms a normally mundane all-gray Viper into a colorful aircraft that screams out to be modeled.
Now, way back in 2008 when these schemes appeared, several companies released decal sheets, including Two Bobs. Of course, back in 2008 I was still in WW2 mode and had little interest in modern aircraft. Fast forward to 2014…does anyone have these decals in 1/32 anymore? Oh hell no, and those that do – aren’t parting with them…so what’s a guy to do?
Well that’s the easy part – at least for me…Fire up Photoshop and Google images and get to work… I managed to get a scan of the long-out-of-production TwoBobs sheet, which allowed me to measure the dimensions of the markings, and get an idea for what I needed to recreate.
I chose the Arctic Aggressor – which of course has markings in white and black. Had I chosen one of the other schemes, I could have used readily-available generic gray markings…but no one has ever accused me of being overly bright.
I did a Google image search for the squadron and ejection seat and rescue logos, which I found in the public relations section of the squadron’s website. I found generic modern stars and bars which were easily manipulated and color changed in Photoshop, and used the Amarillo USAF font for everything else.
The pilot’s name and crew names on the aircraft were, amazingly, a simple bold-face, italicized font in Microsoft Word, which makes perfect sense, as I use Word for stenciling on my commercial lettering projects.
I can’t print white, obviously, so I obtained both white and clear decal film, and printed two sets of decals, one on each type of paper. If the marking on the aircraft is white, like the tail codes, I simply printed a thin black or gray outline around the letter and trimmed it carefully, then blended the paint into the decal edge with a fine brush. If the marking was black on gray or white, I used clear decal film to allow the background color to show through. The fuselage numbers were done by laying a red number over the top of a larger, yellow number to create the yellow-outlined marking.
The decal paper was, amazingly, Testors’ brand sourced at my local art/craft store…I think it’s the first time they’ve had anything other than CA and red sable brushes that I’ve needed.
The Kit
Prior to this model, the ‘newest’ aircraft I’d build were F-4 Phantoms and a Tamiya F-14, so I knew very little about the ins-and-outs of modern aircraft. I had an old Hasegawa F-16A/C/Plus in the stash, and figured if it’s half as good as all the other Hasegawa kits I’ve done recently, like the Ki-61, Ki-84, Fw 190D, Bf 109G-6, how bad can it be? I don’t even need to answer that question. If you’re getting an F-16, go with Tamiya or Academy, plain and simple. This is not a great kit by any stretch, especially when you consider Hasegawa is still trying to get $60 retail for it. Knowing that my decals were a hit-or-miss proposition, I decided not to risk screwing up a newer kit with my homemade decals, especially since the paint scheme requires special markings and there were no other alternatives.
I assembled the kit, added a Black Box cockpit, and did some basic detailing with wire, solder, etc. I painted the model with a combination of Tamiya and Gunze colors, scrounged some Aim-9 missiles from the spares box, and called it done. I sprayed the afterburner can with Alclad and Metalizer. The decals went on nicely but were a little too thick, and they stand out when you get real close to the model.
In hindsight, I’m glad I chose the path I did, not using an expensive Tamiya kit or Academy kit. The quality of my decals made the quality of the build comparable, and all in all it was a successful experiment. Fortunately, my next Viper build is an Academy F-16CJ with TwoBobs decals in the blue flanker scheme, so the results should be much better.


© Jeff Herne 2014
This article was published on Wednesday, May 14 2014; Last modified on Tuesday, April 12 2016