
Rebuilding the 21st Century Toys 1:18 F-104G Starfighter - Part 1
By Dr Menelaos Skourtopoulos
History
The first Starfighters arrived in Greece in March-April 1964. The (then Royal) Hellenic Air Force (RoHAF) received through the Military Assistance Program (MAP) 38 F-104Gs and 4 TF-104Gs.
They were all in overall natural metal finish with white wings (a grey primer was often used for the underside of the wing) and carried a "buzz number" (FG- plus the last three digits of the serial number) on the fuselage behind the wings. In 1966 came five more F-104Gs and two TF-104Gs.
Two squadrons flew the F/RF-104G, the 335 Interceptor Squadron and the 336 Fighter-Bomber Squadron. They flown until then the F-84F Thunderstreak. All of the RFs went to the 335 Sq. to build one of its two subunits. The Air Force wished actually to manned 5 Squadrons with the F-104. But political and financial reasons led to 2 Starfighter and 3 Freedom Fighter Squadrons.
When the Starfighter was withdrawn from active duty in 1992-93 both 335 and 336 Sq. (in Araxos AB) converted to the LTV A-7E Corsair II and soon they will receive the F-16C/D Bl. 52+.
In 1971 all F/RF-104 were painted in the standard USAF-SEA camouflage and the good old silver glory days were over! The only difference to the US SEA-camo. was the FG-buzz numbers that still carried on the fuselage and the black (or olive drab) and light grey radom. You can easy found out, when the F-104 was a MAP or used aircraft from Germany or from the Netherlands. MAP 104s carried 5 digit numbers on the tail. Former Luftwaffe 104s carried only 4. More aircraft received in 1972 from Spain and in the eighties from Germany and the Netherlands.
The Starfighter career by the Luftwaffe was not the best one, by losing too many aircraft and generating a huge public echo against the 104. The Starfighter had a bad reputation among the Hellenic pilots too, but during the first year of operation by the RoHAF No 335 Sq. was able to fly more than 1000 hours without any accident proving once again that careful training and maintenance could make the Starfighter flying with the same safety as many other fighters of its generation. The “tube” was not an easy plane to fly but it was just years ahead of its time.
The HAF realised early that the 104 was not an aircraft for “rookies”. So only experienced pilots were allowed to fly it. The rang of the most of the Hellenic F-104 pilots were Major! One measure for more safety was the installation of the MB GQ7 zero-zero seat. All of the HAF-104s flown until 1973 with the C2 seat and the installation of the MB-seat was very welcome among the pilots.
After 224.489 flight hours and with 16 lives lost (one of the lowest rates among the NATO) the Starfighter was faced out from active duty in 1993. Today you can see the Starfighter only in the museum and as a gate guard in many Air Bases and places in Greece. The rest of them is laying in the bone yards of various depots or it’s already scraped off…
The pilots that flew the F-104 are all proud men to have flown the “missile with a man in it”!
The Starfighter Kits in the bigger scales
In the 32nd scale, we have two kits of the F-104G available, one from Hasegawa and the other from Revell. The Hasegawa Starfighter is the better Kit but Revell offers a far better price and here and there some better parts than the Hasegawa kit. BTW we need desperately a new F-104 Kit in the 32nd scale!
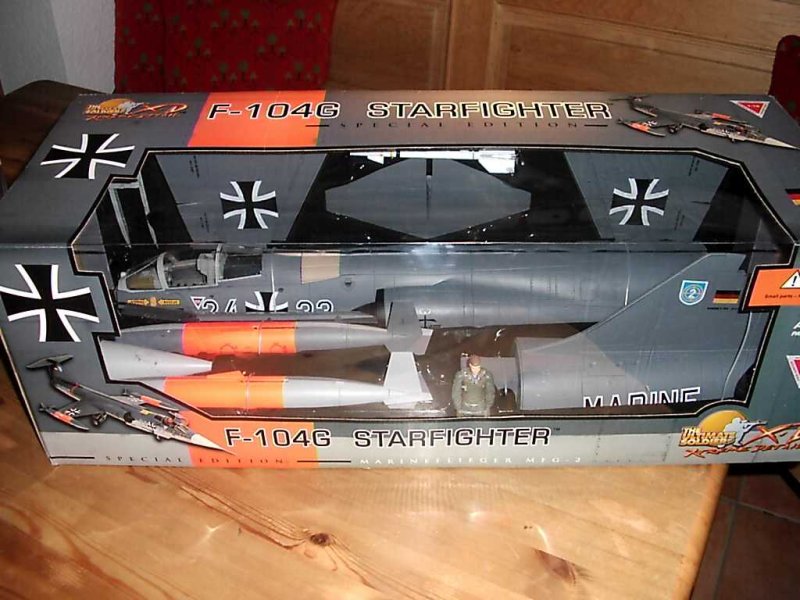
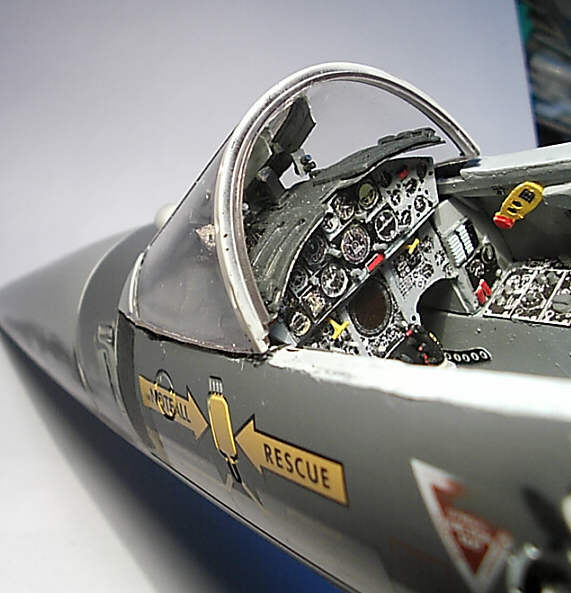
But one of the biggest surprise that I had in the last years, was the issue of the 1:18 F-104 kits. It is more a toy than a kit, already painted and ready to play. But the detail level on its surfaces is not bad at all and allows the making of a really nice big Model of the Starfighter. Meanwhile there’s also the C Version available. The Model is over 1m long and it’s damn big! You need a plenty of room for it and that should be considered before you buy it!
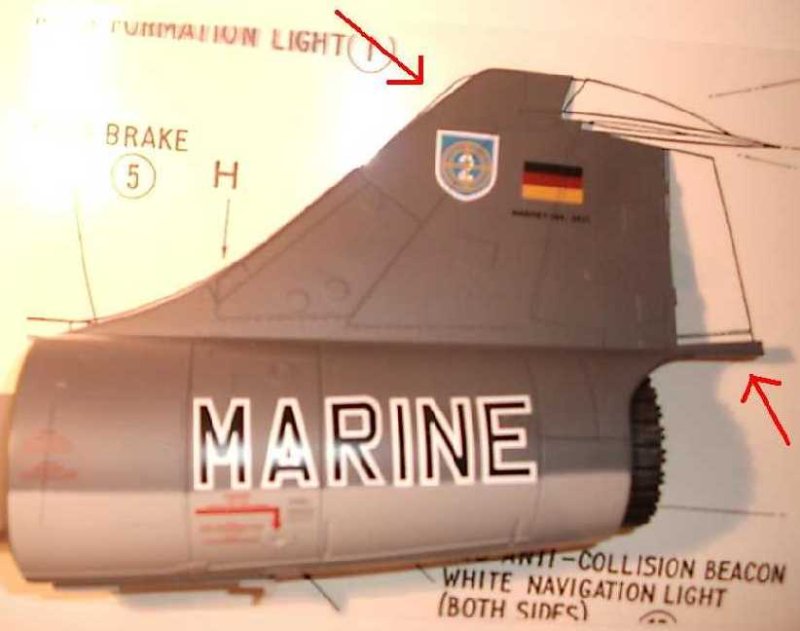
The kit comes in a huge box and there are some parts to snap together. The major fuselage, the tail with nozzle, the horizontal stabilator, the radome, the wings, the tip tanks, two AIM-9B with fuselage launcher and the canopy. Everything is already painted in a very good quality and represents a German NAVY (Bundesmarine) F-104G in grey upper surfaces and light grey under surfaces with the typical German high visibility dayglo orange tip tanks. The landing gear is retractable and the gear doors can open and close. All slats and flaps are also moveable. There is also a air refuelling probe and a pitot tube extra in the box.
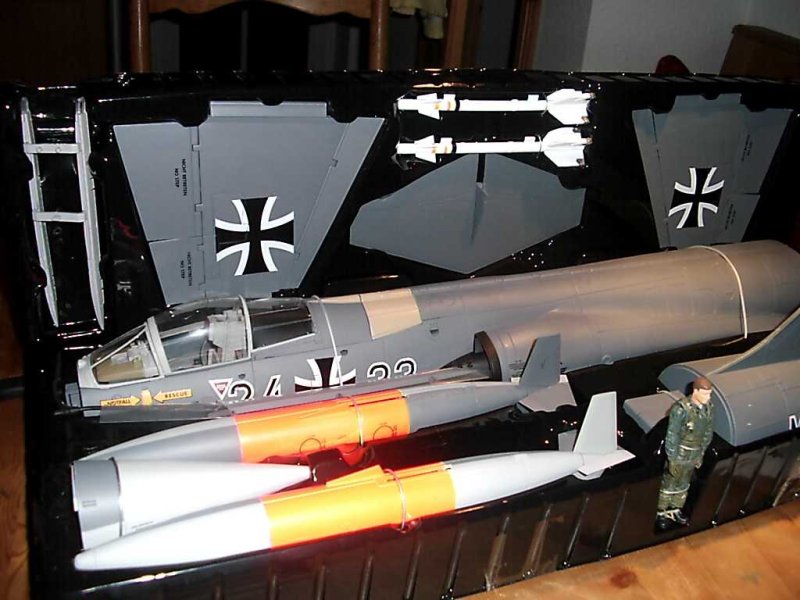
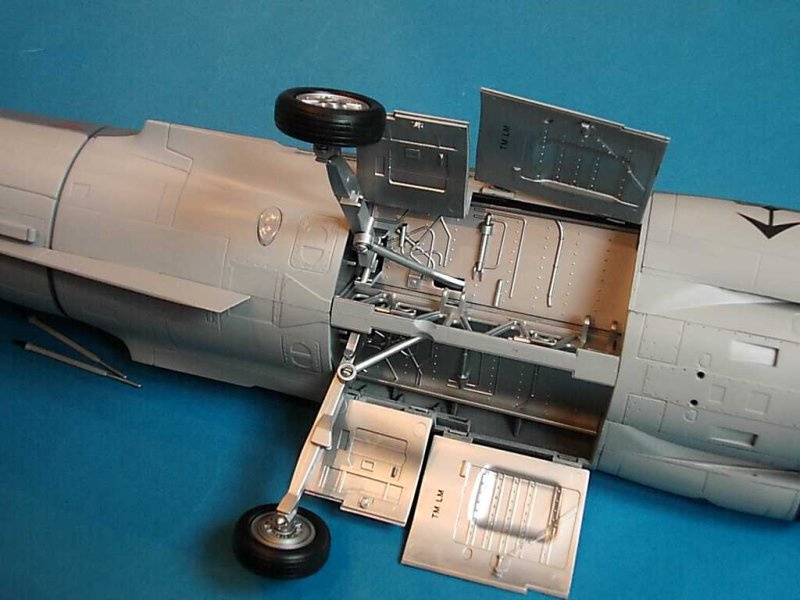
The detail level is really good with a basic cockpit and ejection seat (the C2 upward ejection seat, that not found in the German 104s). The spoked type wheels of the G-Version with rubber tires and the bulked main gear doors are nicely made.

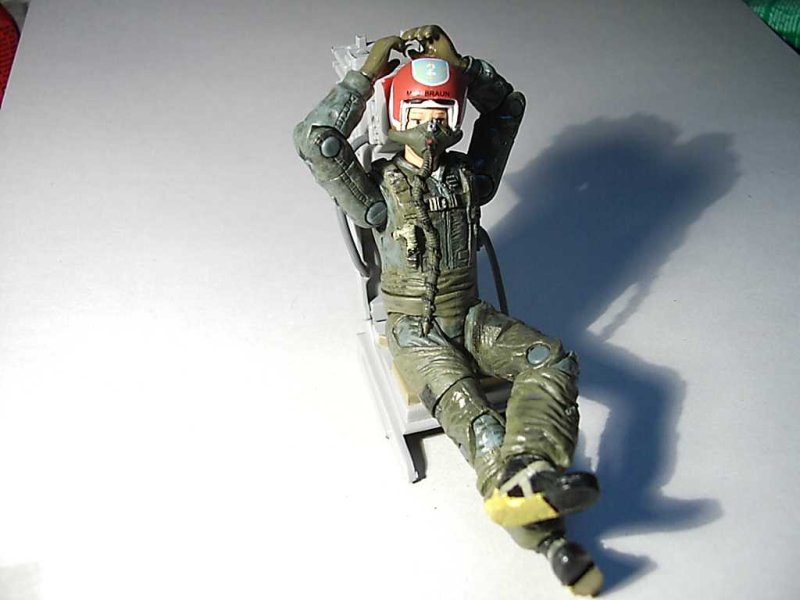
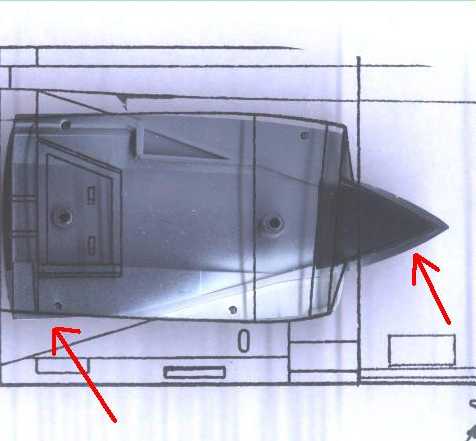
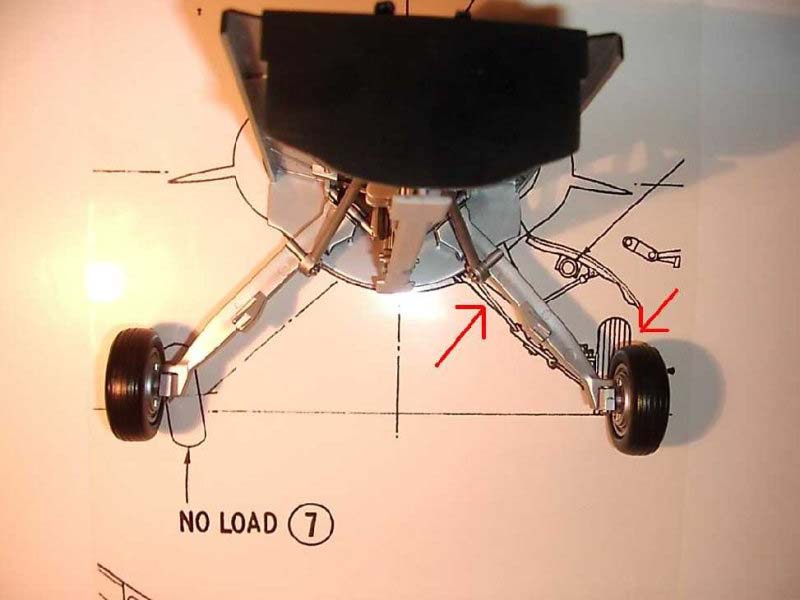
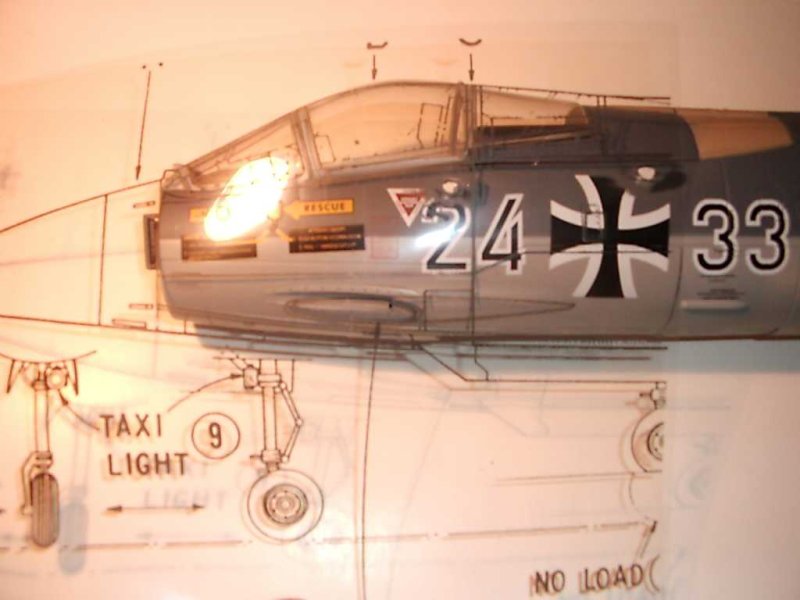
The main landing gear legs are somehow wrong. The canopy parts are also wrong. They are just too high to accommodate the sitting pilot inside. The pilot figure (Capt. Braun!) itself is well done too with moveable legs and arms and separate, parachute, helmet and oxygen mask. Even the typical spurs on his boots (They are hooked-up to the leg restraint cables) are represented.
The two huge tip tanks are nicely made and depict the late G-type tanks.
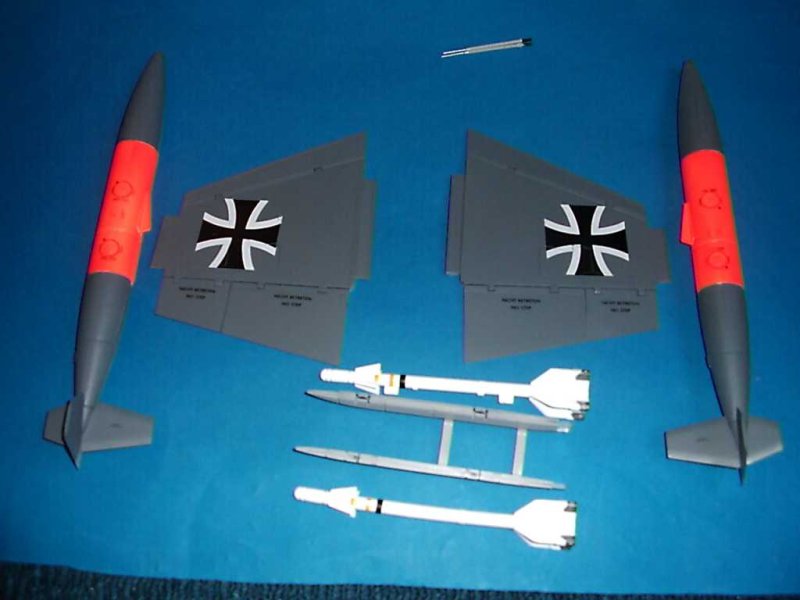
The two AIM-9B have wrong fins and they have to be changed, if you want to use them. Rebuilding and converting My wish was to build an acceptable Model kit of the Starfighter out of this toy. The huge 1:18 scale gives the opportunity to rebuild it as a model with high detail level and off course painting it as a Hellenic Air Force Starfighter in the early '70s. But I was anxious to see how correct the dimensions of this kit are. I enlarged 1:72 plans of the F-104G up to the 1:18 scale an checked it out. It’s astonishing how correct the dimensions are. I was very happy about it and this gave me more courage to go further with some dangerous surgical actions!
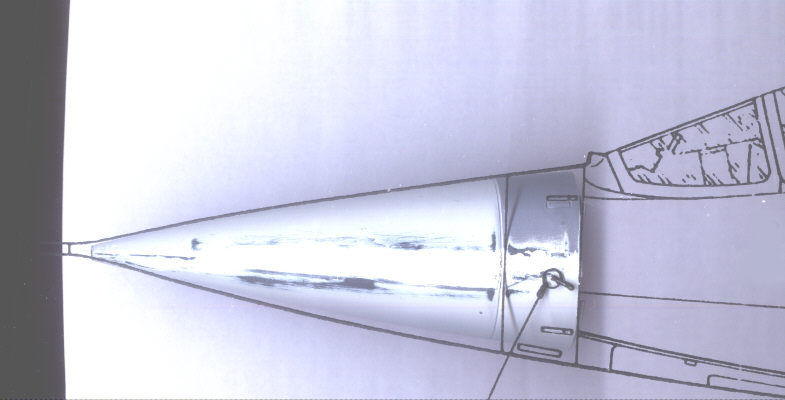
First off all I put everything together to see how good or bad that toy is. I was very surprised to see that is not bad at all (for a toy). Only problem is the main landing gear that is really crude with almost no details and is sitting to high over the ground.
The canopy as I said looks too high.
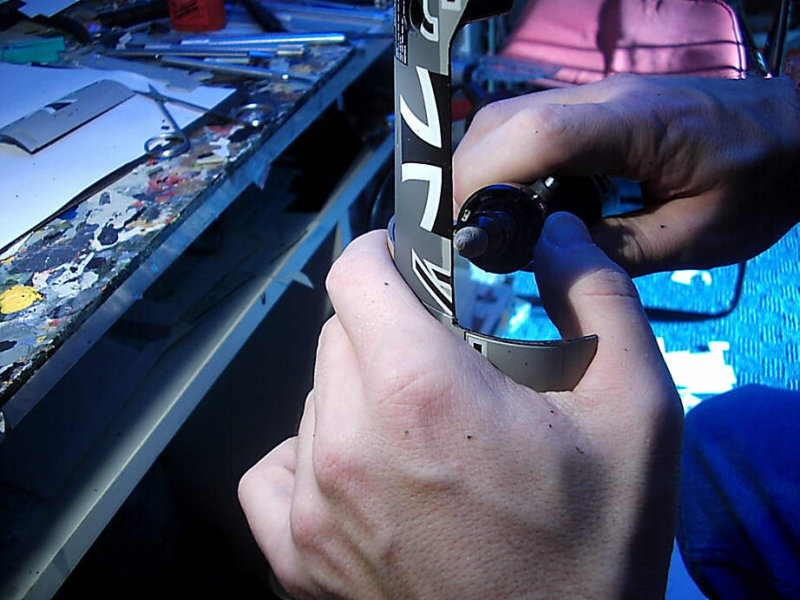
There are some more problems here and there, and I will show them in the text below. First of all, I had to put everything apart e.g. open the fuselage halves and setting free everything that had to be changed.
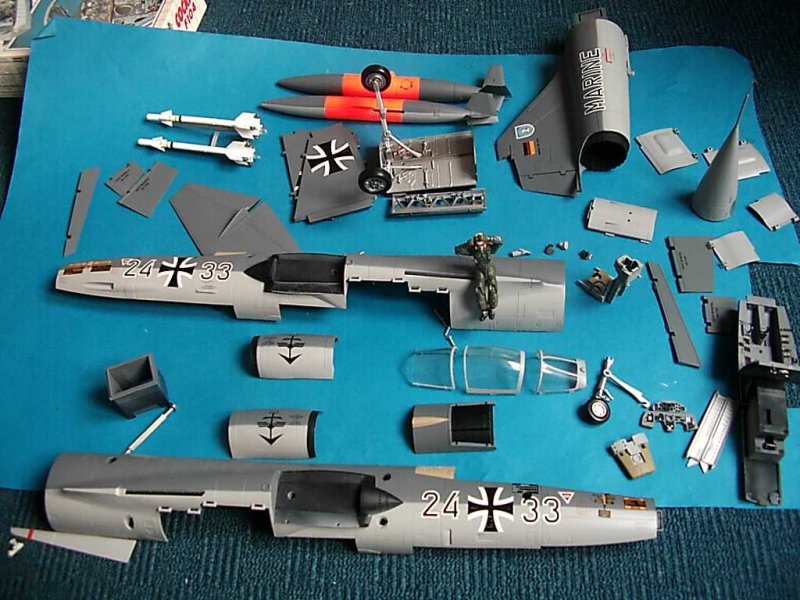
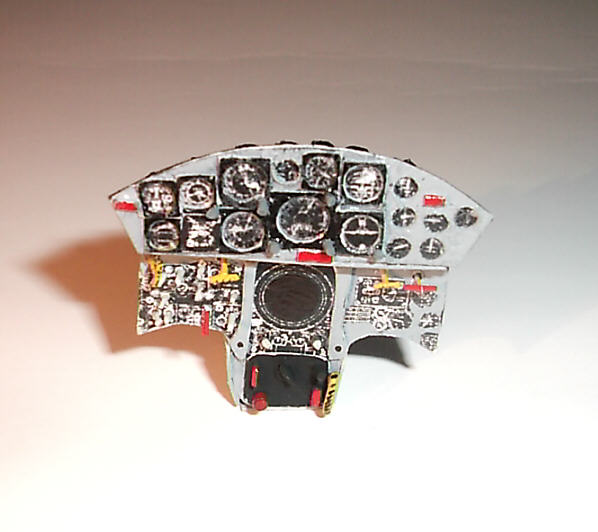
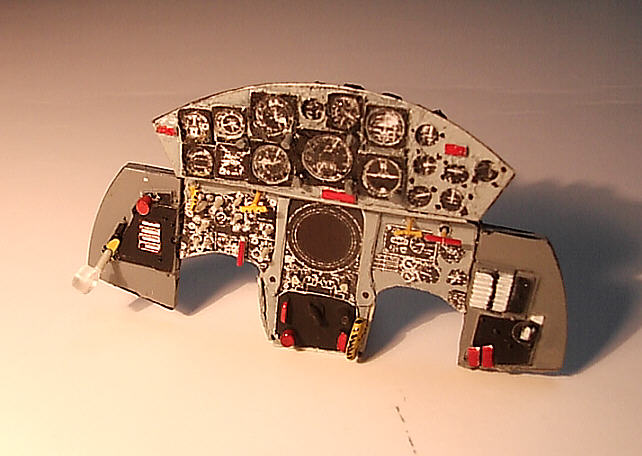
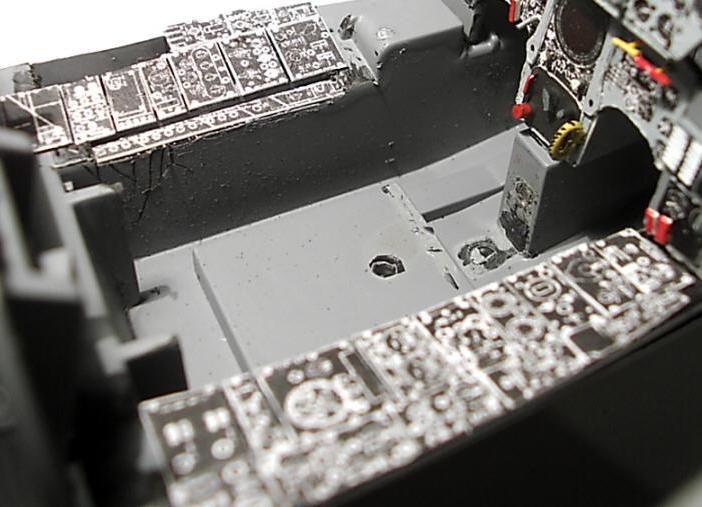
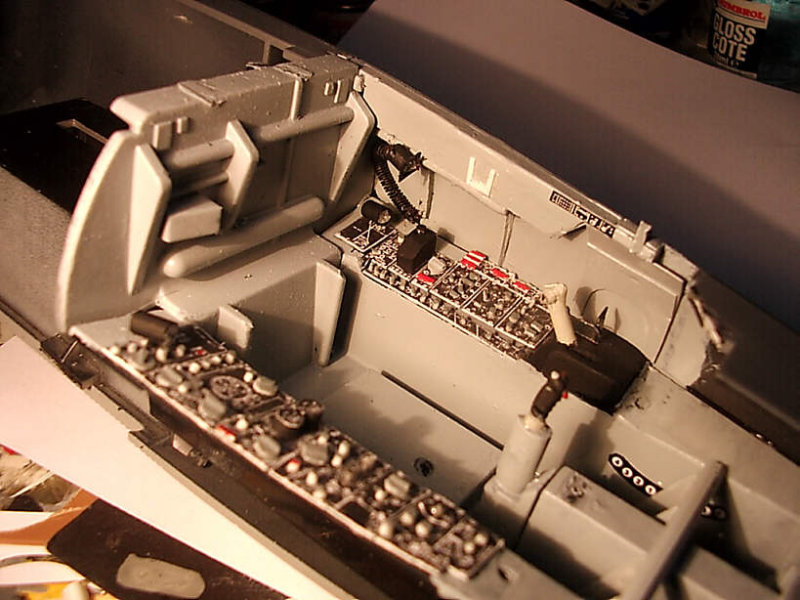
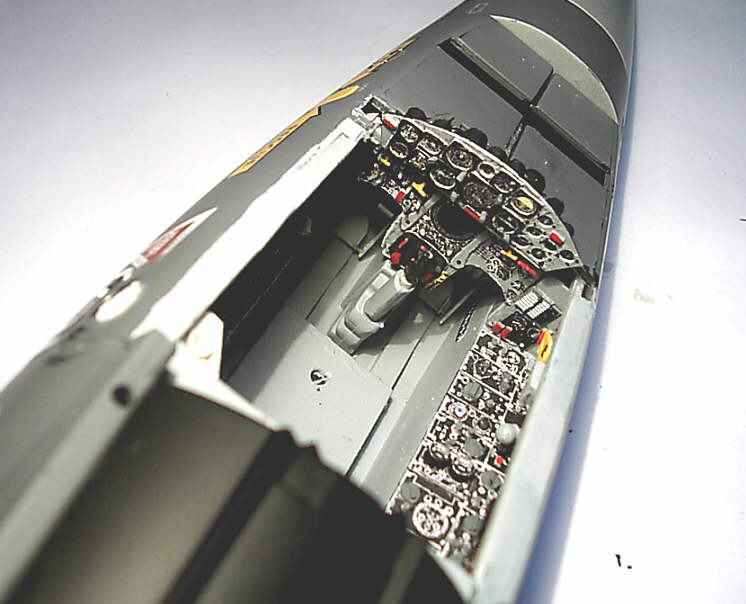
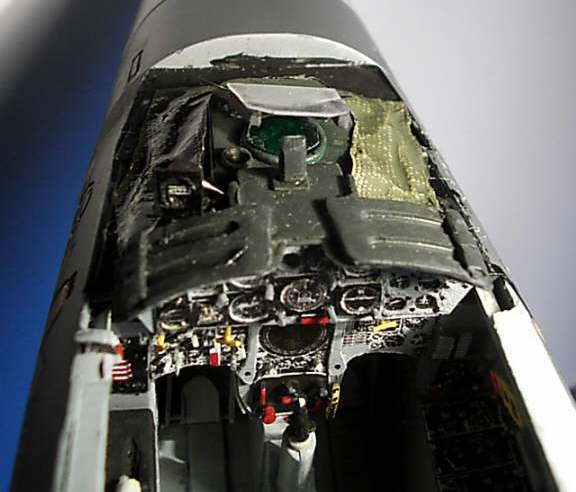
As you see in the photo, you can get almost everything apart. The two fuselage halves are hold together with screws. You have to put out the rubber covers over their holes to get through. The only part, that I couldn’t open was the afterburner section. Is not only screwed but also glued together and I don’t wanted to destroy it… I also separate the C2-Seat from the cockpit for further detailing. Take a look at the pilot in the photo, he is going crazy looking at all that mess. I began the rebuilding with the cockpit. The kit gives a basic cockpit bath with side consoles and instrument panel. There’s a good C2 seat but with basic detail level. This opens a new path for detailing.
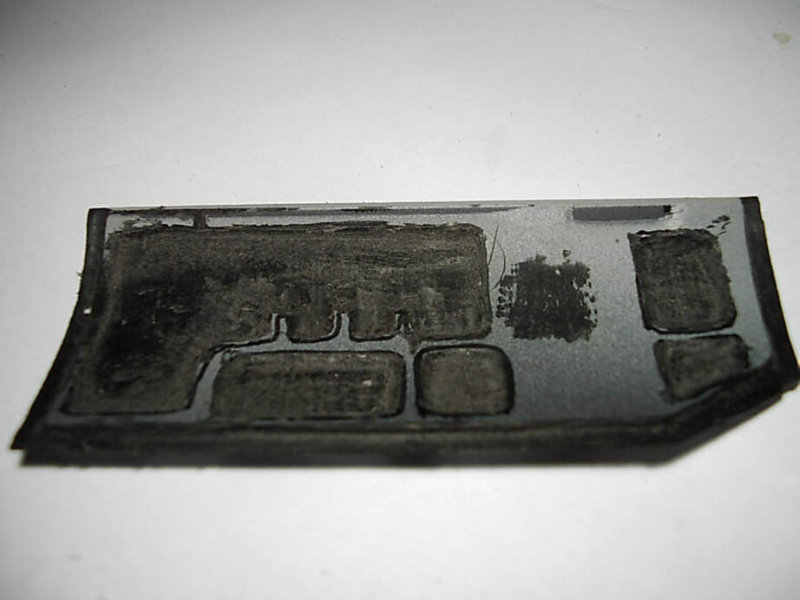
The instrument panel looks a bit like the original panel, but again that’s a part that you have to change. The side consoles did have the basics, but they have to be changed too. Otherwise there’s no detailing on the side walls of the cockpit.
Under the windshield there is also a rudimentary amount of detailing.
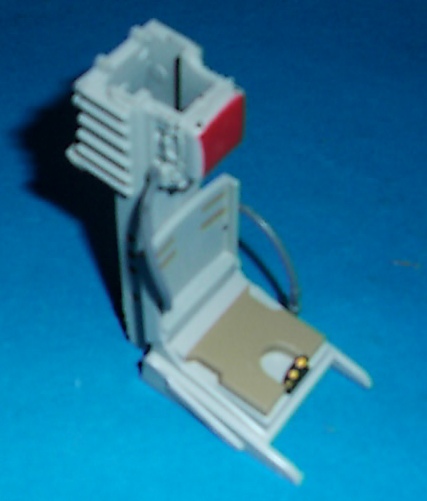
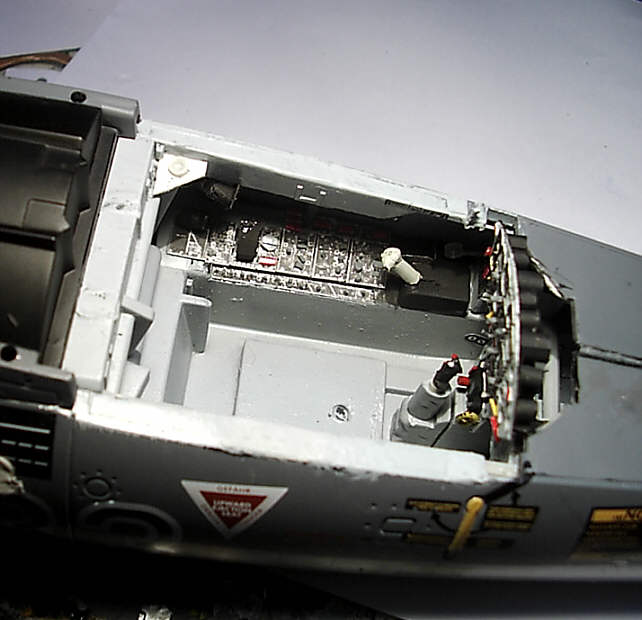
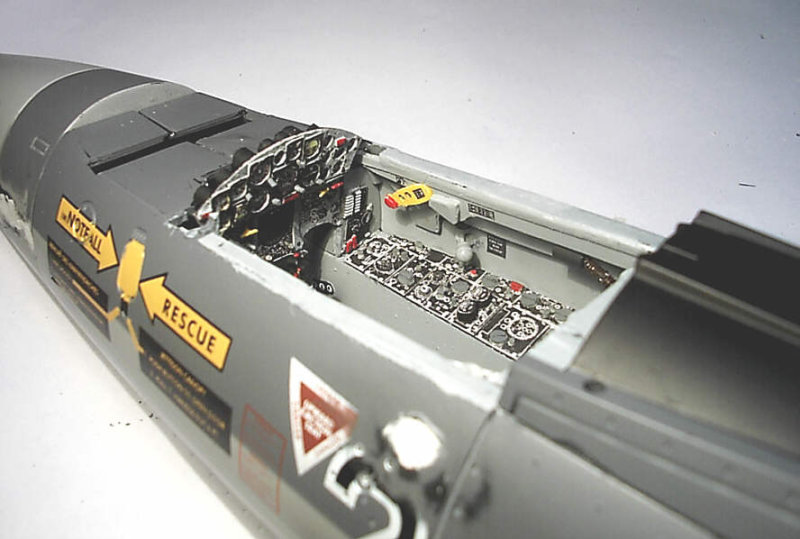
I removed the electronic/LOX bay door, because I wanted to show that compartment opened.

I used some styrene sheet to represent the two compartments inside it. More details will come at the end of the rebuilding. The inside life of the door itself had to be made from scratch, and the thick plastic of the kit and my Dremel helped me a lot!
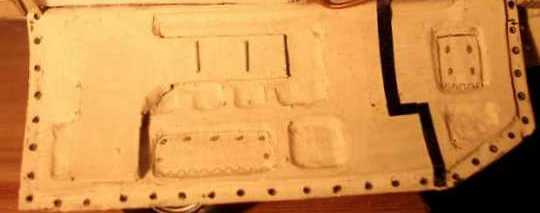
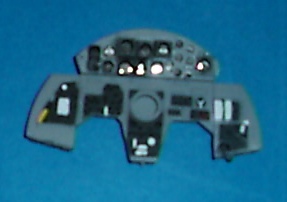
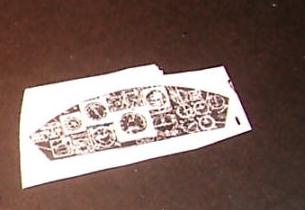
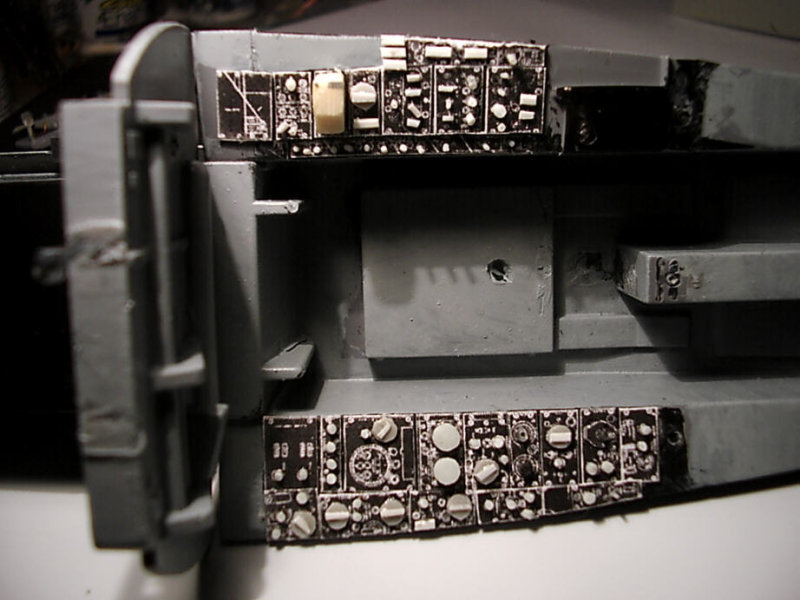
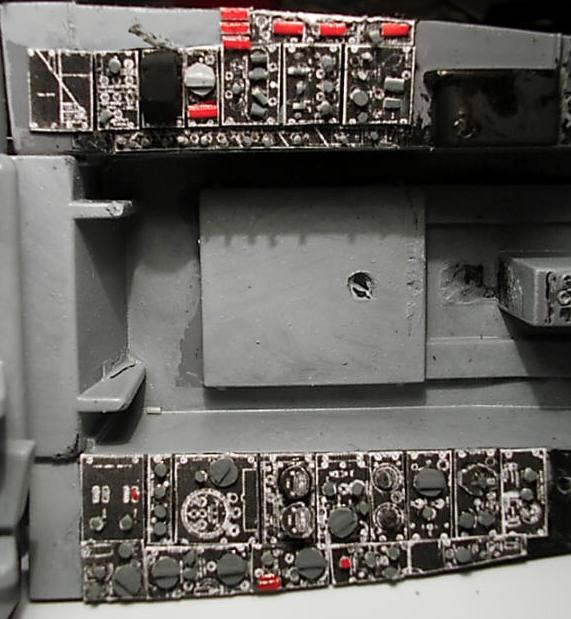
Then I removed everything out of the cockpit bath (C2-seat, stick, instr. Panel and antiglare shield with the gunsight illuminator inside it. The whole instrument panel was made from scratch. First I copied and scaled down drawings of the real instrument panel (watch out there are some minor differences between the interceptor and the fighter-bomber variants) and glue the copy on thin plastic styrene. To represent the instrument frames I cut of also thin plastic styrene and glue it on the proper position on the copied panel picture. I drilled those frames in various diameter with my Dremel. Before I glue those frames, I cut off transparent plastic pieces to represent the glasses of the instrument and glue them like a Sandwich on the panel. Various knobs, switches and T-handles were made from hot plastic styrene and wire. Basic panel colour was medium grey (Humbrol 127) with black instrument frames.
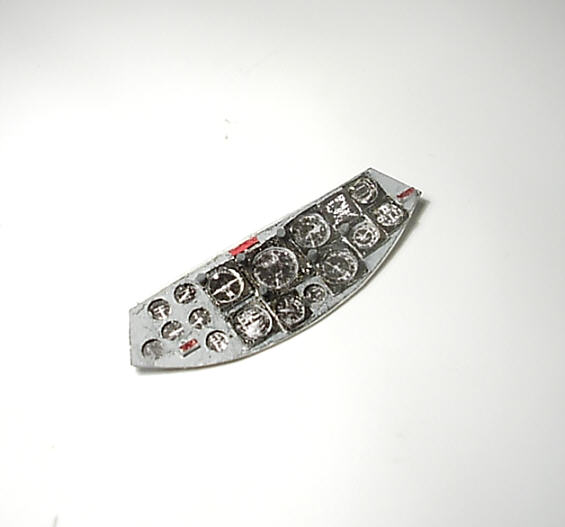
I also build the situation behind the panel, because the back life of some of the instruments are visible when you looking at the real F-104 through the windscreen.
I then cut off the side panels of the cockpit bath and made two new ones from plastic sheet. The left side panel of the 104 hat one small step beside the pilot and this was not shown in the kit. The myriads of knobs and switches on them was the next problem. I just copied and scaled up drawings of the side consoles, and glue them on those new consoles. The switches and knobs were made from plastic styrene in various diameter. You will need a lot of patience until you glue all of those switches (I didn’t count them sorry!), but after some few days of intensive work the result was well worth!
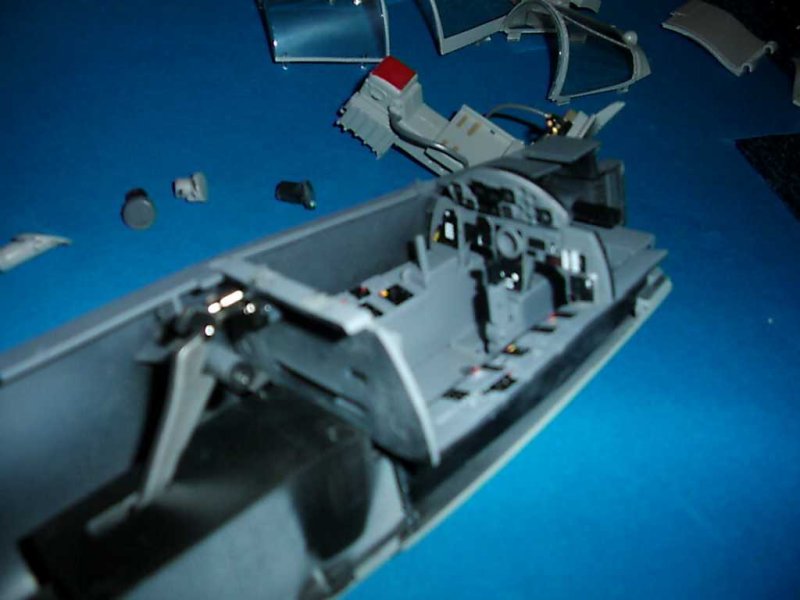
Next step was the pedals of the 104. They made again from scratch with plastic styrene. I also represent the angle indicators on each left and right side of the cockpit bath.
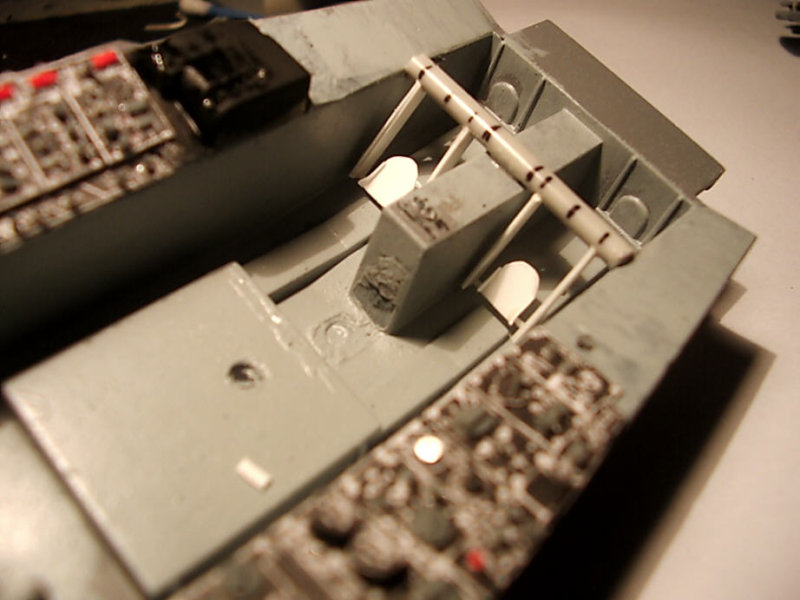
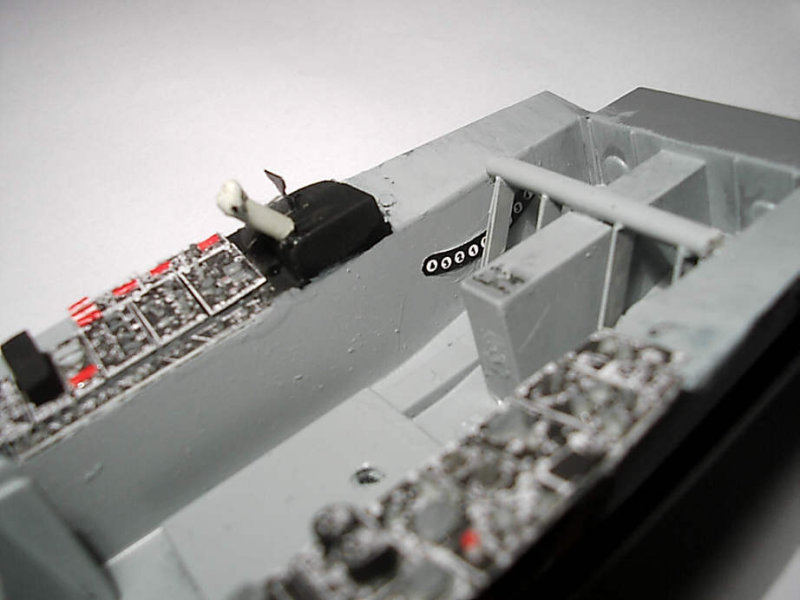
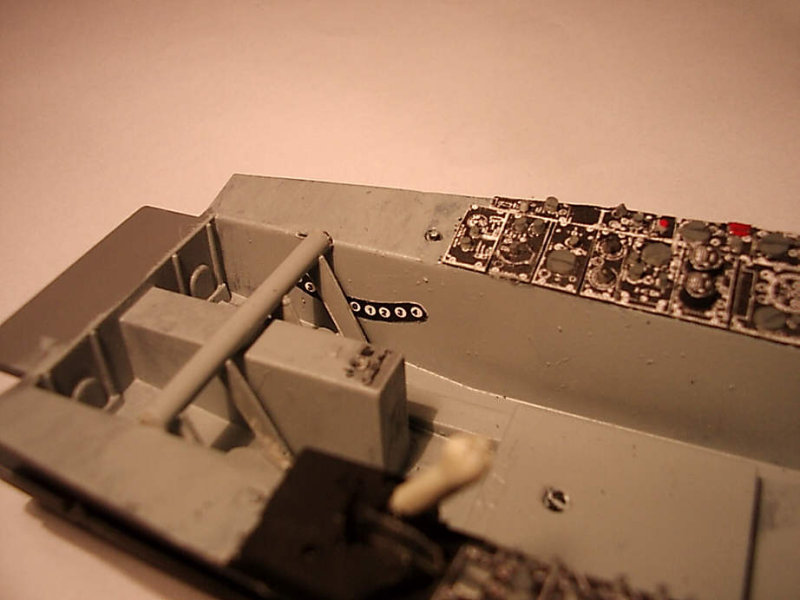
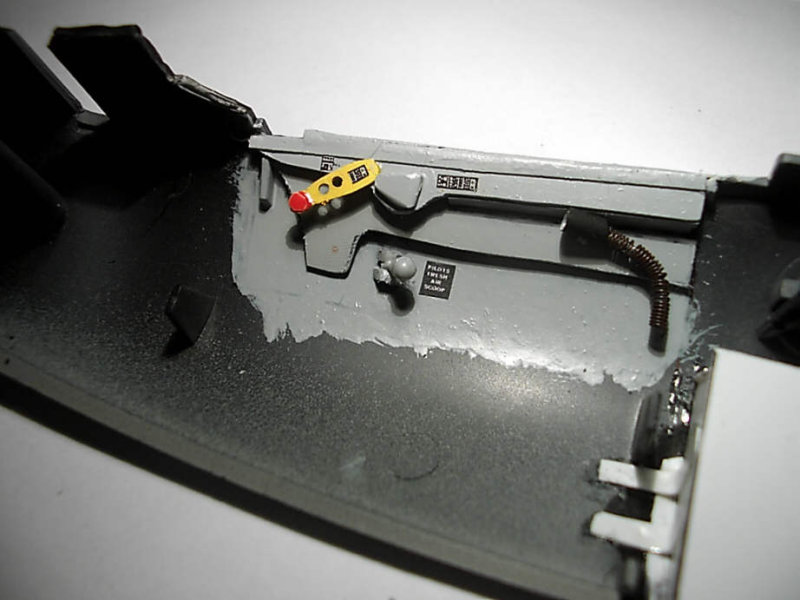
The throttle was made also from plastic styrene and some putty to form the upper end of the throttle. Next job was to work on the side walls of the cockpit region, because there are no details at all. I used some plastic styrene to represent the fuselage structure and the various switches, handles and spot lights. For the stick I used the basis of the kit and build the upper part from putty. Some decals are self made e.g. “Pilots fresh air scoop”.
I was very anxious to see if the new instrument panel will fix in the cockpit without making any more surgical actions, but, no problem. The accuracy of the kit is very good.
The antiglare cover of the instrument panel was rebuild to look like the real thing. I also made the combat camera from plastic styrene and place it in the middle of the covers forward position.
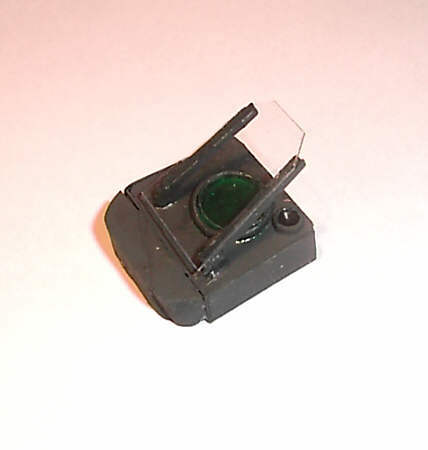
The gunsight of the kit is practically not usable, so I made it again from scratch using plastic sheets, plastic pieces and wire. I used the old but marvellous Esci’s 1:12 F-104G cockpit Kit as a template.
The region under the windshield of the Starfighter is not simple. There’s a canvas cover that covers the complex life beneath it. There are hundreds of cables that come out of the front panel instruments, vents and wires…and the problem is some of them are visible! So I simulate the regions that will be visible after covering them with that…canvas piece. The canvas cover was made from chocolate aluminium paper, that has a row surface. I painted it olive drab.
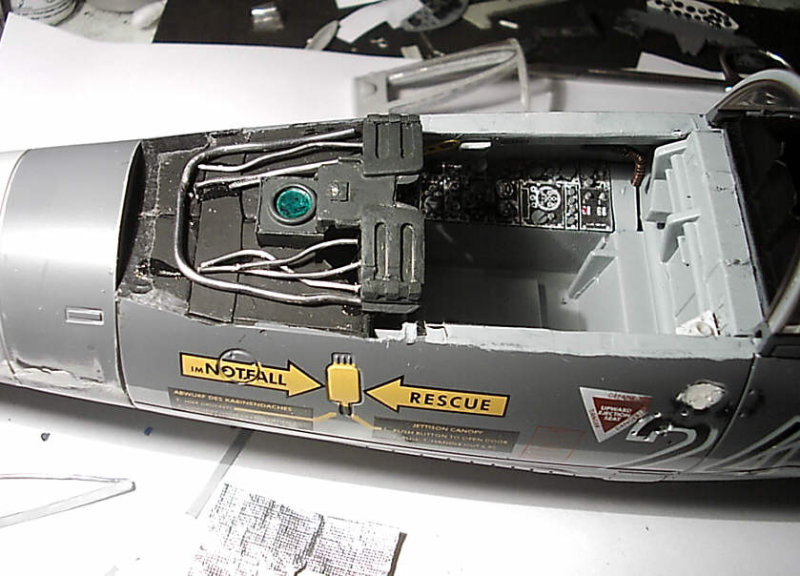
The windshield is also “naked” and there’s a lot of frame life inside of it. I cut off some narrow pieces of plastic styrene and glue them along the canopy’s middle frames. Two cables simulate the electric for the indicators in both sides of them.
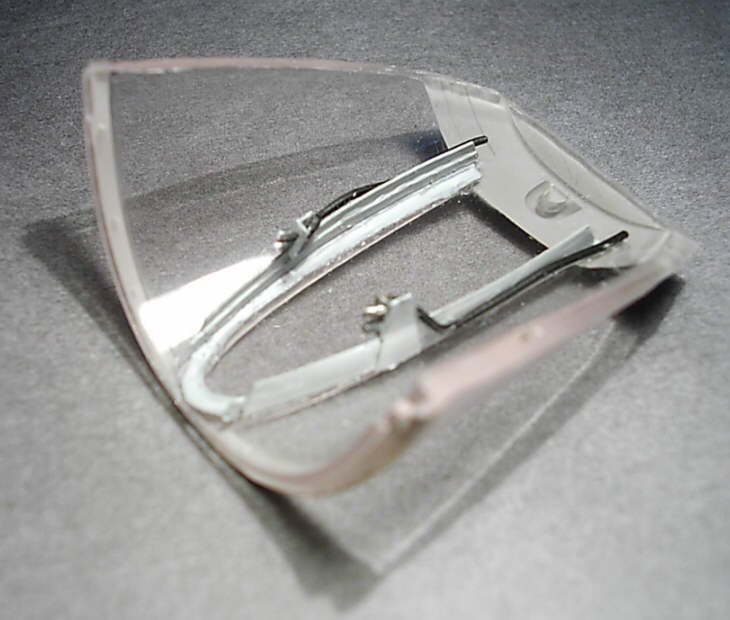
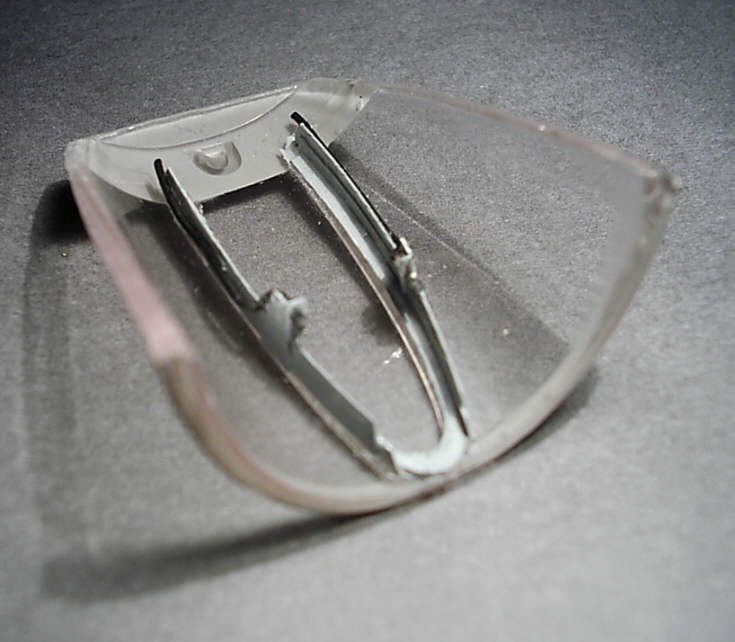
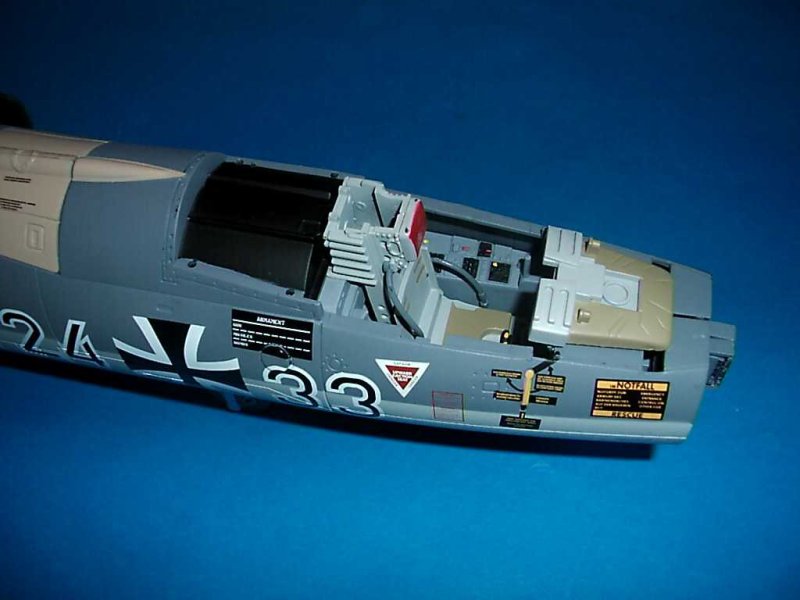
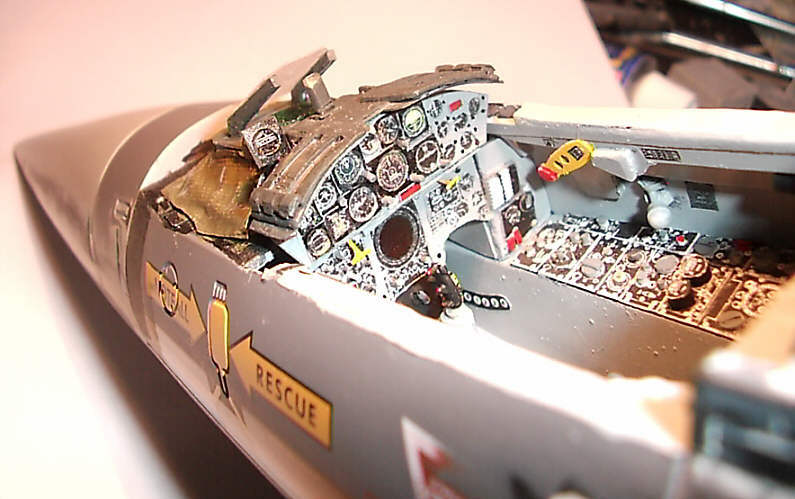
Then I hade to position the canopy over the gunsight and instruments. That part of the canopy is a bit too high again and had to be “narrowed”. I used the Dremel again.

© Dr. Menelaos Skourtopoulos
This article was published on Wednesday, July 20 2011; Last modified on Saturday, May 14 2016