
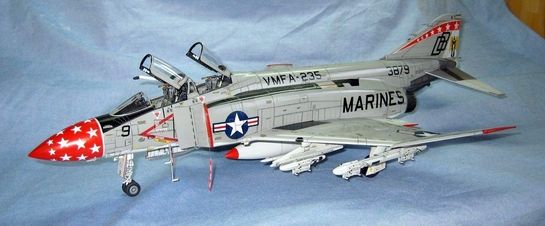
1/32 Tamiya F-4J VMFA - 235 Death Angels
By Douglas Chan
Hi guys, long time no see. I am with a Phantom this time. I hope you all like it.
There are many articles and reviews about this kit, so I think I would skip all those and just name some points which I consider worth discussing. I admit that this kit is one of the highest quality in the market. It's one piece fuselage and wings are really amazing. Well, it's a shame that I built this kit this late. But, it's better than never.
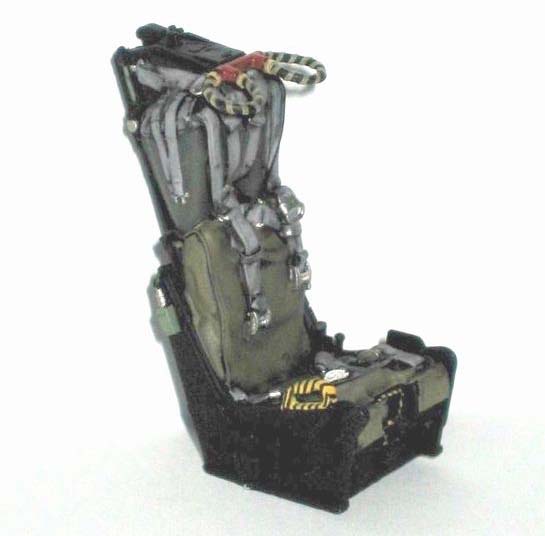
This Phantom is finished some half year ago. Actually I built a total of two. The story is that while I finished the fuselage of the first one and was spraying the final semi-gloss clear over the model, the clear cracked all over. I guess it is because I sprayed in a hot humid place and then took it into an air-conditioned room. The paint couldn't accommodate the temperature change so it cracked. I could not think of a way to make it good. CC then bought me a new one, which is the one you are looking at. The sad thing is I could not save the BlackBox cockpit installed in the scraped one.
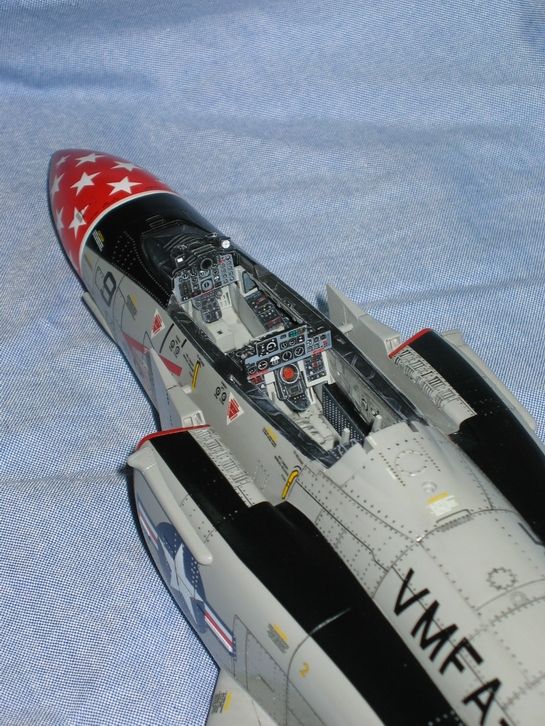
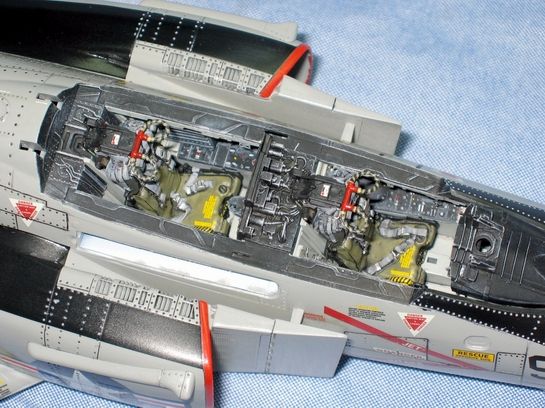
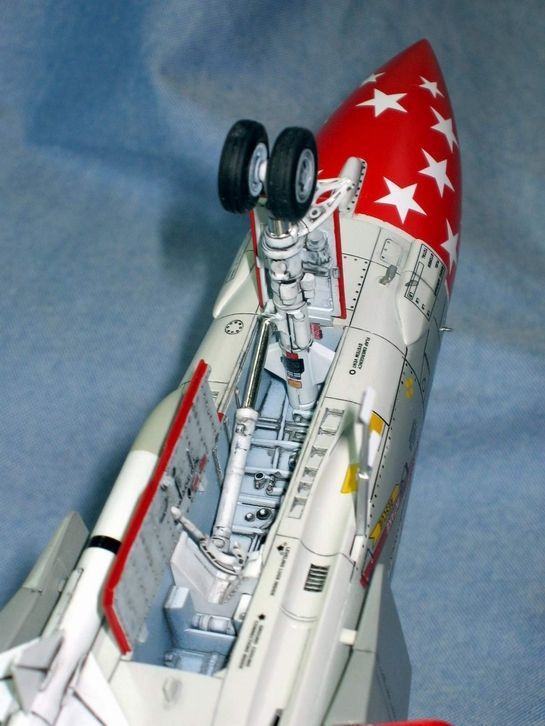
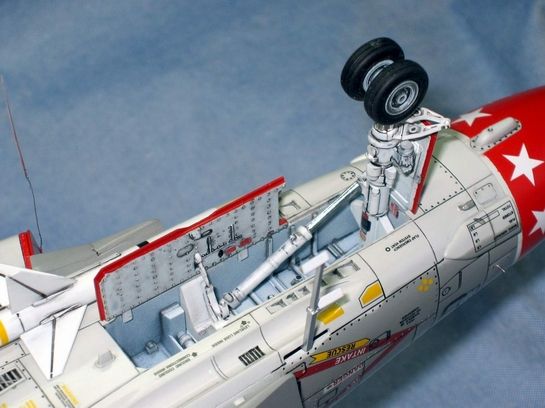
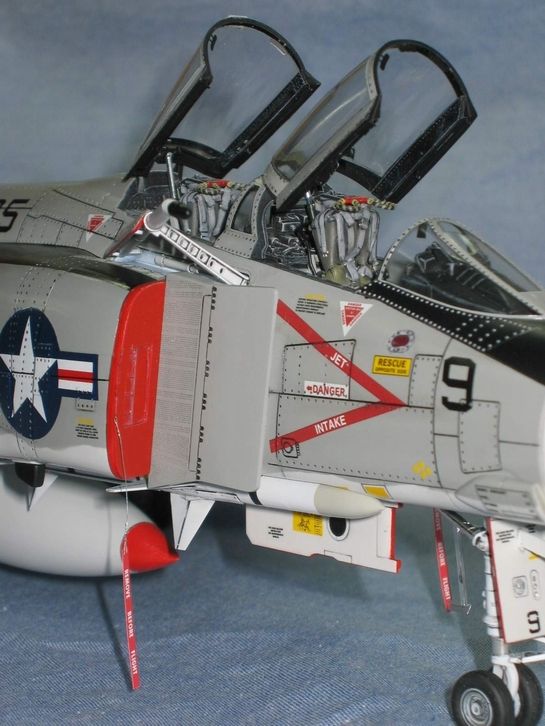
BlackBox cockpit is highly recommended, though what you see here is only the ejection seats. The seats are further enhanced with Eduard photo etched parts. They looks great.
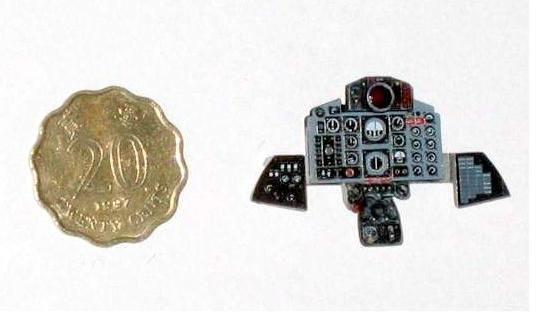
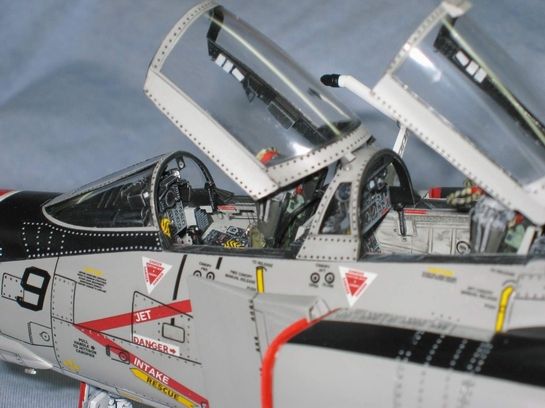
Eduard sets are also used to replace the original instrument panels. I used the new color photo etched set originally designed for F-4E. With a little modification, it looks satisfactory in this J model.
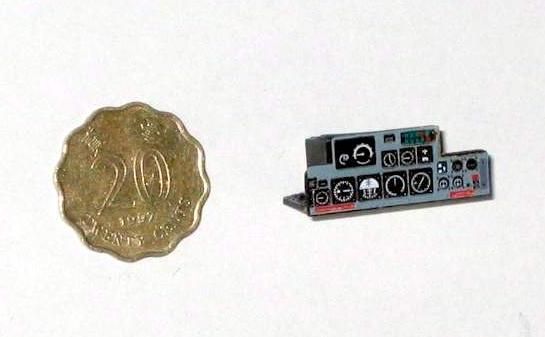
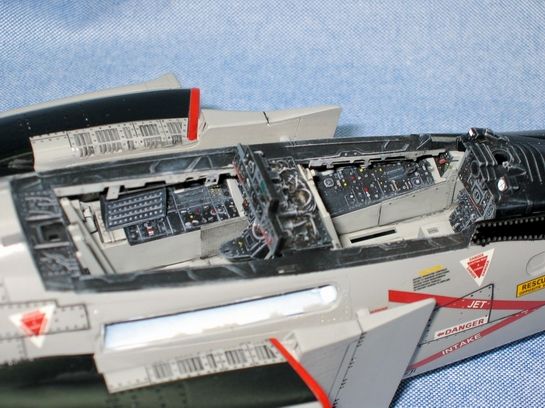
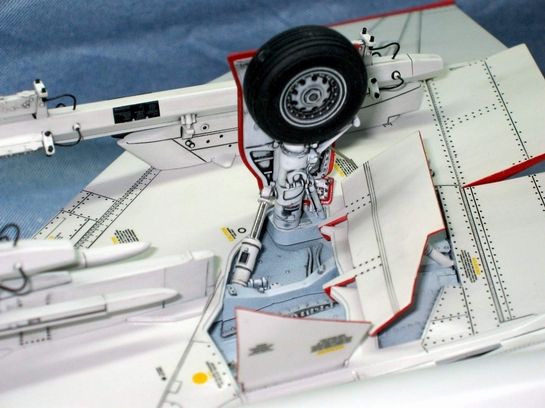
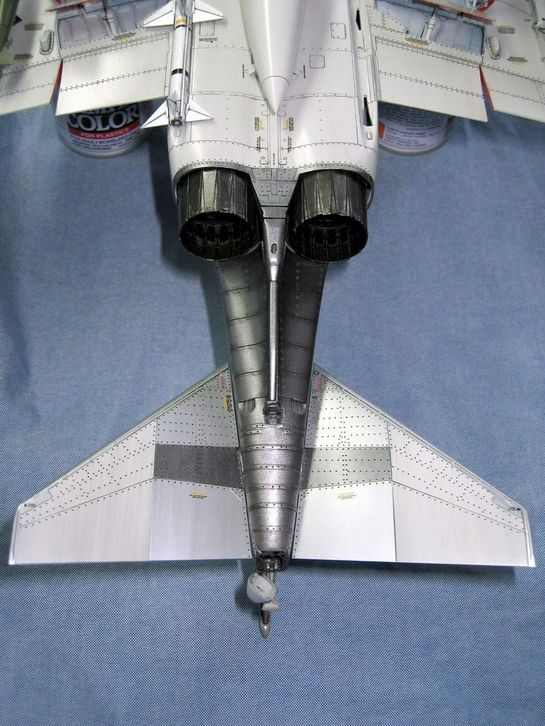
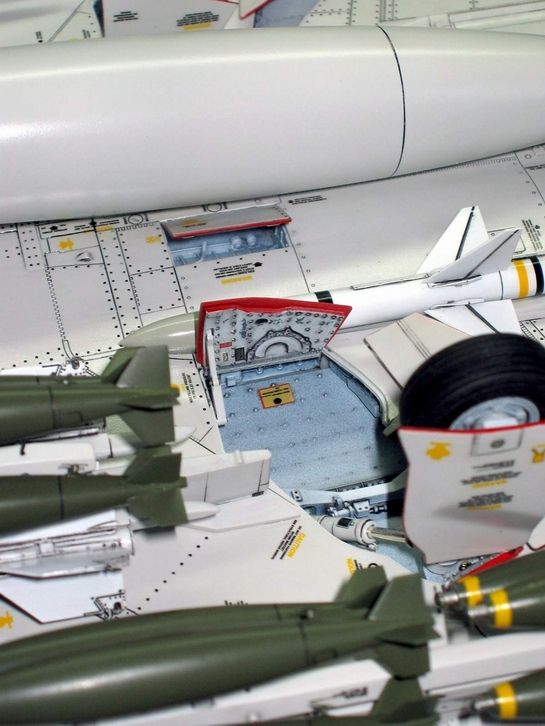
Other Eduard parts are used to modify the exhaust nozzles, canopies, landing gears, and the bombs. I have also scratch made some parts to make the cockpit bulkhead looks busy.

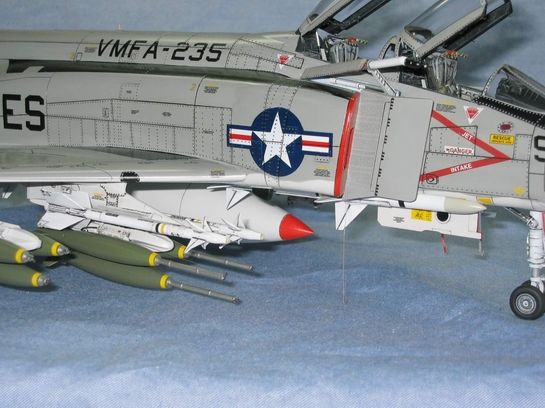
Eduard placards provided a very convenient way to detail the MER, landing gear bays, and cockpit.

Here is a list of the aftermarket parts I used:
- BlackBox ejection seats;
- Yellowhammer decal sheet;
- Eduard photo etched parts # 32074 - F-4E Phantom II Armament Set;
- Eduard photo etched parts #32080 - F-4E Phantom II Exhaust;
- Eduard photo etched parts #32503 - F-4E Phantom II interior set;
- Eduard photo etched parts # 32509 - F-4 Phantom II Placards;
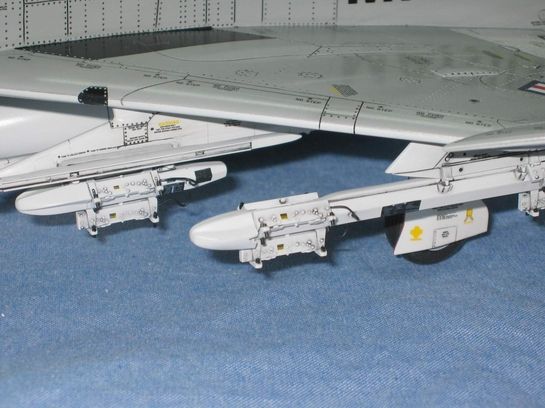
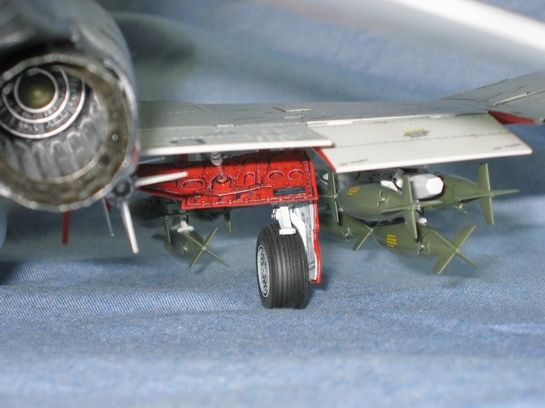
- The Gunsmoke Range, Flightpath, 1/32nd Scale AIM-7 Sparrow Missile Set;
- The Gunsmoke Range, Flightpath, 1/32nd Scale AIM-9L/M/R/S Sidewinder Missile Set; and
- Clear plastic lens of 2.5mm dia. for missile seeker.
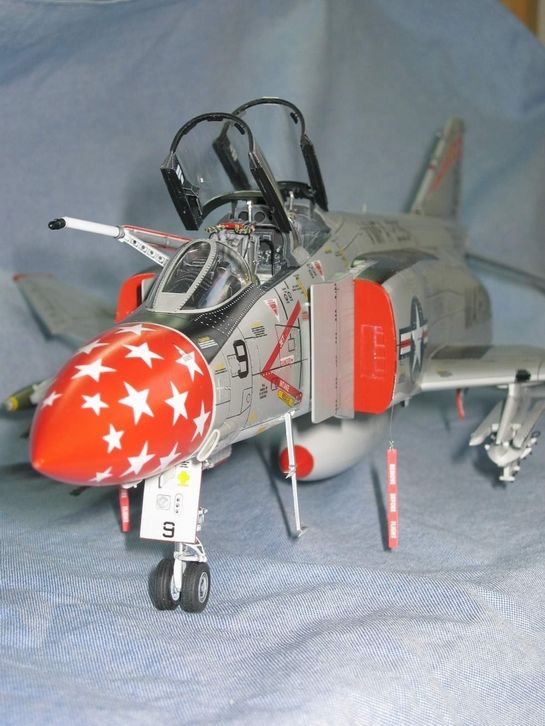
I only loaded ordnance on one side, so I have two different look with one single model.

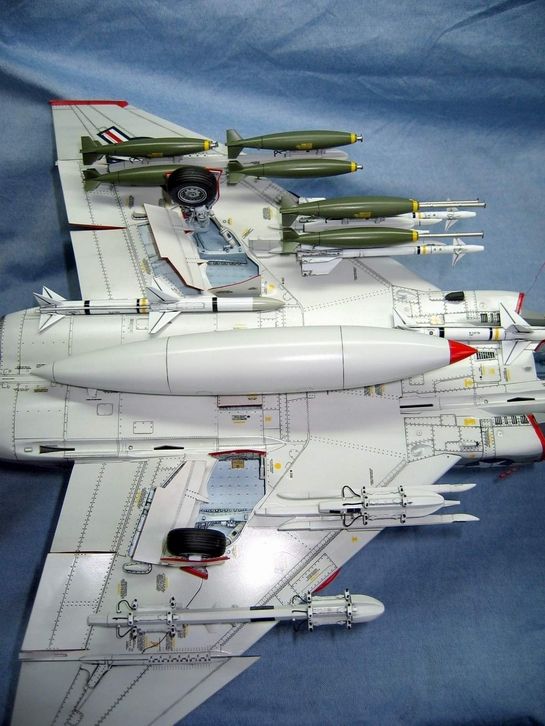
On contrary to the famous detail of this kit, intake duct is what this kit is notorious for. Even with Cutting Edge intake, I couldn't make the inside of the ducts smooth. I believe this is the reason people preferred to cover it with FOD covers. However, production of 1/32 FOD covers has stopped. May be there is only a few people building this kit now so after market manufacturers found it not economical to produce this item. So I made a pair by myself with plastic plate and Eduard 1/48 FOD set. The result is acceptable.
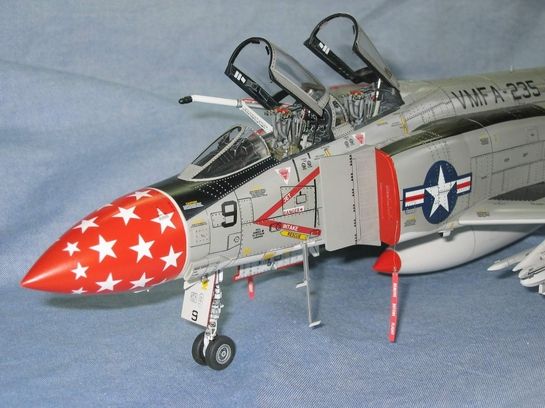
The decal I used is of Yellowhammer. It's VMFA-235 Death Angels. I really like the red radome with white stars. There is one thing which Yellowhammer didn't mention in their instruction - the ECM blister on the intakes should not be installed on the aircraft with that particular marking and aircraft number.
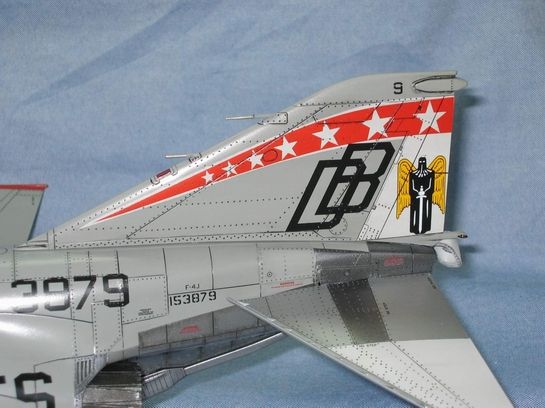
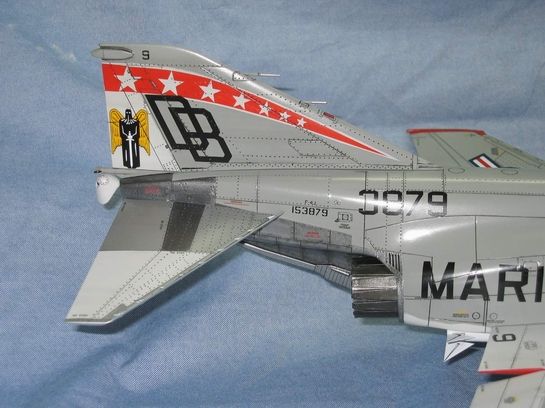
Here I want to thank Mr Paul Osborne who gave me a lot of information and advice on my work. I've made modification according to his advice and I could now tell you all "This is how she looked in 1972!". There is only one thing which is still outstanding - the dihedral angle of the outer wing. Please forgive me, Paul.
Last, the most important one, thanks CC!
© Douglas K. L. Chan
This article was published on Wednesday, July 20 2011; Last modified on Saturday, May 14 2016