
Trumpeter 1/32 MiG-15
By Howard Weaver
I had been waiting a very long time for someone to come out with an injection molded kit, in 1/32 scale, of the MiG-15. Now at last Trumpeter from China has produced one.
There were only a few things that I found with the kit buildup that I would have done differently if I had produced the kit. The first thing I noticed is the decals, You are limited to the People's Republic of China's Air Force only. I'm sure that there will be plenty of aftermarket decals that will come out later.
The next thing that I found during the build is that the intake splitter piece is too short on each side and doesn't fill out to the fuselage sides. If it is installed as sent from the manufacturer, you can look into the front intake and see the front of the cockpit tub. To cure this problem, I added a couple of pieces of sheet styrene to each side of this part so it fills out and reaches to each side of the insides of the fuselage.
The next problem is that the instrument panel, when installed, sits too low and does not come up high enough to meet the inside of the fuselage and leaves a considerable gap that is very noticeable if installed as kit instructions. This is easily cured by simply shimming it up. I don't recall how much, but if this is not corrected, it will be quite noticeable.
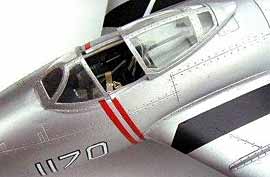
The next thing I found was a lack of cockpit detail. A friend loaned me that Polish publication of the MiG-15 that had great color photos of the cockpit interior. I'm sorry, but the publisher.s name escapes me [there are excellent publications available like the +4 MiG-15 book which is like a walkaround on the MiG-15 and the Russian Armada MiG-15 book - editor's note]. I detailed the cockpit tub using this reference and added seatbelts, throttle quadrant, etc.
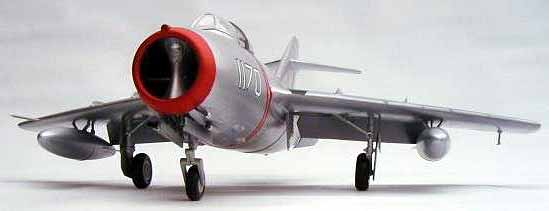
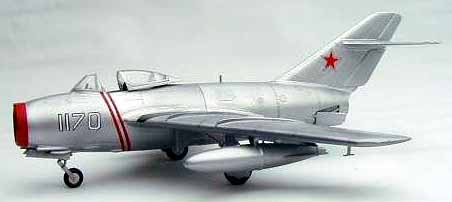
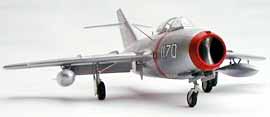
I wanted to do a natural metal finished MiG, but the finished surface of the plastic is very rough. What I did was to primer the whole model with Model Master flat Gull Gray enamel. I let this dry for a couple of days and the sanded it down with 400 grit sandpaper. I did this a couple of times and then painted the whole model with Model Master gloss enamel. I let this dry a couple of days and then painted the model with SNJ silver. It came out very well. If you are not doing a natural metal finish and are doing a camouflage scheme, all this is unnecessary.
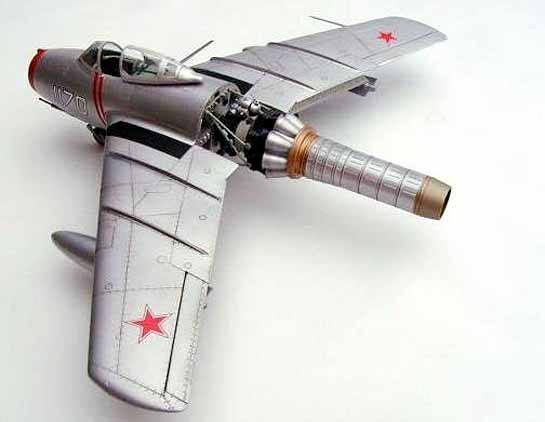
I finished my MiG-15 as the aircraft shown on the cover of Squadron Publications 'MiG Alley'. The stars were from a 1/32 scale Replic sheet, and the numbers were made on my computer with an Alps printer. One last thing to mention. The fuselage separates to reveal a very nicely done jet engine. The kit includes a ladder and a rear fuselage support rig too.
Would I do another build of this kit? You bet I would, and I intend to. Next is the MiG-17!
© Howard Weaver
This article was published on Friday, September 27 2013; Last modified on Saturday, May 14 2016