
Hasegawa 1/32 P-51D Mustang
By Chris Sherland
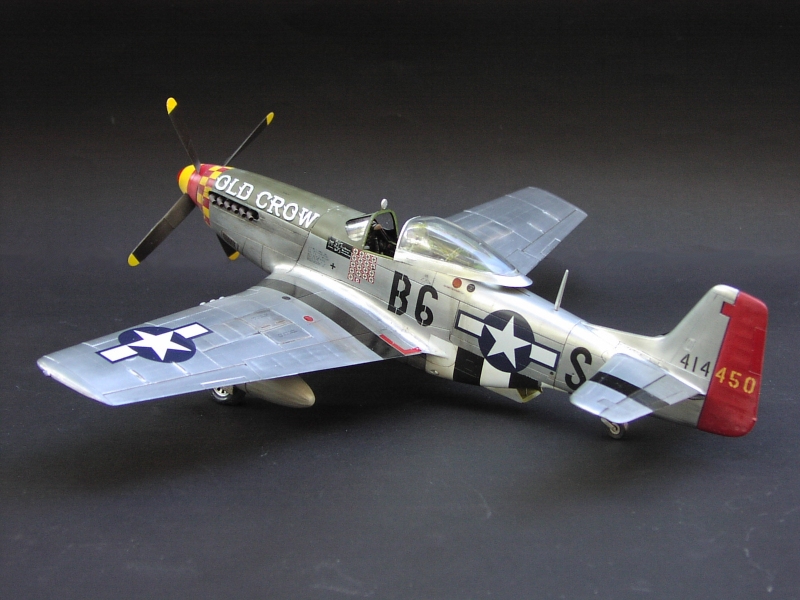
Hasegawa 1/32 P-51D Mustang
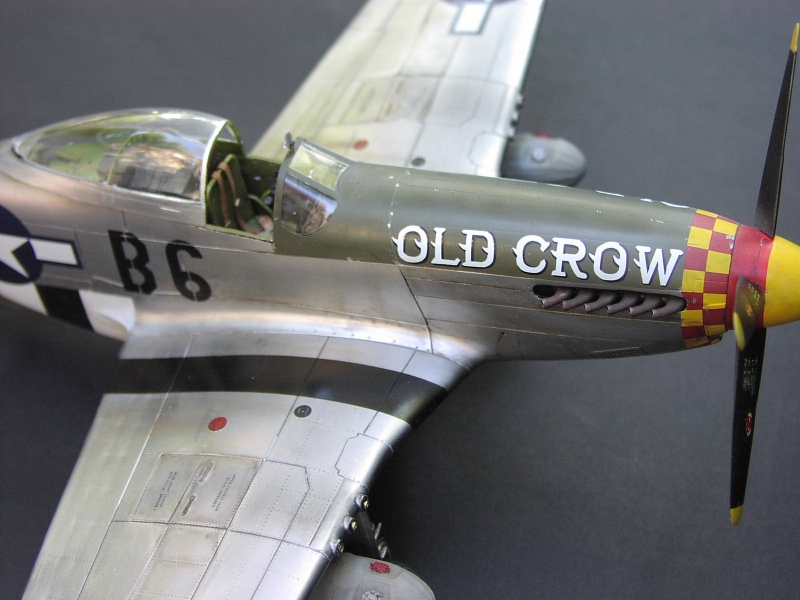
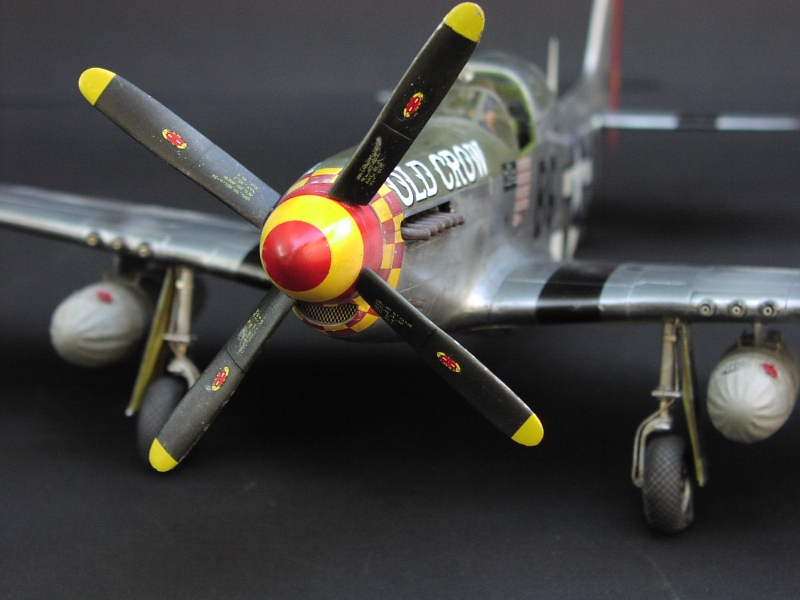
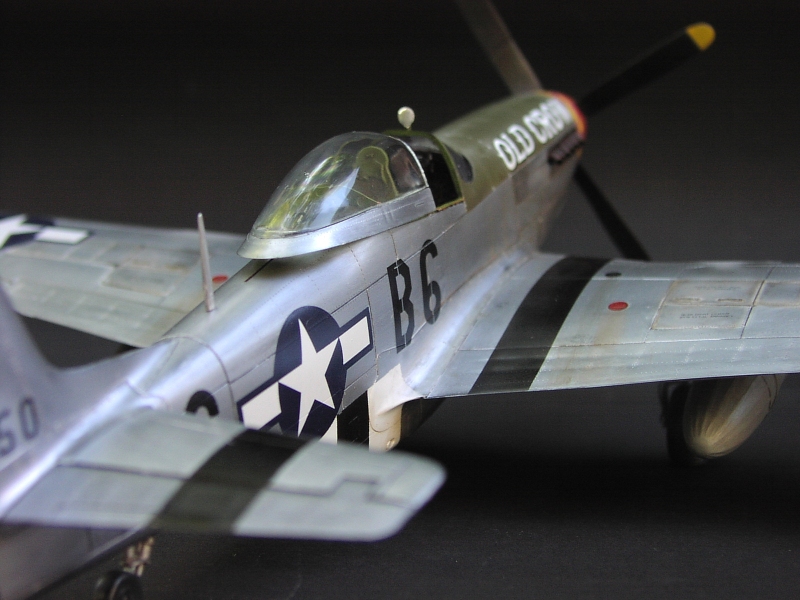
as "Old Crow" of Clarence "Bud" Anderson
363rd FS 357th FG 8th USAAF Lieston, UK, 1944
The old 1/32 Hasegawa Mustang kit shows it's age and is not engineered as well as some of the newer kits from Hasegawa. It has no real shape problems but suffers from a lack of detail in the cockpit and wheel wells, as well as having a pretty bad fit on the cowling due to poor engineering of the way the engine parts fit inside and attach to the cowling itself.
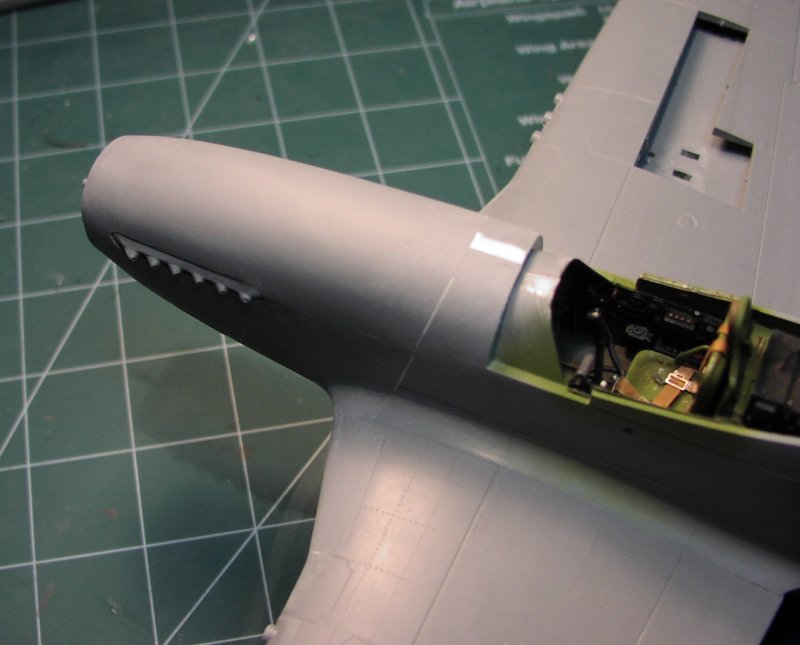
Much work was done on the cowling after the engine was sealed inside forever. The entire aircraft was treated to a "riveting" using a custom pounce wheel called "Rosie the Riveter" from the Czech Republic. Some of that detail can be seen here as well as the heavy sanding that the cowling needed.
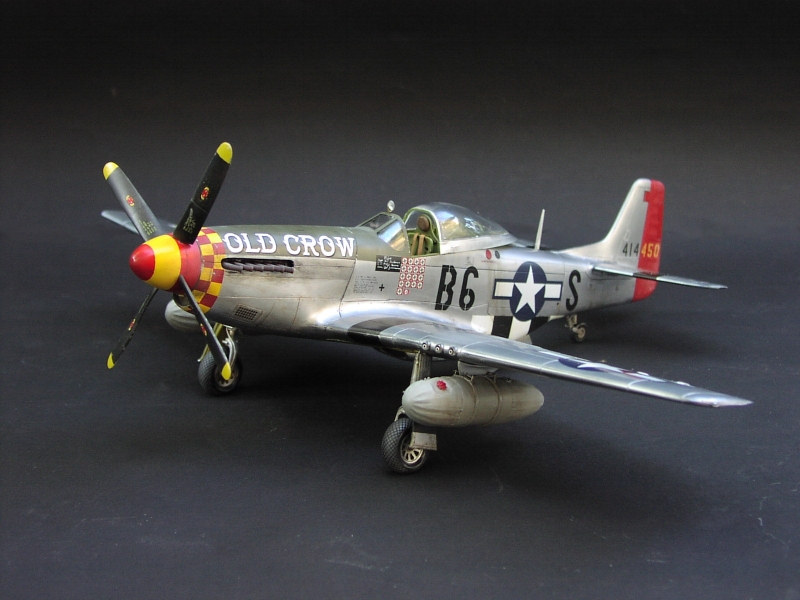
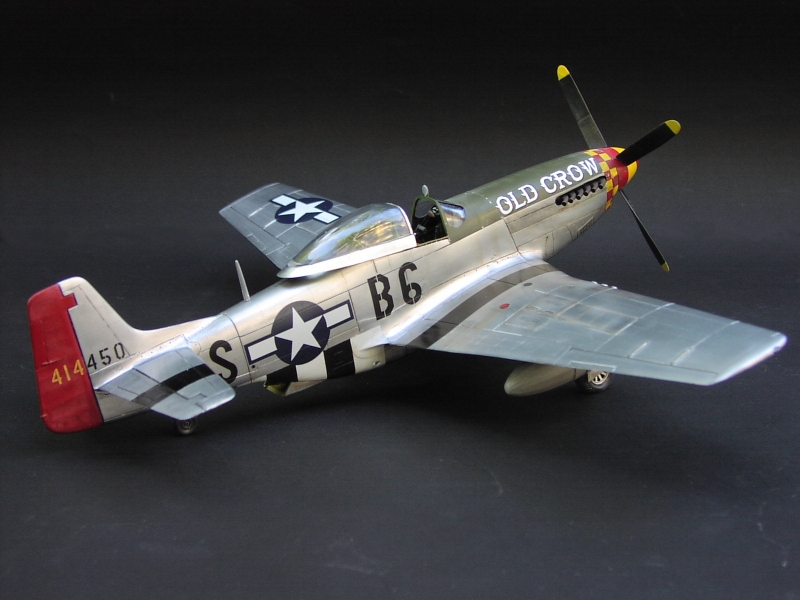
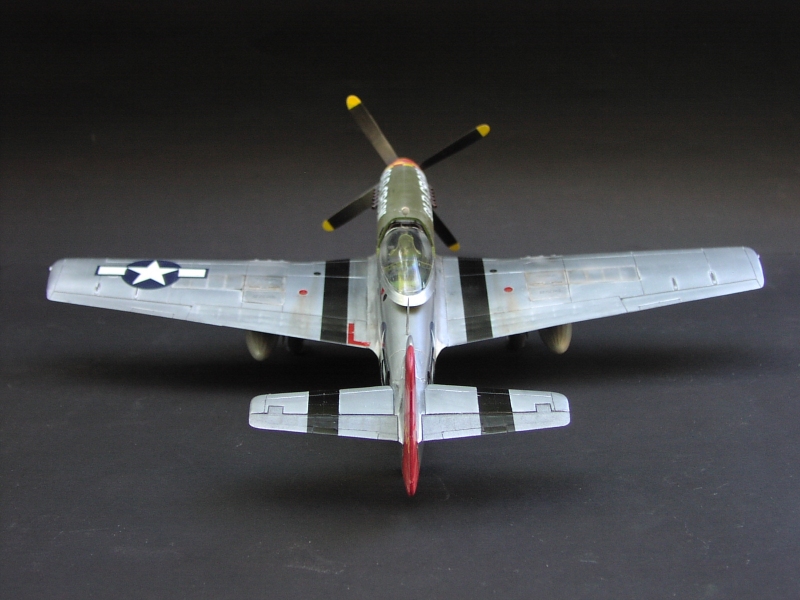
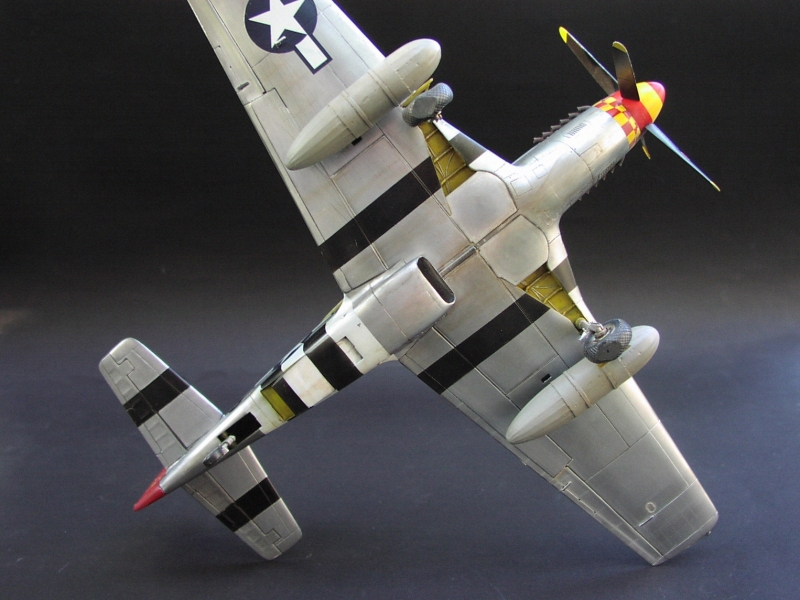
The natural metal finish on this bird was done with a "poor man's" method that is probably considered by the "experts" as being quite silly. I painted the entire model with enamel semi gloss black from the old rattle can, then used the wax-based product "Rub 'N Buff" that is designed for antiquing. It looks quite nice to me, and cost about $1.29 in materials!
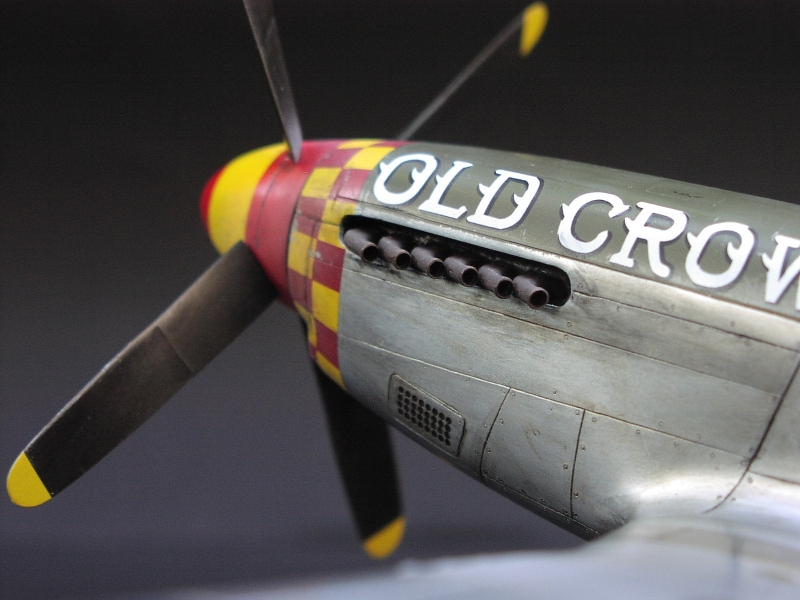
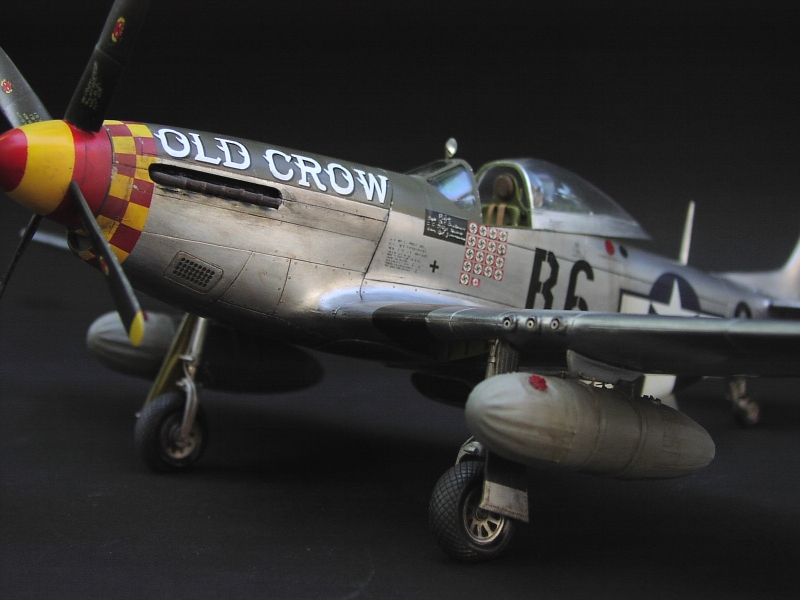
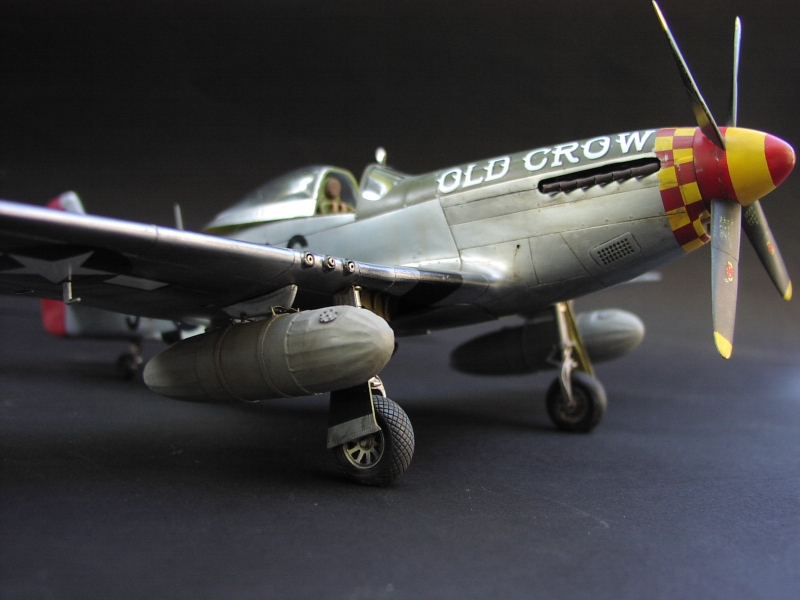
Moskit exhausts were used from Russia. These are super high quality very thin metal parts that are far and away the best after market exhaust products I have ever seen.
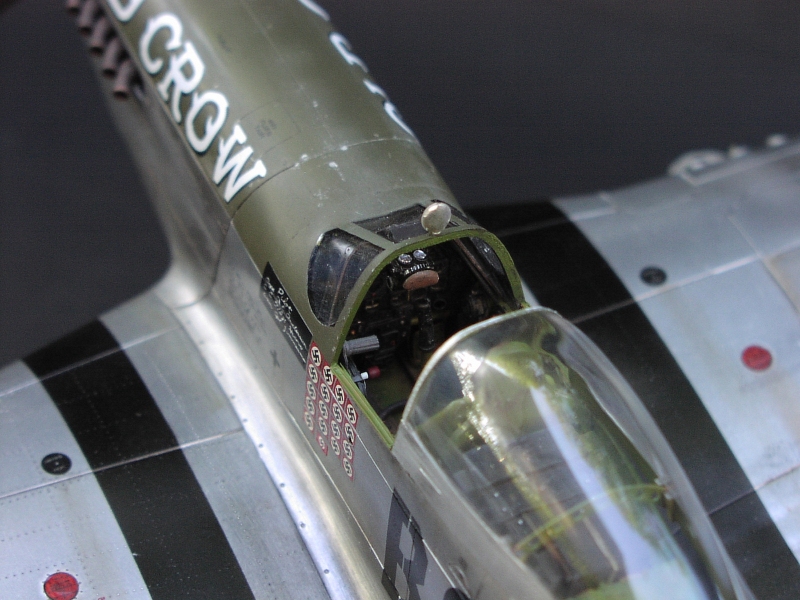
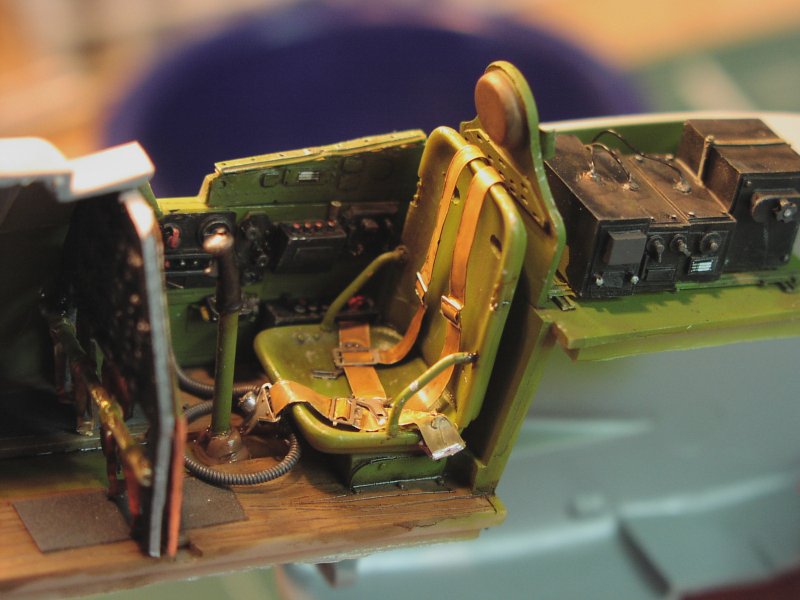
The Verlinden cockpit set was used with great results. A fine set. Here it is before the fuselage was sealed up.
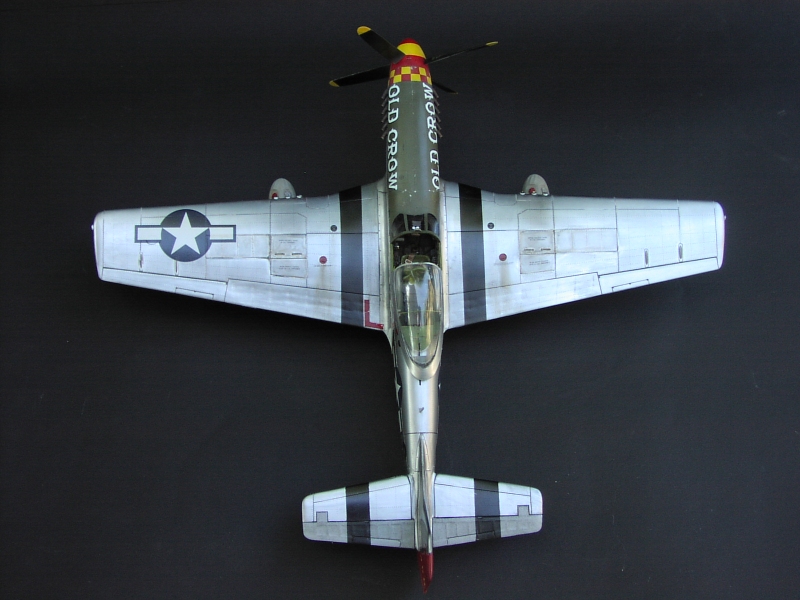
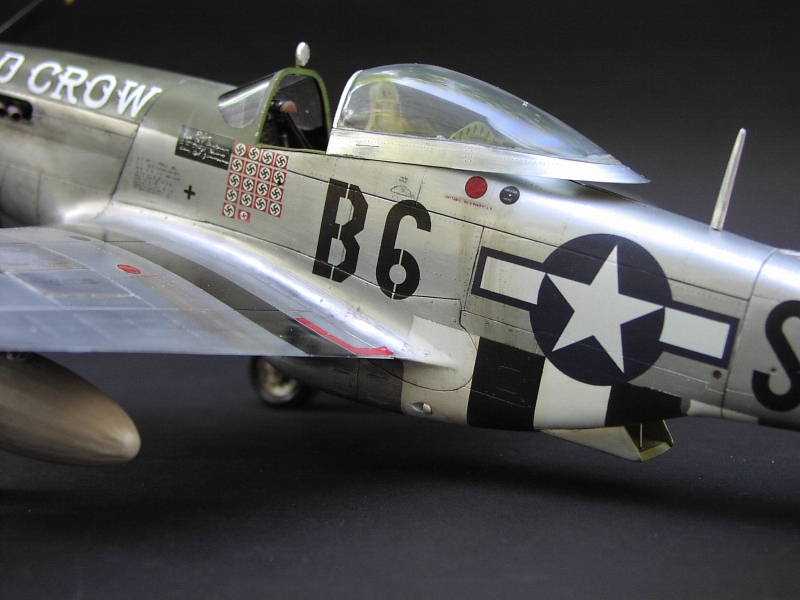
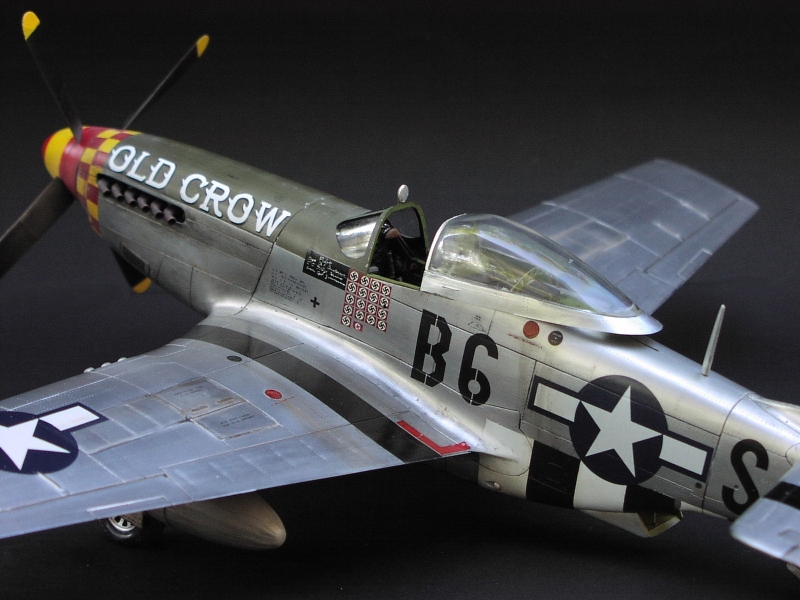
The decals came from the Clarence "Bud" Anderson website and were of remarkable quality.
Other paints were Polyscale Acrylics shot through a Badger 150 with the medium needle and tip at about 12-15 PSI.
Weathering was done with artist oils in Burnt Umber and Black washes of various thickness. Some paint chipping was done with a fine tip brush and Testor's aluminum metalizer paint. Future floor wax cut at 50% with Isopropyl alcohol was used pre- and post-decalling, and again to seal the oil washes. Polyscale flat coat was then mixed with 2% Polyscale flat white and used to seal the anti glare panel, nose checkers, and spinner. This was misted on and then buffed out with a polishing rag.
Brass tubing was cut and attached for the .50 cal barrels.
The model was photographed with a 2.1 MP Olympus C-2040ZOOM digital camera mounted on a tripod, outside in the shade on a sunny Texas morning sitting on a sheet of old black contact paper. No lights were used.
© 2005 Chris Sherland
This article was published on Friday, September 27 2013; Last modified on Saturday, May 14 2016