
Roscoe Turner's Meteor Racer #29
By Rodney Williams
Text & Photos by: Rodney J. Williams © April 2, 2013

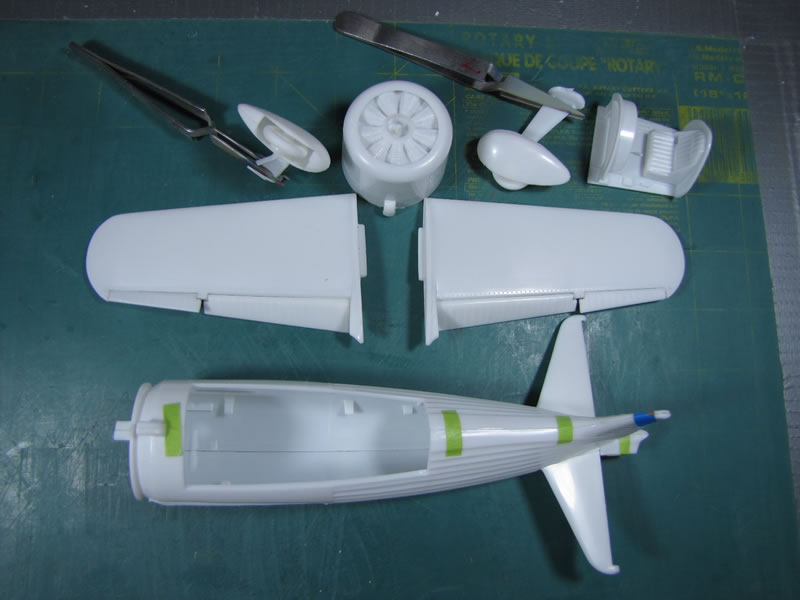
Late last year I bought this 1:32 scale Lindberg plastic model kit. Over the last couple of decades I have built some old-time racers so I thought that I would add this one to my collection. I found a few photos of the model on our societies web site.
Reviewing the kit parts and the 7 steps in the 10”x14” foldout instruction sheet seemed A-OK from a model builders point of view.
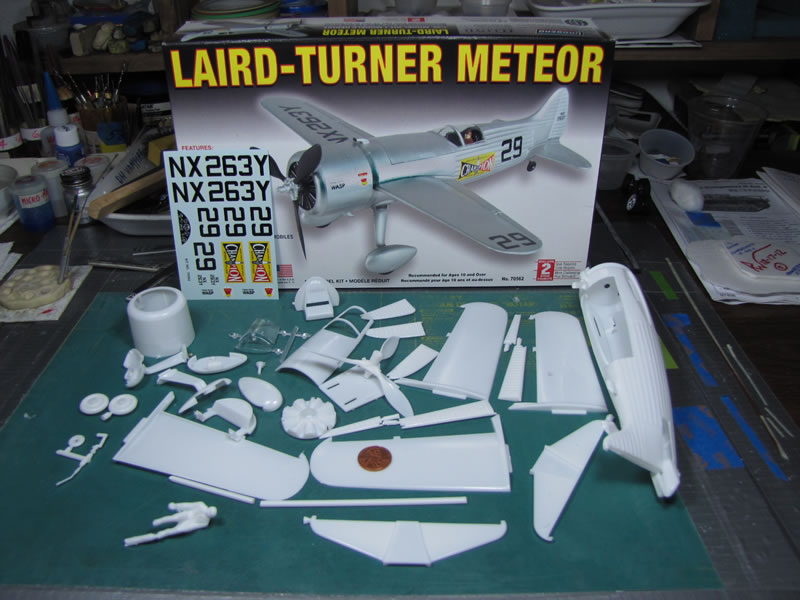
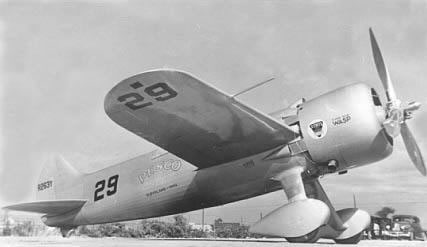
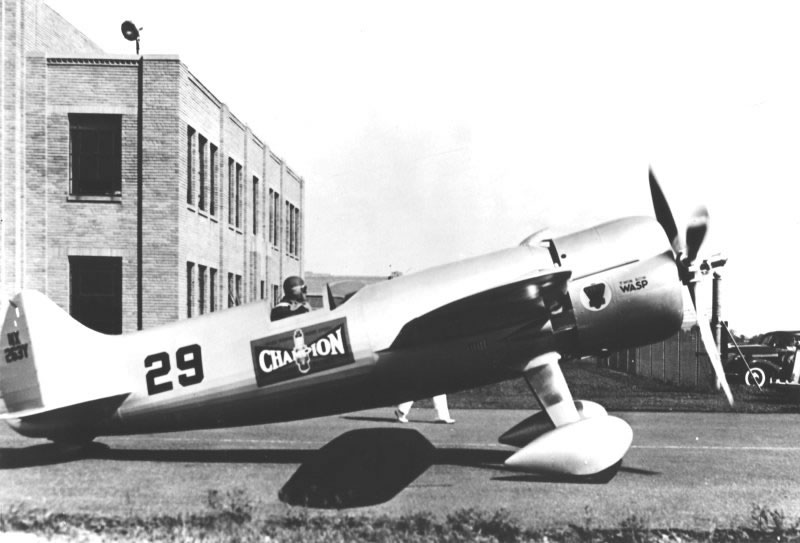
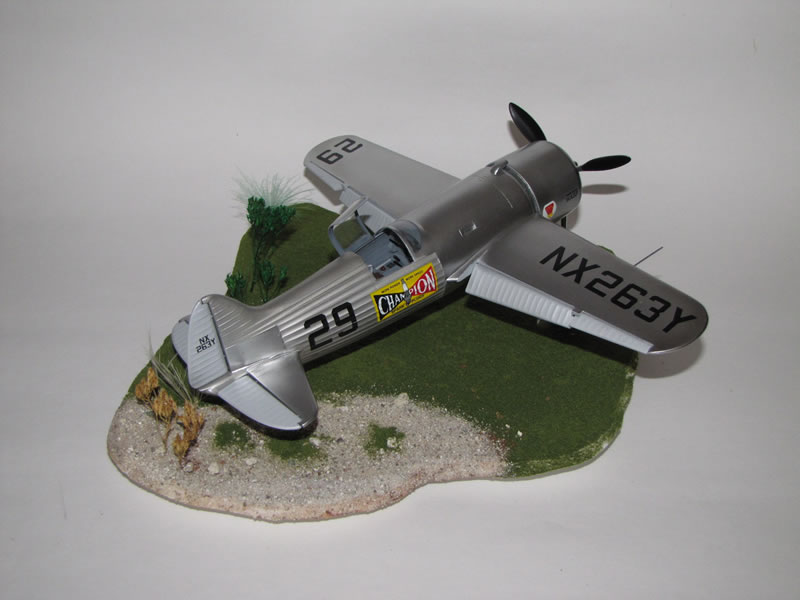
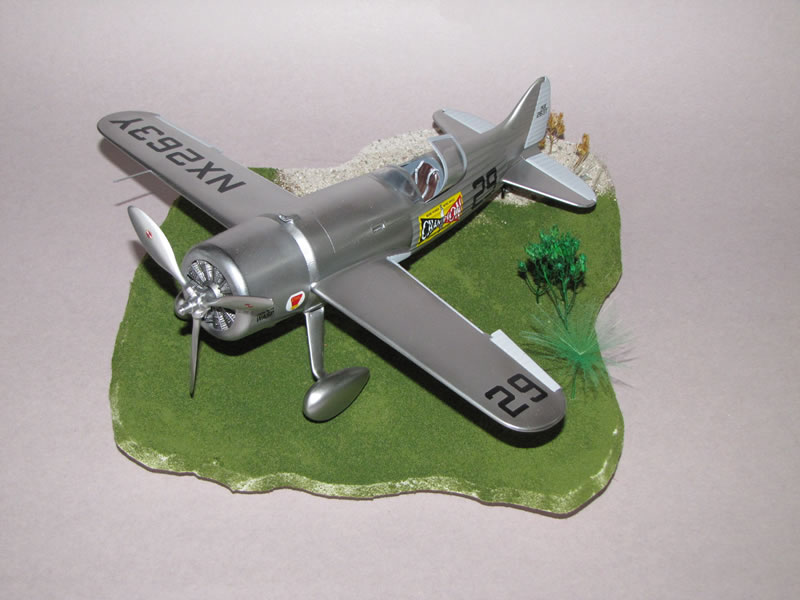
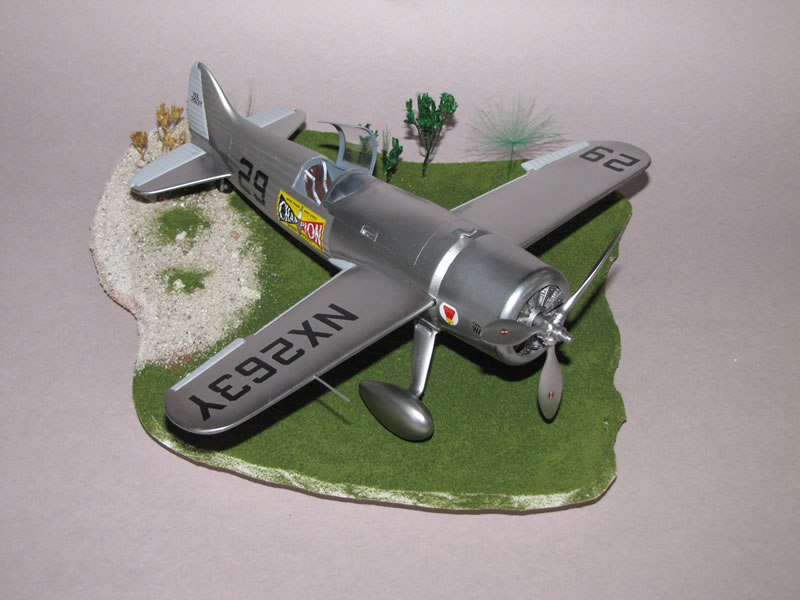
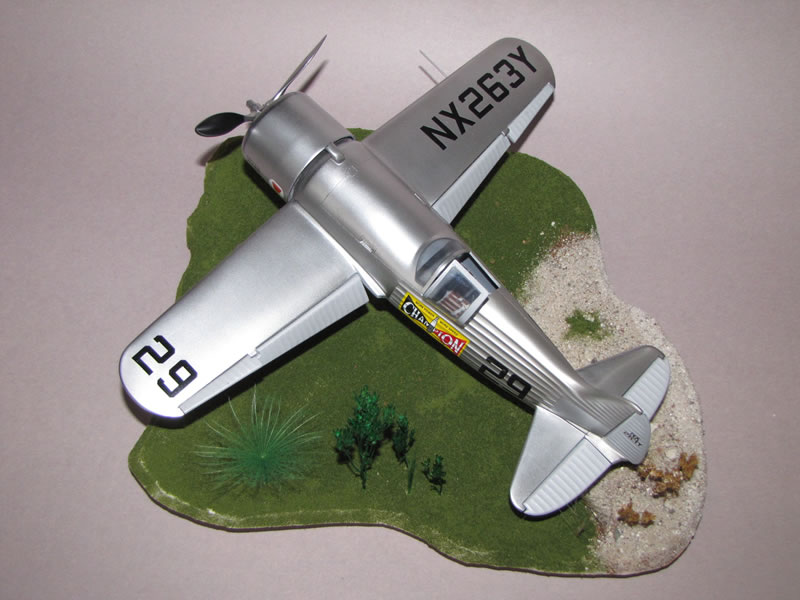
We start this story by showing a few photos of the real airplane and one of my model that is sitting on a simulated grass and gravel base.
I got the idea to use some of my model grass that I bought at a hobby shop in Campbell, California back in 1985. The grass is made by a European company by the name of “NOCH” and is called “Streugras”. It could be a German company but I have no idea. After all these years the grass is still nice and green.

Construction
I began by cleaning up the 3 parts that make up the tail plane. The two elevators are separated and the modeler has the option to glue them in any position on the one piece stabilizer.
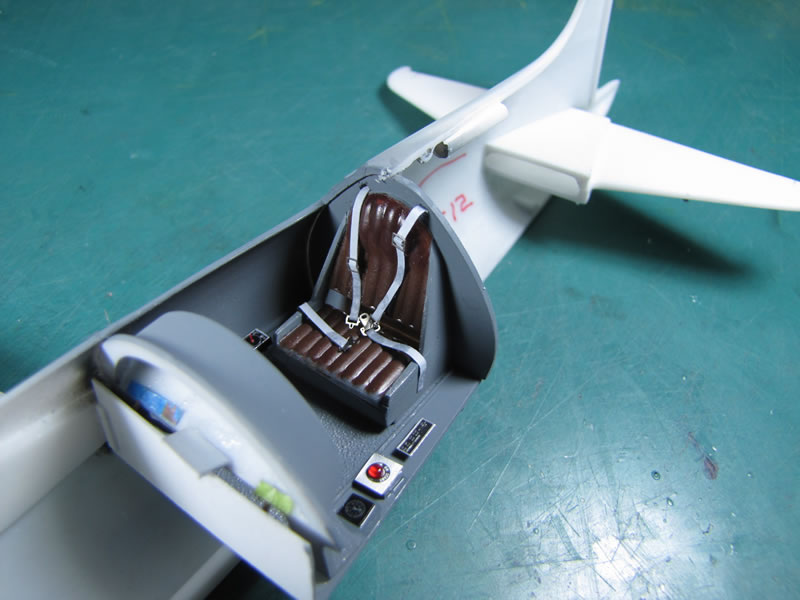
Next came the clean up of the cockpit items and then it was glued together. The pilot’s seat was molded into the back of the cockpit tub. Furthermore the seat did not look like the seat that I found on the web.
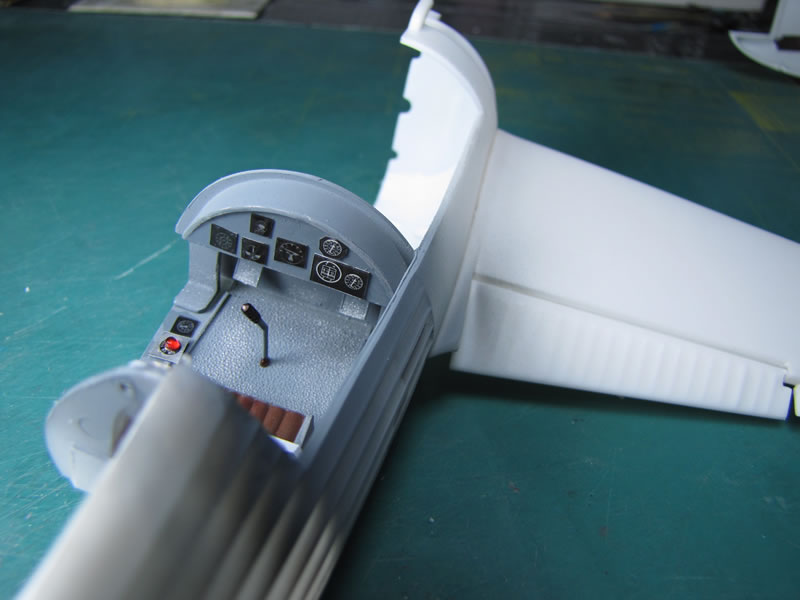
Lindberg did not include any foot pedals in the kit so I found some in my “spare-parts” box. I did not like the kit's instrument decals so I put in some Waldron dials that I have on hand.
I spruced up the cockpit a bit more by adding some seat belts, buckles, harness straps and a few boxes here and there. The cockpit looks better to me but it is in “no-way” an accurate rendition of the real plane. The cockpit tub was “dry-fit” into its location on the right half of the fuselage then I fit the left half of the fuselage to the right half.
The fit was OK so I took everything apart and then painted the cockpit parts. The cockpit tub was now glued into the right side of the fuselage then I glued on the left fuselage section to the right side.


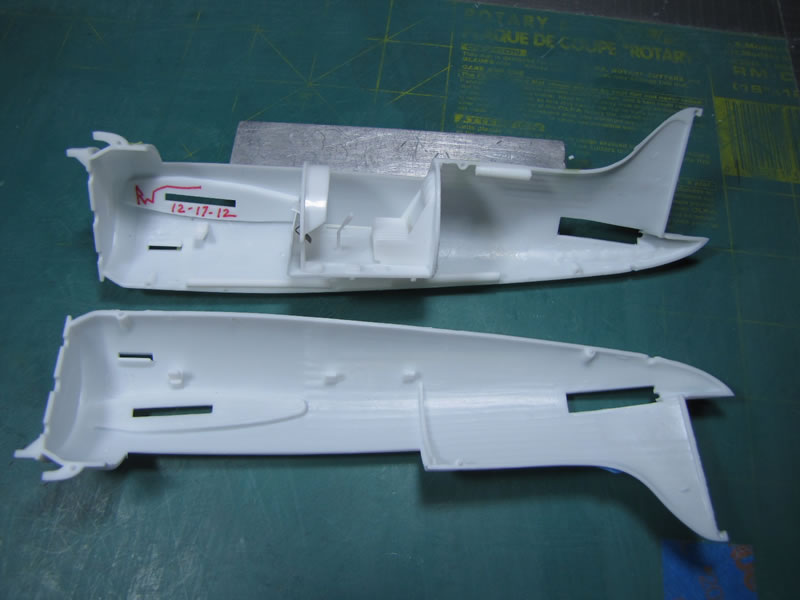


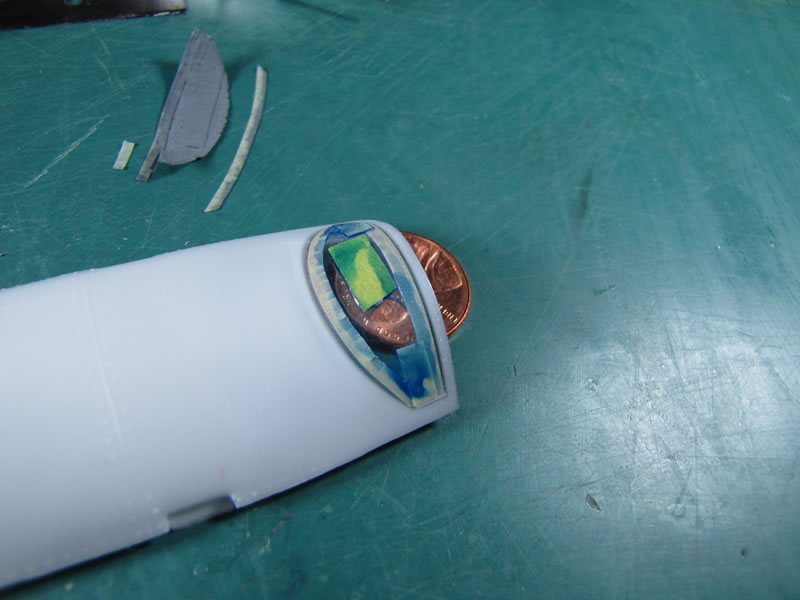
The top elongated fuselage section was not wide enough back where the windscreen and canopy fits to the fuselage. I could spread it to fit but the clear-ridged canopy and windscreen parts may crack and/or break apart, thus you ruin them.
I carefully cut the canopy section off of the elongated part just aft of the windscreen. The clear windscreen part was glued into its position and was mask over for the painting process of the interior of the cockpit. This section of the model was now glued to the top of the model. I had to add some styrene card stock to the front area.
I inspected the 8 parts that make up the wing and cleaned up all the flashing then dry fit it all together. The modeler has the option to glue the ailerons and flaps in the “flight” position and/or off set the ailerons and drop the flaps. I choose the latter and as I am gluing the wings together I make darn sure that my flaps and ailerons are in perfect alignment. All of the seams on the wings are sanded smooth and inspected. It’s time to glue the wing to the fuselage and complete the sanding process.


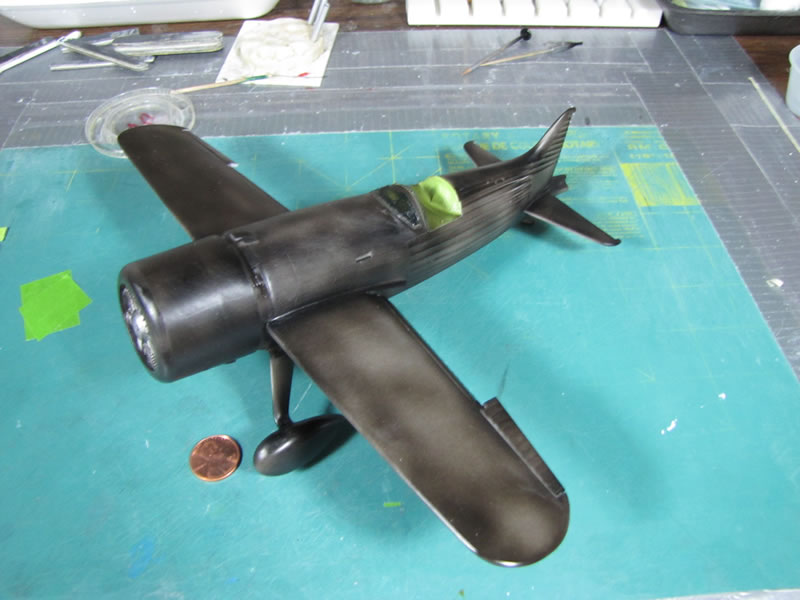
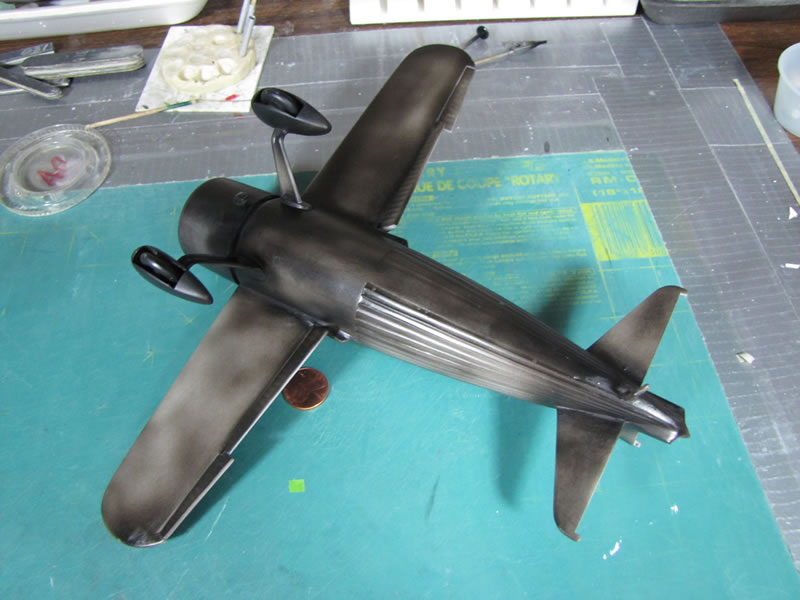
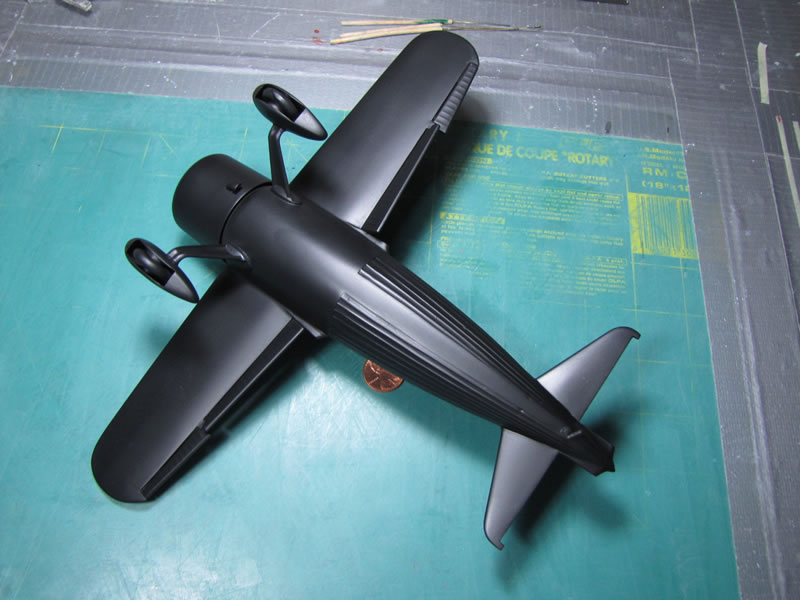
Alas, the model is assembled and I cover up the finished cockpit and “dust-on” some of Tamiya’s XF-1 Flat Black Acrylic paint. Once again the model is check for flaws. As always I find some minor flaws like tiny pinholes that the super glue did not fill up completely including fine sanding streaks. When you finish a model and paint it with a bare metal aluminum paint it shows up the tiniest sanding marks. I have to sand these little sanding marks out of the plastic using 3M’s 400, 600, 800, 1000, 1200, 1500 and 2000 grit wet/dry sandpaper with plenty of clean water.
I repaint the model with Tamiya’s X-18 Semi-Gloss Black Acrylic paint and let it dry for a few days and then check for flaws. Once I am satisfied I can now add my aluminum paints.
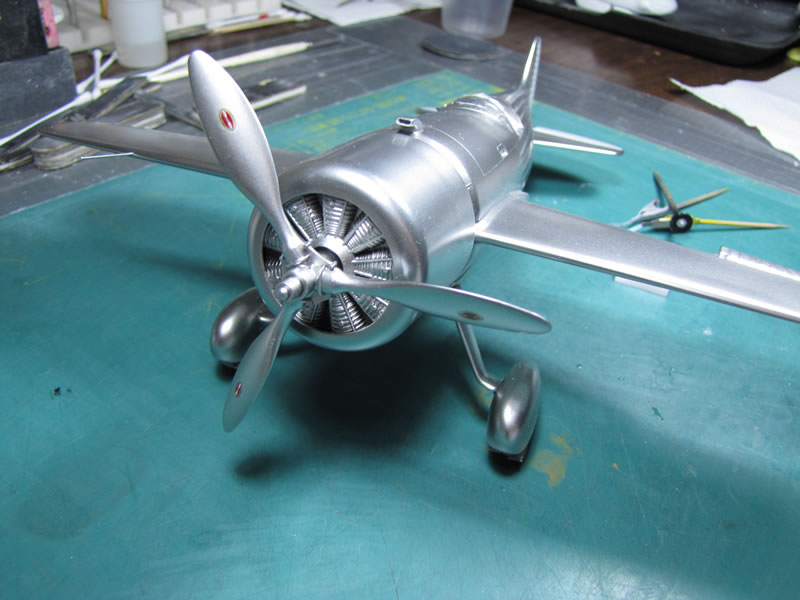
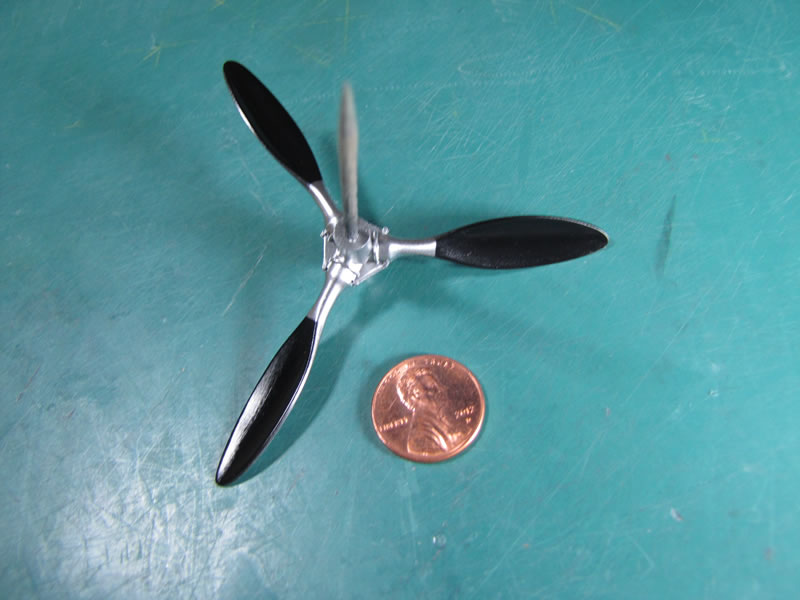
The prop was painted with Alclad’s “polished aluminum” and Tamiya’s semi-flat black. I added the “Hamilton-Standard” prop logos on the front blades then sealed then with Future’s acrylic floor wax that most all modeler’s use. The back side of the prop was coated with what we call “dull-coat” which takes the shine off of the paint.


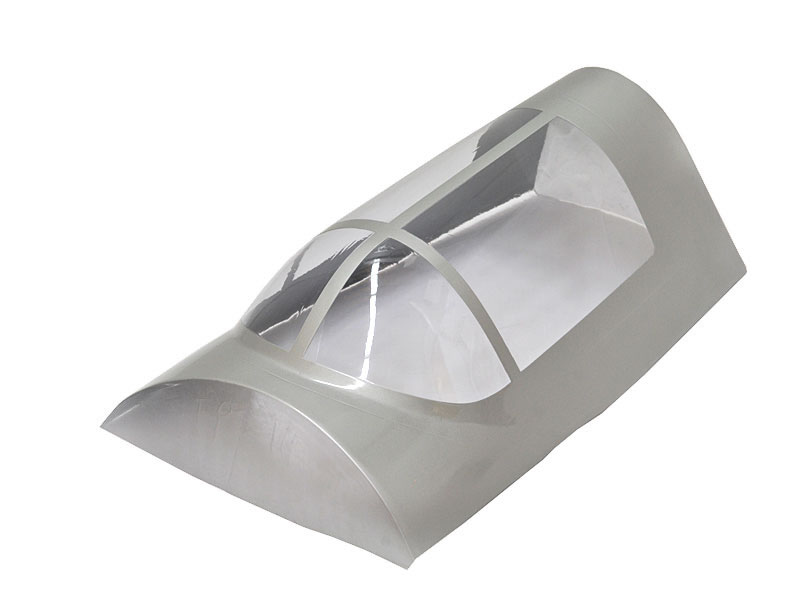
Somewhere along the line I cleaned up and installed the clear plastic canopy window. It was masked off and then I painted the frame.
The finished canopy is resting on my work bench behind the left wing along with the home made seats belts and the tail wheel.
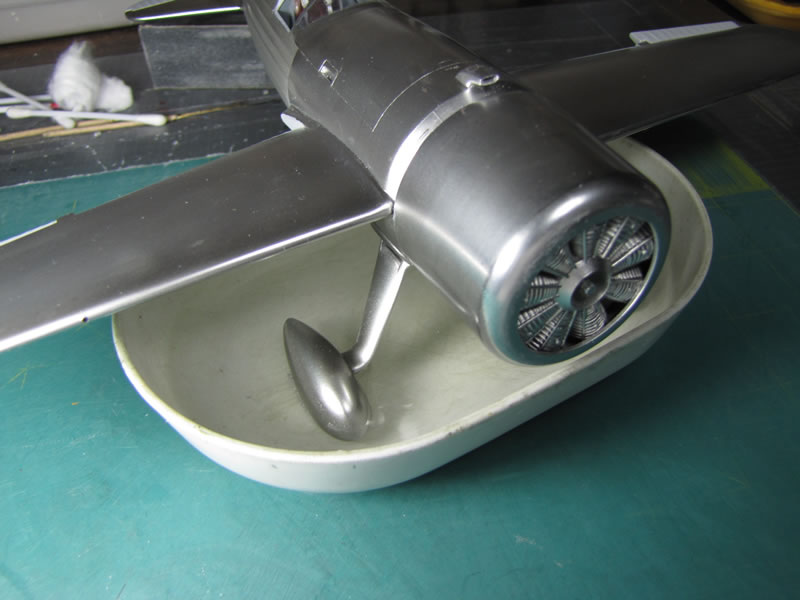
The model is sitting in a small bowl of water, which will dissolve the liquid mask that I put on the painted tires. The model is once again inspected for quality and if necessary any item that does not pass inspection need to get fixed.
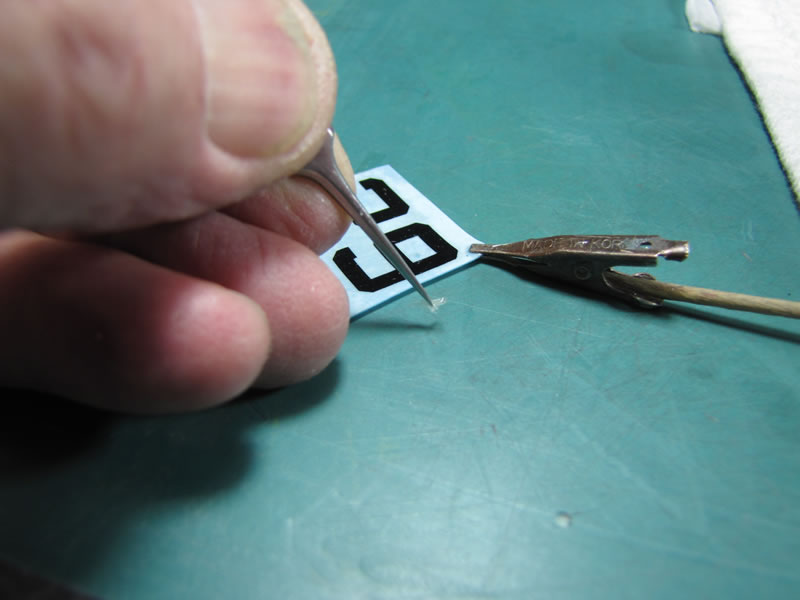
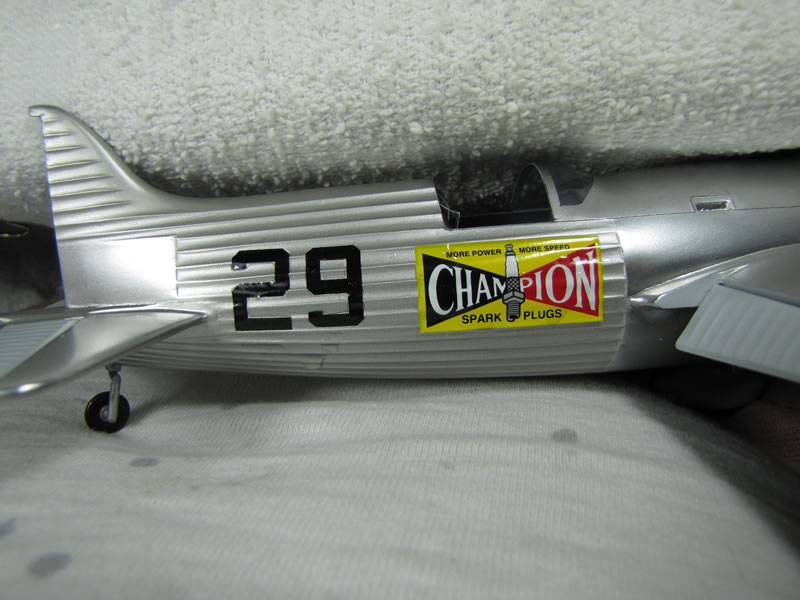
It’s time to add all of the decals on the model after I have carefully cut around each item. The photos show how this is done.
This has become a hard job for me over the past year or so as I have developed “Essential-Tremor” in both of my hands, so say the doctors. I call it “shaky-hands”. The decals are put into clean water for a minute or so then they are laid on my workbench. I blot some of the water off of each decal then carefully remove what we call the “carrier-film”. Look real close at my one photo and you will see the carrier film in my tweezers that I took out of the number “9”.
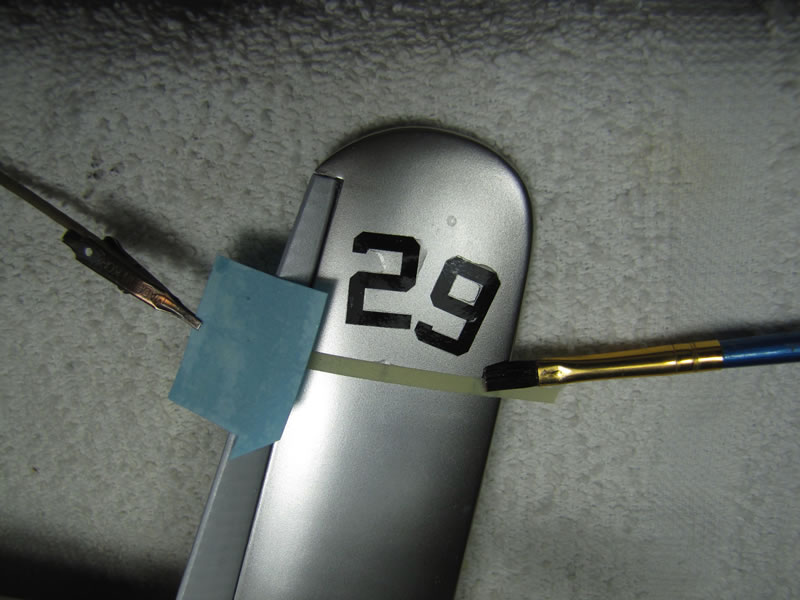
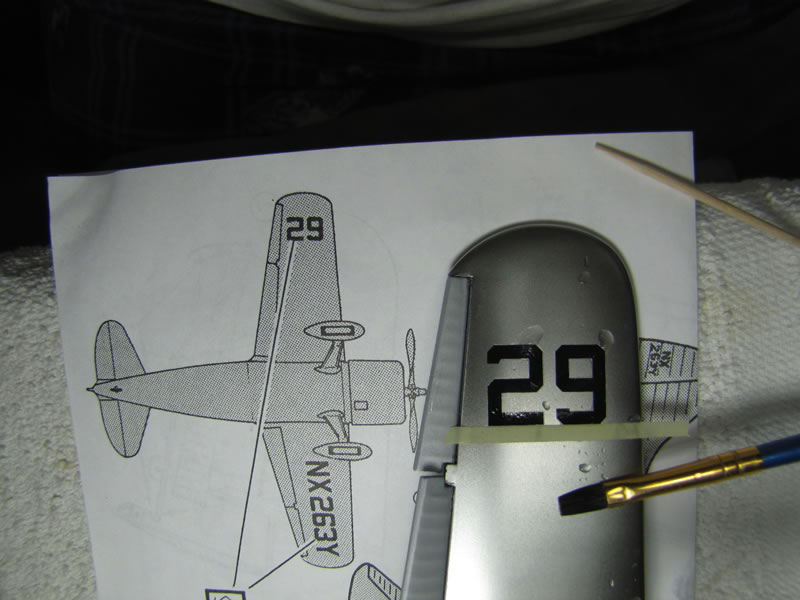
Remember that word “Alignment”? This is where it counts on a model. After each decal is in its right location it is left to dry for a minute or so then I blot off the rest of the water and make sure that there is no carrier film that got under the decal and/or is left on the model. Later I will brush on some clean water with a clean soft brush, which gets rid of any decal glue and setting solution. Then the area is blotted semi-dry and is left to air dry. A dry soft brush is gently wiped across the decals to remove any left over lint from my toilet paper, etc.


Since I use to go to the races up at the Cleveland, Ohio/USA airport (1946-1949), I knew that there was green grass all around where they parked the planes. My base was made by cutting a piece of ¼”–6mm thick white foam board. I glued an extra piece of board on the bottom so that I could get my fingers under the board when it was on a table. I applied thinned down Elmer’s white glue onto the board and sprinkled on my green grass and my graver. I painted some dried local desert plants and glued them into tiny holes that I made in the foam. I added a couple of dead bushes in the gravel area.
It’s time to glue on the canopy in the open position and slip on the prop then the model is finished. I did not keep a work log on this model but it would be safe to say that I spent at least a 100 hours building it.


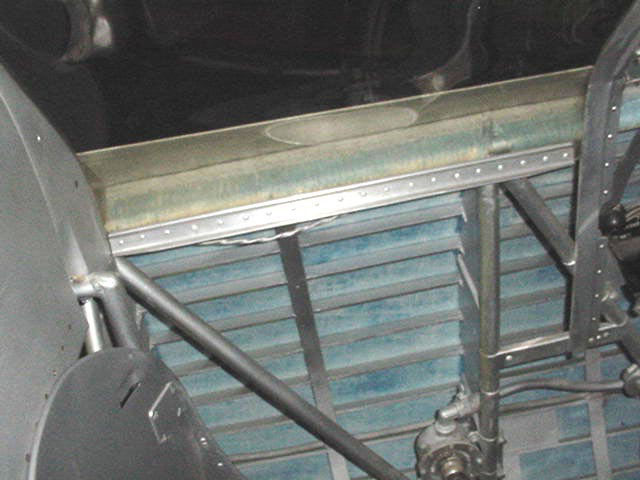
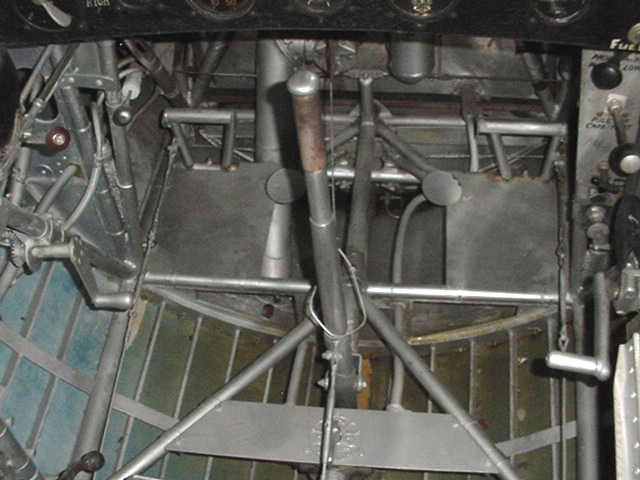
Lindberg made some mistakes on making this model. The photos of the real airplane show that the kit’s engine is molded wrong and the cockpit is really bad.
Then I screwed up as well by not seeking out more photos of the plane on the web. Last week I found out that the canopy is a two-piece canopy and is divided at the top. Each side window is rolled down into the cockpit with a hand crank, which is attached to a “U” type frame work. The windscreen has a divider bar in its center line.
For a couple of years now I have got on my computer and open up Google then click on “IMAGES” and type in what I am looking for in the “Search-Bar” then click on “ENTER”. Presto, up comes a lot of photos that I am looking for.
Now that I know that the kits canopy and windscreen is 100% wrong I should fix it.
Dumb me, I should have access the web prior to building the model but I will certainly fix the problem. On the other hand how many people out there know anything about Roscoe Turner and his airplane from 1938-1940?
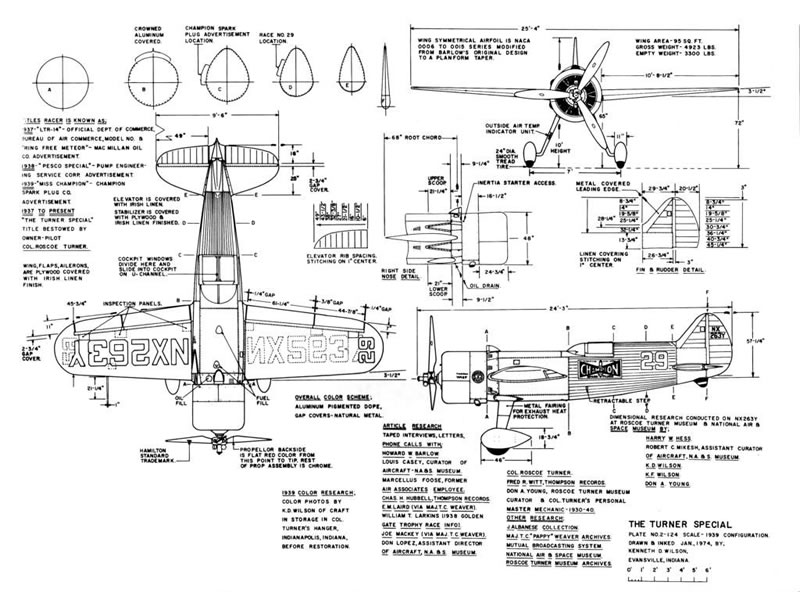
The additional photos show what I found on the web, especially the art drawings and three interior views of the cockpit. An additional photo was posted showing how a modeler built in the interior of the model.
You will note that another photos shows the racer with “no” wheel covers and it has different fuselage markings.
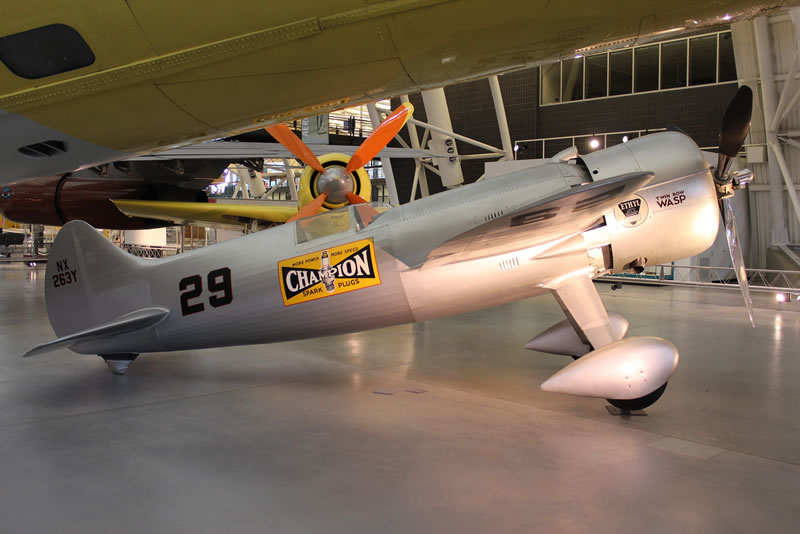
Here is a color photo of the aircraft at the Smithsonian and one of a “replica” Meteor flying.

Model building has some surprises in the hobby for the modeler.
If desired, you can access the Society of Air Race Historians web site to find out more information concerning this aircraft.

Enjoy,
Rodney
Dolores, CO/USA
© Rodney Williams 2013
This article was published on Tuesday, April 09 2013; Last modified on Monday, May 20 2013