
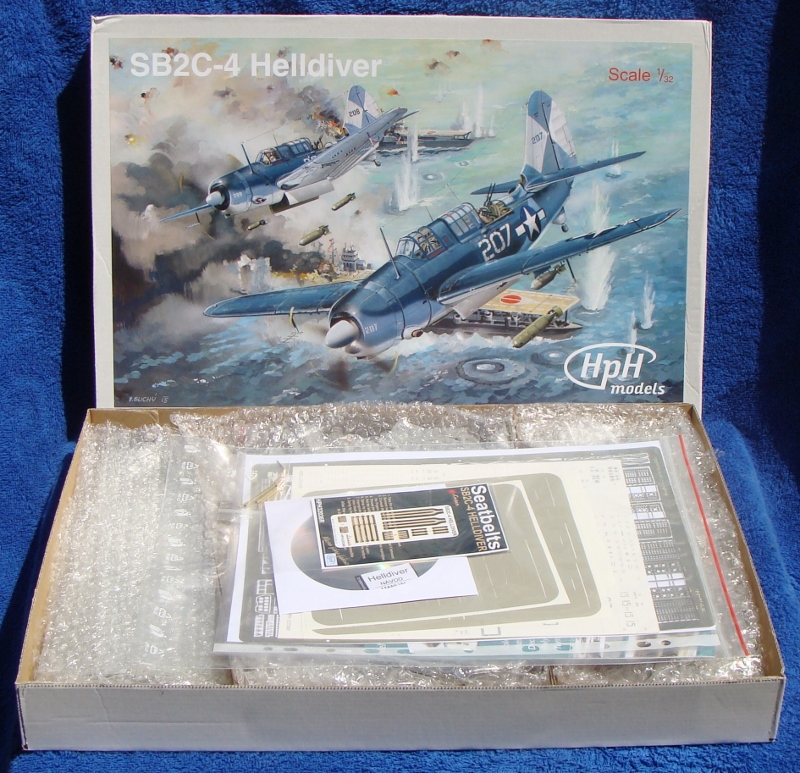
HpH Models | 32036R: SB2C-4 Helldiver
Reviewed by LSP_Paul

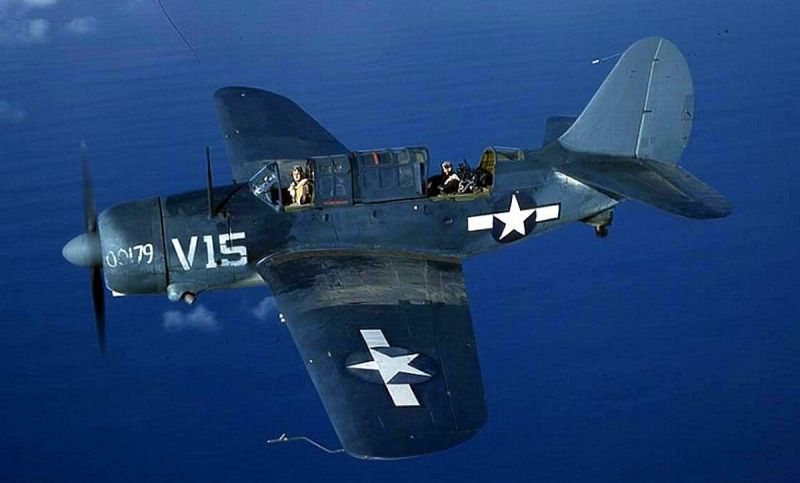
Helldiver: A Brief History
To say the Helldiver did not get off to a good start would be a major understatement. In its early versions the aircraft garnered a reputation for poor stability, structural flaws, and poor handling. A US Navy Carrier's Captain flat out demanded they be removed from his ship as unsuitable for safe operation. Britain rejected the Helldiver after receiving 26 Canadian-built examples. The land based A-25 Shrike was dead on arrival. By the time Curtiss delivered the Shrike, the USAAF had re-evaluated its need for dive bombers, preferring fighter bombers like the P-47 that could fight their way out as well. There was now a surplus of unwanted aircraft. An attempt to pass them to the RAAF failed after the Australians rejected all but ten of them. Eventually 410 Shrikes were returned to the Marines, as the SB2C-1A, where they were used for training. The remaining A-25As remained with the USAAF and were used for non-combat duties such as utility hack and target tow. The Navy demanded 880 changes during the production of the Helldiver, and this did not help alleviate the production backlog. The aircraft was in serious jeopardy of being cancelled due to its being severely behind schedule and into cost overruns the likes of which the US Government had never seen for a new military aircraft. At one point Curtiss was actually rolling Helldivers off of the production line and into a separate line for partial disassembly and rework, definitely not an optimal situation.
Lengthening the fuselage by one foot, enlarging the vertical tail, and redesigning the fin fixed some of the aerodynamic problems and, in retrospect, it appears stability and structural issues had been exaggerated, although more than one Helldiver broke in half when making a hard tailhook landing on a wooden carrier deck.
By the arrival of the SB2C-4, the majority of the issues the earlier examples had were improved upon satisfactorily, and the Helldiver's reputation in the fleet improved. The upgraded engine and 4 bladed cuffed propeller increased thrust, and the perforated dive flaps introduced no drag penalty but significantly increased stability in a dive and during landing.
Industry turned out 7,141 Helldivers, including SBF versions assembled by Fairchild and SBWs from Canadian Car & Foundry. The versions built in the largest numbers were the SB2C-1 (978), SB2C-2 (1,112), SB2C-4 (2,045) and SB2C-5 (970).
General Characteristics
- Crew: Two, pilot and radio operator/gunner
- Length: 36 ft 8 in
- Wingspan: 49 ft 9 in
- Height: 13 ft 2 in
- Wing area: 422 ft²
- Empty weight: 10,547 lb
- Max. takeoff weight: 16,616 lb
- Powerplant: 1 × Wright R-2600-20 Twin Cyclone radial engine, 1,900 hp
Performance
- Maximum speed: 295 mph (257 knots at 16,700 ft
- Cruise speed: 158 mph (137 knots)
- Range: 1,165 mi (1,013 nm) with 1,000 lb bomb load
- Service ceiling: 29,100 ft
- Rate of climb: 1,800 ft/min
Armament
- Guns:
- 2 × 20 mm Mk.2 cannon in the wings
- 2 × 0.30 in (7.62 mm) M1919 Browning machine guns in the rear cockpit
- Bombs:
- in internal bay: 2,000 lb of bombs or 1 × Mark 13-2 torpedo.
- underwing hardpoints: 500 lb on each wing
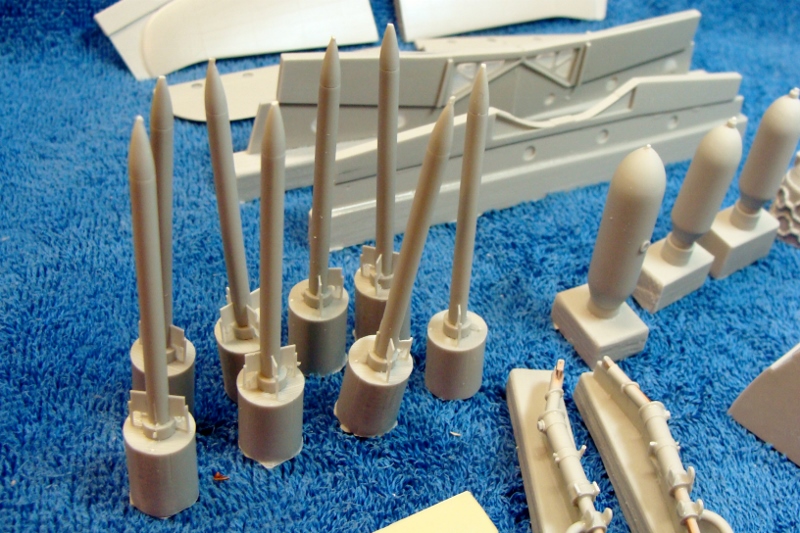
- Rockets: 8 x 5 inch HVAR rockets, 4 on stubs under each wing.
The Kit
When news of the HpH Helldiver started circulating and was confirmed shortly after as "in production" by HpH, many a WWII US Navy modeler was in a state of extreme model aircraft induced happiness. The news that we would finally be able to build in 1/32 almost all of the carrier-borne bombers and torpedo planes used by the Navy in WW II was almost unreal. We do still need a Vindicator and Devastator, and somebody (HpH) PLEASE give us humble carrier plane freaks "THE Ultimate" Hellcat kit? But I digress.
I should mention that I have previously owned or built resin kits by Craftworks, Jerry Rutman, Paul Fisher, MDC, and love them all! I have used numerous manufacturers resin and photo etched aftermarket products over the last 44 years at the bench but until now, never had I experienced an HpH kit. I've read reviews, I'd seen pictures of their previous releases, but nothing prepares you for what you see in your hands when you take the parts out of the box.
If you didn't know by the pour stubs and the thin wafers of resin you need to carefully remove from the smaller parts, you would swear this was an injection molded plastic kit. But no injection molded plastic kit in current production I am aware of in 1/32 even comes close to this aircraft's level of detail, so far resin still has its advantages.
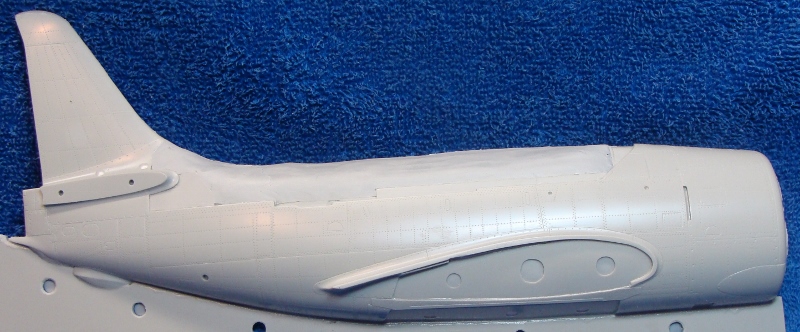
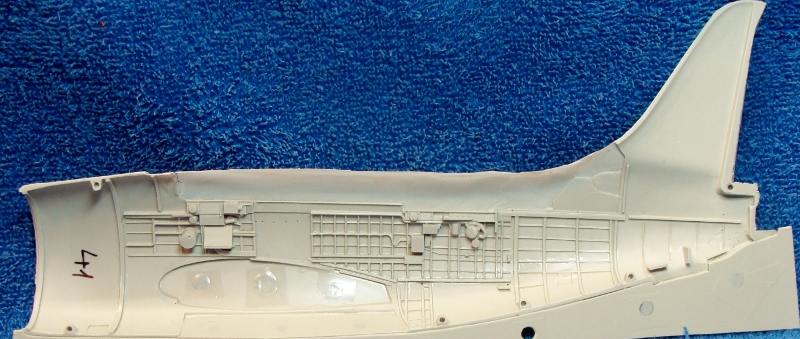
The Parts
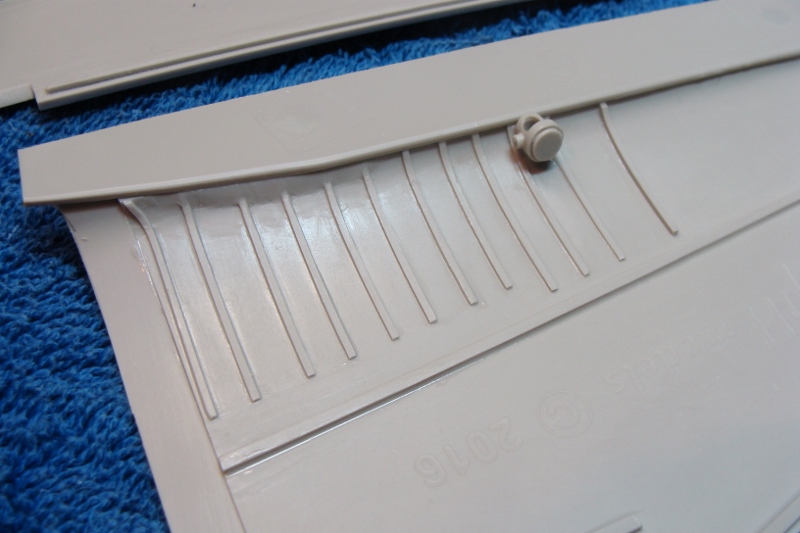
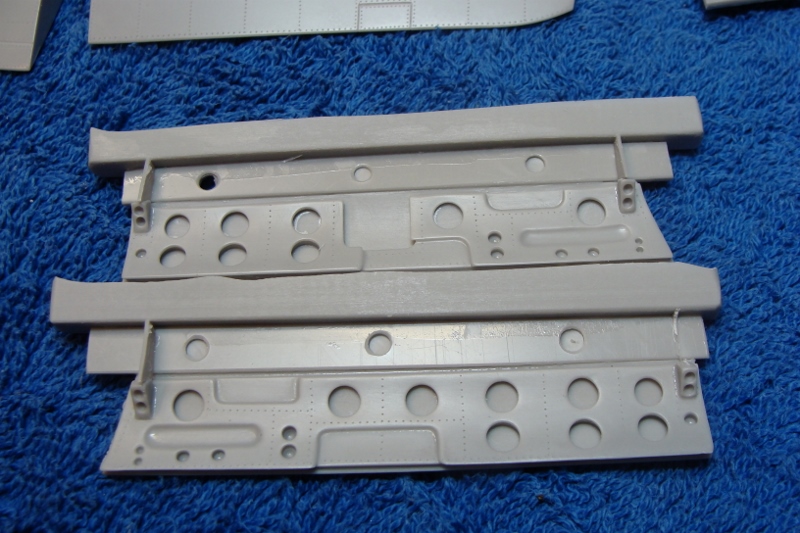
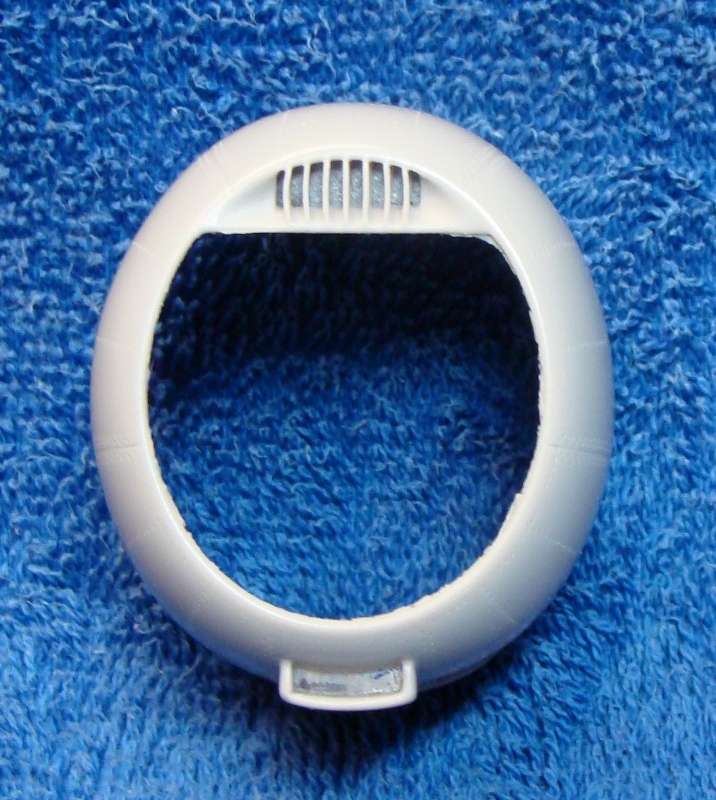
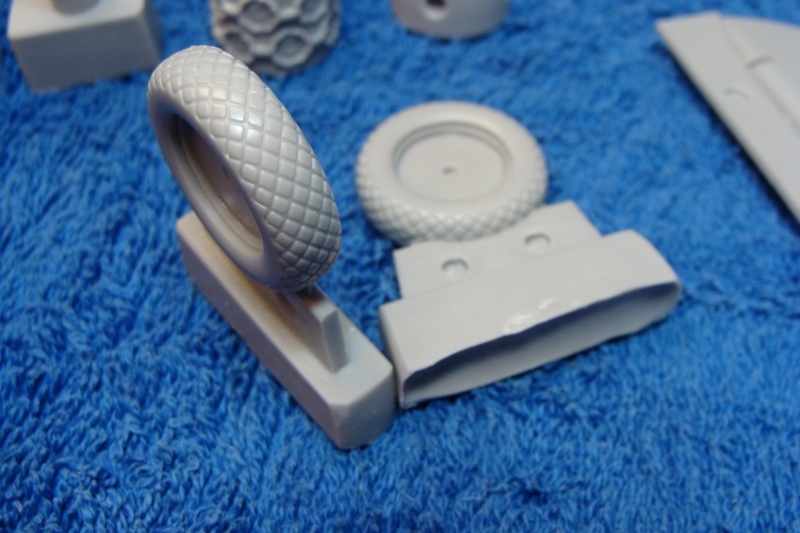
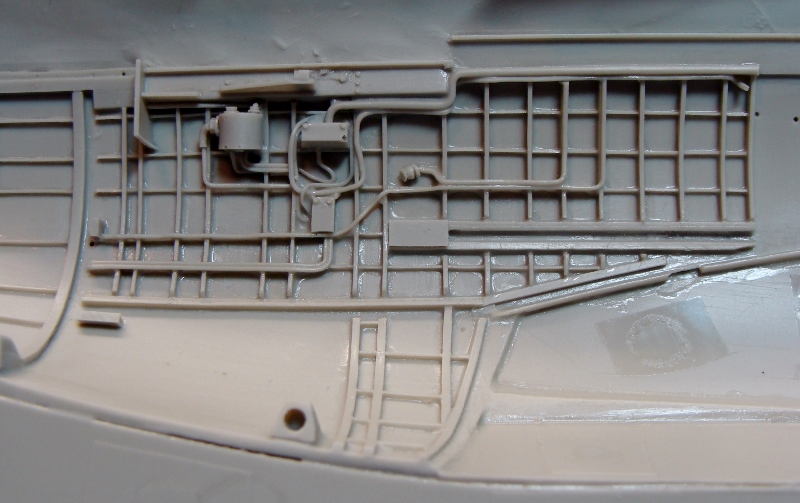
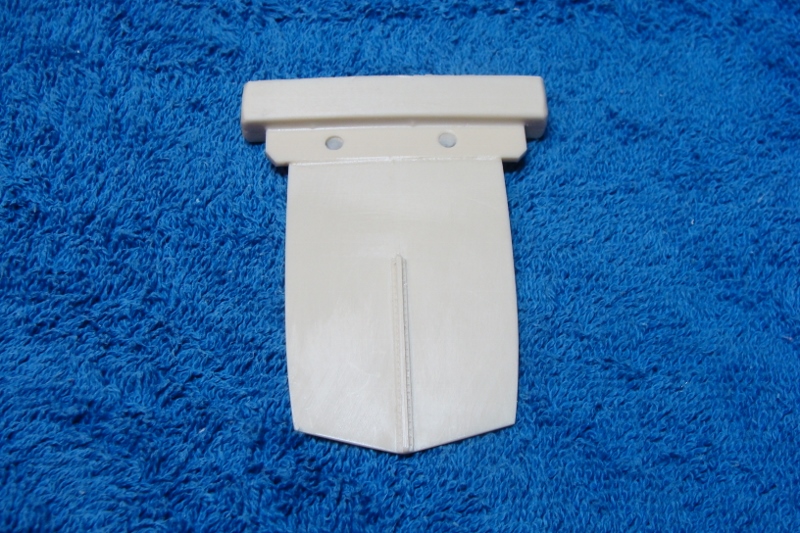
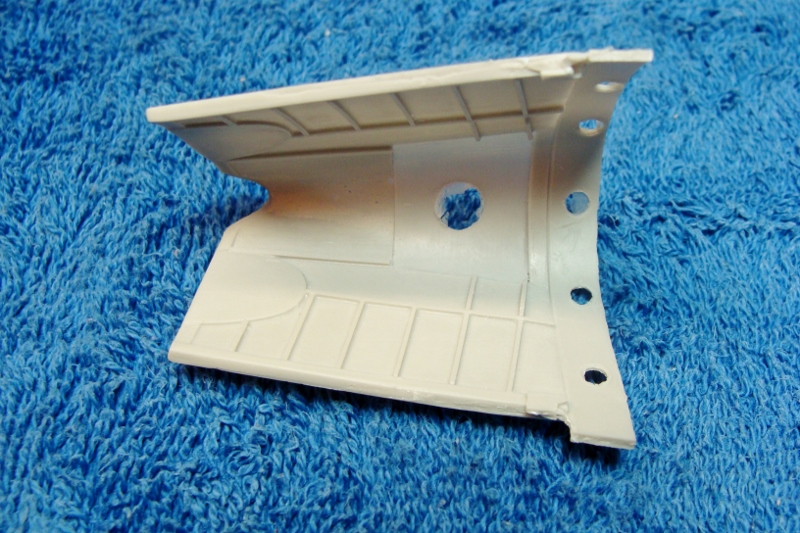
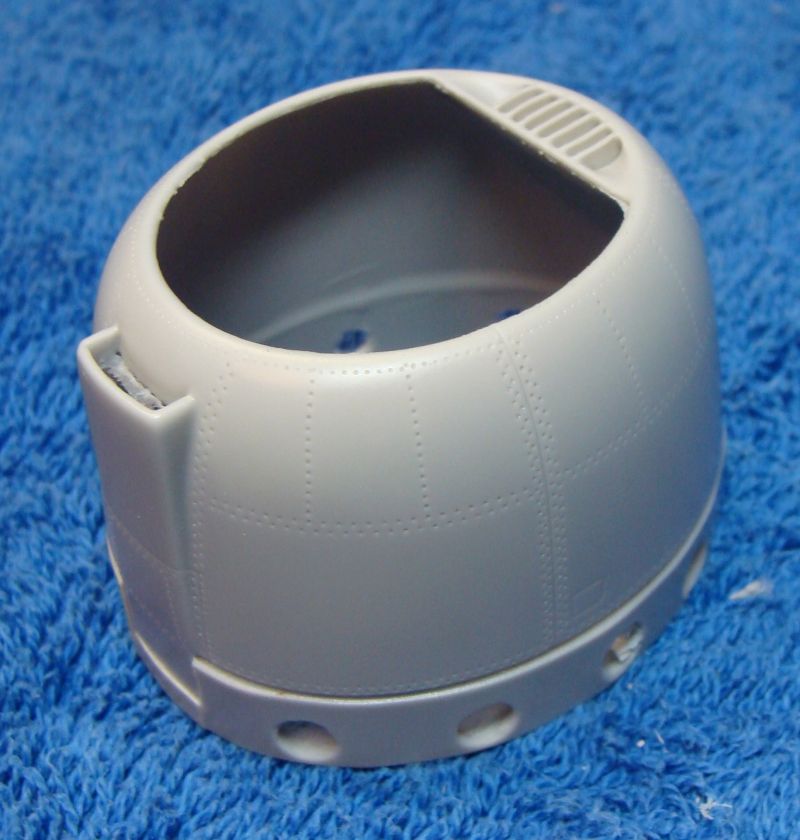
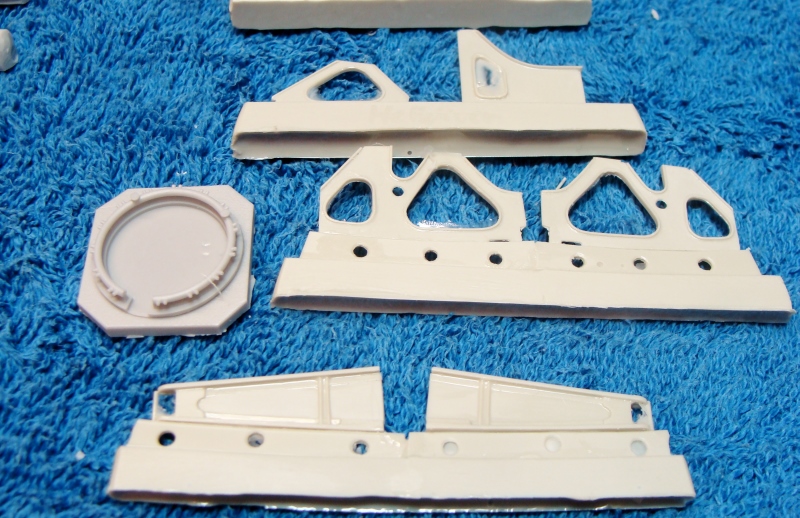
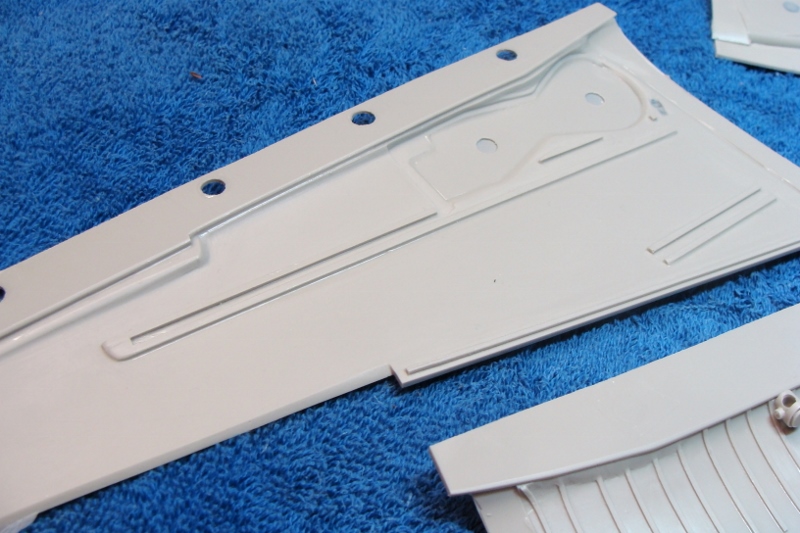
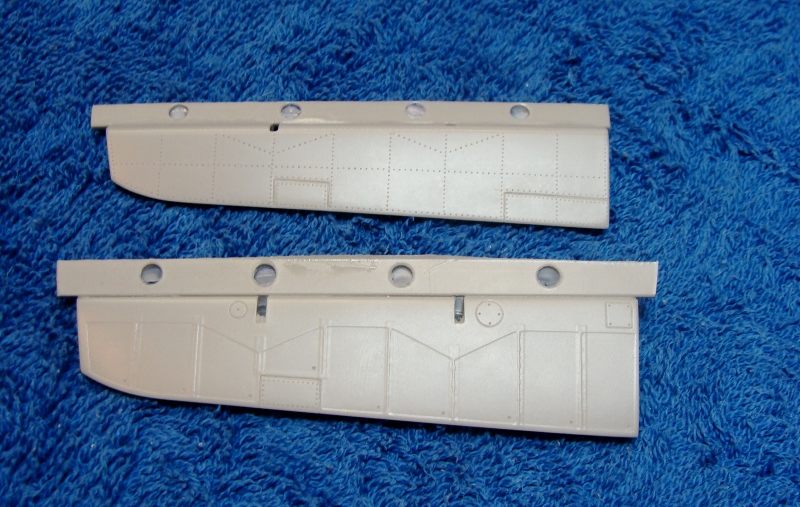
The primary parts and details are made of resin. The resin is silky smooth and free from sunken areas, air bubbles and the surface detail rivals or exceeds that of anything I've seen in plastic or resin kits previously. The rivet and fastener detail on this kit just blows my mind.
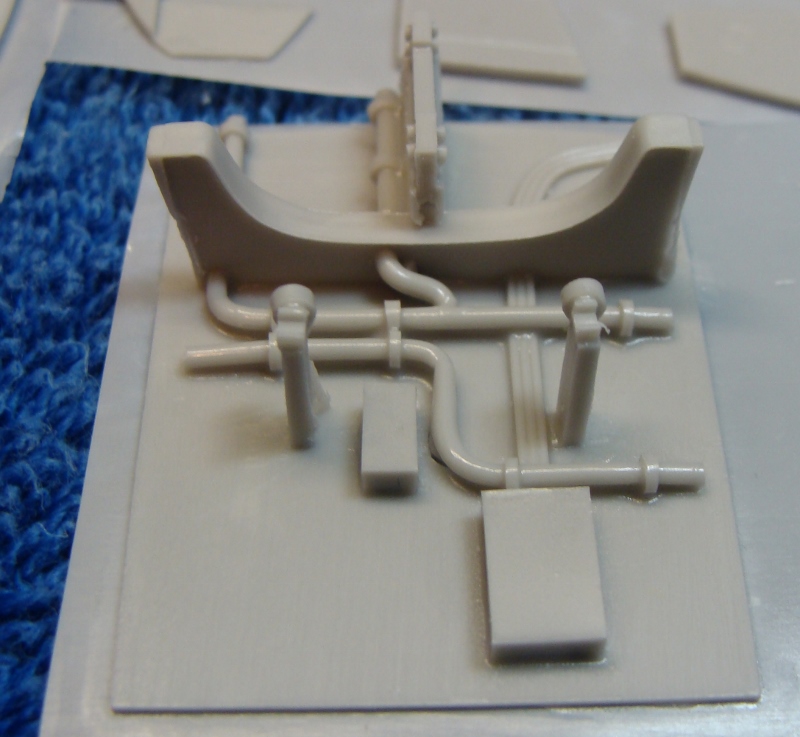
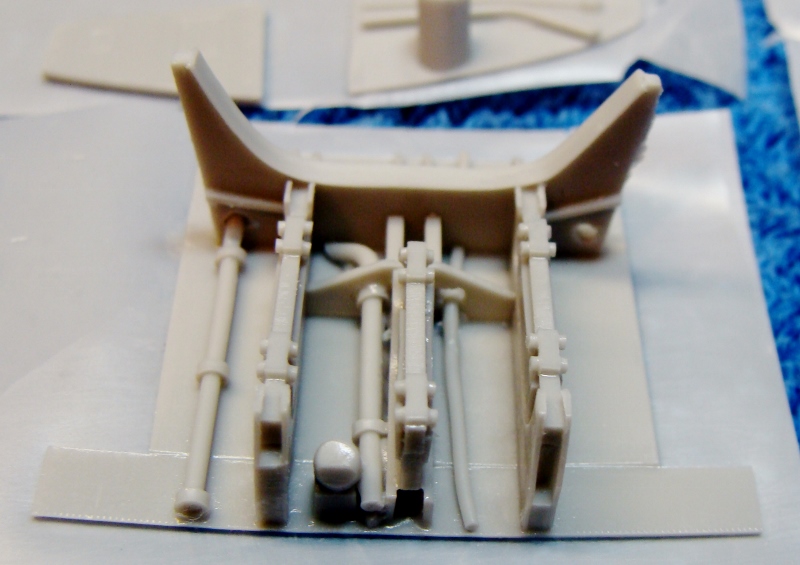
Metal reinforcements have been cast into the highly-stressed resin parts, and should provide an increased load bearing capability. There are pre-drilled alignment holes in each fuselage half so that they can be joined by appropriately sized tubes to add strength as well. I would have liked to have seen cast brass or bronze landing gear legs and struts, but looking over the instructions, things should fit very well and be plenty strong as they are.
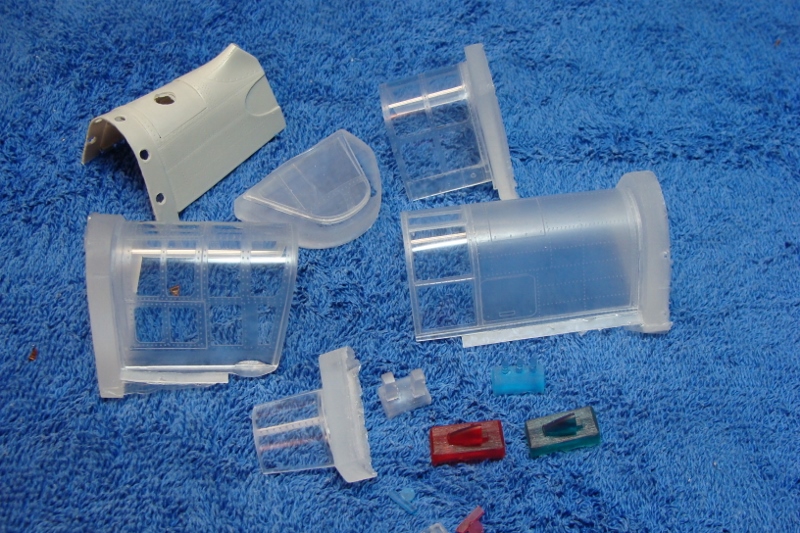
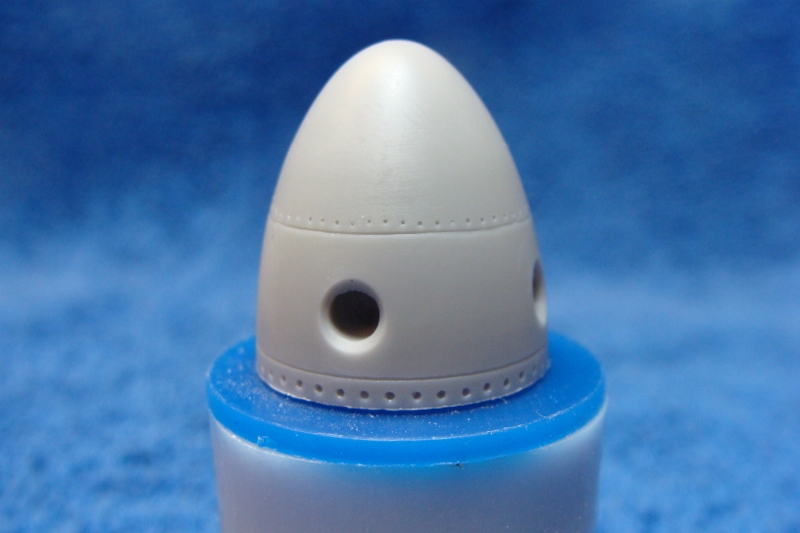
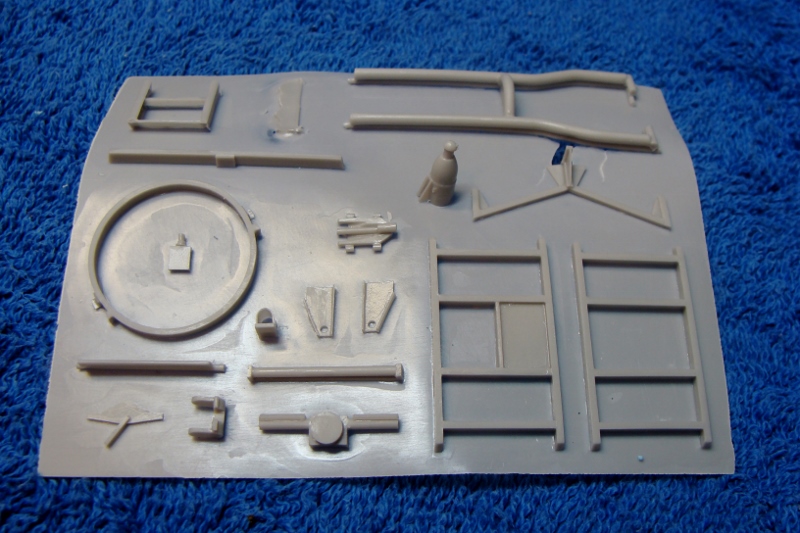
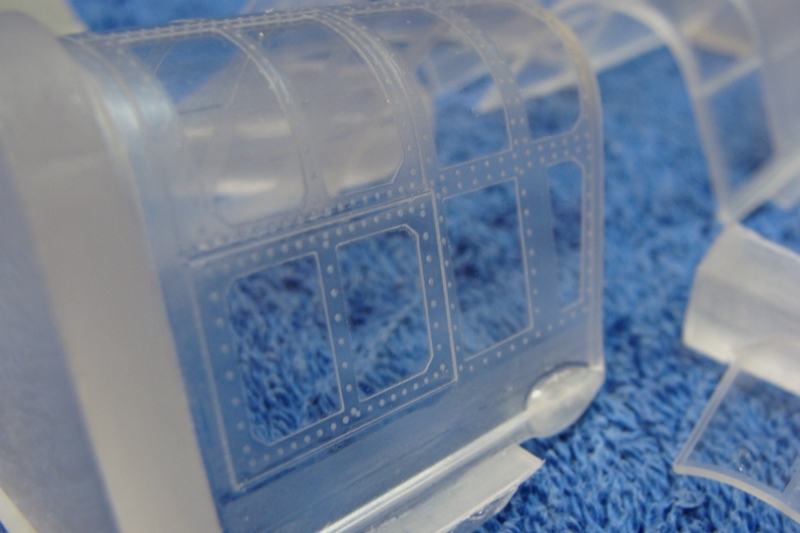
The detail of the many small resin parts is simply amazing regardless if it's cast into the interior or a separate detail part. The clear resin canopies are very crisply detailed including the tiny rivet detail around the canopy frame edges, and the additional transparencies are well detailed and very clear as well. The wings have reinforcing spars cast as part of the the insides of the wings, and there are lots of places to make sure you have a nice tight fit and properly installed wings. I did find some minor damage to some of the smaller parts molded to the landing gear and rockets, but they came off in the plastic bag they were packed in so they should be repairable. There does seem to be a bit of the landing gear bay wiring and plumbing missing, but it is missing on every other kit I've built regardless of the medium it's molded in. I may also be missing four rocket stubs but I'll have to lay all the parts out again during the build to confirm that.
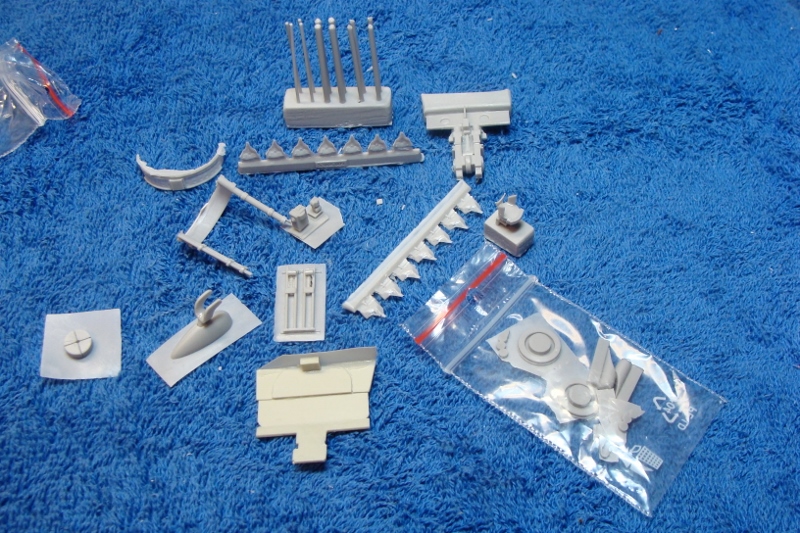
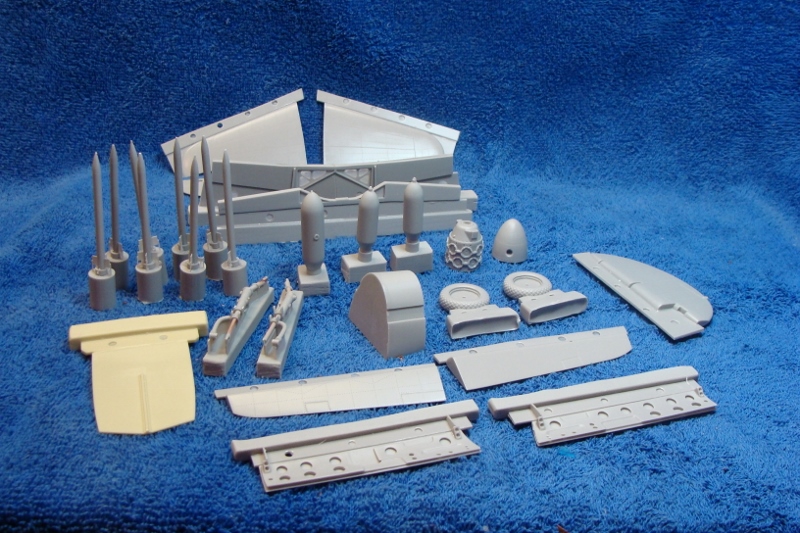
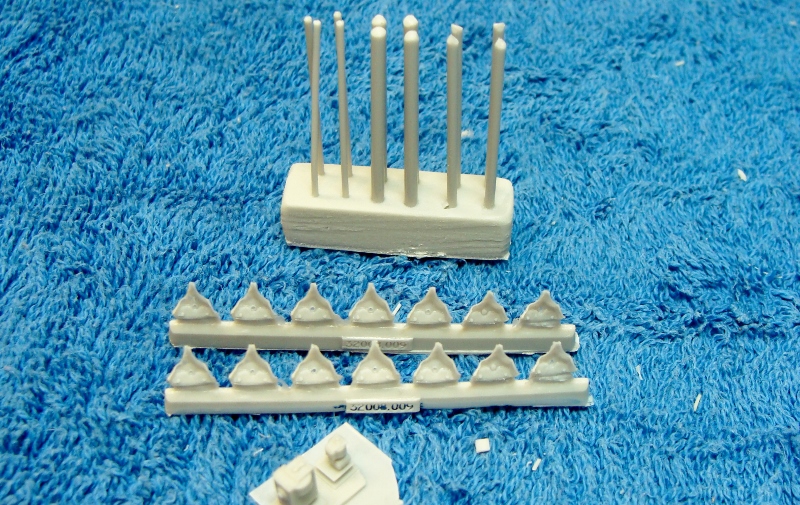
Here are the resin parts. I have left a couple bags of itty bitty parts out but nothing major and all of the resin is extremely well detailed inside and out where appropriate.
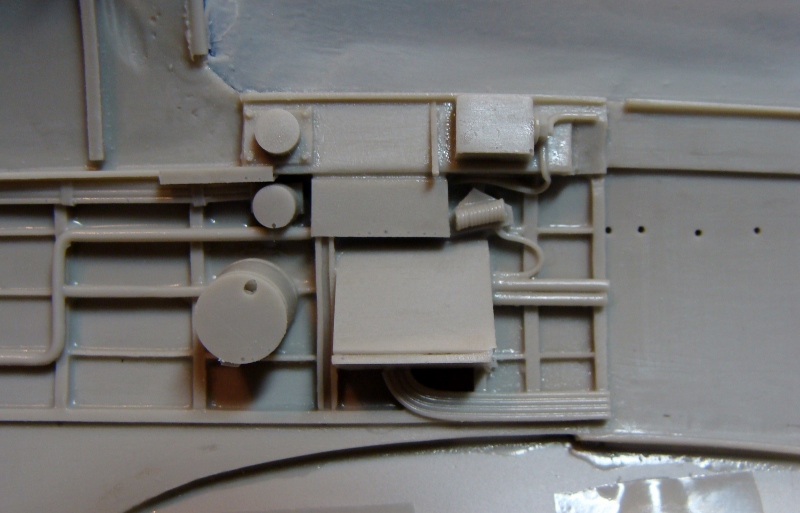


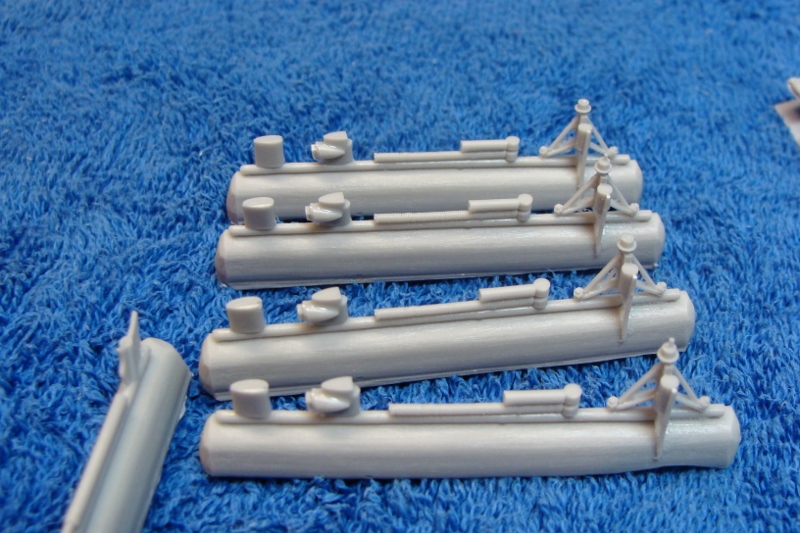


The magnificent Wright R-2600-20 Twin Cyclone radial engine is a work of art and a model in itself, but it's in a variety of pieces at the moment, so you'll have to follow my build review to see it completed.
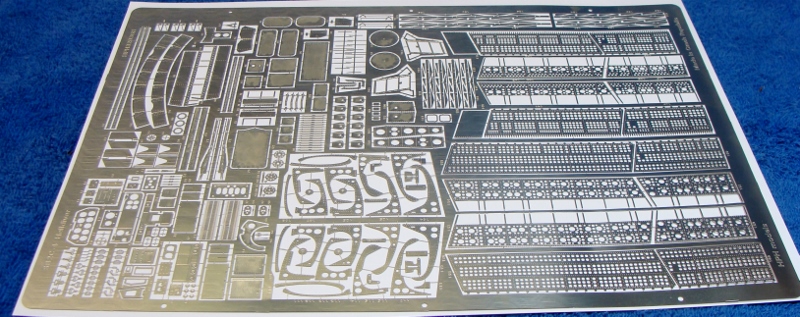
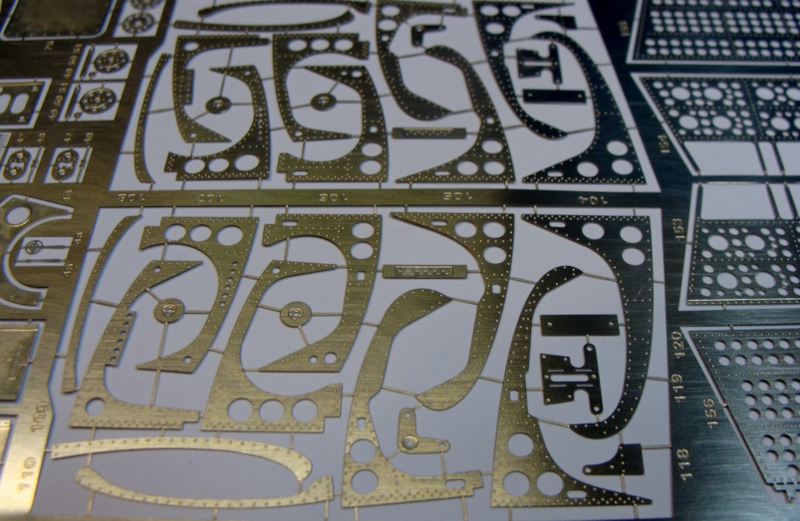
Photo Etch
The photo-etched parts are amazingly detailed with each part designed to push the model's overall accuracy and appearance to the extreme. The dive flap sections alone are sure to provide hours of entertainment. The remainder of the photoetch is used in the wheel wells, fuselage interior and exterior and antenna arrays. The underwing Yagi antenna's in particular will require great care when being removed and installed, they appear to be scale thickness.
Markings
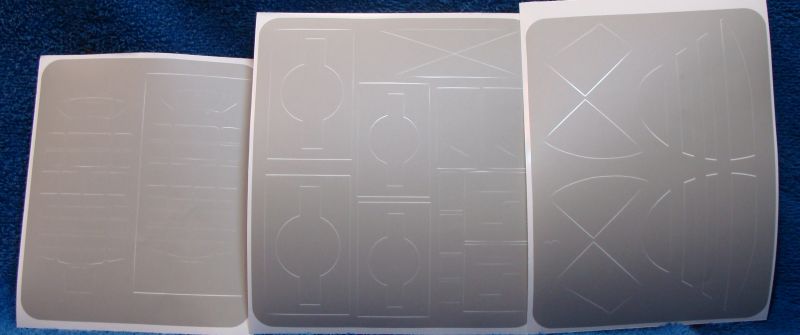
The decals are provided by HGW and are their wet transfer type, masks are provided for the clear parts (inside and out) as well as the larger markings.
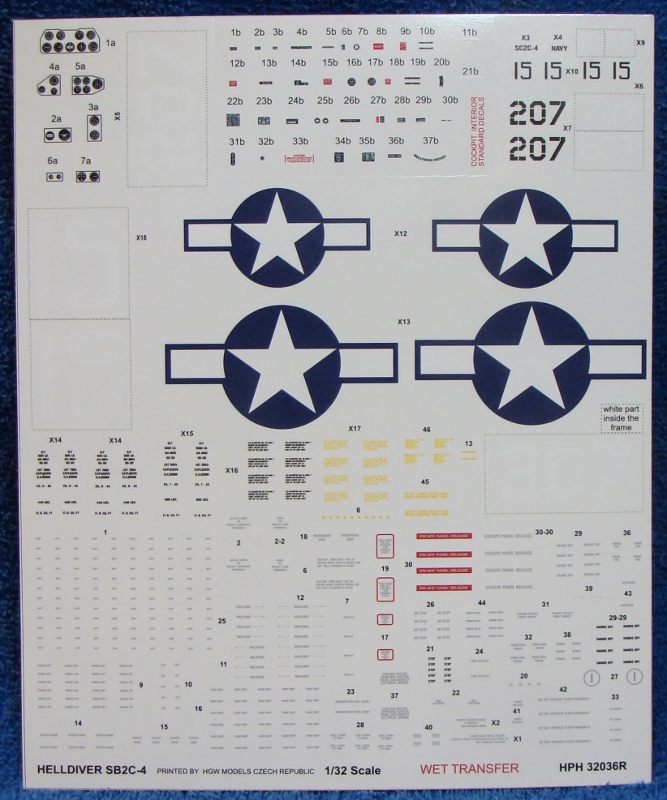
The markings options provided are for VB-45 from the USS Randolph Feb 1945 in Gloss Sea Blue, and VB-83 from the USS Essex April 1945 in US Navy 3 Tone camouflage. You are also provided with all of the tiny warning placards and data stencils found all over the aircraft including the cockpit and bombs!
Extras and Options
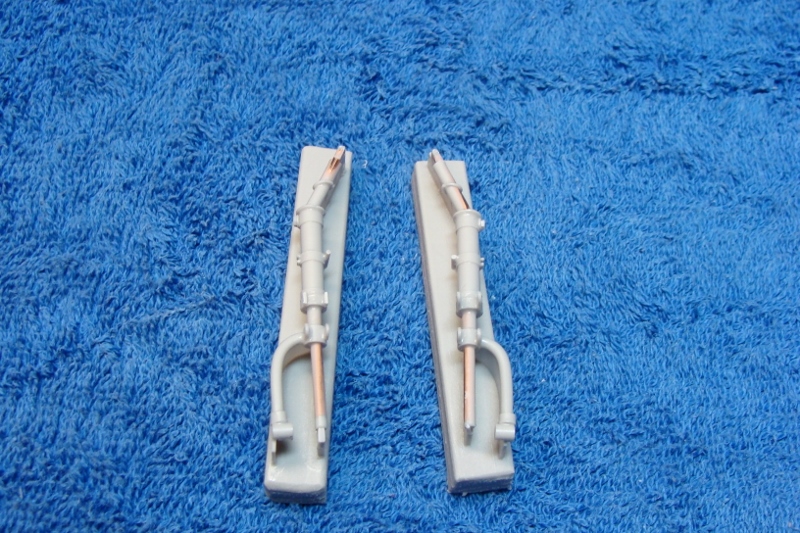
This fantastic kit also comes with milled brass barrels for the rear firing machine guns, and wing mounted 20MM cannon as well as the pitot tube and various lengths of tubing.
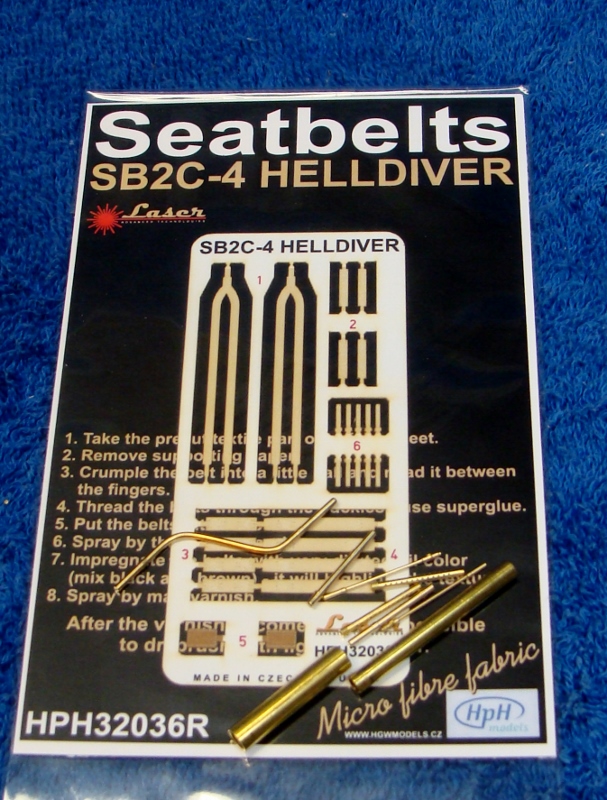
For the finishing touch, you also get a set of HGW's laser-cut textile safety belts for both the gunner and pilot. There is also a provision for the turtle deck to be built raised or lowered using the parts in the kit, a very nice touch that gives the modeler options to display this rather salient feature of the Helldiver the way he or she desires.
Instructions
Building instructions are provided on a CD and includes 57 pages including a full parts map for each resin and metal piece and lots of placement diagrams that should leave little to guess about the position of the detail parts. The instructions come in color and black and white and can be downloaded and printed off should you so desire.
Conclusion
This is truly an outstanding model kit in every respect. Flawlessly cast resin, gorgeous photo etched metal, fabric seatbelts, beautiful decals and masks, metal barrels and no need to buy anything further but modeling supplies.
"But wait! Isn't this a resin kit?" Yes, but it is designed like a high end injection molded kit, you just use a different medium to attach the parts. 2 part epoxy to join the larger parts and super glue or epoxy to join the metal to the resin.
"But isn't resin more difficult and messier to work with?" If you can work with a high end injection modeled kit, have worked with a resin conversion set and photo etched metal doesn't send you screaming you should have little trouble building an all resin kit. YOU do need to make sure you wash all parts before paint or primer, but you should be doing that with all of your kits! If you're worried about resin dust work outdoors, or have a mild vacuum source and a dust mask to work by to collect it as you make it. (A mini-vac works great.) If you can clean up parts from their attachment points and use 5-10 minute epoxy, it's just Modeling 101 from there and certainly nothing to fear.
I am more than satisfied by what you receive from HpH for the money and I am commencing my build on LSP of this enigmatic aircraft forthwith!
The kit is available now from HpH models.
Thank you to Large Scale Planes for the opportunity to review and build this magnificent model and HpH for producing it and getting it to us so quickly for review.
© LSP_Paul 2016
This review was published on Tuesday, June 28 2016; Last modified on Tuesday, June 28 2016