
Vintage Fighter Series 1/24 Curtis P-40 Tomahawk Part 1
By William Joyce
Work began by reading the reviews on LSP’s website and I must say they were not the best; however I still decided to go ahead with the build. I then ordered the kit and Edward aftermarket (belts and cockpit) accessories from Squadron.com. I love Squadron Shop, as a kid I remember getting the monthly flyer (paper printed in black & white) spending hours reading thru all the kits and accessories. Sorry…rambling, back to the P-40. I also ordered the aftermarket flap set from Cammett Ltd. Now I can not wait to put this set together. The detail is amazing and there is no doubt in my mind these flaps are really going to dress up the kit. Cammett also makes an aftermarket motor for this kit. I opt not to purchase, after seeing the flap set I have a feeling I will regret not ordering the motor.
Started by reading the instruction and the reviews a couple of times. What I determine was that the engine is well detailed, however, once the kit is completed; only the top of the engine and firewall are easily seen. Side panel(s) would have to be cut to allow for the majority of the engine to be displayed. At this point I am not planning on doing any cutting….we’ll see?
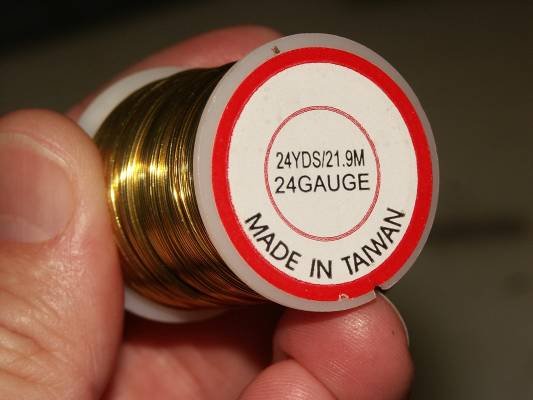
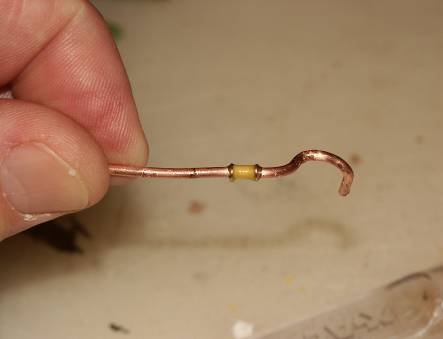
I am using additional wire to add detail to the kit as well (first time effort). I am using 24 gauge wire, to represent the smaller size and a thicker gage for the larger size. I am not sure of the gauge for the larger wire? I purchased the 24 gauge at Hobby Lobby and the other at Lowes.
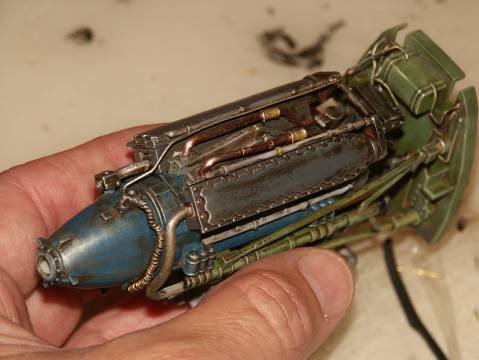
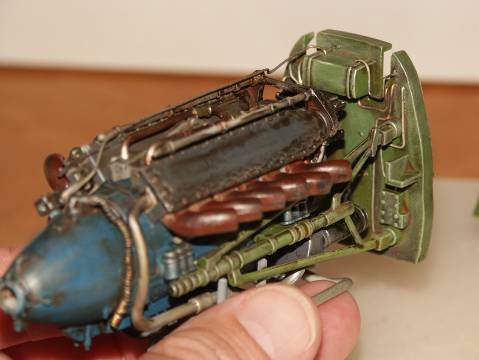
The engine was assembled first, all parts fit very well. I painted all the major parts before assembly then sprayed Future to prepare for washing.
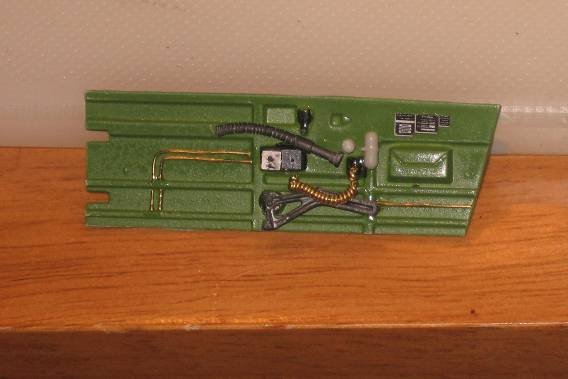
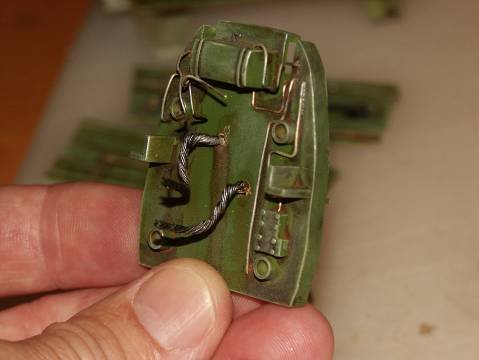
Next I tacked the firewall. After reading several articles on the LSP site I decided to attempt adding wire to boost detail. Now I must clarify, I placed wire in areas I thought it would be seen after the kit was complete. For instance I have not added any extra detail to the bottom of the engine. With that said I drilled small holes, with my Dremel tool, and bent the wire to fit then glued into place. All the interior parts were painted with Testor’s enamel green zinc chromate.

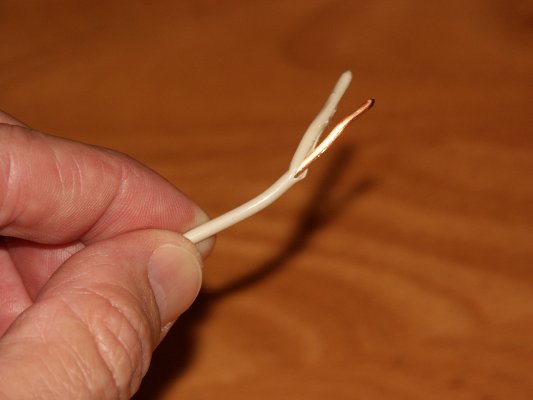
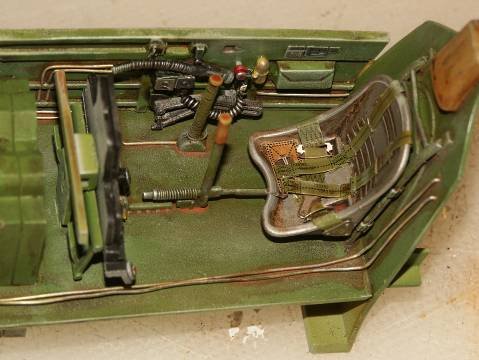
The side panels, cockpit seat and instrument panels all fit very well. I added wiring and radio cord. The cord was made by taking a straight piece of 24 gauge wire then winding another piece of 24-gauge wire around it.
After painting the Edward aftermarket detail was added and the wire painted with light coat of silver enamel. Future was then applied and allowed to dry for at least two days to prepare for the oil wash. After the oil wash was applied to the engine, firewall, and cockpit, and allowed to dry for a couple of days, I mixed some base coat green zinc chromate with white and dry brushed to bring out details.
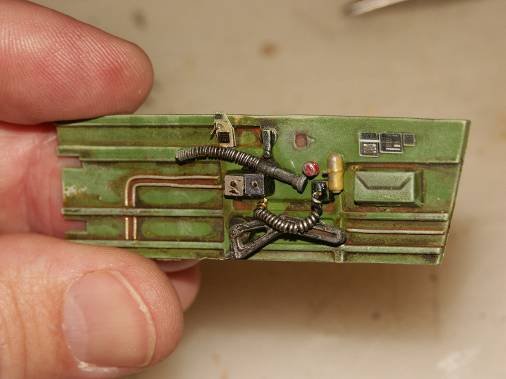
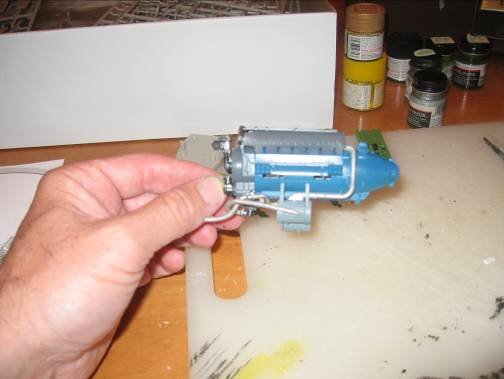
With the top of the engine being the most visible I added some detail here. I took the thicker electrical wire, peeled off the rubber outer coating, and formed to shape. I decided to add some eye candy here with makeshift filters or clamps, whatever you want call them? This was accomplished with Tamiya masking tape and 24-gauge wire. I cut strips of masking tape say 3/16 of an inch wide by 1/2 inch long. I then rolled the tape around the wire and cut two small sections of the 24-gauge wire and crimped them on either side of the tape. I then applied a drop of gap filling super glue to the seal the deal.

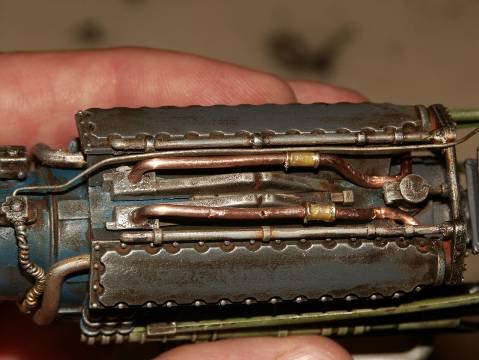
I then drilled and glued into place. I also added some smaller wire as well. Applied several oil washes and dry brushed with enamel silver to bring out detail.

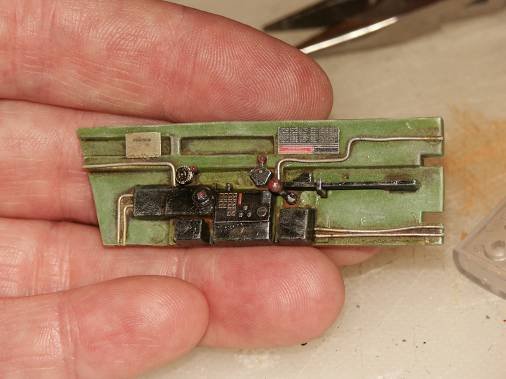
Below are some pictures of the cockpit with the Edward belts and cockpit detail accessories added.
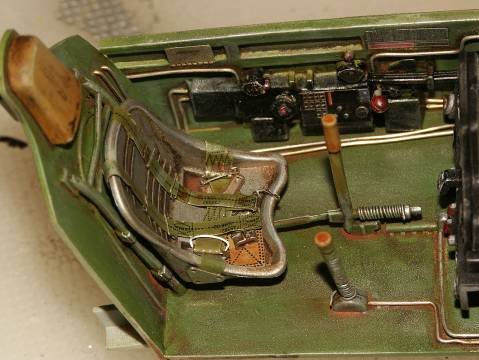
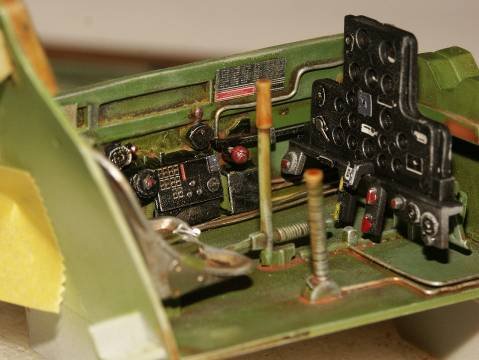
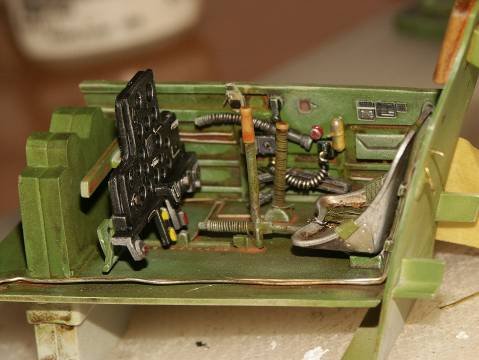
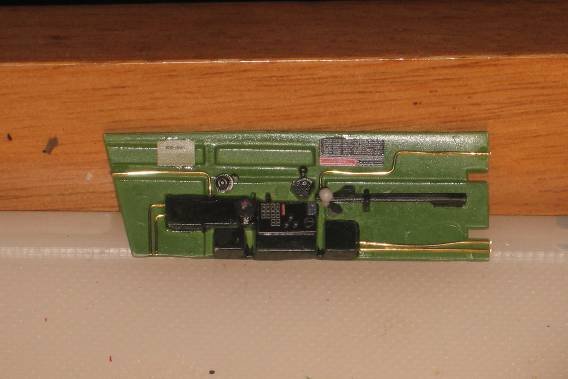
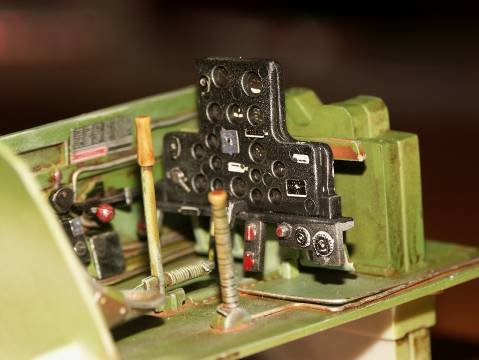
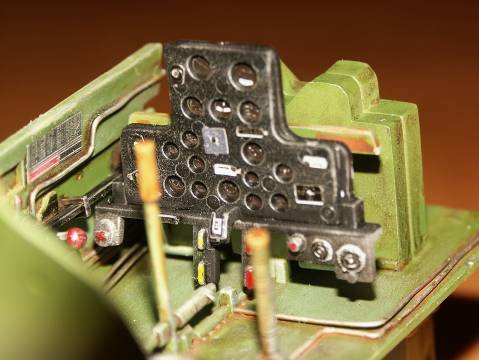
The instrument panel was painted black then the Edward aftermarket detail added and dry brushed with enamel silver.
So far I really like the kit and construction has been a breeze.
That’s all for now.
William Joyce 2007
This article was published on Wednesday, July 20 2011; Last modified on Saturday, May 14 2016