
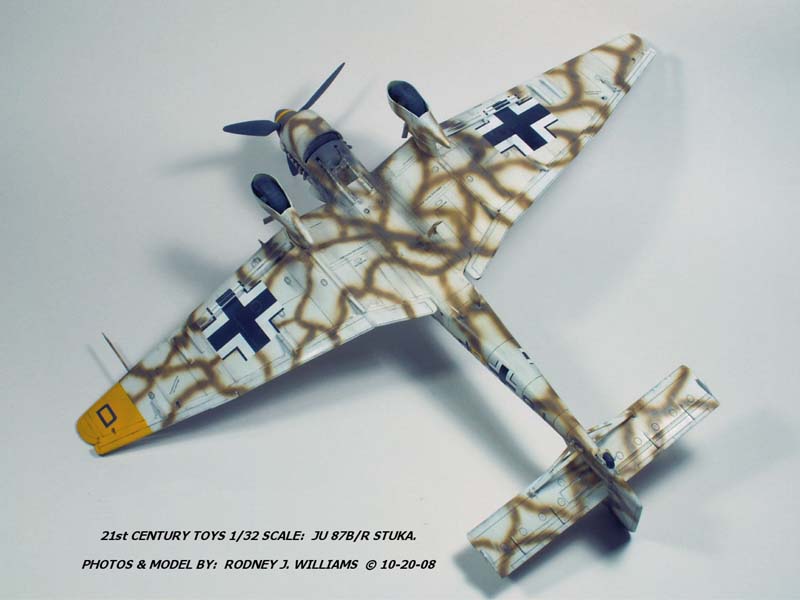
21st Century Toys 1/32 Scale Ju 87B/R Stuka
By Rodney Williams
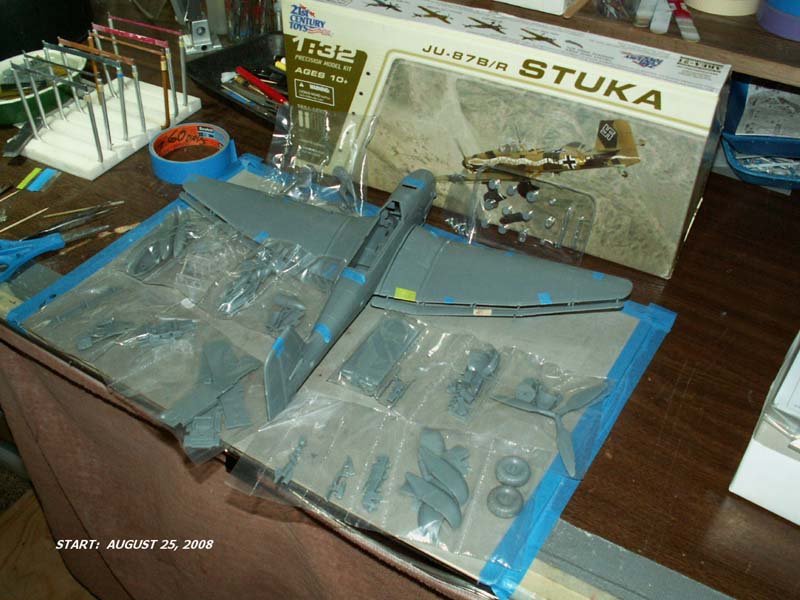
THE KIT
My first photo shows the kit parts, which are packed into small sealed plastic bags. I found 3 missing parts, which were replaced by "Sammy" who works at the company head quarter's in California. There was no charge involved, so my hat is off to Sammy, as we say here in America.
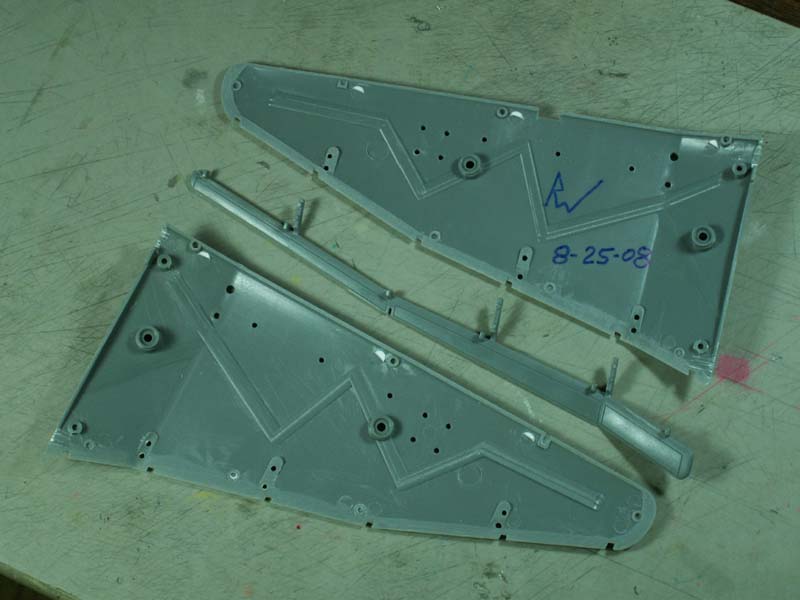
CONSTRUCTION
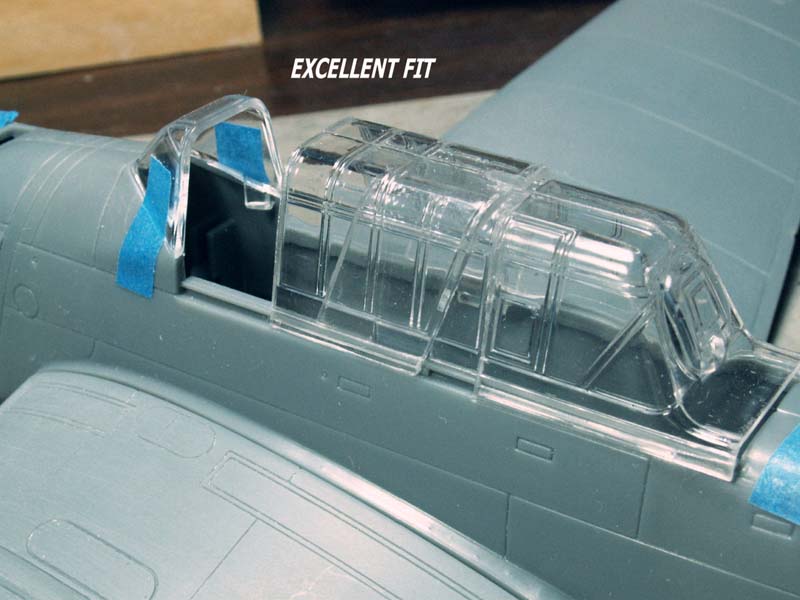
My Stuka log says that I started on this model in late August, 2008 and finished it by mid October, 2008. The instructions show how to put the cockpit parts together, then comes the wings, etc. To me, the clear parts for any model are very important. I taped the two fuselage parts together then dry fitted all of the clear parts to the fuselage, which fit to perfection. The two canopy sections are real good "sliders".
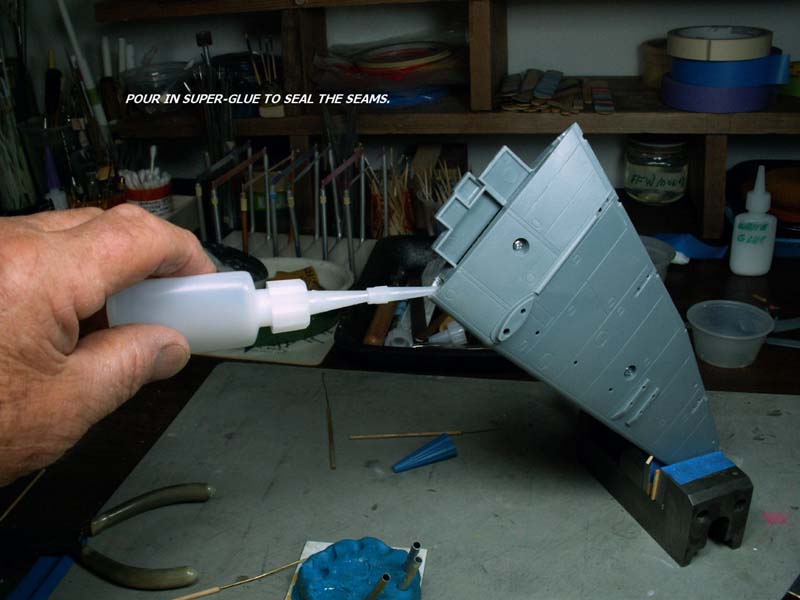
This photo shows me pouring in a few drops of super glue into the big wings. I turn the wing up and down, so the glue seals the inside of the entire wing seams. I have used this method for a decade or more and have never had a seam split open.
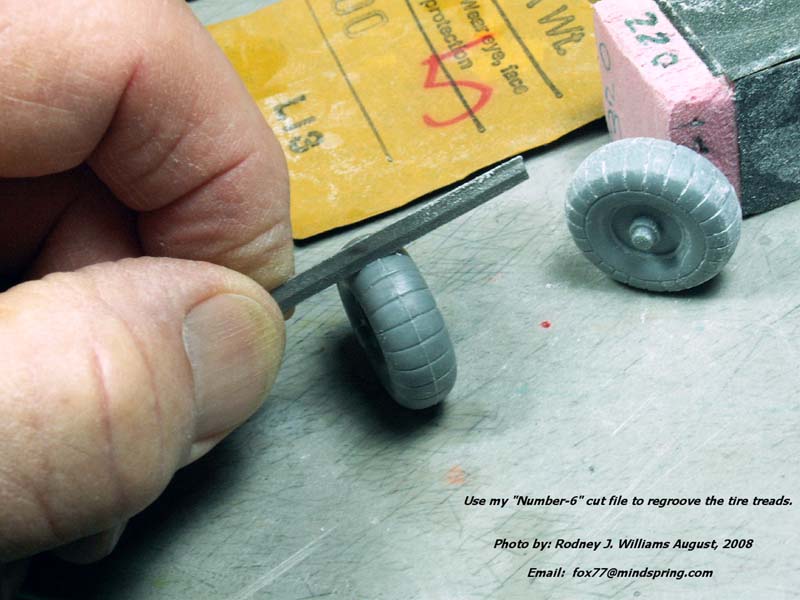
I removed some minor flashing then slightly flatten part of each tire. I "re-groove" the treads using my small #4 and #6 jewelers' file's that I bought 20 years ago.
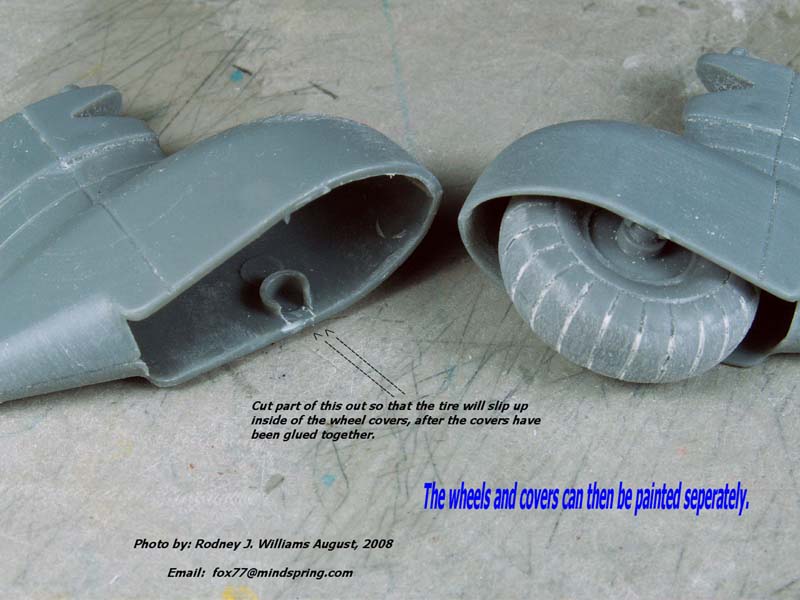
This photo shows how I cut out a section of the molded-in tire holder, (or what ever you want to call it). This lets the modeler glue the two wheel strut cover parts together and complete the sanding. The finished "strut cover's" are glued to the wings and are painted along with the model.
The one part tire and rim unit is painted separately. After they were snapped into place on "final assembly" I rotated them so that the model would set on the flat part of the tire. I applied a bit of thinned-down white glue, which will keep the tires in their proper place.
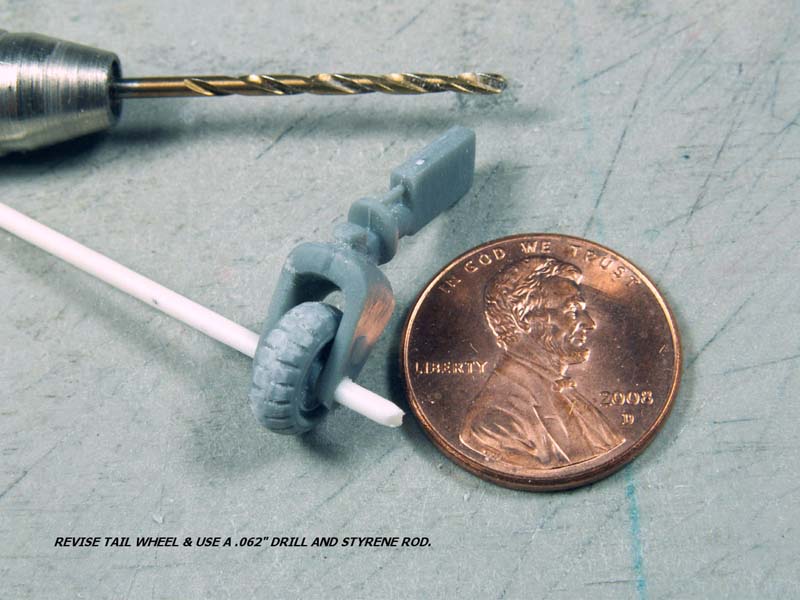
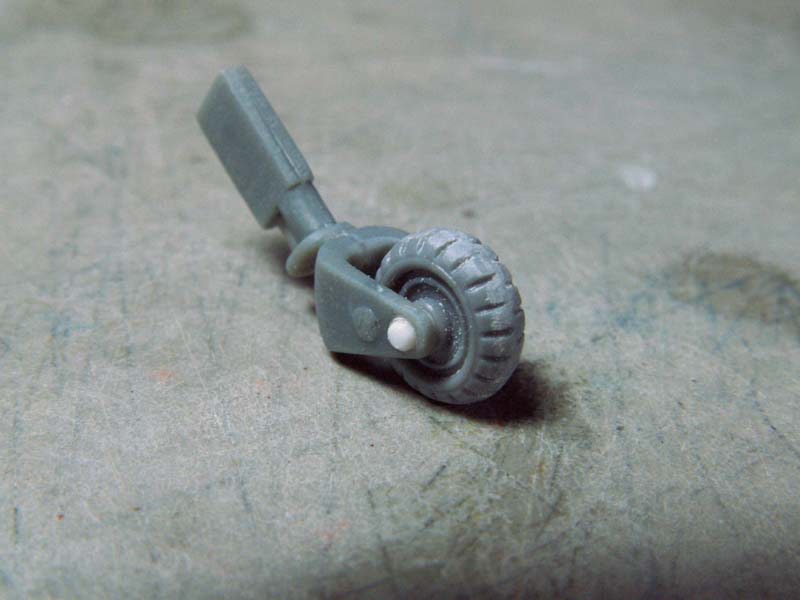
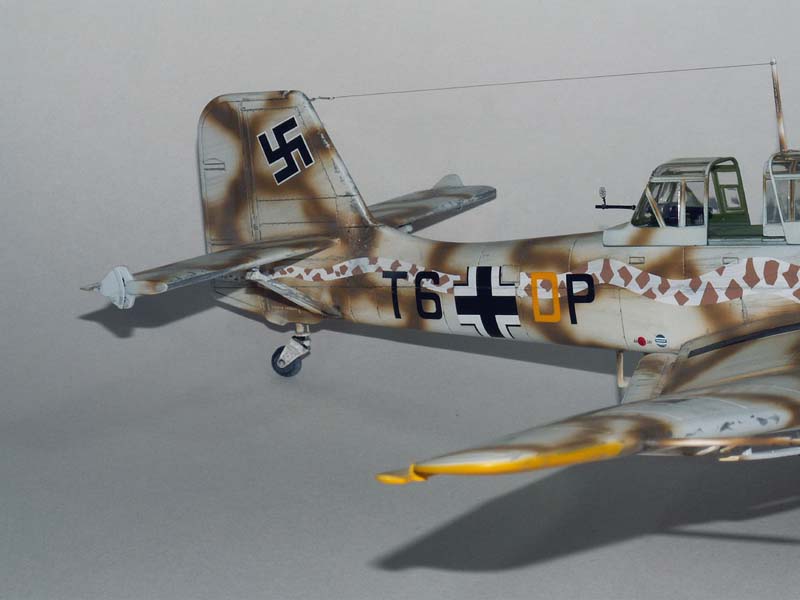
This photo shows the "revised" tail wheel. You will note that the treads do not match up on this solid one piece tire. I did not correct that problem, but should have "DID-IT."
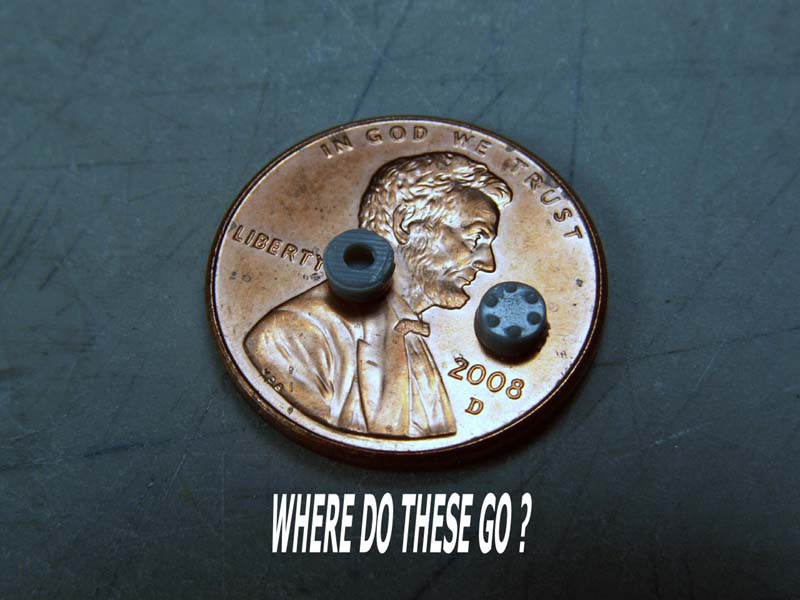
Here is the mystery parts photographed on my penny. There is no data on the building instructions, showing where they go, so I left them off.
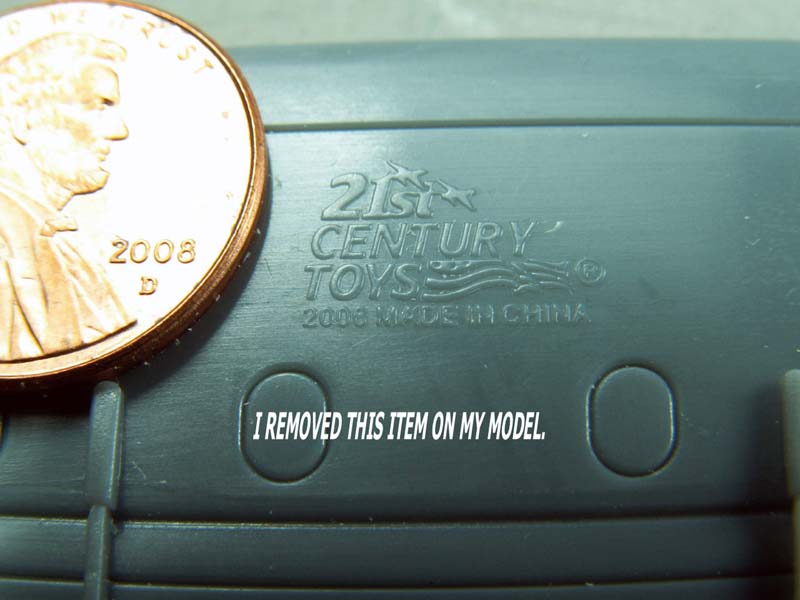
This photos show's the company name embossed onto the plastic which I had to sand off.
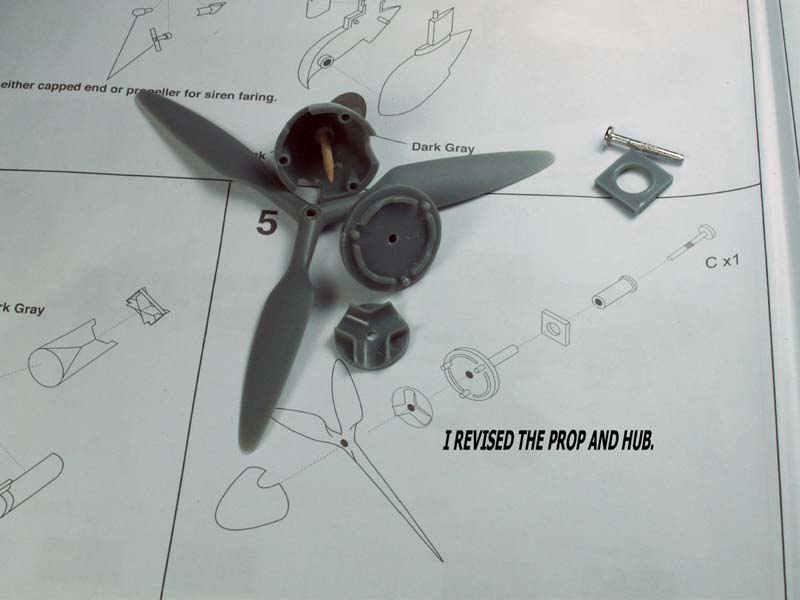
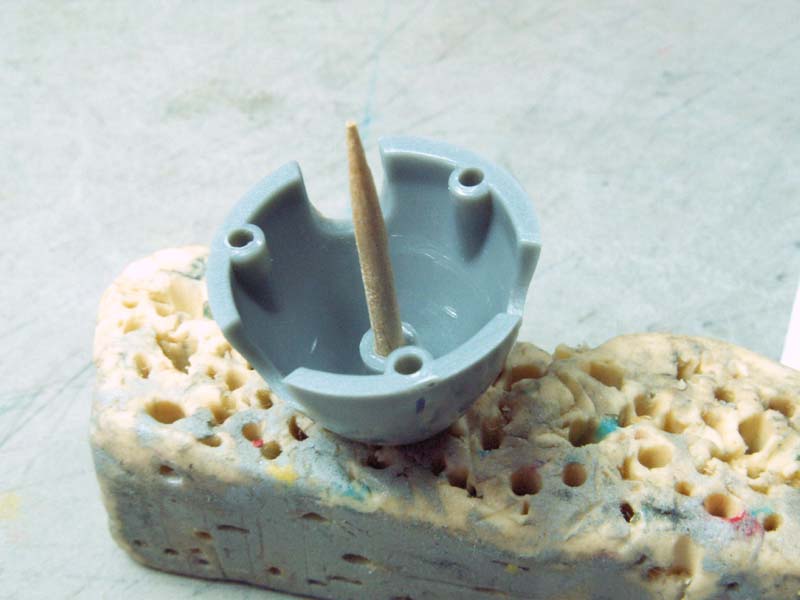
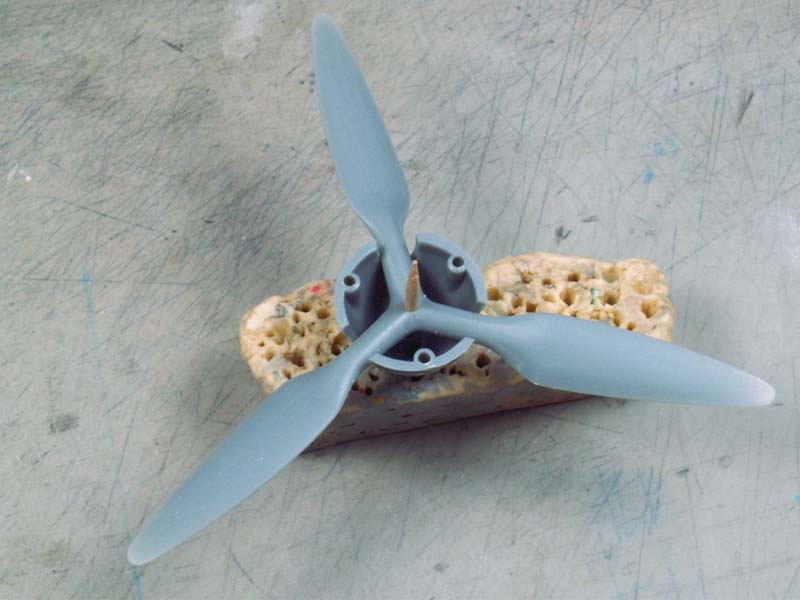
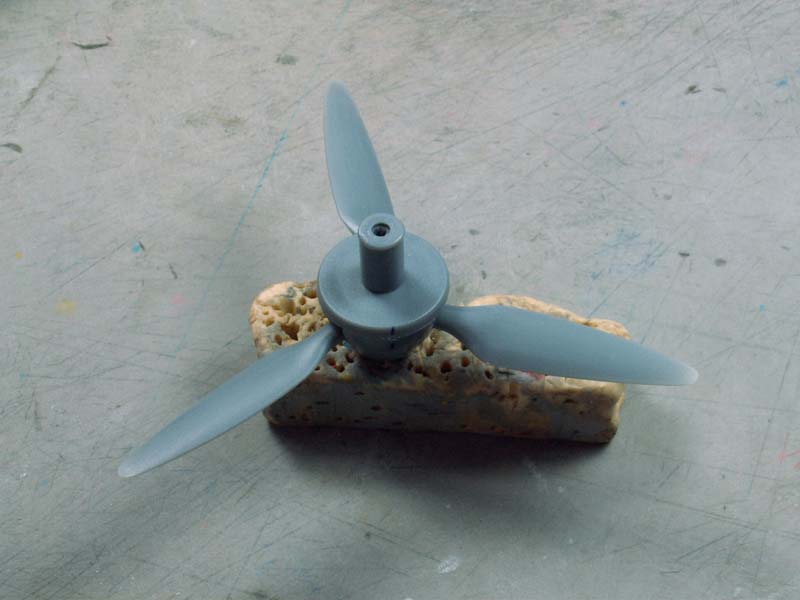
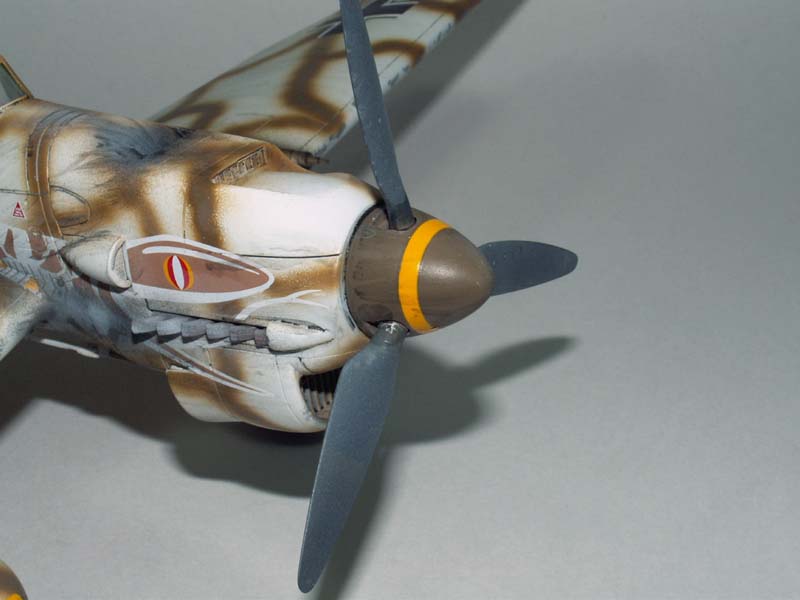
For some reason, I revised the prop and used a round wooden toothpick, which worked out just right for me.
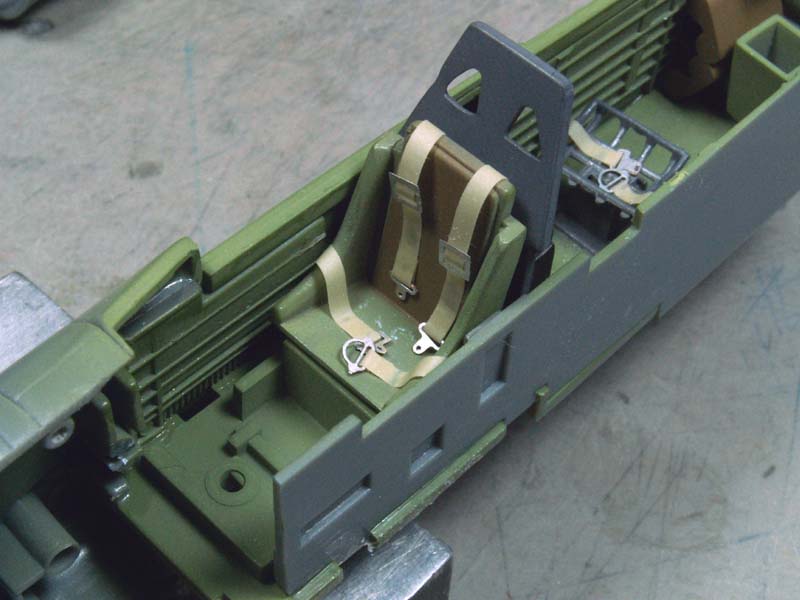
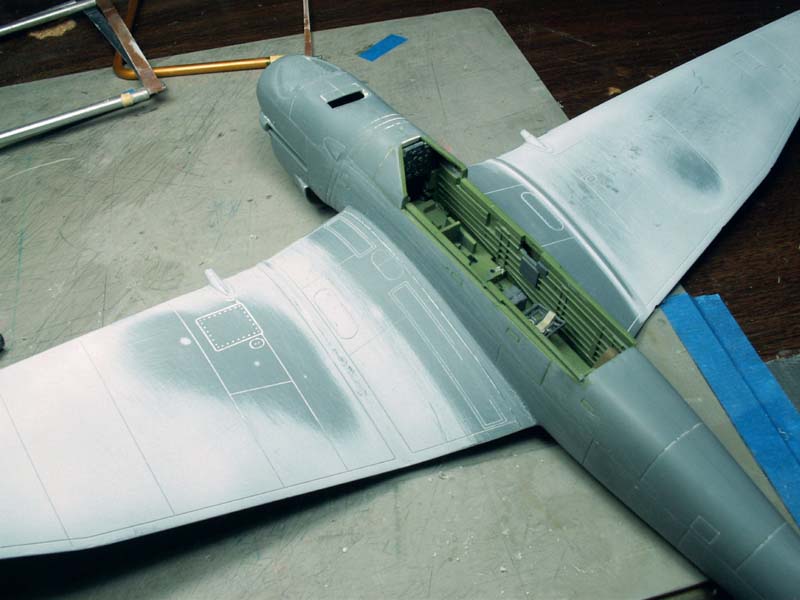
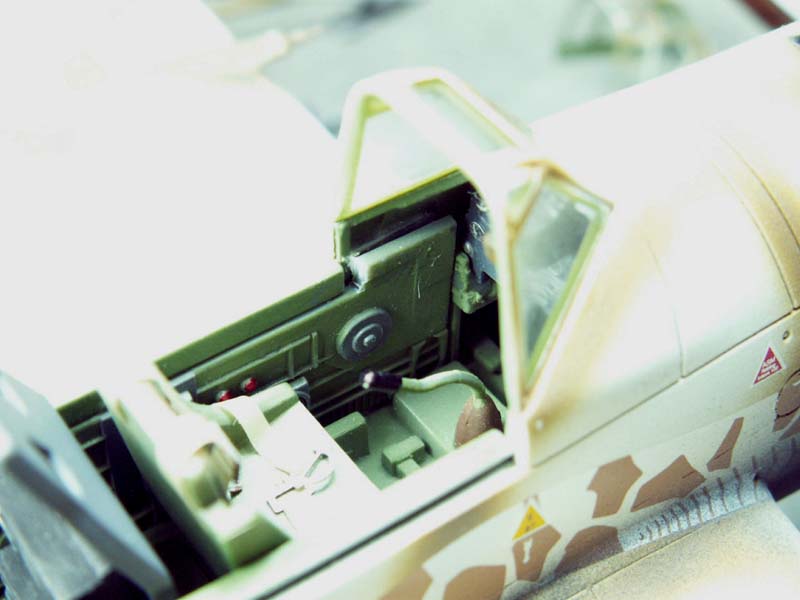
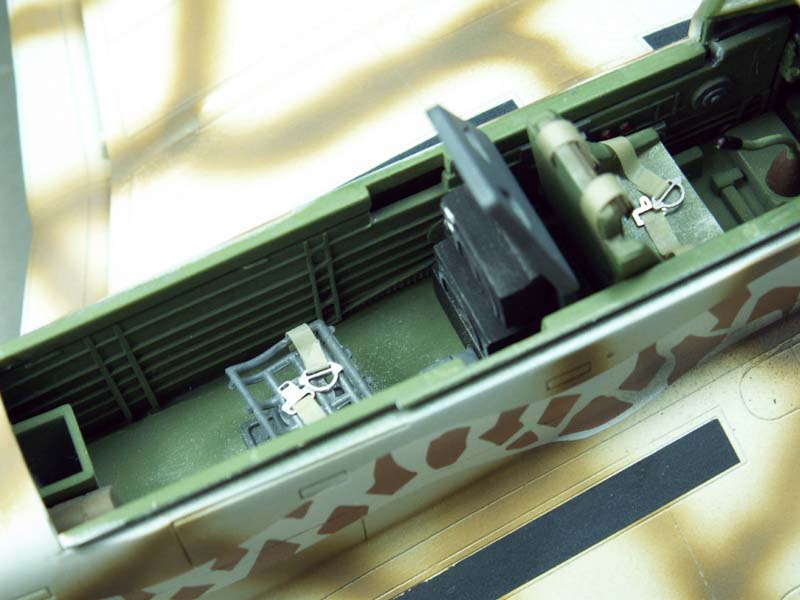
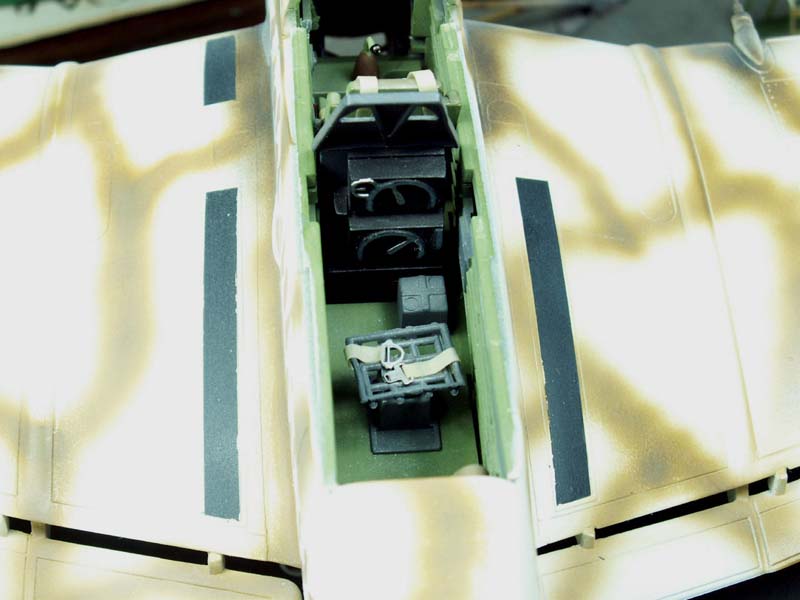
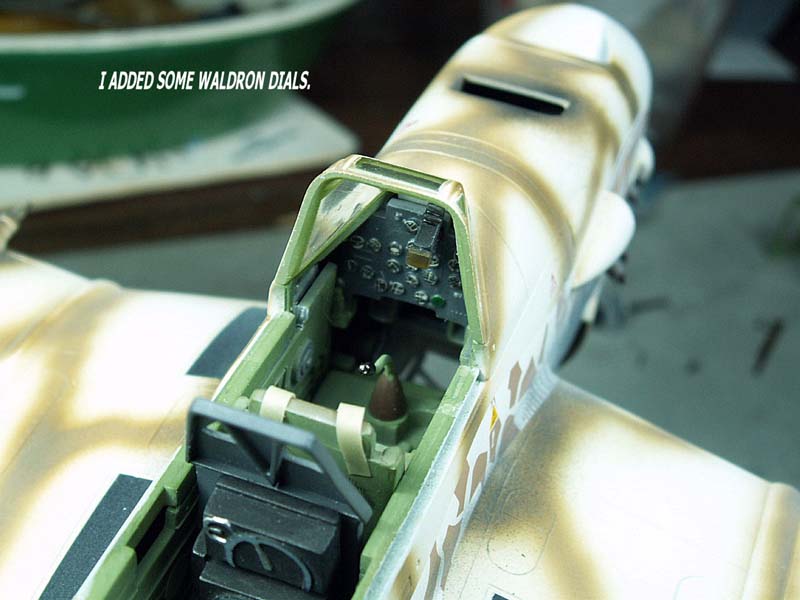
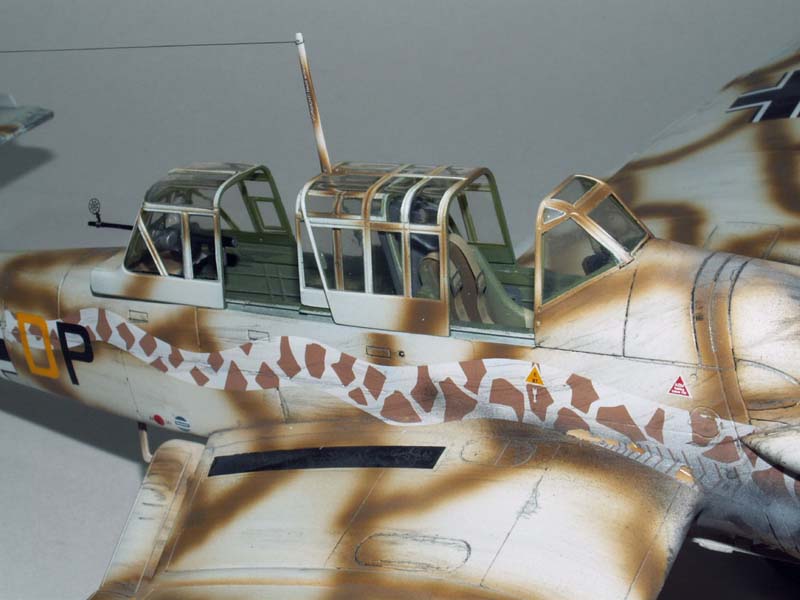
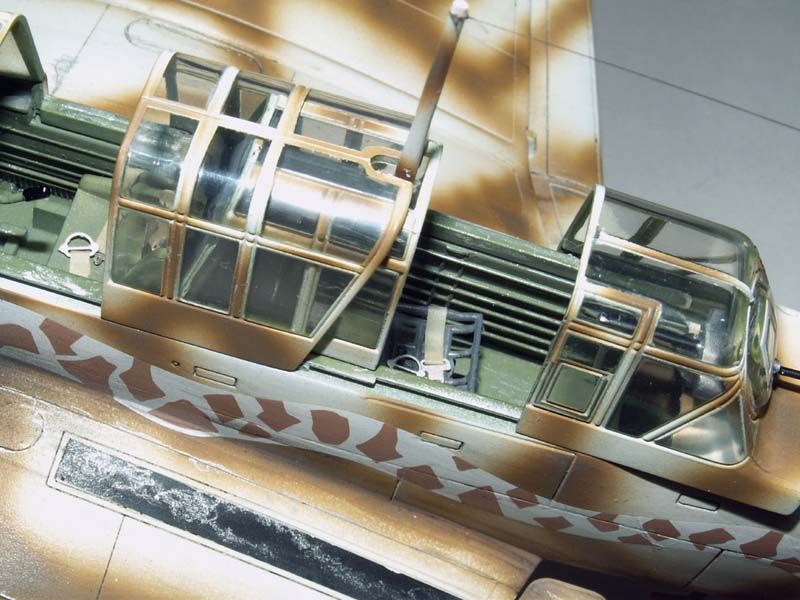
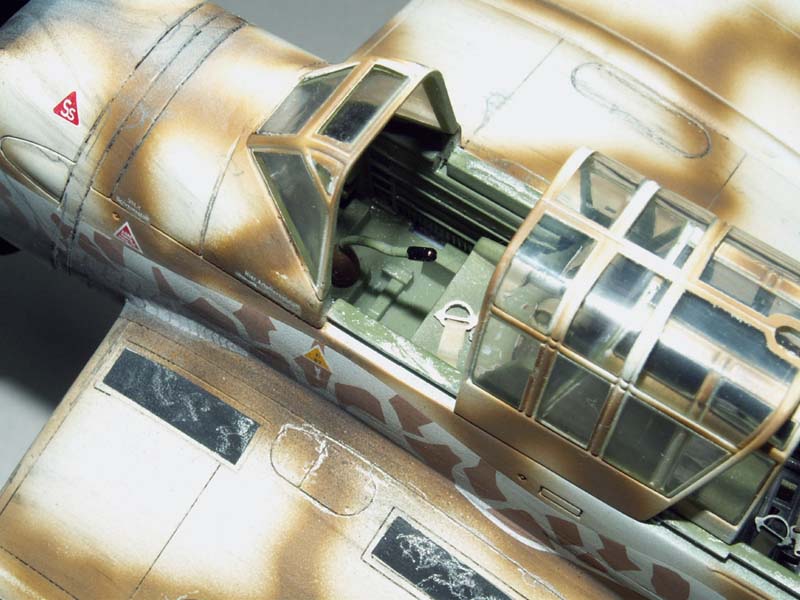
These photos show the semi-finished cockpit area. I used some Waldron instrument dials, and seat belt buckles. The straps were made out of my "3M-Fine Line" masking tape.
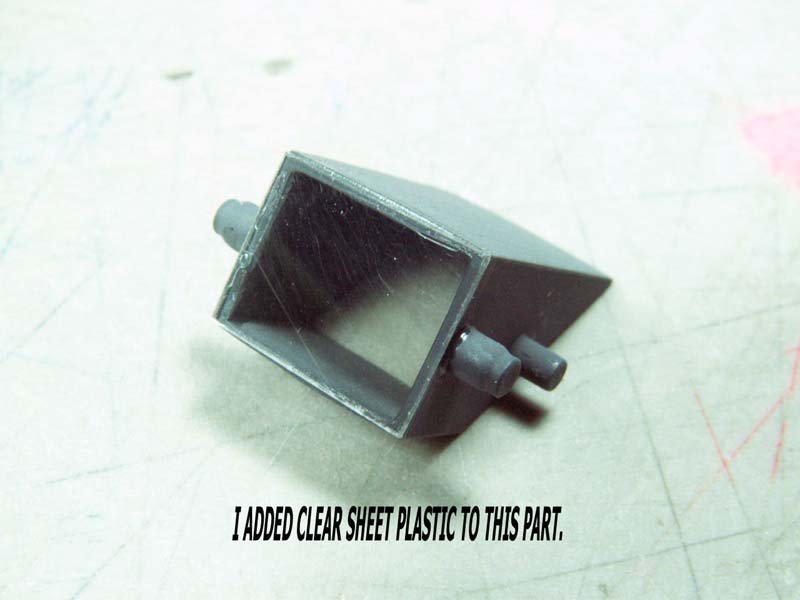
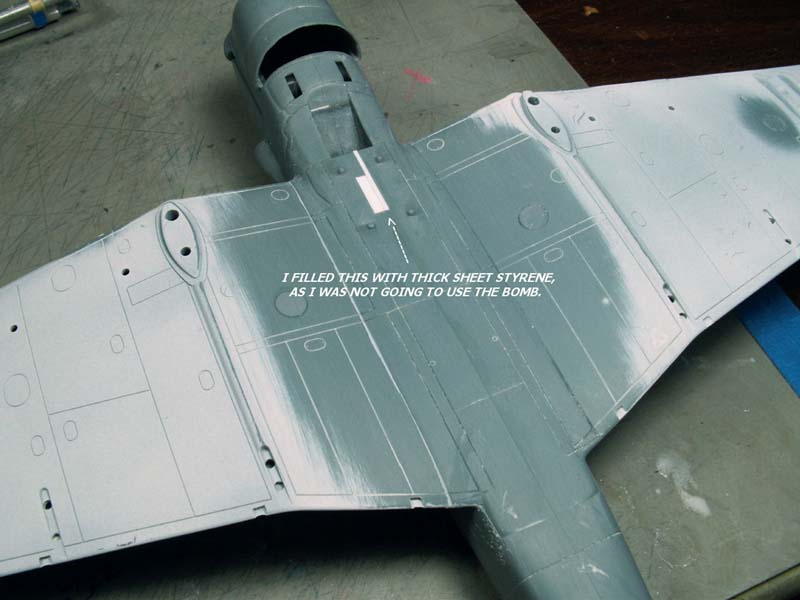
I added some clear styrene to this part, which I think might be the "bomb-aiming window".
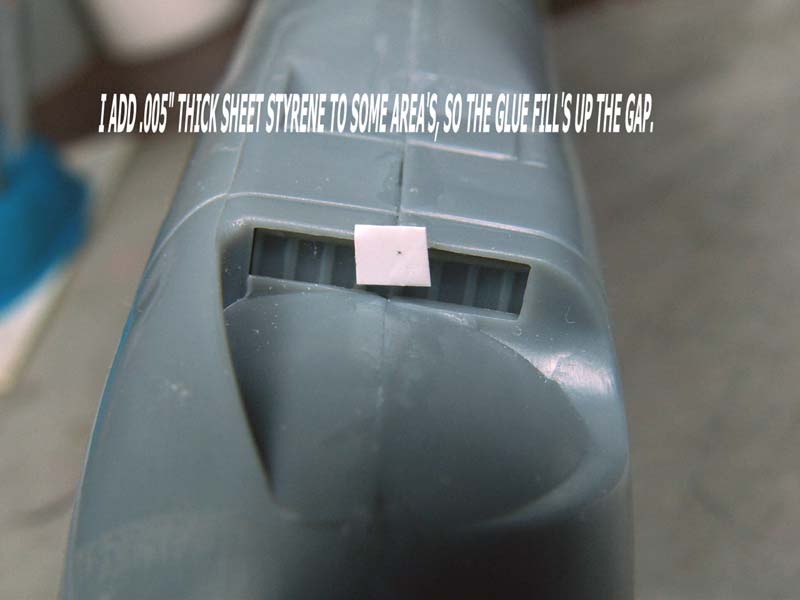
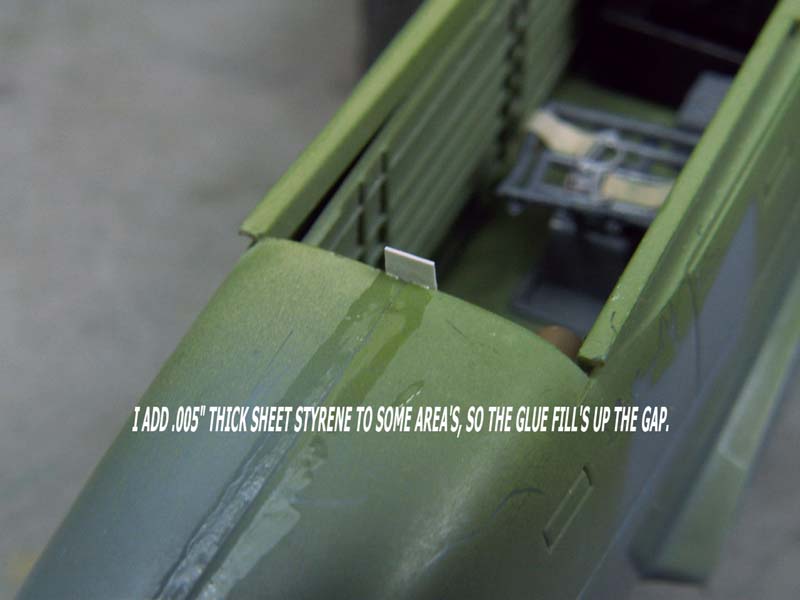
These photos show my neat little trick of how I add small pieces of .005" thick sheet styrene to "V" shaped areas and add some super glue. The little pieces of styrene are carefully cut off and the area is sanded. Presto...the gaps are gone.
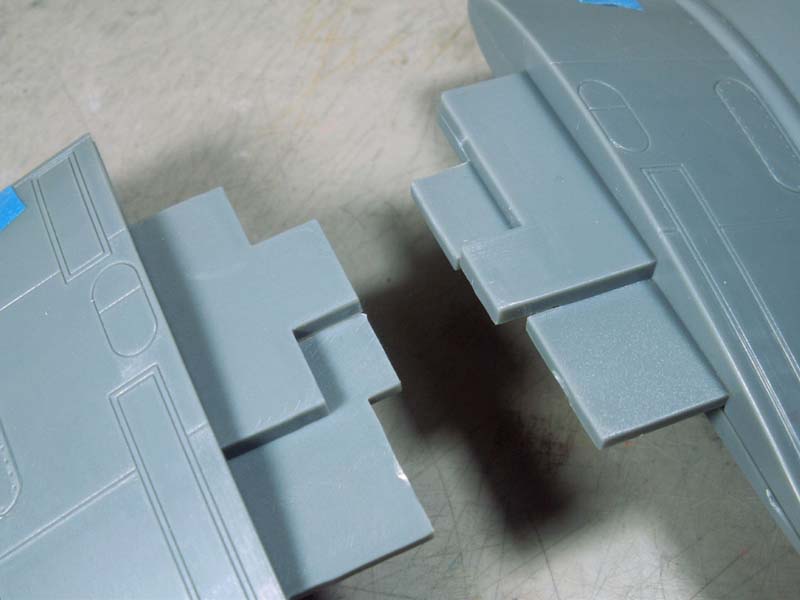
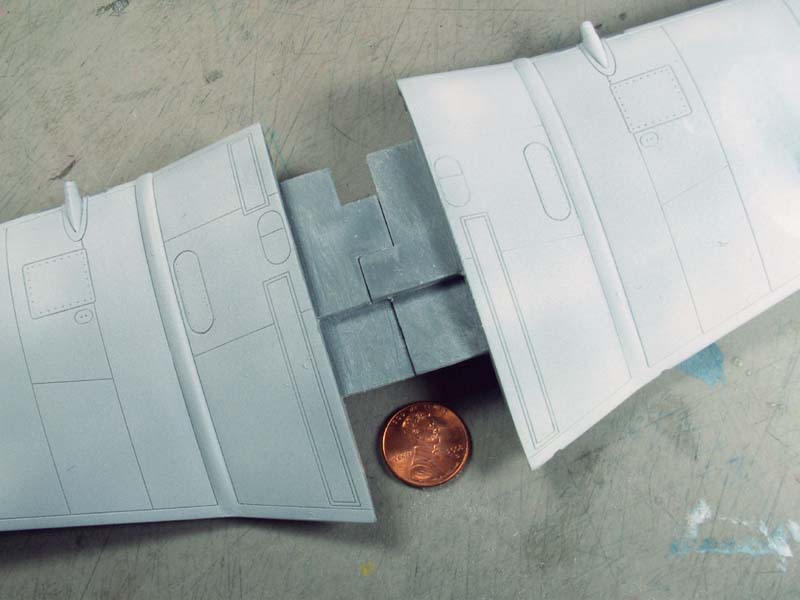
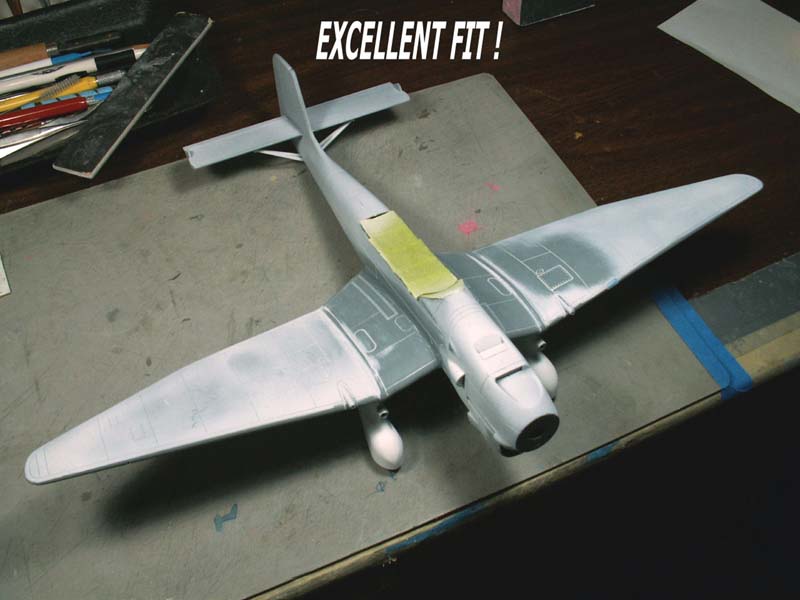
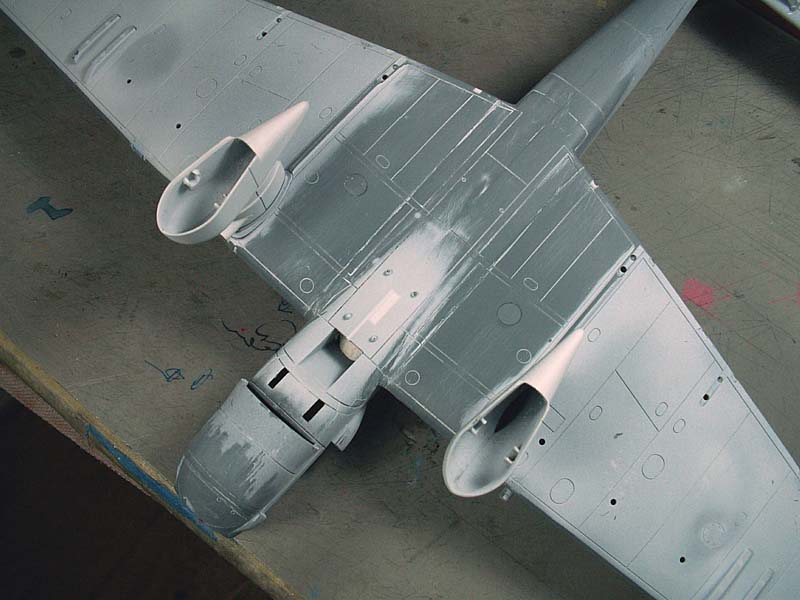
This photo shows the wings lock together. Make sure that they lock together when you dry fit the wings to the finished fuselage, before you add any glue. I had to sand the parts a little bit so I could get a "perfect" wing/fuselage fit.
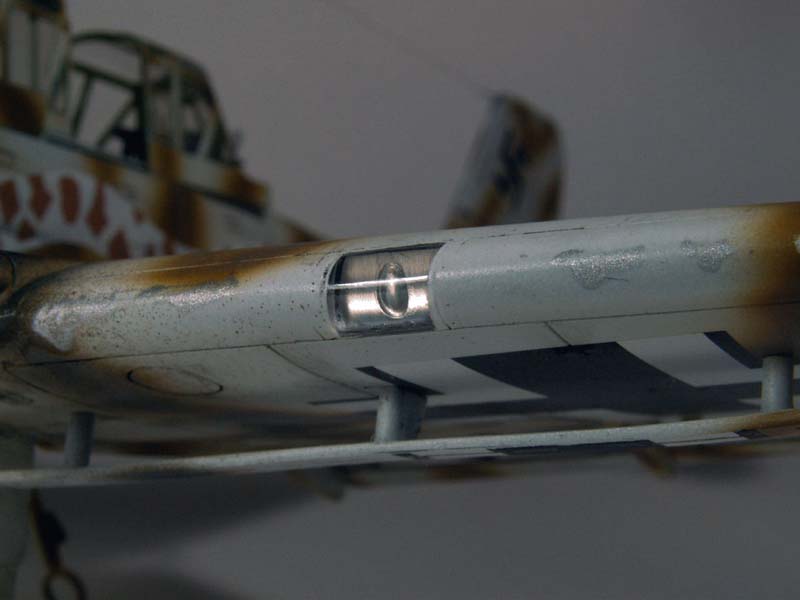
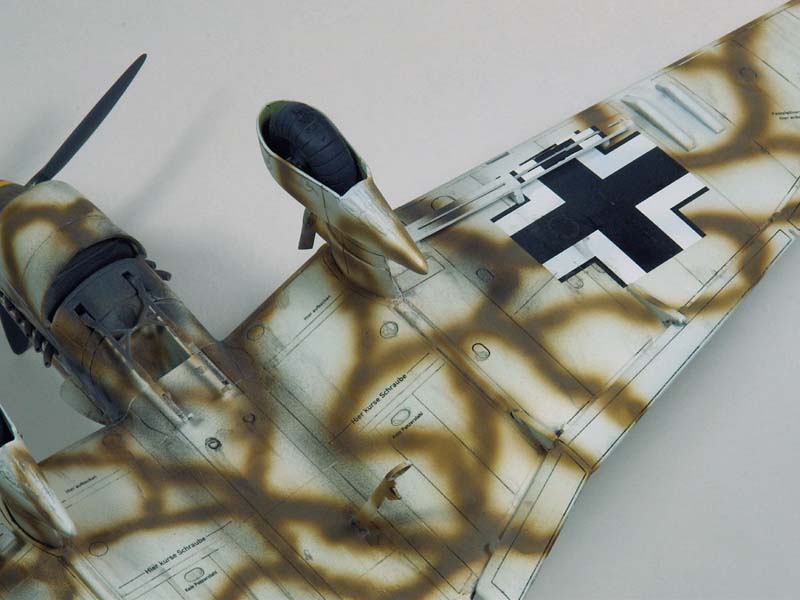
This single photo show's my revised wing light. I have several sizes of flat clear plastic, so I decided to make a real looking wing landing light. I removed a section of the wings leading edge then cut and fit in the clear plastic. I marked the center then drill a .062" diameter hole about 1/32" deep into the back side of the plastic. I inserted one of my "fine" round DREMEL cutting tools into the hole and made it smooth as glass by turning it real slow by hand. I painted the back of this clear plastic part with some silver paint. It was super glued into the wing slot then I cut and sanded the front down to1500 grit sand paper then coated it with Future.
CHECK FOR FLAWS
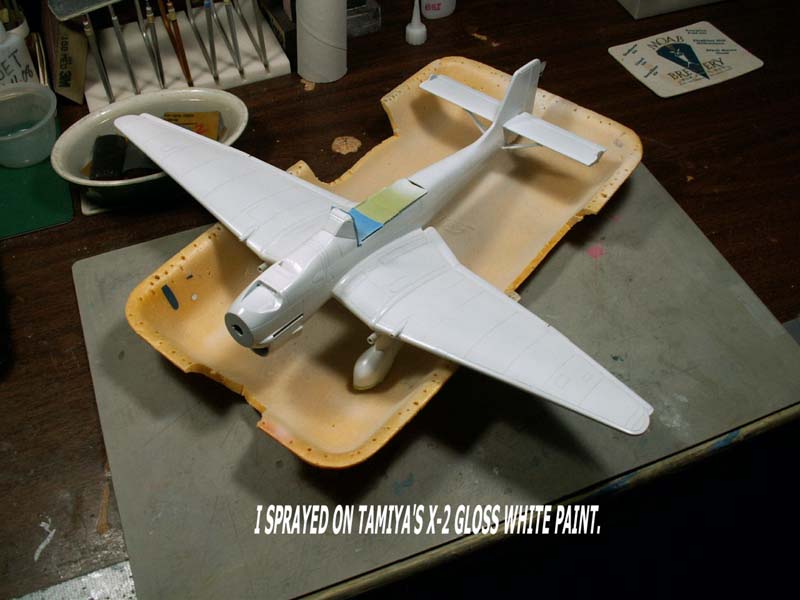
After my model was all together, I dusted on some Tamiya XF-2 Flat White paint and began checking for flaws, which were fixed.
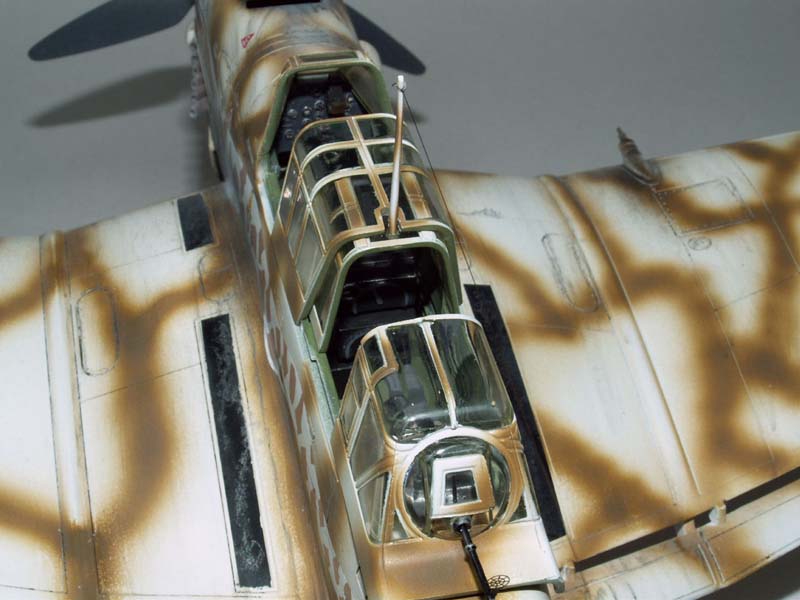
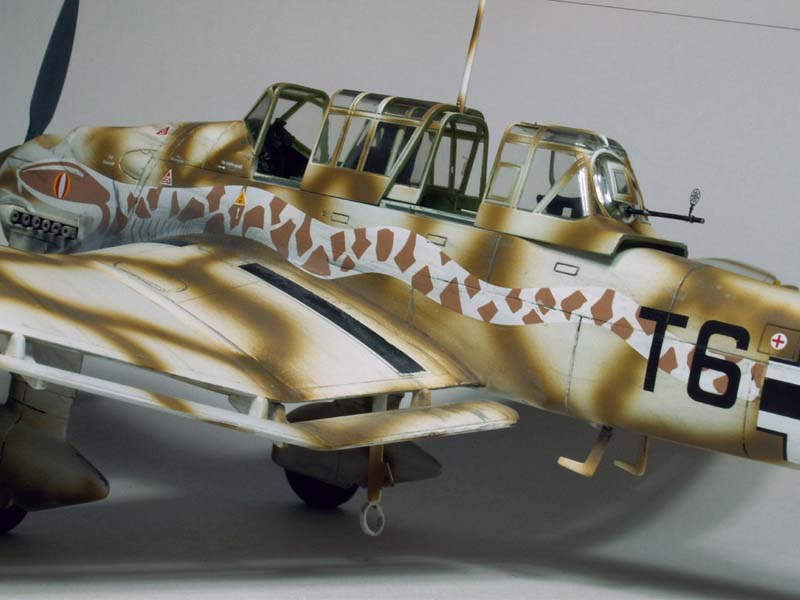
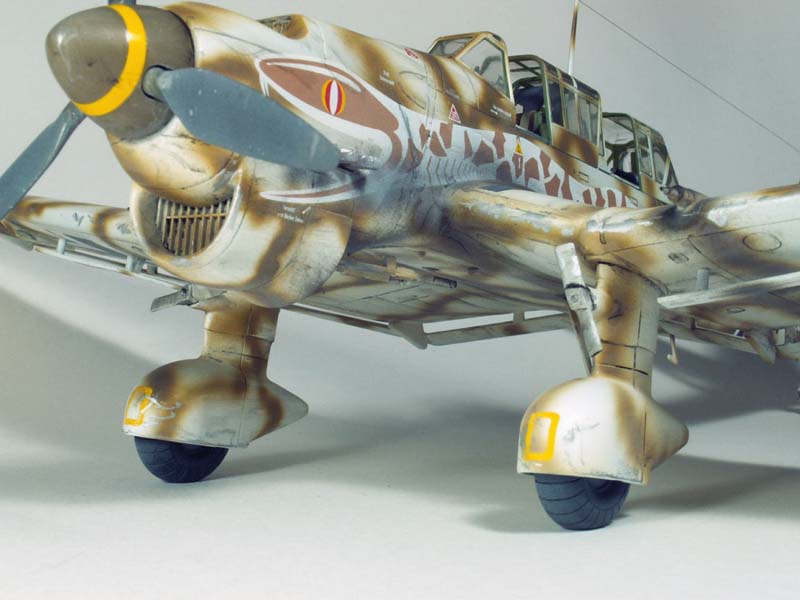
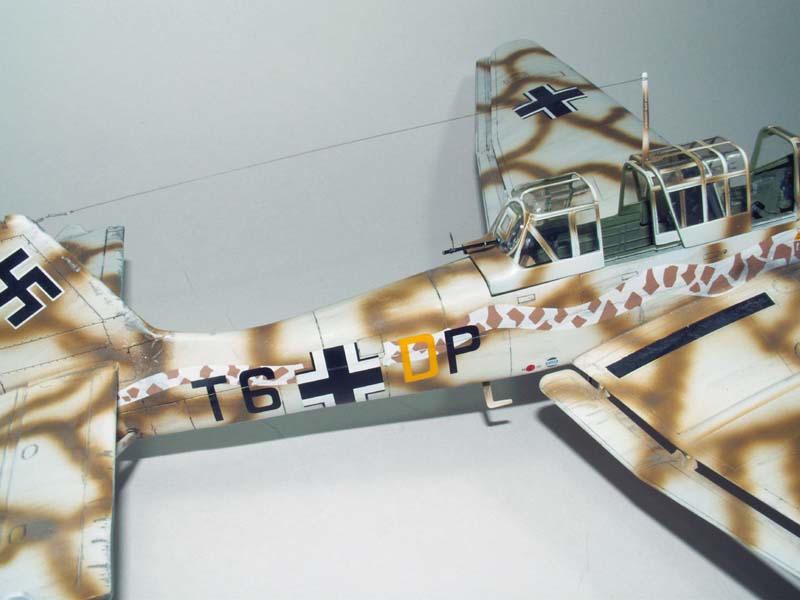
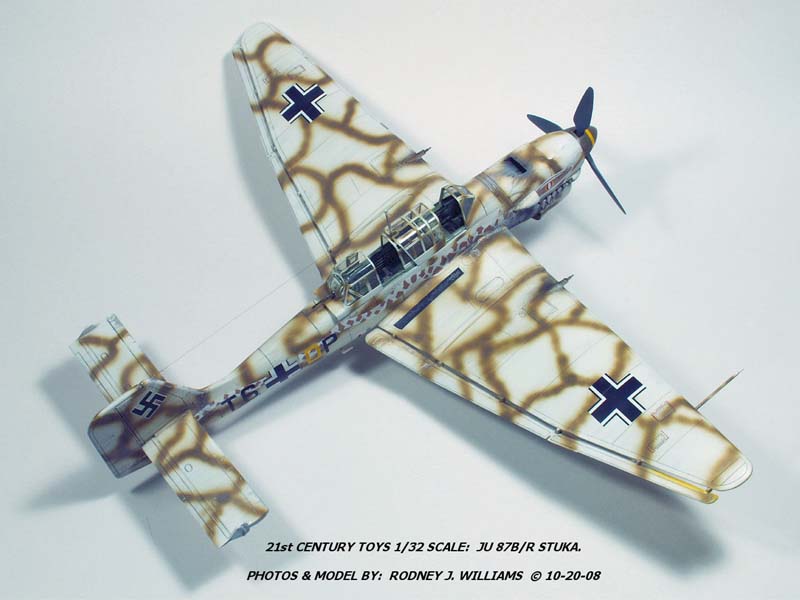
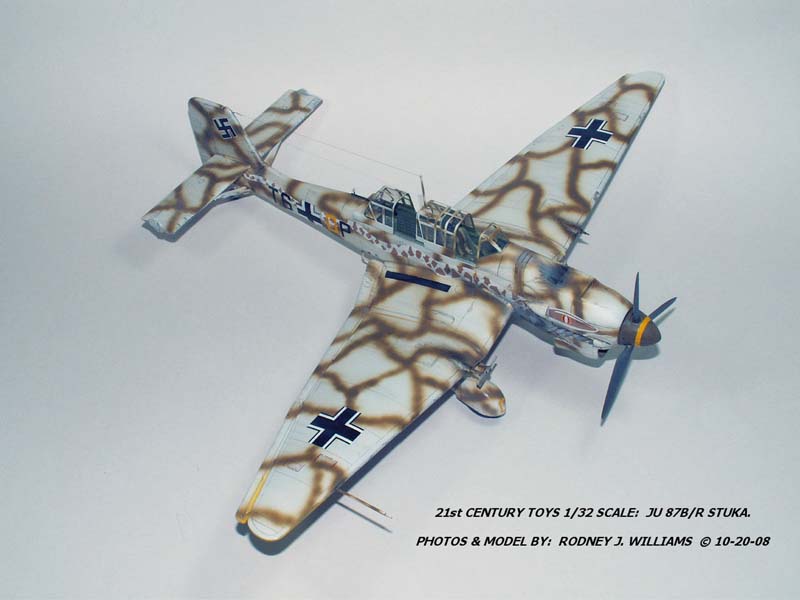
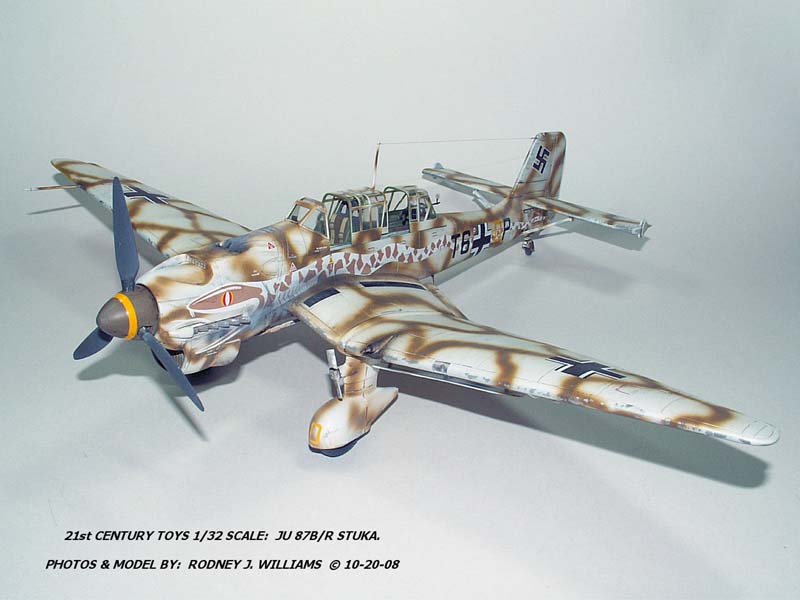
The model is now ready for the final paint application with Tamiya X-2 Gloss White. My brown color was mixed up to my liking and applied on the model. I got this "camo" pattern idea from seeing another Stuka on a web site. The yellow on the one wing tip is Tamiya X-8 Yellow.
I used the kit decals, which went on very nice, then over coated the model with some more Future. A few days later I added some artist oils for my weathering, including some dull silver paint.

THE FINISHED MODEL
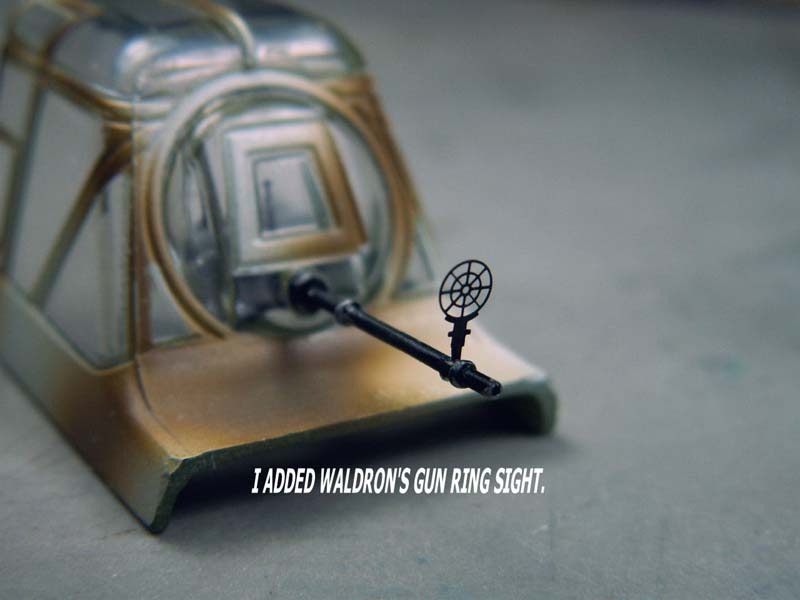
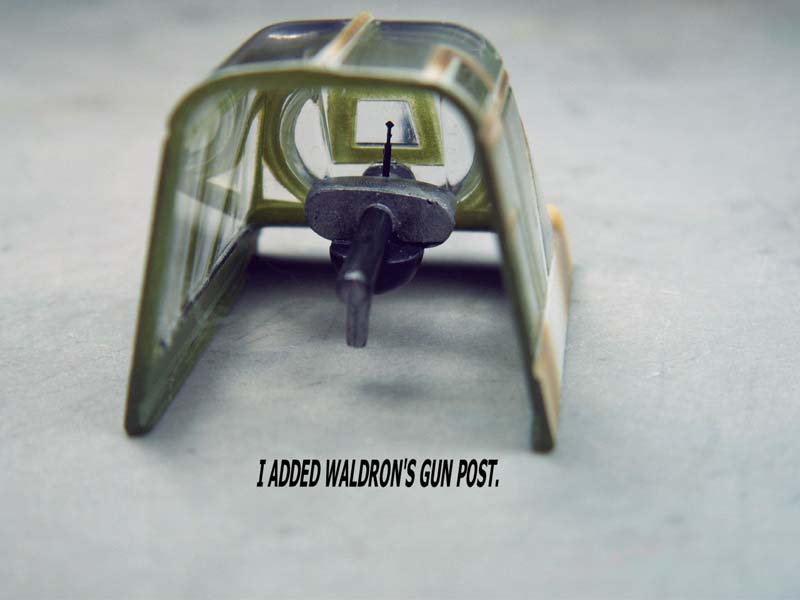
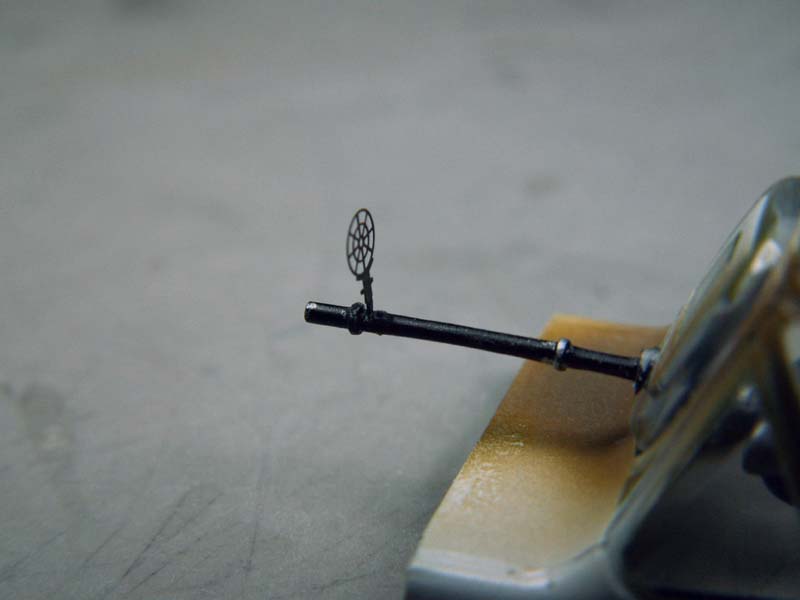
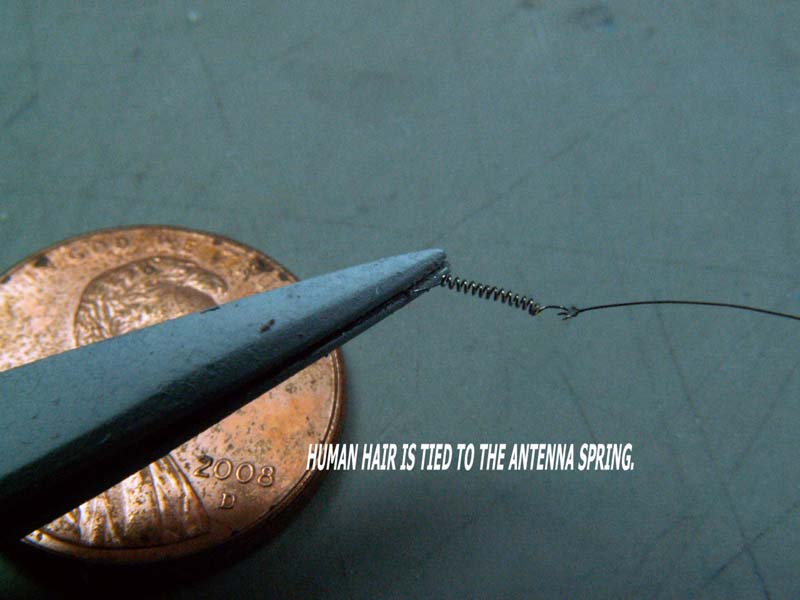
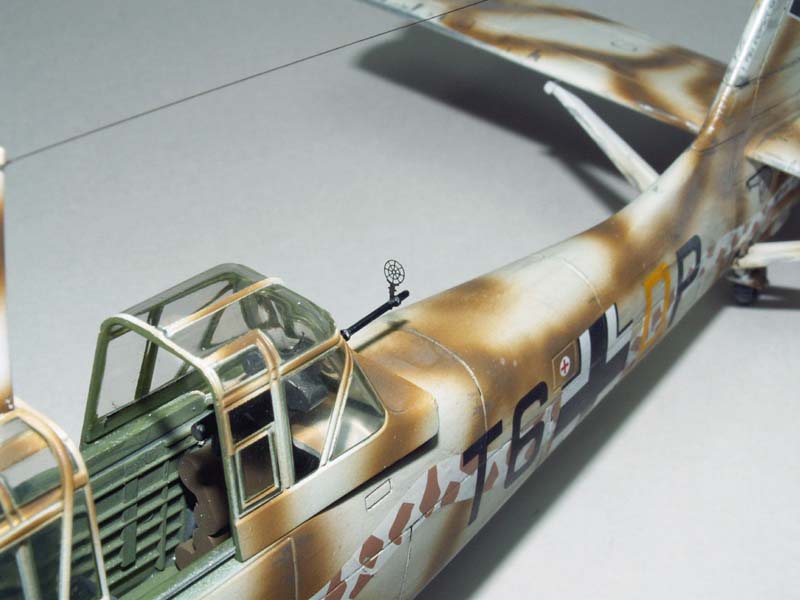
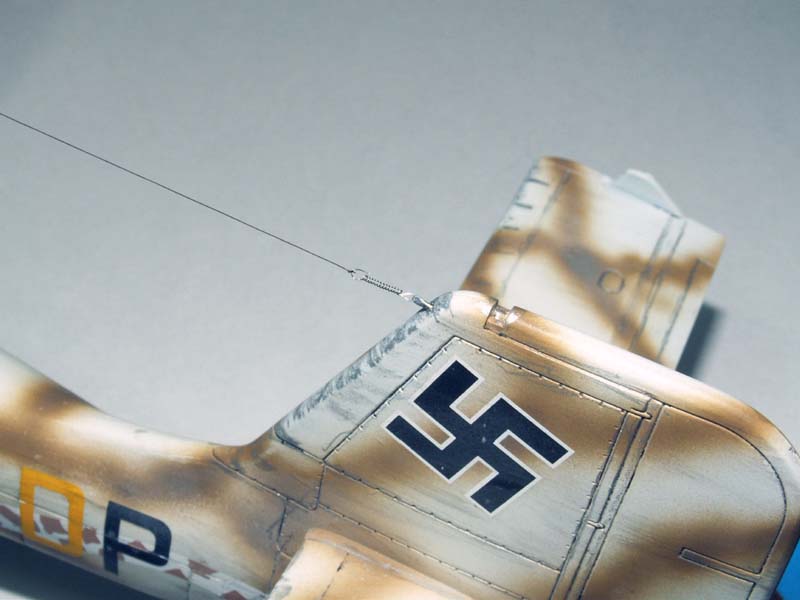
The rest of the photos show the finished model including some close-up shots of the gun sight ring and the spring for my antenna wire. A long time ago my modeling buddy, Matt Matsushita showed me how to use the black nylon thread from women's stretch nylon stockings. This was time consuming and you had to become real good at it to do the job right. About 7 years ago I got the bright idea of using women's long black hair. It ties real easy, and it accepts super glue excellently compared to the nylon.
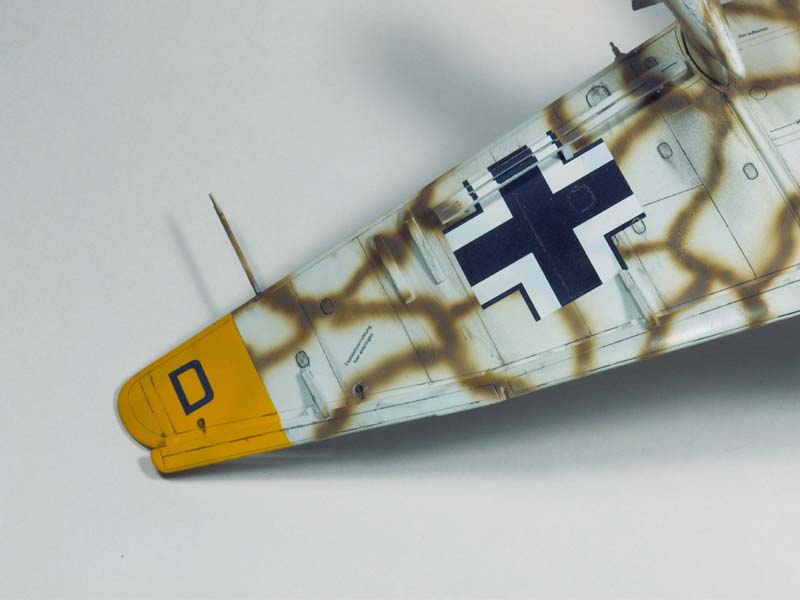

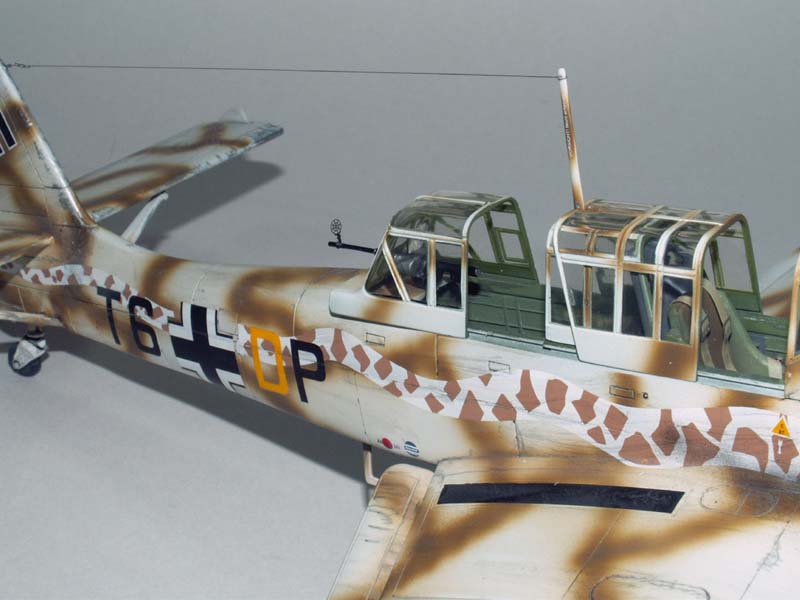
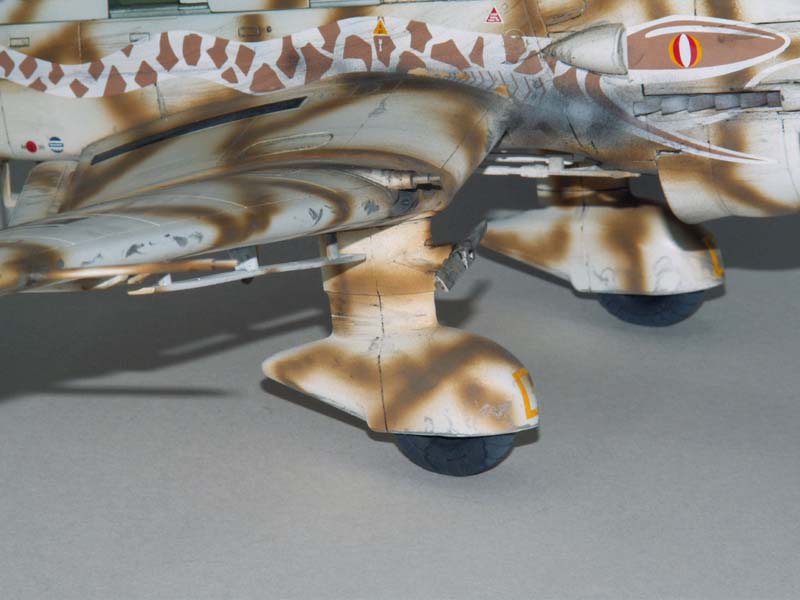
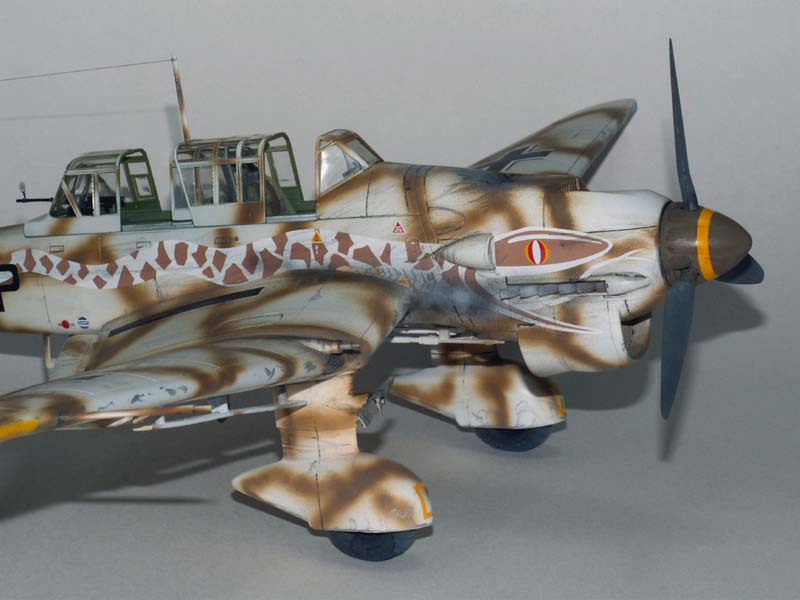
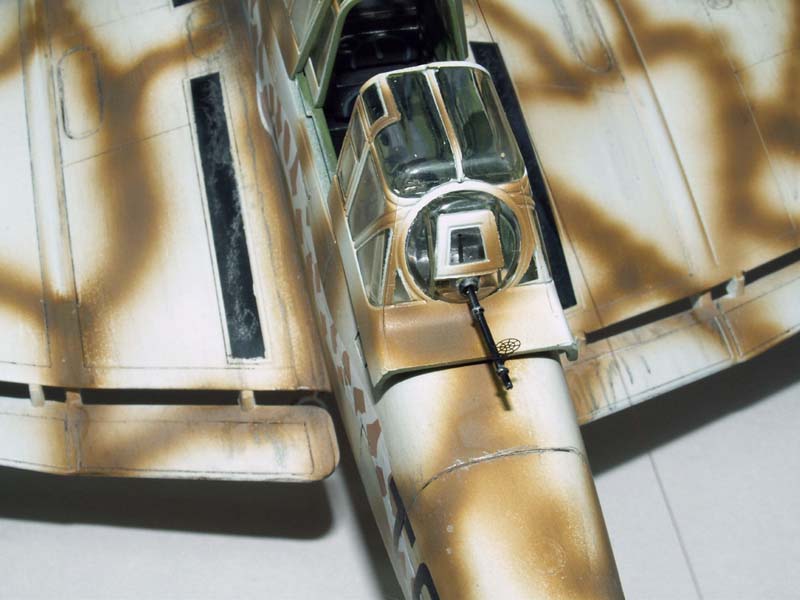
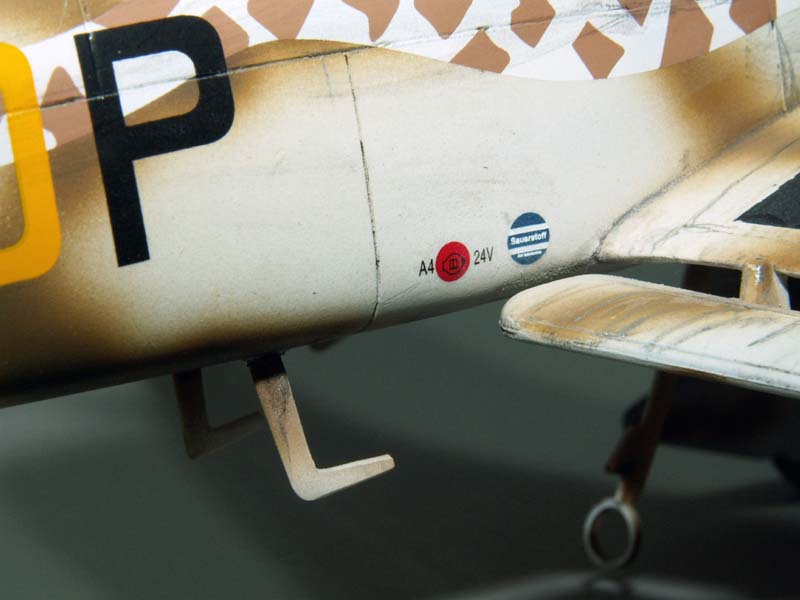

The box art and the decal instruction page showed three things that were attached to the bottom of the fuselage. These items did not come with the kit, so I hand crafted them from sheet and tube styrene. I also used some steel tubing for the gun barrels and the pitot tube.
In closing, I rate this model a number 9 on a scale of 1 to 10. The parts fit together excellent. The canopies open and close with no problem at all. And yes, the panel lines are a bit too big, but once the model is sanded down, painted and viewed at about 2 feet away, I see no real problem with the model.
PHOTOGRAPHY
All of my finished digital full length photos of the model were taken on a tripod at a distance of about 2.5 feet. I set my camera on Aperture Priority, which gives me excellent "depth of field" at f8.0. My Konica/Minolta DiMAGE Z3 has two "macro close-up" settings. I use the number two setting when I want to achieve extreme close up shots. The #2 setting lets me get my camera lens to within 1" of the subject.
SOME NEWS
I hear stories about "21st Century Toys", who may or may not be in business, so if you can find any of their 1/32 scale kits...buy them.
Luck of the Irish:
Brad Hagan sent me his un-built 21st Century Toys "A6M2 ZERO TYPE 21". I built it right out-of-the-box...well almost! I will have a story for it in the very near future.
Happy 21st Century Toying.
© 2008 Rodney J. Williams
This article was published on Wednesday, July 20 2011; Last modified on Saturday, May 14 2016