
Airfix 1/24 Fw 190D-9 Part 1
By Rodney Williams
My first "AIRFIX KIT!" WOW! IT'S BIG!
When I got back into modeling in 1977, I started to build models in 1/72 and 1/48 scale. I built a 1/72 scale 747 jet airliner and a B-52. They were super big. My eyes were very good in those days, so it was easy to see all those big parts, compared to the tiny 1/72 and 1/48 scale model part's.
My first conversion project was a 1/32 scale F4U-1A to the F2G-1D Super Corsair. I didn't know a darn thing about scratch building, nor making molds to do what? (Vac-u-forming plastic for windscreens and canopies!). I learned the easy way! (EXPERIMENT UNTIL I GOT IT RIGHT!)
I answered a "want ad" in one of my modeling magazines! The guy's name was "Paul." He wanted a FW-190D-9 "DORA," converted from the FW-190A kit. I knew what the 190A was, as I had built it in 1/48 scale. What's this "D-9 DORA?" I had no idea!
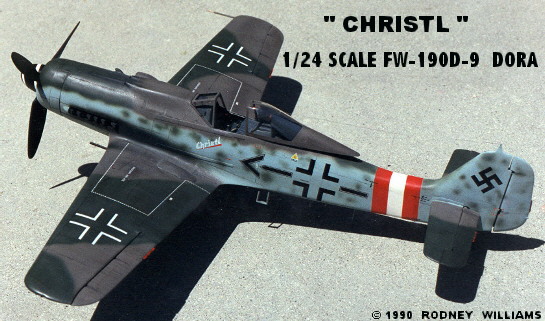
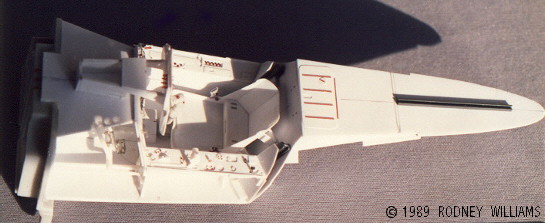
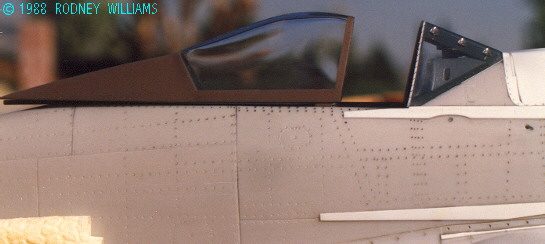
My first photo in this story shows the finished model. Its' name is "CHRISTL!"
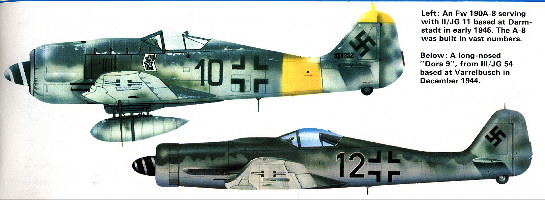
My next photo is a color art drawing of both aircraft. Now I knew the difference.
Paul sent me the "A" kit with a 3 view 1/24 scale drawing of the D-9. I met August Hupp at the IPMS/USA contest in 1987. Auggie, as he was called, made the D-9 "DORA," 1/24 scale conversion kit for the FW-190A.
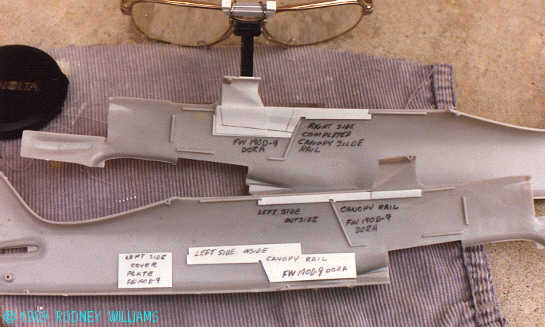
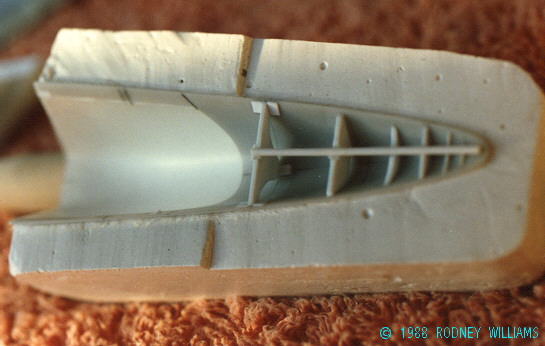
I began construction, by adding several items to each side of the fuselage.
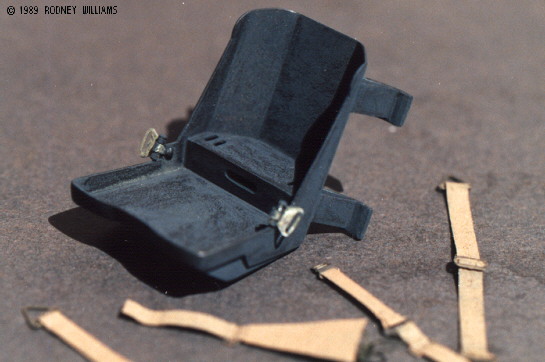
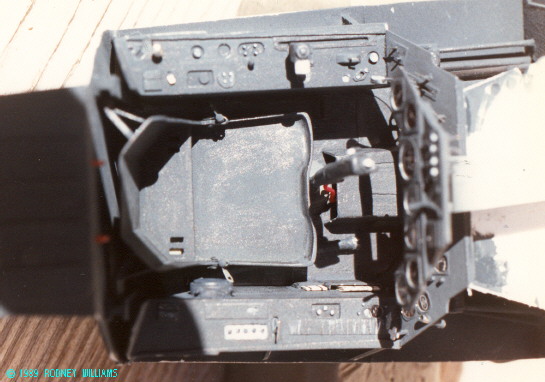
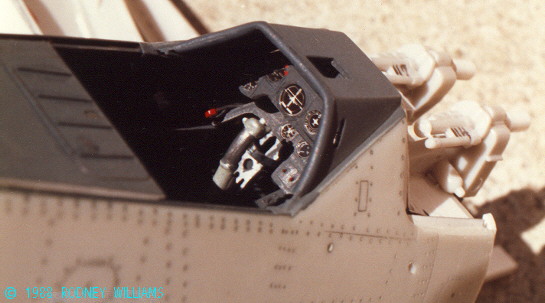
I was going to revise the kit cockpit, but changed my mind, once I temporarily glued it together with white glue. I felt that I could scratch built a better one.
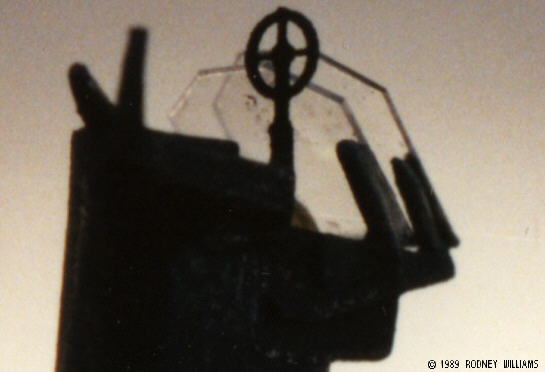
Here are several photos, which show my progress on the entire cockpit, including the gun sight, and the gun sight ring! Paul sent me a copy of the only "known" black and white photo close up side view of the aircraft with the pilot. His name was Barkhorn! It is said that no one knew for sure what the aircraft's serial number was, so no number was added to the rudder area. Paul also sent me a color side view "art" drawing of said aircraft, showing the color scheme, with no tail I.D. number! Those two prints are gone!
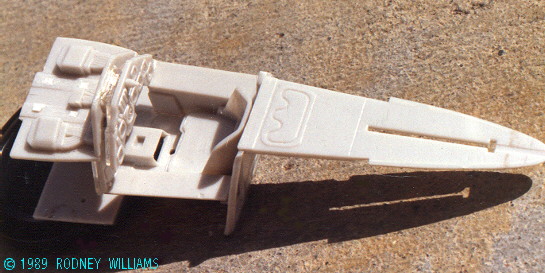
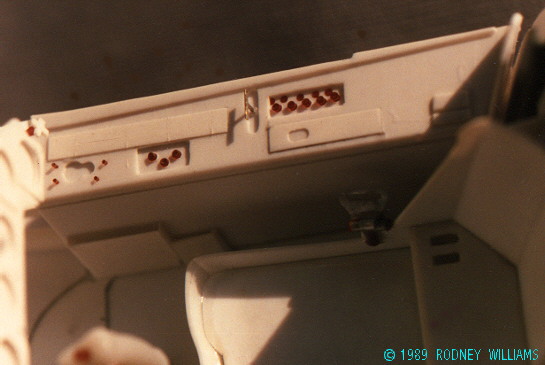
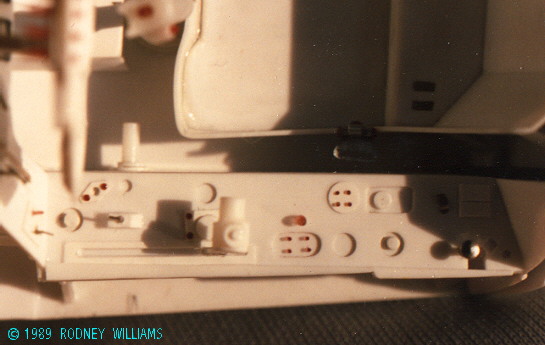

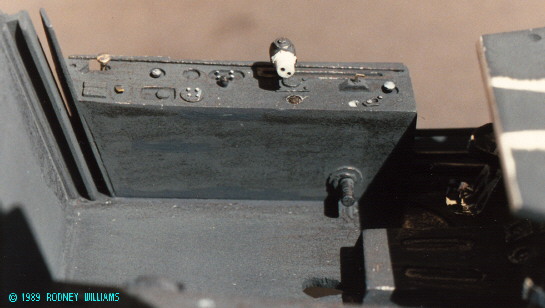
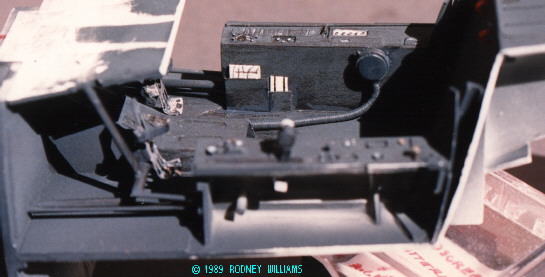
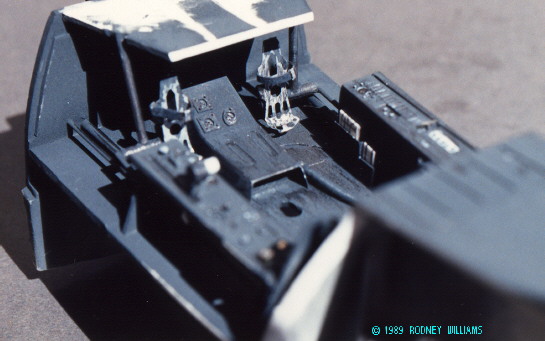
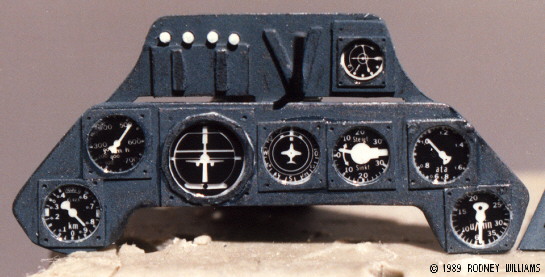
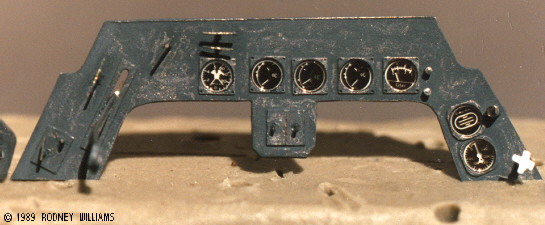
Building the two instrument panel's must have been easy! I used Waldron's 1/24 scale German instrument dials, including the foot pedals. They were really nice, and for once, I could read all the word's and numbers on the dials! This is great, the bigger, the better!!
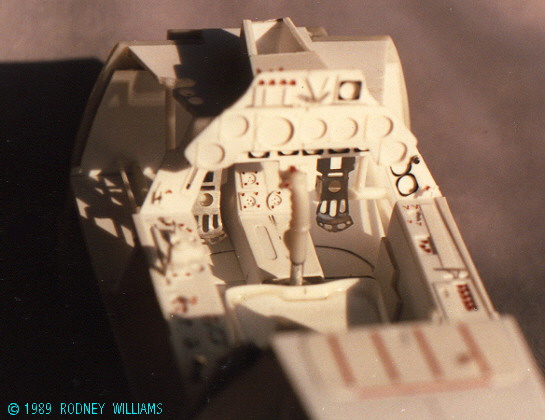

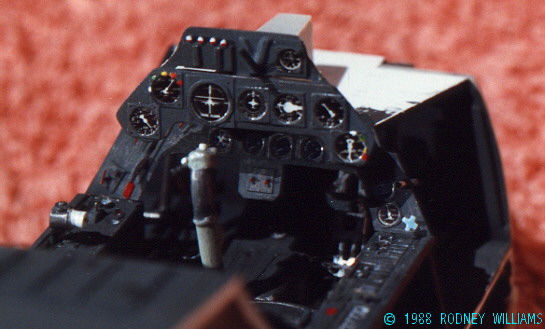
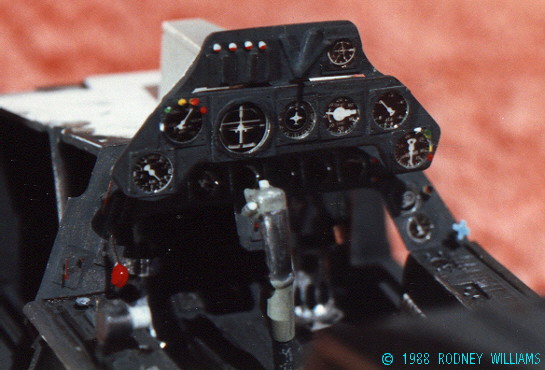
As I progress in my building procedure, I dry fit the cockpit tub several times to one side of the fuselage, then attach the other fuselage half. Nothing like acquiring a proper fit before you paint everything, then discover it does not fit! I have no idea what the name of the colors I used on the cockpit area. It was a German color's, by Floquil. I weathered it slightly with something!
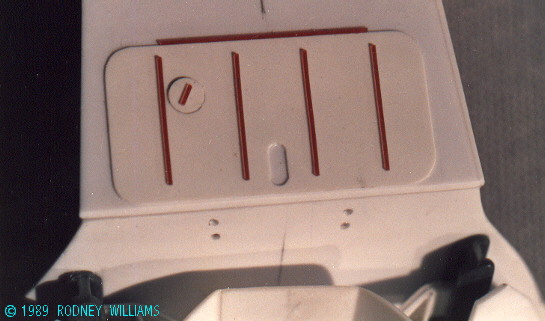
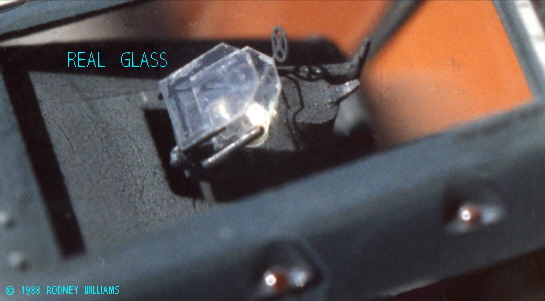
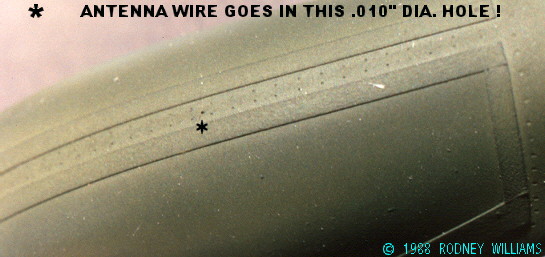
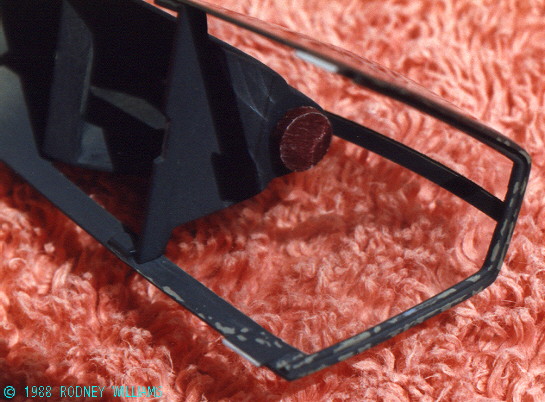
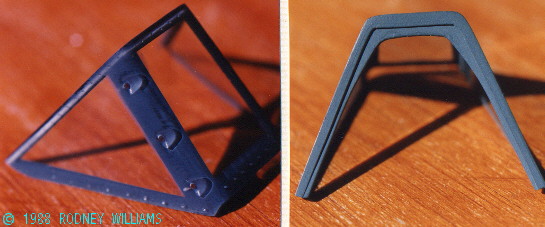
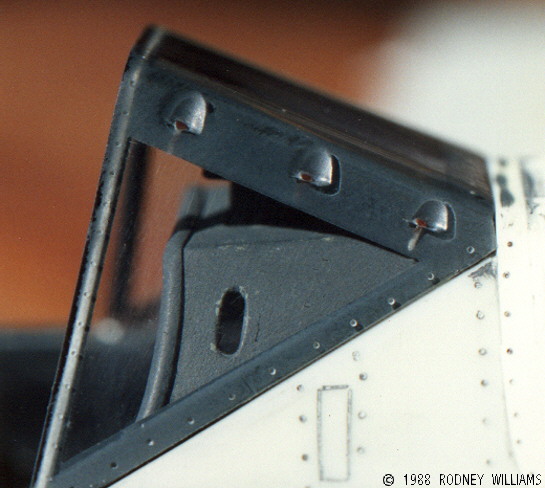
These several small photos show the gun sight, and the gun sight ring. My friend Ray Morton told me to go to the "Train Shop" and buy some rail road train window glass. It's super thin, and with some practice with a special glass cutter, you can make real glass for your gun sight.

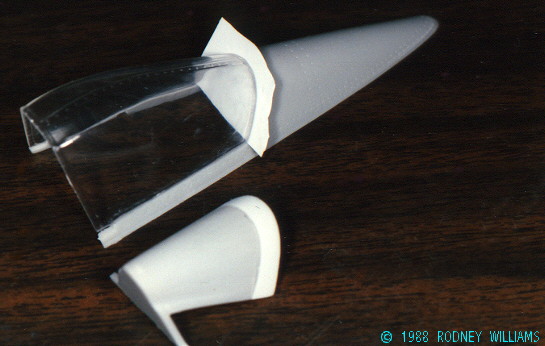
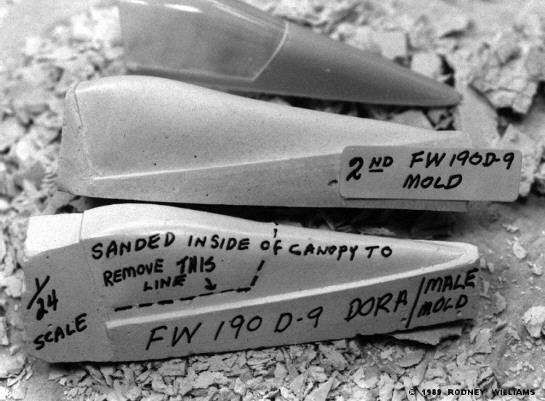
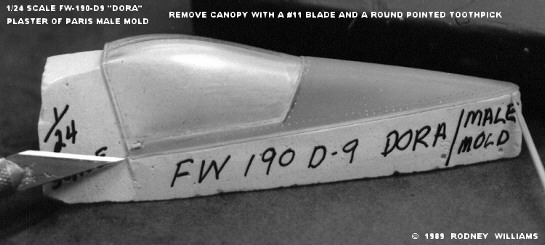
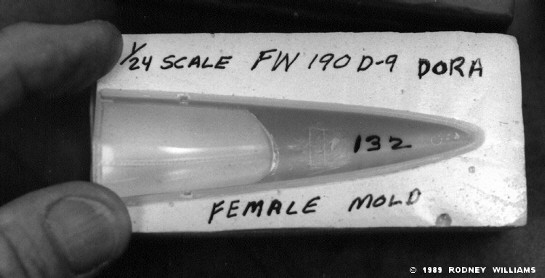
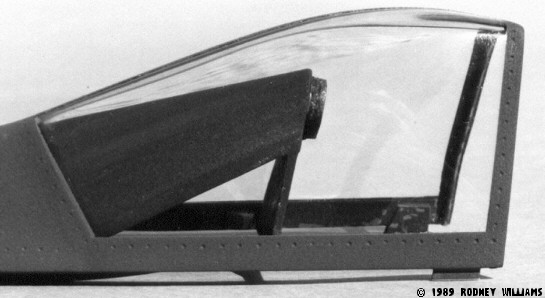
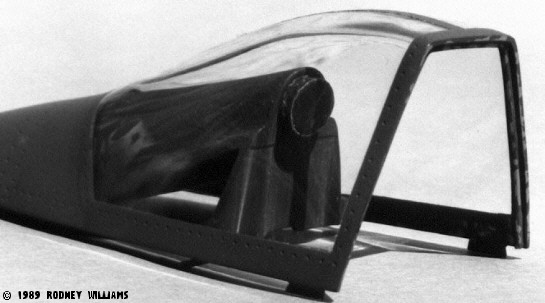
The kit canopy frame and head rest was molded as one part! How to paint it, then add the canopy was my problem. I felt it could not be done properly, so I separated the parts. I super glued the clear canopy to its' frame, and made two vac-u-form mold's, using "plaster-of-paris!" These black & white photos show both plaster mold's. One mold is called "male" mold, while the other one is a "female" mold.
The female mold let's you place your canopy inside it for sanding and building in the aft canopies rib section. The male mold lets you work on the exterior side of the canopy! One can see the additions to the canopy, including the canopy frame rivets. After my sanding and Blue Magic polishing application's, the entire unit was dipped several times in Future Floor Wax. The wax, as you know, give that "glass look," to the vac-u-form plastic. Then, the inside frame lines were air brushed on, and weathered slightly.

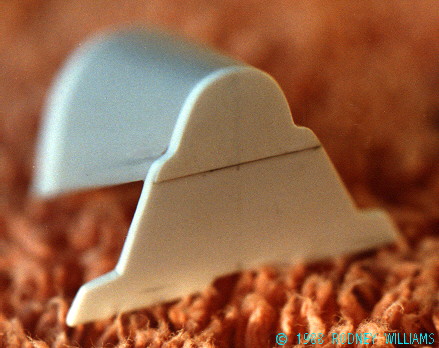
My "real leather" headrest: I made a pre determined oversize hole in some real thick styrene. I made an undersize round headrest plug. I soaked a piece of very thin leather in water, then stretched it out. I applied some white glue on the plug and laid it on the wet leather. I carefully pushed the leather and plug into the oversize hole. Once dried, I trimmed off the excess leather. It was white glued to the pre-painted headrest bracket. The headrest bracket was then white glued to the pre painted finished canopy. OH BOY! It sure looked great.
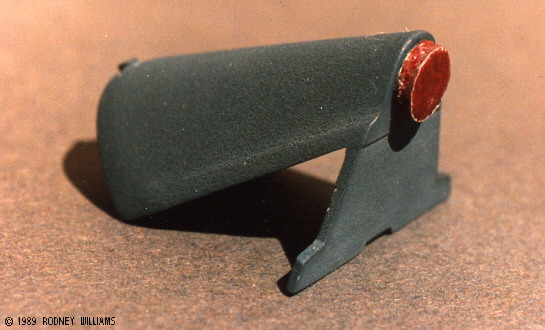
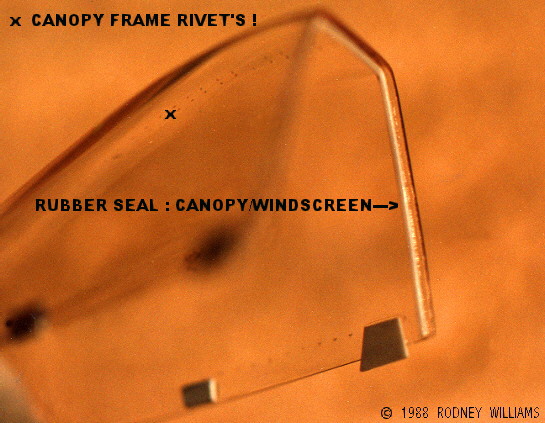
I'm showing the finished windscreen at this time. It was revised by drilling out some small half round holes on the outside edges, so I could install some frame rivets. Like all my clear parts, it too was sanded down to 2000, then Blue Magic and Future Floor Wax process was applied. With a big model like this, it became real easy to paint the frame work on the inside, compared to the rather complicated process on a 1/72 scale model. The challenge is there, and I love it! I hope you do to?

Part two will show more scratch building. What a job! To do what I do, you just have to "love" it!
Until next time, happy modeling! To go to Part Two
© Rodney Williams
This article was published on Wednesday, July 20 2011; Last modified on Saturday, May 14 2016