
Elite Forces 1/18 F6F Hellcat Part 13 - Exterior Lights
By Rodney Williams
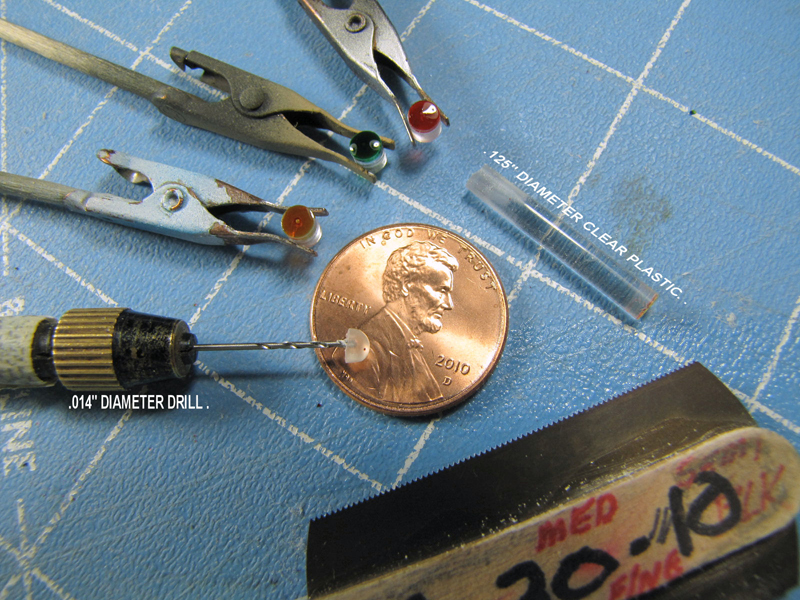
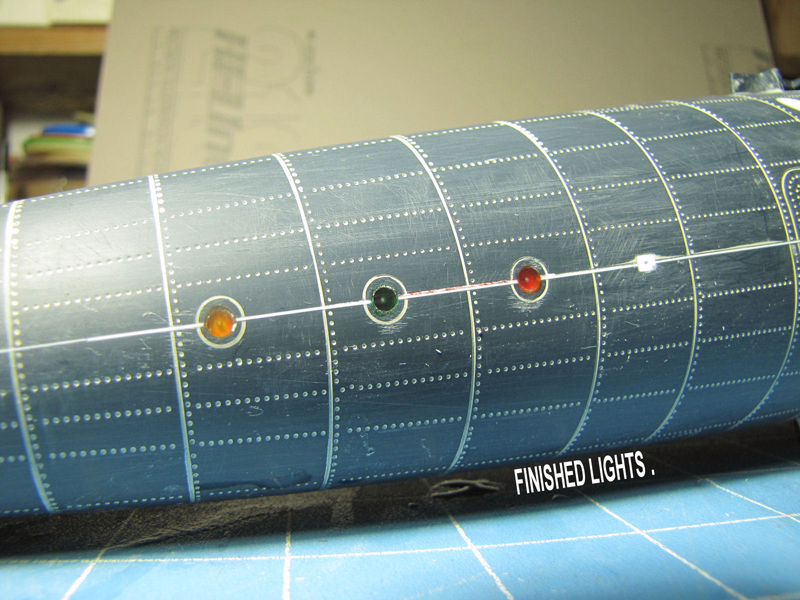
There are 3 round recognition lights on the bottom aft fuselage section. These lights are colored red, green and amber and/or the last one may be orange. These lights were made out of some clear round plastic. I drilled some holes into the ends of each piece then added my Tamiya colors to each one.
I made two other recognition light´s for the top of the aft fuselage section. One light will be clear as seen in the photo and the other one will be painted with my Tamiya Clear Blue. My first photo only shows one of these top fuselage lights. These lights were shaped from the same round clear plastic.
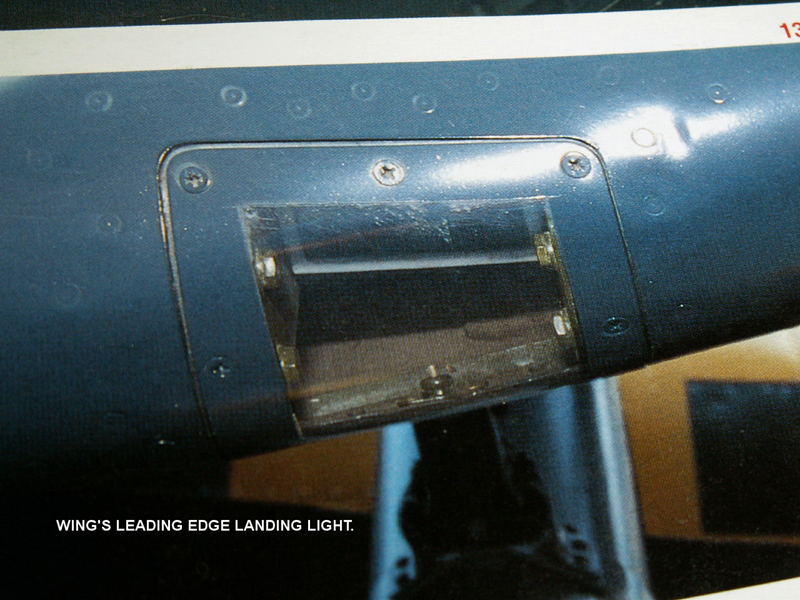
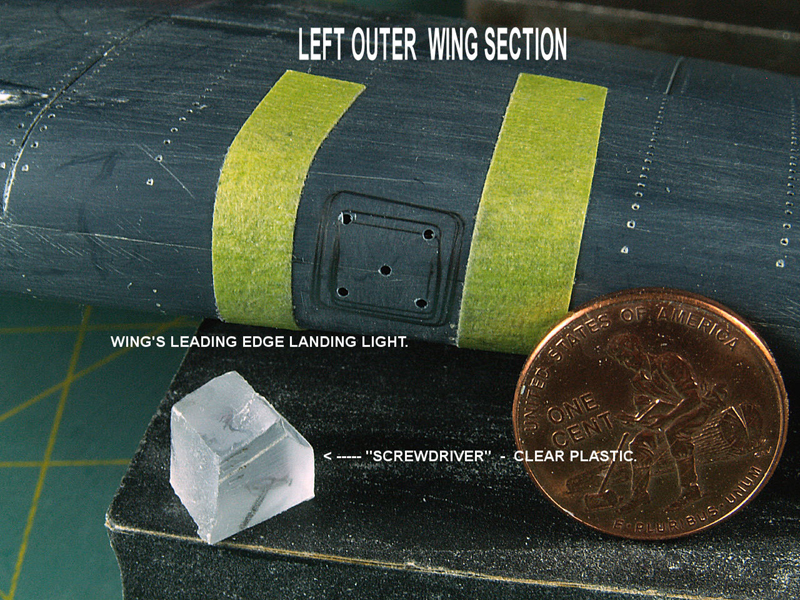
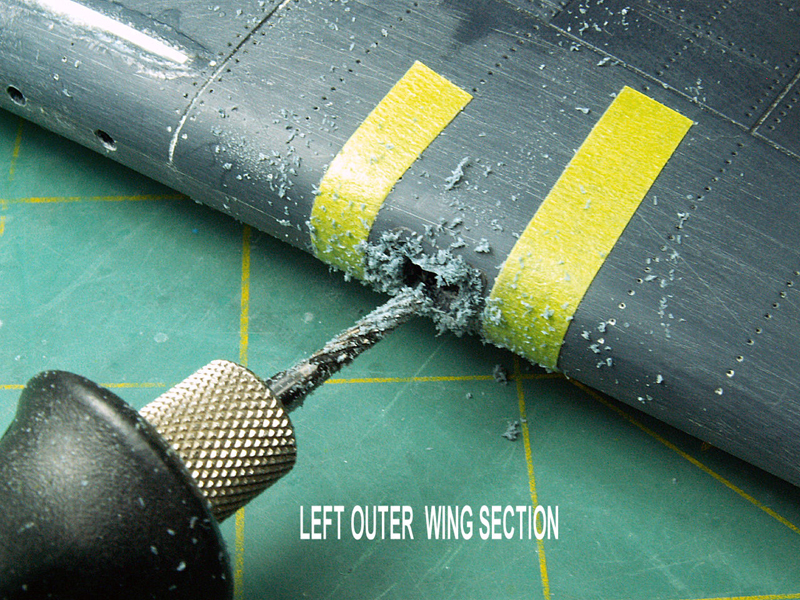
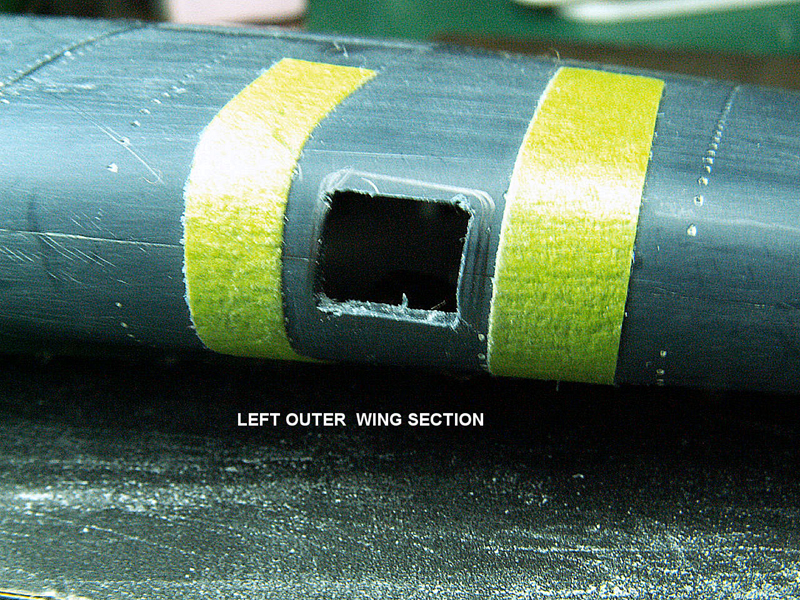
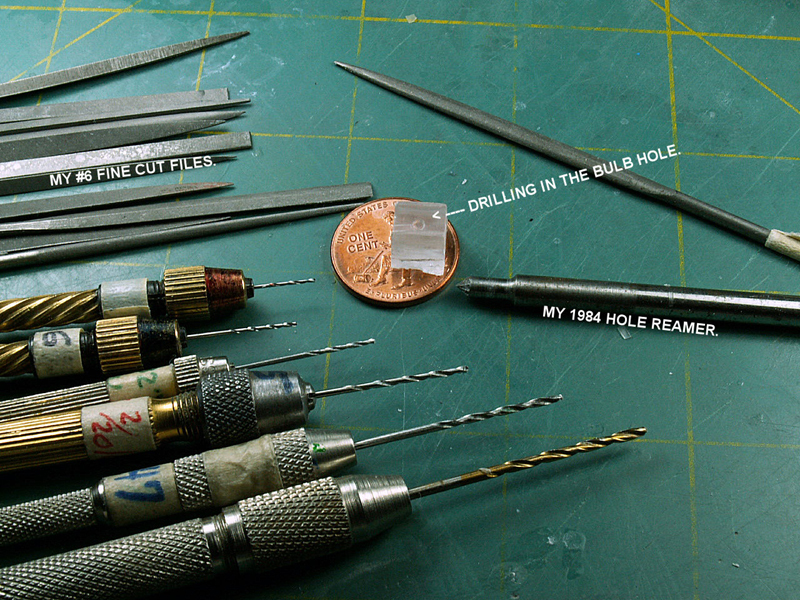
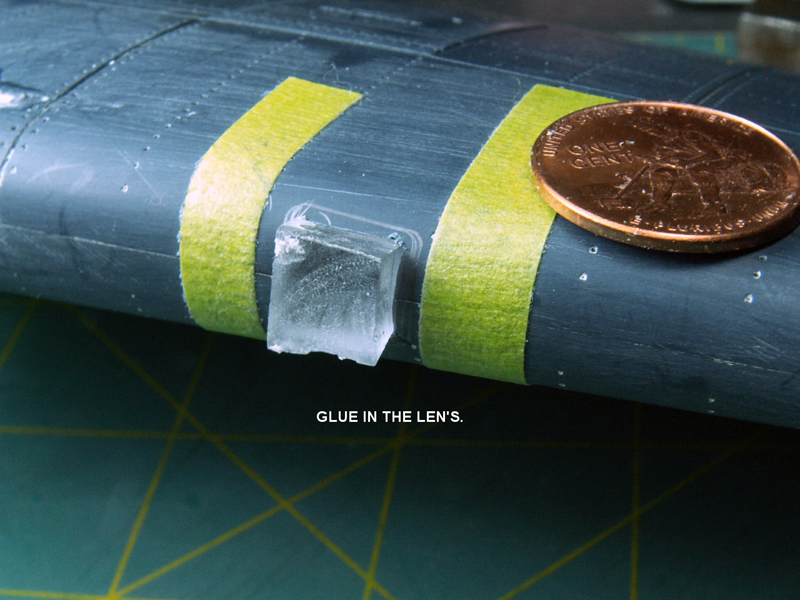
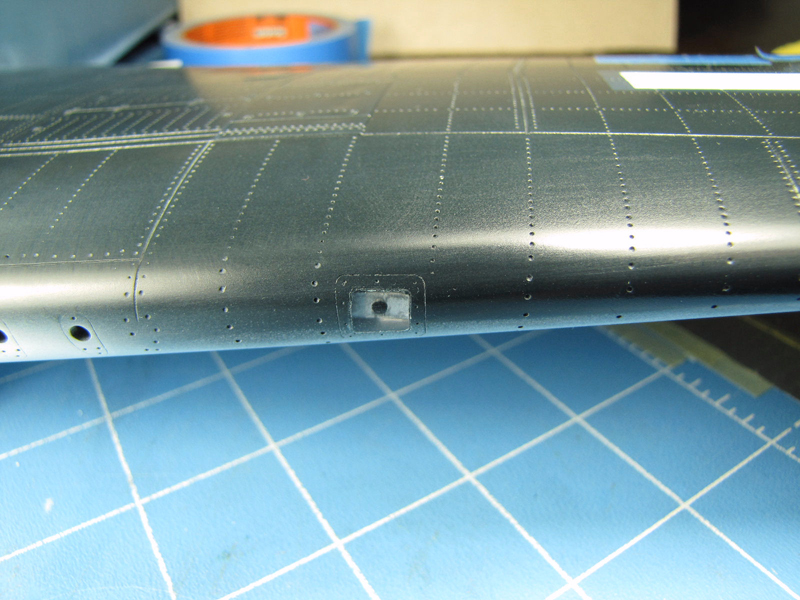
My next light project was to install the left wings landing light. The Aero Detail 17 F6F book shows a real nice close up color photo of said light in question on page 37. Other book data says that the light is horizontal to the tarmac and is not in line with the wings dihedral. Dave Hansen who is a "long" time modeling friend sent me some 3 view drawing that he got from "C. GRAHAM" copyright © 1975. Mr "C" says that there are no real drawings available from Grumman, so his drawings were made from a real F6F Hellcat. It appears that the wing landing light which is encased behind a clear light cover is of a rectangle shape. The exterior of the light cover is larger on its inboard side and smaller on the outboard side. So remember when you make one, it´s the basics that count in model building. The photos show how I made my light.
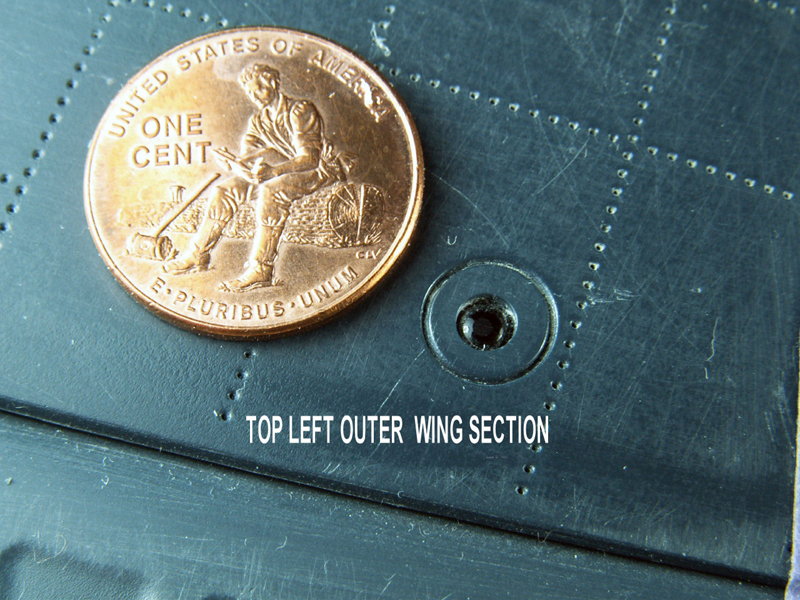
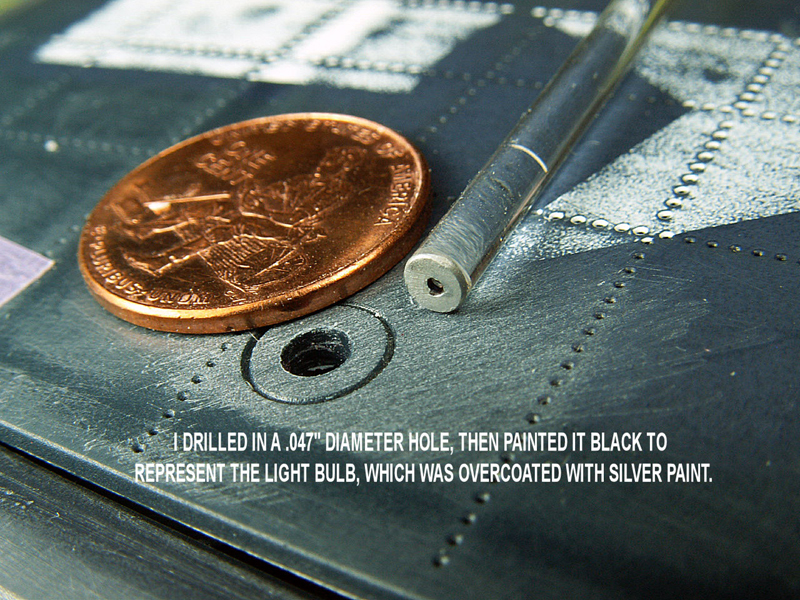
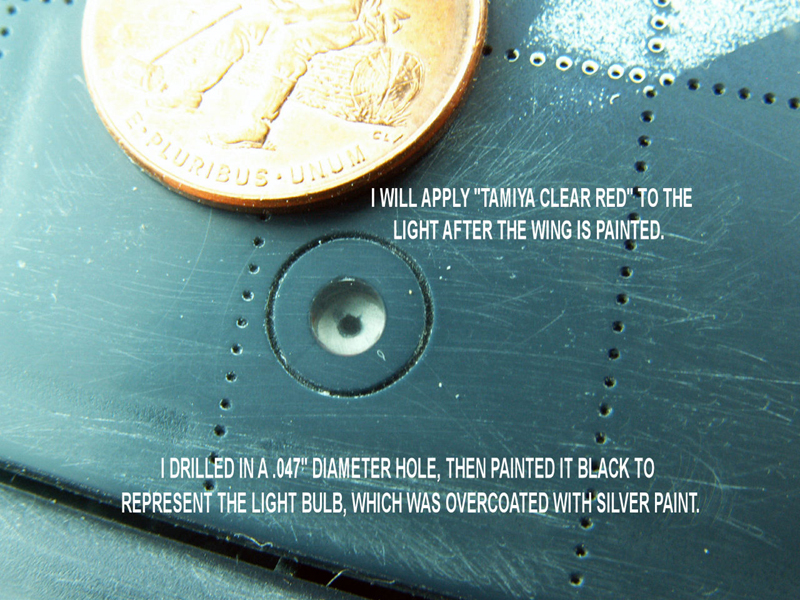
On top of each outer wing tip there are round recognition lights. The company installed some round oval red-looking lights, which looked very dark. The outer wing´s were made of two sections and were glued together (top and bottom). I choose to drill out these lights and make some new ones using the same clear round plastic. I´ll coat the lights of final assembly with some of my Tamiya clear red color.
My next story will show how I glued in the ENGINE, etc.
Part 1 | Part 2 | Part 3 | Part 4 | Part 5 | Part 6 | Part 7 | Part 8 | Part 9 | Part 10 | Part 11 | Part 12 | Part 13 | Part 14 | Part 15 | Part 16 | Part 17 | Part 18 | Part 19 | Part 20 | Part 21
© Rodney Williams 2010
This article was published on Wednesday, July 20 2011; Last modified on Saturday, May 14 2016