
Special Hobby 1/32 Bell P-39D
By Rick Cotton

To this builder, no aircraft looks cooler than a Bell P-39 Airacobra. Forget its performance, the mixed combat record, and the political intrigues surrounding its inception and the supercharger issue….the ’39 just looked cool. When we consider its historical significance, the Airacobra must be included in any collection of significant ww2 combat aircraft. I won’t belabor you with the bird’s history..let’s cut some plastic on the Special Hobby 1/32 scale P-39D Airacobra.
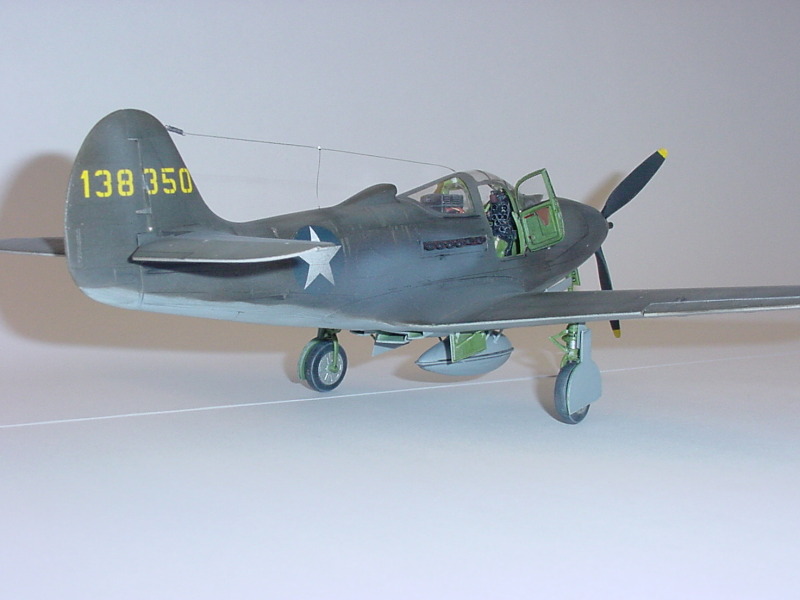

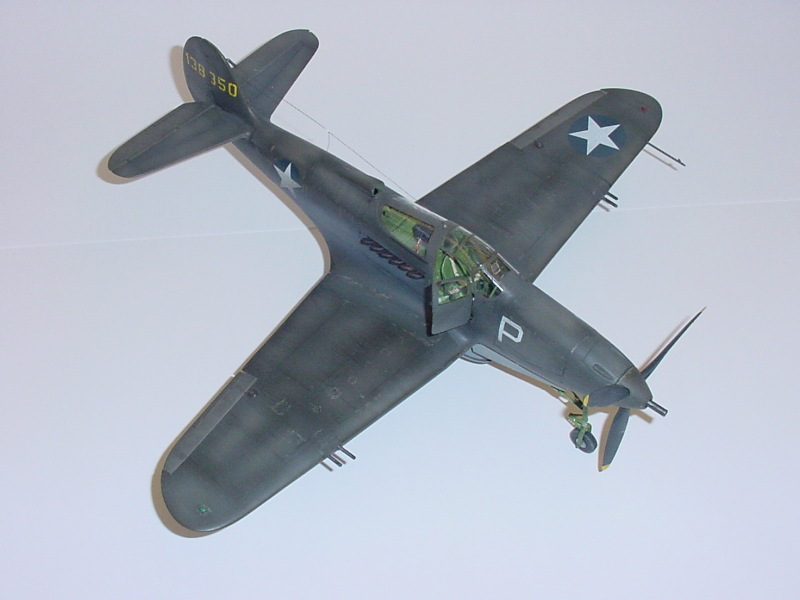
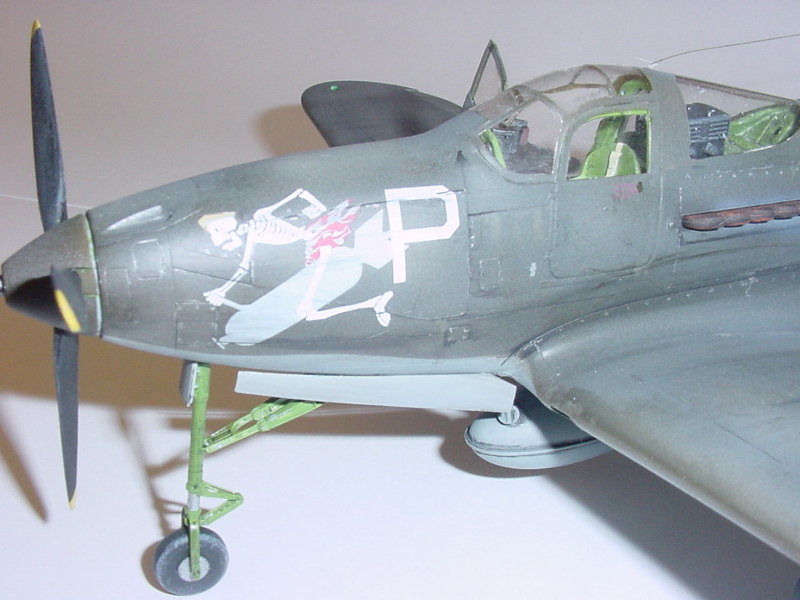
The kit arrives with fairly soft gray plastic, resin 6-port exhaust stubs, a resin gunsight, and extensive clear parts, all of which are generally of excellent quality. Panel lines are crisply recessed, and rivets are at a minimum (add ‘em if you want ‘em). There is a nice little set of photoetch belts and buckles, and a choice of bombs or a drop tank. 3 sets of markings are provided, all from 1942, and all OD over Neutral Gray birds.
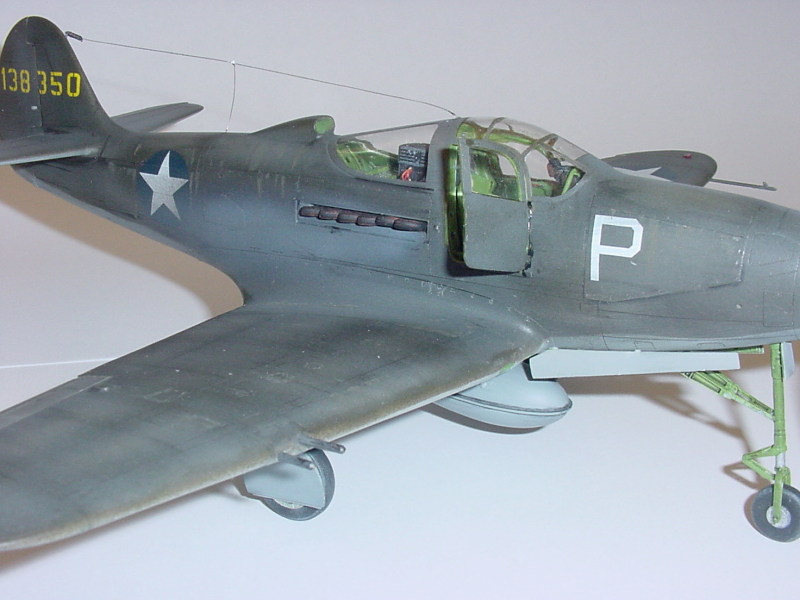
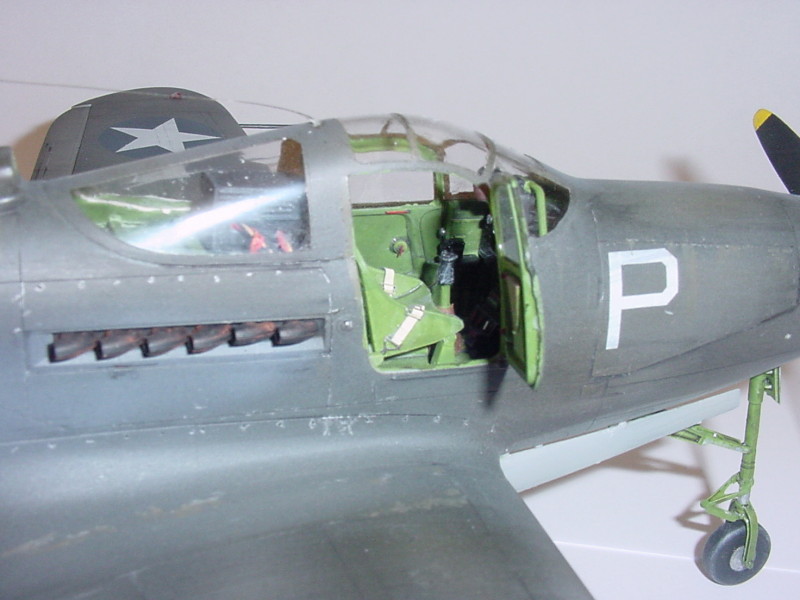
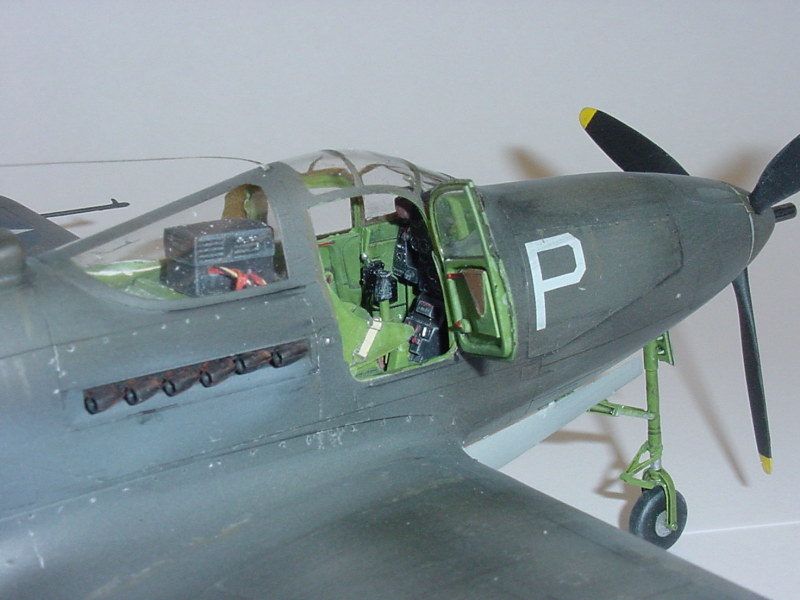
Construction starts with the cockpit. It is fairly complete, but a few small items are either generically molded, or missing altogether. Detail on the instrument panel is a bit soft and indistinct. Careful painting helps here, or else you can wait for the inevitable resin cockpit. On the plus side, everything fits very well, the resin gunsight looks good, and the doors (which really fit!) can be posed open to show all your drybrushing skills at work. I added the two red charging handles for the nose-mounted machine guns, and scratchbuilt the detail on the insides of the doors, as none is provided there (it’s OK, what’s there isn’t difficult to replicate with a good reference.). I did not use the photoetch harness provided, as I have difficulty bending the belts on these things to where they look right…I did use the buckles and some tape to do my belts.

The cockpit is covered by a large single-piece canopy, which needs a tiny bit of trimming and tweaking to get it to fit. I faired the front end of mine onto the fuselage with a bit of putty. The port door was glued closed, and the starboard tacked in place with Elmer’s white glue for painting.
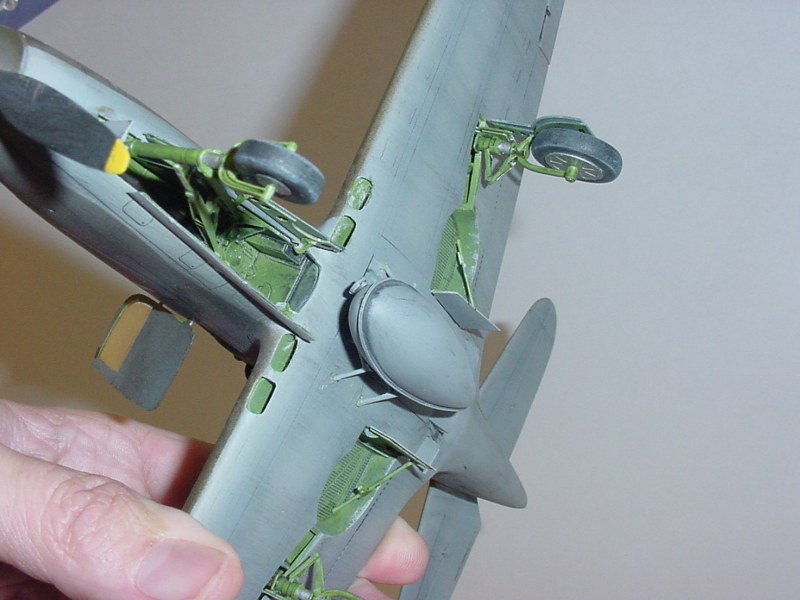
A bit of filling is needed to fair in the cooling vents at the leading edge of the wing. Special Hobby provides the duct work here…a nice touch. The lower wing is a single unit, with dihedral built right in. Assembly of the wing to the fuselage wasn’t perfect, but it wasn’t bad, either, requiring a bit of trimming and filling to get it right.
The gear bays are well done, especially the nose gear. The intricate (and slightly fiddly (I love that word – thanks to you modelers across the pond)) nose gear assembly is reproduced in excellent detail, but test fit all the nose gear bay pieces…you’ll find one bulkhead should be a bit rear of where the instructions show to install it. Oleo scissors are separate and nicely done. Tires are unweighted, and both early and late nosewheels are in the box. Tiny photoetch hinges are included to install the nose gear doors. A handy panel added to the top of the nose allows you to add weight above the nose gear bay before closing up and seaming the fuselage.
I used the kit decals, specifically the version on the box top…although the instructions show the “US ARMY” legend normally on the underside of the wing to be missing on this bird. Accurate? Who knows? At any rate, the kit decals performed very nicely, although the yellow prop data marking were too translucent. ALL the decals are very thin, and very opaque. I used no setting solution at all.
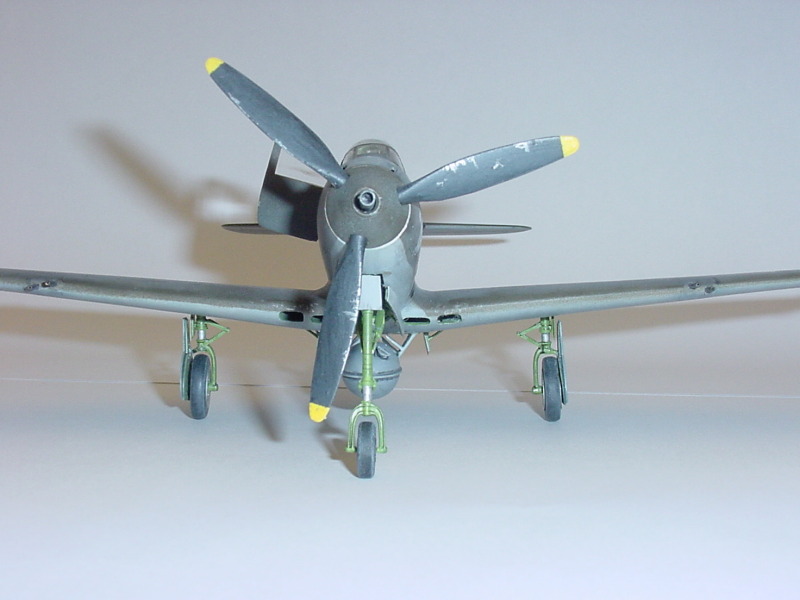
Overall, I found this kit to be a much easier build than the 1/32 Buffalo previously released by this company. Fit was very good in most places, detail was good to very good, and the decals were very well done. No real problems were encountered in this build at all. At the time of this writing, Special Hobby has announced an RAF/RAAF version of the “Iron Dog” to come. Hopefully “Q” models won’t be far behind!
Well done, Special Hobby! Great subject, fun build, and a gap definitely filled in the 1/32 aircraft world!
© Rick Cotton 2007
This article was published on Wednesday, July 20 2011; Last modified on Saturday, May 14 2016