
Building George Welch’s Pearl Harbor P-40B In 1/32 Scale
By Phillip Gore

THE AIRCRAFT
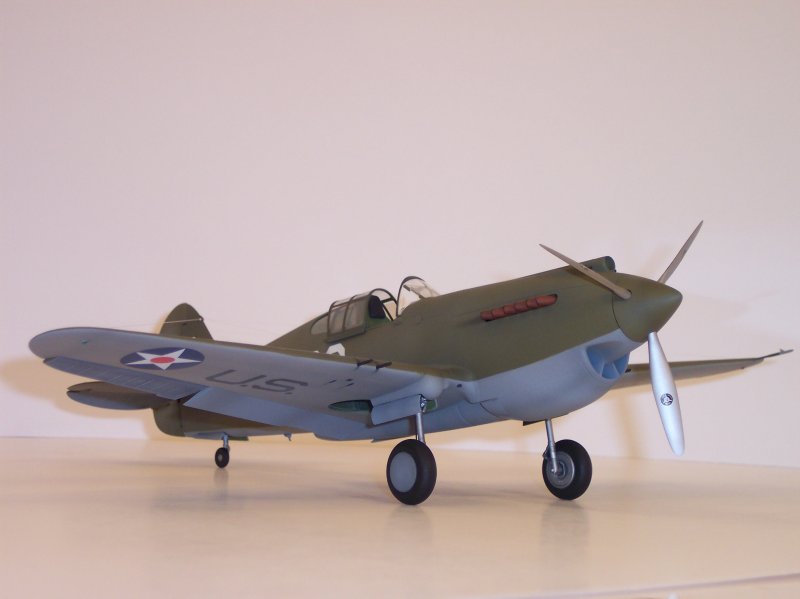
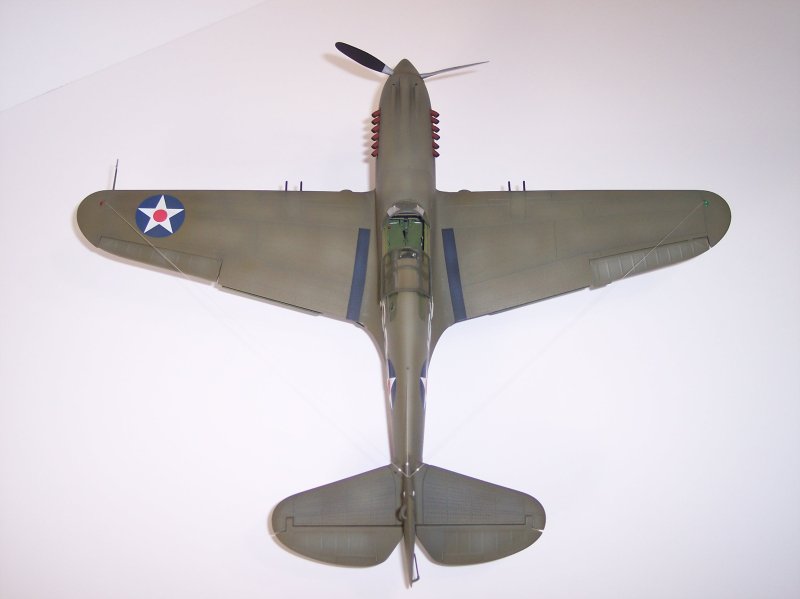
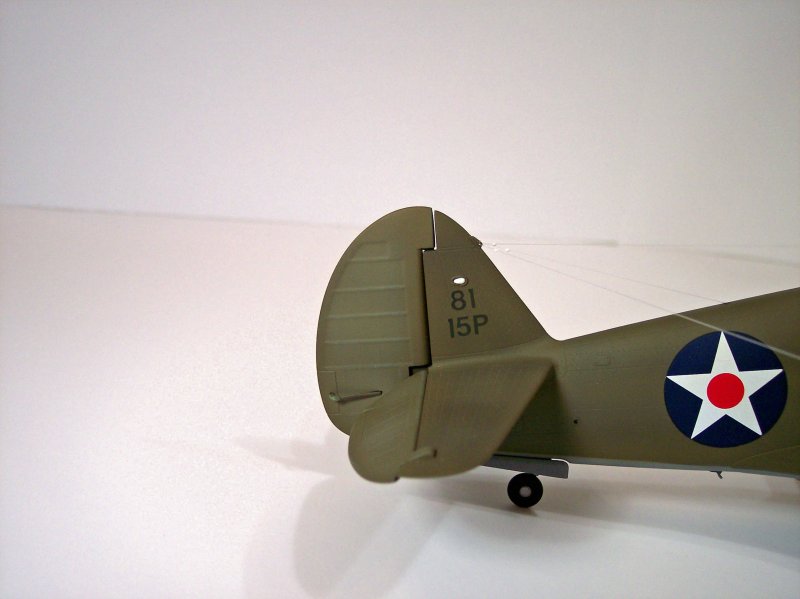
The color scheme and markings were patterned after the Curtiss P-40B flown by Lt. George Welch’s during the attack on Pearl Harbor, where he was credited with shooting down four enemy aircraft.
THE MAN
While doing research on George Welch and his Pearl Harbor P-40B I found out several interesting facts I thought were worth passing along:
- Welch finished the war with 16 confirmed victories. Malaria forced him out of combat in Late 1943. He resigned his USAAF commission in the spring of 1944 and became a civilian test pilot for North American Aviation.
- Welch crossed the sound barrier two times before Chuck Yeager while flying a North American Aviation XF-86 (Sabre). Welch achieved this feat in a controlled dive (not in level flight like Yeager).
- Welch was sent to Korea to fly demonstration flights for pilots after F-86s had been deployed to Japanese and South Korean fighter bases. During the course of flying less than 20 sorties he unofficially shot down as many as six MIG-15 fighters.
- Welch died on May 25, 1953 after sustaining severe injuries from ejecting out of a damaged YF-100 (Super Sabre).
THE MODEL
The model used was the Trumpeter kit. My goal was to build this kit straight from the box as much as possible, and not correct any of the kit flaws that have been mentioned by other contributors (i.e. shallow cockpit, overly raised fuselage hatch, too many rivets, etc.). In this I was successful, with the only modifications being:
- Adding insulated wire for the brake lines-
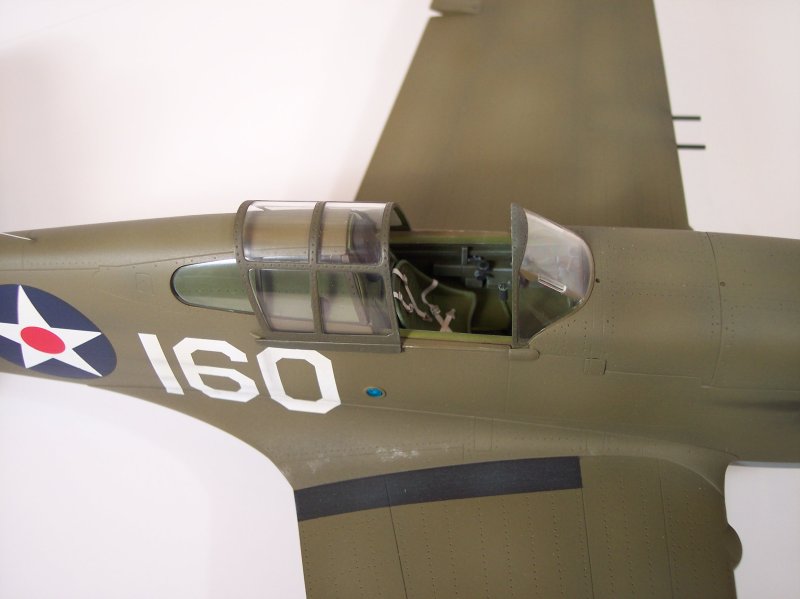
- Adding masking tape seat belts-
- Adding a couple of very small styrene panels (to cover some unacceptable gaps at the engine cowling)
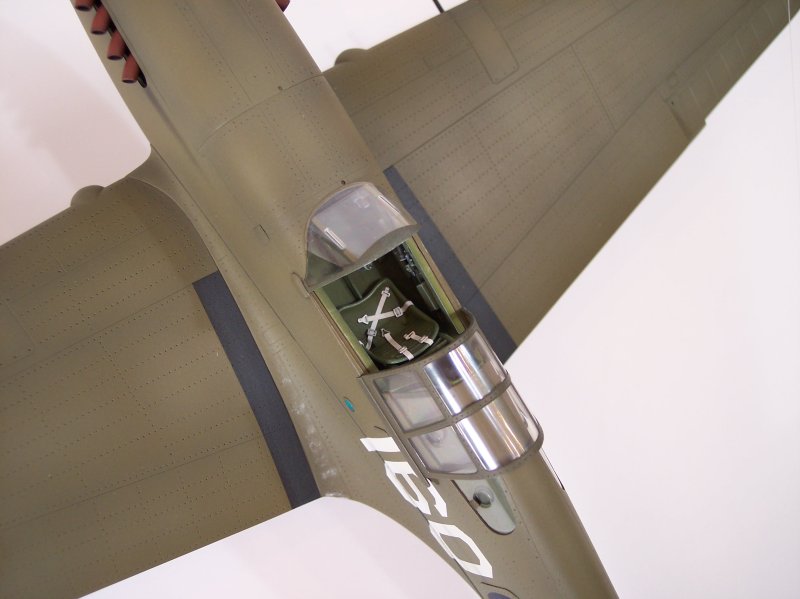
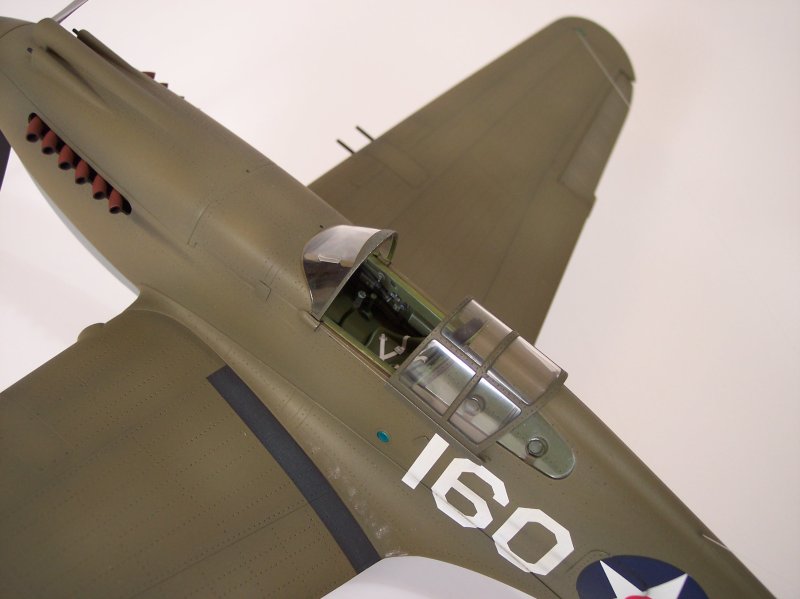
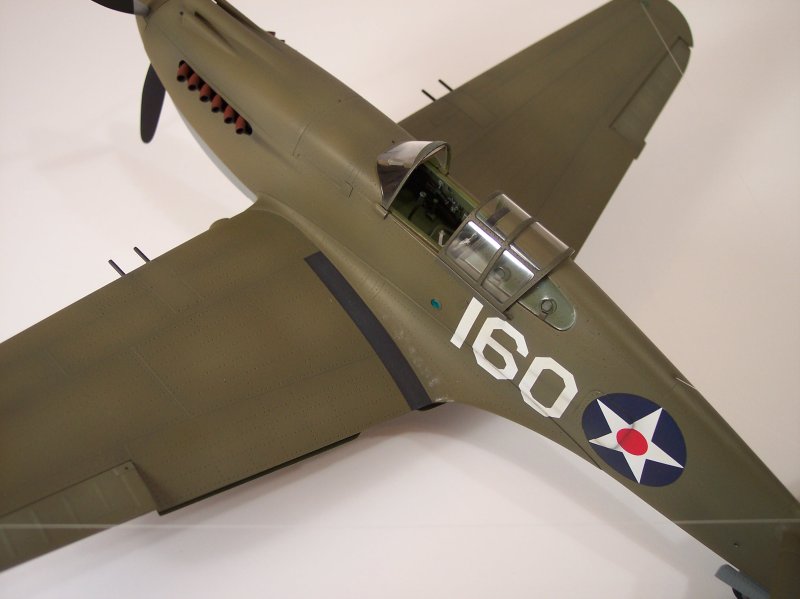
Cockpit/Engine
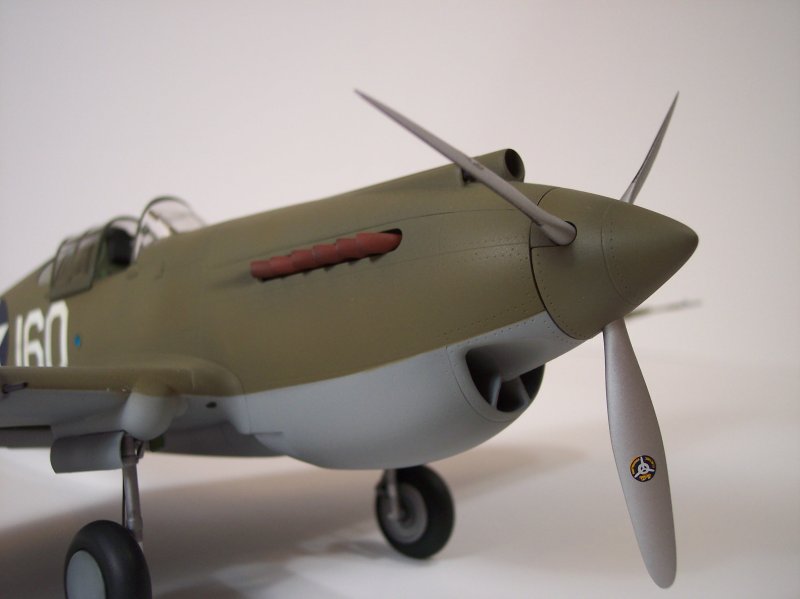
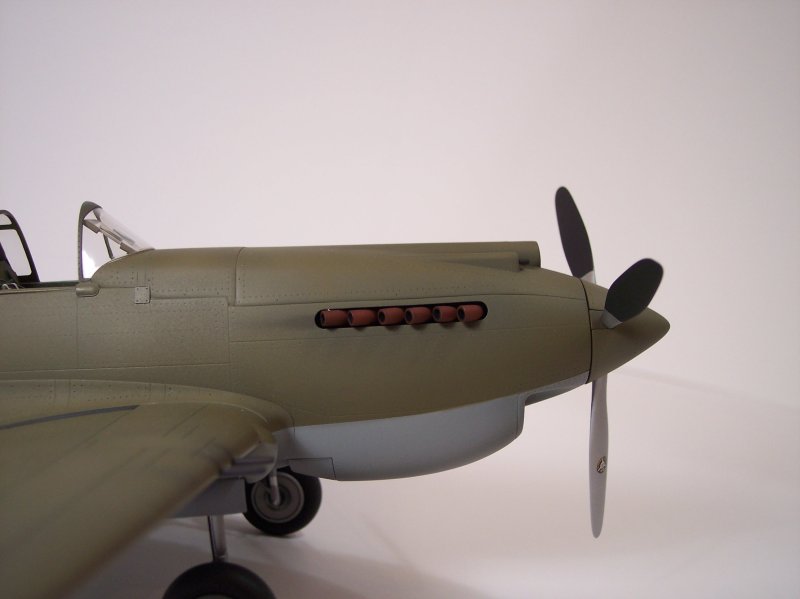
Model Master (MM) Interior Green was used for all of the internal components. A “depth effect” as was achieved by: brushing all of the parts with dark gray pastel chalk, using a Q-Tip to remove the excess and overspraying the parts with an interior green wash. The final touch was dry-brushing the parts with MM Dark Ghost Gray. The only engine parts used were what was required to attach the exhausts later in assembly. To help cover my lack of an engine, I used the “closed” cowl flap part (although I know these are open when the plane is parked.).
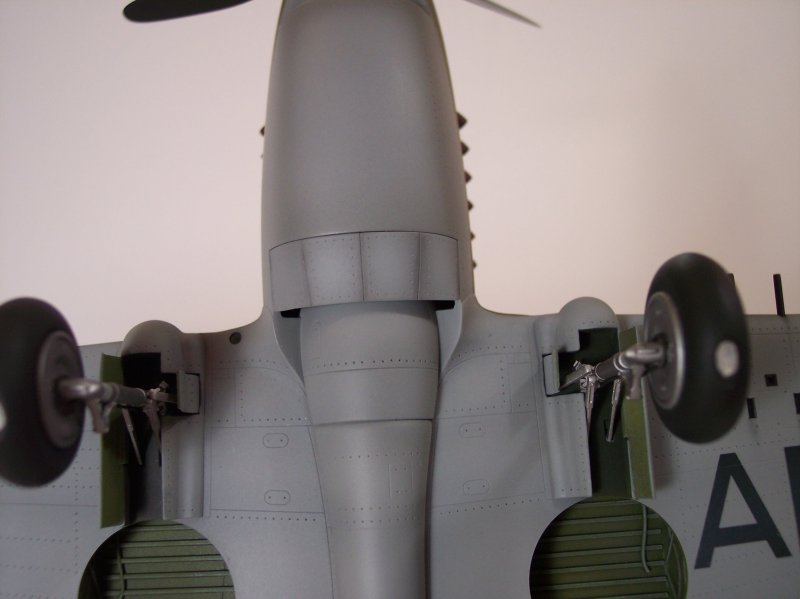
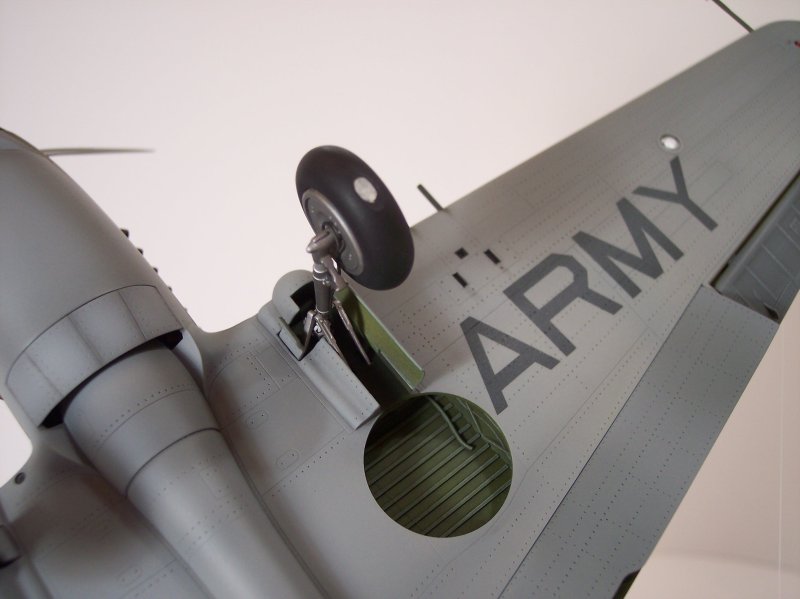
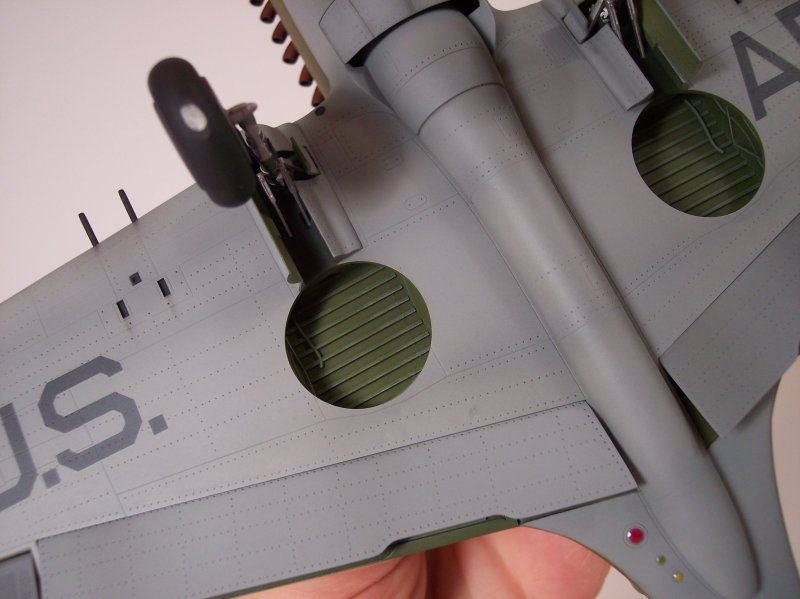
Wheel Well/Landing Gear
MM Metalizer Aluminum was used to paint all of the landing gear/wheel parts. MM Metalizer Sealer was added to provide a protective coating and then a thin black wash was airbrushed to make them look worn and used.
Canopy
A vinyl masking set from EZ Mask (in Canada) was used on the canopy pieces and they worked really well. White Glue was used to attach all of the canopy pieces.
Painting
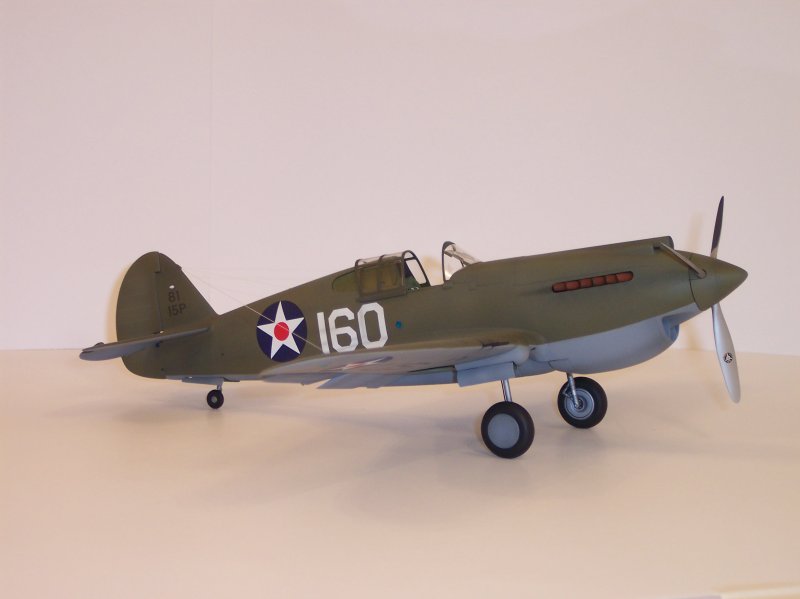
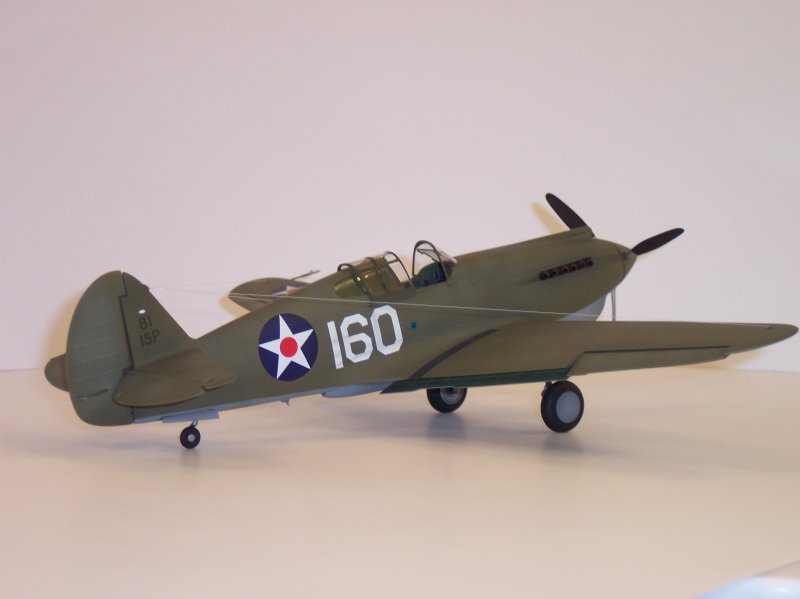
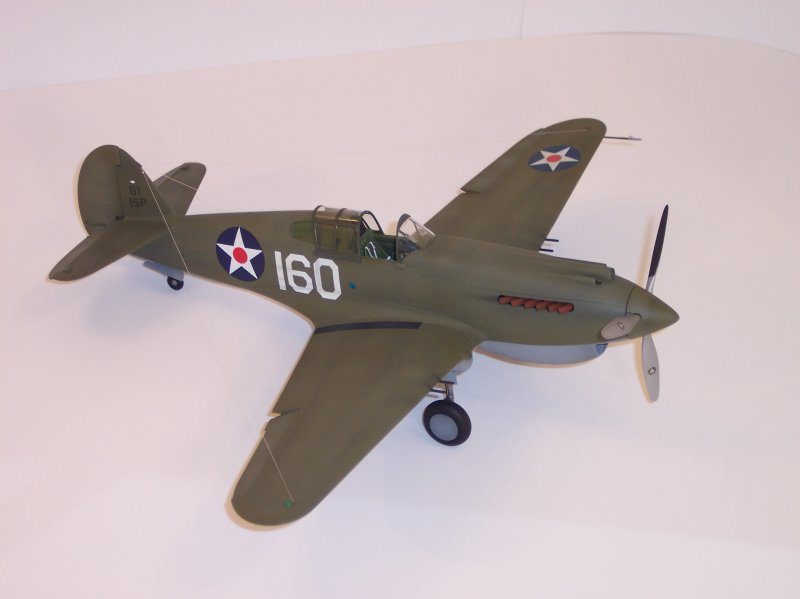
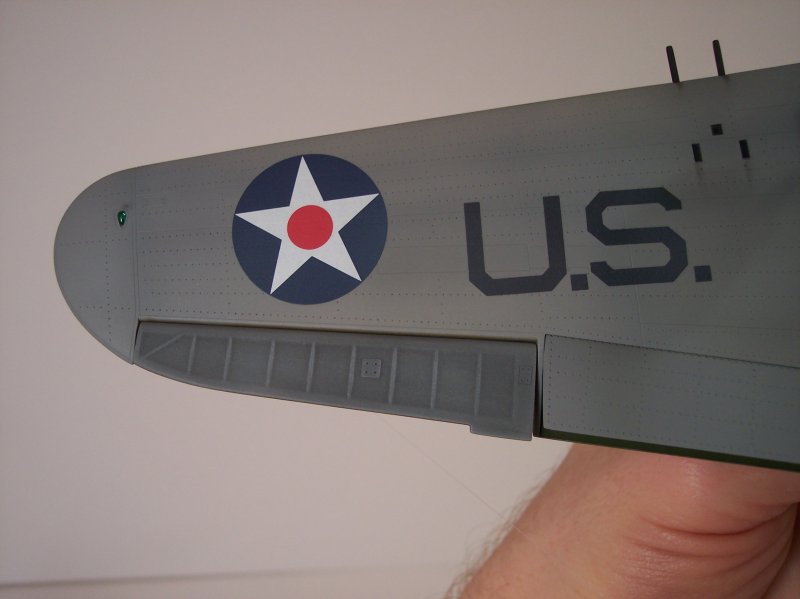
MM Olive Drab and Neutral Gray were used for the upper and lower surfaces. According to Dana Bell’s book (U.S. Air Force Colors Volume 1: 1926-1942-Squadron Publications), a model builder has a wide license to represent the color variations of faded olive drab camouflaged aircraft. First, I applied the base color out of the bottle. Next, a very dark olive drab wash was airbrushed over all of the panel lines. To make this effect more subtle, a wash of the base color was sprayed over the panel lines. Finally, a much lighter olive drab wash was airbrushed at random on different panels, but not on the panel lines. The overall effect is one color that has multiple variations. When you are close to the model the difference is not so noticeable but becomes more dramatic as you move away. Also, the areas that would see more sun exposure (wing tops/stabilizer tops/fuselage spine) were given more attention with the lighter olive drab wash. The rudder, flaps and elevators were not oversprayed with the dark olive drab wash. They were also dry-brushed with MM Dark Ghost Gray to highlight the internal rib pattern. I wanted the fabric-covered areas to have a greater “faded effect”. Aluminum paint chipping was limited to a few places along the leading edge of the wings. Aluminum scuff marks were placed along both sides of the wing root, and the canopy entrance. The photos of various Pearl Harbor P-40s I have do not show a large amount of exposed metal through chipping or wear. I guess this is a judgment call. These same steps were used when applying the neutral gray to the lower surfaces, only a little more restraint was used. The entire model was given several coats of Future Floor Polish before the decals were added.
Decals
I tested the kit supplied decals and was not happy with them. The only ones I used were the propeller blade logos. The decals I used came from many sources. The fuselage national insignias came from a Super-Scale 1/48 SBD sheet. The wing national insignias came from an Accurate Miniatures 1/48 B-25B Doolittle Raider sheet. The plane numbers (160) were cut from white decal stock using stencil patterns I made. The letters on the lower wings came from an Academy-Minicraft 1/72 B-17C sheet. It came close to the correct size and font, although I believe the lettering is supposed to be insignia blue instead of black. The tailfin numbers came from a Super-Scale “Railroad Gothic Letters and Numbers” sheet. Micro-Sol was used to get the decals to conform to the surfaces.
Final Details
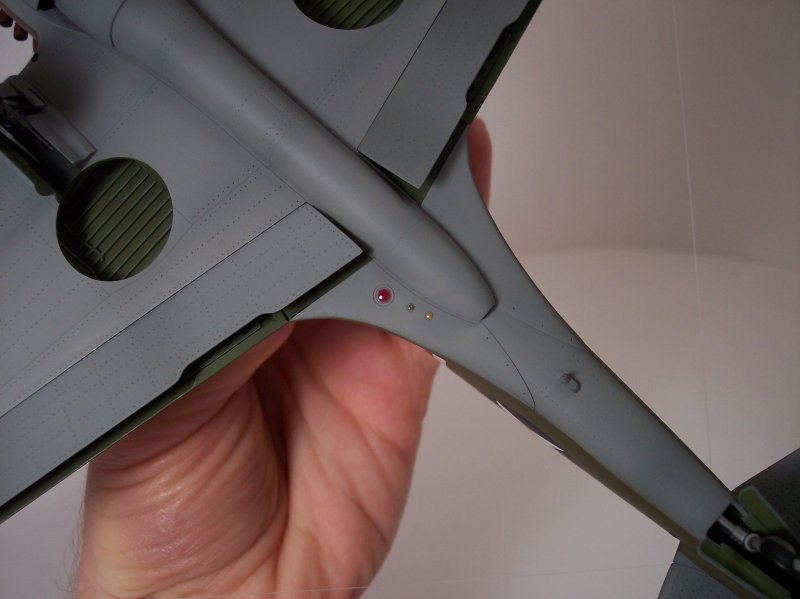
The various clear kit “lights” were colored by mixing a few drops of food coloring (red/green/blue) with Future Floor Polish and airbrushing the parts. Fishing line was used for the antennas. Holes were drilled all the way through the wings so the antennas could be attached. White paint mixed with 5-minute epoxy made the antenna insulators. Engine and machine gun exhaust stains were added with black pastel chalk and ground up pencil lead. My biggest gripe about the kit was the poor quality of the .30 caliber machine guns. I think the detail could have been better for 1/32 scale. I know the barrels should be perforated with blast tubes at the front, but I wound up just cutting the front ends flush and drilling out the ends.
Conclusion
This was the first Trumpeter kit I have built (and the first 1/32 scale airplane in about a decade) so there was some trial and error. I think it is a very good kit out of the box and I am extremely grateful to Trumpeter for making this subject available in 1/32 scale. As a final note I would like to acknowledge the tremendous modeling talents that contribute to this website. I have found the articles and photos to be impressive, educational and they helped with my project.
© Phillip Gore 2007
This article was published on Wednesday, July 20 2011; Last modified on Saturday, May 14 2016