
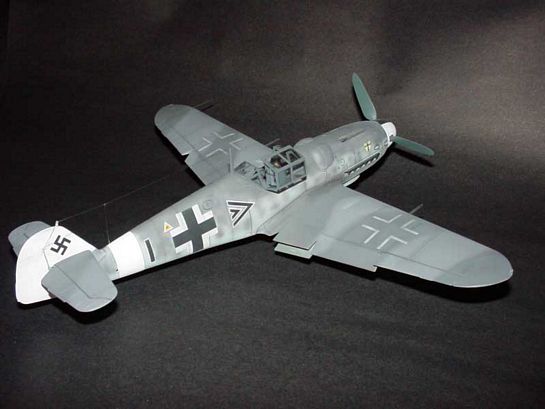
Hasegawa 1/32 Messerschmitt Bf 109G-6
By Jeff Herne
When Hasegawa released their new-tooled Bf 109G-6 in 1/32, I came up with all sorts of justifications NOT to get the model…it’s too expensive, too big, everyone will have one…etc.
Well, I eventually broke down and got mine from Marvin Banka at a club meeting. Marvin had started the cockpit section, but little else had been done.

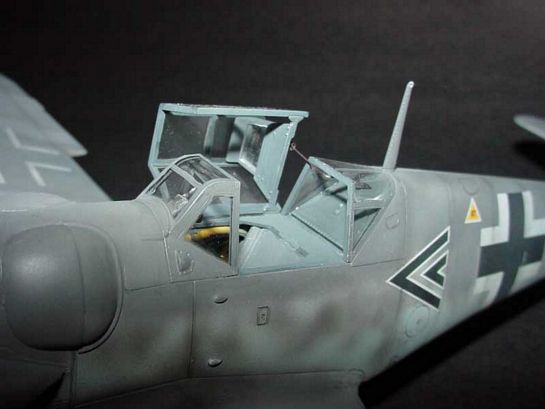
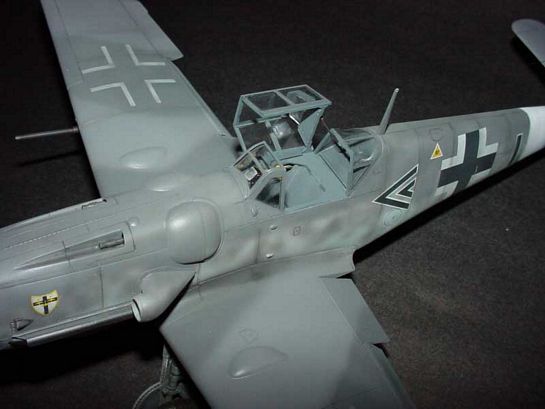
The model is well engineered, with finely scribed panel lines. It was interesting to note that the tail section was separate, indicating that a wooden tail for later versions G-10, G-14, would be forthcoming (and have since been released). I painted the cockpit area RLM 66, and did some dry brushing using Floquil ‘Old Steel’, so the contrast would be subtle. I painted the instrument panel RLM 66, then painted each of the instrument faces and bezels in flat black. The instrument faces were then dry brushed with white paint. I then applied pure India ink to each of the faces using an insulin syringe. Once dried, I applied a drop of Future to each of the faces. With the instrument panel completed, I went to the reference books looking for additional cockpit details that could be added. I settled on adding some wiring to the throttle quadrant and oxygen systems, and that was about it. Seatbelts were added using Eduard German Fighter seatbelts.

With the cockpit area complete and ready to install, I assembled the fuselage using Tenax 7R. I also installed the center wing section at this point, but left the outer wing panels off. Fuselage assembly was straightforward, with no fit problems. At this point, with the fuselage assembled, I had to decide on which aircraft I was going to model, as Hasegawa gives you choices of two types of engine cowls with different gun troughs, and different windscreens. I certainly wanted an aircraft outside of the two markings provided in the kit.
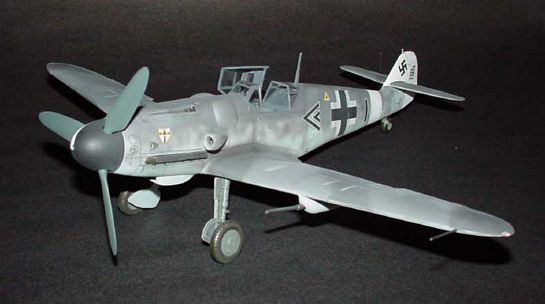
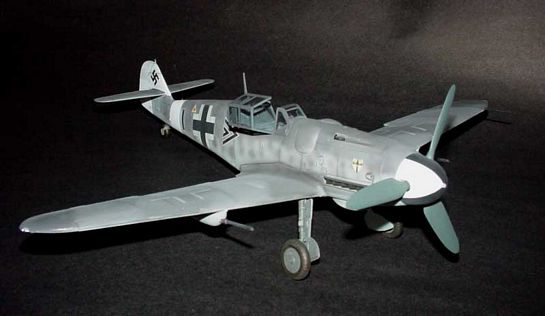
Using the Historie and Collections book on the Bf 109, and looking at my decal stash (remember, I don’t build in 1/32, so decals are real thin), I happened upon a Bf 109G-6 of III./JG27, based in Greece in 1943. It was an attractive aircraft, and it fit the decals I had on hand, so I chose the proper gun trough cowl and windscreen, and carried on.
The remainder of the model was built as per the kit instructions, although I opted for the later armored headrest with the glass insert instead of the earlier version. The kit provides both, but indicates in the instructions to use the early version.
Once the fuselage was glued, sanded and smoothed, I attached the outer wing panels. I took a different approach than I usually do. Instead of assembling the wing halves together then attaching them to the model, I attached the upper wing half to the fuselage to insure a tight fit to the wing root. I figured it would be easier to correct leading edge alignment problems than it would to fight with a wing root seam. I was correct, as both wings lined up perfectly. When I attached the lower wing panels, I found that the seam occurred on the underside of the aircraft in an area that would prove easy to sand and smooth. There were no alignment troubles on the leading or trailing edges, although I had about a 1/64in. overlap at the wingtips. This was resolved with a couple of passes with a sanding stick.
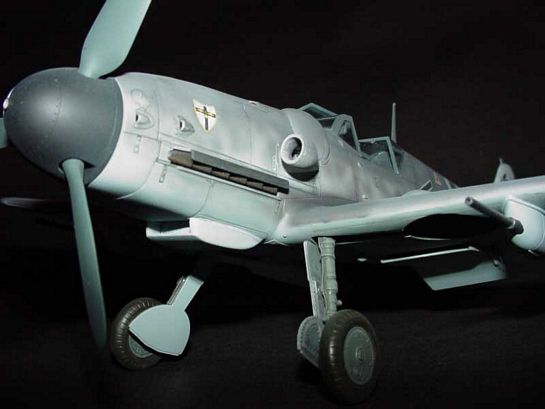
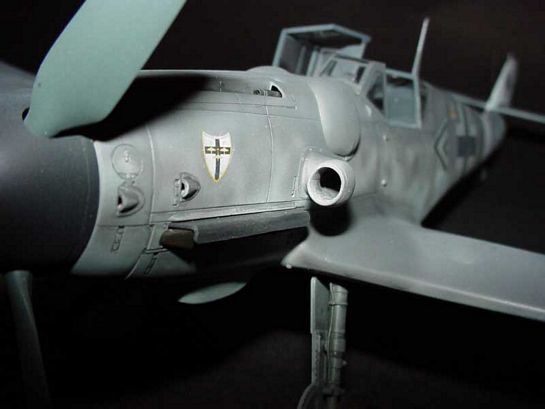
With the balance of the construction completed, I filled and sanded the seams, and started working on the sub-assemblies, landing gear, prop and spinner, gun pods, and canopy. Everything went smoothly until I got to the underwing pods. Hasegawa tells you in step 3, when you’re building the wing, to drill the locator holes for the pods if you want them…of course, I didn’t do that, so I had to position the gun pods using a set of drawings and reference photos. I decided to replace the barrels at this point, as the plastic versions in the kit looked too small. I used brass tube within tube to achieve the segmented effect. Once the barrels were cut, I soaked both in ‘Blacken It’ instead of using paint. The results are spectacular, a dark finish without losing the sharpness of the parts to paint layers.
Once the sub assemblies were completed, parts were separated according to the colors they needed to be painted. I used Gunze paints throughout, with the exception of RLM 66 and RLM 02. I used Aeromaster RLM 66, and Tamiya RLM 02 for these colors.
I sprayed the undersides of the model RLM 76 and allowed it to dry for about 48 hours. I’ve learned to exercise patience with acrylics, since masking them before they’ve had a chance to harden usually results in peeled paint.
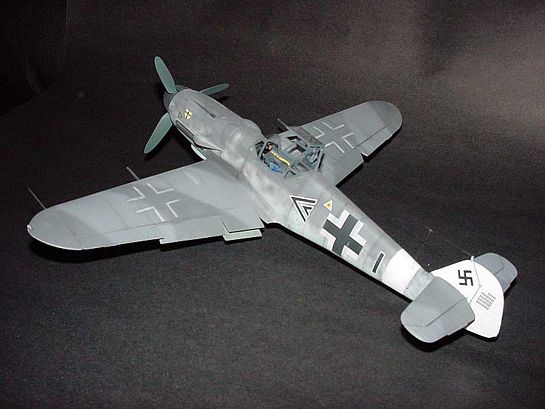
My particular aircraft carried an RLM 74 and 75 pattern on the upper surfaces, so I sprayed the individual colors with 24-48 hours of drying time between each coat. With a model that builds as well as this one did, it’s a true test of patience to wait for the paint. The tail was painted white, as was the fuselage band, using Tamiya Flat White. The camouflage was done entirely freehand, but and was not without loss…as I was applying the finishing touches to the paint, my airbrush compressor finally capsized after 12 years of abuse. Fortunately, it allowed time for the paint to cure while I went in search of a new compressor.
A few days later, new compressor at the ready, the model received a coat of Future Floor wax in preparation for the decals. I applied the decals after waiting another 24 hours for the Future to harden. It was here that I ran into my only glitch. For some reason, the starboard wing cross curdled and disintegrated after I applied it to the model. I did nothing any differently, so why it happened remained a mystery. It did mean that I had to sand the wing and repaint it. Feathering new paint into several layers proved to be a task onto itself, but in the end, with an extra decal from a second kit, everything came out fine.
Decals for this aircraft were an interesting mix from a variety of kits. The crosses and swastikas came from the kit, and the Gruppe chevron came from the 1/32 Fw-190D-9 kit. My D-9 has a set of EagleCal Decals waiting for it, so I wasn’t concerned about using the kit-supplied markings.
Finding a JG27 emblem proved to be troublesome, but ironically, I managed to find a 1/48 Bf 109 decal sheet from Fujimi, released in the 1980s. The decal sheet has a pair of grossly oversized 1/48 Gruppe emblems, which happened to be a perfect match for 1/32 scale. I also used the kill markings for the rudder from the same sheet. It pays to save even decals that are…shall we say…crappy.
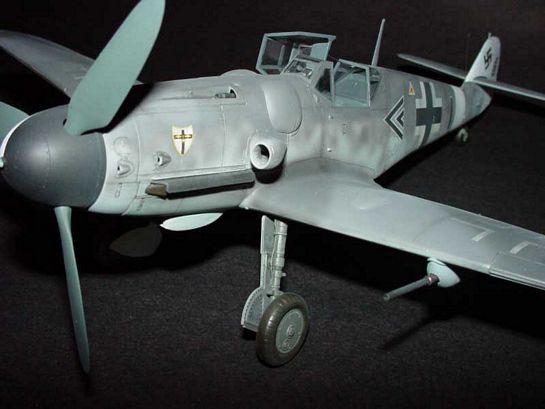
After doing some reading, I decided to subdue the wing crosses, as they really stood out against the RLM 74 and 75 wing surfaces. Whether or not this was actually done to the real aircraft, who knows, I’ve been unable to locate any photos of the actual aircraft, but I liked the way it looked.
With the decals in place, the model got another coat of Future, then a wash of India ink and Tamiya thinner over the panel lines. The heavier lines were given the once over with a Rapidograph .025 drafting pen. Then the model was wiped down, and a light gray pastel was worked into the panel lines. This gives an effect similar to pre-shading without all the hassles of putting too much paint onto the pre-shaded areas. Once that was done, the model received a coat of Future mixed with X-21 Tamiya Flat Base.
The canopy was attached at this point with Kristal-Kleer, and some minor wear was simulated using Floquil ‘Old Steel’ dry-brushing. Once dried, I touched up the areas with RLM 74, followed by a light coat of Future and Flat base, applied with a small brush.
The model took about 35 hours to complete over a 2 month period, not counting all the drying time. It’s a wonderful model, easy to build, and looks great when completed. I have a second Bf 109G waiting to be built, this one with EagleCal decals for Hermann Graf’s red-nosed aircraft.
I highly recommend this kit to any 109 fans, or those looking for a 1/32 kit that won’t take 6 months to build or correct in order to make presentable.
Jeff Herne is the editor of ModelX magazine
© Jeff Hene 2007
This article was published on Wednesday, July 20 2011; Last modified on Saturday, May 14 2016