
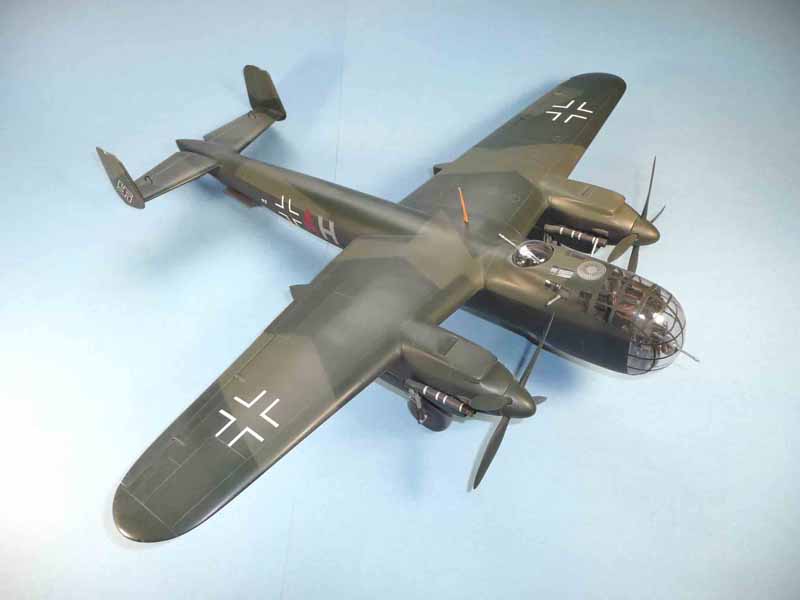
A Do 217M-1 in 32nd Scale: Or - Building a Model For What turned Out To Be The Wrong Reason
By Frank Mitchell
Background
I recently posted a couple of photos of my 1/32 Do 217M-1 and offered to talk a little more about it if anyone was interested. After an overwhelming number of requests (well, at least two), here is a more detailed overview.
I should first note that this model was built about 10 years ago, so lots of things have changed, like the internet, digital photography, etc. Thus, the pictures aren't great, but they are the best I could do---
The origin of the model was a desire to do a book of my thoughts about model building with particular emphasis on heavy conversions and scratchbuilding. After thinking about it for a while, the idea that floated to the surface was to build and document in detail a radically modified vacuum-form kit. My logic was that one model could demonstrate many different techniques.
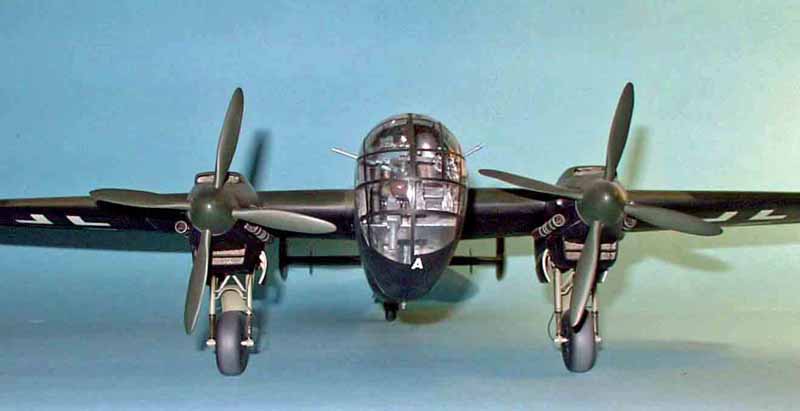
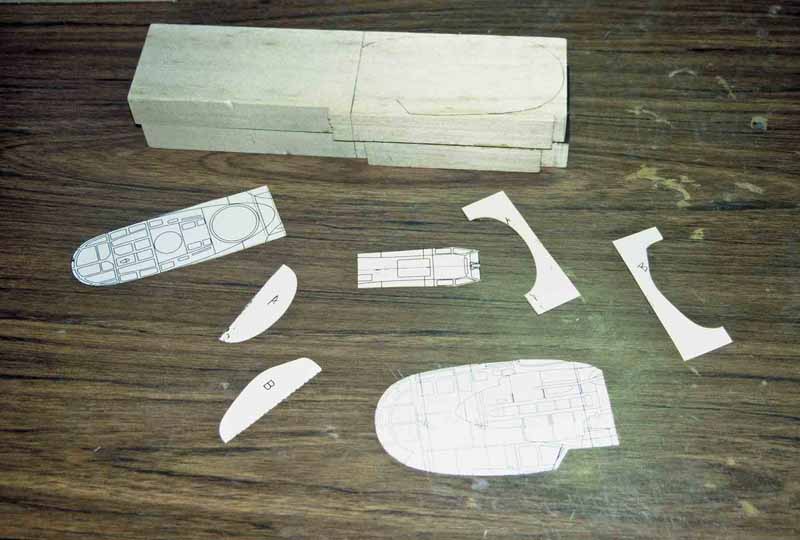
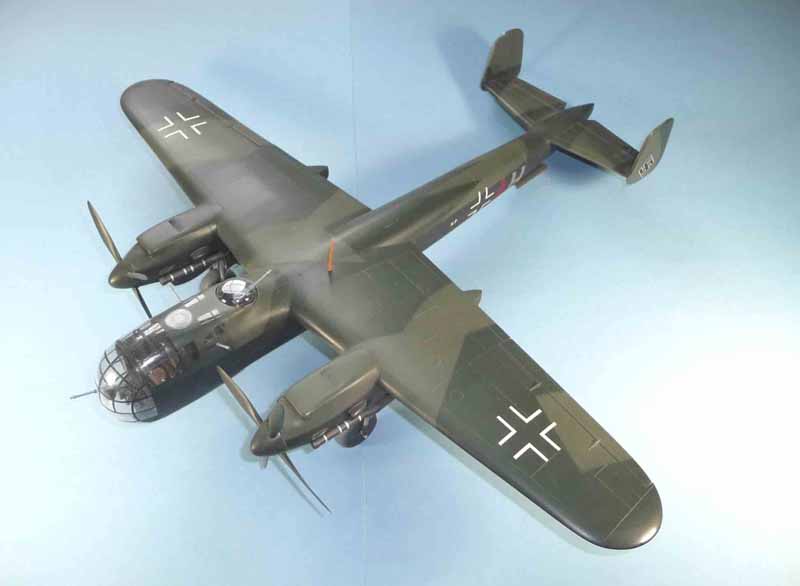
With that decision made, a trip to the basement revealed several potential candidates from which I chose the 1/32 ID Models vacuum-form kit of the Dornier 217N-1 nightfighter. I decided on the conversion to an M-1 because A) It was big (for better photography), B) The new nose would require lots of detail, C) Other extensive fuselage modifications were also needed, D) It would require scratchbuilt landing gear, turrets, etc.
Construction
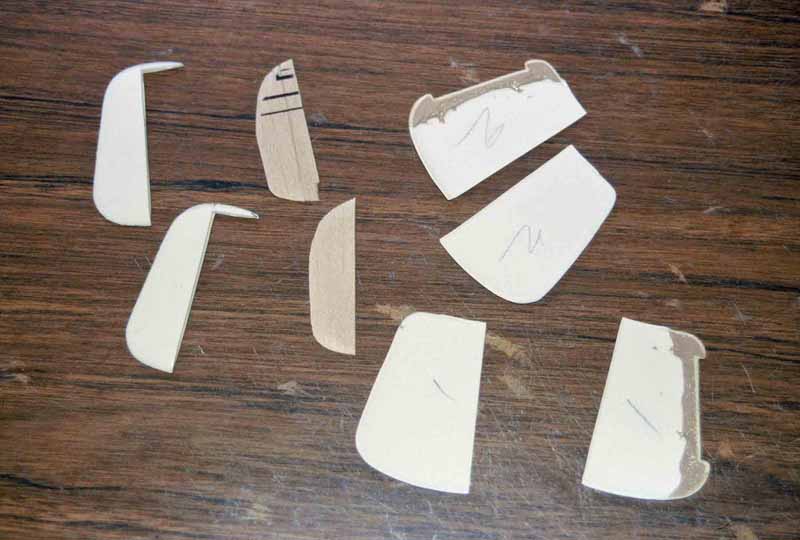
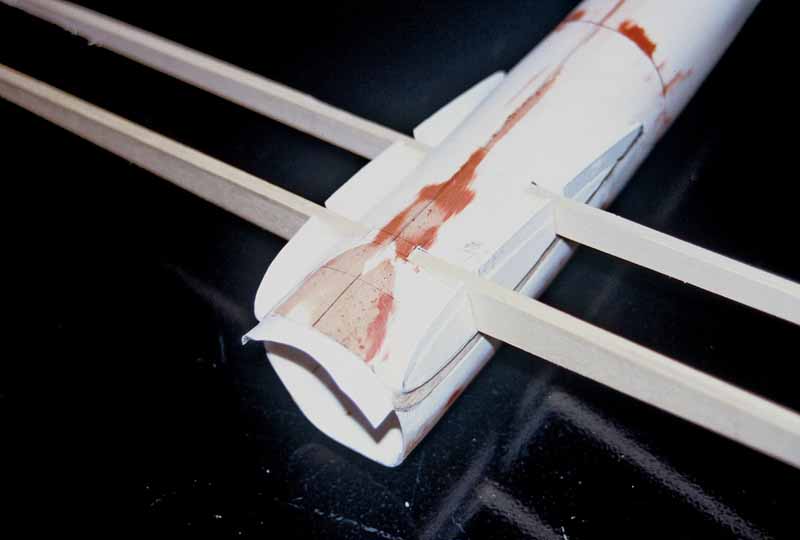
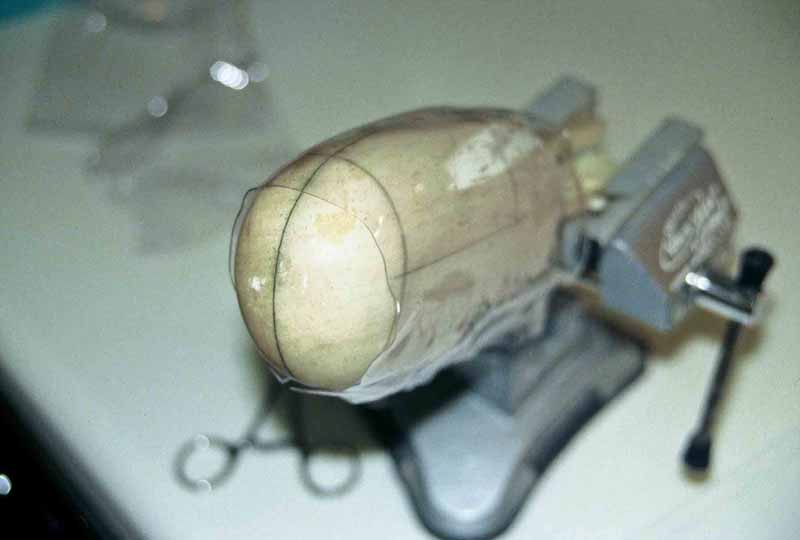
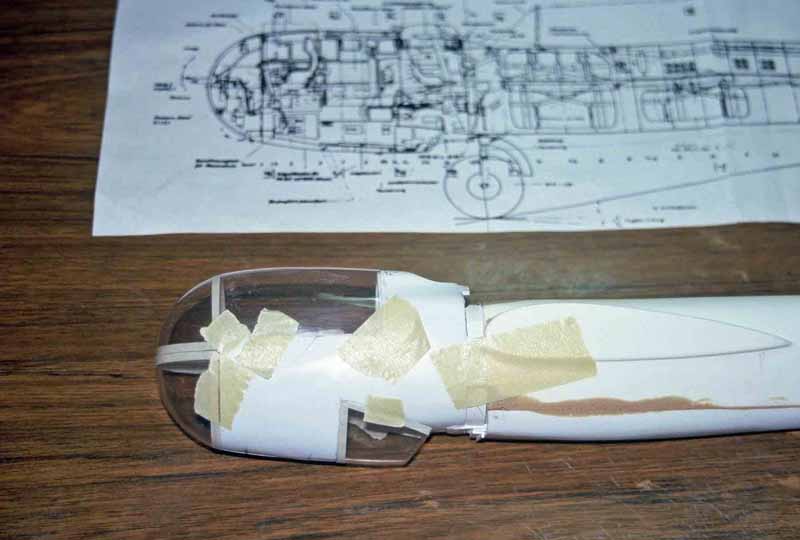
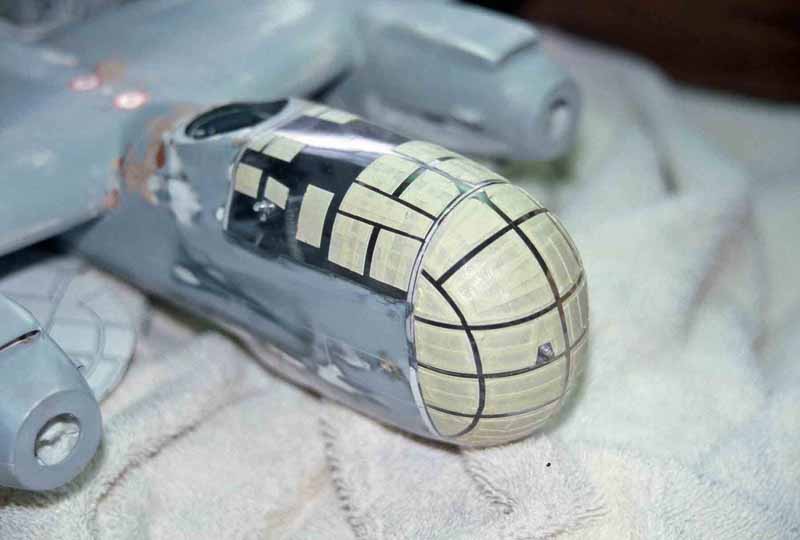
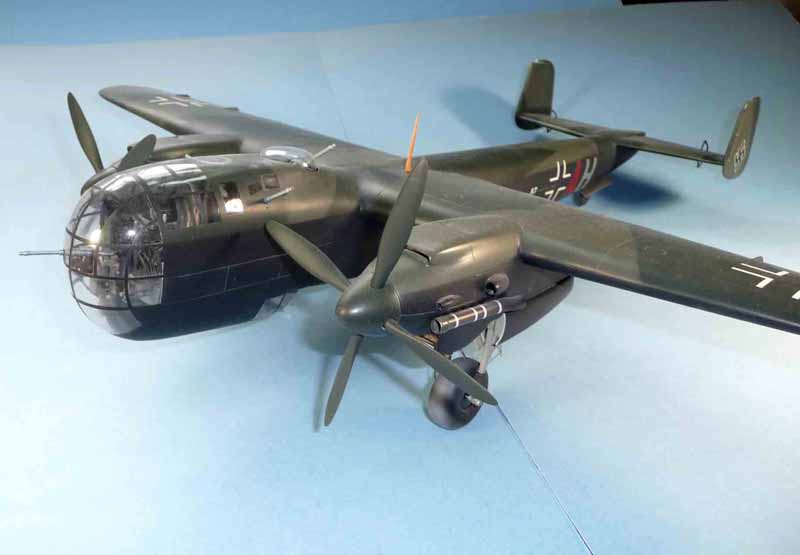
The kit fuselage was cut off at the wing leading edge and a mold for the new nose was carved from balsa. Two clear vinyl moldings were made, both by heat-and-smash; one for the extreme forward nose section, and one for the cockpit windows behind the nose.
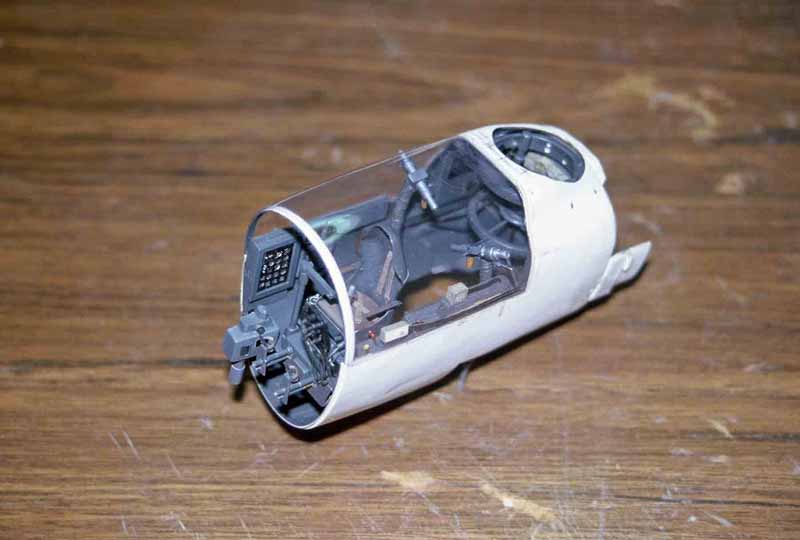
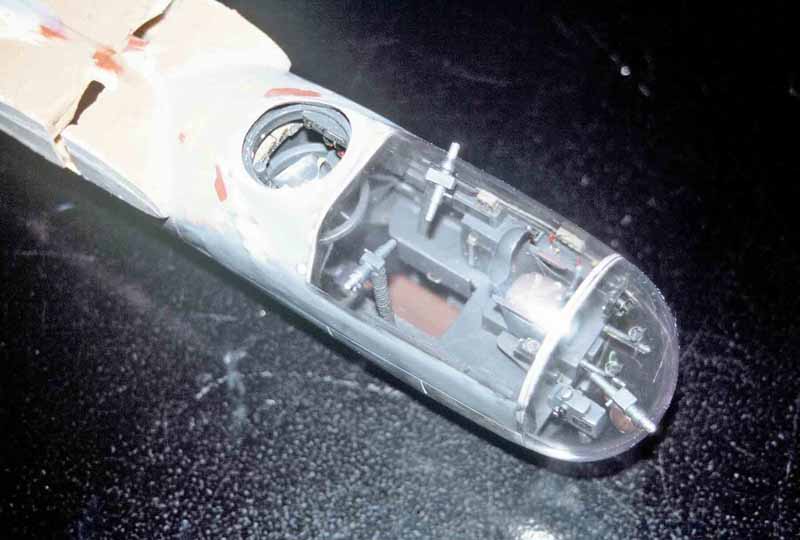
To fill up all that space meant lots of little pieces had to be made and further, and in addition, the interior had to be built and finished before the nose could be fitted to the fuselage. That interior took what seemed like forever to build; there is a lot of stuff in there and it can all be seen. This sequence also meant (unfortunately) that lots of care had to be taken throughout the rest of the construction to avoid damage to the nose or its contents.
Since the nightfighter had a very different shape from the slimmer M-1, the fuselage also needed a large new bottom molding of styrene which was again formed from a balsa mold.
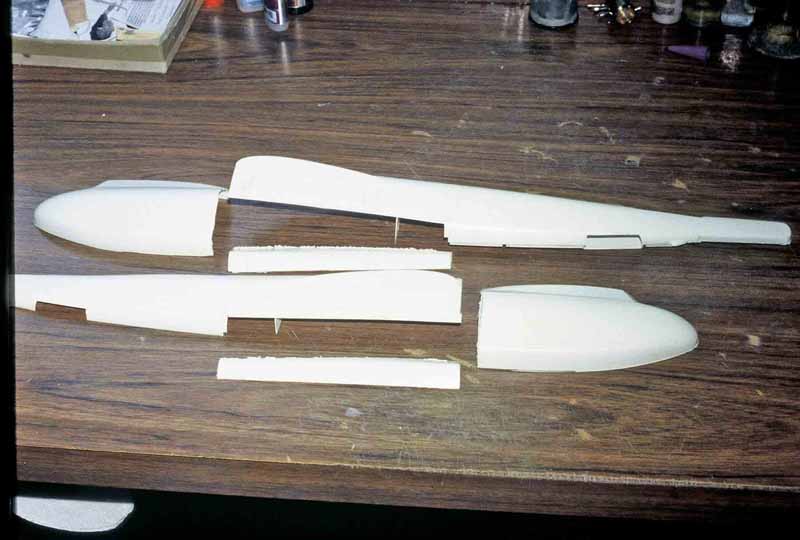
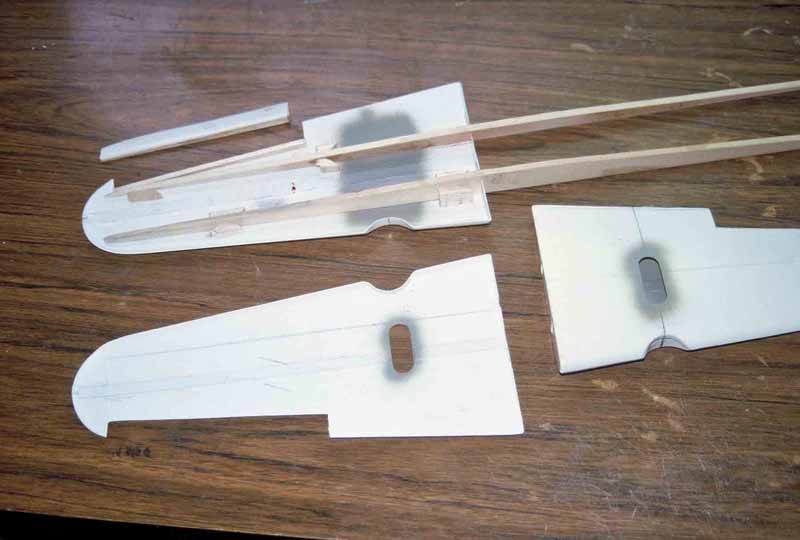
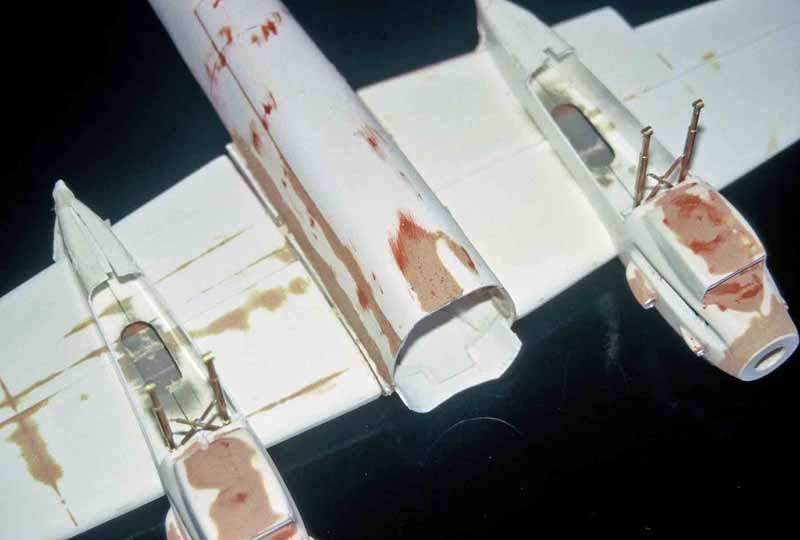
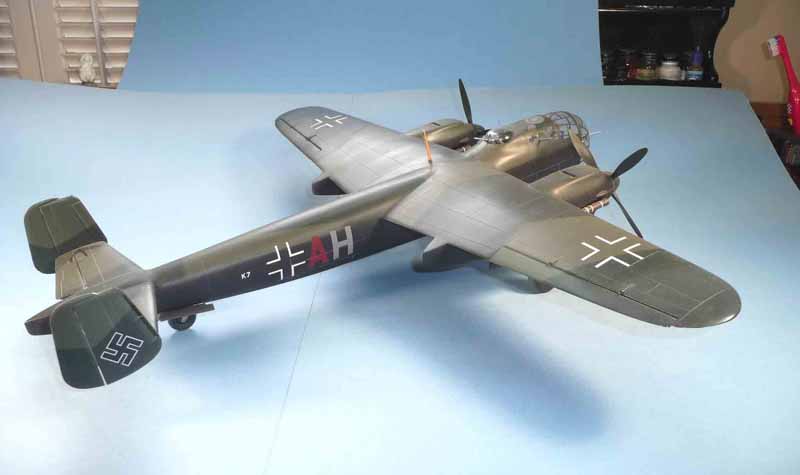
The kit wing chord was too narrow, so the wing panels had to be sliced apart and sections added. The wings also needed all of the usual vacuum-form changes of new control surfaces and lots of detailing. Two full-span basswood spars were used, with the main one being placed to also serve as a mounting point for the main gear. The spars also assured good strength, which was necessary because this model needed lots of handling.
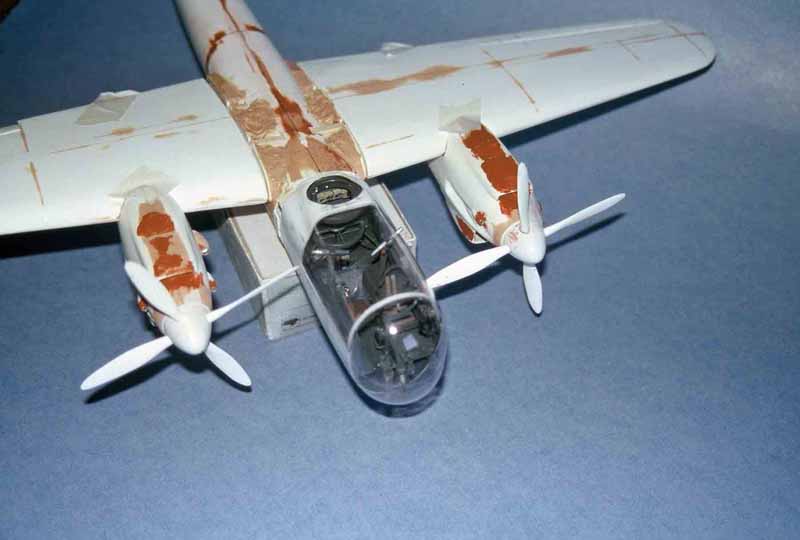
The kit engines needed a fair amount of tweaking in terms of shape and scribing, but they were close enough that I did not need to make new ones. The spinners were molded from a turned Lucite master, and new prop blades were molded in epoxy from an RTV mold. The exhausts were made up from brass and aluminum tubing.
The gear itself was made up from (lots of) brass and aluminum tubing with some styrene detailing. The well wells were also detailed since those spaces are big and empty (the story of this model).
One-half of a main wheel was turned from basswood; this was used to make an RTV mold which was, in turn, used to make four copies which were joined to make the two main wheels. The wheel centers were taken from a 1/24 Mercedes car kit; almost perfect match in looks and fit. Sometimes you win one.
The turrets were also molded from clear vinyl over turned basswood molds.
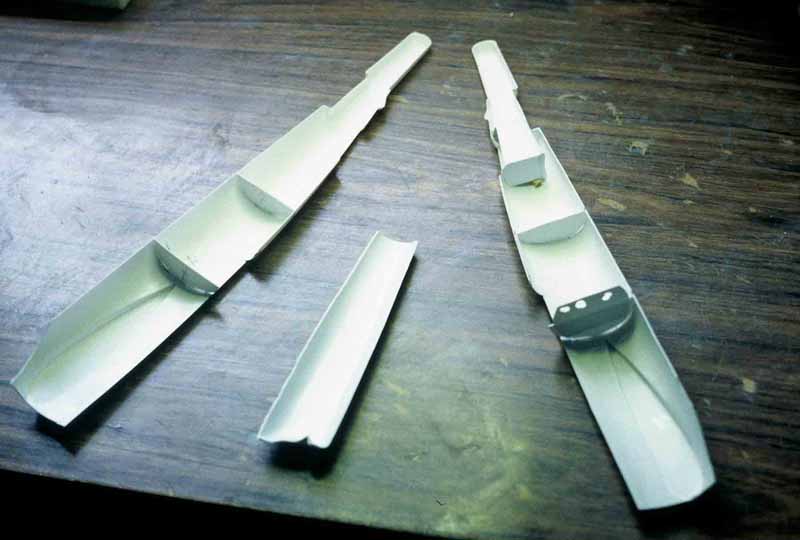
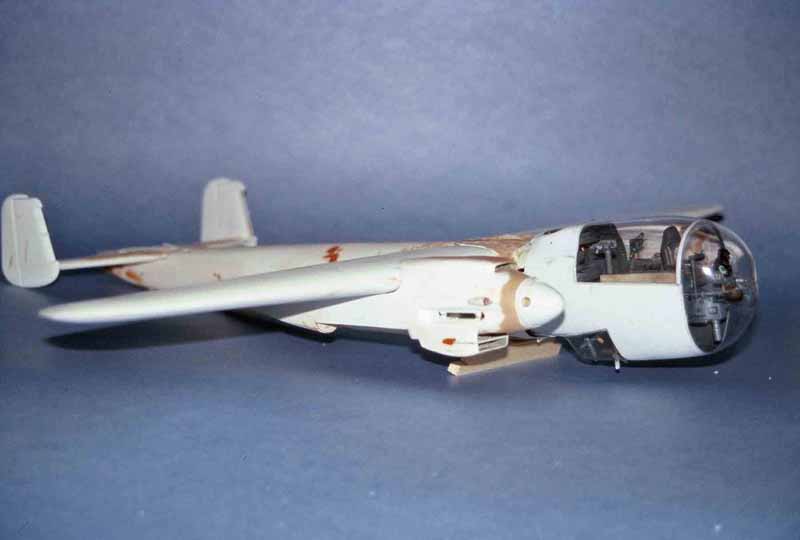
The tail shapes were pretty much out of the kit, but the forward edges of the fins had to be replaced and carved from basswood since they are airfoil-shaped to counter the torque and set slightly out from the fin itself.
Lots of detailing, scribing, sanding, priming, swearing, etc. was needed throughout the model because of its size, which, by the way, became a real nuisance as the model grew larger (and larger). By the time it was ready for paint, it was a wrestling match.
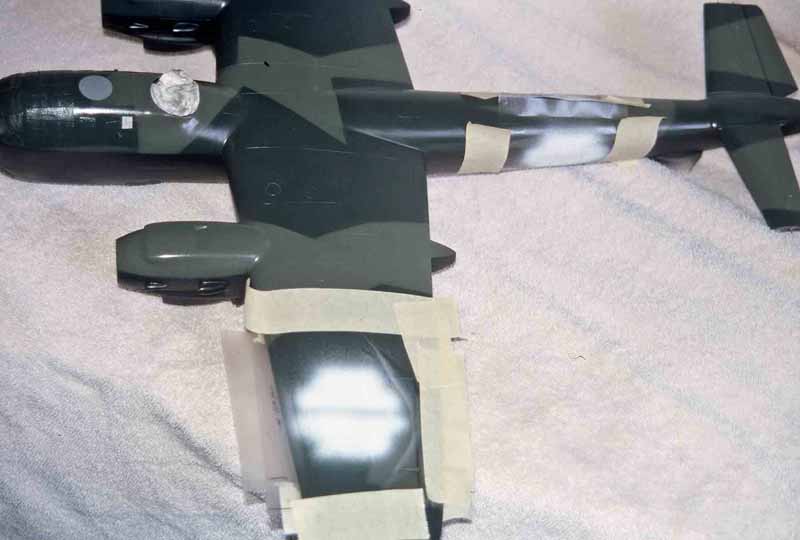
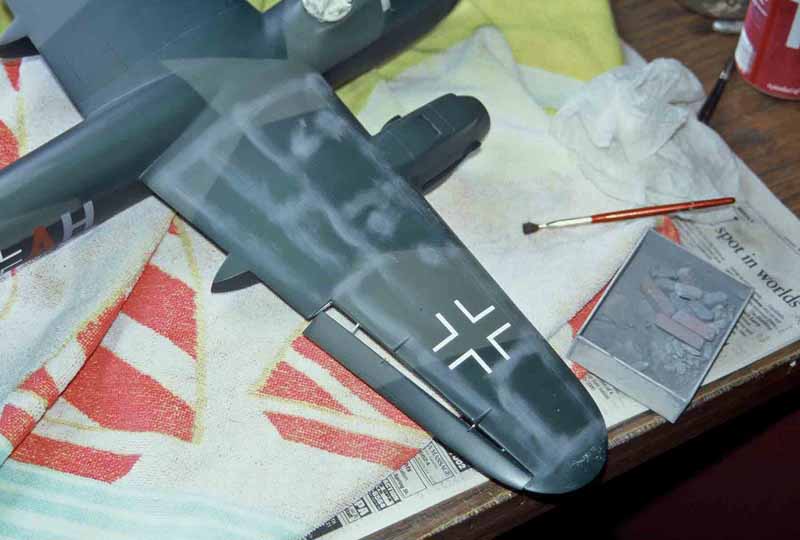
Considering all the other work in the beast, the paint went on relatively easily; Gunze was used throughout, and weathering, what there was of it, was done with chalks, and light sprays of very dilute shades of gray. All the markings were painted on using frisket paper. The only decals were the swastikas and part of the codes.
The end of the story is that the book never got published, but I still like the model, even though I did have to add an extension to my display shelf.

© Frank Mitchell
This article was published on Wednesday, July 20 2011; Last modified on Saturday, May 14 2016