
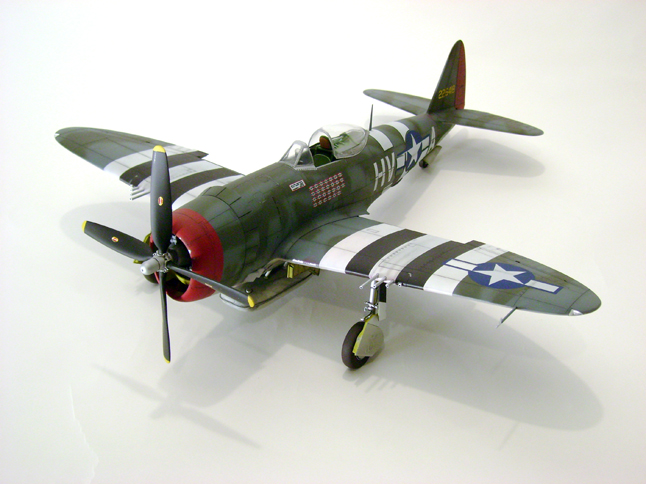
Hasegawa 1/32 scale P-47D
By Brian Casteel
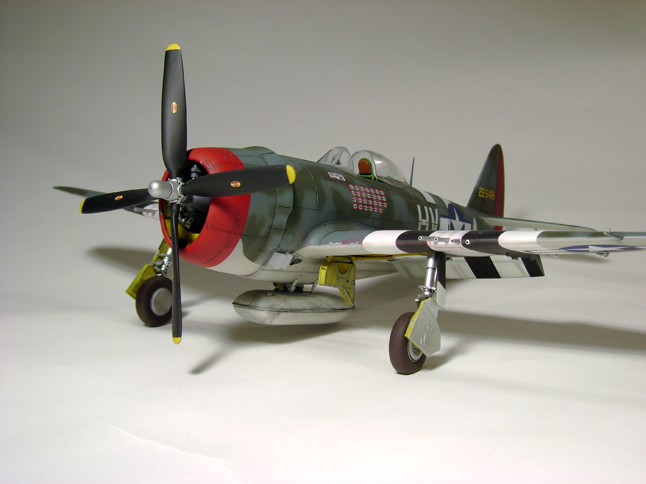
The Hasegawa P-47D Bubbletop is an awesome kit and I highly recommend it. Now, you don’t really need any more information than that but if you would like more please read on. I got the kit in early May, started it in mid June and finished it in early August. Now, for someone like me that suffers from SBS (Slow Builder Syndrome), that is a fast build and if you take into consideration that I built the Gabreski version with all the camouflage and invasion stripes…that is a REALLY fast build.
Well without gushing to much, the kit is very well designed with only a couple of exceptions.
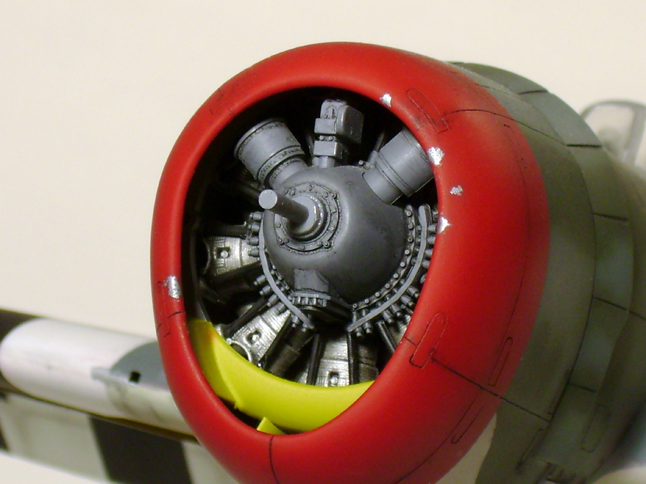
The first being the four part cowl, HATED IT! The biggest problem with the four piece cowl is that the seams run right through the latches at the front of the cowl. I put mine together and filled all the seems and then rescribed it. Now the latches look correct. It’s not a difficult thing to do but it does take some extra time.
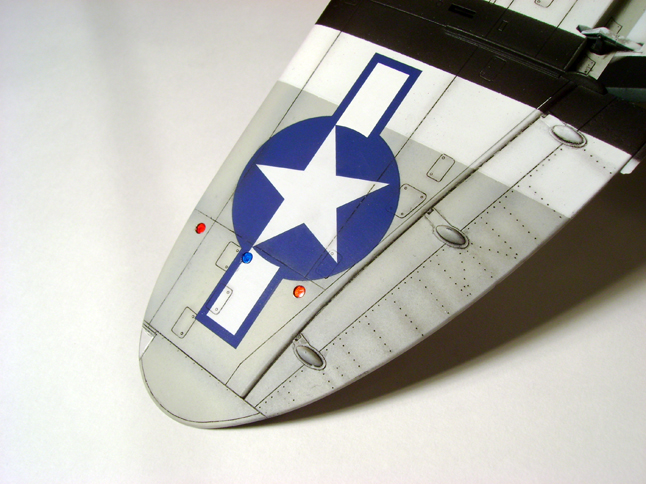
The second is the complexity of the decals. That is, if you build the Gabeski scheme out of box. I studied and studied the instructions and decal sheet and tried to figure out my best plan of attack for the invasion stripes. I abandoned the invasion stripe decals for the wings altogether opting to paint them instead. I did use the invasions stripe decals on the fuselage though. On the wings they give you the white part of the decals and you must paint the black part. Well if I am going to be doing all that masking it just makes more sense to paint the black and the white. On the fuselage you don’t have that luxury because the white stripes there have a black keyline around them. So I painted a black field on the fuselage and laid the white decal stripes over that. Now the weird thing is that if you build the other choice out of the box (The Eagleston Bird) the decals for the stripes on the fuselage have both the black and the white put together in one piece for each side. Why one and not the other Hasegawa?
The build is great and went together like butter. All the time I spent on this kit was in the painting and decaling, and as you can see is quite complex. Hardly any time (with the exception of the cowling) went into filling seams or repairing sink marks. There are a few sink marks but like I said, no time at all to fix.
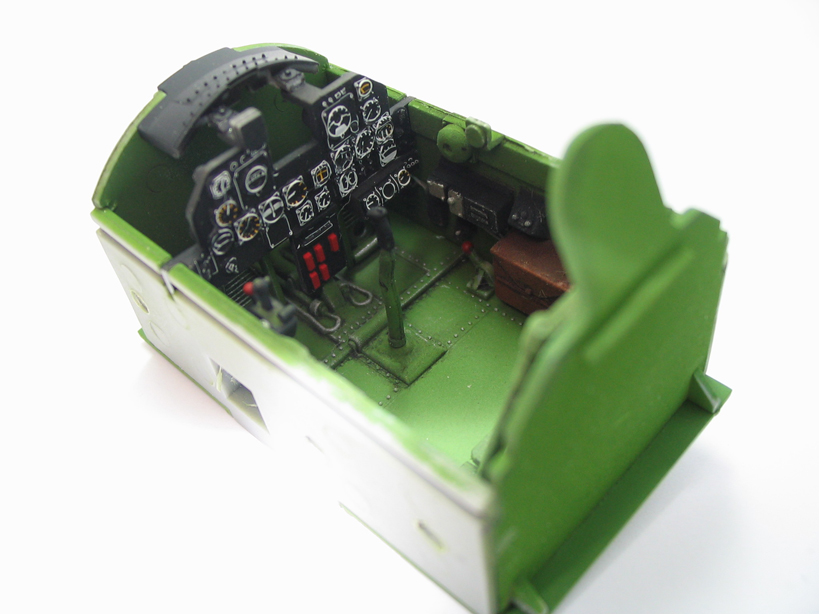
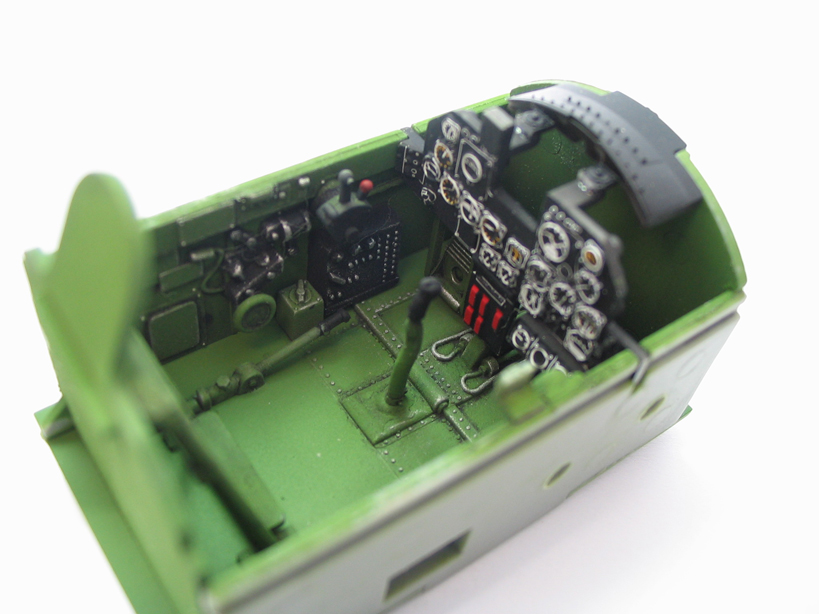
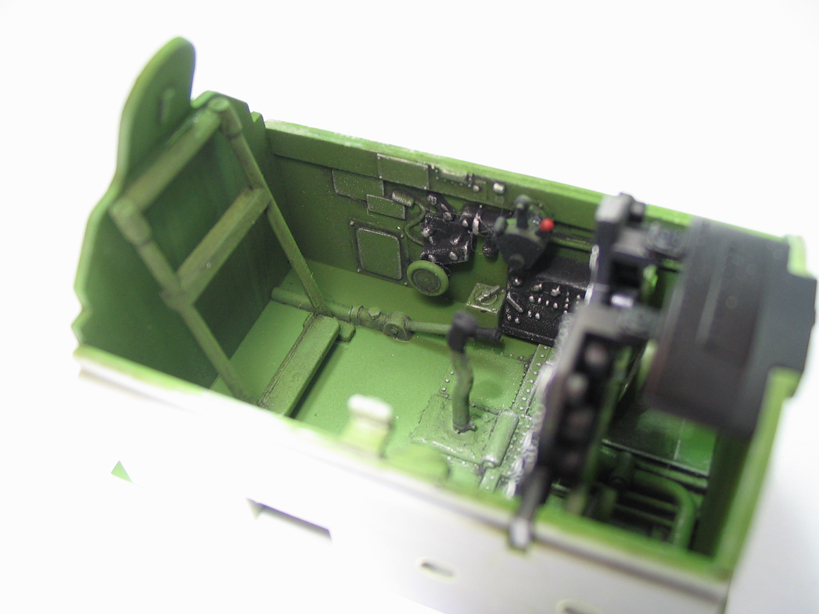
My favorite part of the plane to work on was the cockpit. I really liked the detail and the overall fit and construction. Even out of box it looked fabulous. I didn’t build the 8-piece pilot even though it is a much better figure than the 2-piece Hasegawa figures of the past.
The engine is nicely detailed. But in my humble opinion it could have used a bit more relief in the cooling fins.
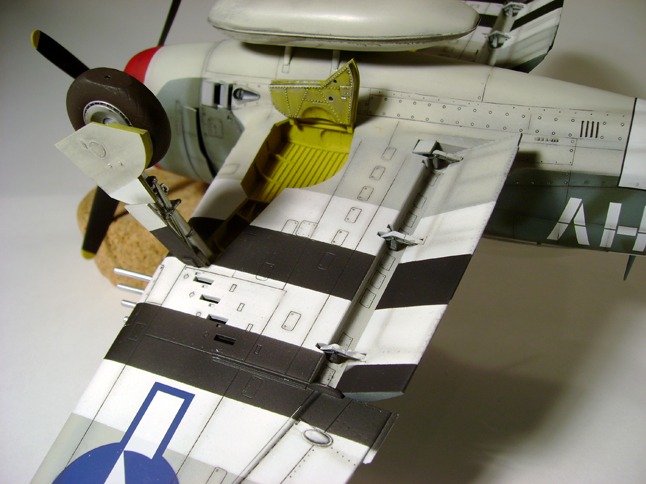
The elevators have this nice alignment system that helps assure that they will sit even after installing. However they are a bit tricky to blindly align inside the fuselage. I recommend several dry runs at this to get a feeling for where and how they line up before applying any glue to the parts.
When it was time to paint I used Model Master paints. First I gave the plane a pre-shading treatment of flat black over the panel lines. Then I airbrushed a Camouflage Grey on the bottom, let it dry for a few days then masked it off and painted the top half in an Ocean Grey. Let that dry and painted the Dark Green Camouflage pattern on top of that. Then I did my invasions stripe work. I used Tamiya clear from a rattle can for my gloss coat in preparation for the decals. I let that cure for a few days and then added my decals, then a wash of black grime over the panel lines. I hit all that with a few coats of Testors Dull Coat from my airbrush and after a day or two of drying I worked all the panel lines with some black charcoal dust to accentuate the wear and tear.
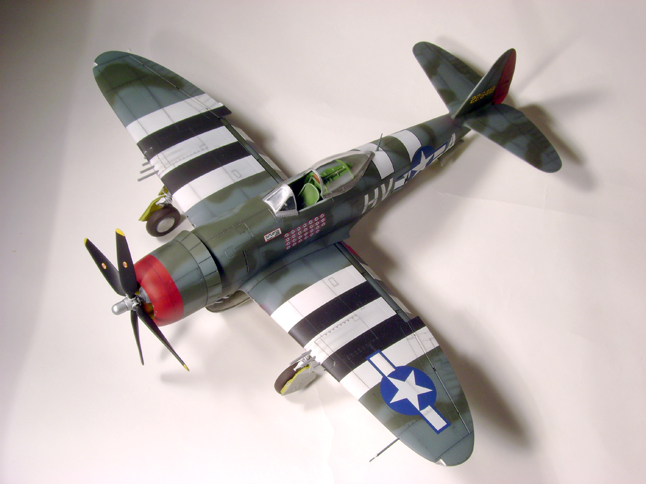
I finished it up by adding the canopy, pitot tube, gun barrels (which I drilled out), landing lights, landing gear and all the rest of the final details. Then I stood back and took a look. Awesome! even if I do say so myself, and apparently the judges thought it wasn’t too bad because it took an Out-of-Box Award at the 2007 IPMS Nationals in Anaheim.
© Brian D. Casteel 2007
This article was published on Wednesday, July 20 2011; Last modified on Saturday, May 14 2016